


We may receive a commission when you use our affiliate links. However, this does not impact our recommendations.
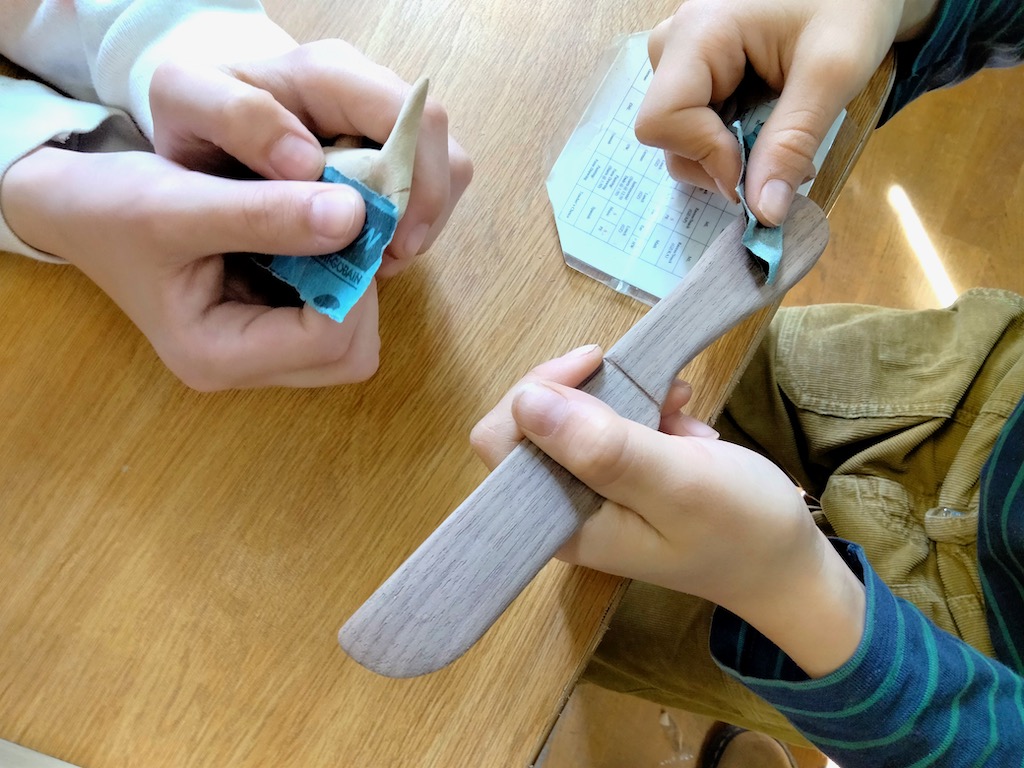
Two of my 5th-grade students working on their projects. While one of them is sanding a basswood fish the other is giving his walanut butter knife a finishing touch with very fine sandpaper.
With the outbreak of the Covid-19 pandemic, I was obligated to change my curriculum and put our traditional shop work on hiatus. Since I wasn’t able to use our benches, vises, and clamps I had to lighten up the projects, forgo the use of gouges, mallets, and chisels, and come up with mainly whittling projects that could be realized in the classrooms and on the students’ desks.
While most of these projects had to do with carving animals I recently introduced a small butter knife to our menu. What is unique about the butterknife project is the technique that the children in grades 4th and 5th shape it. Instead of whittling knives, we use a set of needle rasp which are surprisingly effective and safe. It takes a few minutes or less to train a child to use a rasp but after that, they are able to utilize it with remarkable proficiency. The woods that we use can’t be too hard though. Pine, sassafras, butternut, sapele, walnut are all great woods for a small cheese or butter knife. These species are not too difficult to rasp, and yet they are not too soft either, such as basswood – our wood of choice for the animal projects.
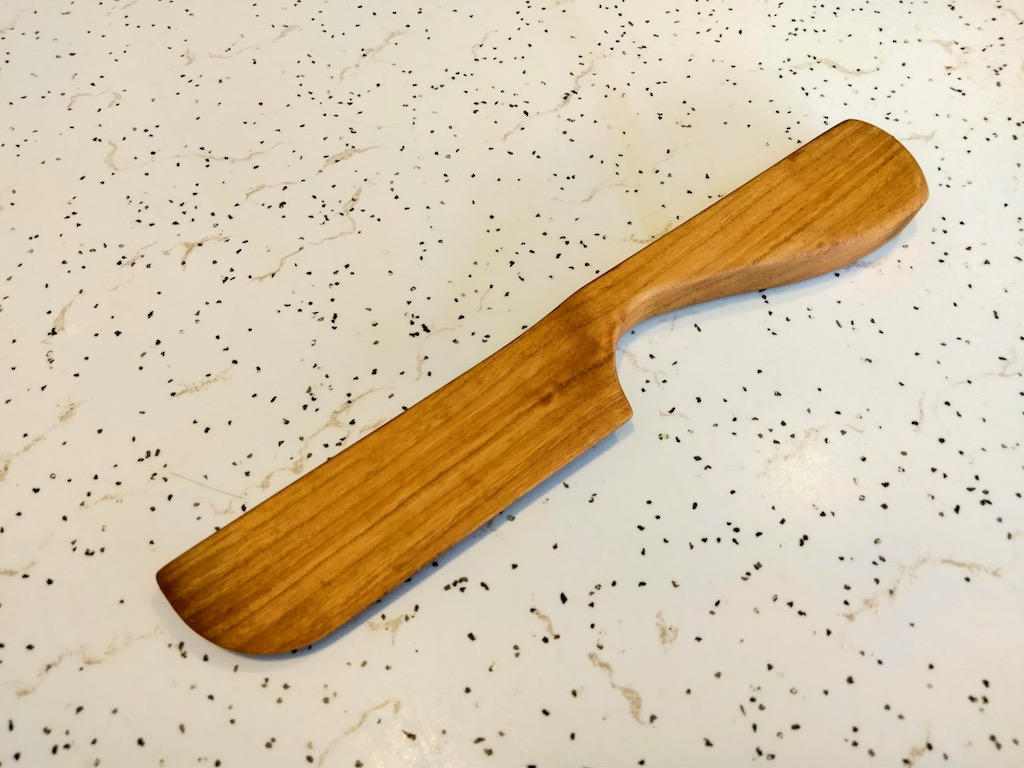
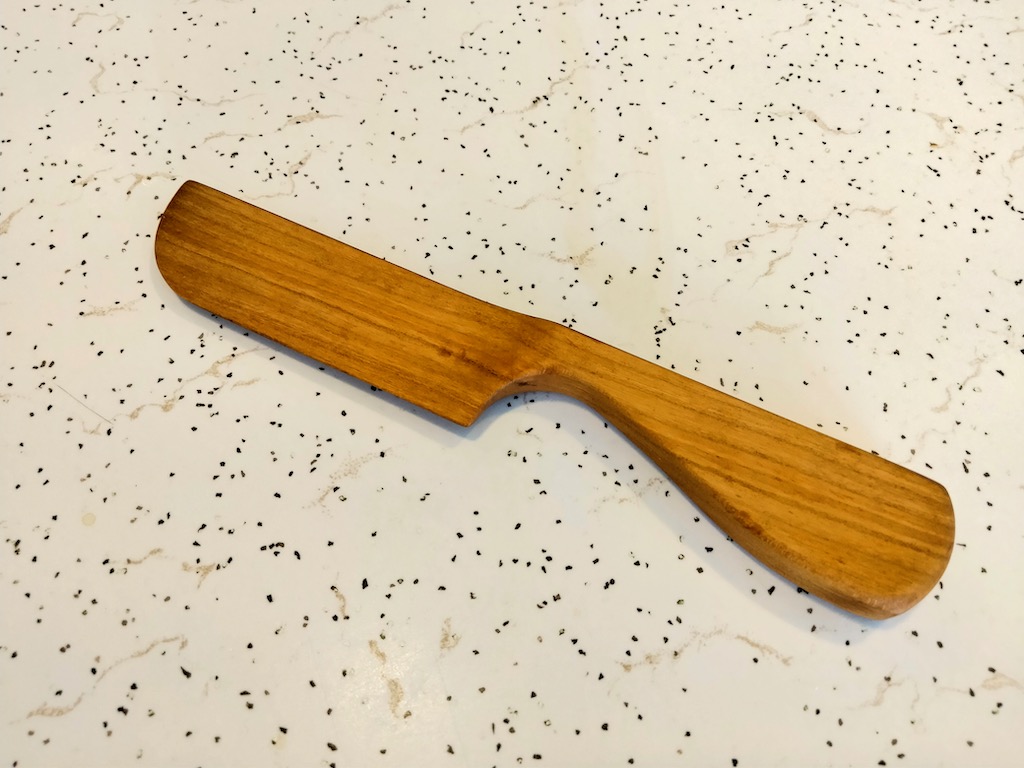
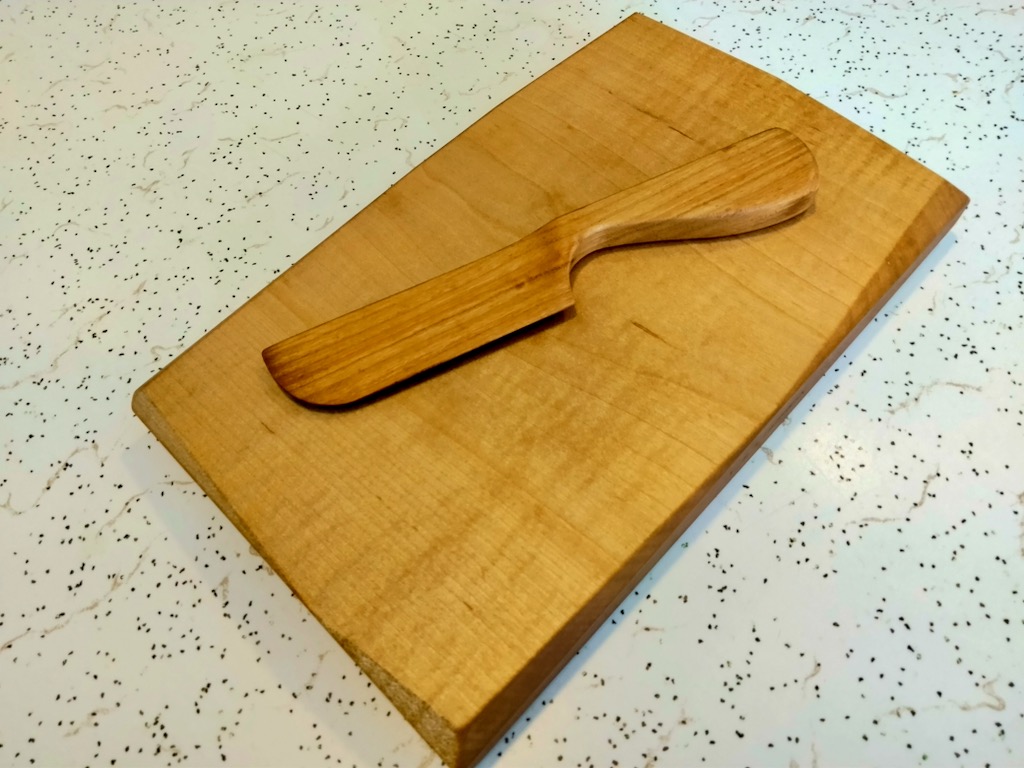
This is one of the butter knives that I build myself as I was developing this project.
We begin this project by drawing a few design ideas on a piece of paper.
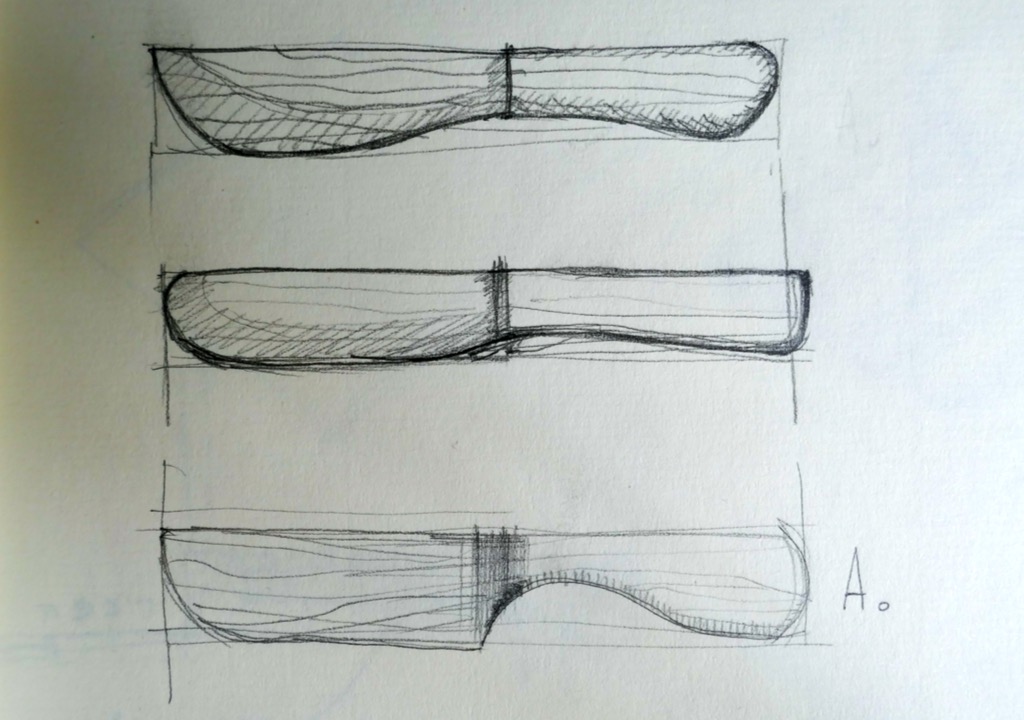
In illustration (A) you can see some of the designs that worked well for us.
After this, I drew for the children two parallel lines that define the thickness of the blade (B). I traced these lines on the top and bottom edges of the blade portion.
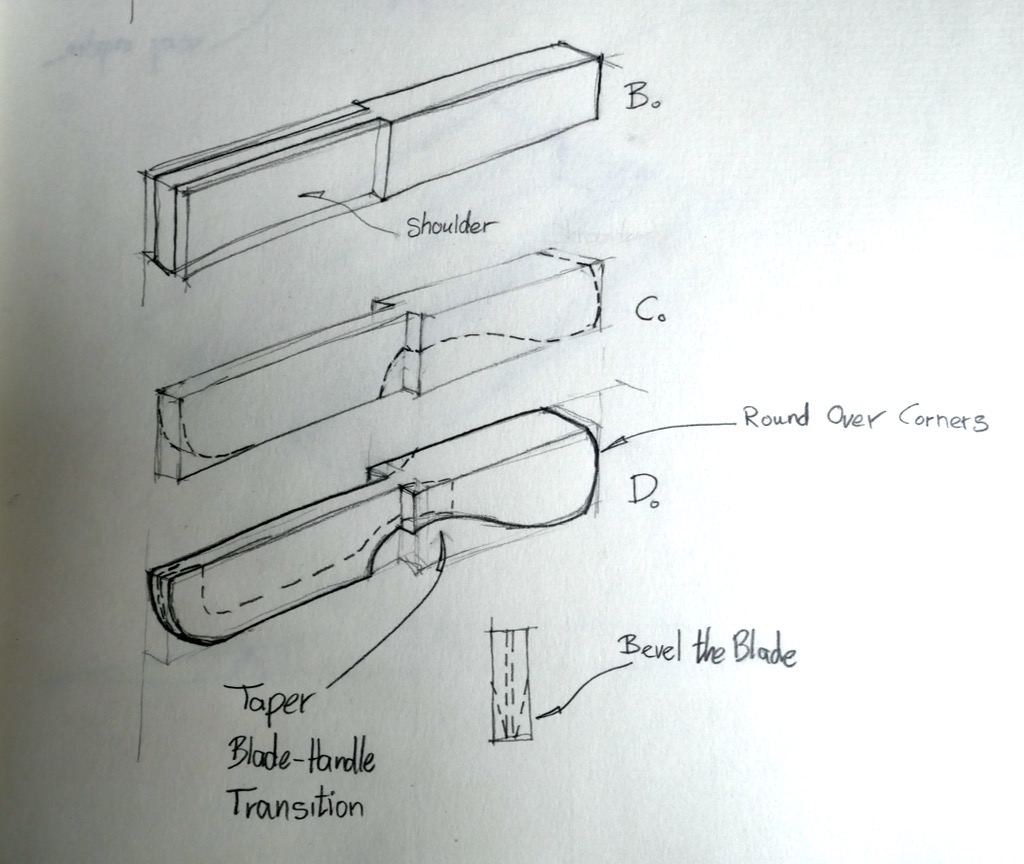 Then the students rasped the two shoulders carefully (C) until the blade rectilinear shape was formed. At this point, we traced the design that the student chose on the blank’s surface and the student begin to rasp away the shape. I wanted to note that in some cases we begin to rasp the knife silhouette first and then continue to narrow the blade).

Now we are ready for the last shaping step – tapering the blade and rounding over the handle’s corner. To help my students taper the blade correctly I drew two inset guidelines on the blade (D) and asked them to rasp diagonally from the inset line to about a third of the blade’s thickness. I instructed them to avoid the temptation of making the blade truly sharp. The reason is that wooden objects can’t hold a sharp edge and will crumble or worse – produce splinters that can hurt us or end up in the food that the knife cut.


With some sandpaper, my students smoothen out their knives to eliminate all the rasp marks and lastly apply a coat of flaxseed oil on the wood.

The butter knife is a great introduction to woodworking which teaches kids some handtools skills, give them a taste of sanding, and culminates with the excitement of witnessing how their knife’s color transforms as they anoint it with a coat of oil. Try it with the kids in your life or with those you teach and see how fun this activity can be.
Here are some supplies and tools we find essential in our everyday work around the shop. We may receive a commission from sales referred by our links; however, we have carefully selected these products for their usefulness and quality.


