We may receive a commission when you use our affiliate links. However, this does not impact our recommendations.
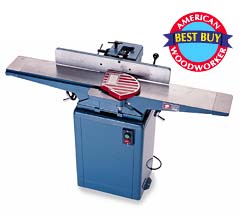
![]() jointer is a must-have for many woodworkers. Few can do without the smooth, straight edges and faces they get from their jointers. We tested twelve 6-in. floor models that sell for under $600.
jointer is a must-have for many woodworkers. Few can do without the smooth, straight edges and faces they get from their jointers. We tested twelve 6-in. floor models that sell for under $600.
A 6-in. jointer will handle material up to 6-in. wide, the width of the cutter head. A 6-in. jointer serves the needs of many woodworkers, but more advanced and professional woodworkers often choose an 8-in. jointer (for a review, see AW #58, April 1997, p. 58). These machines cost from $700 to $2000.
There are 6-in. jointers available as benchtop models, but we recommend a floor model if space permits. They are quieter and can handle longer boards.
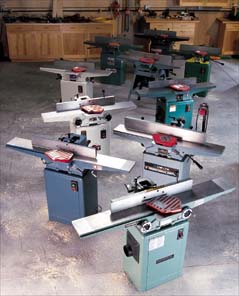
Table Adjustments
Infeed and outfeed table adjustments can be made using handwheels or levers. Most of us preferred the handwheels because they make fine adjustments easier. This is particularly important on the outfeed table. Better yet are models with handwheels on the front of the jointer instead of under the tables-they're really easy to get at.
Fences
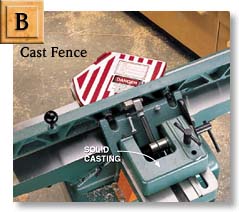
The fence aligns your material to the bed of the jointer, so it needs to be easy to adjust and rigid. There are two styles of fences. One rides on a post (Photo A), the other is carried by a casting (Photo B). Most testers preferred the fences on castings. Most, but not all jointers, have positive stops at 45, 90, and 135 degrees (Photo C). A handle on top of the fence helps you adjust to different angles. Unfortunately, this handle is typically in the way when edge jointing. Fences that are higher and longer lend more support to the material.
|
|
whichever system is used to support the fence, it's crucial that the fence be rock stable. |
Beds
Infeed and outfeed tables must be parallel to each other. Jointer beds can become out of alignment because the cast iron warped after manufacturing or because of damage in shipping. One machine in our test had this problem and a call to the manufacturer resulted in a new machine. Be sure to check your jointer and call your dealer if there's a problem. Also, longer beds are always better because they make it easier to handle the stock. As a rule of thumb, you can get good results jointing material that's twice as long as the jointer bed.
|
|
|
Ease of changing knives
When resetting knives, they may be supported by either jack screws or springs (See Fig. A). Jointers that come with springs under the knives also include a knife setting device. Most users found that springs made it easier to reset the knives. However, four of our five top jointers had screws under the knives. Jack screws are easy enough to live with on a jointer with other great features.
|
|
Assembly and Job Readiness
Many of the jointers look alike and assembly of many was very similar. Closed-stand models are generally easy to assemble. The open-stand models take lots more time to put together—as much as an hour or two more.
How much tweaking will you need to do before cutting wood? This is primarily determined by how well the knives were set at the factory. Only one jointer needed the knives completely reset before cutting wood.
Getting Your Jointer To Work Right
All of our jointers were functional, but occasionally you get a lemon that won't do what a jointer is supposed to do. It's a matter of small tolerances. The most obvious symptom is that no matter how good your technique, you can't produce a straight edge. Here's how you can check your machine to make sure it's working right:
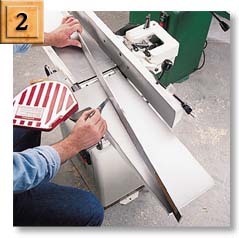
You can test for parallel by unplugging the jointer and placing a high-quality straightedge on the outfeed table. Try to slip a feeler gauge under the straightedge, starting with the smallest gauge. If the tables are absolutely perfect, even the thinnest of gauges won't slip under the straightedge. Use progressively thicker feeler gauges until one won't slip under the straightedge. The thickness of the largest gauge that can slip under the straightedge is the amount your bed is off.
|
|
|
According to the tool experts we interviewed, if you slip more than .003 in. of feeler gauge under the straightedge, you'll have a problem jointing a true surface. Repeat the process placing the straightedge diagonally across the beds to check for twist.
|
S Your Jointer bed travels up and down on dovetail ways. The quality of machining, or lack of it, is a major factor in whether the beds are parallel. |
|
|
The Fence
If there isn't any twist in the beds, you can check for a twist in the fence using a square. Adjust the fence so its face is tight to the square at one end. Move the square down the fence, looking for light between the fence and the blade of the square. If there's a gap, a feeler gauge will tell you how big it is. Gaps bigger than .003 in. could give you a problem.
HOTO General 80-100 LM
This jointer had the longest bed in the bunch. There wasn't much packing grease to clean off, so job readiness was great. We liked the front-mounted handwheels and the smooth-operating fence. Fit and finish on all the parts was great. If you need explicit instructions to set up tools, this tool may be a problem because assembly instructions consist only of an exploded view of the tool. If you have a little familiarity with jointers though, you'll be okay.
|
|
|
Editors' Choice Delta 37-195
This is a unique machine, with several distinctive features that you will either love or not. The fence is great. It's significantly longer and taller than most. The handles on the fence are not in the way when edge-joining. Woodworkers with bad backs will also like the high switch placement. You won't have to bend over every time you want to turn the tool on and off. Assembly was very easy. The fence has a unique rack and pinion system to move it across the bed. While this does make moving the fence easy, it also makes the tool stand farther away from a wall than most jointers, creating a bigger footprint. If you're very short on floor space, you may not like this tool. The lever on the infeed table locks in place with every 1/32 in. of adjustment. Squeeze the handle on the end of the lever to release it. This makes the lever easier to use than other lever-style jointers.
|
|
|
Editors's Choice Jet JJ-6CSX
All the features we like are here, including handwheels on the front, a smoothly operating and rigid fence and plenty of power to get any job done. Assembly was straightforward, thanks to a well written and illustrated owner's manual. The castings on the Jet look identical to the General, except for the lack of bed extensions. Jet's Limited Edition jointer comes with two extra sets of knives.
|
|
|
Best Buy Bridgewood BW6R
his jointer offers lots of features for the money. The fence is rigid and we were really impressed with the quality of machining on the beds. You'll need to wire in the switch, but the owners manual is great and covers this. We appreciated the lack of packing grease.
|
|
|
Best Buy Sunhill 924028
You'll get the second longest bed in our test with this jointer. The bed length comes from adding extensions to the infeed and outfeed tables. The assembly instructions say nothing about the extensions, but they're easy enough to put on. There aren't any instructions for the electrical switch either, and it needs to be installed. Again, it's easy to do if you're accustomed to light electrical work.
|
|
|
Rabbeting on the Jointer?
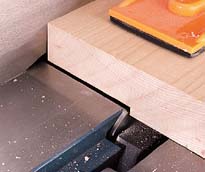
Most jointers have a rabbeting ledge built into the bed of the machine and most people never use it. As luck would have it though, while this test was in progress, I was in the middle of making some doors that needed to be rabbeted for glass. What the heck, says I, I'll do it on the jointer. Lo and behold, it made a believer out of me! It's easy to make wide rabbets and with great surface finish, too. It'll take more than one pass to complete most rabbets, so if you're running lots of pieces, a tablesaw set up might still be the best bet. But for some applications, rabbeting on the jointer is the way to go.
|
Set the fence to produce the corner ravvet width. On a wide rabbet in hardwood, as shown, you, you take off 1/6 in. per pass untill you reach until the depth you're after. |
|
![]()
|
First we put each of the tools together. (A huge task!) We used the owner's manuals and checked for missing parts. After the jointers were properly set up and ready for action, we turned a group of seven woodworkers loose on them. The testers ranged in skill level from novice to advanced, and gave us lots of feedback on what they liked and didn't like about the tools. All the AW editors also had a go at the jointers and submitted their opinions. Finally, we measured the jointer tables to see if they were parallel. Although many of the jointers looked a lot alike, there were small but significant differences that distinguish the best jointers. |
|||||||||||||||||||||||||||||||||||||||||||||||||||||||||||||||||||||||||||||||||||||||||||||||||||||||||||||||||||||||||||||||||||||||||||||||||||||||||||||||
|
|
|||||||||||||||||||||||||||||||||||||||||||||||||||||||||||||||||||||||||||||||||||||||||||||||||||||||||||||||||||||||||||||||||||||||||||||||||||||||||||||||
|
|
|||||||||||||||||||||||||||||||||||||||||||||||||||||||||||||||||||||||||||||||||||||||||||||||||||||||||||||||||||||||||||||||||||||||||||||||||||||||||||||||
Here are some supplies and tools we find essential in our everyday work around the shop. We may receive a commission from sales referred by our links; however, we have carefully selected these products for their usefulness and quality.


