We may receive a commission when you use our affiliate links. However, this does not impact our recommendations.
Related: Shaker-Inspired Sewing Counter
Shaker Sewing Counter: Glue-Up Tips
The glue-up for case pieces is ALWAYS a little nerve-wracking and though this particular Shaker-style Sewing cabinet is no less daunting given its frame-and-panel construction, following these tips can make everything a breeze:
TIP #1:
Pre-Finish Before Glue-up = Massive Headache Avoided
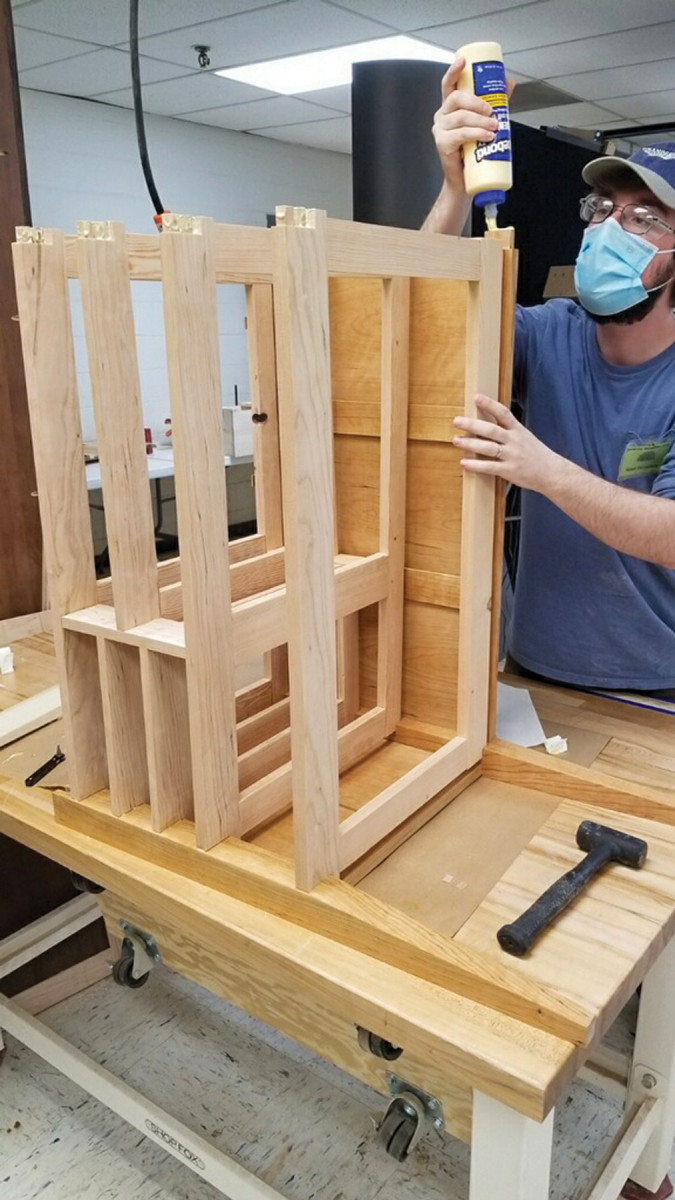
First, you’ll want to save yourself the headache of cleaning glue out of tight, hard to reach corners. The best way to do this is pre-finish your pieces before glue-up. I shellacked all the rails, aprons, legs, panels, and stiles. After everything was glued, I did my finishing touch of wax over the piece but having the shellac down acts as a barrier and prevents the squeeze-out from bonding to the fibers so that you don’t have hard to wipe beads or stains in the wood. If you prefer to finish after the glue-up, the same goal can be achieved with the use of painter’s tape. For example, put a few pieces of tape around the mortises without covering them, then fit the apron into place and trace its outline on the tape. Remove the portion of tape that was covered by the apron, and you’ll be left with an easy to remove guard against squeeze out.
Prefinishing components, such as this side assembly, not only makes it easier to get a good finish, but also makes squeeze out easier to remove. The glue doesn’t stick to the finished surfaces.
TIP #2:
Break the Glue-Up into Several Parts
Next, glue-ups are a lot more manageable if broken down into parts. For example, here’s the breakdown I took when completing my sewing counter:
DAY 1:
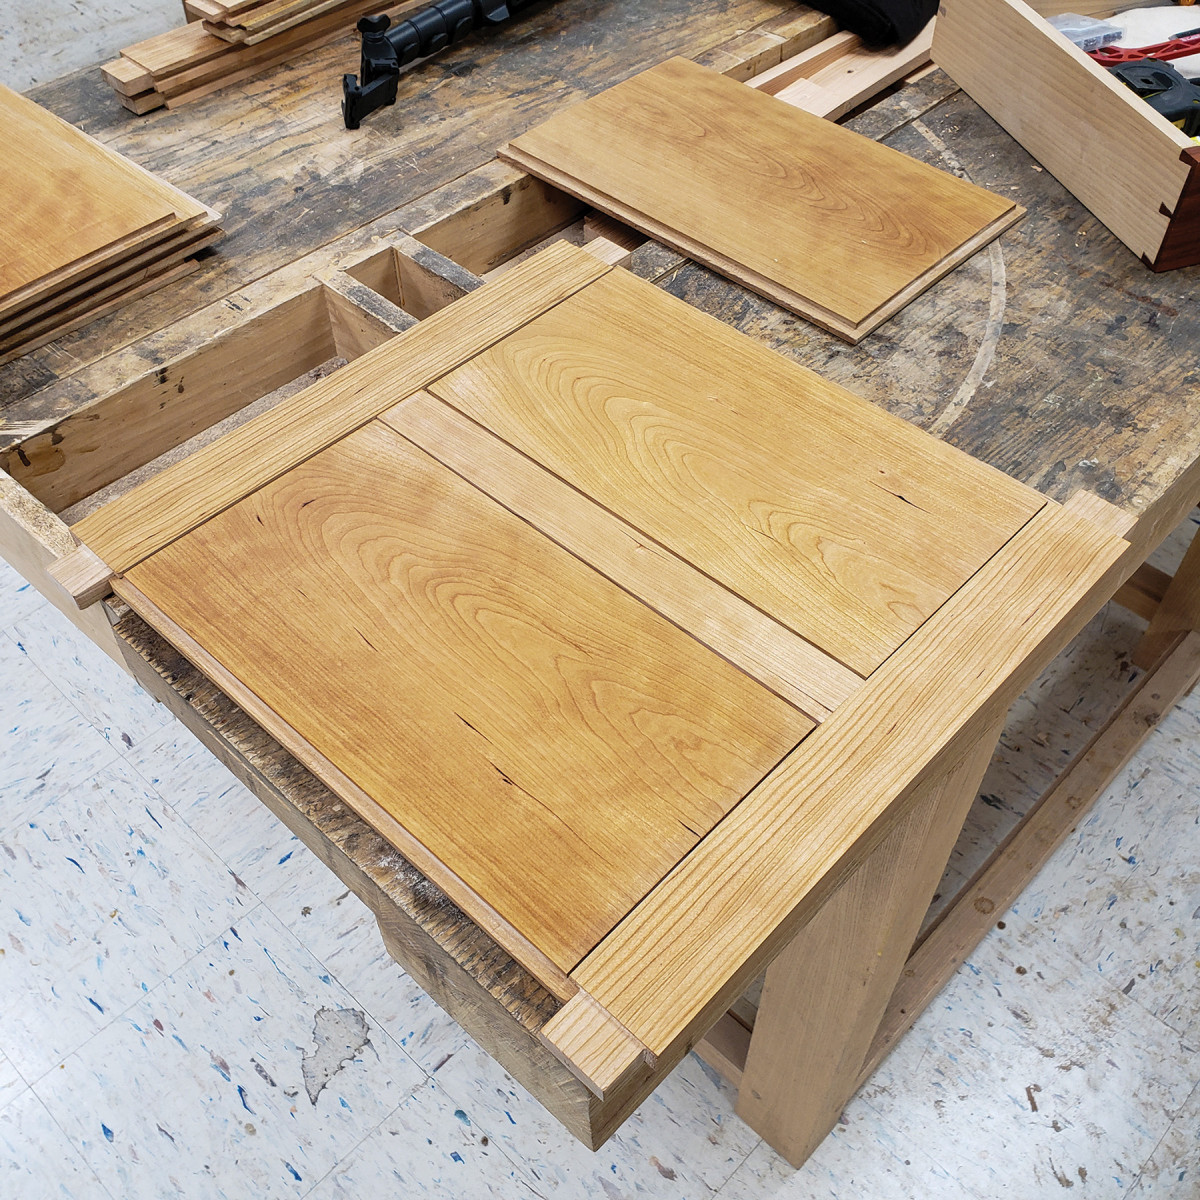
- Glue-up the sides: First, I put the stile in place between the apron with a little glue. Then dry-fitted the panels into place. You do not want to glue them in – they need to be able to move seasonally. Additionally, this is a good reason to pre-finish them so that as they contract in the winter you don’t spot unfinished lines along their tongues! Then I glued the aprons into the legs and left them over night to cure, giving me two solid sides to work with.
- Glue-up the drawer webbing: While the sides are setting, I individually glued-up the drawer webbing so that I have all of the parts ready to go for day 2 of the assembly.
- Prepare the back panel: Start by placing one stile into the back aprons with a little glue. Insert the middle back panel and then place the second stile in between the two aprons with a little bit of glue. Remember not to add glue to the panels just like for the sides. You will add the other two aprons when you put the case together tomorrow.
DAY 2: Now it’s time to move onto to Tip #3 where you should enlist a friend to help you complete the glue-up and case assembly.
TIP #3:
Enlist a Friend to Help
Lastly, in pieces of this size, it is very difficult to fit the joinery together all on your own. Inevitably, you’ll have the front rails fit perfect into their mortises, then when you go around to the back to fit the webbing into its notches, a rail will come loose, back and forth you’ll do this until the glue starts to set and then you’re in big trouble… I recommend enlisting a friend or partner for help, bribe them if you have to! At the guild there are plenty of people around to help with glue-ups, another wonderful perk of working in a shared shop.
DAY 2:
- Get prepared: Set one of your finished sides on the table with the mortises face up, preferably over some cauls that allow you to fit some clamps (but it’s not necessary). Next glue the drawer divider into place between the webbing.

- Glue and place the rail mortises of the front leg. Begin by putting glue into the rail mortises of the front leg. FRIENDLY REMINDER: Do not add glue to the back mortises. Just like the panels, you do not want to add glue to allow for seasonal movement. Next, place the little rails with their webbing followed by the bottom rail and it’s webbing. Lastly, place the webbing with the drawer divider. NOTE: As you do this, you’ll have to fit the small drawer rails into place on the front drawer divider. This makes adding the opposite side a lot easier since the webbing is standing upright. Ask a friend to help you fit the webbing into its notches as you glue and hammer the rails into the mortises in the front.


- Insert the back side. Begin by placing one back panel into place followed by the prepared back side. Lastly, add the last back panel.
 Insert the last drawing webbing, add glue, and place the second side. First, install the last drawer webbing – it’ll be the either the middle drawer webbing or the two small drawer webbings depending on which side you placed onto the workbench. Add glue into the second side’s front leg mortises, then have a friend help you position it in place. Throw some clamps on spanning the rail and back aprons, have your friend help you lift it upright, then check for square and adjust the clamps if necessary.
 Insert the last drawing webbing, add glue, and place the second side
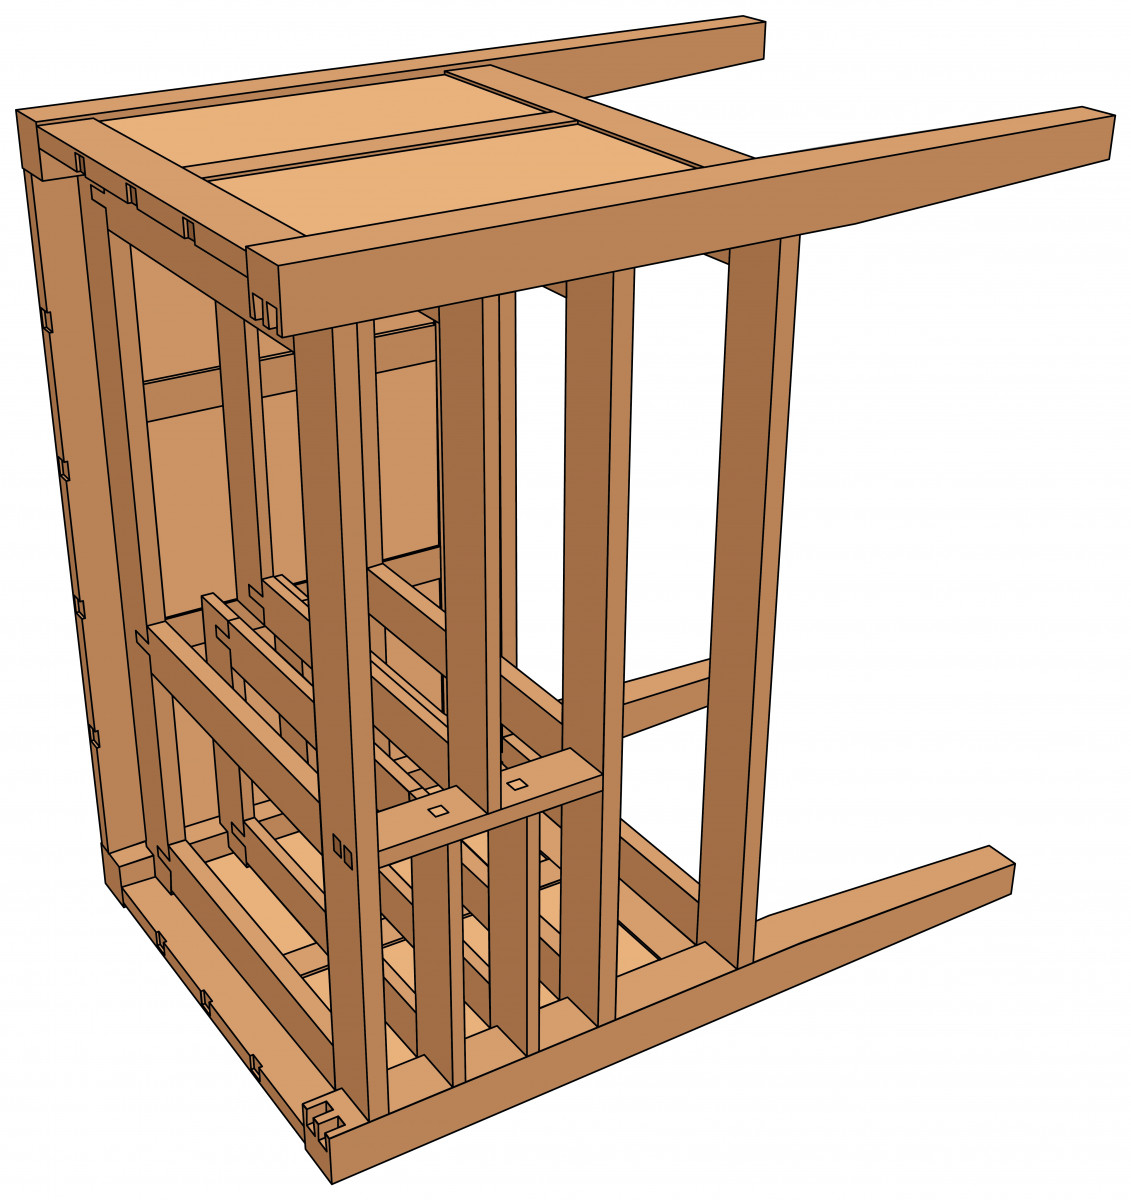
 Hammer the top rail (with the top attached) into the dovetail. Now that the cabinet is upright again, use a rubber mallet to hammer the rail onto the cabinet base. If you haven’t drove screws through the top rail and into the top, be sure to do this before placing it; otherwise, attaching the top to the case will not be easy!
 - Attach the top to the case. The last step in assembly is to attach the top to the case. You already screwed one side of your figure-8 fasteners to the top of the sides and back of your case. Now screw the other half of the figure-8 fasteners into the top. The easiest way to do this is to set the cabinet upside down then finagle your way to the figure-8 fasteners and with a special ratchet screwdriver for tight spaces, drive the screws into place.
- Onto the drawers. To wrap everything up, rub-joint the drawer and workshelf guides with hide glue, attach the knobs to the workshelf and drawers, and insert them into place.

 Hammer the top rail (with the top attached) into the dovetail
- Lastly (and possibly most important), thank your friend for their help!
BONUS TIP:
ALWAYS practice your glue-ups all the way through at least once before your start!
Here are some supplies and tools we find essential in our everyday work around the shop. We may receive a commission from sales referred by our links; however, we have carefully selected these products for their usefulness and quality.