


We may receive a commission when you use our affiliate links. However, this does not impact our recommendations.
Locking Miter Joint for Legs
You need a special router bit to tackle the locking miter joint, but it’s useful for many projects. The basic idea is to mill one board flat on the router table and the adjacent board held vertically against the fence. This creates a perfect joint with one bit and one setup. I’ve also come up with my own techniques to improve cut quality and avoid any tear-out or snipe. Luckily, anyone can incorporate these tips into their locking miter routine and all it takes is a few strips of 1/4“ MDF. I recommend making all cuts in two passes with this router bit.
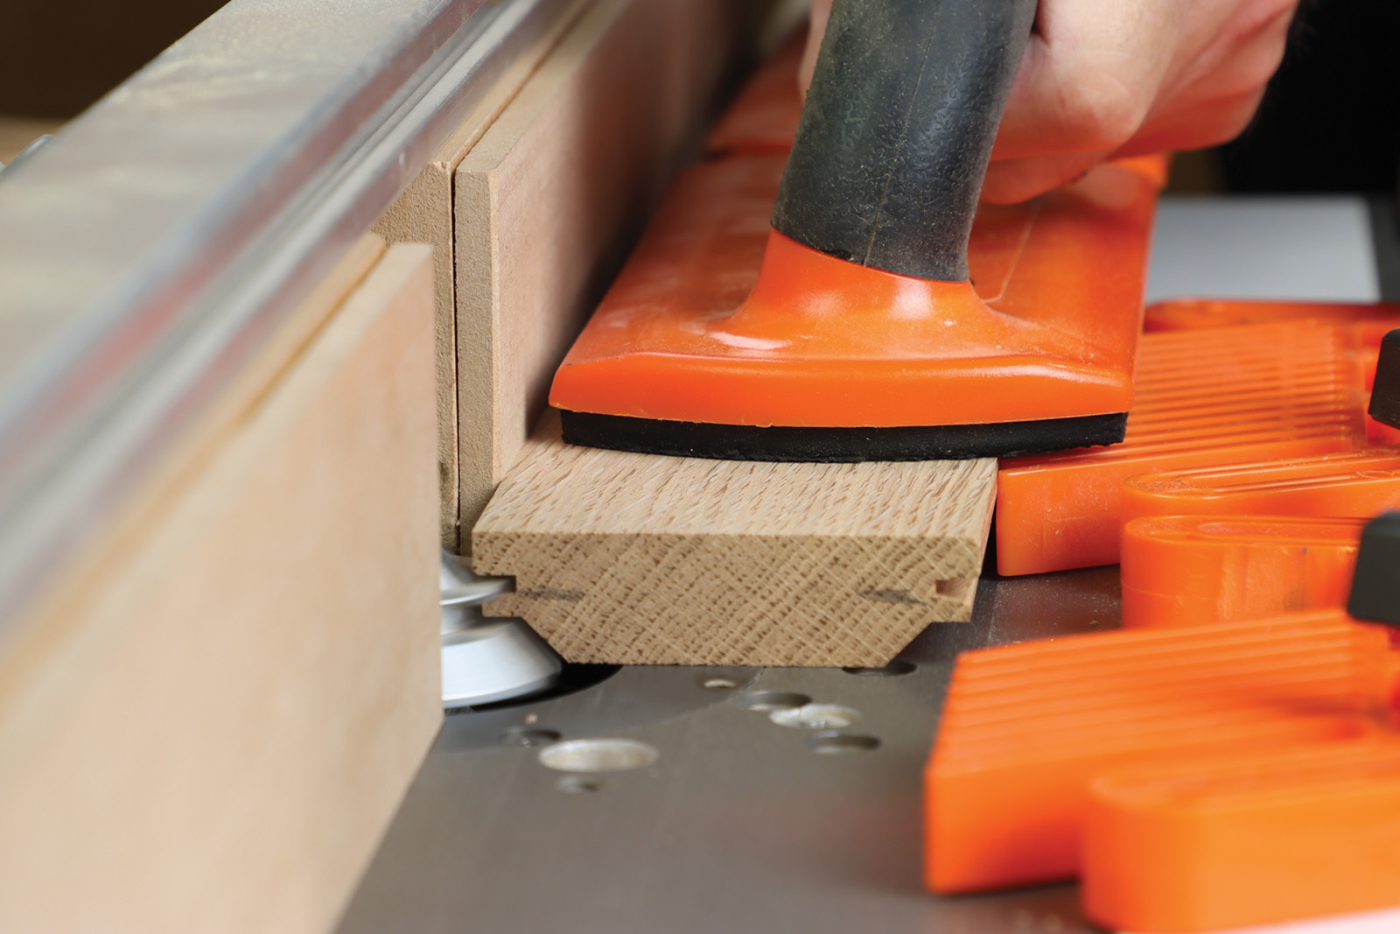
1 With spacer strips attached to the router fence, rout the first pass on the horizontal boards.
First set the proper bit height and fence position, according to your material thickness. Once a sample cut shows everything is set correctly, temporarily secure strips of 1/4“ MDF to your router fence with double-sided woodworking tape. Make these the same sizes as your router table fence, as you’ll be able to reuse these strips for multiple projects. Make the first pass on all work pieces with these spacer strips in place on the fence. This essentially removes less material and leads to a much cleaner cut with less strain on the router. An important note about planning for successful assembly: rout the same profile on both edges of each board. Then rout the opposite profile on both edges of the mating board. This way, the leg blank can be drawn together by clamping in primarily one direction.
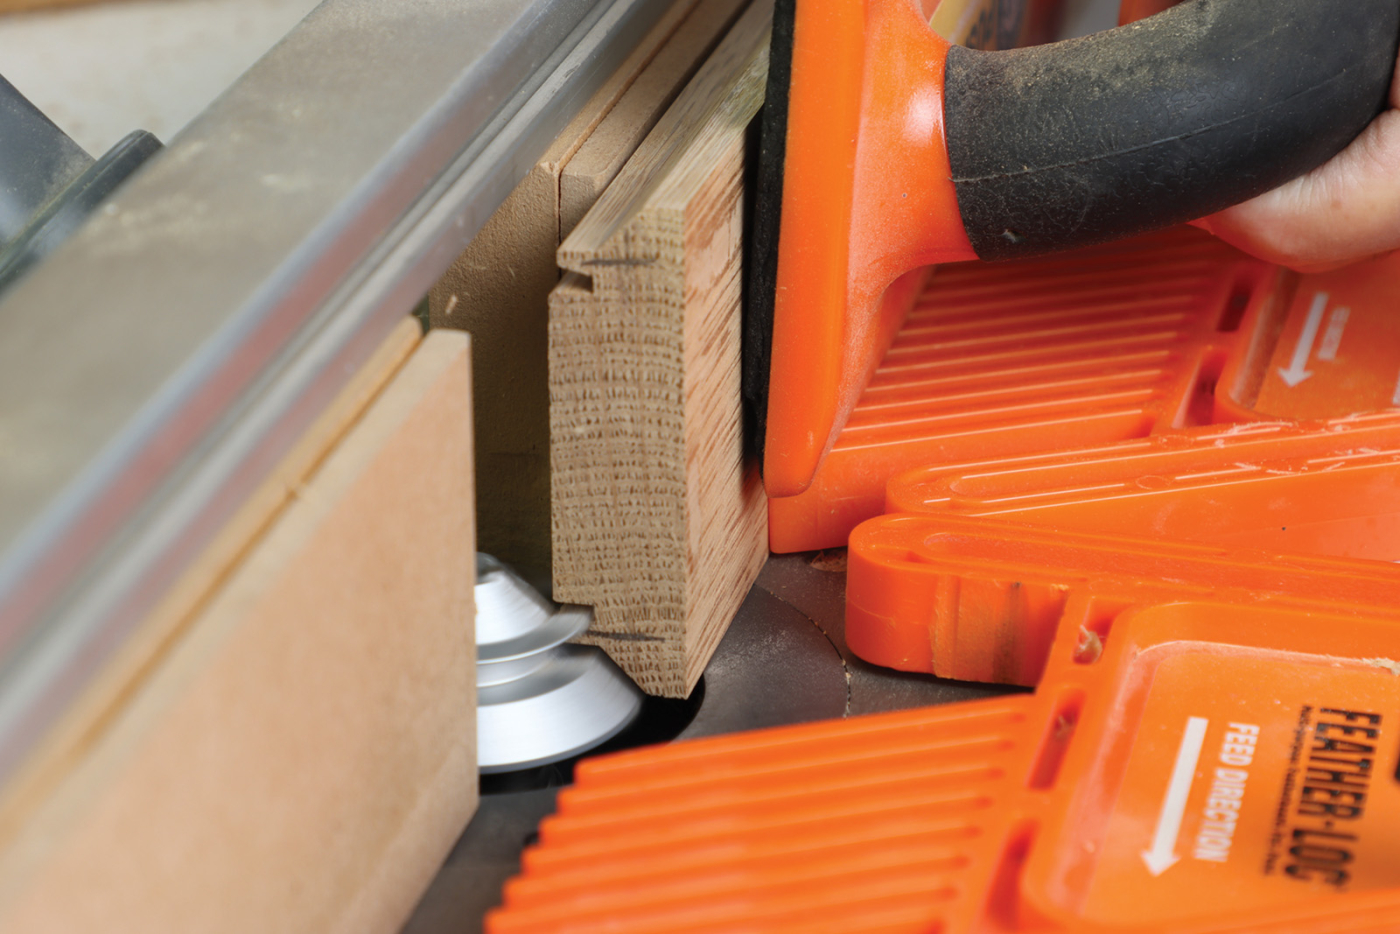
2 Next, rout the first pass on the vertical boards.
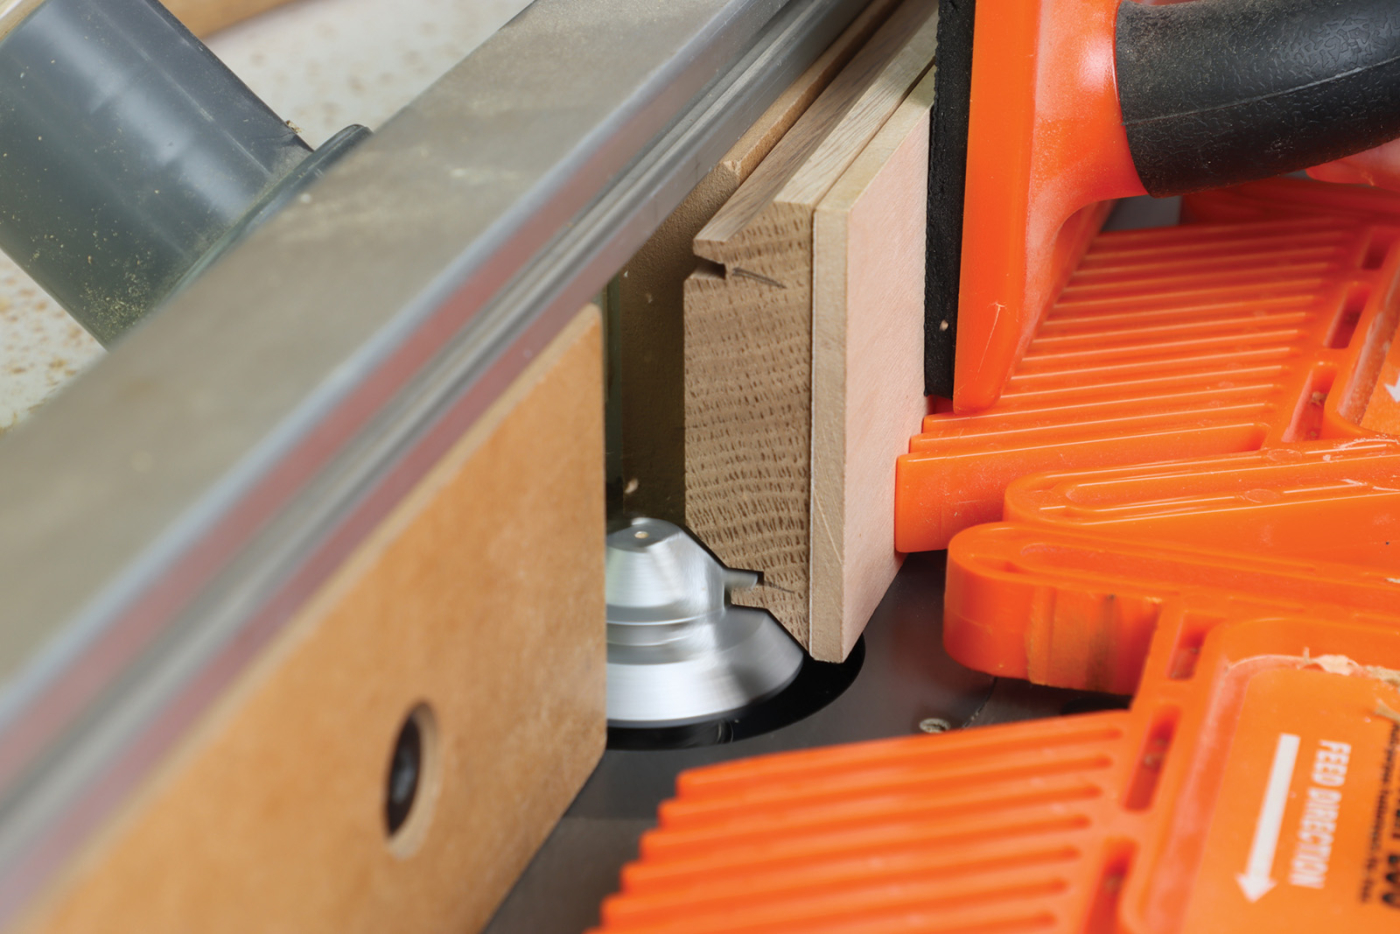
3 Remove the spacer strips from the fence and attach a 1/4″ MDF strip to the workpiece to complete the second pass on all parts.
Once the first pass is complete on each workpiece, remove the spacer strips from the router fence, and get ready to make the second pass. It’s worth noting that the bit height and fence position are unchanged from the first pass. This second pass will form the typical “knife edge” we expect with a locking miter joint. To protect that delicate edge and support the workpiece as it passes over the router bit, add strips of 1/4“ MDF (or plywood) with double-sided tape. I made just one strip to save material and transferred it from one workpiece to the next to cut the right components required. The strip is simply sized to match the length and width of your workpiece. This is a very important step and yields consistent cuts, while avoiding common problems like snipe as you push the board past the bit. Complete the second pass on all boards and dry assemble the rear legs to determine the size for a solid core to fill the central void. It should be about 1-1/4“ square and is installed as the lock miter legs are assembled.
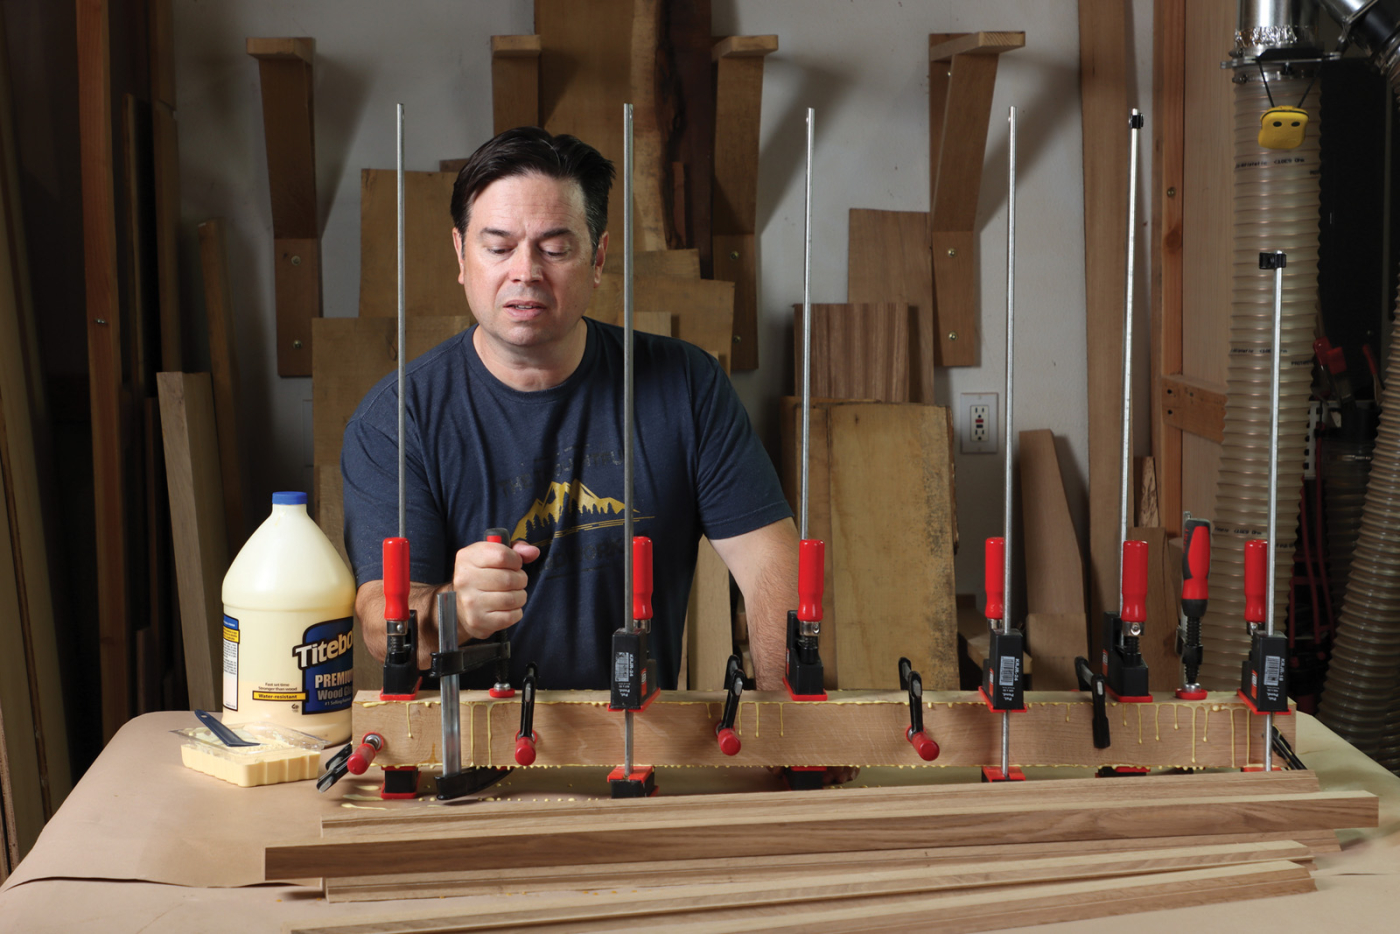
4 Assemble the rear legs with a solid core in the middle and glue the parts together.
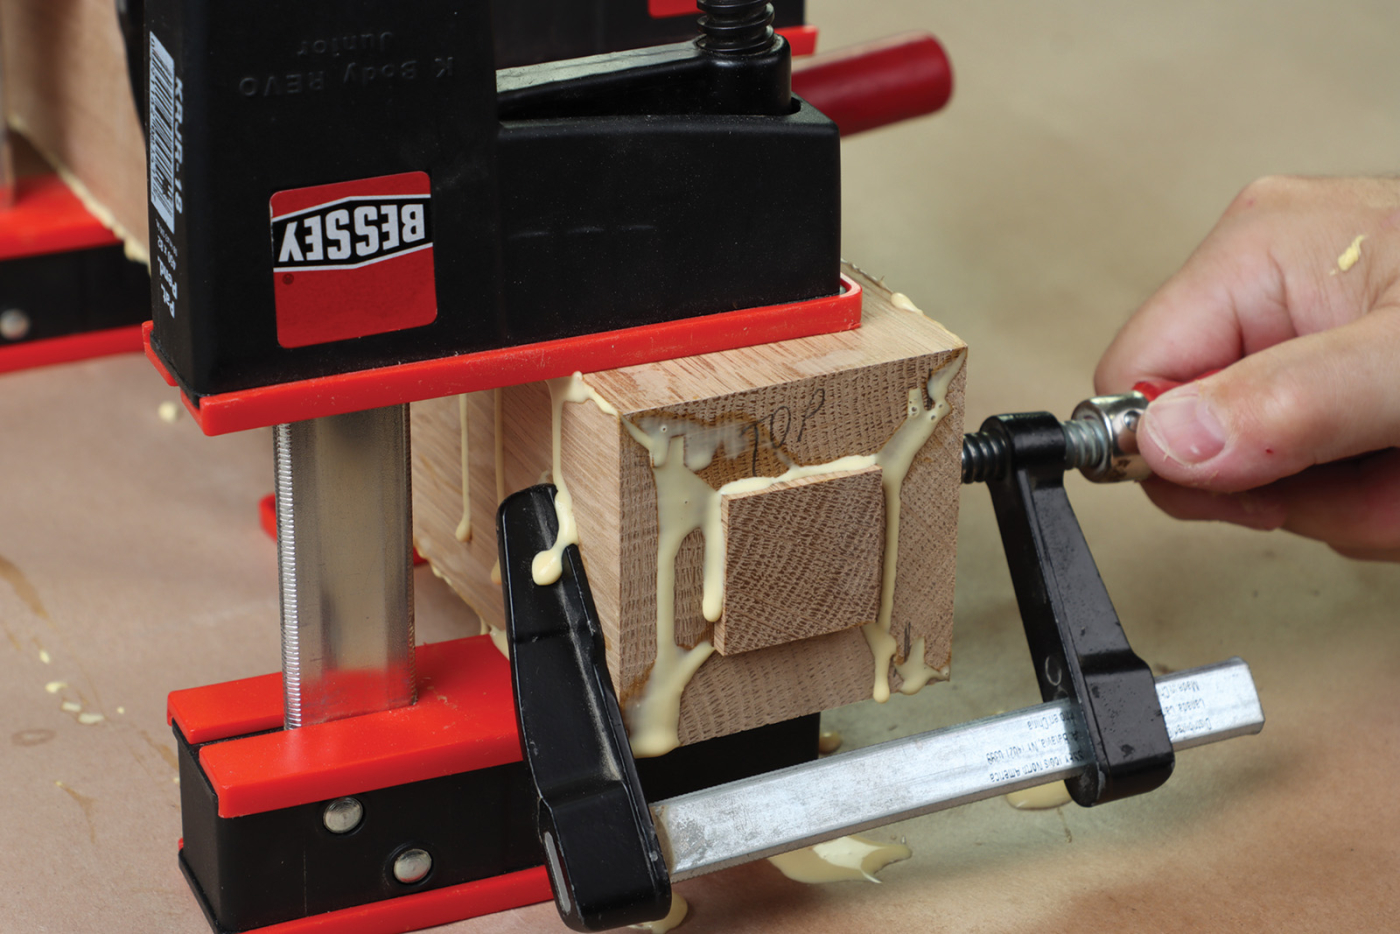
5 Make the solid core about 0.005″ undersized to allow room for glue and to ensure the locking miters seat fully.
Here are some supplies and tools we find essential in our everyday work around the shop. We may receive a commission from sales referred by our links; however, we have carefully selected these products for their usefulness and quality.


