We may receive a commission when you use our affiliate links. However, this does not impact our recommendations.

In the assembly room you pass a rack full of clamps. Pipe, bar and C-clamps are organized and handy. While none are brand new, all are in good shape even after years of use.
Right before lunch that day, a local landscaper stopped by to chat with Maloof. He was taking down some Torrey pines (five or six feet across and maybe 100 feet straight). He’d found trees for Maloof in the past and wanted to know if he wanted these. Sure, Maloof says, and they worked out the arrangements. But Maloof also brought up a particular walnut tree he’d seen and wanted to know when he could get that one. The tree wasn’t scheduled to come down any time soon, but Maloof knew where the good wood was, and he was keeping his eye on it.
Of the buildings on his property, two are dedicated to lumber storage, and Maloof is currently overseeing the construction of a third. He designed the new structure with a peak to mirror the San Gabriel mountain peaks looming directly behind the building.
The wood storage sheds hold thousands of board feet of quilted maple, figured walnut, rosewood, ebony and zircote. It’s more than most woodworkers could use in a lifetime, but not Maloof. “Those pieces, you can see how wide they are (five-feet wide and easily 2″ thick), those are beautiful. They’re fiddleback walnut, and I’m making a dining table for the kitchen in the other house and the other will be a conference table.”
Building a Maloof Piece
 David Wade describes the process in making a piece of Maloof furniture. “Sam does all the sculpting on the band saw, does the joinery and the wood selection and puts everything together. But it’s a continual backand- forth process. He’ll put a seat together, then I’ll get it and carve out the shape, then it goes back to him. He puts the back legs on, then it goes to Mike or Larry and they start shaping it. When that’s shaped it goes back to Sam and he’ll do the arms. Everyone gets their hands on it.”
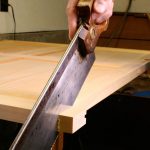
The process starts in one of the wood storage rooms with Maloof picking 5″-to-7″ width, 8/4 material for the seats in the rough. Backs will be 12/4 or 14/4. Maloof heads straight to the band saw to cut the lumber to size, then lays out the pieces using one of the hundreds of patterns hanging in the shop.

The photo above shows the lathe tools and some spindles ready to be fit into the back splat.
Maloof rough-sculpts the pieces on the band saw. He also will use the templates as shaping patterns, nailing the template to the piece, then heading to the shaper and using the template to guide the shaper as with a flush-trimming router bit.
“It would take me a lot longer if I didn’t cut them out like I do on the band saw (free handing the large chunks of wood rapidly through the machine),” Maloof says. “I can make a couple items in 15 minutes, but if I were doing it all by hand it would probably take me four or five hours.” But he doesn’t recommend his freehand shaping method because of the safety factor. “I didn’t know any better when I started … It’s sorta dumb. You can say that, too. It’s sorta dumb.”
He’s had his choice of band saws throughout the years, working his way up from a 14″ cast-iron Rockwell band saw with an extension block, to his current 32″ Agazzani.
“I use machines wherever possible,” Maloof says. “But I’d say 90 percent of it is hand work. You can’t do it with a machine. There’s no way. There isn’t a machine made that would do the things that we do by hand. It’s very time-consuming… but we don’t let anything out of the shop that we don’t like. We’d rather cut it up and throw it away.”
With the pieces roughed, the rest is shaping. Wade explains this part of the process:
“There’s a lot of detail work, a lot of shaping to get the hard lines established. And then sanding from there. We use pneumatics, files and Nicholson #49, 10″ rasps. The Dynabrade’s really helpful for sanding, and we use electric quarter-sheet sanders. (There’s a) lot of hand sanding. We’ve made foam blocks in different shapes that we use to get into the curves.”

In the assembly room, more templates dot the walls, while partially assembled pieces wait for the next step. A 10″ cabinet saw sits amidst rough-sanding machines, including an edge sander, large disc sander, spindle sander and contour sander.
Wade recommends Klingspor sanding products, saying they seem to cut better than any other papers they’ve used, last longer and don’t load up as much. With all the sanding that goes on, they rely on air cleaners and attic fans to keep things clean. On Fridays the shop gets a thorough cleaning. Wade says he’s even resorted to a yard blower.
Finishing Remarks
The last step is putting on the finish. Maloof developed a two-part finish 50 years ago and continues to use it on all his pieces. The first step is the poly-oil (one-third semigloss urethane, one-third raw tung oil and one-third boiled linseed oil). The second step is wax-oil (same as the first mix, but leaving out the urethane and adding a couple handfuls of shredded beeswax per gallon to the mixture. This is heated in a double- boiler until the wax melts).
You can buy Maloof’s finishes pre-mixed from Rockler (rockler.com). That’s what’s on his shelves, and that’s what they use.
“Four coats of the poly-oil, and one coat with the wax-oil and it gives it a nice sheen,” Maloof says. “It’s a friendly finish. It’s real easy to apply, just rub it on and rub it off. No need for a spray booth. It’s friendly down the road, too. If you do have a dent or a cup ring or something, it’s easy to repair.”
 The Maloof team works a standard 40- hour week, but the guys also help out with Maloof’s Saturday workshop lectures.
“I know a lot of people, very good friends of mine, that just think I’m crazy doing what I do, as far as giving workshops,” Maloof says. “They say, ‘You don’t owe anybody anything, you’ve been doing it for so long.’ But I still enjoy giving workshops, I like to share what I do. I don’t have any secrets.”
Maloof’s past is all around him, with many pieces coming back to his shop for repairs or on their way to museums. Though Maloof has a lifetime of experiences already, his zest for life has not decreased. He remarried a little more than a year ago, and to who else, but a former customer.
Maloof had built a dining table for a couple early in his career and throughout the years they’d stayed in touch. Beverly and her husband had divorced over time, and then Maloof’s first love, Alfreda, “had to leave” as he explains her 1998 death.
Some time later, Beverly “invited me to her house for lunch and I couldn’t see the grain through the finish (in the table he’d made). It looked awful. So I told her I’d come by and pick it up and redo it for her. I did, and I think that’s the reason she married me.”
Maloof continues to take orders on new furniture pieces and has about a four-year waiting list at this time. With his newly formed Sam and Alfreda Maloof Foundation for the Arts and Crafts (see the story at right for more details), his plate is full, but his work will continue to delight and dazzle generations to come. PW
Here are some supplies and tools we find essential in our everyday work around the shop. We may receive a commission from sales referred by our links; however, we have carefully selected these products for their usefulness and quality.