We may receive a commission when you use our affiliate links. However, this does not impact our recommendations.
Solutions for common situations, from softening edges to stripping.
Here are 10 tips and tricks you might use to both speed your finishing and get better results. I’ve arranged them in the rough order of typical finishing steps.
Soften Sharp Edges
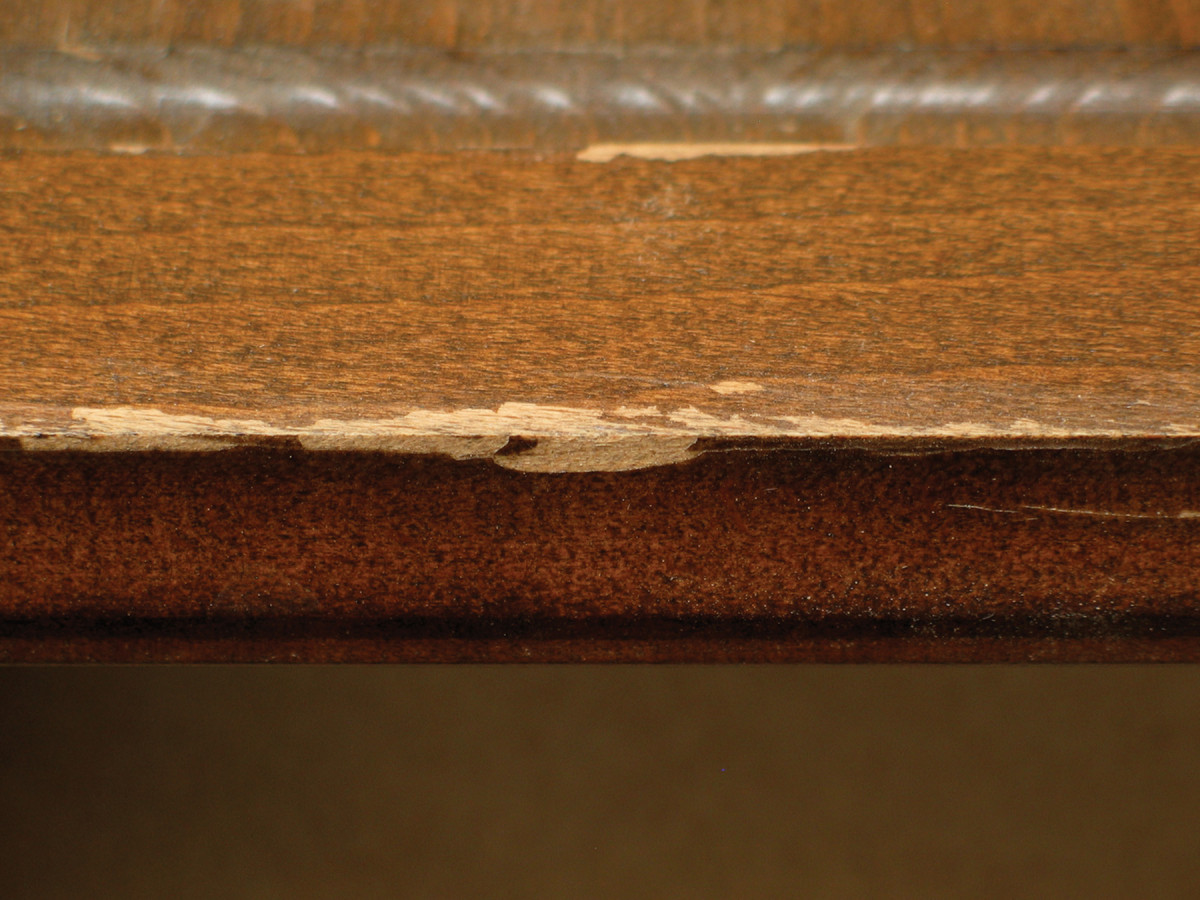
Soften edges. Film-building finishes can peel away from sharp edges as shown here. These edges also get damaged easily – so soften them with a couple passes of medium-grit sandpaper before applying the finish.
Machining wood leaves edges sharp. Always soften them with several light passes of medium-grit sandpaper before applying a finish. Film-building finishes can peel away from sharp edges if they aren’t rounded over a little, and sharp edges get damaged more easily than softened edges.
Apply Stain
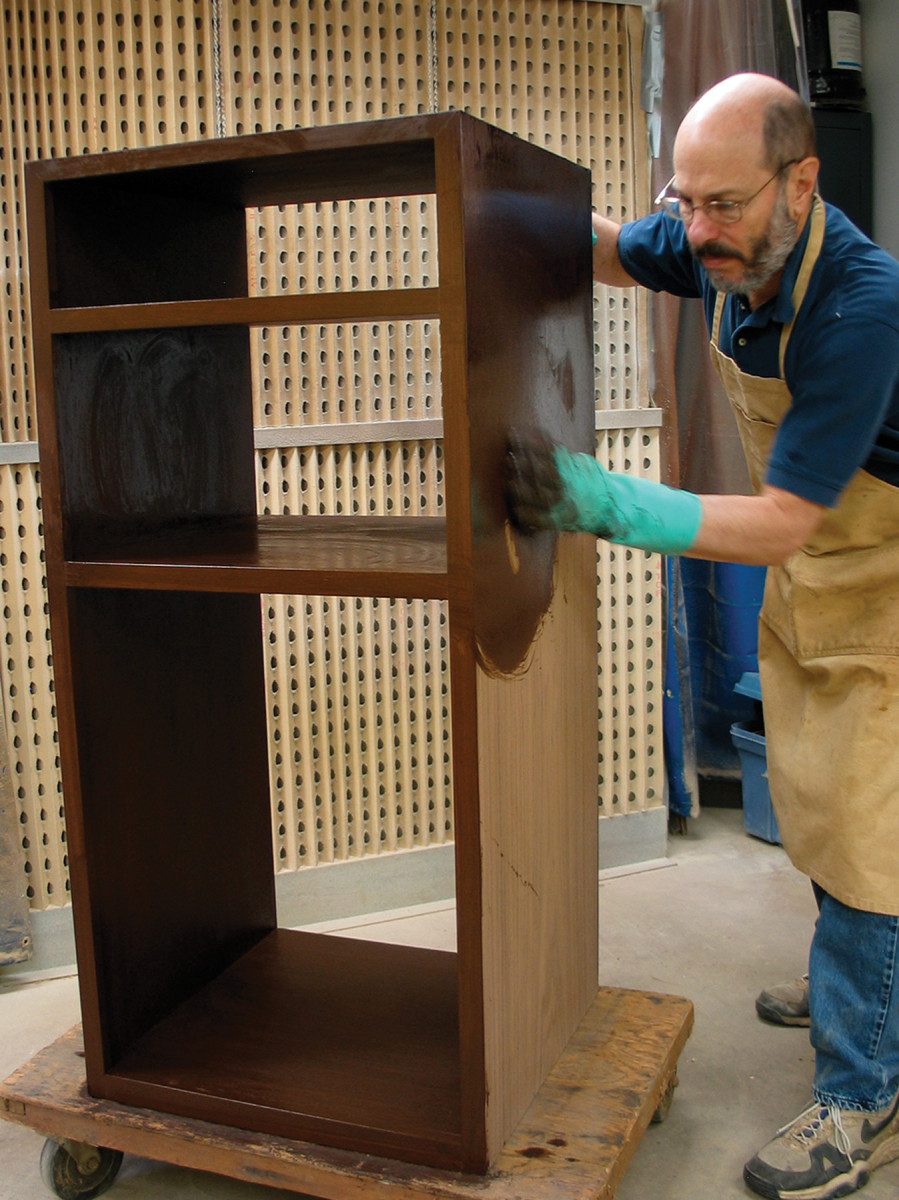
Applying stain. The fastest ways to apply a stain are to wipe or spray. Brushing a stain is very slow, usually too slow with fast-drying stains. Still, many people brush, probably because they haven’t considered the speed factor.
The most efficient methods of applying stain are by wiping or spraying. Brushing is very slow, often too slow with lacquer- and water-based stains that dry rapidly.
When you have thoroughly wetted a surface with the stain, quickly wipe off the excess. With fast-drying stains, try dividing large projects into smaller sections to give you enough time, or get someone else to apply or wipe off.
Avoid Runs & Sags
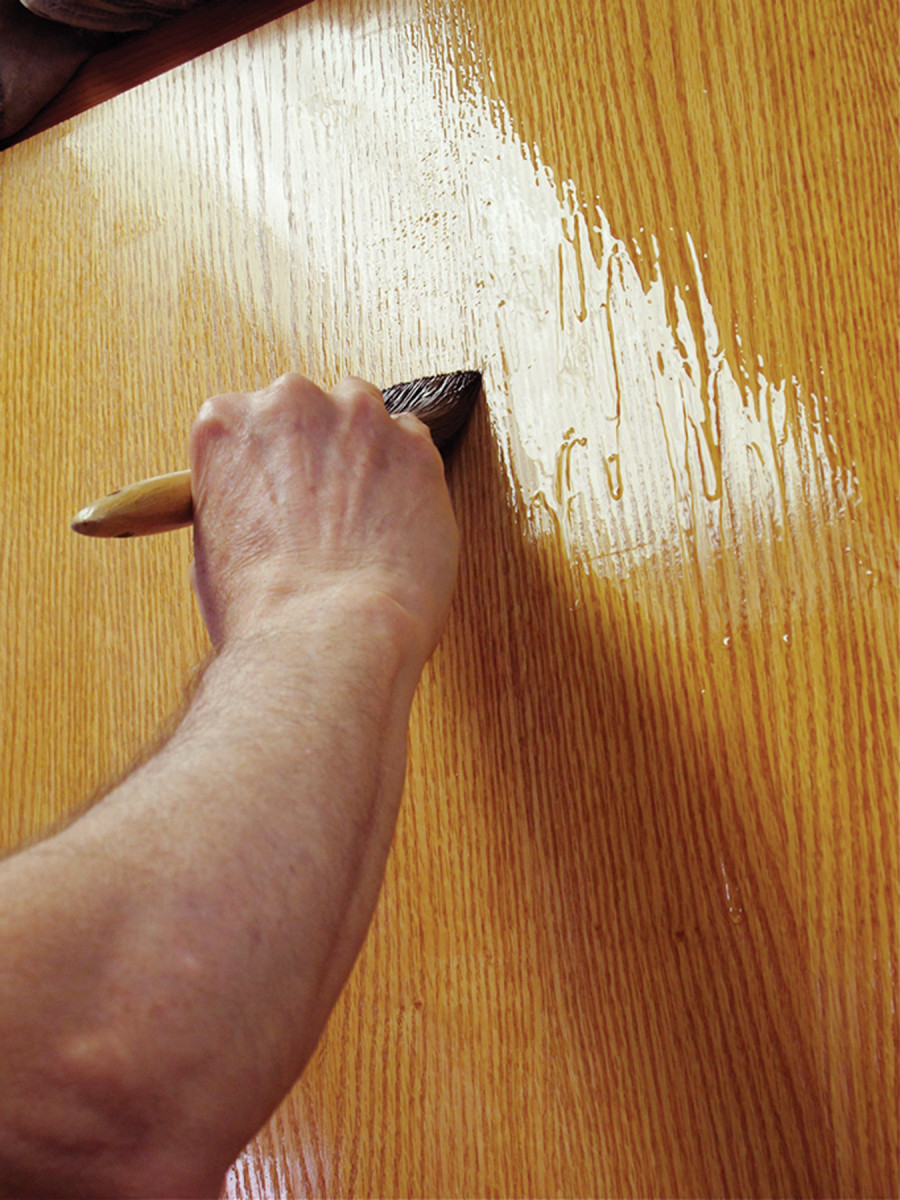
Runs & sags. Notice in this picture how easy it is to see the developing runs in a reflected light and how difficult it is to see them elsewhere. Always check the finish in a reflected light while applying it, and brush out any runs as they develop.
You should never have runs or sags in your dried finish. The way to achieve this level of perfection is to watch the surface you’re brushing or spraying in a reflected light. You might need to arrange some lights or move your body and your head often to see what’s happening.
With a reflection you can see easily when a finish begins to sag or run. Then it’s a simple matter of using a brush (even if you’re spraying) to remove the problem. Lift the excess finish off the surface with the brush and spread it to another part, drag it over the lip of a jar or can or wipe it on a clean cloth.
Best Bar-top Finish
The best finish to use for bar tops, restaurant tables or kitchen tables depends largely on how you intend to apply it.
For a pour-on finish epoxy resin is best. Just like epoxy adhesive, it comes in two parts, which you mix before pouring it onto the surface and spreading it evenly using a plastic spreader.
If you’re using a spray gun, the best finish is catalyzed (“conversion”) varnish, which also comes in two parts for you to mix before spraying. Close behind in durability are one- and two-part catalyzed lacquers.
If you’re brushing the finish, oil-based polyurethane is best. It is significantly more durable than water-based polyurethane because alcohol spills and cleaning chemicals will soften water-based polyurethane over time.
Avoid Rough Surfaces In Confined Spaces
When spraying in enclosed areas, such as the insides of cabinets or drawers, with a fast-drying finish, it’s common to get a rough-feeling finish. The bounce back and turbulence created by the force of the spray, even HVLP spray, keeps the finish particles in the air long enough to dry. Then they settle and stick to the surface.
To prevent this from happening, slow the drying of the finish with a retarder. In some situations you can remove the back of the cabinet or the drawer bottom so the bounce back can be exhausted.
Lacquer Over Stain or Glaze
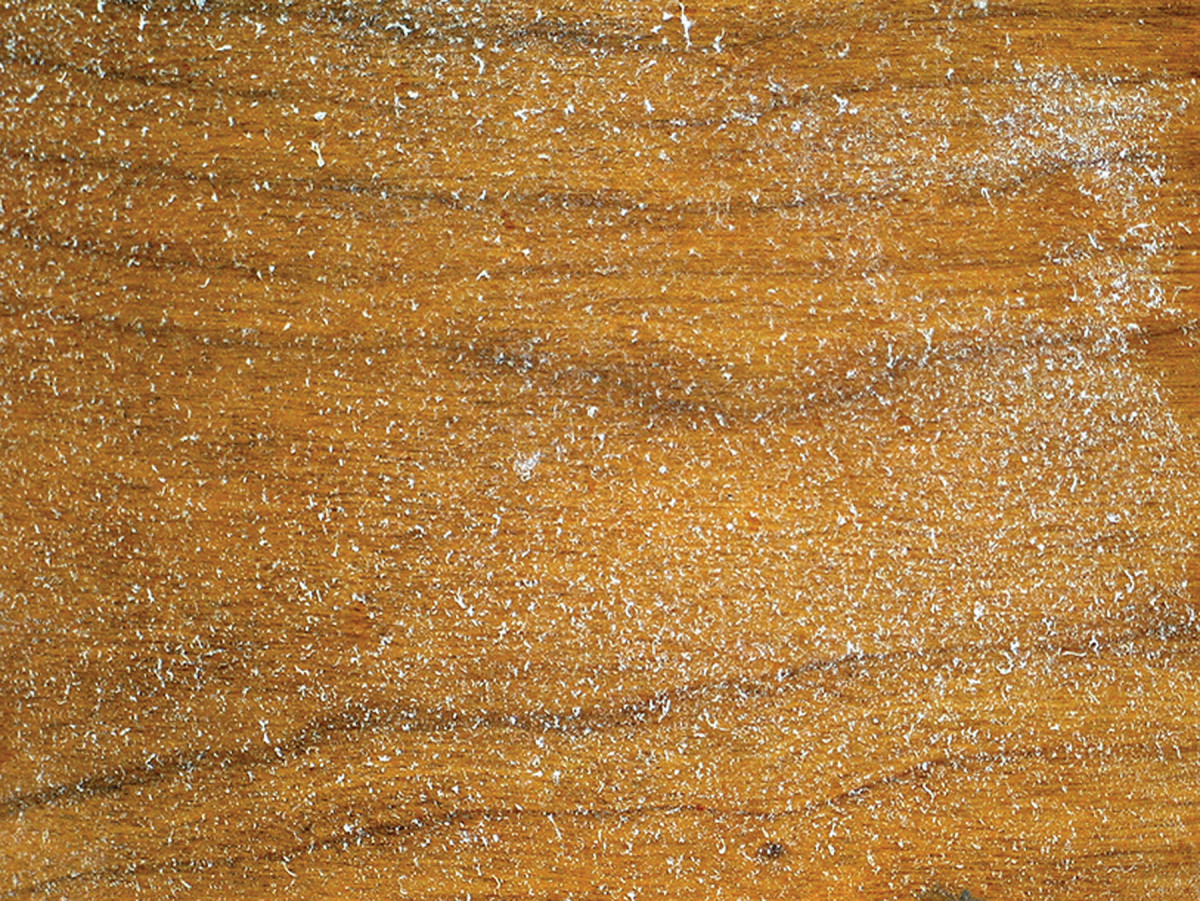
Rough spray. Spraying the interior of cabinets and drawers with a fast-drying finish such as lacquer or shellac might leave a rough surface like this close-up shows. To avoid it, slow the drying of the finish with a retarder.
As long as you are using a spray gun for application and solvent lacquer for your finish, you don’t have to let an oil-based stain or glaze dry overnight before applying the finish.
The trick is to mist (or “dust”) some lacquer onto the stain or glaze after the thinner has evaporated (the stain or glaze dulls) but before the oil binder begins oxidizing and becomes tacky. Unless the stain or glaze is thick, in which case this trick might not work, the lacquer incorporates the uncured stain or glaze and bonds to the wood or finish coat underneath.
After the mist coat dries, continue with your finish coats. It would be a good idea to practice on scrap wood first to be sure you have the timing right. If the timing is wrong, the finish might wrinkle or turn white.
Match Colors
Matching colors is one of the most difficult tasks in wood finishing. It’s rare that a stain alone accomplishes a match. The best procedure is to get the color close but a little on the light side with a stain. Then tweak the color by applying a glaze or spraying a toner.
To get a preview of what the glaze or toner will do, apply some to a clean glass plate and place it on the stained wood to which you have applied a coat of finish. You’ll know right away if you have a match, or what you need to do to get closer.
Remove Dust Nibs
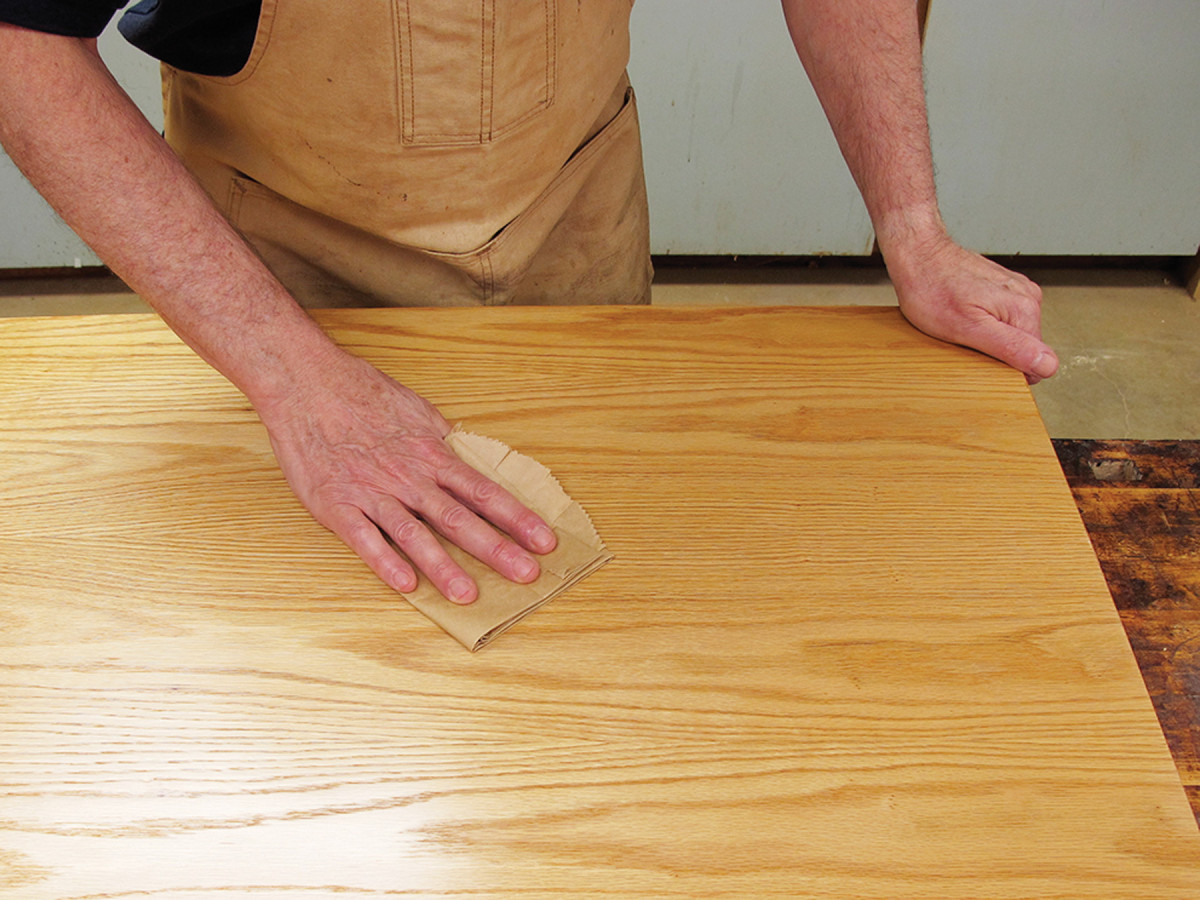
Brown paper bag. There are always some dust nibs stuck in your finish. As long as they aren’t excessive or large, you can level them so the finish feels smooth by rubbing with a folded brown paper bag. This won’t scratch the finish as long as it’s fully dry.
There’s almost always a little dust that settles onto the last coat of finish before it dries, even with fast-drying lacquer. As long as the dust isn’t excessive or large, you can make the surface feel smooth by rubbing it with a folded brown paper bag after the finish has fully dried.
Smoothness is important because people like to touch the finish. Smoothness says quality.
Use a Plastic Spreader When Rubbing a Finish
When leveling a finish with sandpaper and a lubricant, you can get a quick view of where you are in the process by using a plastic spreader to remove the sludge from an area. As long as the finish you applied has a gloss sheen, dips and pores where you haven’t sanded enough show up well.
The plastic-spreader trick is a lot quicker than washing off all the sludge with a rag and solvent, or a rag and water, and you don’t have to let the solvent or water dry to see what’s happening. The shiny areas in the pores show up immediately.
Rough Up the Surface Before Applying Stripper
High-performance coatings are often difficult to strip because they are designed to resist damage from solvents. To give your solvent stripper a better chance of working, rough up the surface with coarse sandpaper first. This radically increases the surface area for the stripping solvent to attack.
Then give the stripper a longer time to work, if necessary, by keeping it wet on the surface.
Here are some supplies and tools we find essential in our everyday work around the shop. We may receive a commission from sales referred by our links; however, we have carefully selected these products for their usefulness and quality.