We may receive a commission when you use our affiliate links. However, this does not impact our recommendations.
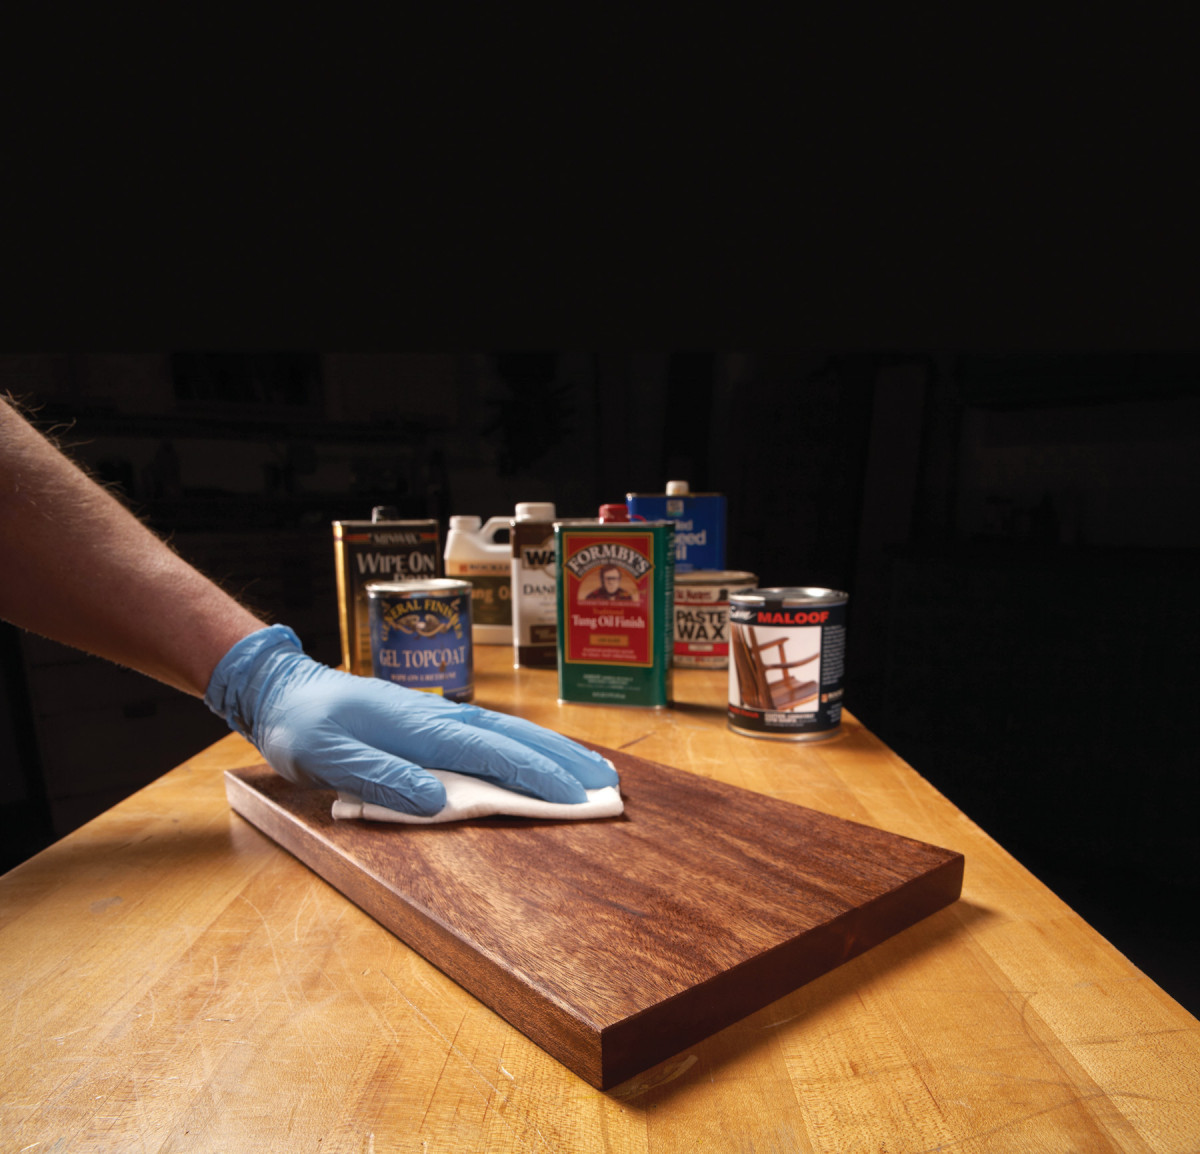
This two-step process guarantees flawless results.
No brush marks, drips, runs, bubbles, hairs, dust or orange peel—and beautiful results every time. For most furniture projects, it doesn’t get easier than using a wipe-on/rub-off finishing process. This two-step method eliminates all the usual problems because rubbing off all of the finish that isn’t absorbed by the wood leaves no wet film in which the problems can occur. The clear and important difference between this method and all others (including wiping on and leaving a film build) is the rubbing off. No attempt is made to build a film on the surface of the wood. Rubbing off the source of all the problems is the big trick.
The wipe-on/rub-off method avoids time spent cleaning brushes and it dramatically reduces or eliminates sanding between coats. There are some limitations, though. This method can produce only a satin to semi-gloss finish and the finish itself won’t be waterproof.
Finishes suitable or formulated for wiping on and rubbing off are widely available. They offer convenience, but you can also easily concoct your own wipe-on/rub-off finish. Thinning out an oil-based brushing varnish is one way. In fact, just about any finish can be wiped on and rubbed off, as long as it doesn’t dry too fast. Shellac, lacquer and most waterborne finishes fall into this category; they get sticky before you can rub them off.
Choosing the right material(s) for your wipe-on/rub-off finish can be confusing. Tung oil and linseed oil are natural vegetable oils that have been in use for ages. Paste wax is another classic wipe-on/rub-off finish. Then there are products like gel varnish, “Danish oil” and wiping varnish, as well as custom blends you can mix up yourself. So how do you choose the right formula? Here are three simple considerations.
• The type of resin (or solids). The materials that remain and harden to seal the wood after the solvents evaporate are important because they have varying degrees of amber tone, working time and durability. For example, boiled linseed oil has more amber color than pure tung oil, while pure tung oil has a longer working time. Oil-based varnishes come in a variety of tones, will dry much faster and are more durable in every way than both tung oil and linseed oil.
• The thickness of the material. Thicker or more concentrated material is more effective at sealing the wood, but may be harder to apply and remove. For example, brushing varnish straight from the can is hard to rub off because it’s thick and goopy. Rubbing off is much easier if the varnish is thinned out.
• Working time and drying time. Faster drying time means less working time, so it’s important to choose a material that has enough working time to allow you to get it all rubbed off before it gets sticky. You’ll need a long working time if you plan to rub in the finish with wet/dry sandpaper. Products with a lot of oils have the longest working time—they require a day or longer to properly cure. Gel varnish, on the other hand, dries so fast you can apply two coats in one day.
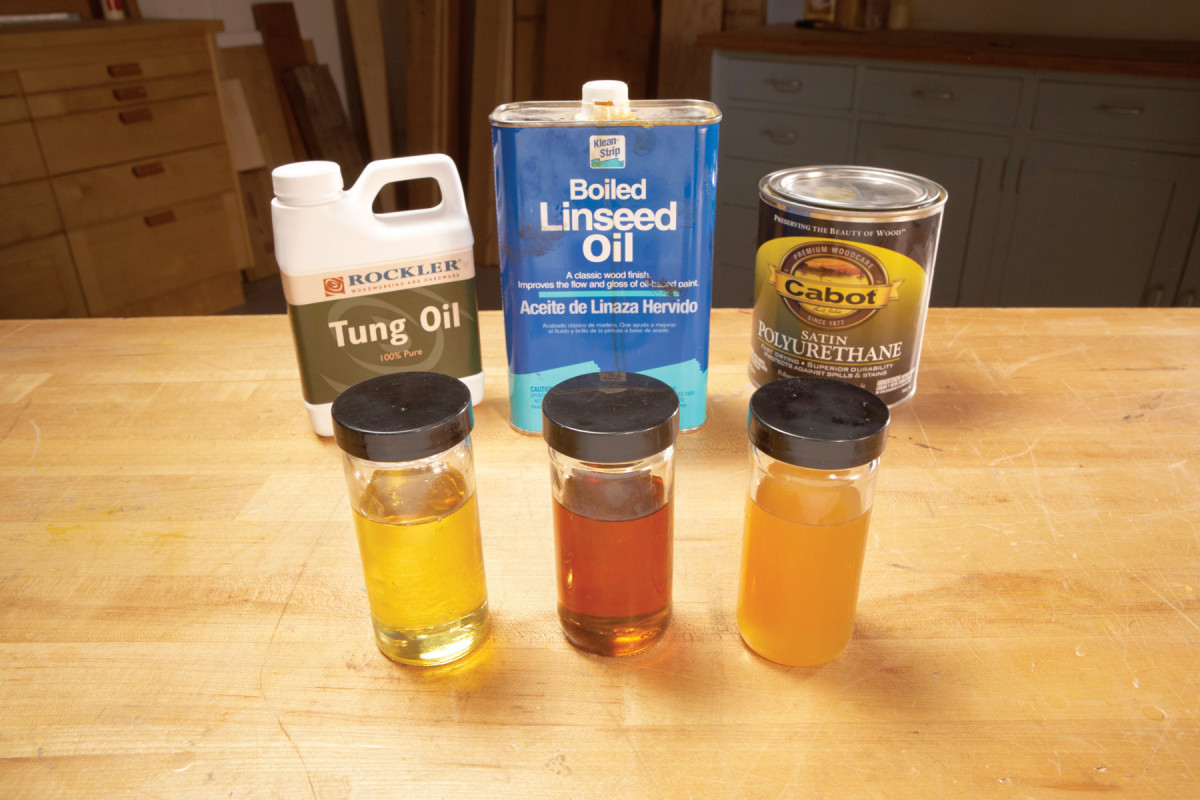
1. Make your own high-quality wipe-on/rub-off finish by blending 100% pure tung oil, boiled linseed oil and polyurethane varnish.
One favorite wipe-on/rub-off finish is a combination of equal parts boiled linseed oil, 100% pure tung oil, and polyurethane varnish. This blend balances the color and drying time of the two oils and is more durable due to the addition of the polyurethane. You can thin the blend to make it easier to smear around and remove. Use a gloss poly varnish to slightly increase the sheen. Master furniture maker Sam Maloof used this type of finish extensively. He even developed his own branded version (available at www.rockler.com). To make a “Danish oil” type material, simply thin any oil-based brushing varnish 50% or more with mineral spirits or paint thinner.
One Drawback—It’s Not Waterproof
 It’s virtually impossible to achieve a 100% waterproof seal with a wipe-on/rub-off finish alone. Fortunately, there’s an easy fix: Just apply a thin coat of waterproof material on top. That’s all it takes to build a consistent, durable film. In fact, if you want a waterproof coating that retains the low sheen and very “close to the wood” look of an oil finish, the wipe-on/rub-off method is an excellent and thorough way to prep the wood’s surface.
After three rounds of wipe-on/rub-off finish on the entire piece, brush one coat of thinned-out (25-50%) oil-based brushing varnish on the top or any other horizontal surface that a glass or cup might find. Don’t bother to brush vertical surfaces—there’s really no need to make them waterproof.
If brushing creates a dust or brush-mark problem, you don’t have to wait until the next day to deal with it. Simply wash off the messed-up varnish film with paint thinner or mineral spirits and try again. Most oil-based products can be removed this way for at least an hour or more.
Tips for applying
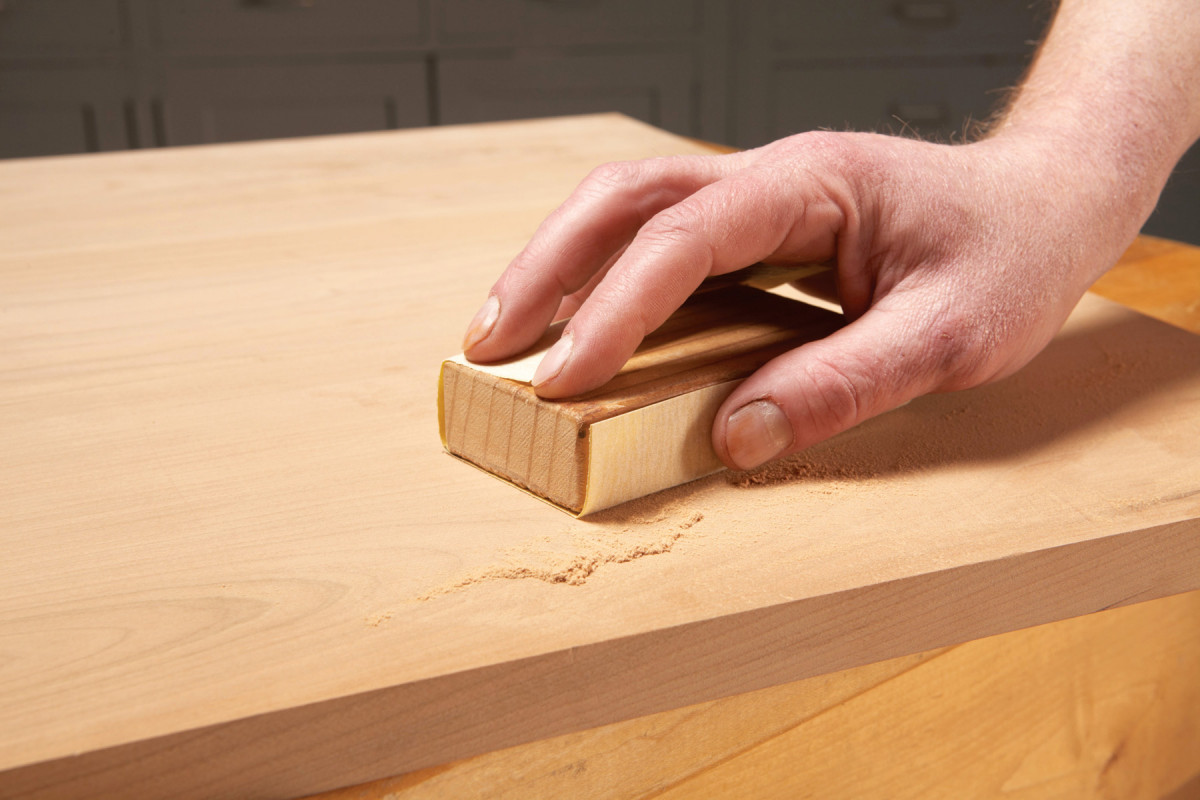
2. Finish-sand to a finer grit than for a film-building finish. Wipe-on/rub-off finish shows scratches that a built-up finish hides.
• When you prep the bare wood for a wipe-on/rub-off finish, sand to a higher grit than you would for a film building finish (220-400 grit vs. 150 grit). The quality of the sheen of a wipe-on/rub-off finish is determined by the smoothness or texture of the wood surface itself. The 150 grit scratches that would be filled by the layers of a film-building finish will leave the wipe-on/rub-off surface looking dull and lifeless.
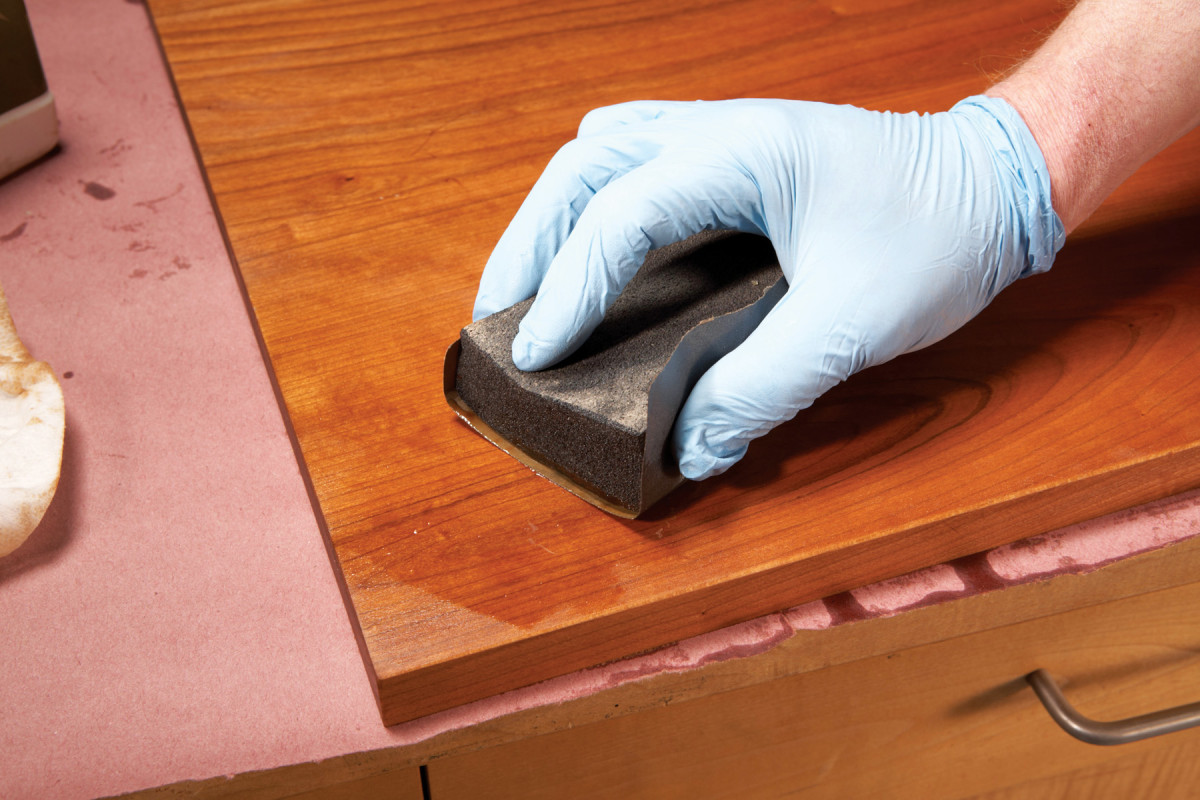
3. Rub in the wet finish to create a silky-smooth surface.
• If you choose a finishing material that has enough working time you can create a surface that looks spectacular and feels super-smooth by rubbing in the first application of finish. Use a soft block and fine wet/dry sandpaper (600-1000 grit) to create a slurry that helps to seal the wood. You can feel the difference immediately by running your finger across the still-wet wood. This step needs to be done only once, unless you miss a spot. Following this application, two more wipe-on/rub-off coats are usually enough to create a nice finish; more coats will slightly increase the sheen. Allow each coat to dry before applying another coat.
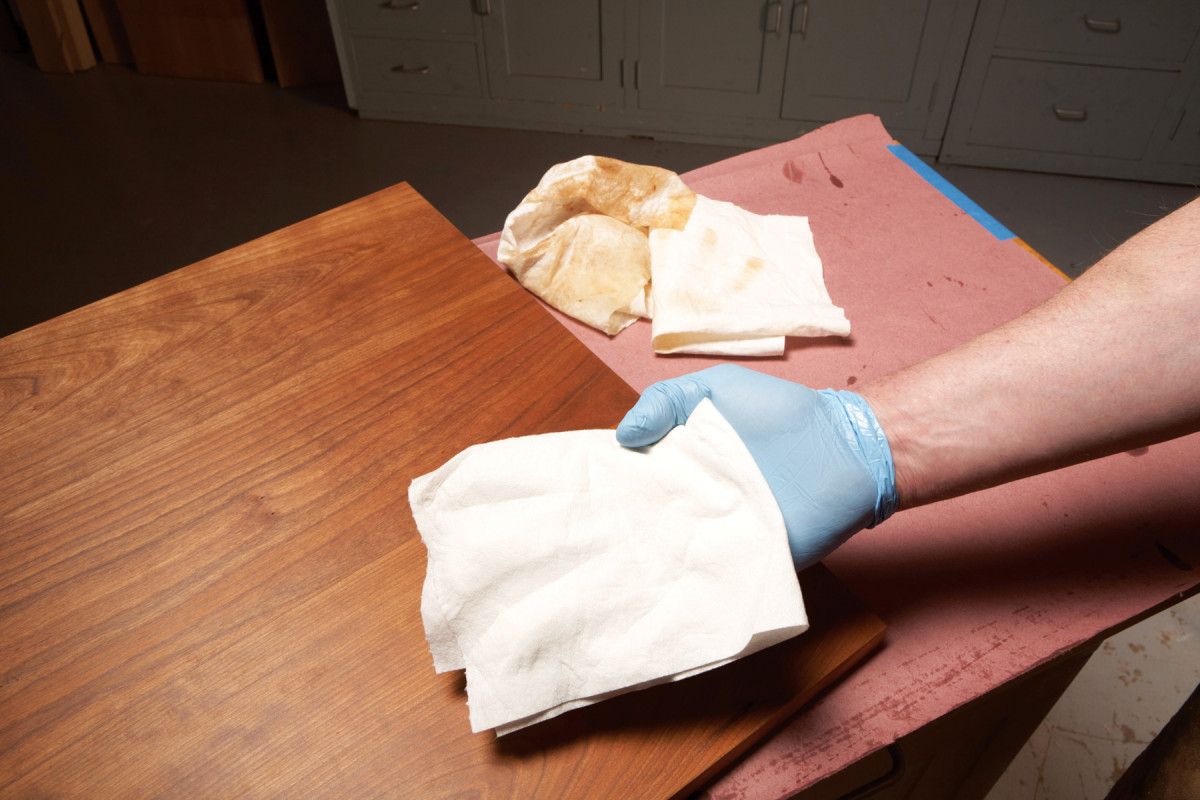
4. Keep wiping until your last rag comes up clean.
• The best way to determine if you’ve removed all of the finish that hasn’t been absorbed by the wood is to continue rubbing with clean rags until they remain completely dry, showing no signs of excess finish. Good rags for this process are soft and absorbent; knit cotton and Scott shop towels are good choices. Note: The finish-soaked rags are likely to spontaneously combust, so dispose of them immediately and properly.
• Only two problems commonly occur with wipe-on/rub-off finishes and they’re both easily avoided. The first occurs when wet finish that isn’t absorbed by the wood is left on the surface to create streaks, rag marks, and sticky or shiny spots. The second occurs as slower-drying oils or excess solvents bleed back out of the pores of the wood and leave little rings. If they’re still wet, these rings can be removed by rubbing. But if they’re allowed to harden on the surface, they must be sanded off.
Here are some supplies and tools we find essential in our everyday work around the shop. We may receive a commission from sales referred by our links; however, we have carefully selected these products for their usefulness and quality.