We may receive a commission when you use our affiliate links. However, this does not impact our recommendations.
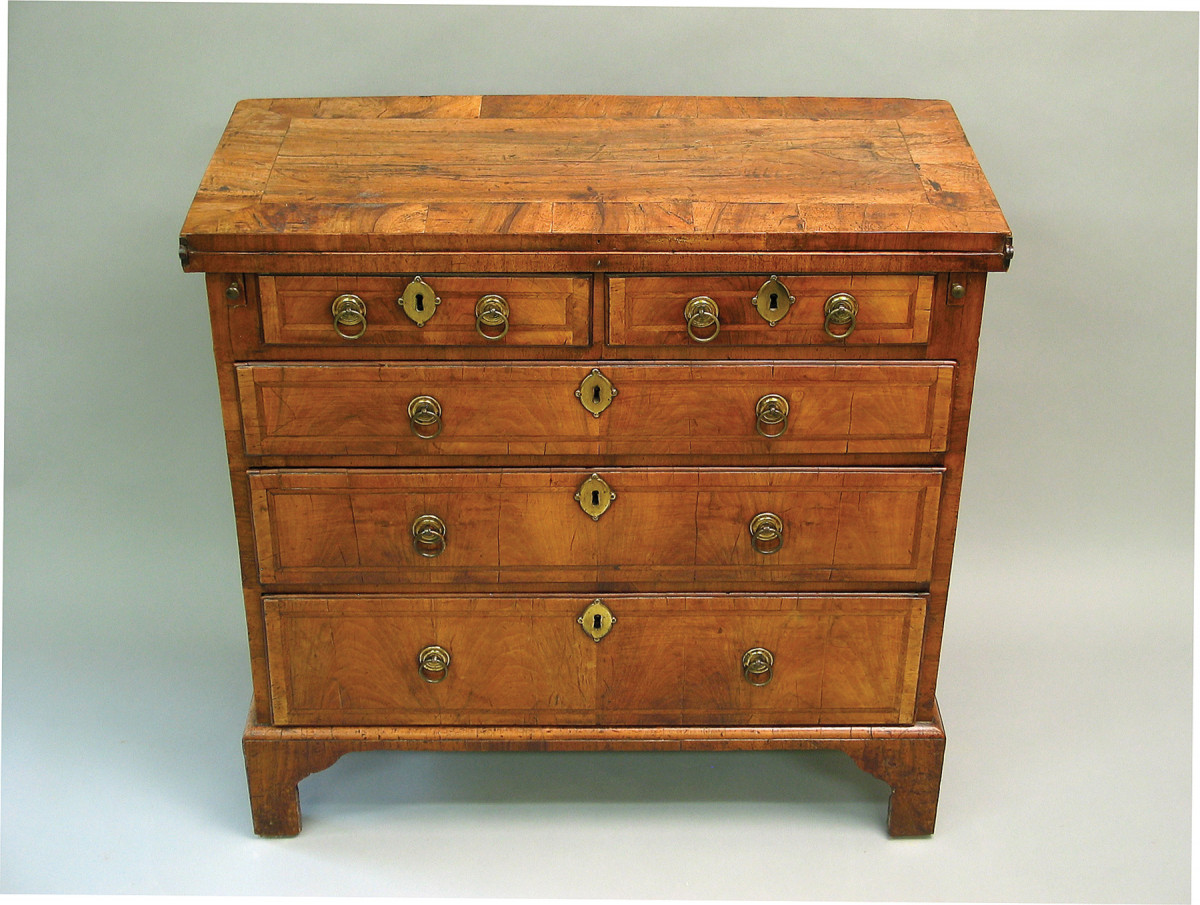
Top closed. With the hinged top folded closed, the piece serves as a chest of drawers. Notice my veneer repair in the lower left-hand corner of the top.
Veneer is just thin wood – so don’t be afraid of it.
I love repairing old furniture – the older the better. I find repairing more challenging and satisfying than making new because someone else, or time and age, has set the parameters within which I have to work.
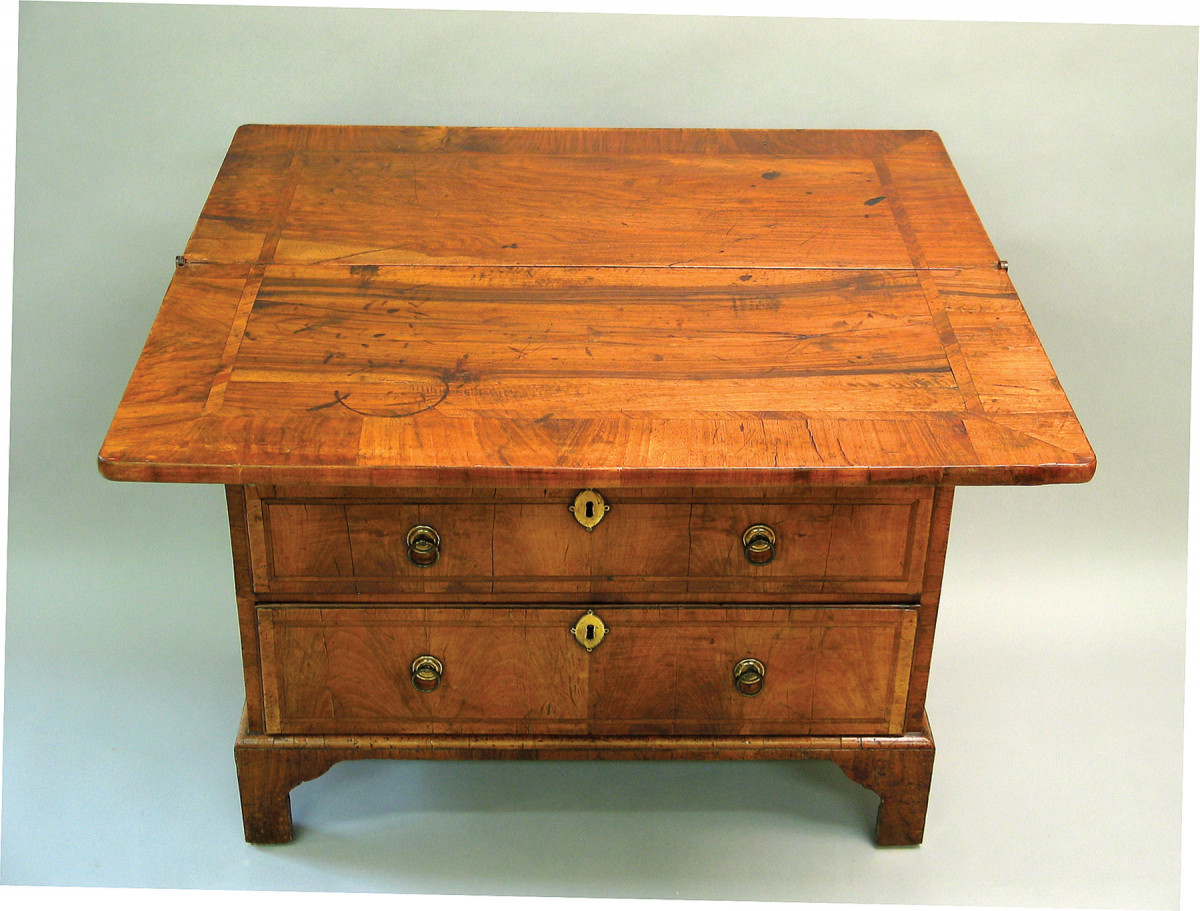
Top open. With the top opened to rest on pull-out lid supports, the chest becomes a writing desk. Notice that the veneer on the back half may have been at some point replaced. The two halves should be bookmatched – but they’re not.
I’ve written several articles in Popular Woodworking on furniture repair, including “Regluing Doweled Chairs” in April 2007 (#161) and “Animal Hide Glue” in August 2007 (#163). Both articles are available free at popularwoodworking.com/finishing.
But I haven’t written on veneer, and lots of things can go wrong with veneer. For some reason many woodworkers, and even professional furniture restorers, have a fear of working with veneer (some shops even refuse to do it). I find this fear difficult to understand because veneer is just thin wood, subject to the same rules as thick wood.
Recently, I had the opportunity (joy, really) of replacing some missing veneer on one of the oldest pieces of furniture I’ve ever worked on– an early 18th-century George II bachelor’s chest with a hinged top that opens to a desk. The challenges were a little greater than usual, so I thought I’d show you how I dealt with them.
One aside before starting. After you’ve worked on a lot of old furniture, you become adept at spotting anomalies that indicate fakery or a “marriage” of two or more pieces of furniture. On this card table I saw nothing to make me question its authenticity.
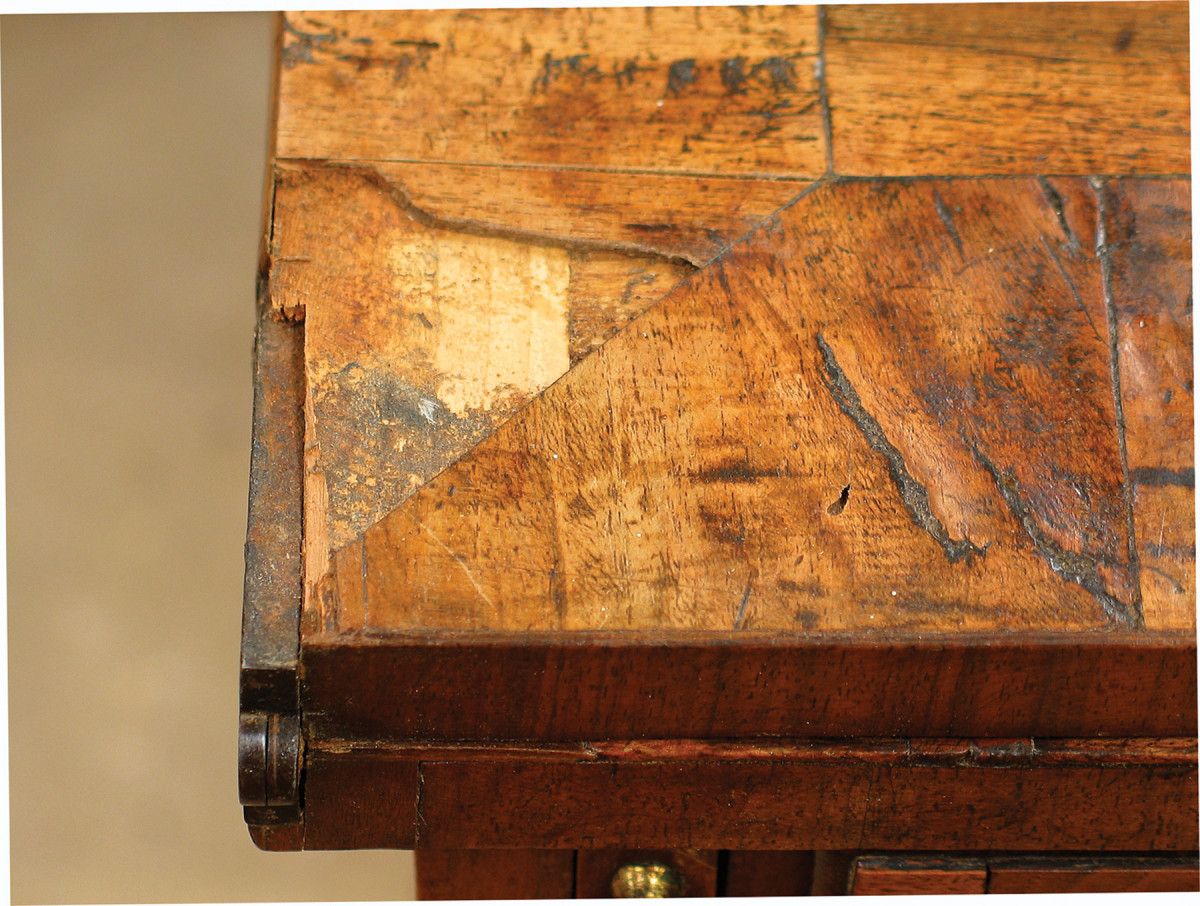
The damage. Here’s the damage the owner wanted me to repair.
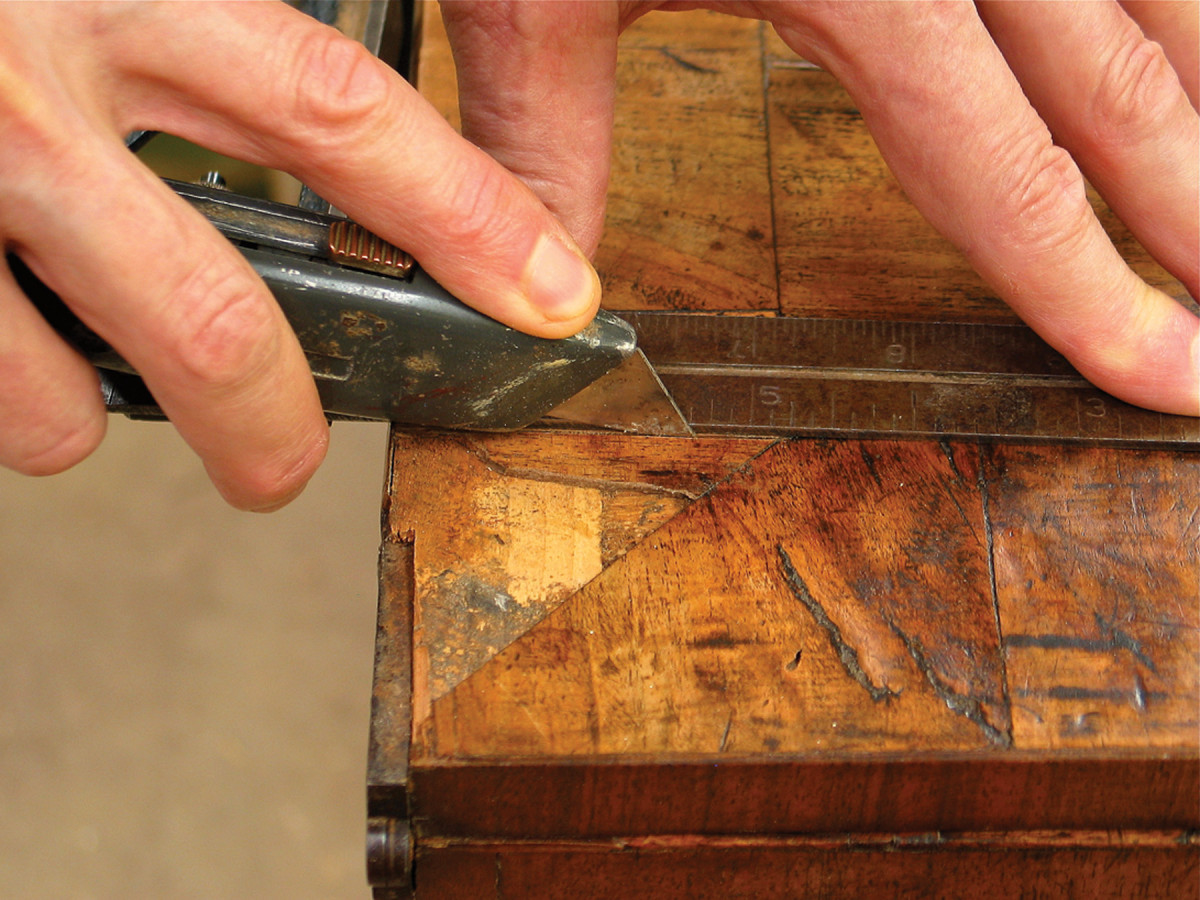
1. Straight edges. It’s far easier to shape a patch when you’re dealing with straight rather than curved edges. So, if possible, I always try to straighten the edges before fitting my patch.

2. Removing excess. It’s often possible to pop off the waste veneer as I’m doing here. When I meet resistance, I can usually overcome it if the glue is hide glue by using a syringe to insert a little denatured alcohol under the veneer. The alcohol crystallizes the glue, making it easier to separate.

3. Cleaning up. Though it’s possible to reglue right over old hide glue using hot hide glue, it’s best to clean off the old crumbly glue (and whatever contaminants, such as wax, that might be on the surface) before gluing the patch. Here I’m washing off the old glue with hot water. All contaminants come off with the glue.
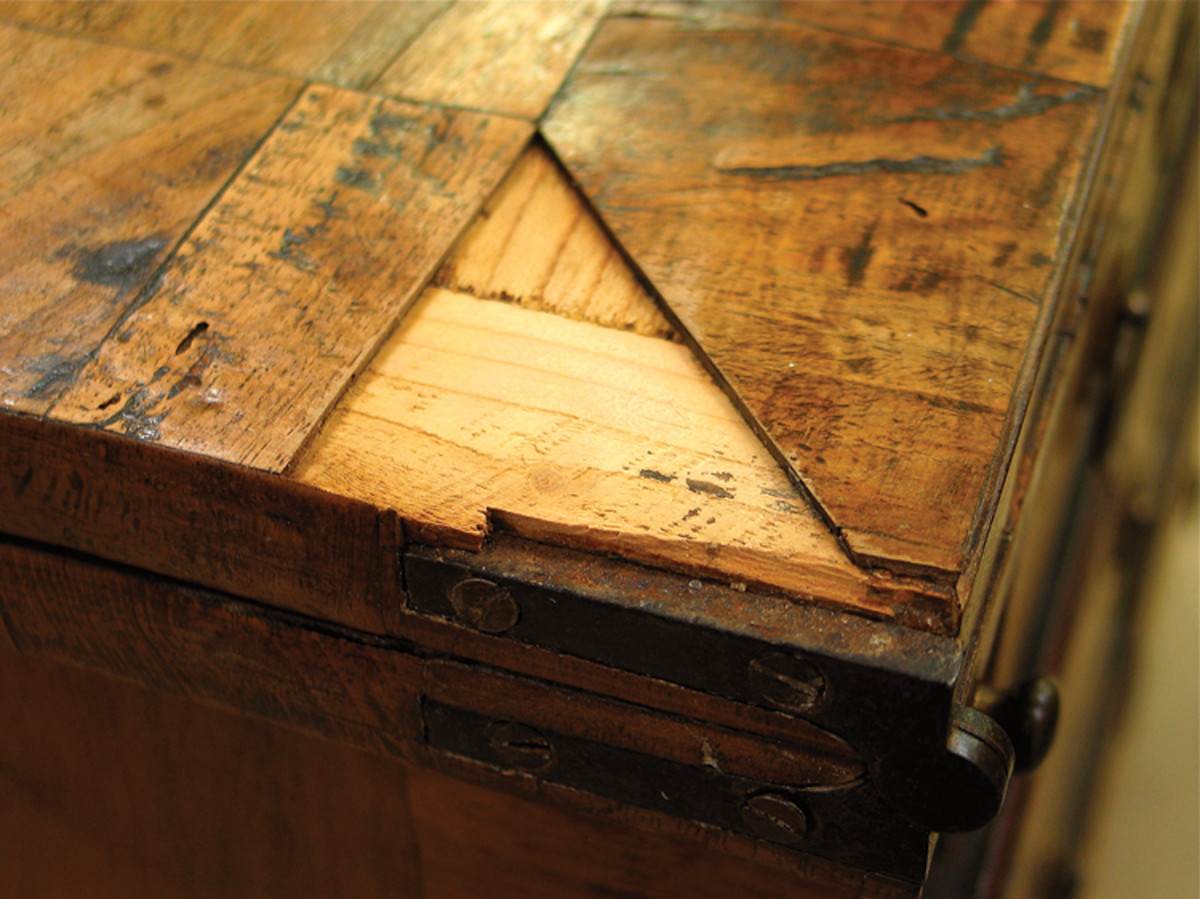
4. The challenge. Above the hinge you can see damage to the substrate that must be repaired so the veneer has something to bond to. Also, you can see that the veneer is considerably thicker than modern 1⁄32″-thick veneer. Thick veneer is common on furniture made before the machine age. Veneer seems to get thicker the older the furniture.
5. Straight edges. Again, it’s always easiest to work with straight edges. So I’m cutting one using a chisel.
6. Rub joint. One of the reasons I love hot hide glue is that I can create a strong bond simply by rubbing two pieces of wood together with the glue in between. Work proceeds very rapidly using rub joints. Arranging a clamping setup for this patch would clearly be difficult.
7. Shaping the patch. After leveling the repair to the substrate using a chisel, I cut the veneer patch and trim it to fit snugly. The veneer is European walnut, which is considerably lighter in color (closer to tan) than American black walnut. If I didn’t have any solid European walnut, I could use American walnut, but I would have to bleach the color out of the wood, then stain it to match, which could be difficult. I could also glue several layers of thinner European walnut veneer on top of one another to create the thickness, but cutting the veneer from solid, as I’m doing here, is always best.
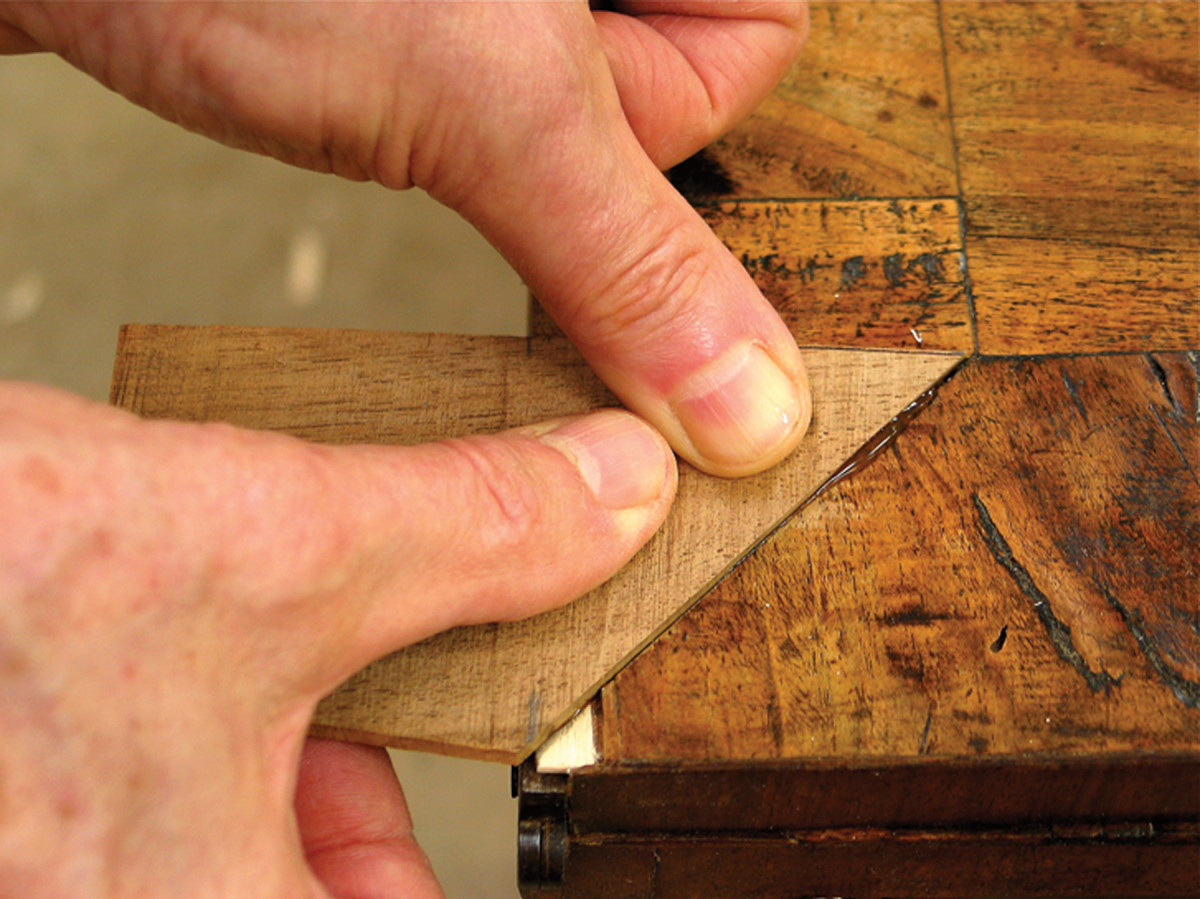
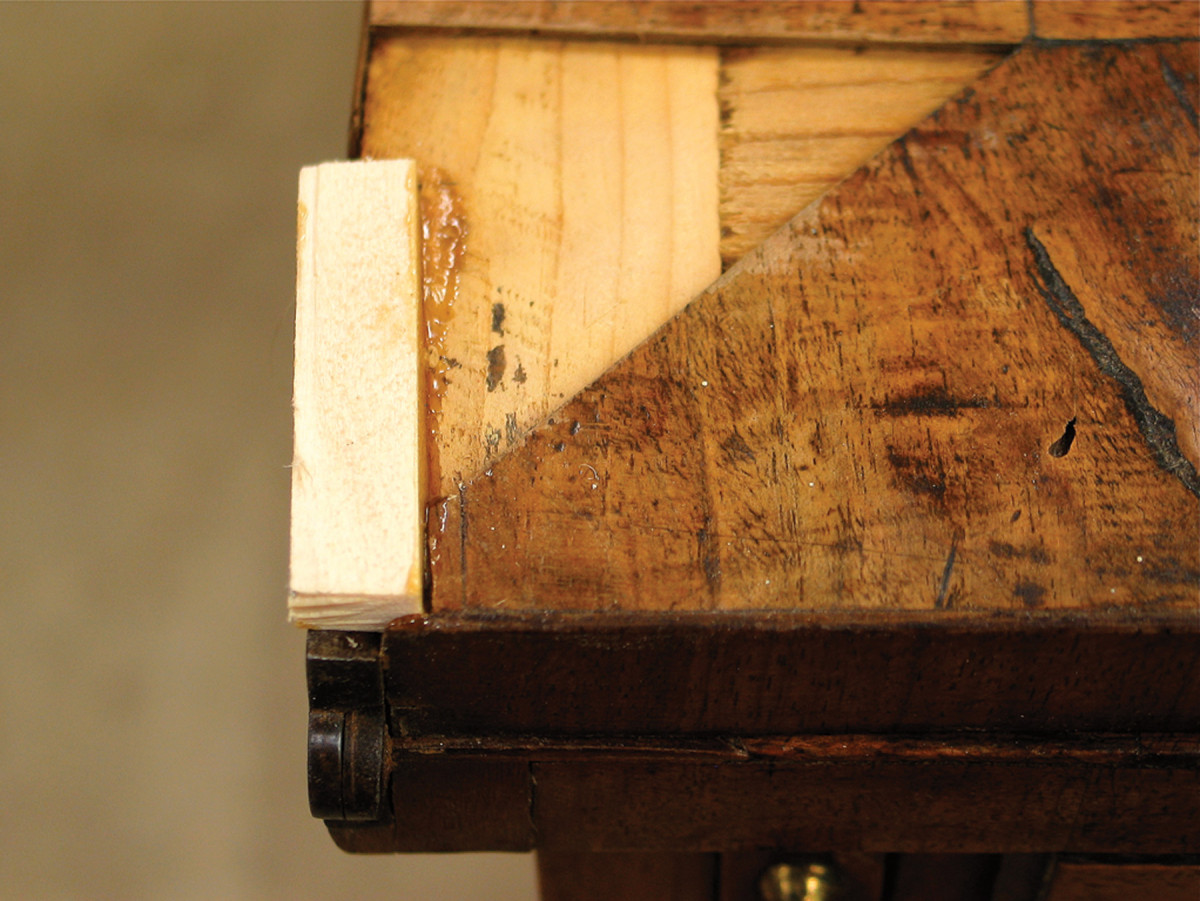
8. Rub joint. Because of its thickness, I can glue the veneer patch, which I cut thicker than needed (called “leaving proud”), quickly and simply using a rub joint. But clamps wouldn’t be difficult to arrange here.
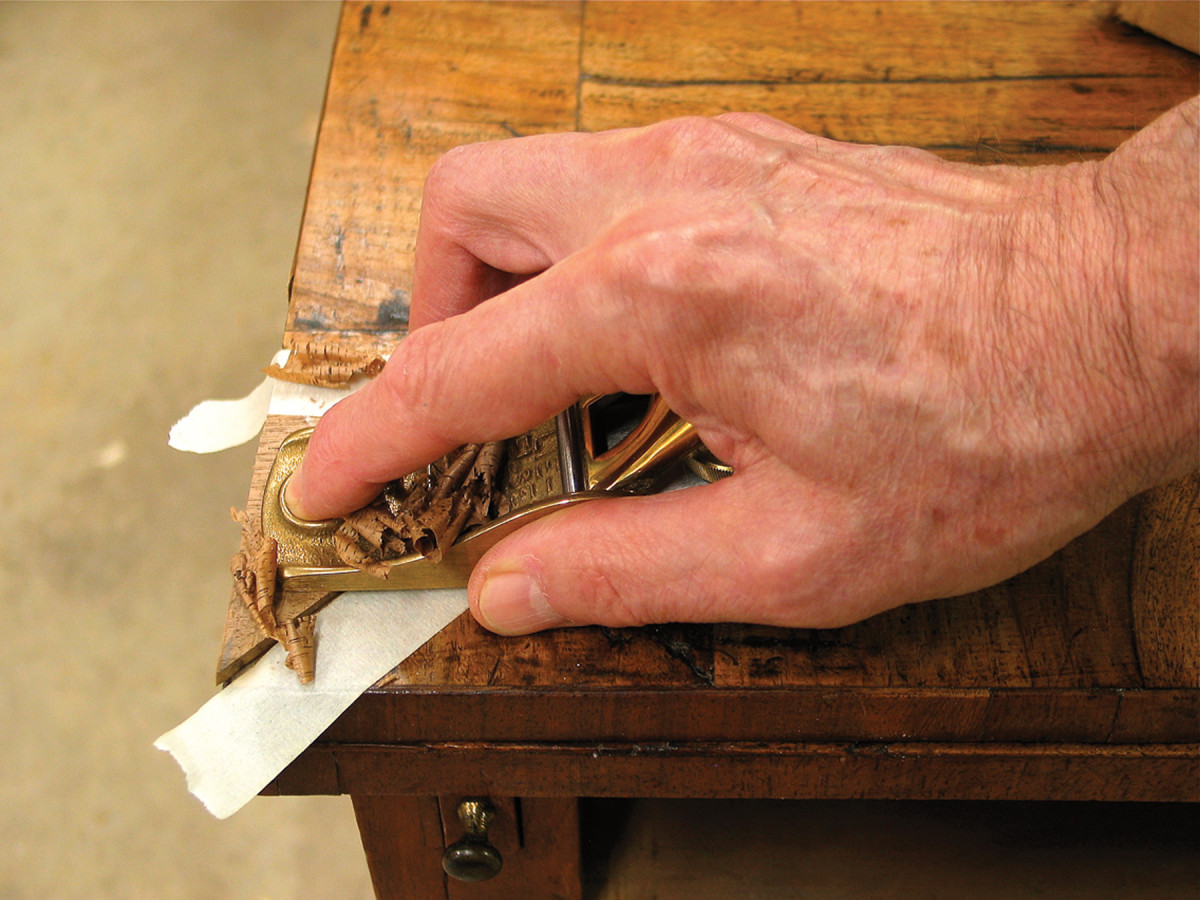
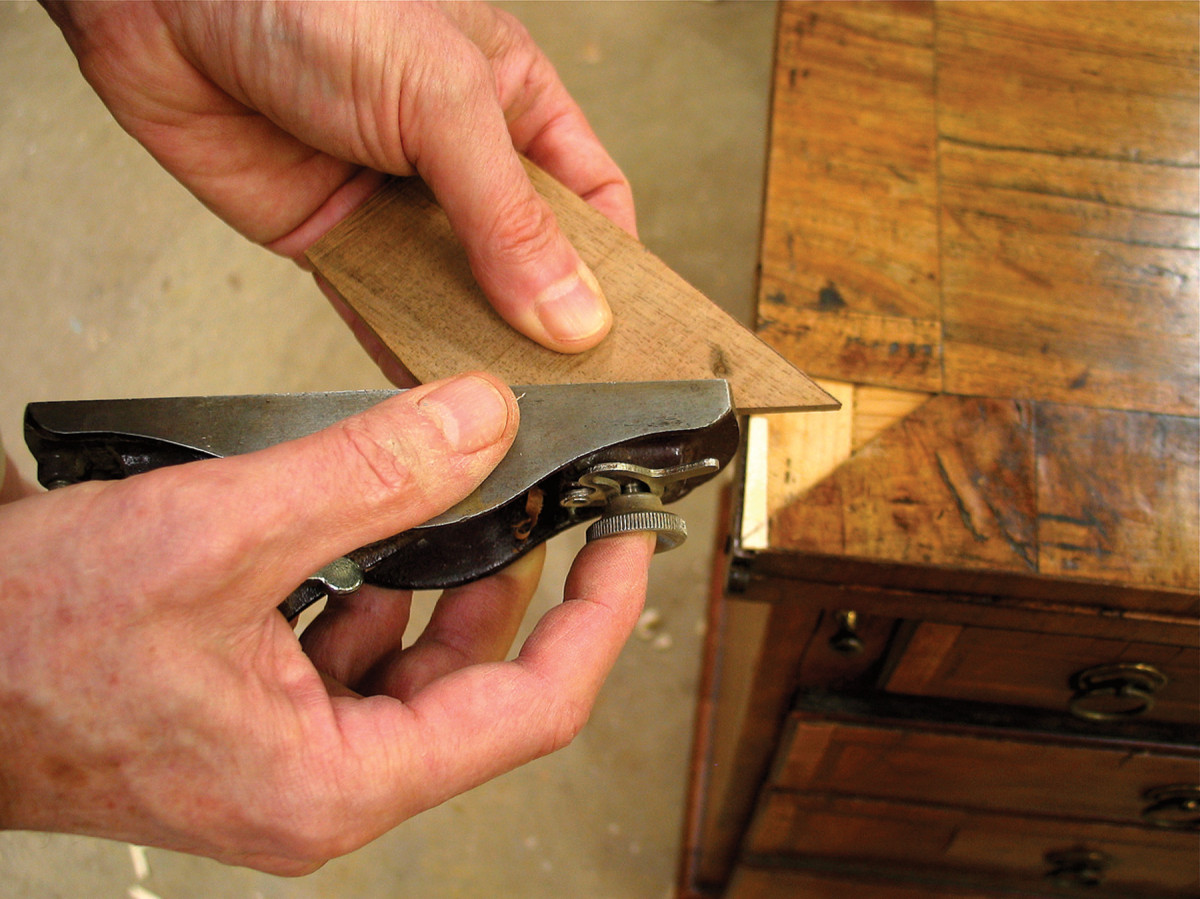
9. Leveling. I use a block plane, scraper and sandpaper to level the veneer patch to the surrounding wood. It’s important to avoid cutting into the surrounding old veneer. If you cut off some of the aged surface wood, you may expose wood that is lighter or darker and create difficult color-matching problems. Applying masking tape around the patch can be helpful. Working slowly and carefully is essential.
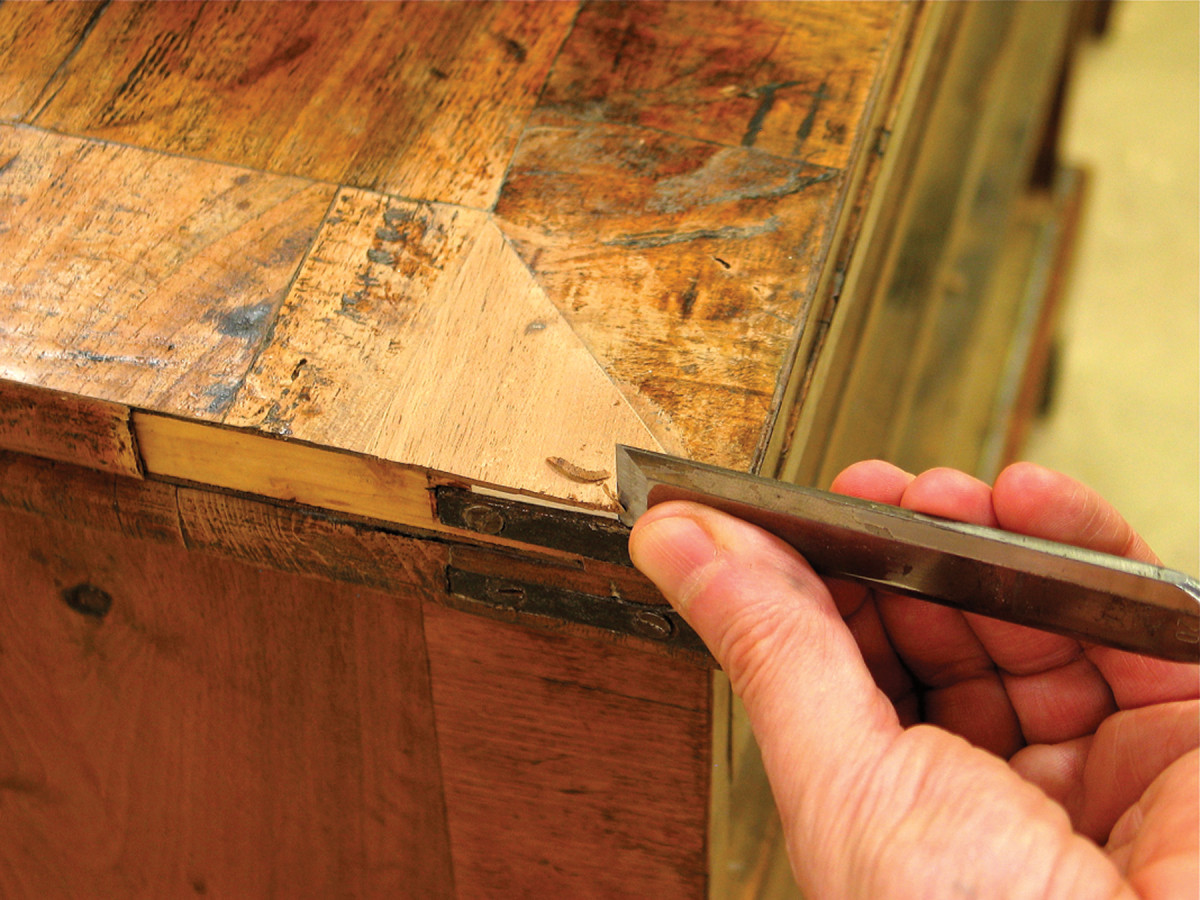
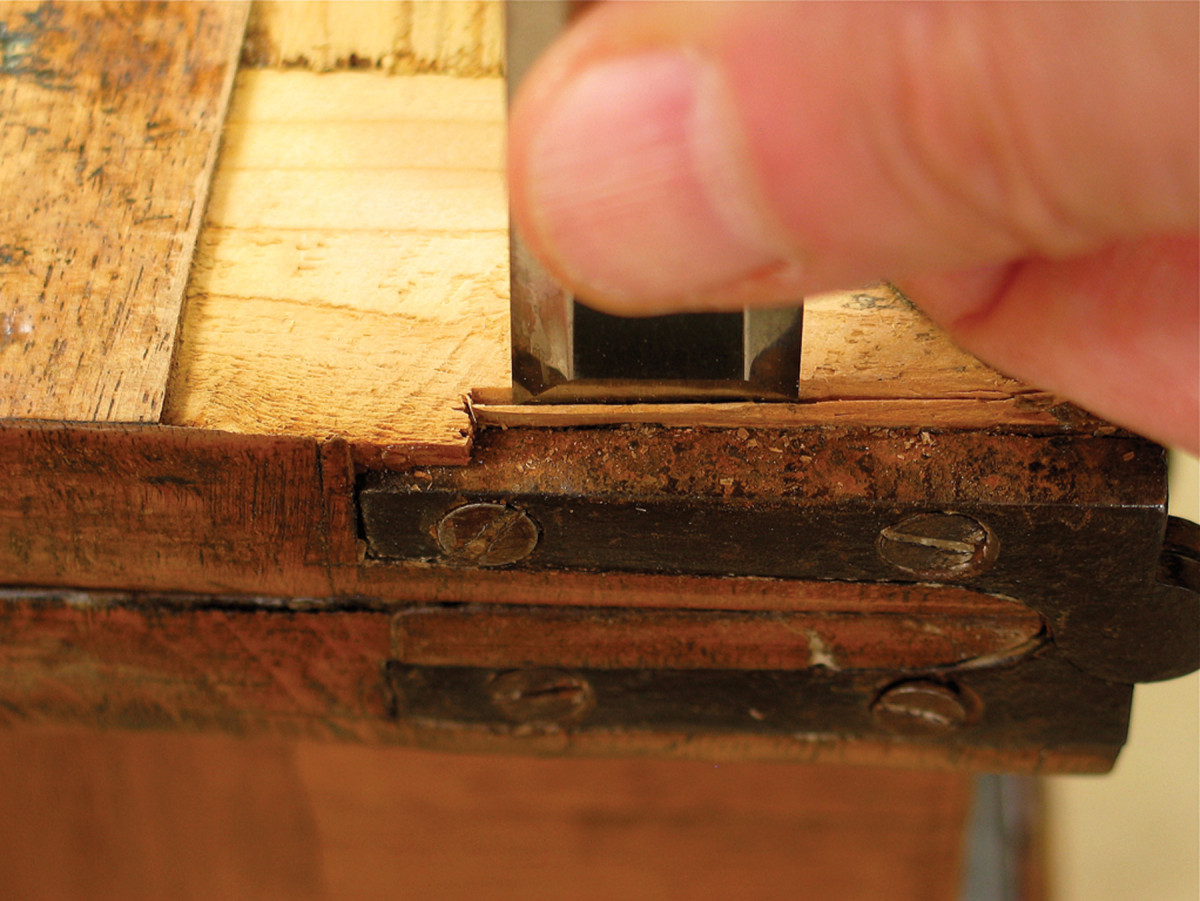
10. Trimming. With the top surface of the patch leveled, I trim the end using a chisel because of the difficulty of getting a handplane into the narrow area above the hinge. Notice the missing veneer to the left of the hinge. I popped it off (by inserting denatured alcohol) to make the shaping and trimming of the patch easier. With the patch trimmed flush I will reattach the veneer so it covers the edge as it originally did.

11. Finished. Here’s the completed repair with a wax finish applied. Wax was the common finish used in the early 18th century and it continues to be the finish on this piece. The repair stands out a little in this close-up, but it disappears in the larger shot shown at the beginning of this article. Only someone who knows it’s there would find it, which is all that you can ask for in a repair.
Here are some supplies and tools we find essential in our everyday work around the shop. We may receive a commission from sales referred by our links; however, we have carefully selected these products for their usefulness and quality.