We may receive a commission when you use our affiliate links. However, this does not impact our recommendations.
It’s fast, forgiving and affordable – and you don’t need a spray booth.
The hardest part about learning to spray finishes is becoming convinced that you can learn to spray finishes.
Of all the ways to apply finishes – brush, rag, rubber and spraying – there’s only one method easier than spraying: ragging on oil. Spraying finish is always faster than any other application method – astonishingly so. I can spray two coats of lacquer on a chest of drawers and have the thing assembled in just a few hours (compare to a few days with a hand-applied finish).
Oh and one more thing: In my opinion, spraying produces better results.
Plus, with good spray systems now costing about as much as a half-decent cordless drill, you just ran out of reasons to avoid spraying.
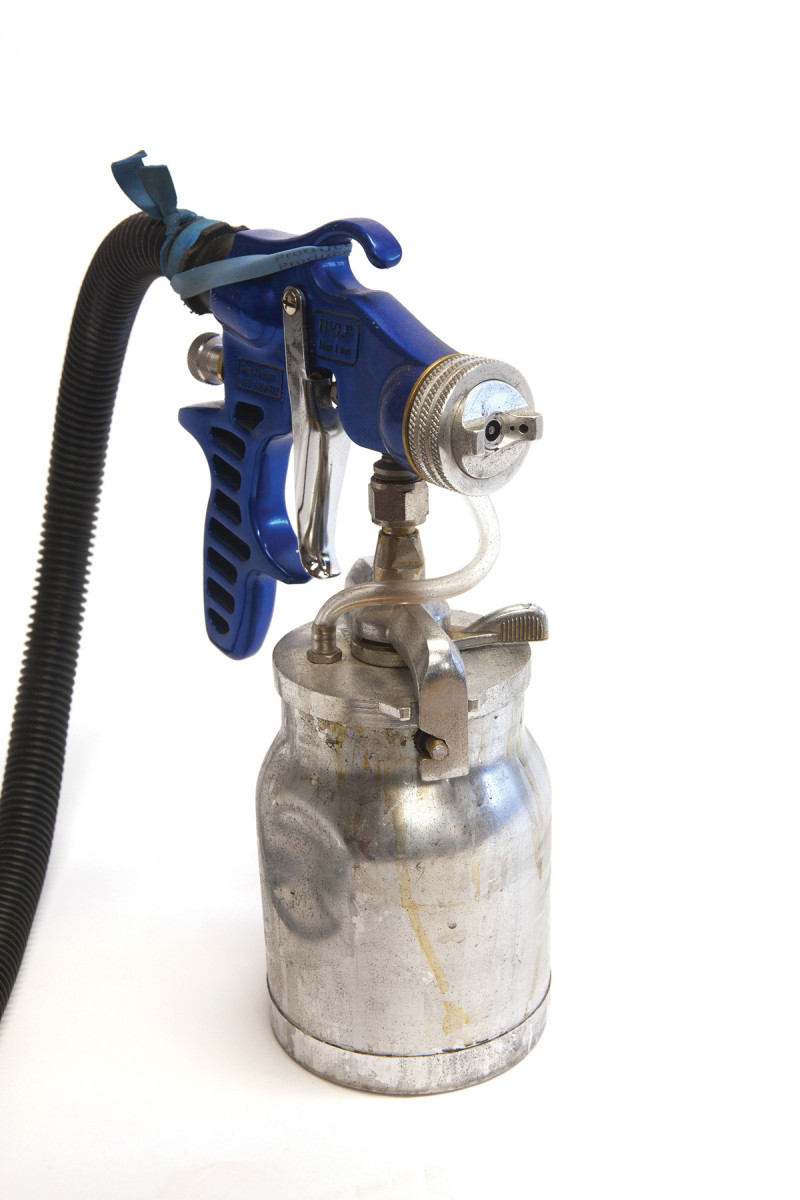
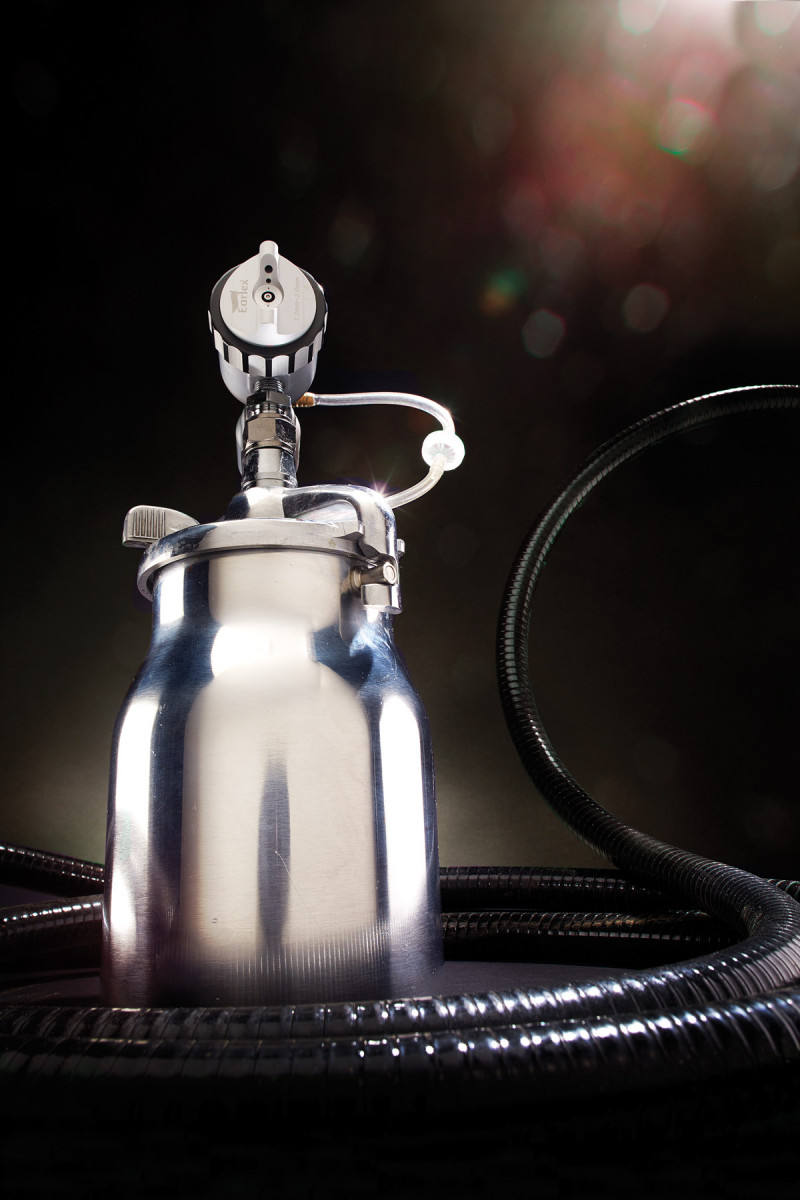
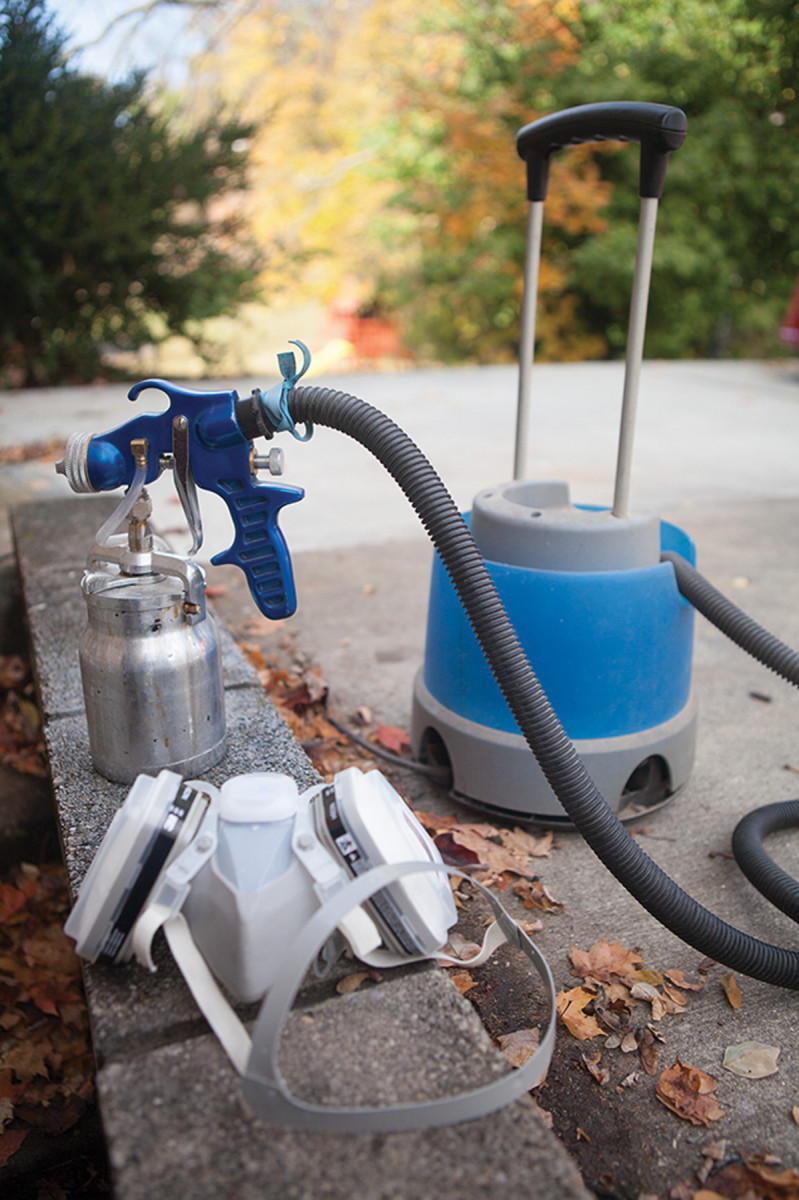
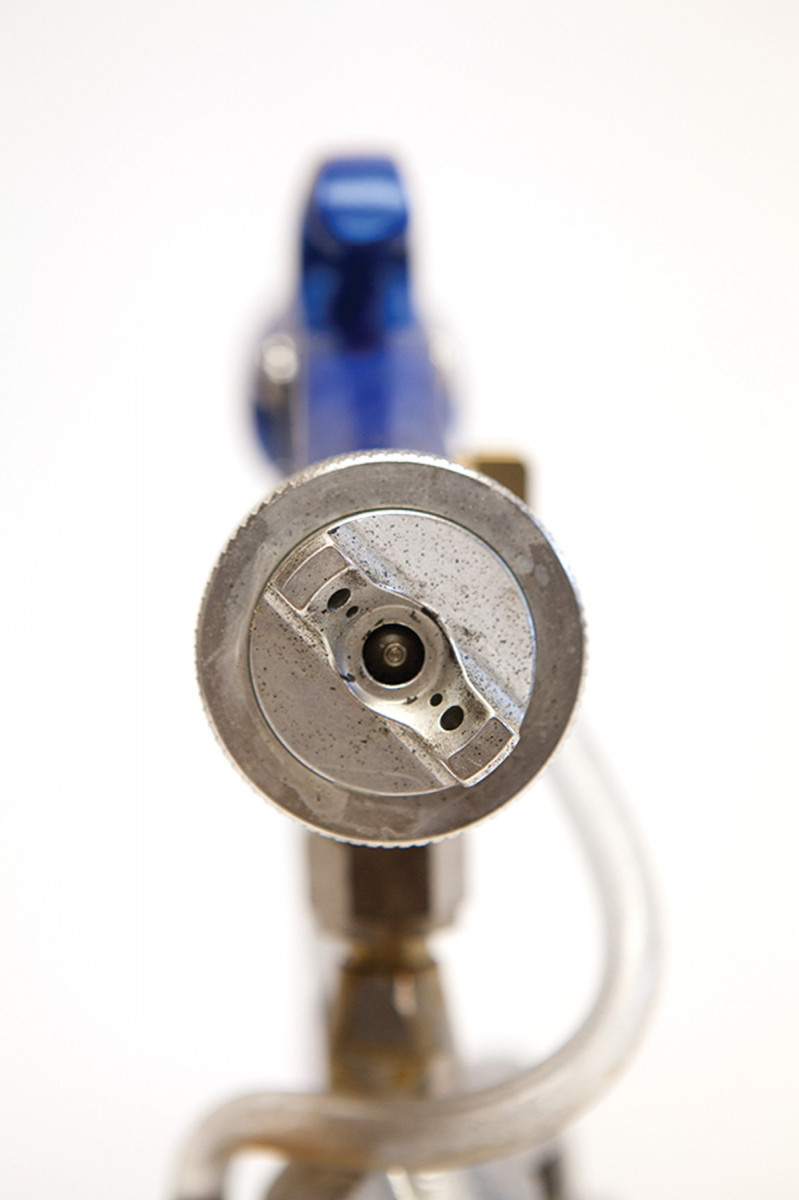
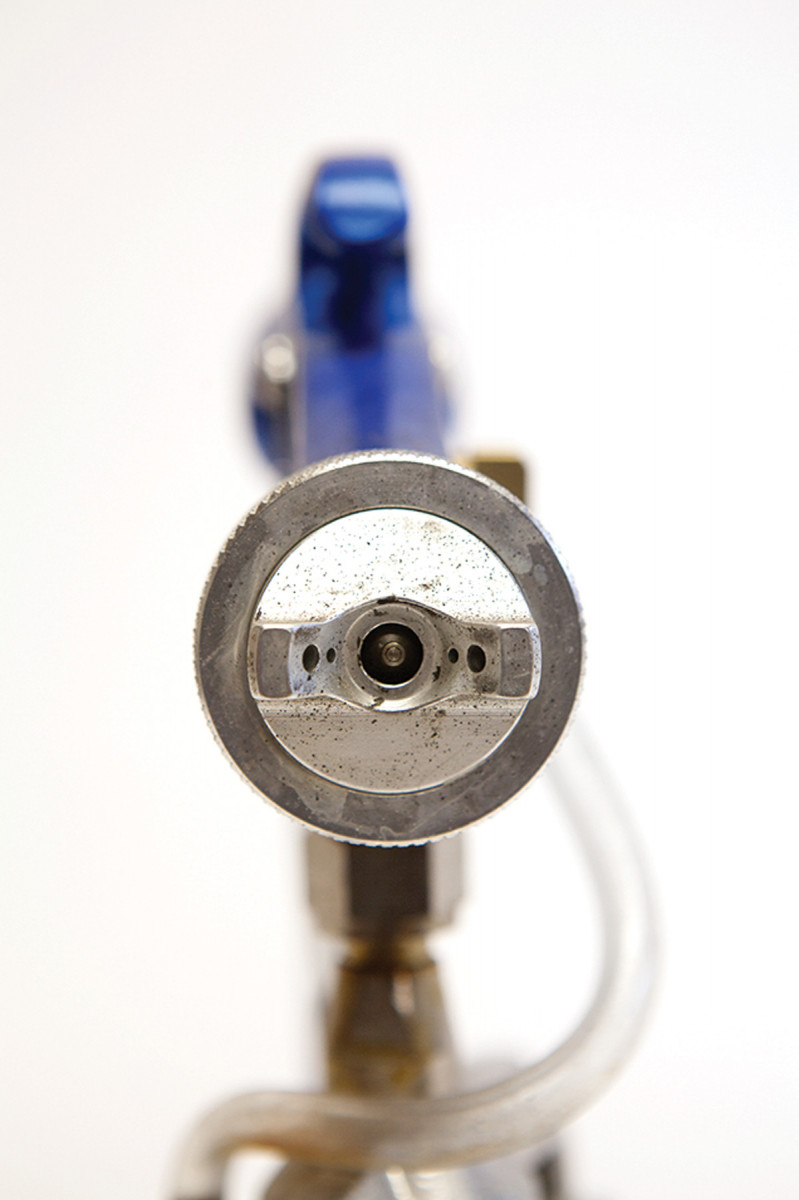
A simple spray gun. Here you can see the fluid control knob, the air cap, fluid tip and the “cup” – which holds the finish. These are the essential parts you need to be concerned with.
If you’re a professional finisher or refinisher, this story is not for you. Most of the resources I’ve read about finishing are aimed at people in cabinet shops or industry. This article is for the home woodworker who wants to get the speed and quality of a spray finish but doesn’t have money or space for dedicated setup.
I first learned to use a spray gun as a teenager working in a door factory, and I’ve used everything from industrial equipment down to the plastic DIY units. And while I could spend most of this article discussing all the differences among the systems – high-pressure vs. high-volume-low-pressure units (HVLP), bleeder vs. non-bleeder guns – I don’t think that’s as important as the basic techniques involved in spraying. (I do think that most home woodworkers would be better off with an HVLP system, but that’s just an opinion.)
 All the systems are more similar than they are different: Air is forced through the finishing material, atomizing it into a fine spray that you control with a spray gun. You control the mix of air with the finishing material, the shape of the cone of finish squirting from the gun, and (of course) when finish is coming out of the gun and when it is not.
These are easy things to learn to control.
The second part of spray finishing that bemuses people is how to actually spray the work. Where do you start and finish? How do you finish interior spaces? What about legs?
I’m going to discuss all of these aspects of spray finishing. But first, let’s talk about what you can and can’t spray.
What to Spray
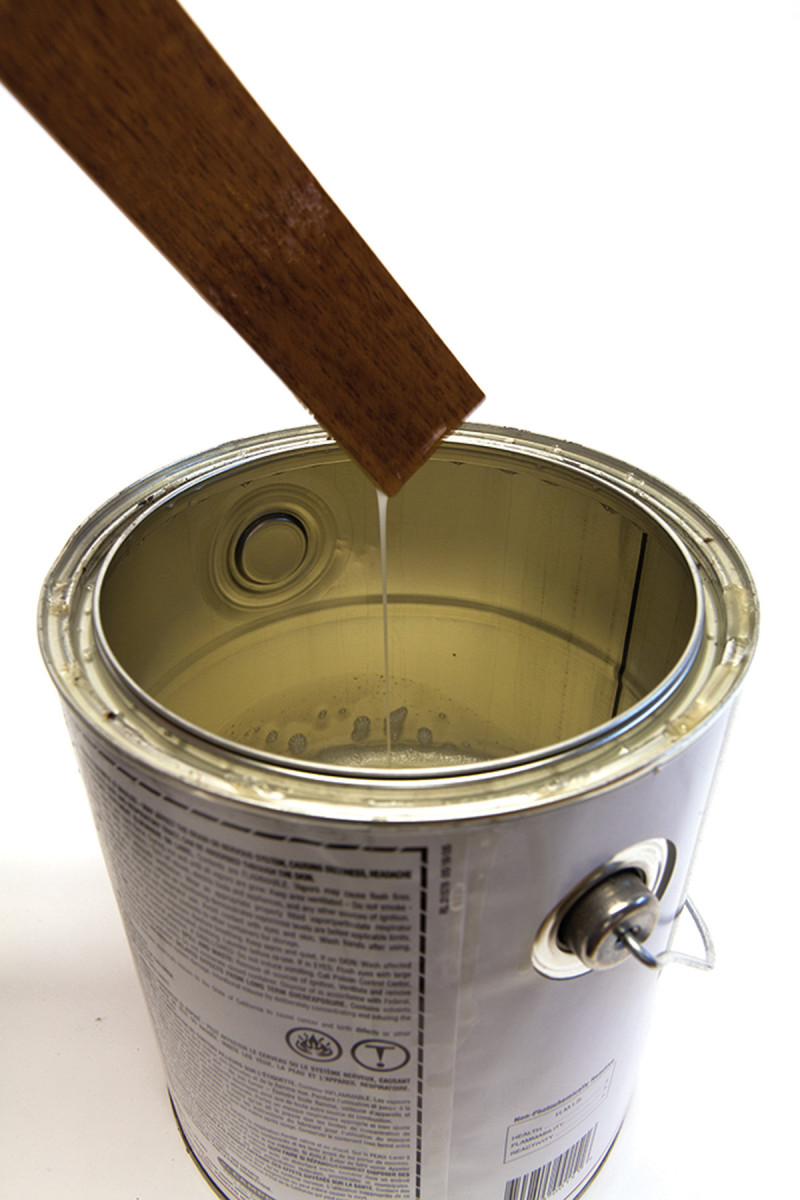
Thin enough. After stirring the finish, I pull a stick out of it to see how quickly it runs off the stick and breaks into droplets. If it looks thick enough to put on waffles, I add some thinner to the mix.
In theory, you can spray almost any finish if you can get enough air into it to atomize it. But for a practical, do-it-at-home woodworker, it’s best to spray finishing materials that are thinner than latex paint.
Finishes such as shellac, lacquer, dye and milk paint are all easily sprayed by even the most basic spray systems. You can indeed thin varnishes and heavier finishes so they will spray. But I rarely do this because lacquer and shellac dry faster and lay out evenly, so that spraying a heavy slow-drying varnish is silly in many (but not all) cases.
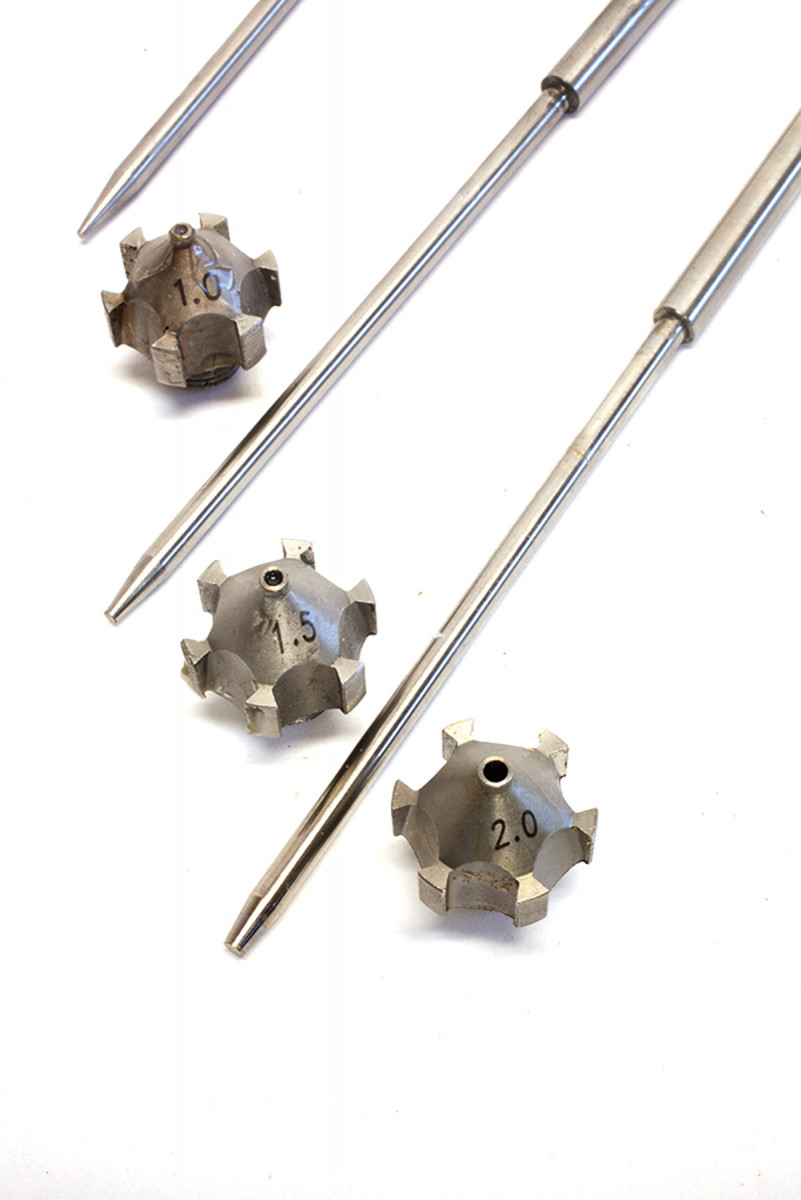
Start small. I have three tips for my gun. The smallest one (1.0mm) is good for shellac. The middle one (1.5mm) is good for lacquer and the largest one (2.0mm) is for thinned acrylic paint.
When buying a spray system, the more expensive units have more power and can atomize heavier finishes – that’s what you are paying for (plus usually a nicer spray gun). If you are only going to spray light-bodied finishes at home, you probably don’t need a heavy-duty system.
Nature’s spray booth. I like to have a little breeze when I spray outside and make sure I spray predominantly in the direction of the breeze. Also, I avoid direct sunlight on my spraying area. And bird poo.
No mater which rig you purchase, you will need a few needles and matching fluid tips in different sizes for the spray gun. If a small tip won’t atomize your finish, swap out to a bigger tip (or thin the finish). Having a few common sizes will help avoid frustrating dead ends.
Some systems come with “viscosity cups” that allow you to see if your finish is thin enough to spray. I generally don’t mess with these. If the finish is thinner than pancake syrup, it probably will work fine.
Where to Spray?
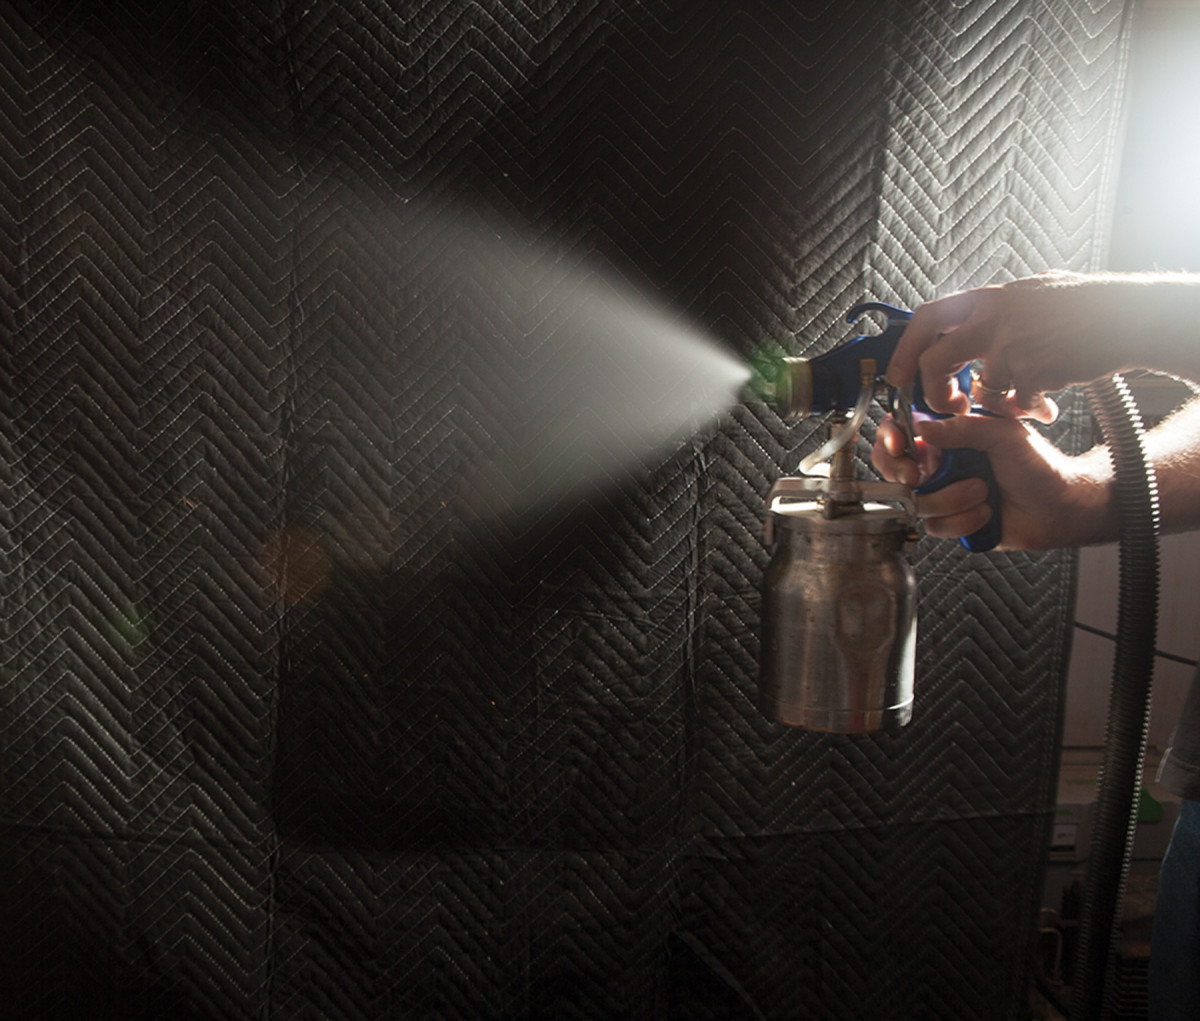
Remember this. Here’s a vertical fan on my HVLP system. I have opened the fluid control until I see this fan. Opening it up more will not change the shape of the fan, but it will deposit too much finish on the wood.
For most of my career I’ve sprayed in an industrial spray booth. These are nice, but I don’t think they are practical for the home woodworker. You could rig up a ventilation system with a special fan and curtains, but that’s a hassle for some woodworkers and it can bring a lot of solvent smells into the house.
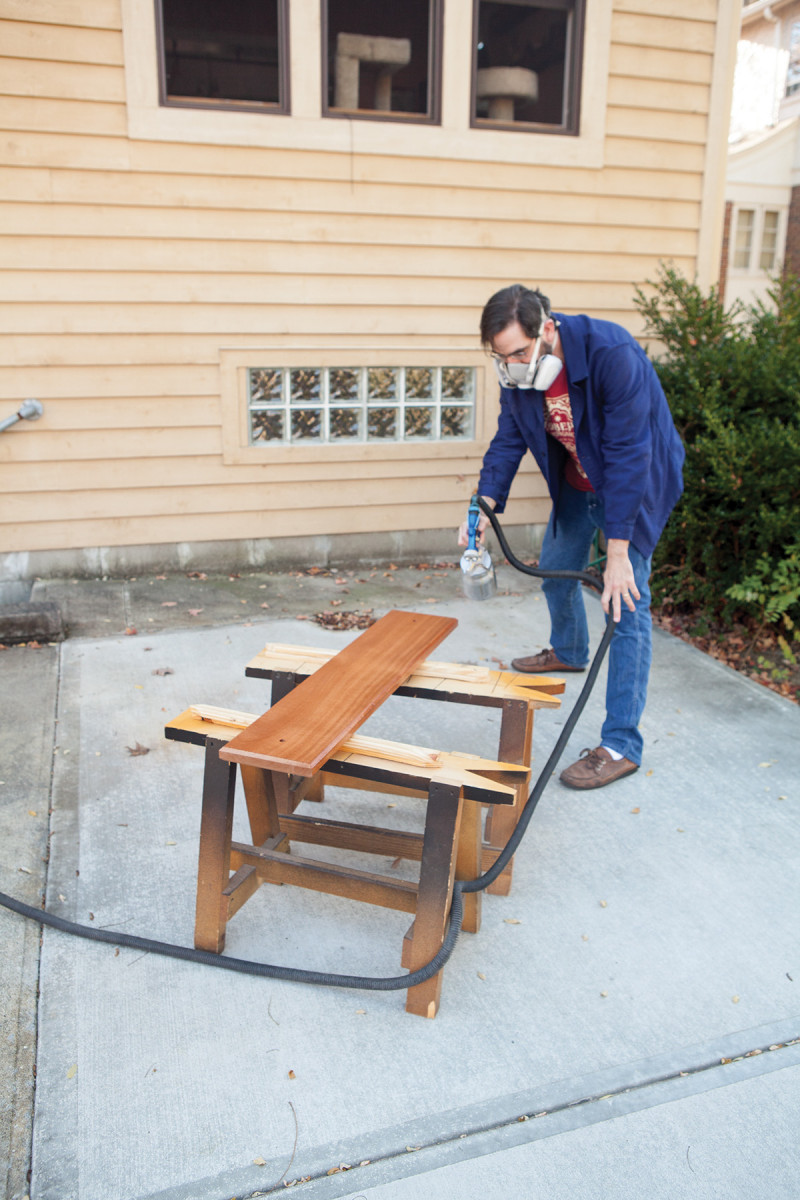
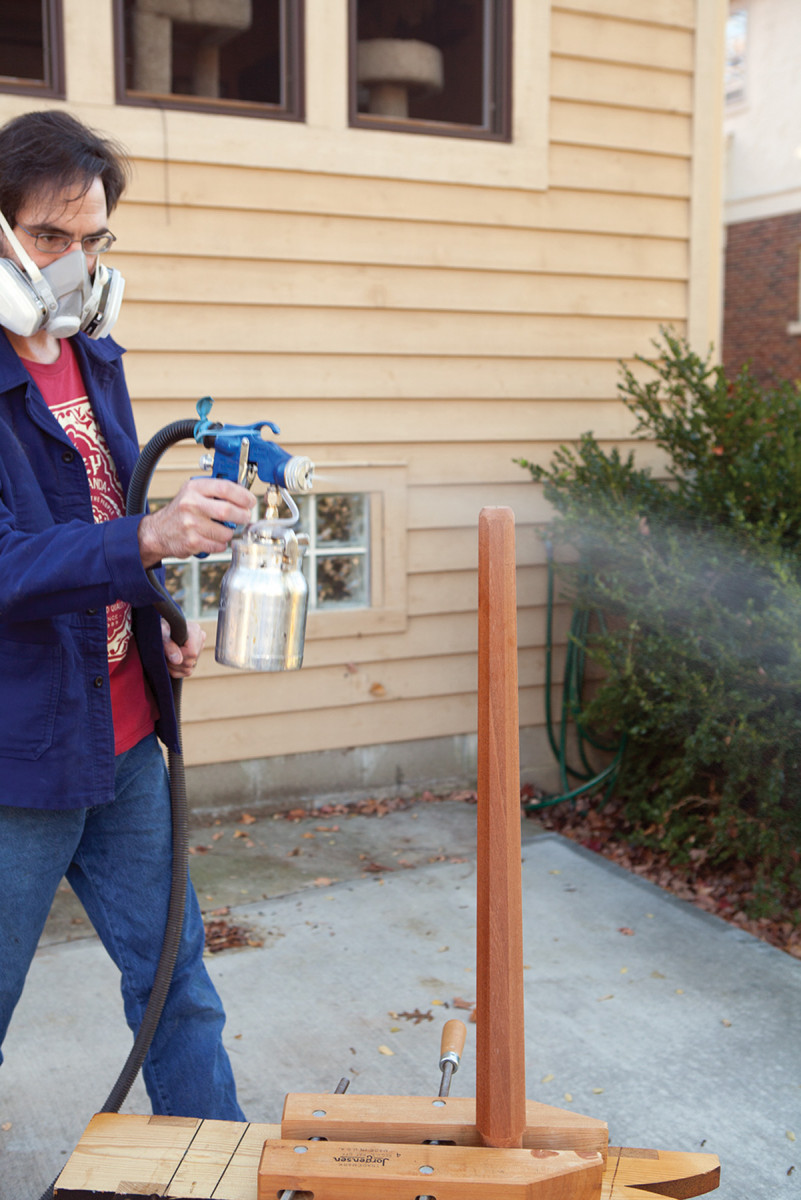
At home, I spray outside and with a respirator. Yes, I have to wait for a decent day sometimes, but I have been amazed at how I can even spray in the Midwest in December by spraying a furniture component then taking it into my heated shop to cure. Really, there are only two months (January and February) when I don’t spray.
Set up the Gun
Three fans. Here you can see how rotating the air cap can produce three separate shapes of fans.
 So now that we have the spray booth sorted, let’s set up the gun. All the guns I’ve used let you control how much finish goes into the airstream; some systems also allow you to increase or decrease the airflow, either at the gun or from the source of the compressed air.
If you buy an HVLP system, you’re probably going to be able to regulate only the amount of finishing material. So setting the gun is easy. Begin with the fluid control turned all the way down. Pull the trigger and start to open up the fluid control. You’ll see the fan get bigger and denser as it fills with atomized finish. When you reach the point when you open the fluid nozzle and the fan does not change in size or density, stop.

Back edge. Spray the back edge of the piece.
That’s a good mix to begin working with on a test board.
If you have a system that allows you to also control the airflow, I recommend you read your system’s instructions. It will tell you a good place to begin when regulating the airflow. Balancing airflow and finish material takes a little experience and it is a good idea to use someone else’s gun that’s been set up so you know what a good fan looks like.
Ends. Then spray the ends of the piece.
The other important adjustment on the gun is the air cap – it controls whether the fan is spraying a horizontal band of finish, a vertical one or something that is roundish.
A horizontal fan is ideal for spraying vertical components such as legs or spindles. A vertical fan is ideal for panels. I like a round pattern for working inside casework.
Oh, and you need to learn to use the trigger. It’s good practice to let go of the trigger when your fan is not hitting the work, even if it’s for only a second. This saves finishing material. It also helps prevent you from getting too much finish material on the perimeter of a panel.
How to Spray a Board

Front edge & face. Spray the front edge, then continue working on the face of the panel.
 So with you gun settings somewhat dialed in, it’s time to spray a test board to see how the finish is flowing out – if your fan is too wet or dry. Some people use cardboard or Masonite for this step. I use a scrap piece that is the same species I’m spraying and that has been prepped in the same way as my project. Rough or machined lumber won’t tell you what your gun is really doing. Cardboard absorbs finish too readily and is rough.
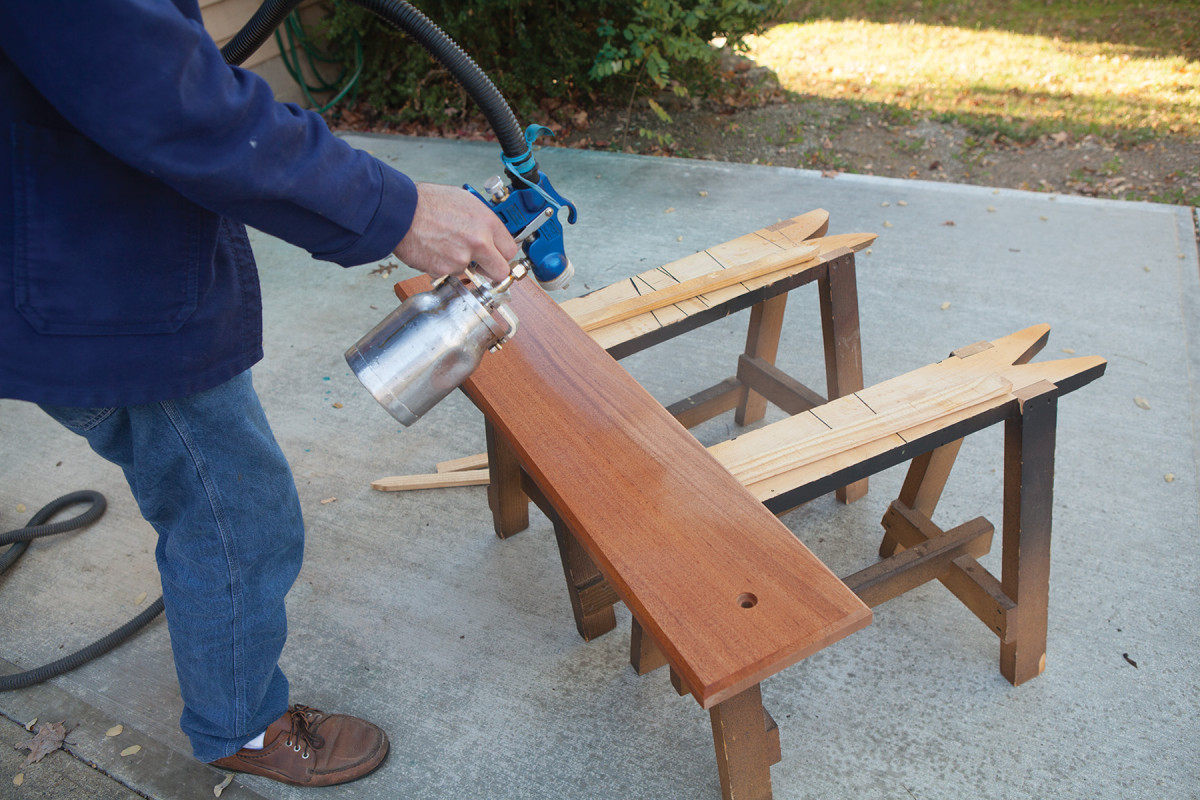
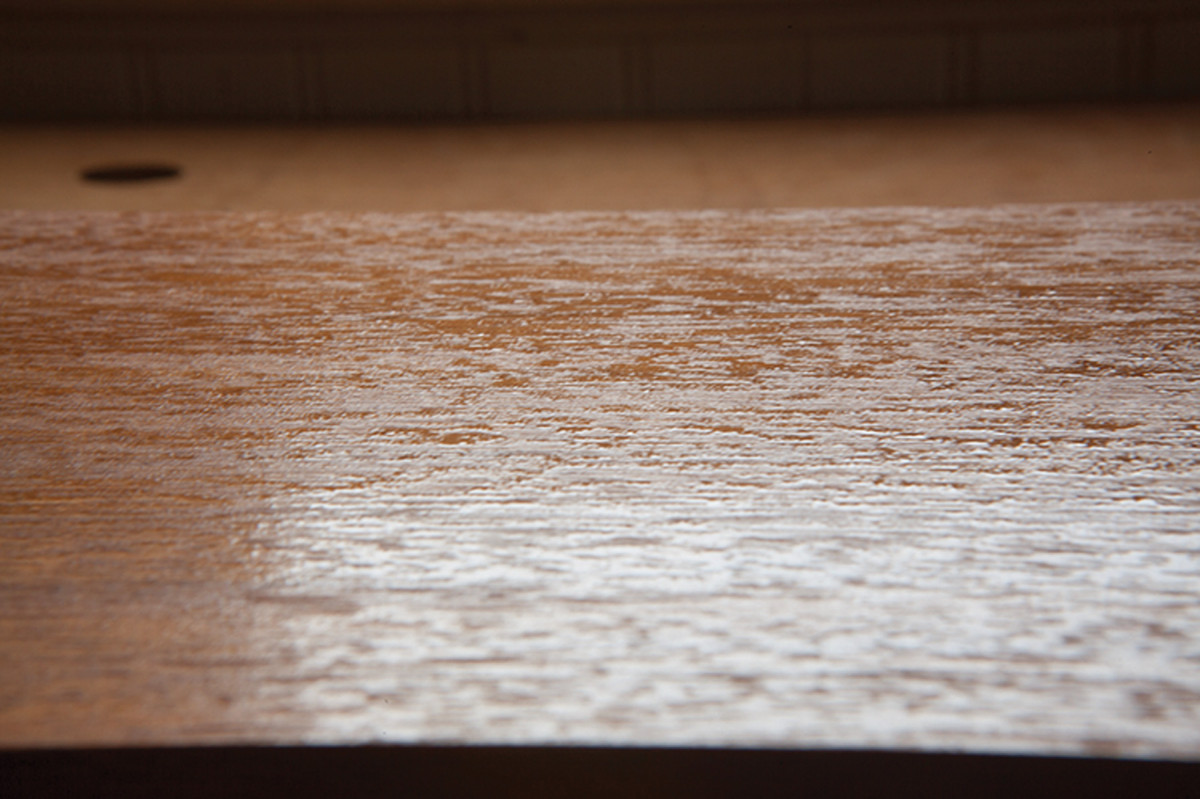
When you spray the board, keep the gun about 10″ away from the work. Begin by spraying the underside of the board and start at its back edge. You want to work robotically – keep the gun at 90° to the work and a consistent distance at all times. Pull the trigger an instant before the fan will hit the board and release the trigger an instant after the fan goes off the board.
Rule of thirds. Make your new stroke overlap one-third of your previous stroke.
After spraying the back edge, spray the end-grain edges of the board in the same manner. Then position yourself to spray the front edge. Spray the front edge. But instead of stopping after the front edge, adjust your wrist and continue to spray the face of the board.
Your strokes need to overlap – I overlap one-third of my previous stroke with the next stroke. The board will change color as you spray finish on it, so that will help guide your efforts to lap your strokes.
After spraying the board, crouch down so you can see the reflection of the film lying on the board. It won’t look perfect (usually) but it should look consistently wet with no bone-dry areas or huge puddles. If it’s dry in one area only, you probably missed a spot. If it’s dry in stripes on the board, then you didn’t overlap your strokes or you need to open the fluid control a bit.
If you have puddles (or lakes), then you either lingered too long in one spot or you have too much fluid coming out of the tip.
Let the finish set up (for lacquer or shellac this can be about five to 20 minutes). Then evaluate the test board. It might be a little rough, like your skin after one day of not shaving. Sanding that down will fix those nibs. What’s important is the film is thin and consistent. If it looks thick and gloppy, you need to reduce the fluid in the fan. If it feels like coarse sandpaper and there’s no film whatsoever, you need to increase the fluid in the fan (or you held the gun too far away from the work).
If you are uncertain about your results, wait for the finish to cure some more (about 30 minutes in a warm room). Then use a #300-grit sanding sponge to remove the fuzzy nibs and level the first coat. If you get white dust when sanding lacquer or shellac, don’t worry. That’s good. If you don’t get white dust, let the finish cure longer and try again.
Then repeat the spraying process for the test board and evaluate your results. After spraying a few projects, you will dial in the gun settings immediately – especially with a familiar finish material.
But Everything’s Not a Board
Film finish. When you lower your view to the board you can see the light reflecting off the film and see if it looks somewhat consistent. This is lacquer on mahogany, about 30 seconds after it was sprayed. Open-pore woods such as this will look like this at first – kind of splotchy. After 15 or 20 minutes the film will be much more consistent. So don’t panic.
Spraying complex assemblies can seem overwhelming. It helps to break down the project into interior surfaces, secondary surfaces and primary surfaces.
Interior surfaces – such as the inside of a chest of drawers – don’t need to be sprayed at all. If they get some overspray, no big deal. Historically, the inside of casework was left unfinished. This philosophy can extend to the insides of drawers and cabinets as well – but that’s an aesthetic choice.
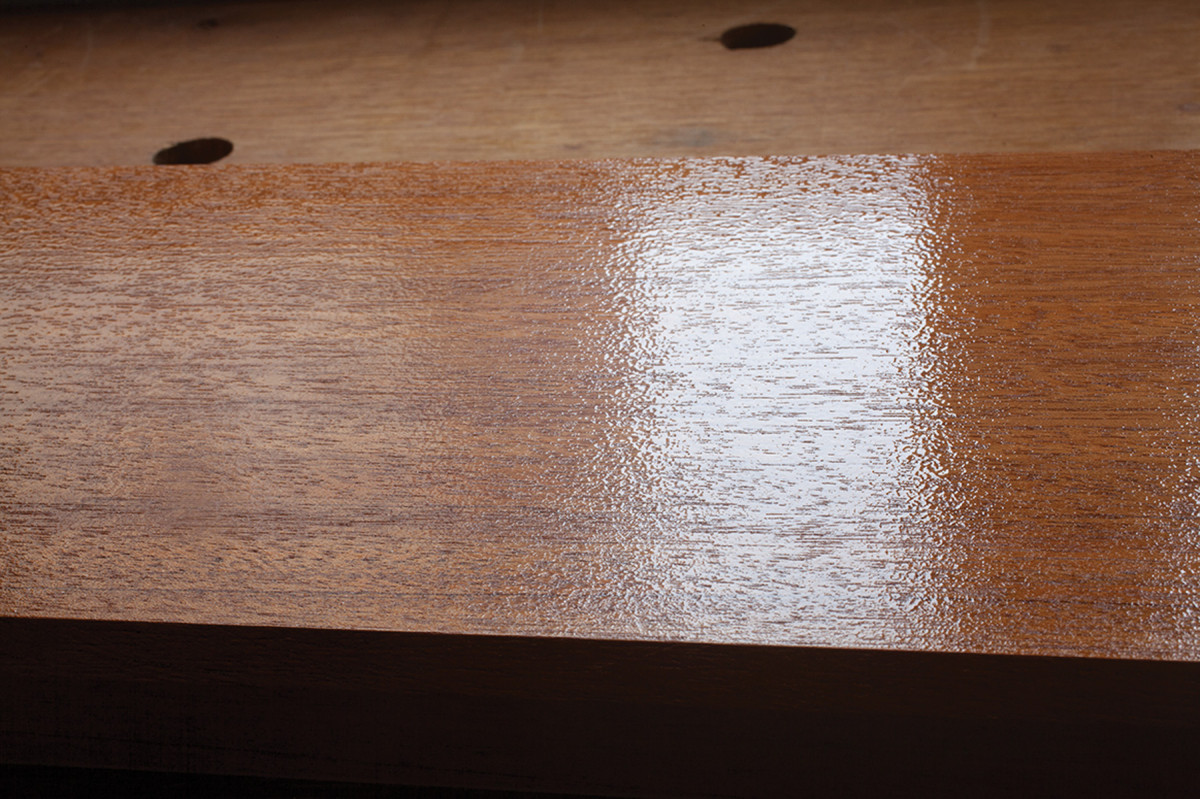
Second coat. After sanding the first coat, here is what the second coat looks like after about 30 seconds. Better, but still wrinkly. This will flatten out easily after about 20 minutes.
Secondary surfaces – shelves, the insides of doors, cabinet backs in open casework and etc. – need finish, but they don’t have to be as perfect as the primary surfaces. Primary surfaces are the showy bits – the tabletop, the case sides, the drawer fronts.
In my shop, I don’t spray the interior surfaces. So I start by spraying all the secondary surfaces. The final surfaces to get sprayed during a coating session are the primary surfaces.
So when spraying a bookcase, for example, I:
1. Don’t spray the backs of the backboards.
2. I set the air cap at a diagonal to produce a round cone and spray the interior of the case and shelves.
3. Set the air cap to make a horizontal fan and spray the front edges of the case and shelves.
4. Spray the case sides.
5. If the case has a visible top, I set the air cap to make a vertical fan and spray the top.
Done. The second coat after 20 minutes of drying – perfectly smooth. This is a low-luster lacquer. I don’t like blindingly shiny finishes, but these same techniques work with high-gloss finishes.
Another good strategy when spraying is to spray as many parts that can be laid flat as possible. If you can take the shelves out and spray them flat on sawhorses, you’ll get better results than spraying them while inside the carcase.
After a coat of finish sets up, level it with a sanding sponge (or stearated sandpaper) and add a second coat. For most projects, two coats of lacquer or shellac is plenty. Three coats is fine. After three coats things will start to look plastic-y.
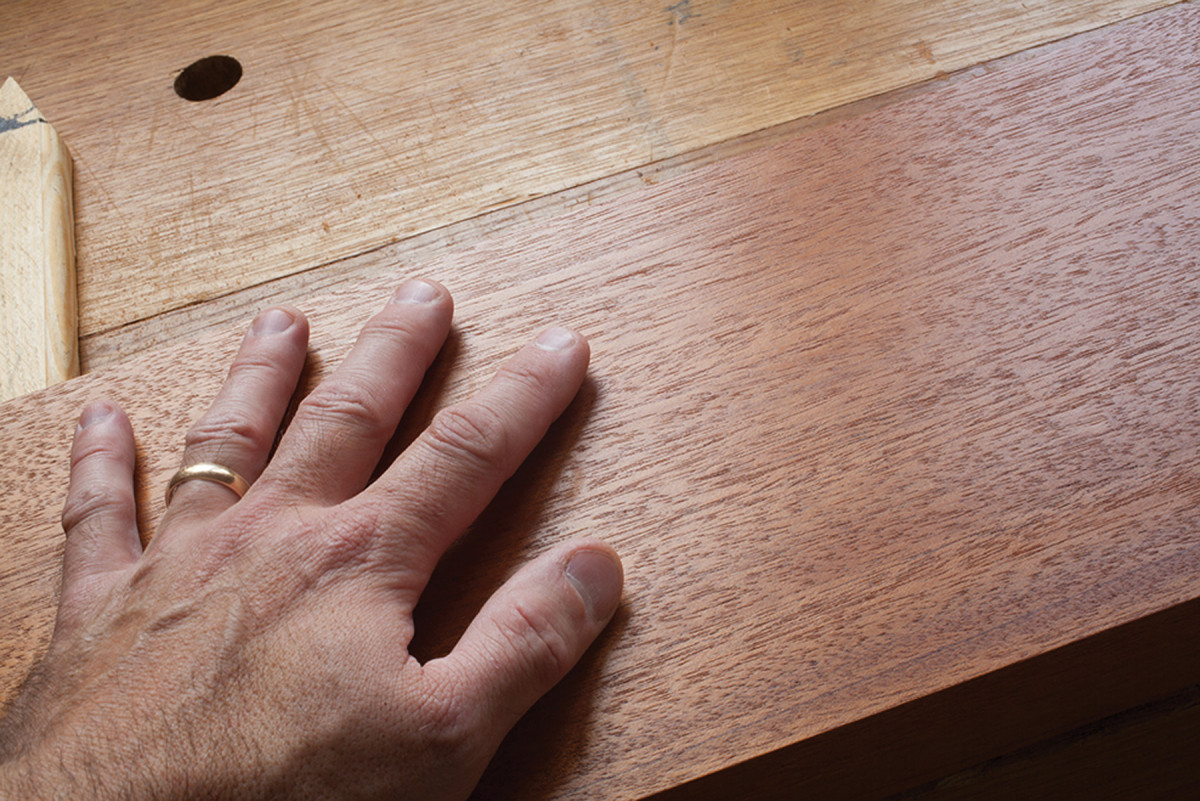
A dust-up. If the lacquer or shellac gets white and dusty when you sand it, that means the finish is cured and hard.
Final tip on leveling the finish: If it looks good but still feels a little rough, wait two weeks and rub down the finish with a brown paper bag. It is just coarse enough to level the nibs without showing visible scratches.
Clean-up

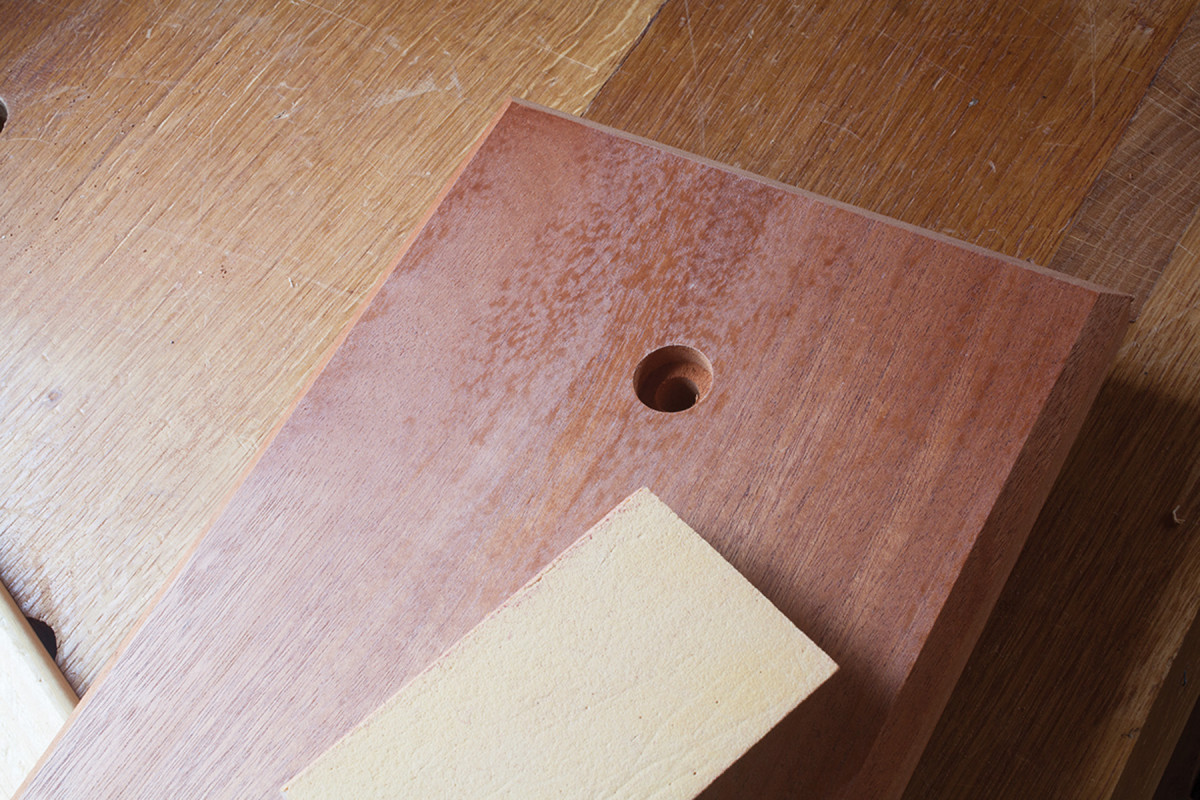
Interior surfaces. Here I’m spraying the inside of a tool till for a chest. I spray one end, the bottom, then the other end. The goals are to keep the center of the fan pointed at 90° to the surface you are spraying and a consistent distance – about 10″.
Spray equipment needs to be clean to work. Most problems that I’ve encountered with spraying are caused by poor gun hygiene.
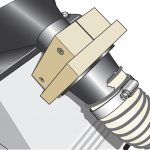
Horizontal fan. When spraying legs, I get them vertical and use a horizontal fan. This reduces the chance of getting dry spots on your legs.
When you are done spraying, run a few ounces of solvent through the gun. Shake the gun occasionally while spraying the solvent to ensure it cleans the entire cup that holds the finish.
Disassemble the gun and soak the needle, fluid tip, air cap and any other parts that came in contact with the finish in a little solvent overnight. Lubricate the needle and the trigger of the gun (most people use petroleum jelly or mineral oil; just don’t use silicone).
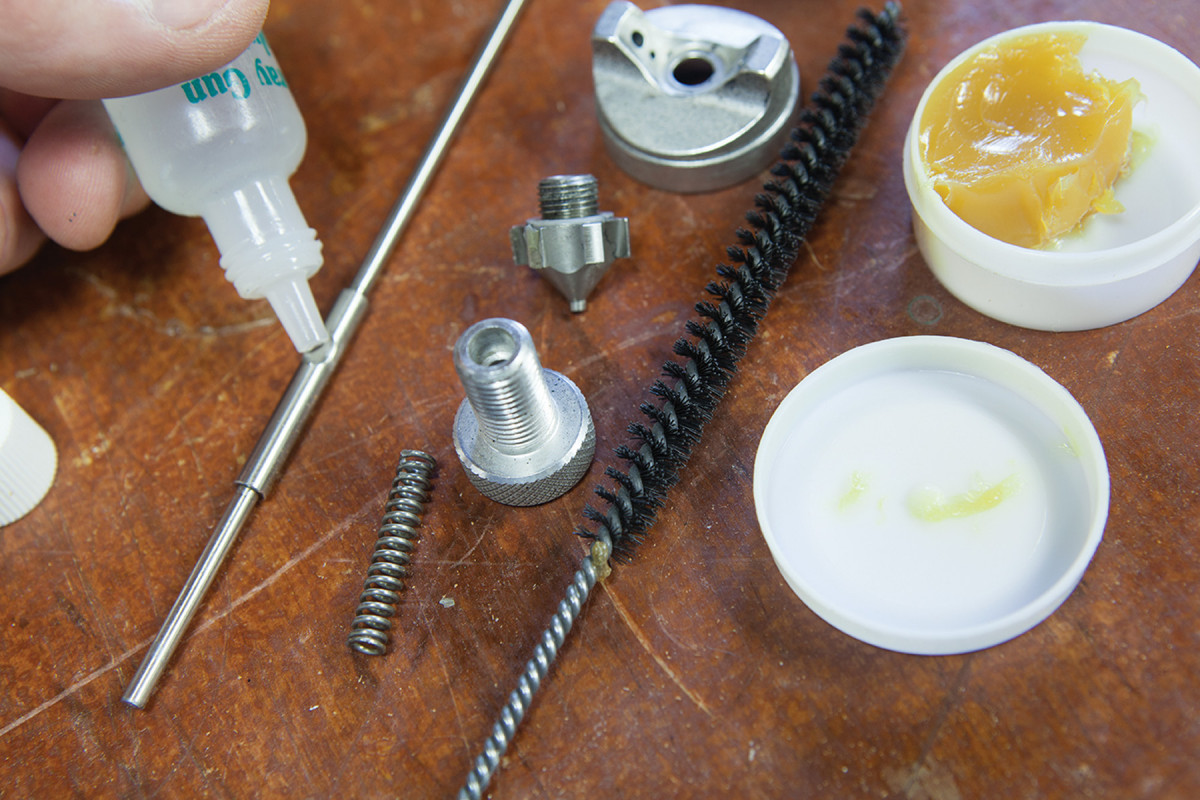
Stop sticking. Lubricating the interior parts prevents things from gumming up – even a few molecules of sticky finish can prevent parts from moving smoothly.
If all this sounds simplistic, that’s because it is. Yes, there are fine points to spraying finishes, especially when you get into advanced techniques, such as toning a board. But if you want to simply apply a topcoat finish and have it look dang-near perfect after a few hours of work, spray finishing is definitely something to try.
Here are some supplies and tools we find essential in our everyday work around the shop. We may receive a commission from sales referred by our links; however, we have carefully selected these products for their usefulness and quality.