


We may receive a commission when you use our affiliate links. However, this does not impact our recommendations.
Follow these steps to get a deep glow, a buttery-smooth surface and unmatched protection.
Years ago, while working at the Philadelphia Museum of Art, I visited the furniture conservation department to ask for some help finishing one of my own pieces. I got a one-word reply: “Waterlox.” After more than a decade as a professional furniture maker, I consider Waterlox my mainstay, too. The reasons are many. Waterlox Original Sealer/Finish has a tung-oil base modified with resins, giving it the luster and vibrancy of pure oil with the quick build and durable protection of a lacquer. Its unique formula also lets you brush it on thick or wipe it on thin. My approach takes advantage of both qualities: I brush on coats first, which saturates the wood and provides a foundation for a series of thin, smooth coats, padded on with a folded rag. I only need to level the surface twice—once after each stage—and I do it with steel wool, which follows every contour and leaves a smoother surface than sandpaper. The whole process couldn’t be simpler, easier and more foolproof, delivering a deeply lustrous semi-gloss that’s also lovely to touch.
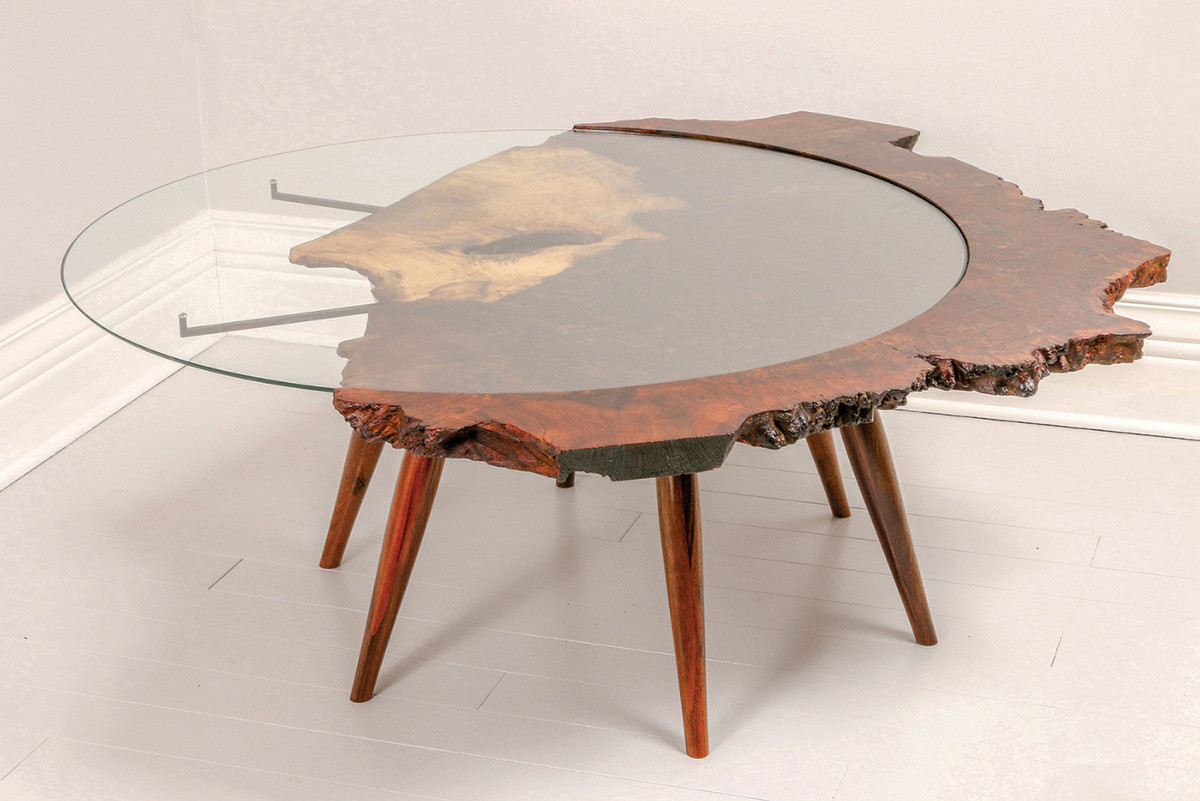
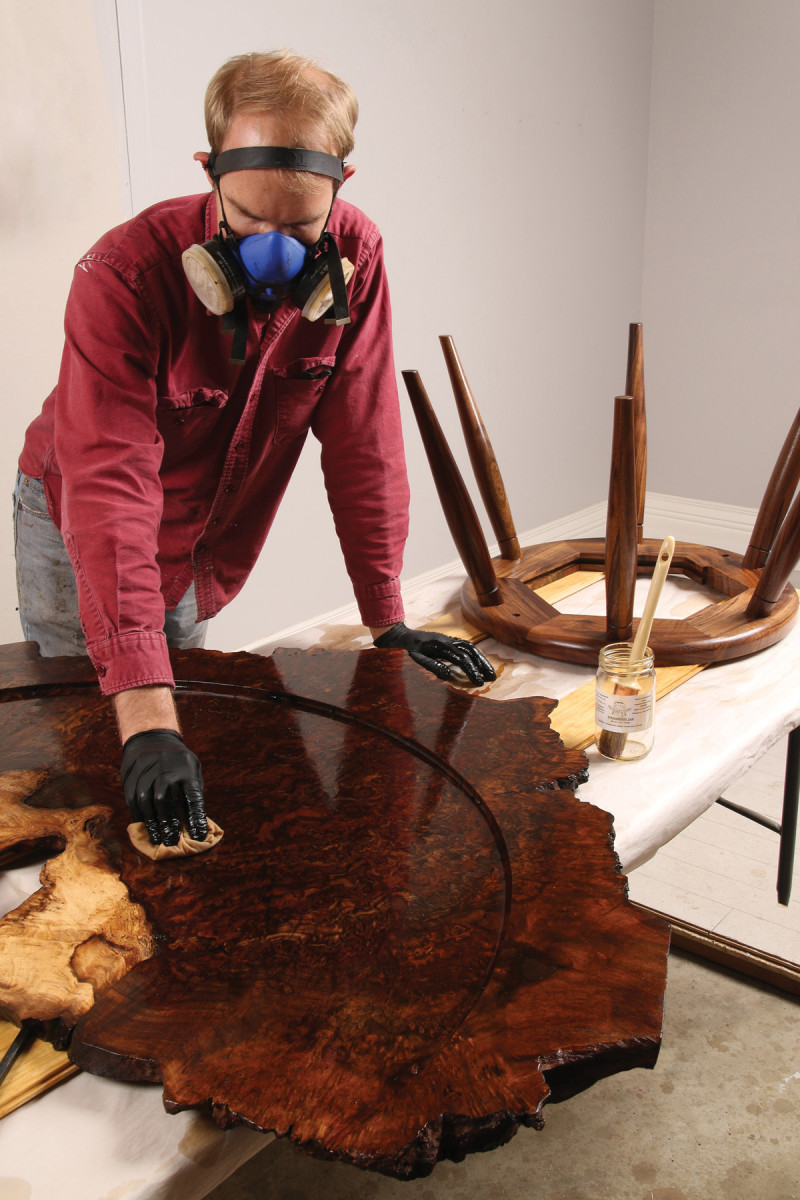
1. Used correctly, Waterlox will handle most of your finishing needs, delivering deep luster, unmatched protection, and a flawless feel on even the most challenging pieces, like this burl-top table.
This versatile finish will work for almost everything you build. You can apply it thinner for a more natural look or build it up for a deeper luster and more protection. I usually apply five coats, building the finish to a medium film that has durability and depth while letting the wood’s beauty shine through. I’ve found that water beads up on the surface of Waterlox and I’ve never experienced any discolored rings from hot or cold beverages, with or without coasters. At the same time, the film is flexible, so it won’t chip or flake. If there’s damage somehow, Waterlox is easy to repair, letting you blend new finish in with the old and avoid having to strip an entire surface to bare wood.
Get Ready
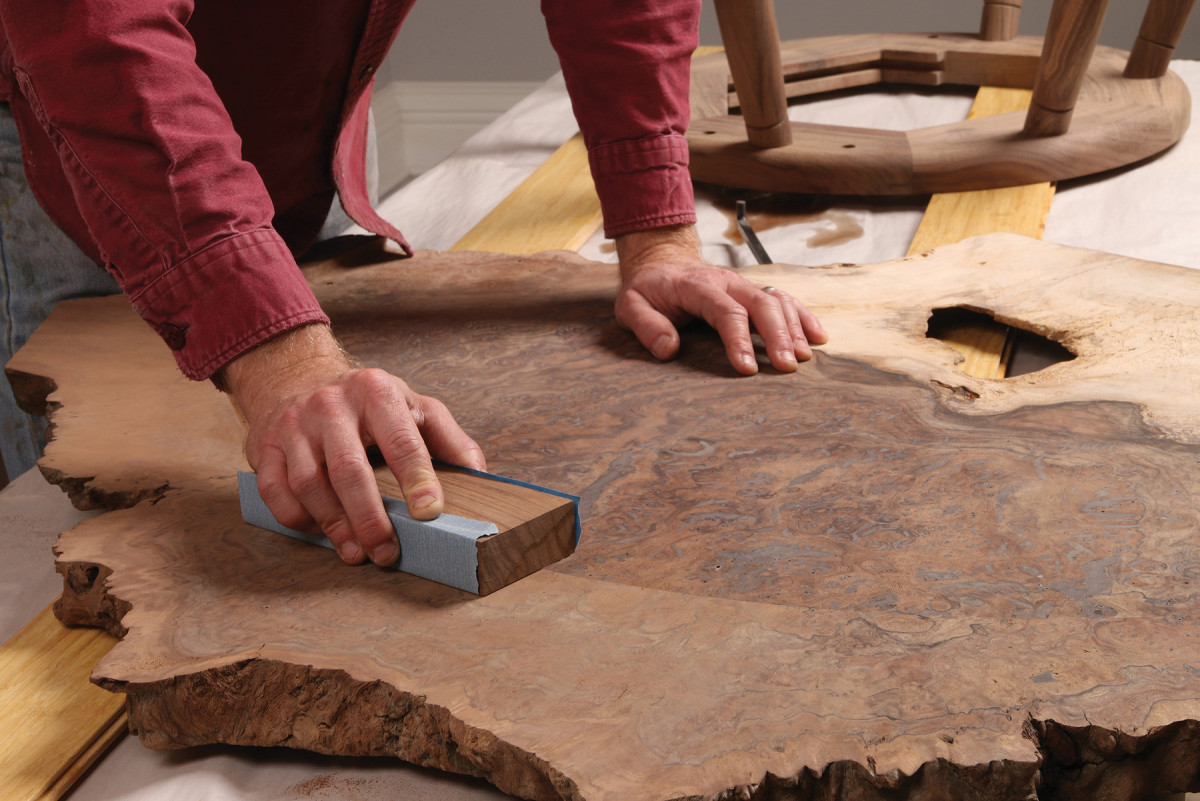
2. Surface prep is standard. Sand up to #220 grit. Any less will show sanding scratches, while finer grits could burnish the wood, interfering with its ability to absorb oil.
Prepping the surface for Waterlox is pretty standard. Sand all of the surfaces to #220 grit, and remove the dust with compressed air. The first few coats aren’t particularly sensitive to dust, but, if possible, move the piece to a cleaner area or room for the final padded coats.
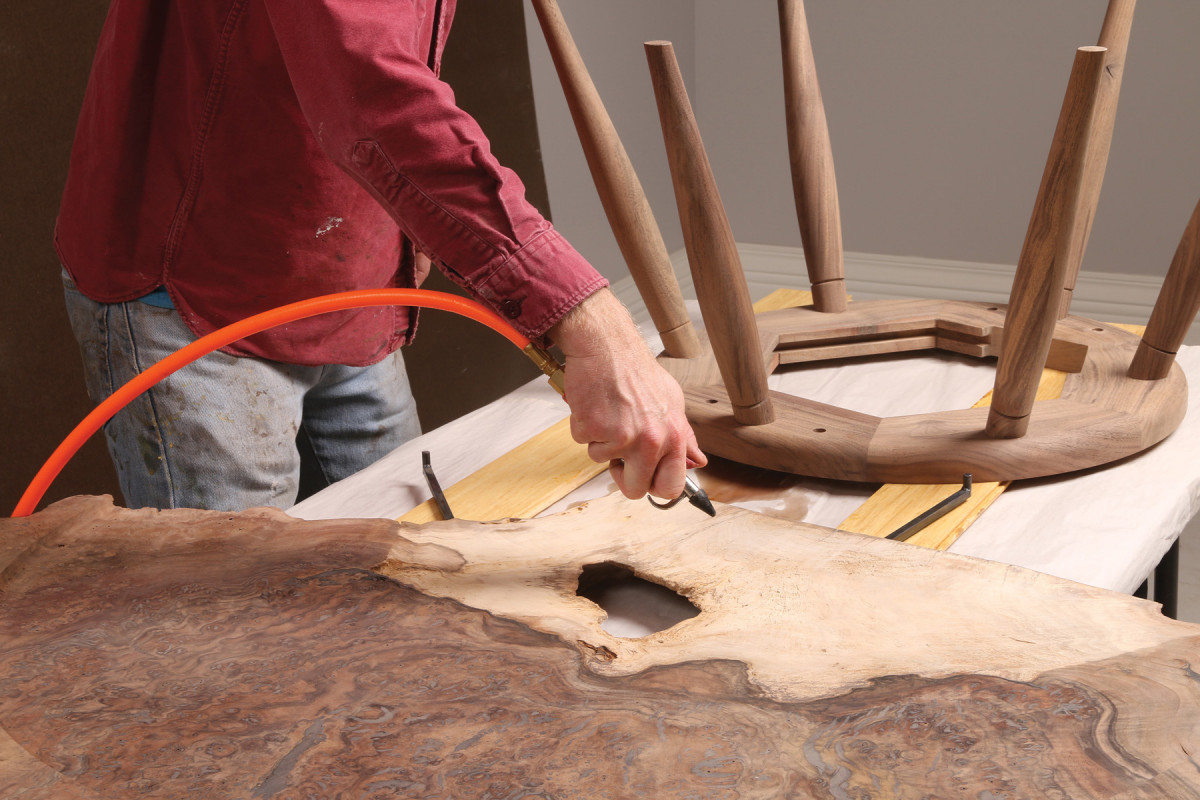
3. If possible, remove sanding dust with compressed air. A clean brush and rag can also work.
Dried glue will resist any oil finish, leaving light areas, so do your best to remove squeeze out. However, if you discover a missed spot after brushing the first coat, Waterlox is forgiving—just let the finish dry, sand the area and reapply. No one will be the wiser.
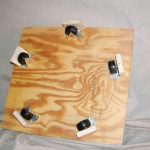
I break down pieces if I can for finishing, removing tabletops from bases, for example. And I put strips under the workpieces to lift them off the table when applying Waterlox, so they don’t pick up debris and the finish doesn’t pool around the bottom. I seal these strips with Waterlox so they don’t wick finish from the piece.
Start with Two Coats
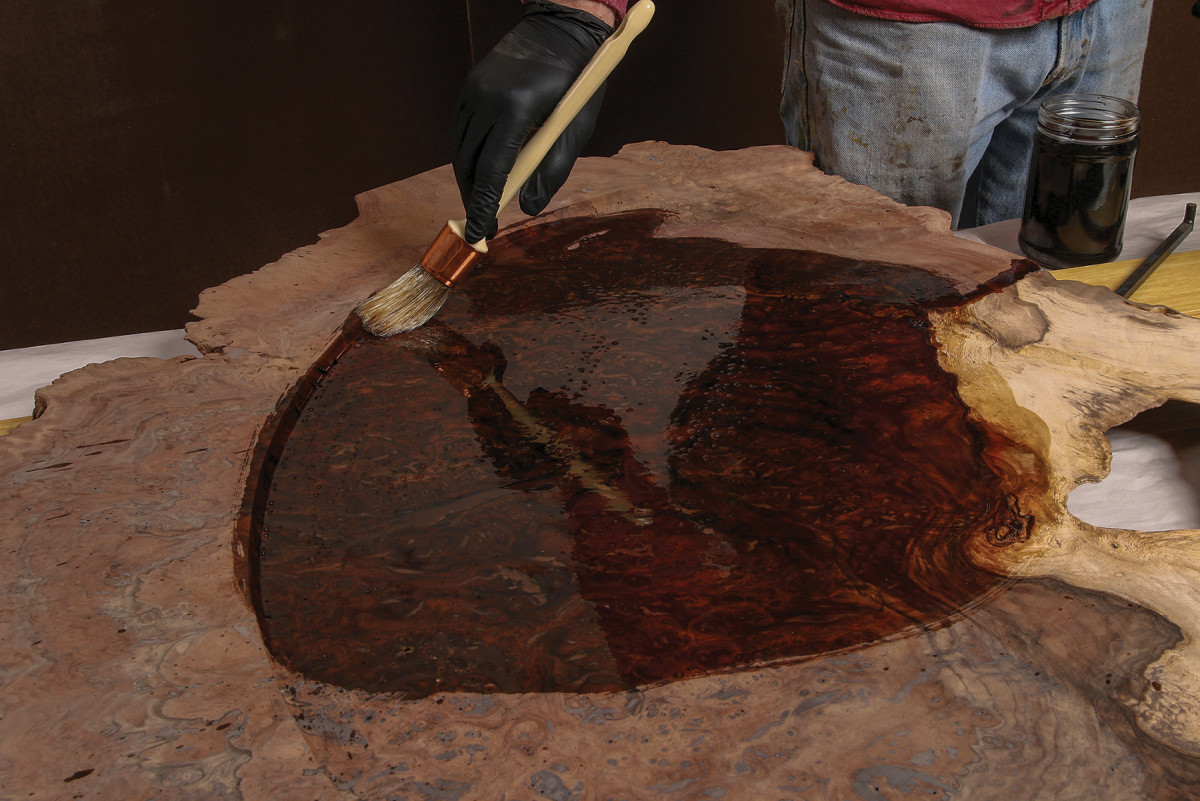
4. I brush on Waterlox with a large, round, natural-bristle brush that fits into my jars of finish. I work on one large area at a time. Start by transferring as much finish as possible onto the surface, and then use the brush to spread it evenly.
I start with two brushed coats of Waterlox, which saturate the wood with finish and establish a foundation for the padded coats that follow. After brushing, I smooth the wet finish with a cotton rag, to remove drips or puddles and leave
a wet, even coat.
A large, soft, natural-bristle brush works best, but there’s no need to break the bank. I use a 13/8” round domed-sash brush by Jack Richeson & Co. It holds a lot of finish and fits nicely into the glass jars I use.
The first step is to get as much finish transferred onto the furniture as possible. Then I use the brush to move the finish around and evenly cover the surface, returning to thirstier areas like end grain or spalted wood to give them more finish. Since Waterlox starts getting tacky after about 15 minutes in a warm shop, it works best to break a big piece into sections, brushing finish onto one section and then wiping down the previous one, and so on.
I remove the excess with clean, lint-free cotton rags. The goal isn’t removing every bit of excess but just avoiding pooling and drips. So leave the piece glossy with wet finish rather than wiping it down to a matte look. If an area is still absorbing a lot of finish at this point, feel free to move more finish there with the rag. That said, the next coat should even out the look. Before leaving the piece to dry, make a last spot check for drips and pools.
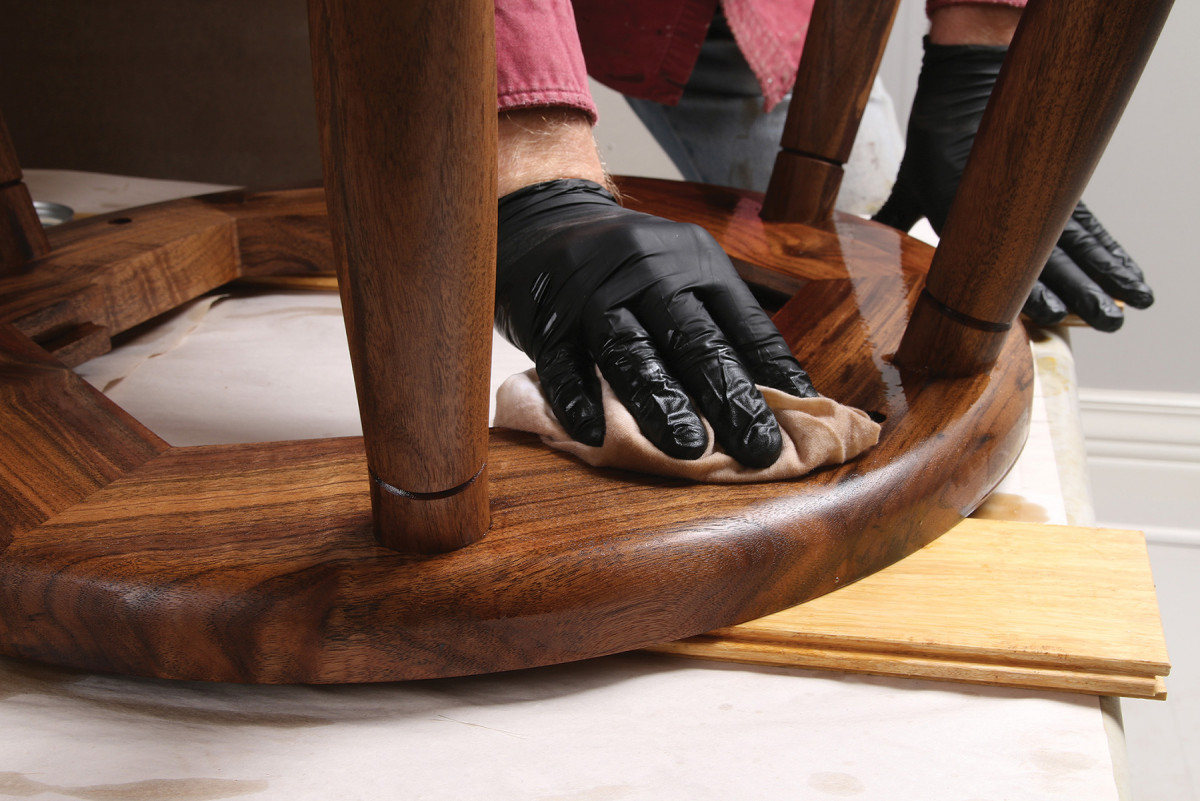
5. After saturating the surface, wipe off the excess gently with a lint-free cotton rag. You want to even out the sheen while leaving the wood slightly wet so you begin building a film. Let the finish dry for at least 24 hours before brushing on and wiping off another coat as before.
After leaving the piece for at least 24 hours, apply a second brushed coat. The wood will absorb less this time, so apply a little less finish to prevent drips. This time, wipe down the surface with the grain, which will make marks less visible. Again, spot-check the piece before you leave it and wait another 24 hours for it to fully cure.
Level the Surface
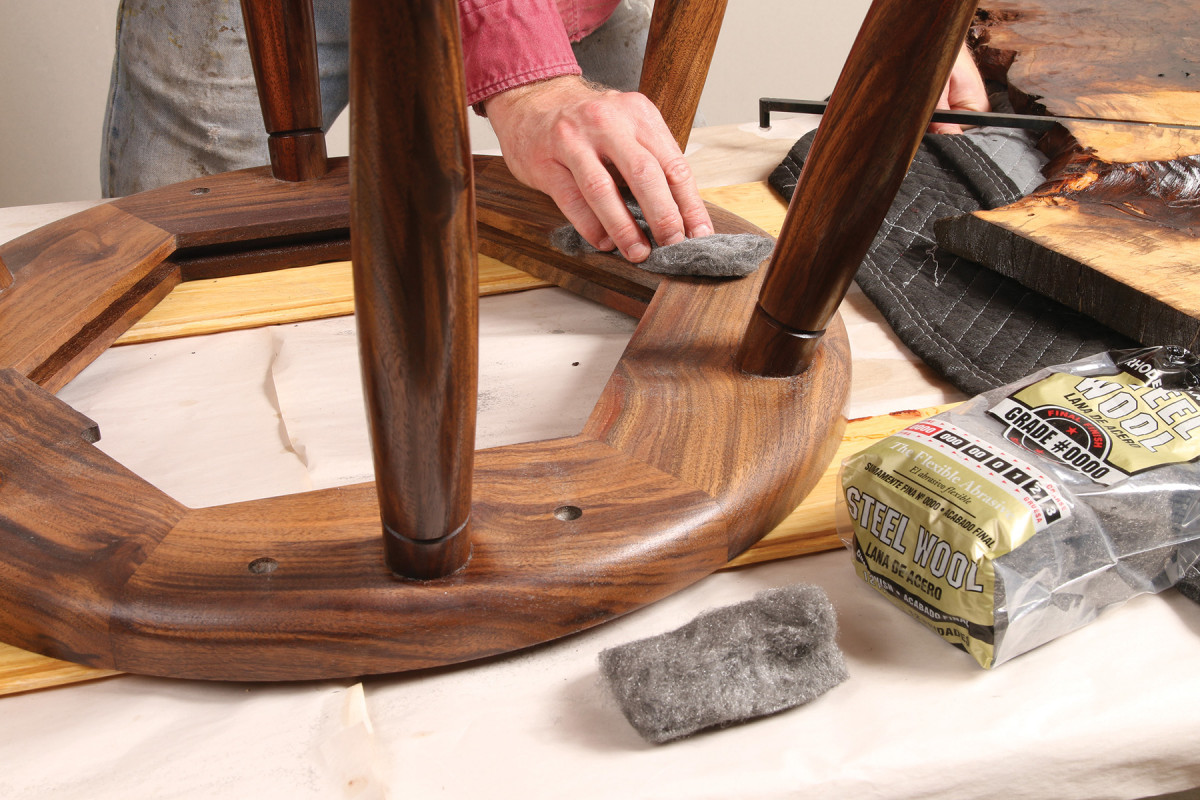
At this point, it’s time to level the surface, removing any debris left in the finish. I do this with medium-grade steel wool, which seems to scrape rather than scratch and grind the surface (like sandpaper would). This leaves a smoother surface for the thin padded coats that follow. You might be tempted to smooth the surface after the first brushed coat, but my tests show that to be a waste of time. You’ll get just as good results smoothing the second coat only. Medium-grade steel wool can get a little prickly and painful, so I protect my hands with latex gloves.
Rub with the grain, as cross-grain scratches can telegraph through to the final finish. Then blow off the surface with compressed air, or brush and wipe off the dust. The surface should feel smooth. Drag your hands over the entire piece, and hit any areas that feel rough with the steel wool again.
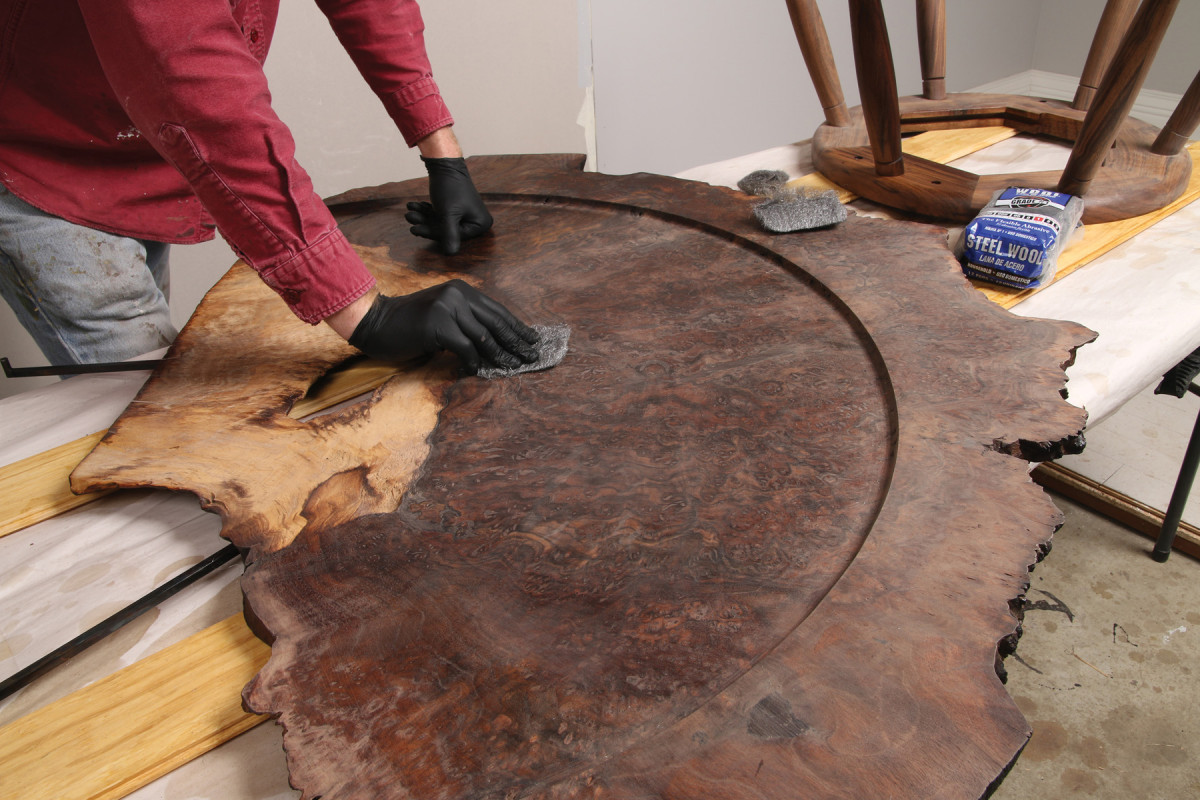
6. Let the second coat cure for another 24 hours, and then buff the surface with medium-grade (#1) steel wool to remove dust and debris and level any rough or bumpy areas. Use your fingers to feel for rough spots as these will telegraph through the thin padded coats that follow.
Last, look at the piece in raking light to spot any drips or heavy areas. In open-grained wood, finish can wick out of the pores during the drying process, leaving a raised rim around each one. Pay special attention to these areas. Any issues left behind will only compound with each thin padded coat that follows.

7. The padding technique depends on a wrinkle-free pad. Fold the corners of a clean cotton rag, and then fold them in again to form a flat pad.
Pad on Thinner Coats
My padding technique is inspired by French polishing, and lets me build up protection and luster in a series of thin, smooth coats. The process is very forgiving. If you mess up you can just rub the area out, using steel wool for slight mistakes or sandpaper for bigger ones. Then apply extra finish until the area looks similar to its neighbors, and start applying coats to the entire piece again. Once the piece is in service, the same process works for invisible repairs.
To make the pad, simply fold a lint-free cotton rag to make a palm-sized flat area on one side. Any folds on the working side will produce streaks in the finish. It’s similar to a pad for French polishing, except that there’s no charging cloth wadded inside. Since Waterlox dries slower than shellac, that extra wadding isn’t necessary to keep the pad wet.
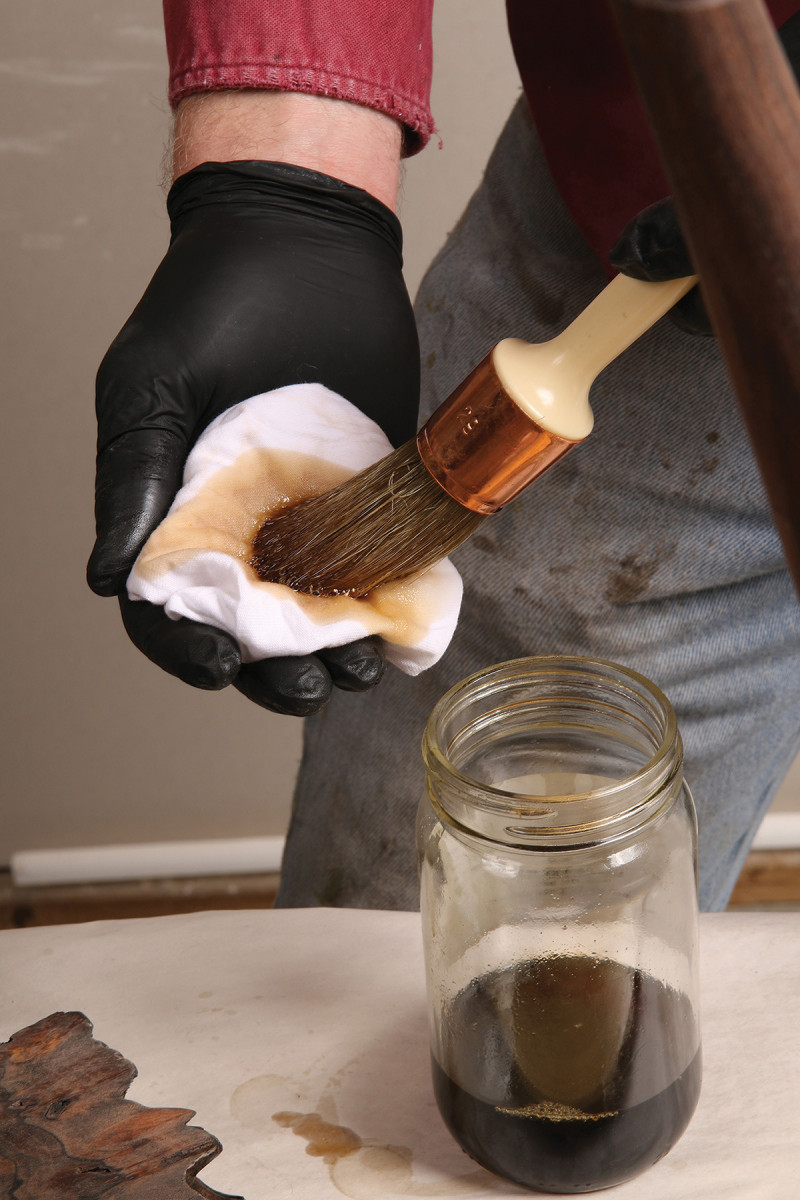
8. Use the brush to charge the pad with finish. A couple of dips should do it.
I use the brush to charge the pad, dipping it in the jar and pressing it into the cloth. The flat side of the pad should be wet but not dripping wet. As you pad on layers the rag will eventually become saturated. Add finish to keep it from getting sticky.
I use the pad to transfer a fair amount of finish onto the surface, and then even it out into a thin, smooth coat. The technique is more like rubbing than wiping. I don’t lift the pad from the surface as I go. If you stop short and lift the pad, you’ll leave a bump or bubble of finish behind. When you do need to set the pad down on the surface or lift it off, do it in a smooth, gradual motion, like an airplane landing or taking off. I wipe in the direction of the grain, so any marks will be less noticeable.
Areas that are still absorbing finish will appear dull or pale, so wipe these areas a second time to get more finish into the wood and even out the sheen so it looks evenly glossy and wet. At the same time, you’re applying a film here, not a thick coat, so if the finish is dripping, you should apply less to the rag.
You can keep working until you feel a little resistance, but definitely stop when the pad starts to grab, or just before. As the finish tacks, it’ll pull fibers from the pad and you’ll create stroke marks too, creating problems to fix with steel wool later.
After the finish has cured for 24 hours, pad on a second coat like the first. There’s no need to buff the entire piece between coats, but it’s worth your time to spot-check for rough spots or drips and knock those down with medium steel wool.

9. Once again, finish one section at a time. The motion is a gentle back-and-forth, without lifting the pad. When you do need to set it down or lift it, do it like landing a plane to avoid leaving behind a bubble of finish.
The Keys to Success
No finish is perfect, and Waterlox does have a few minor drawbacks. I have developed techniques to eliminate most of those, and the pros vastly outweigh the cons. It isn’t cheap, but neither is nice wood or the time you invest in a beautiful piece. In all cases you get what you pay for.
Keep the Shop Warm
One thing people don’t realize is how sensitive Waterlox is to temperature. The finish will lay flatter and meld together better in a warmer shop. If applied much below 65 degrees, it tends to clump up and show brush and rag strokes. So turn up the heat in your shop.
If you’re heating your shop with a space heater or wood stove, make sure the actual finish and the piece of furniture is up to temperature before you begin padding on coats. If your shop isn’t heated regularly in winter, it’d be best to store the finish somewhere that is.
Keep Oxygen Out of Can
Waterlox comes out of the can thin and ready to use. Unfortunately, as many users have found, it becomes viscous and turns to gel if left in a container with too much air in it. My technique requires thin and watery coats, so I go to great lengths to keep it that way. It’s not difficult.
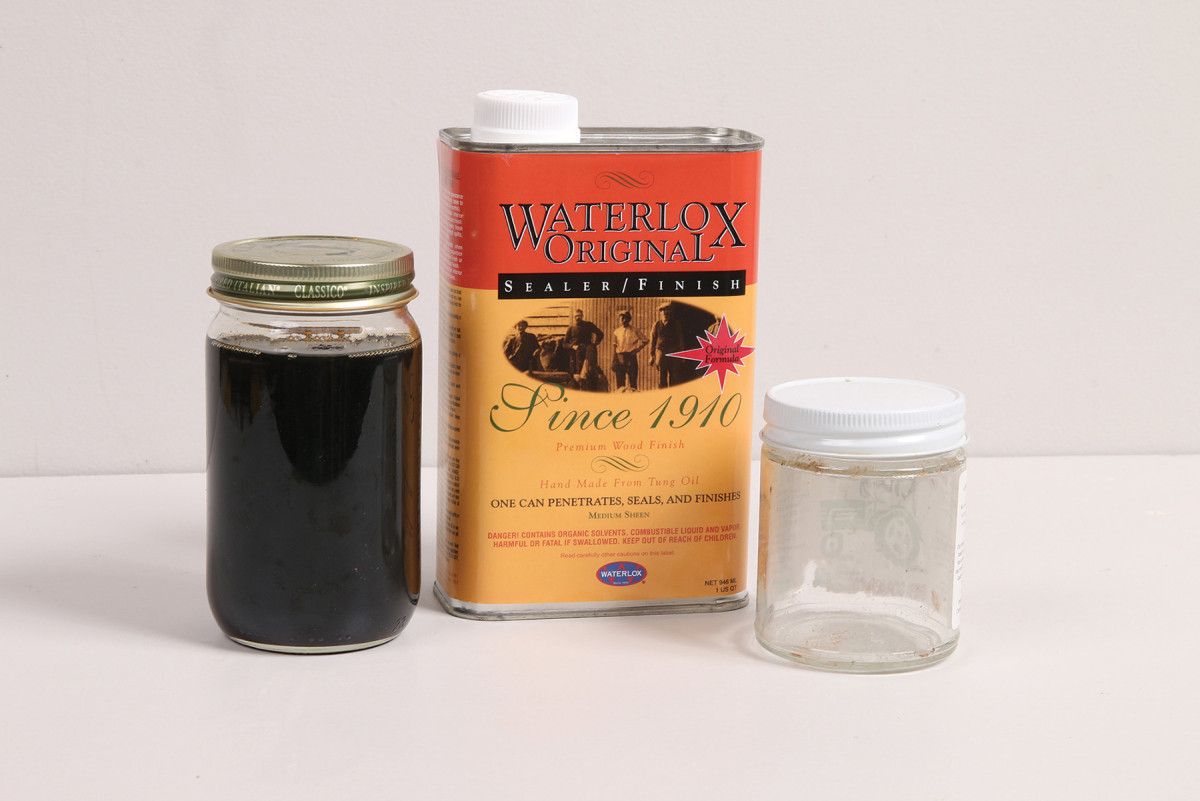
A. Waterlox cures quickly in the presence of oxygen, and will soon turn to gel in a half-empty can. Your first step should be to empty the can into smaller glass jars with metal lids. Leave them full until use.
As soon as I get the finish home, I transfer it from its store-bought can into several smaller glass jars with metal screw-on lids (not plastic). I wash and save my old peanut butter, pickle and small, glass condiment jars, in a variety of sizes.
When the finish in the jars gets down to just over half-full, I transfer it into smaller jars, leaving as little air in the new container as possible. If there’s even 1″ of airspace, I displace the oxygen by blowing into the jar as I put the lid on. I take a deep breath, hold it for a bit so my body uses up most of the oxygen, and then crack the lid and exhale into the container before screwing down the lid tightly. You can also use an off-the-shelf product called Bloxygen to displace that airspace, or add clean glass marbles to the jar to bring the finish level back to the rim (and thus decreasing the airspace).
If one jar becomes a little more viscous than the others, I use it for the brushed-on coats, as this will not affect the quality of the final finish. And I almost always open a fresh jar for the final padded coat so it lays flat.
An Alternate Approach for Lighter Woods
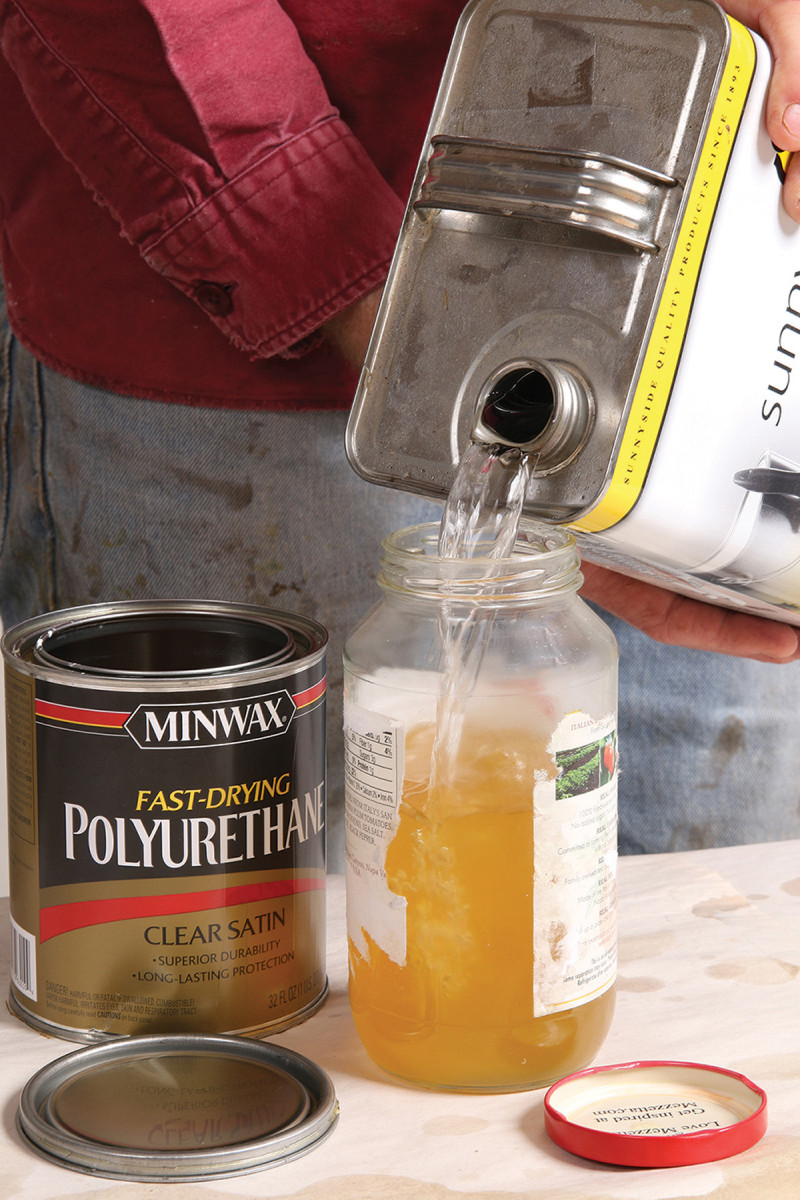
B-C. You can cut polyurethane half-and-half with mineral spirits and use the same brush/pad approach I use for Waterlox.
Waterlox has a darker hue than some oil finishes, which adds richness to walnut and other medium-to-dark woods, but can make light woods look brownish. That’s OK if you’re going for an aged look on maple or ash, but if you want to preserve the natural color of any light wood, I recommend polyurethane.
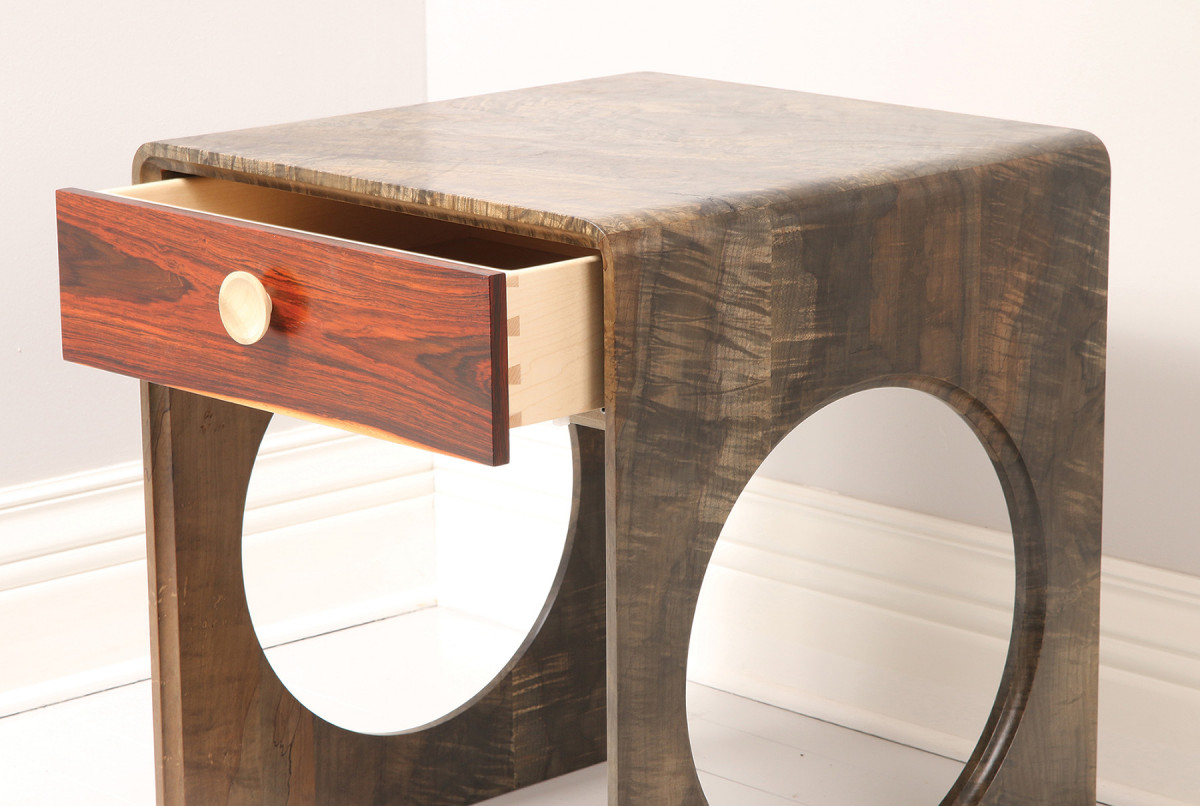
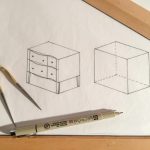
That’s what I did on this table, to keep the gray spalted maple closer to its natural color, and the maple drawer parts bright and blonde.
If you dilute it half-and-half with mineral spirits, you can use the same brush/pad technique I use for Waterlox to get the same beautiful results, with a similar flexibility of build.
Protect Your Lungs & Hands
Waterlox produces a fairly strong odor, so I consider a proper vapor respirator to be a must. I also wear latex gloves to protect my hands and keep them clean.
Buff After Second Coat
Once the second coat is dry (24 hours), knock it down with super-fine (#0000) steel wool. Rub with the grain where possible, but don’t feel bad about rubbing cross-grain to smooth out tight areas where one surface meets another. As before, blow off the entire piece with compressed air and feel for areas you might’ve missed. Your hands see far better than your eyes at this juncture.
This is a good time for fine-tuning the finish. If some areas look more matte than others, I just pad on more finish, let it cure and even out the look with more steel wool.
10. After applying two thin padded coats—with 24 hours of drying time between each—it’s time to level the surface again. Use 0000 super-fine grade steel wool, working in the direction of the grain and removing the dust afterward.
The Most Important Coat
Use a fresh jar of finish for the final coat, so it lays as flat as possible. Pad it on the same way but be extra careful to follow the grain. Once you’ve wiped a section, check it in raking light. If you see a dull spot, give it another wipe and then do a quick overall wipe of the entire section. If the temperature is low and you get some bumps and clumps of wet finish, wipe it off as best as you can with a clean rag and let it dry for 24 hours. Then buff it with steel wool to smooth the surface, and pad on another thin coat.
Allow the final coat to dry for an extra day or so to help with the final buffing. If the furniture has areas that’ll see heavy use, like a tabletop, or you just want to build up a deeper luster, you can pad on additional layers of finish. Hit the piece lightly with the super-fine steel wool between each additional coat.
The Paper Bag Trick
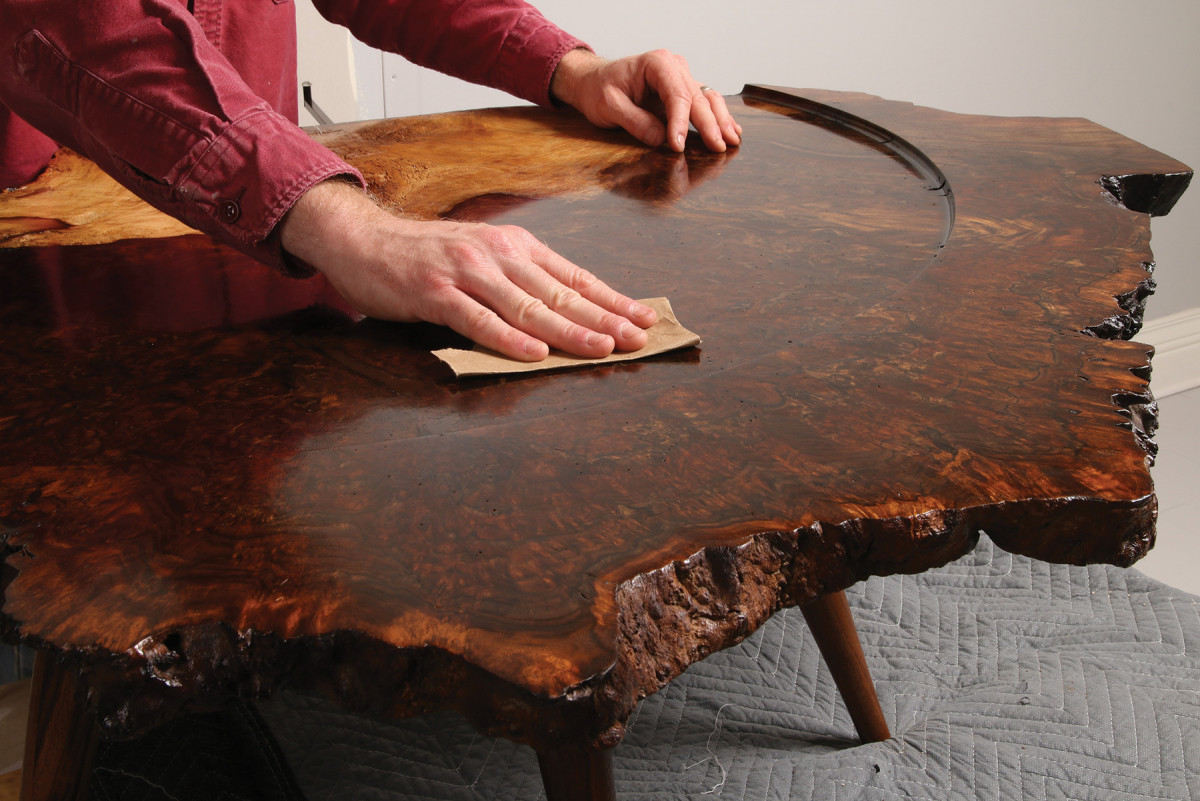
11. After letting the last coat cure for 24 hours at least, rub out the surface with a common paper grocery bag.
Furniture is made to be touched, so the final coat of any finish needs to be rubbed out. My favorite tool for this is a plain brown paper grocery bag—a mild abrasive that is foolproof and effective.
The paper grabs small dust particles that have collected in the final coat, leaving a surface that’s soft and smooth to the touch. However, it’ll not fix significant defects in the finish. Buff those out with steel wool and reapply one or more coats of finish with the rag pad. I cut up clean grocery-store bags, and use only sections that are free of print and seams, folding them into a roughly 4″ square. I then buff the wood lightly with the grain, checking the paper often. Any buildup of finish or debris can mar the finish, so switch to fresh paper as needed. If the finish wants to roll up into tiny pills, it’s not fully cured, so let it rest another day or two. This step will knock down some of the gloss on the piece, and a few months of curing will knock down the gloss a bit further. That’s just one of the many things I love about my go-to finish.
Here are some supplies and tools we find essential in our everyday work around the shop. We may receive a commission from sales referred by our links; however, we have carefully selected these products for their usefulness and quality.


The only caution when using Waterlox is to dispose of the rags with finish on them properly. (Layout flat outside, hang up open, store in sealed metal container, etc. ).
I’ve been using Waterlox for about 12 years now, and am (obviously) in general quite pleased with it. However, I’ve found that when used on a very oily wood (Koa, rosewood, canary, etc.), after 5-6 years the natural oils seep out and the Waterlox then becomes gummy. It collects dust, imprints from clothing (if you sit on the surface), etc. I’ve found no way to repair the finish short of removing it, which requires a combination of chemicals and then sanding, as just sanding results in clogged sandpaper within seconds. Just for awareness…
Thanks Austin,
This is probably the best article about finishing that I’ve ever encountered.
I’m a manicurist by trade, so, my skills definitely transfer , and because I’ve been in the trade for 35 yrs, I’m fussy!
I’ve been doing finishing since forever , and I’ve had to develop most techniques on my own, using my “manicurist sense”. I’ve kept thinking over the years that the finishing articles were pretty elementary, in almost every publication,
As if all readers were DIY hacks. Thanks for sharing your professional knowledge in way that is both detailed, and straightforward .
Can’t wait to try waterlox! I’ve been looking for something that gives more depth, and luster . Since I’m a manicurist, I have to use great retraint not to make EVERYTHING GLOSSY AND SHINY, because I DO love the process.
I too love Waterlox, however I have problems with bubbles, no matter what technique I use.. bubbles .. the only thing I have found is multiple coats at very thin rate.. is there a way to avoid this ?