We may receive a commission when you use our affiliate links. However, this does not impact our recommendations.
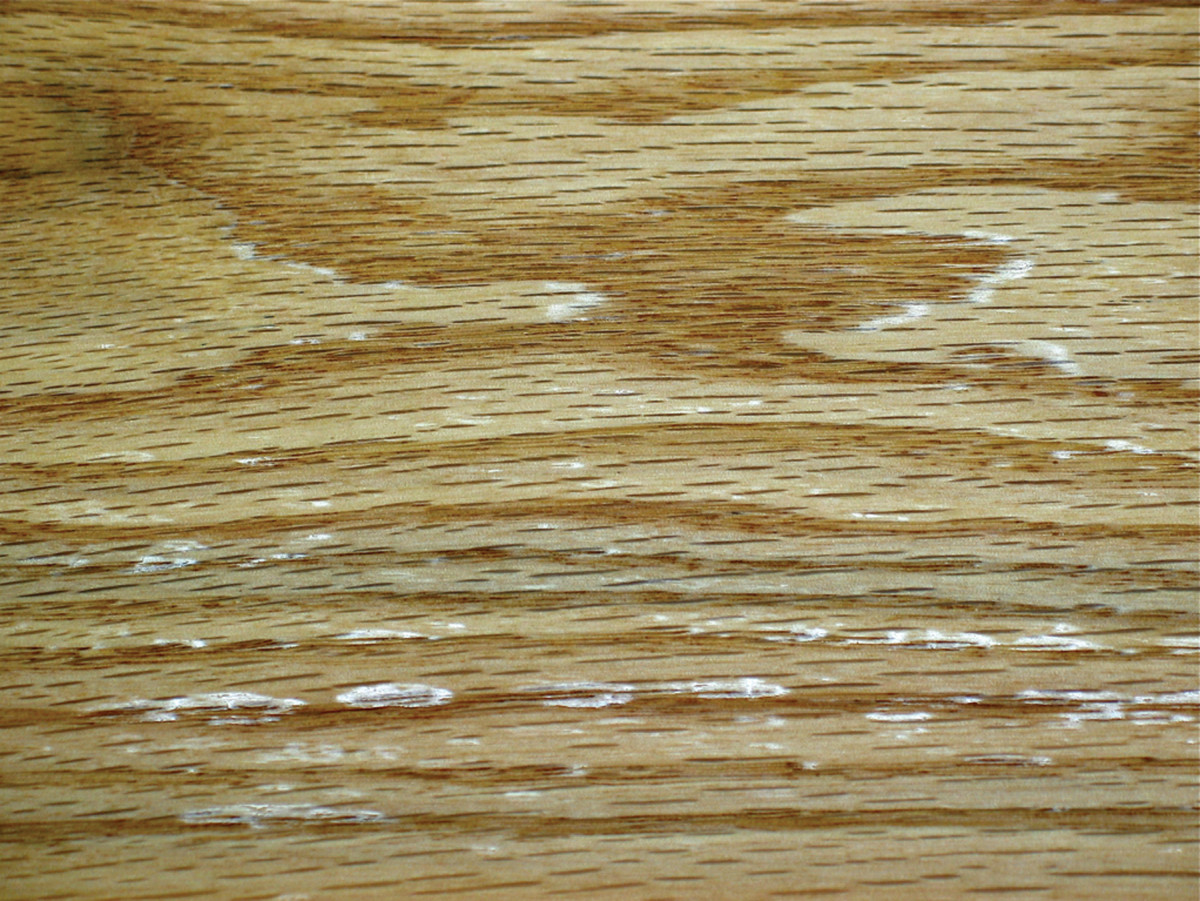
Bleeding. The shiny spots on this oak panel show where an oil/varnish blend has oozed out of the pores and dried on the surface. To keep this from happening, check your project every half hour or so after you apply the finish and wipe off any bleeding before it dries.
Bleeding, blushing, blotching, orange peel and fish eye.
The basics of wood finishing are really quite simple: You use one of three tools – a rag, brush or spray gun – to transfer a liquid stain or finish from a can to the wood. Finishing becomes more complex when problems occur.
Here are five common problems, together with how to avoid them – and how to deal with them when they happen.
Bleeding
Bleeding refers to an oil finish oozing out of pores after being applied and wiped off. It is more likely to occur on large-pored woods such as oak or mahogany than on tight-grained woods. And it is more common with thinned commercial blends of oil and varnish (Watco Danish Oil, for example) than with pure oils such as boiled linseed oil or tung oil.
Bleeding is also more likely on hot days, especially if you move the wood into warmer temperatures or sunlight before the finish has totally cured.
If you allow the bleeding to dry and harden, it will form glossy scabs that can’t be removed without also removing (by abrading or stripping) the finish around each. Sometimes, however, you can disguise the scabs adequately by rubbing the surface with #0000 steel wool then applying another coat to even the sheen.
To prevent the scabs from forming keep a close eye on your project and wipe over the surface with a dry cloth every half hour or so until the bleeding stops.
Once the wood is sealed, meaning the first coat has cured, there shouldn’t be any more bleeding. So bleeding is usually limited to the first coat.
Blushing
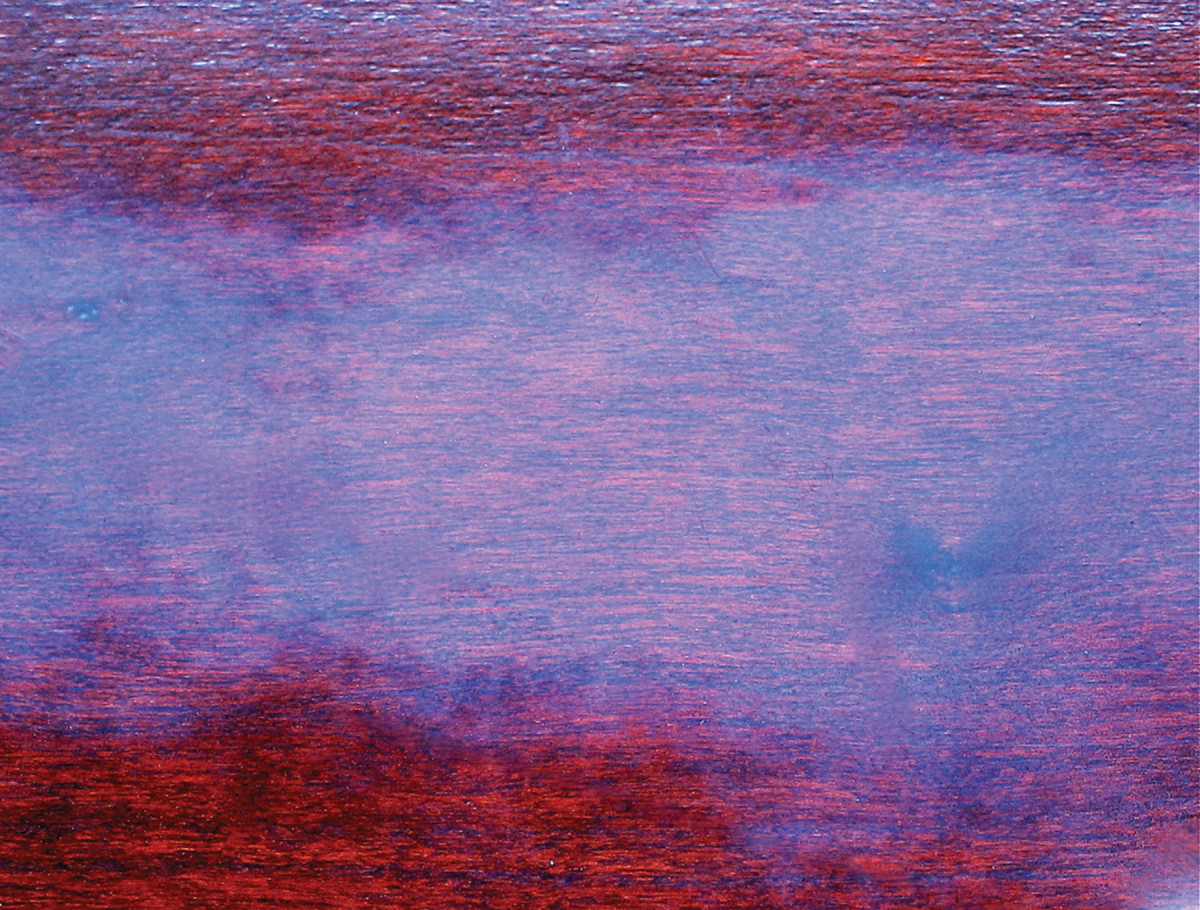
Blushing. The milky white area in the center of this panel is called “blushing” and occurs often during the application of shellac or lacquer on humid days. To keep it from happening, slow the drying of the finish by adding a little lacquer retarder to it.
Blushing is a milky whiteness that occurs in fast-drying shellac and lacquer finishes in humid weather. It’s caused by moisture in the air condensing onto the finish as the solvents evaporate and cool the surface. The moisture then evaporates, leaving air voids that refract light rather than let it pass through.
Blushing doesn’t occur in varnish because it dries so slowly, or in water-based finish.
To avoid blushing you have to slow the drying of the finish. Do this by adding lacquer retarder to the lacquer or shellac. (Brushing lacquer has already been retarded enough so that blushing is very rare.)
Adding retarder slows the drying of the finish, so don’t add more than needed. You will have to experiment to find this amount because retarders use different solvent formulas and humidity can vary.
Blushing will sometimes clear up on its own. Otherwise, spray some retarder onto lacquer, or alcohol onto shellac on a drier day. Or let the finish harden and sand or rub it with a fine-grit abrasive paper, pad or steel wool. The blushing occurs right at the surface of the finish, so it doesn’t take much abrading to remove it.
Blotching
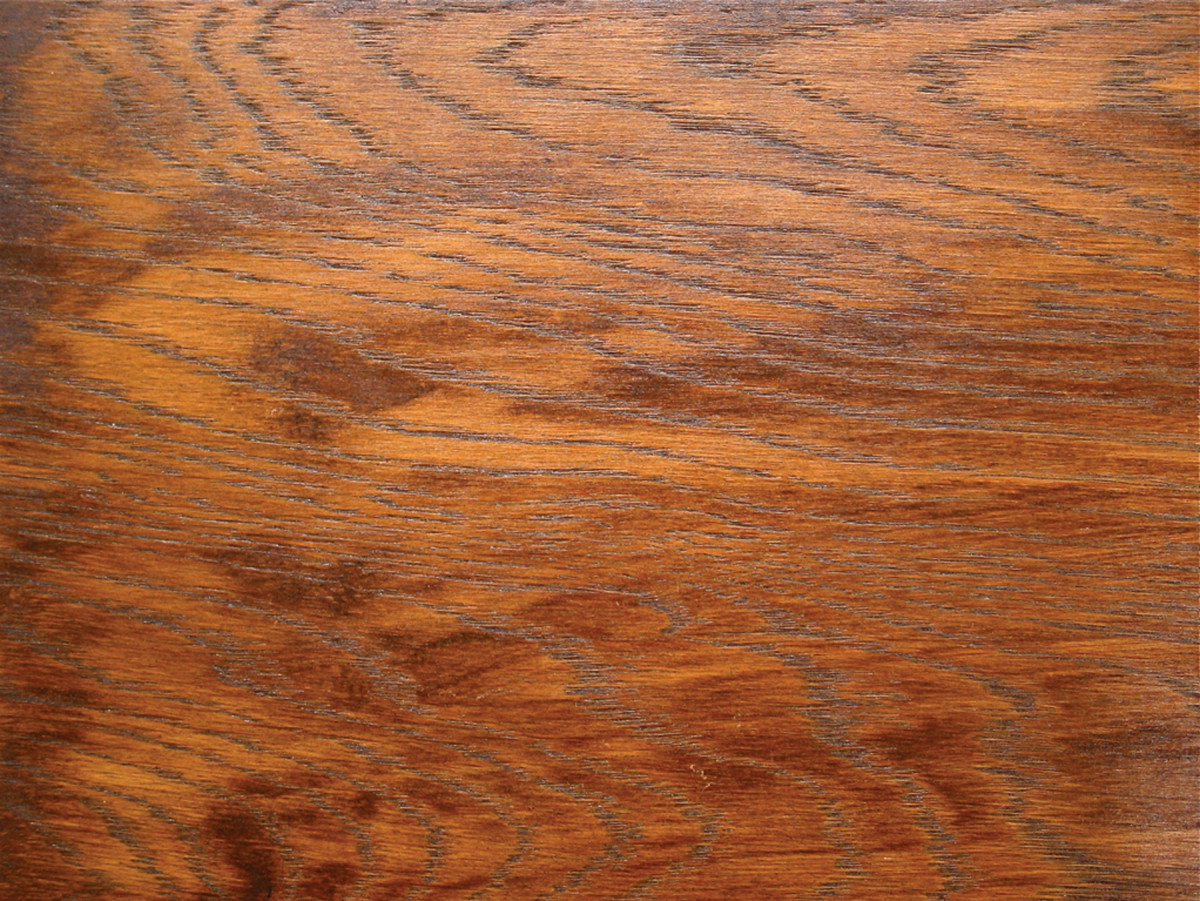
Blotching. The darker spots on this oak panel are areas where the stain dried before it was wiped off. To keep this from happening with fast-drying water-based and lacquer stains, work faster or on smaller areas at a time, or get a second person to wipe off quickly after you apply the stain.
Blotching is uneven stain coloring usually associated with uneven densities in the wood. (See “Battling Blotching in the finishing section at popularwoodworking.com/.) Blotching can also be caused by not getting all the excess stain wiped off before it begins to dry.
This would be very rare with an oil stain because the drying is so slow, but it is common with water-based stains and lacquer stains. (Lacquer stains are fast drying stains used by professional finishers who usually spray the stain and have a second person following closely behind wiping off.)
Once the blotching occurs, quickly apply more stain, or the thinner for the stain (water or lacquer thinner), to soften the hardened stain so you can wipe it off. If you use the thinner for the stain, you will lighten the color on the wood, and you may have to restain it.
To avoid the blotchy drying, work in smaller areas at a time, work faster or get a second person to wipe off.
Orange Peel
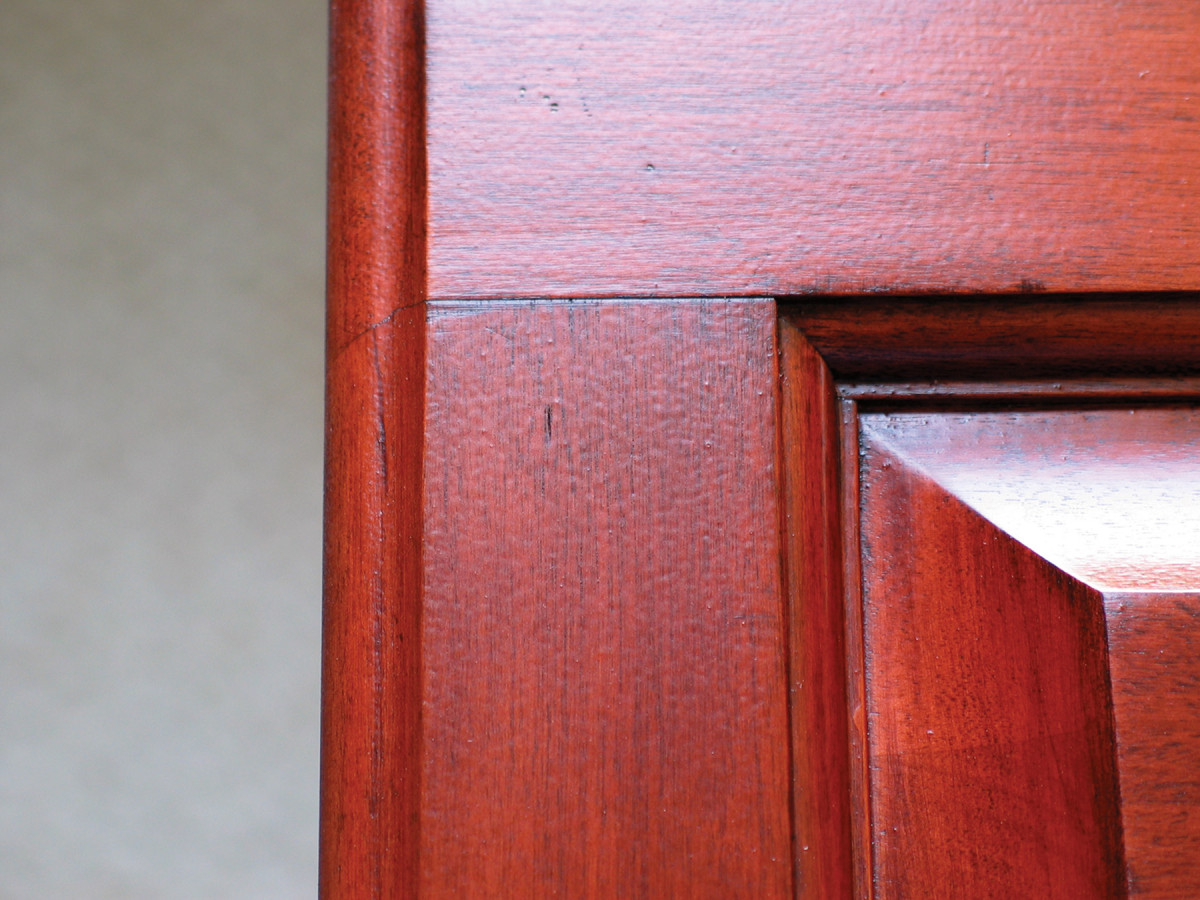
Orange peel. A common spraying problem is orange peel, caused by spraying too thick a liquid with too little air pressure, or moving the spray gun too fast or holding it too far from the work surface. To keep it from happening, thin the finish, increase the air pressure, and watch in a reflected light while spraying to get the speed and distance correct for the best results.
Orange peel is the spraying equivalent of brush marks left when brushing. It can occur with any finish and is usually caused by spraying too thick a liquid with too little air pressure. When stated this way, the solution is obvious: thin the liquid or increase the air pressure.
If you’re using a spray gun with air supplied by a turbine rather than a compressor, you won’t be able to increase the air pressure. You’ll have to thin the liquid.
Another cause of orange peel is holding the spray gun too far from the work surface or moving the gun so quickly that you don’t deposit a fully wet coat. The best way to determine the proper distance and speed is to watch what’s happening in a reflected light.
By positioning yourself so you can see a reflection on the surface, you will see when the finish is going on too thin and you can make the necessary adjustment.
Other than stripping, the only way to remove orange peel after it has occurred is to sand it out. Once you have leveled the surface, you can either rub it to the sheen (gloss, satin or flat) you want using abrasives, or spray another coat being sure to make the necessary adjustment so you don’t get orange peel again.
Fish Eye
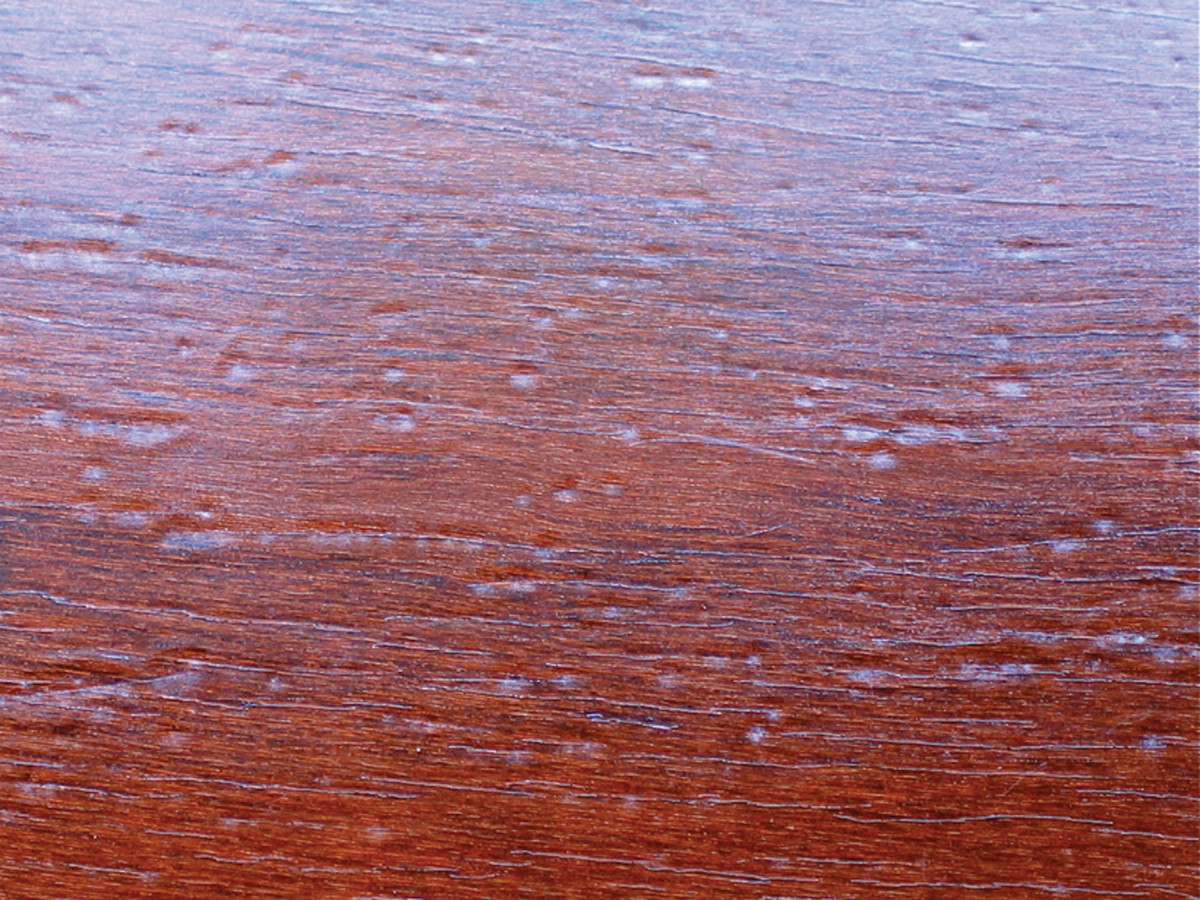
Fish eye. An increasingly common problem when refinishing furniture or woodwork is fish eye, or craters, which is usually caused by silicone-containing furniture polish having gotten through cracks in the finish and into the wood. Because it has already happened you have to deal with it. Do so by washing the stripped wood thoroughly, sealing the wood with a coat of shellac, and/or adding fish-eye eliminator (silicone oil) to the finish to lower its surface tension so it flows out level.
Fish eye, which is also referred to as “cratering” or “crawling,” is caused by a surface tension (slickness) difference between the finish and oil that has gotten into the wood. The oil that causes the greatest problem is silicone oil, contained in many furniture polishes, lubricants and skin-care products.
You’re unlikely to experience fish eye when finishing new wood, but it’s common when refinishing old wood and occurs most often when applying lacquer or varnish. To prevent fish eye, use one or more of the following procedures (for really bad cases of contamination you may need to use two or even all three).
■ Wash the bare wood thoroughly with mineral spirits or naphtha, or with household ammonia and water or a strong oil-removing detergent such as TSP.
■ “Seal in” the silicone oil by applying a first coat of shellac. It will flow over the oil in the pores and form a barrier so you can apply another finish on top.
■ Add a fish-eye eliminator, which is silicone oil sold under various trade names (the most common is “Smoothie”) to the finish. This lowers the surface tension of the finish enough so it flows over the oil already in the wood. When adding this product to varnish or polyurethane, thin it first in a little mineral spirits or naphtha, then add it.
Once fish eye has occurred, it’s usually best to wash off the finish with the appropriate solvent and start over, taking one or more of the precautions discussed above. Decide quickly, as “washing off” is easy if done right away, before the finish has totally set up.
Alternatively, you can sand out the craters and add silicone oil to your next coats. Or if you’re fast enough with sprayed lacquer, you can add silicone oil to your next coat and spray within a minute or two. Once you’ve added silicone oil to any coat, you have to continue adding it to each additional coat or it will fish eye.
Here are some supplies and tools we find essential in our everyday work around the shop. We may receive a commission from sales referred by our links; however, we have carefully selected these products for their usefulness and quality.


