We may receive a commission when you use our affiliate links. However, this does not impact our recommendations.
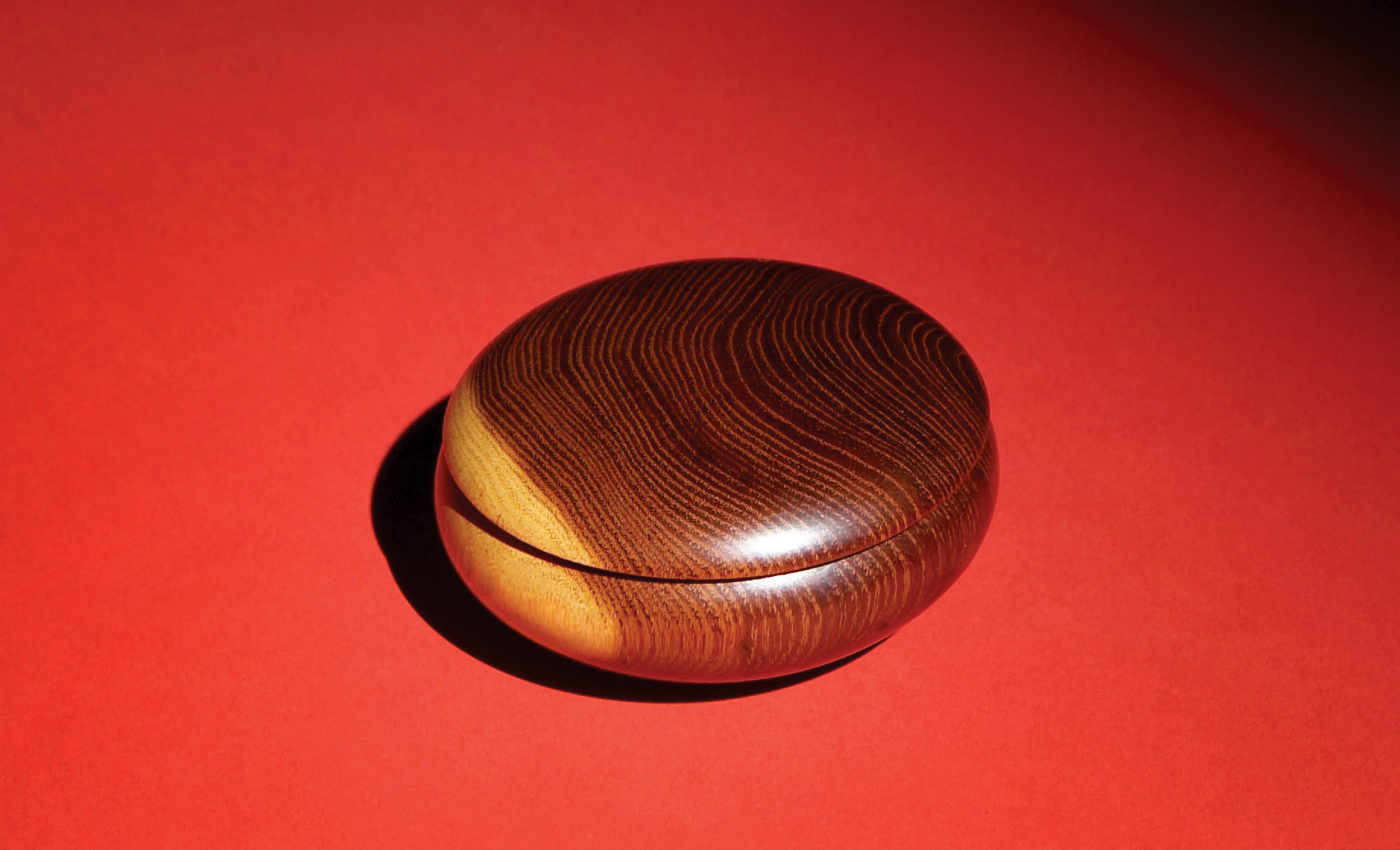
Marbled
Take a walk on the wild side of finishing.
I’ve got six good reasons to skip the stain and polyurethane on your next small project: bleached, blended, charred, marbled, salt and pepper, and iron and vinegar each name beautiful finishes for wood. These finishes are rarely seen on large pieces of furniture, however, because consistent results are difficult to achieve on large surfaces. But these finishes can produce spectacular results on small projects, where you can more easily control the consistency of the material (all parts made from the same piece of wood, for example) and the way you apply the finish. I’m a professional woodturner, so all of the projects shown here are turned. But these finishes can be successfully applied on virtually any small woodworking project.
Salt & Pepper
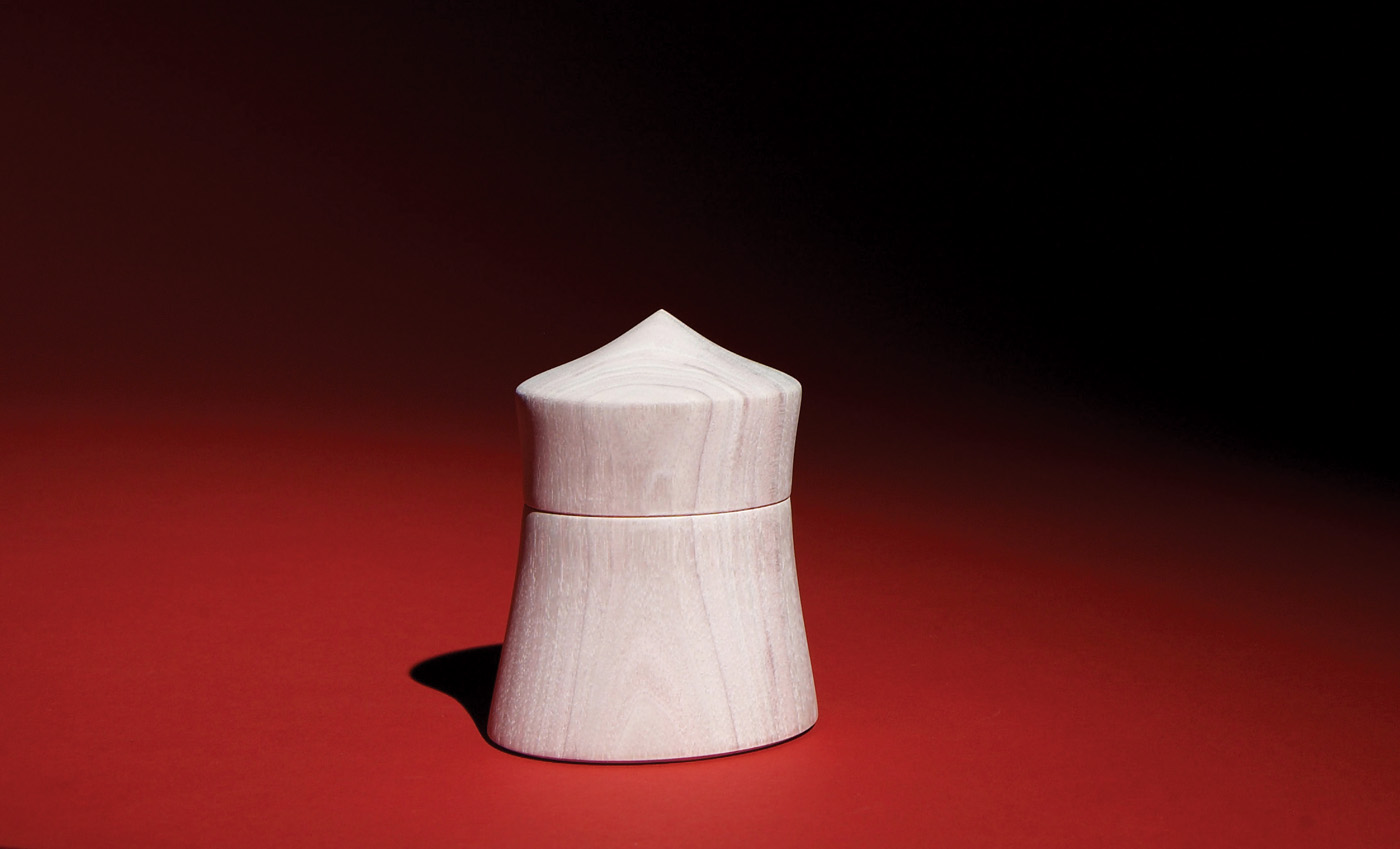
Bleached
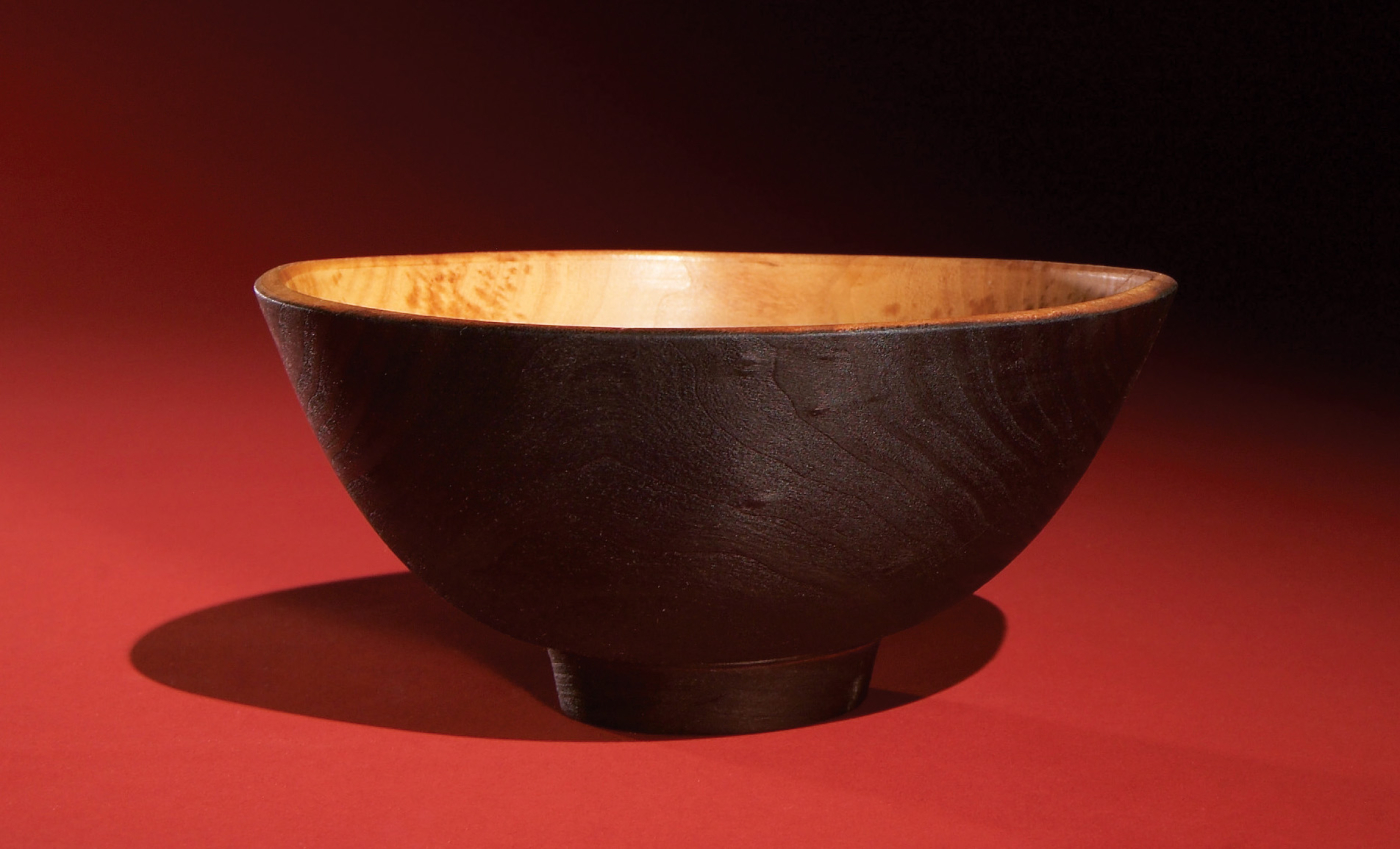
Charred
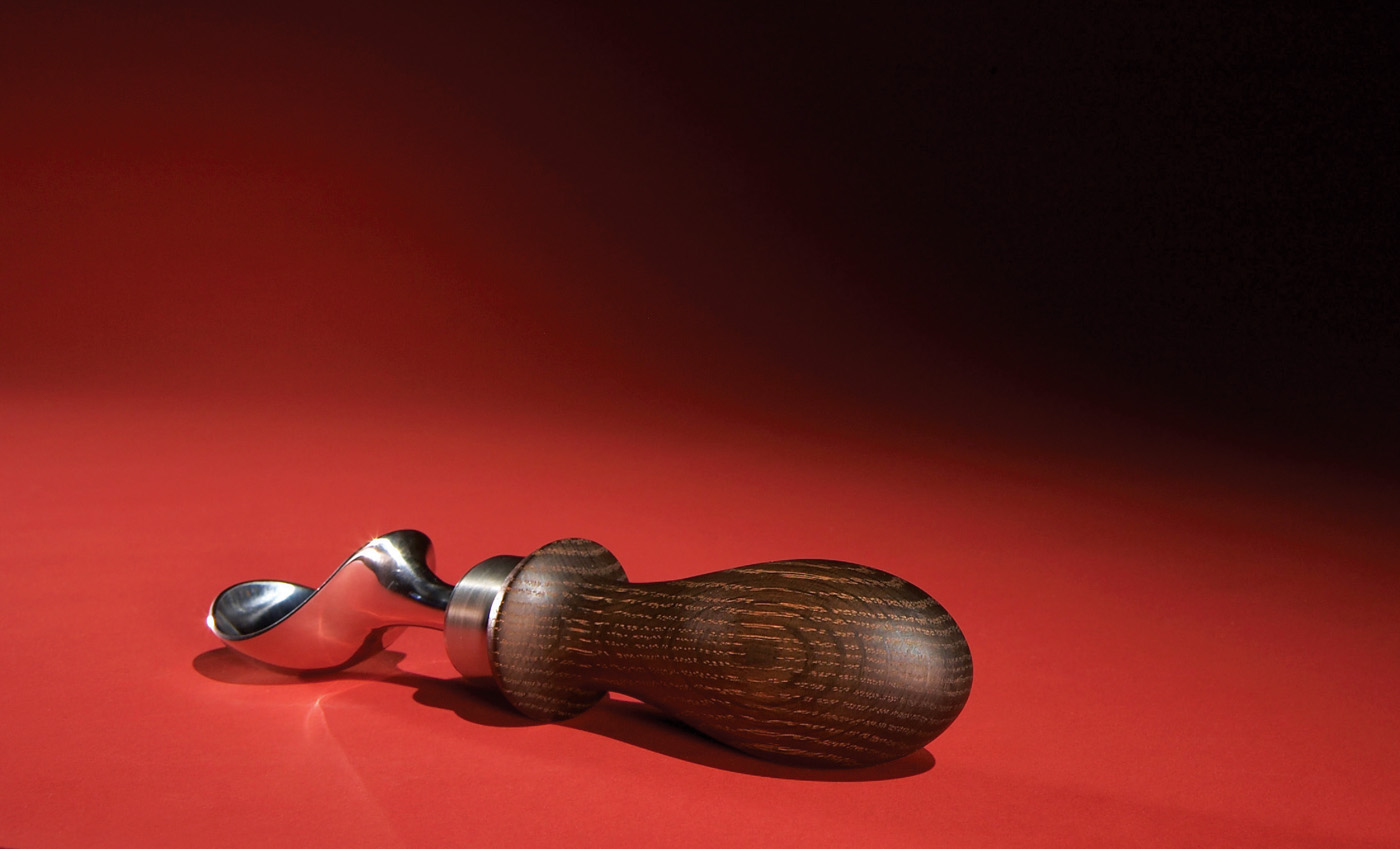
Iron & Vinegar
Blended
Salt & Pepper Finish
Any wood that has visible pores is a candidate for a two-color finish. The basic process is to stain the wood one color and then fill the pores with another color. Using black and white on walnut is one of my favorites. Walnut blackens beautifully and whitening its pores creates delicate, graceful grain patterns. If your project is a lidded box or container, add interest by leaving the inside a natural walnut color.
The technique
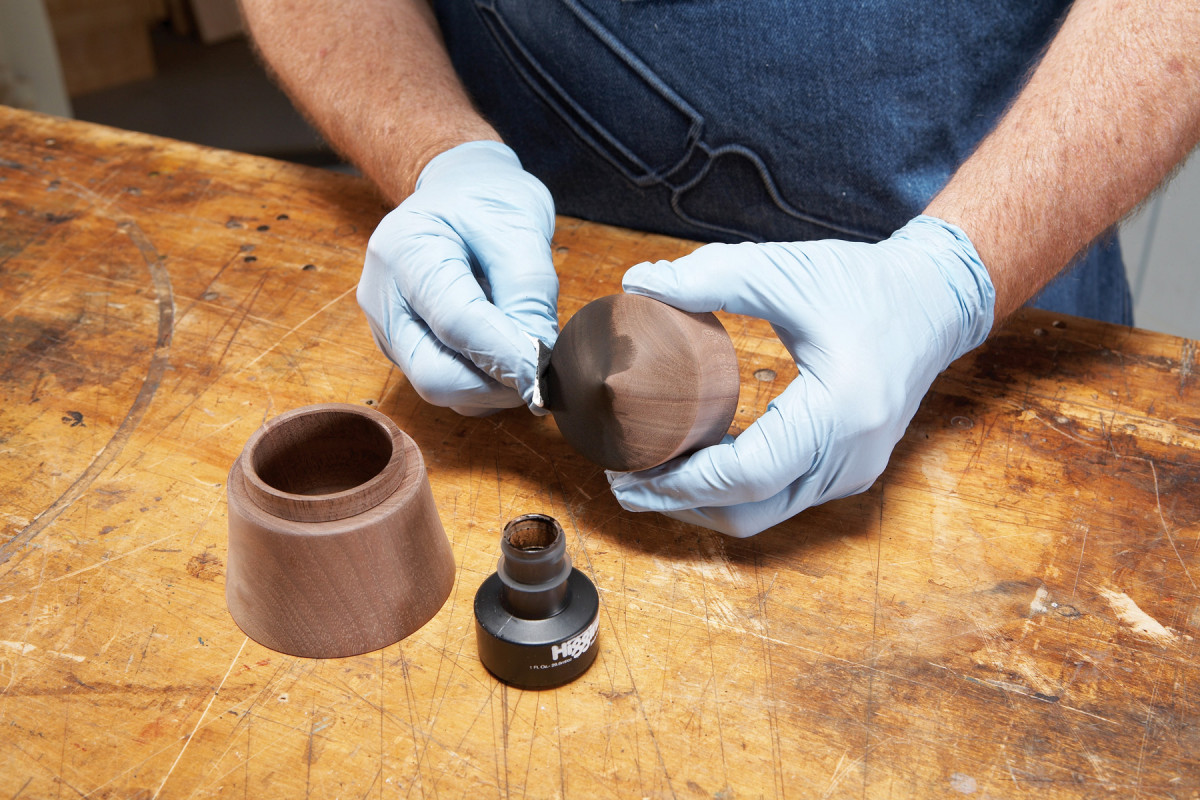
1. Apply India ink with a rag or brush. India ink is great for ebonizing wood.
Finish-sand the workpiece to 220 grit, making sure that no sanding scratches remain. Then apply coats of India ink (Photo 1). India ink is an excellent material for ebonizing wood—it’s easy to apply (wear gloves!), dries in less than half an hour and it won’t fade. Up to three coats of ink may be required to achieve a uniform black surface. Let the ink dry completely before recoating.
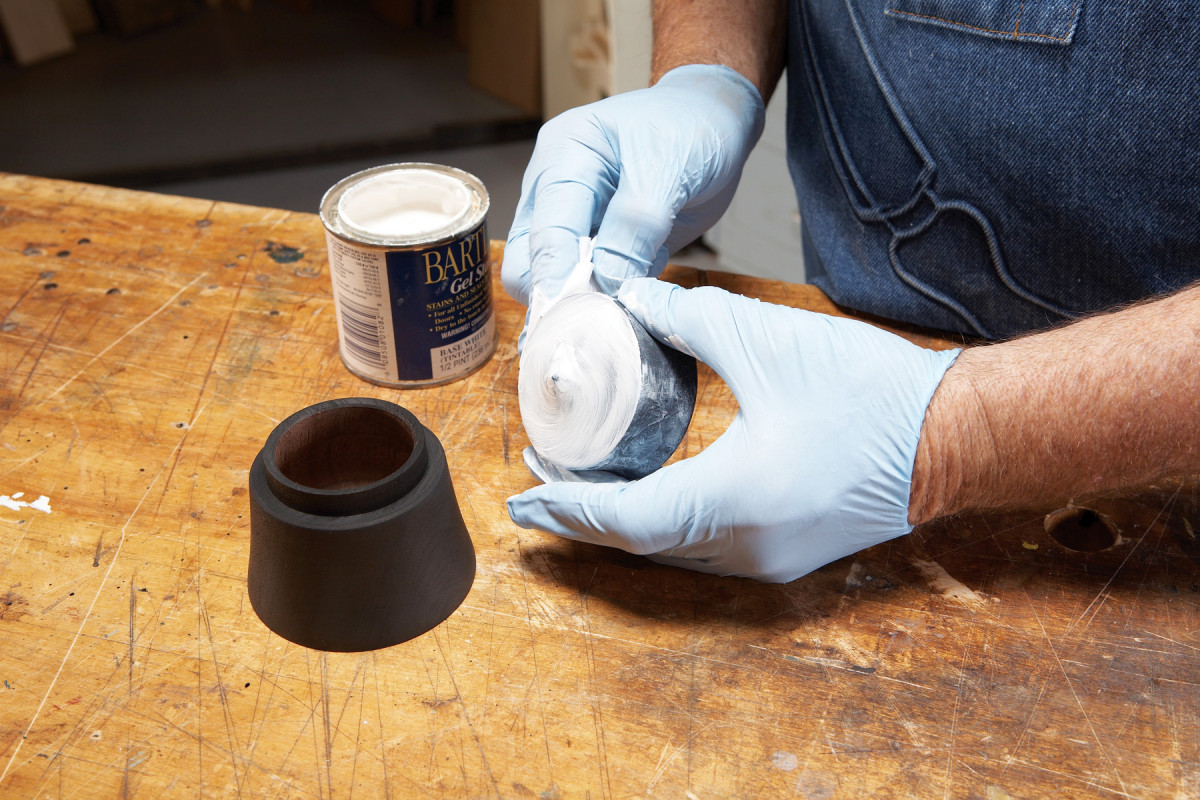
2. Wipe on white gel stain to fill the pores. Continue wiping until the stain is completely removed from the surface.
Color the pores with white gel stain (Photo 2). Apply the gel stain with a clean white rag. Cover the piece evenly, then immediately wipe across the grain to pack the pores and completely remove the excess stain from the surface. Allow the stain to dry completely. If the pores aren’t evenly filled, repeat the staining process.
Pale topcoats such as lacquer and blonde shellac help to preserve the white color in the pores. Do not use finishes that add an amber tone.
Bleached Finish
Bleaching often makes wood look lifeless, but I find its effect on walnut to be striking. I bleach walnut until it’s nearly white and then lightly sand the surface to bring back the ghost of the original color.
The technique
Two-part wood bleach from the paint or hardware store works the best. The two components are hydrogen peroxide and sodium hydroxide (lye), so be careful. Wear rubber gloves and eye protection and strictly follow the instructions.
Finish-sand the piece you want to bleach to 180 grit. Bleaching solutions contain lots of water, so it’s a good idea to preemptively raise the grain. Dampen the sanded piece with water, let it dry and then sand lightly with 180 grit to remove the raised fibers.
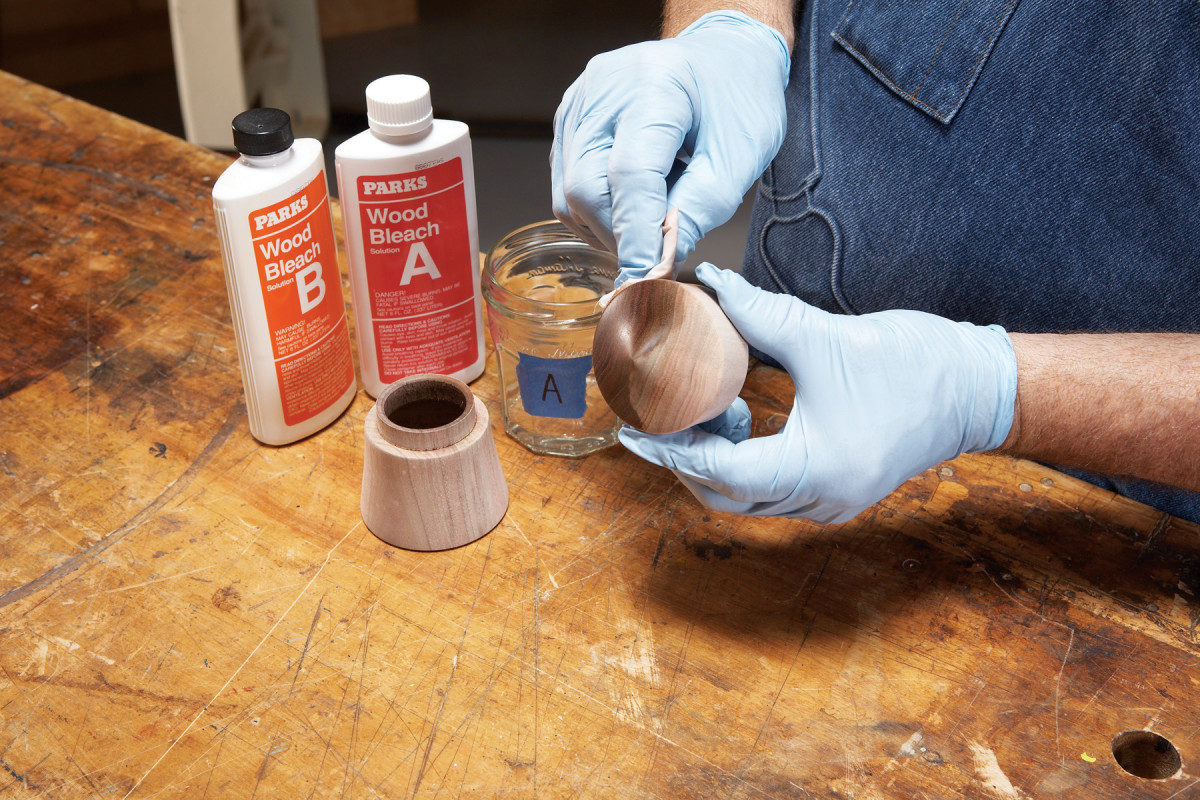
1. Remove the wood’s natural color with two-part wood bleach. Several applications may be necessary.
Don your protective gear and follow the manufacturer’s directions to apply the bleach. Some tell you to apply Part A, wait a few minutes, and then apply Part B; others tell you to mix the two parts together and apply the mixture. Wipe on a light coat of the solution (Photo 1). There’s no need to saturate the wood; just dampen the surface. Let the piece dry. Then repeat the process—it usually takes seven or eight applications to bleach walnut white. When you’re satisfied with the white color, wipe the piece with a damp cloth to remove any bleach residue. Then let it dry.
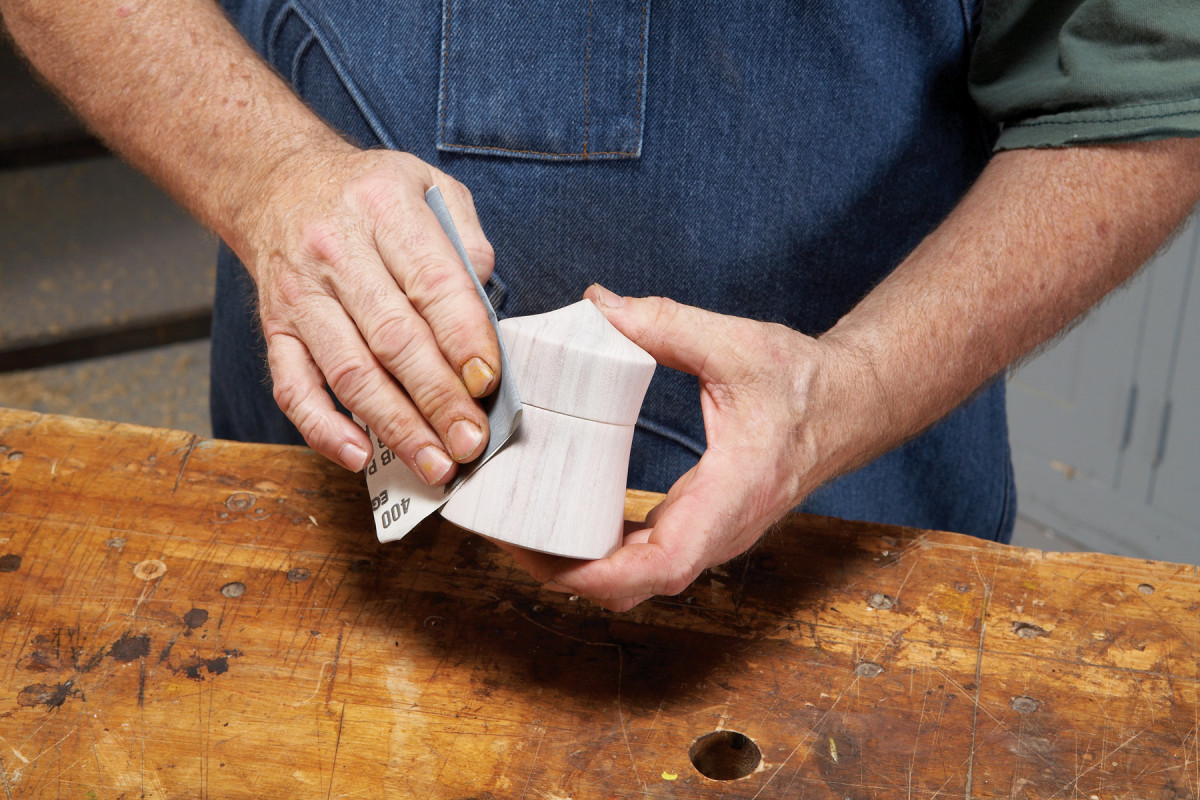
2. Sand lightly to ghost back the walnut color. Then apply lacquer, wax or a clear water-based finish.
Sand lightly with 320 to 400 grit to gently ghost back the walnut color (Photo 2). Then apply lacquer, wax or a clear water-based finish to preserve the bleached look.
Iron & Vinegar Finish
Woods that contain high amounts of tannic acid (such as white and red oak, cherry and walnut) can be ebonized by brushing on an acidic solution of iron and water. Depending on the species, the black color that results is likely to contain shades of brown, red or green. The coloring is usually uniform and consistent, without the blotching that sometimes occurs with oil-based wood stains. On oak and other woods that have large pores, the effect is particularly striking because the pores usually remain light in color.
The technique
In a glass container, immerse a pad of steel wool (steel is mostly iron) in white vinegar from the grocery store. Screw on the lid and allow the steel wool and vinegar to react for at least a day. Shake the solution occasionally.
Finish-sand the piece you want to treat to 180 grit. The iron and vinegar solution contains lots of water, so it’s a good idea to preemptively raise the grain. Dampen the sanded piece with water, let it dry and then sand lightly with 180 grit to remove the raised fibers.

1. Wiping a solution created by immersing steel wool in household vinegar onto woods that contain high amounts of tannic acid causes a chemical reaction that turns the wood black.
Apply the solution with a cloth. There’s no need to saturate the wood; a good dampening of the surface will do. On tannin-rich woods, the reaction can be instantaneous (Photo 1). Let the piece dry and then repeat the process. If the surface starts to feel rough, lightly sand between applications. Eventually the color will become uniformly dark; you can stop whenever you like, though. Sometimes a lighter shade of black looks great, so you may want to call it quits after one or two applications. When you’re satisfied with the color, wipe down the wood with a damp cloth to remove any residue from the solution. Let the wood dry before applying a finish. Oil finishes, wiping varnishes and oil/varnish finishes enhance this coloring process.
Charred Finish
Ebonized wood often isn’t pure black. Depending on the method used, the color usually includes shades of brown, red, purple or blue. A rich, deep, pure black is hard to achieve—unless you char the wood with a torch. This method works on any wood, although the results will look distinctively different from one species to another, depending on the character of the wood. Also, a uniform appearance is easier to achieve on face and edge grain than on end grain.
This finish is tricky because it’s fairly easy to overheat the wood and cause it to crack or ignite. End grain surfaces and thin pieces (less than 3/8″ thick) are especially vulnerable. It’s a good idea to develop your charring technique by practicing on pieces that aren’t “keepers.”
The technique
Finish-sand the piece you intend to char the same as for a clear finish—charring doesn’t cover sanding marks or torn grain as well as you might think. Work in an area free of combustible materials. Wear a heavy protective glove to hold the piece while charring its surface, and use a propane torch with an adjustable flame so you can control the heat level.
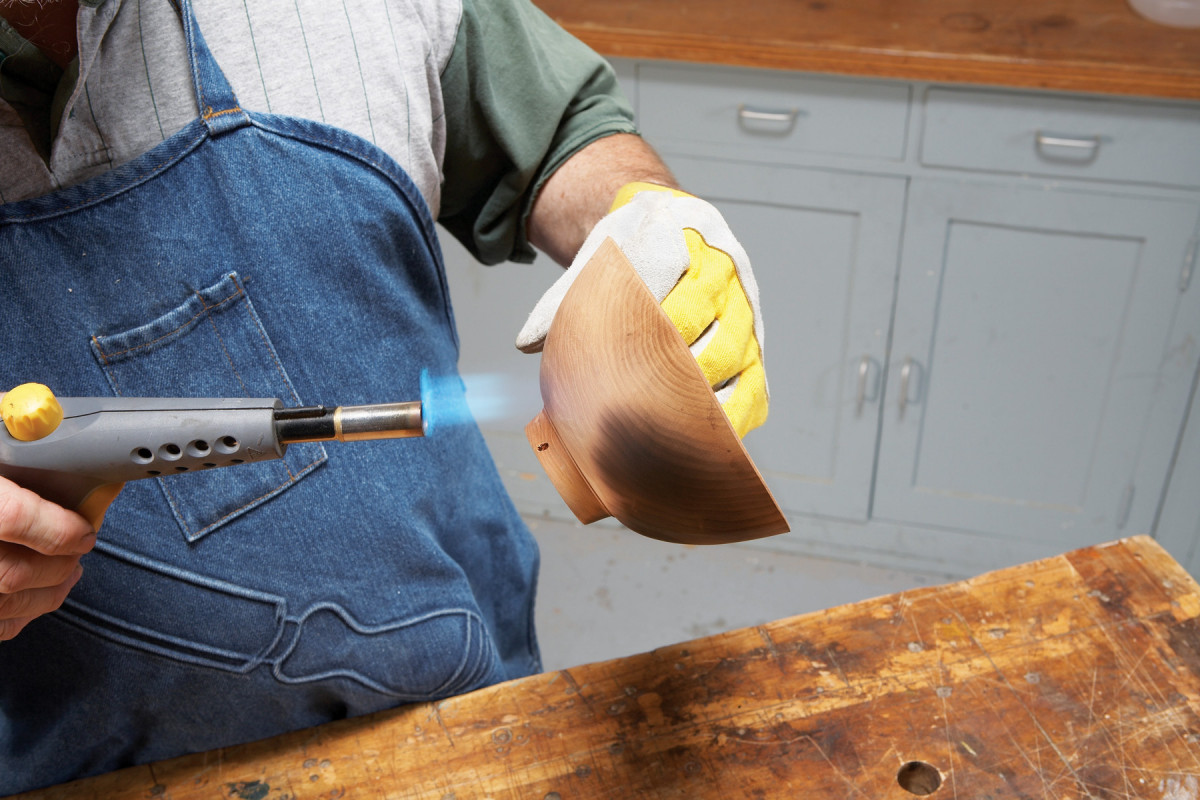
1. Lightly scorch the wood with a torch. Move the flame continuously and quickly so the wood doesn’t overheat.
The best approach is to char the wood to a uniform appearance in stages, stopping to brush off the burned debris between applications of heat. Start by lightly skimming the wood’s surface with the flame (Photo 1). Make slightly overlapping passes and move the torch continuously. If the wood ignites, simply blow out the flame and let the wood cool before resuming.
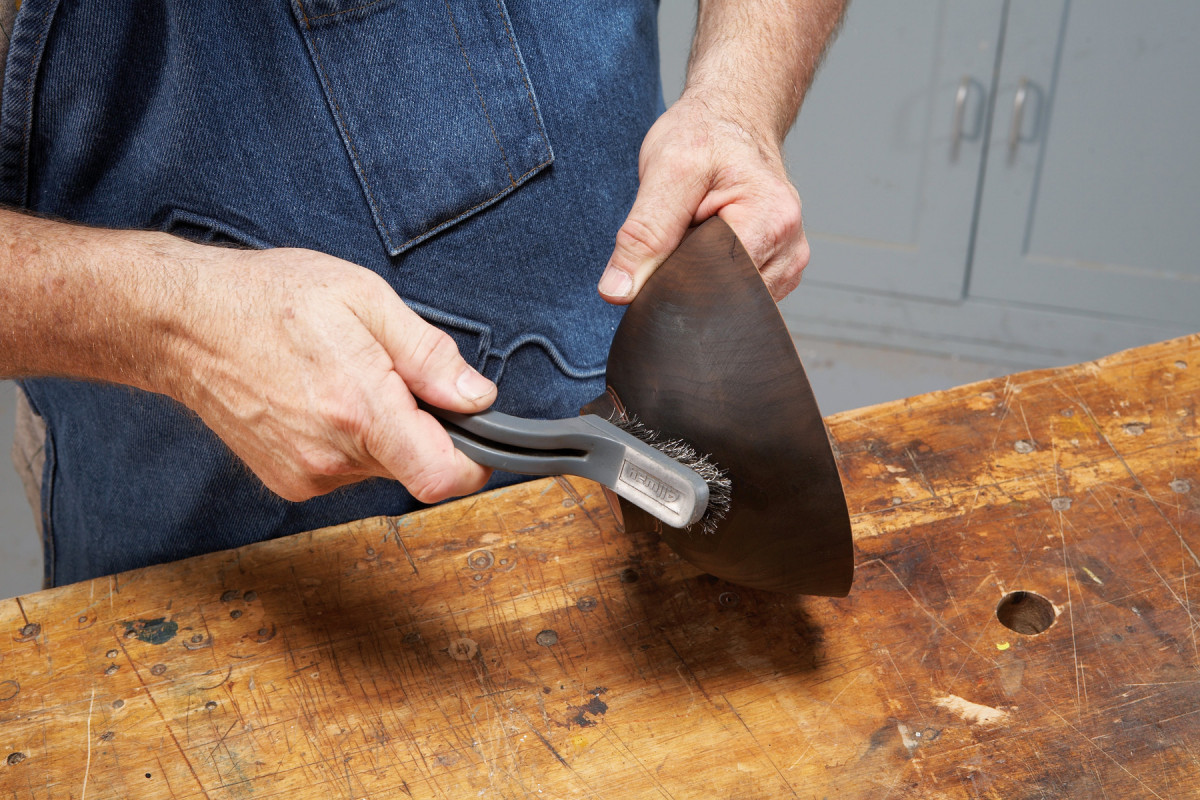
2. Brush off the loose debris with a soft bristle brush. Repeat the process, if necessary, to create a consistent black color. Then apply an oil finish to intensify the black.
After lightly charring the entire surface, let the piece cool, and then go over it with a soft metal brush to remove the ash and other completely burned debris (Photo 2). Brushing often accentuates the latewood, which is usually harder and more resistant to the flame than the earlywood. Torch and brush the entire surface a second time to make the charred color as uniform as possible.
The last step really brings out the rich, carbon-black color. After the piece has cooled, apply a coat of oil finish. I usually use boiled linseed oil or pure tung oil (both thinned by one-third with mineral spirits). Rags soaked with boiled linseed oil are flammable, so dispose of them properly.
Blended Finish
One of my all-time favorite finishes for dark woods is a blend of high-quality oils and varnish—it’s very similar to the finish espoused by master furniture maker Sam Maloof. This “hybrid” finish enriches the color of the wood, highlights the grain and gives the surface a beautiful luster without ever looking like built-up film finish. For my taste, however, its rather dark amber color adds too much yellow tone to light woods such as maple, holly and pine. This finish also dries very slowly—but I’m willing to wait for the rich, luxurious appearance it provides.
The technique
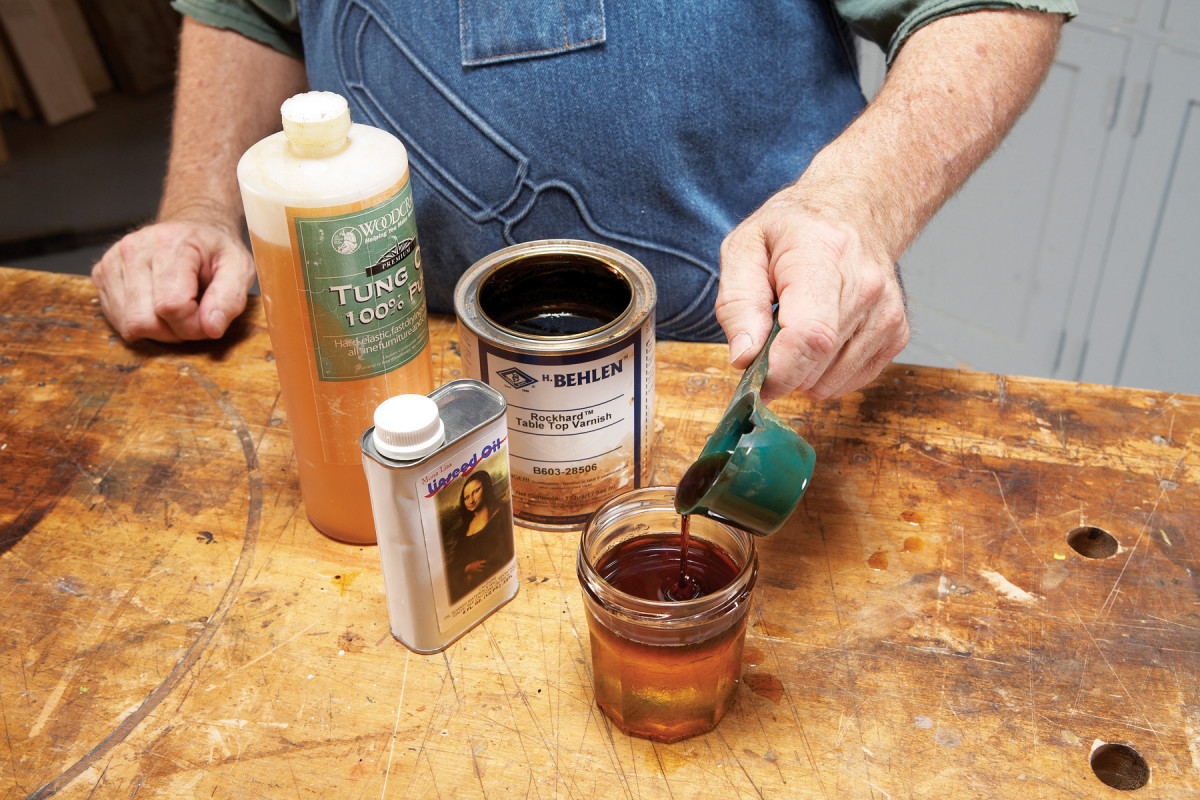
1. Mix equal parts pure tung oil, boiled linseed oil and gloss varnish. Premium ingredients are the key to this finish.
Premium ingredients are the key to this finish, which consists of equal parts 100% pure tung oil, boiled linseed oil and gloss varnish with a high resin content, such as Behlen Rockhard Table Top Varnish. This finish has a relatively short shelf life—it thickens with exposure to air (even the air inside a closed, half-filled container), and eventually becomes unusable. So mix the three ingredients in small batches (Photo 1). To make this finish easier to use on large surfaces, add small amounts of mineral spirits, naphtha or turpentine to reduce its syrupy consistency.
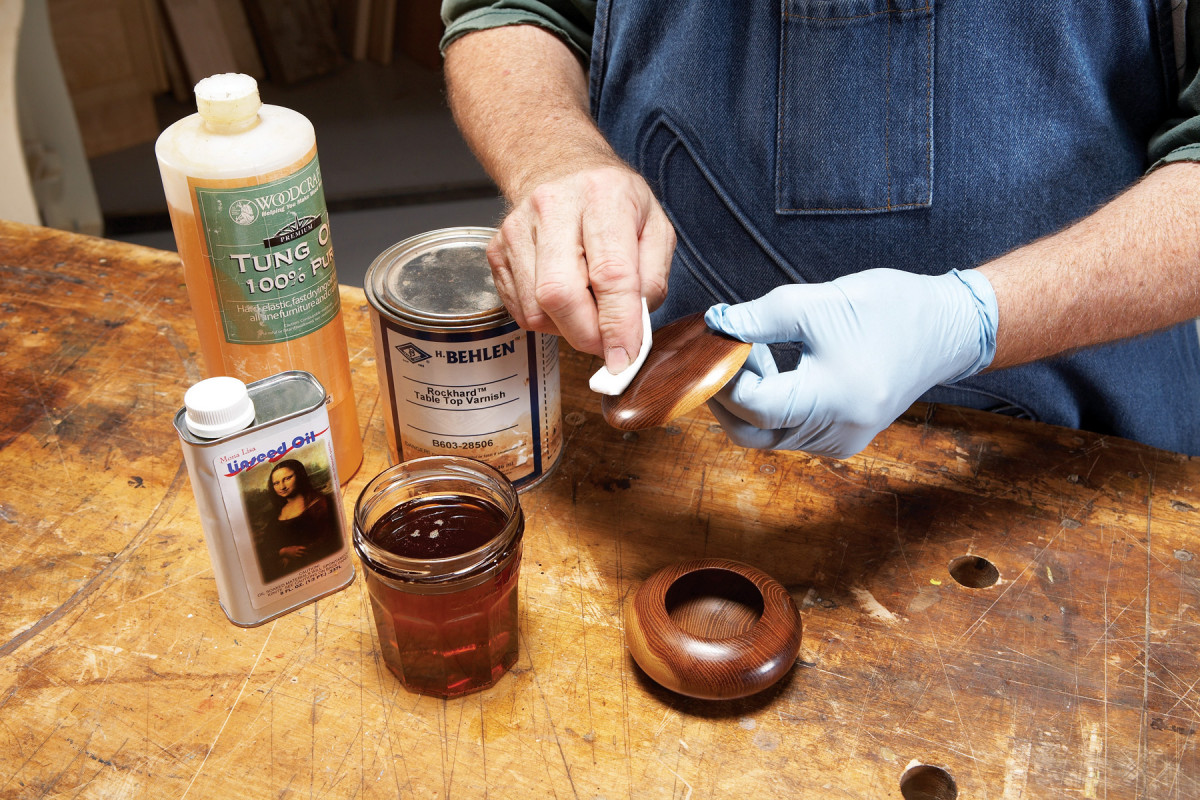
2. Apply an even coat of finish and then wipe the surface dry. The lustrous appearance develops as additional coats are applied.
Finish-sand the workpiece to 220 grit. Then wipe on the finish with a lint-free cloth (Photo 2). As soon as the piece is evenly coated, use a clean cloth to wipe the surface dry. After 30 minutes, wipe down the surface again to make absolutely sure that no residue remains. Move the piece to a dust-free area to dry. Note: The finish-soaked rags are likely to spontaneously combust, so dispose of them immediately and properly.
After two or three days, gently rub the piece with very fine abrasive wool (steel or synthetic) to remove any roughness, dust or residue from the surface. Then apply additional coats of finish, following the same procedure. The first few coats add little sheen—they look pretty much like an oil finish. But eventually the finish will build and the luster will develop. The more coats you apply, the higher the sheen. I normally stop when the finish has a soft, warm glow. Let the finish cure for several weeks before buffing to brighten the sheen, or rubbing to dull it. I usually buff my pieces with a soft towel or rub them with abrasive wool.
Marbled Finish
The process of floating colors on water, creating patterns and then capturing those patterns on paper or fabric probably originated somewhere in the Orient. Called “marbling,” this process traveled westward through India, Persia and Turkey before arriving in Europe in the 17th century.
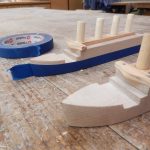
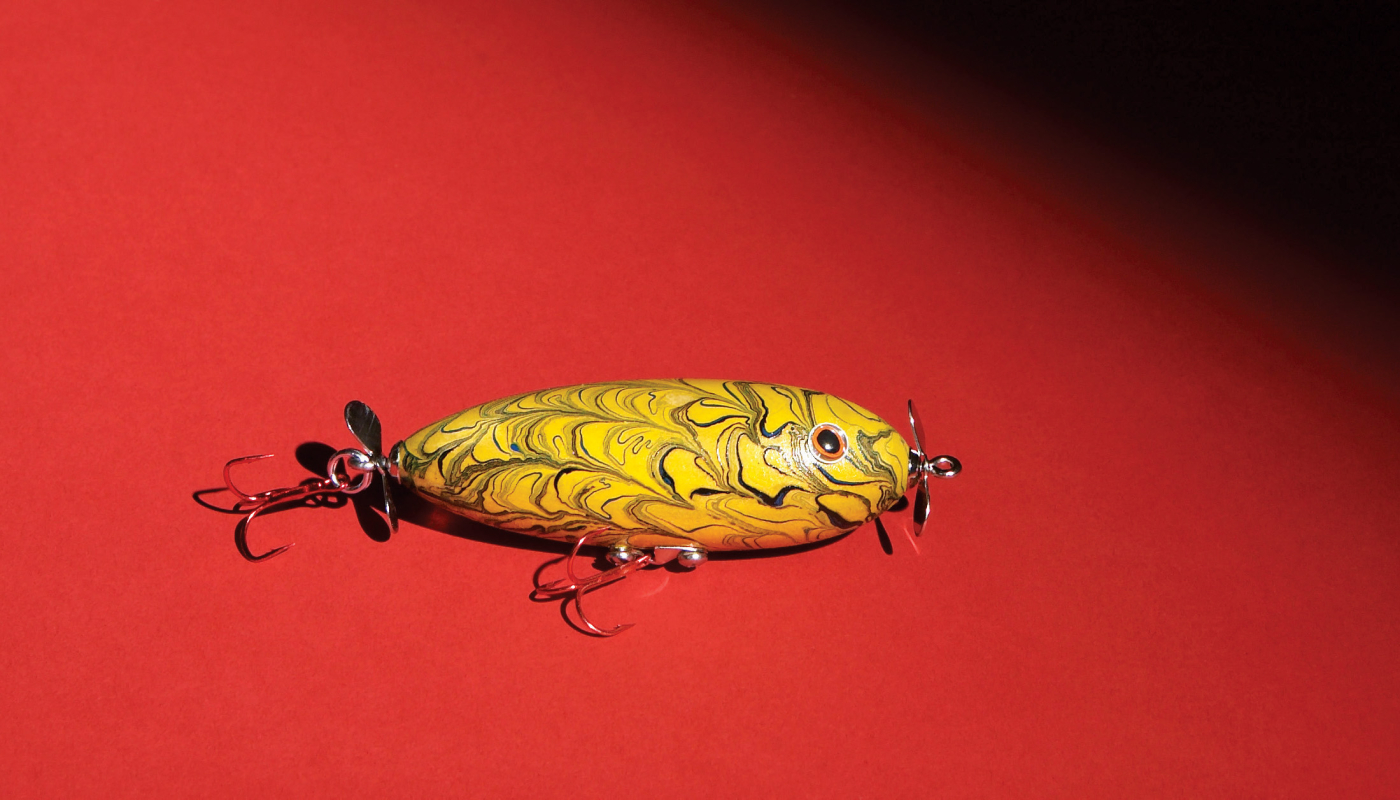
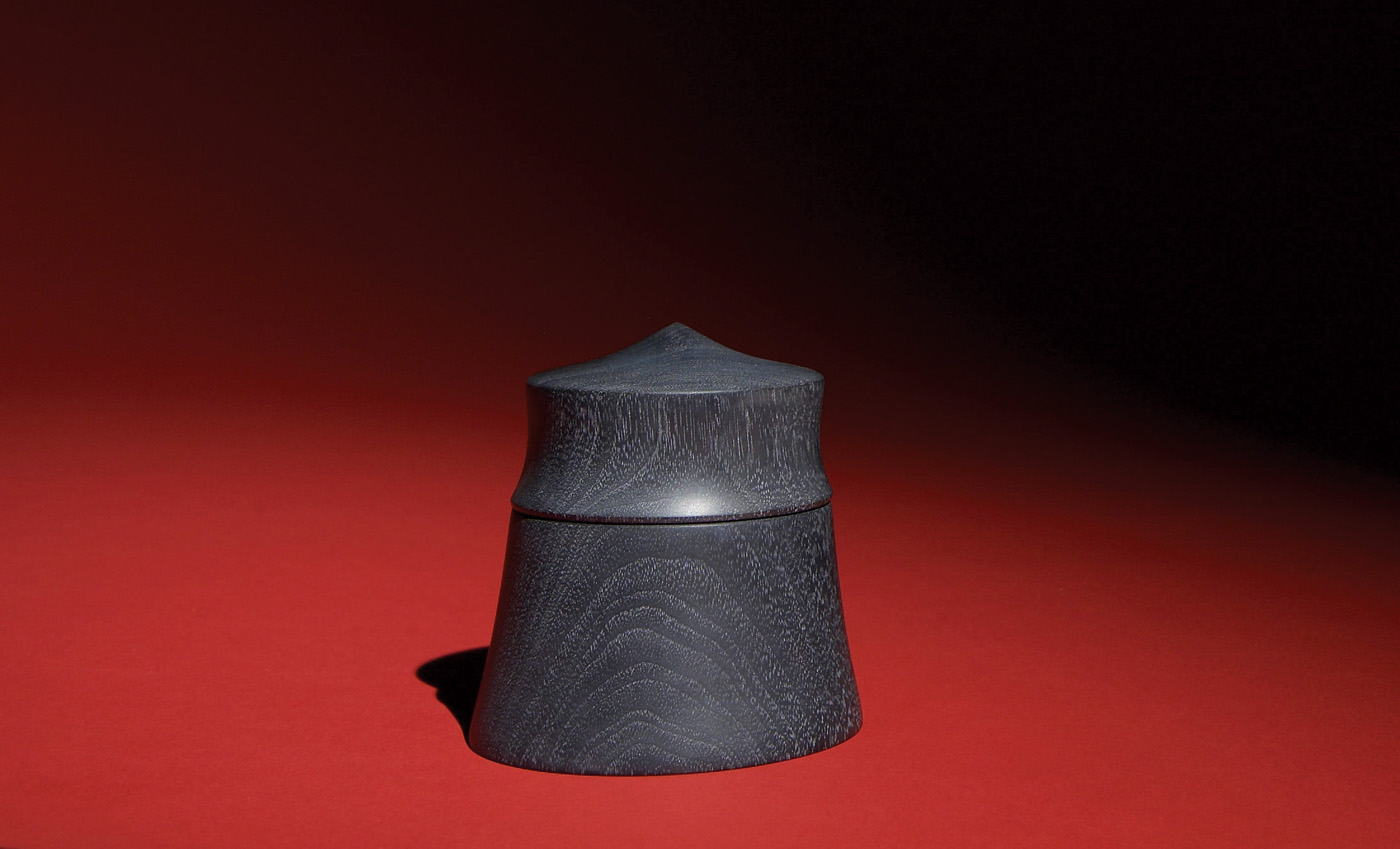
Marbling three-dimensional objects is less common, although it has appeared on vases, bowls, boxes and even fishing lures. Learning how to marble flat and rounded surfaces offers unique coloring opportunities for wood.
A variety of variables affects the process and its success, so it’s best to learn the basics using sheets of 4″ x 6″ paper. Chemical contaminants, air pockets, dust, improperly mixed colors, temperature and humidity are all factors that can frustrate the marbling process.
Liquid acrylic paints, carrageenan, alum and other marbling supplies are available at art supply vendors such as www.wetpaintart.com. You’ll need a blender to mix the carrageenan solution (it’s food-safe, so no worries if you borrow Mom’s), distilled water to thin the acrylic paints and glass jars (a pint jar for the alum solution and a gallon jar for the carrageenan solution). You’ll also need a palette, a shallow tray, foam brushes, measuring spoons, rubber gloves, eyedroppers (one for each color, plus one for the distilled water), toothpicks, foam board, a bunch of 2″ wide newspaper strips and practice paper (65 lb. to 75 lb. weight, and not too slick).
The technique
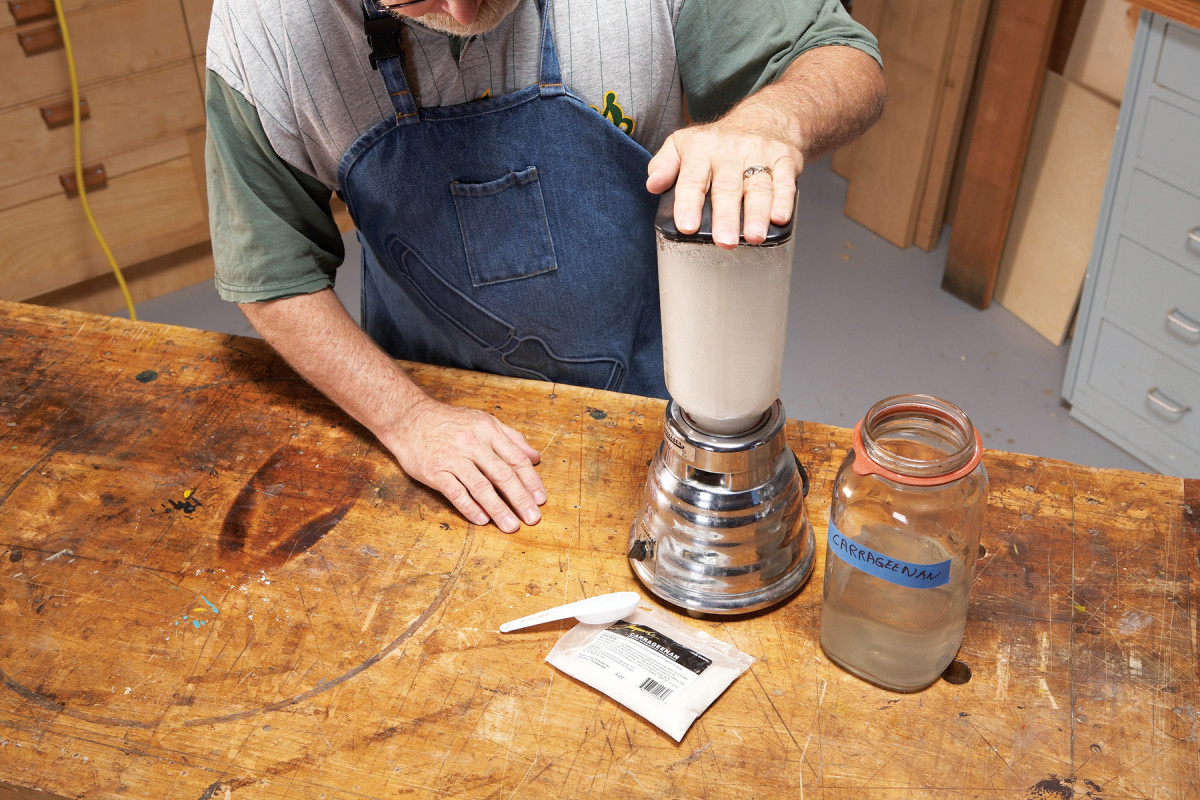
1. Create a solution that’s thick enough to float the acrylic paint used for marbling. Mix carrageenan and water in a blender. Let this solution sit overnight. Then pour it into a large shallow tray.
Mix the carrageenan solution the day before you plan to marble (Photo 1). Follow directions on the bag, usually 2 tablespoons per gallon of distilled water. The solution has a two to three day shelf life, so prepare only as much as you’ll need. Mix the solution in a blender for at least one minute. Then set it aside.
Finish-sand the pieces you plan to marble to 180 grit and preemptively raise the grain. Dampen the sanded pieces with water, let them dry and then sand lightly with 180 grit to remove the raised fibers.
The next day, mix the alum solution in very hot tap water, according to the package directions (usually 2 teaspoons per pint). Allow this mixture to cool before using it. In fact, make sure that everything you’ll use (the solutions, the paints, the water, the pieces you plan to marble, etc.) is at the same (room) temperature.
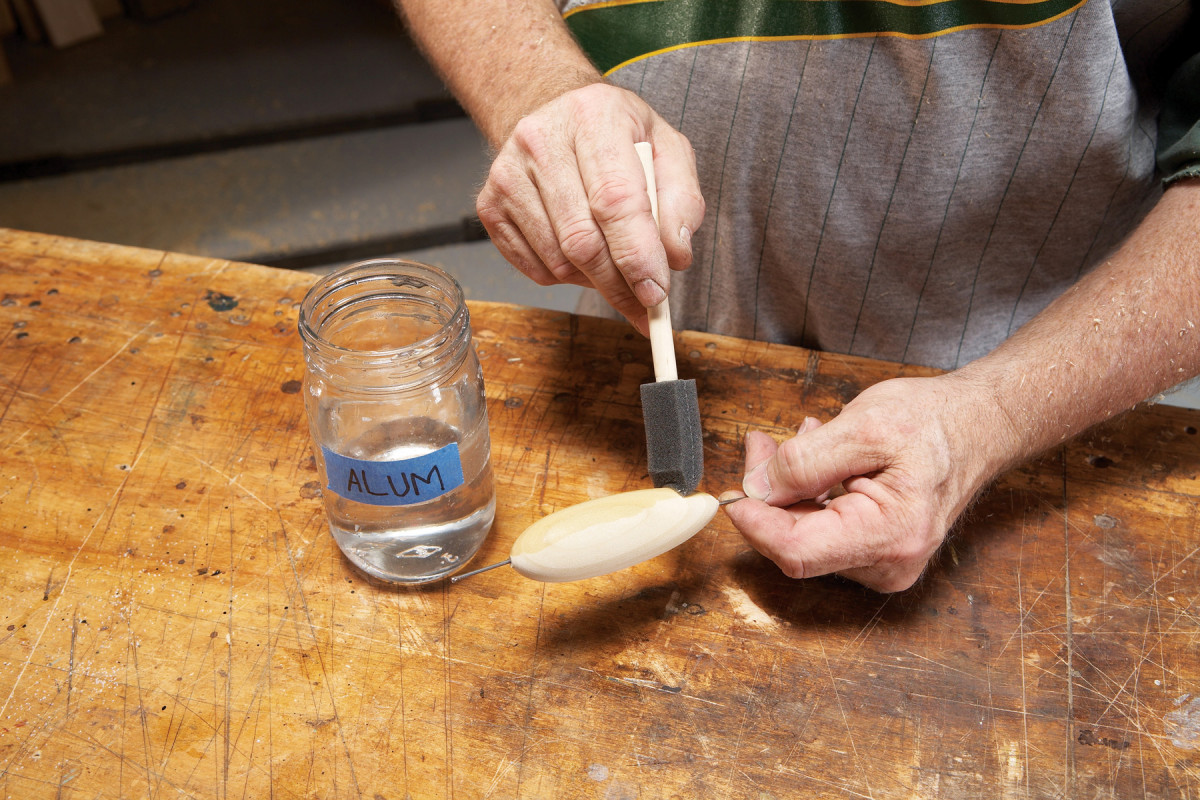
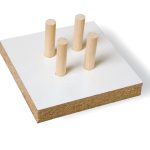
2. Coat the piece you plan to marble with a solution of alum to prime it for marbling. Don’t touch the primed surface.
Find a dust-free area for marbling. Pour the carrageenan solution into the marbling tray to within about 1/4″ of the top. Use the foam brush to coat the paper (one side only) or the pieces that you plan to marble (completely) with the alum solution (Photo 2). The alum solution works like a paint primer to help the acrylic colors stick to the surface. It’s a good idea to wear rubber gloves for this step because you should never touch the alum-treated surfaces with your bare hands—touching may affect the adhesion of the paint. Set the primed pieces aside to dry for about an hour.
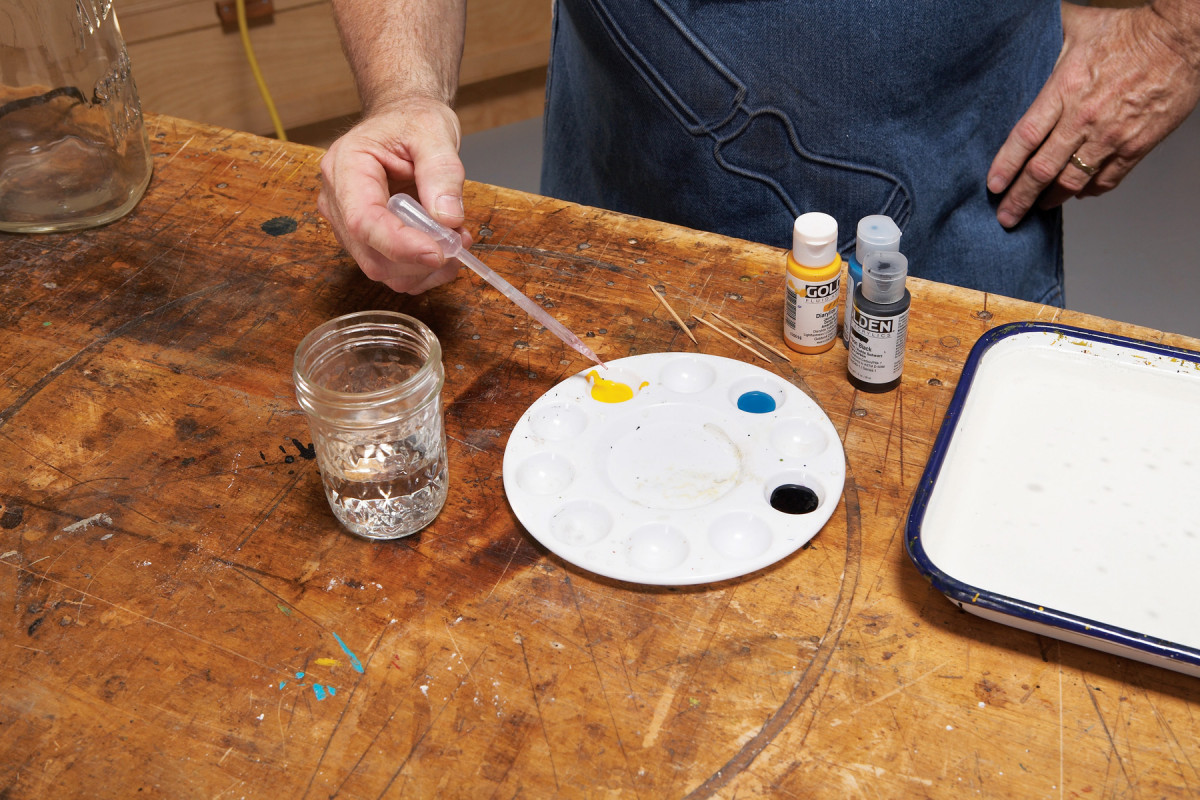
3. Thin acrylic paint with distilled water so it will float on the surface of the carrageenan solution.
Choose the acrylic colors you plan to use and thin them with distilled water to the consistency of whole milk so they’ll float on the surface of the carrageenan solution. It’s best to limit the number of colors for your first marbling attempts. One of my favorite combinations is is simply black and white. An inexpensive plastic palette is great for mixing the paints (Photo 3). Shake the bottles to mix the paint and squeeze some of each color that you’ve chosen onto the palette. Then use eyedroppers to add the distilled water.
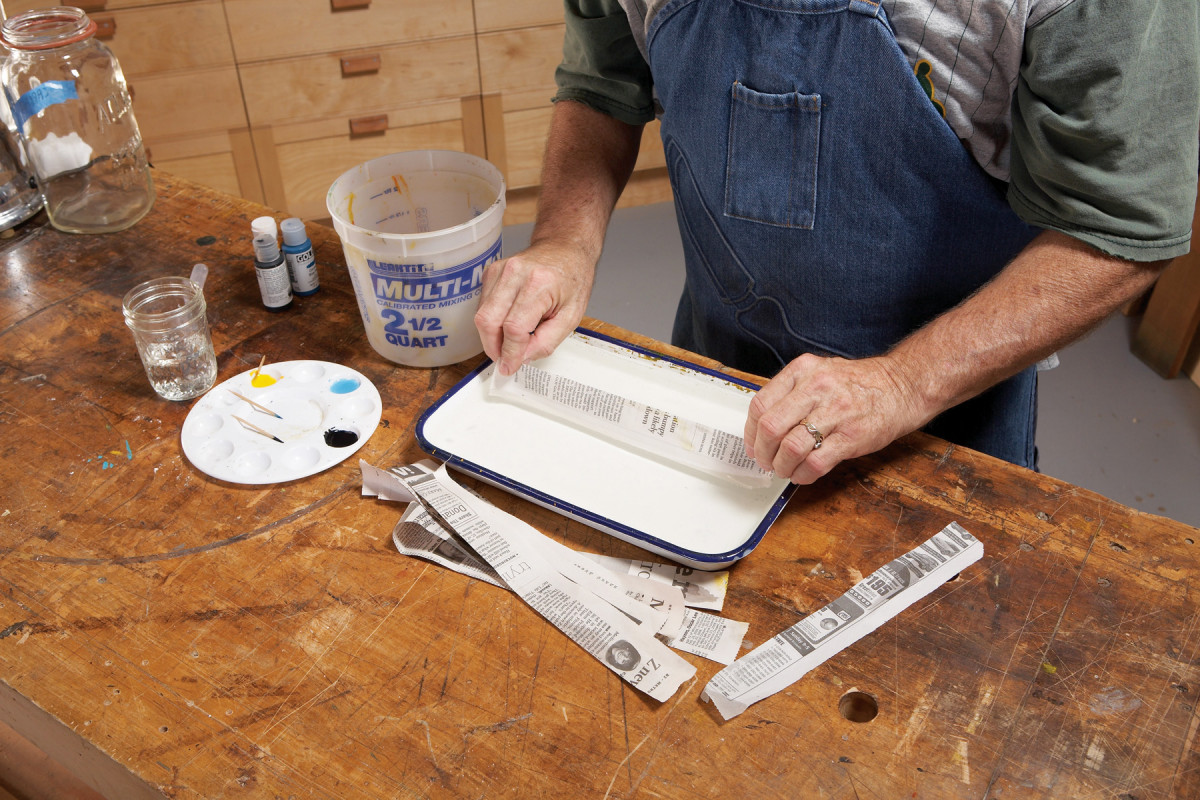
4. Clean the surface of the carrageenan solution just before adding the paint by skimming it with newspaper strips.
Mix the thinned paint by stirring with a clean toothpick. Just before you drop the paint onto the carrageenan solution, skim its surface with a strip of newspaper (Photo 4). Skimming removes dust and other floating imperfections that can cause “bald spots” on the marbled surface.
Dropping the paint onto the carrageenan solution is one of the most critical—and unpredictable—steps in marbling. Using an eyedropper, gently squeeze a drop of color onto the center of the solution. Avoid creating bubbles when you squeeze. The drop should immediately disperse across the surface. If it sinks to the bottom of the tray, the paint is too thick—thin it further and try again. (Paint drops on the bottom will cause no harm, as marbling occurs on the surface.)
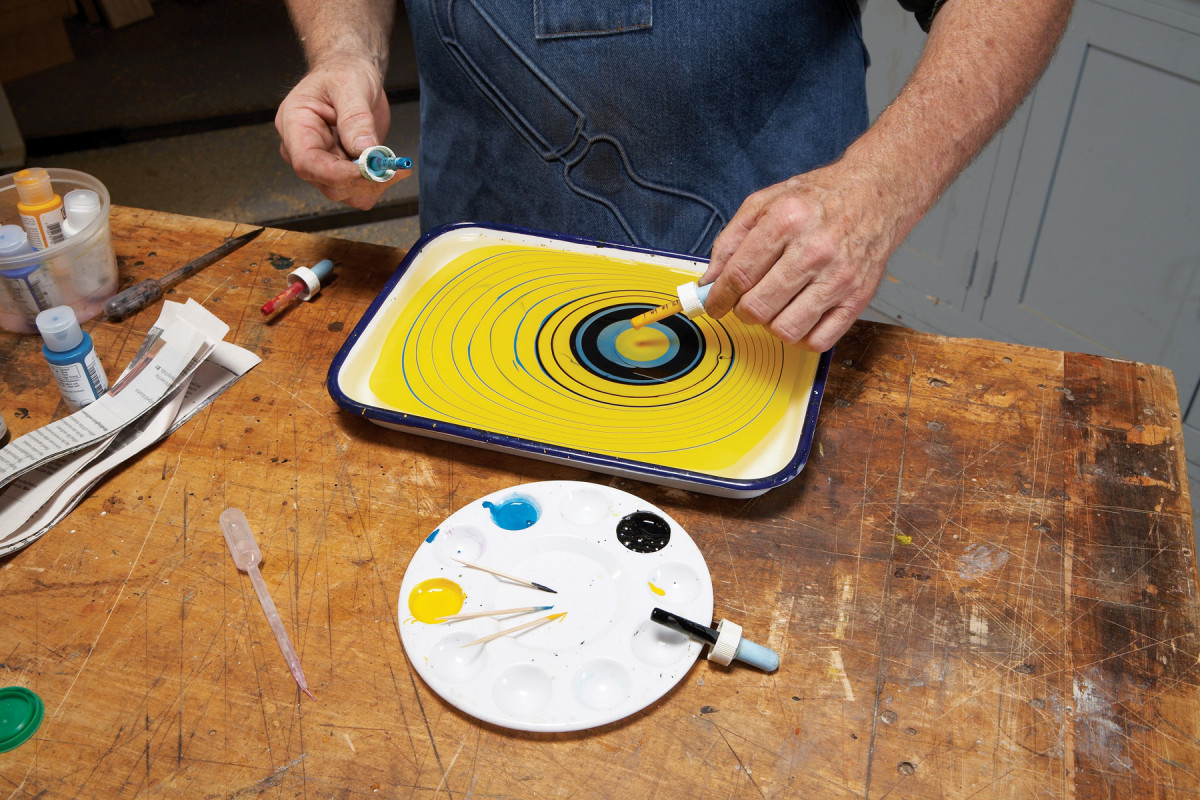
5. Gently squeeze drops of acrylic colors onto the carrageenan solution. The colors disperse across surface, forming rings.
Using a different eyedropper, gently squeeze a drop of the next color onto the dispersed color. As each drop disperses, it creates a ring where it meets the previous drop. Alternate squeezing drops of different colors until the surface is covered with rings (Photo 5). You’ll learn that some colors disperse more aggressively than others—experimenting with different colors is one good reason to practice on sheets of paper.
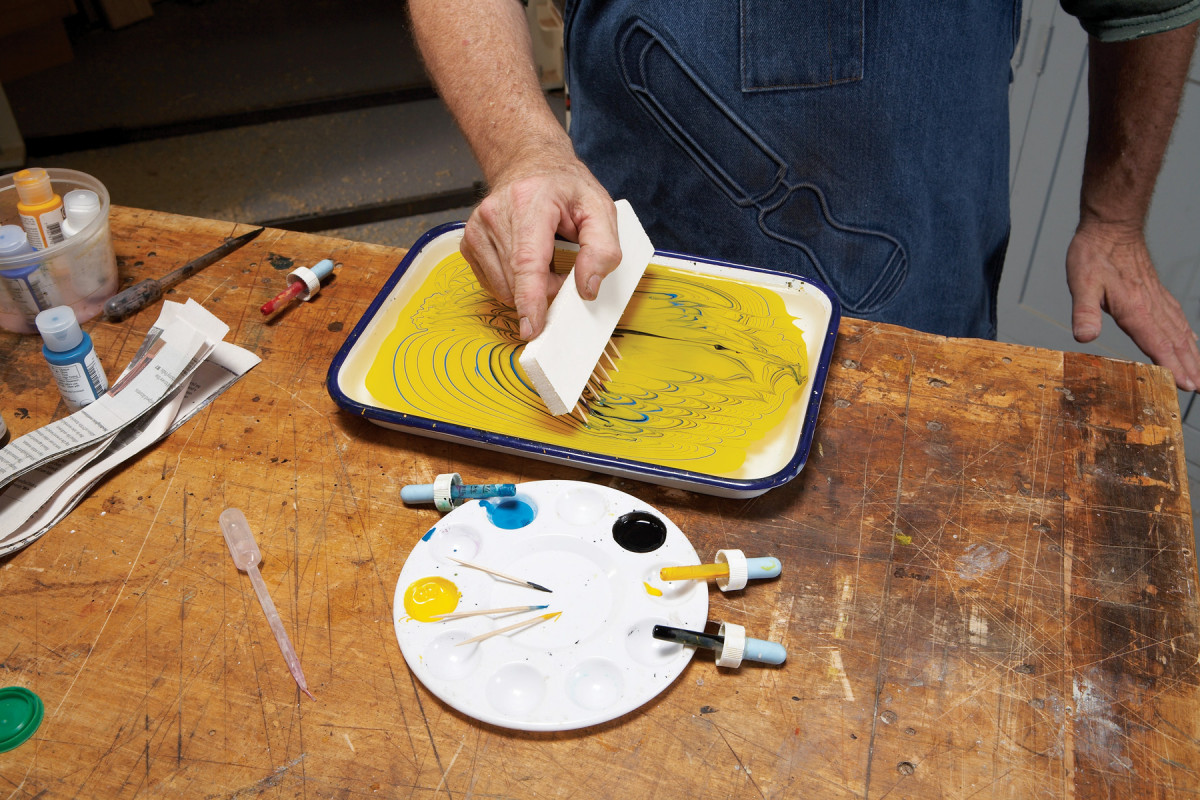
6. Use a patterning tool to comb the layers of paint into interesting patterns. This tool is made from toothpicks and foam board.
Creating patterns in the floating colors is, perhaps, the most mesmerizing step in the process. You simply pull patterning tools slowly and gently through the paint (Photo 6). Effective patterning tools can be made from nothing more than toothpicks and foam board. Varying the spacing between toothpicks is one simple way to modify the patterns you create.
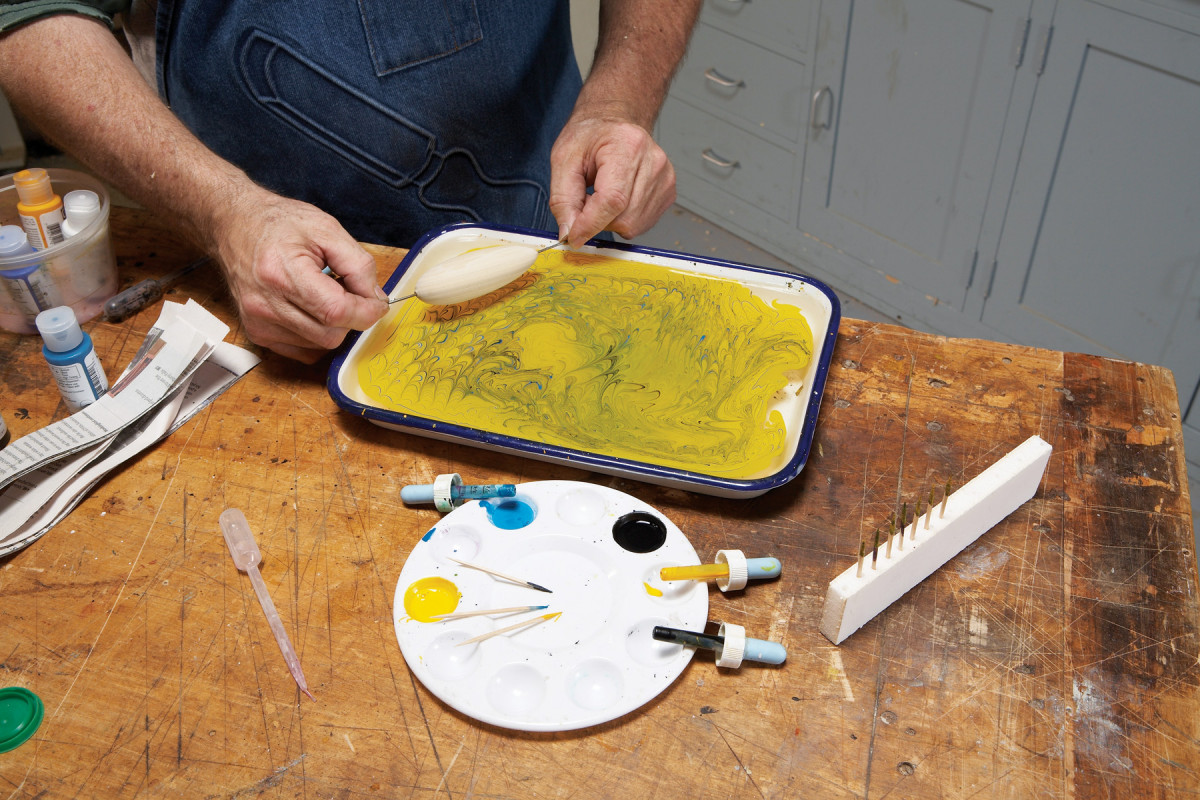
7. Position the workpiece over a paint pattern that you like.
Pull the tool straight across or move in waves, loops or zig-zags. Make separate passes that overlap. Use a stylus such as a cat’s whisker or a hatpin to create delicate patterns and swirls that are more spontaneous and free-form. Once again, experimenting is important because you’ll learn how to make and recognize patterns in the paint that will create interesting marbled effects on your projects.
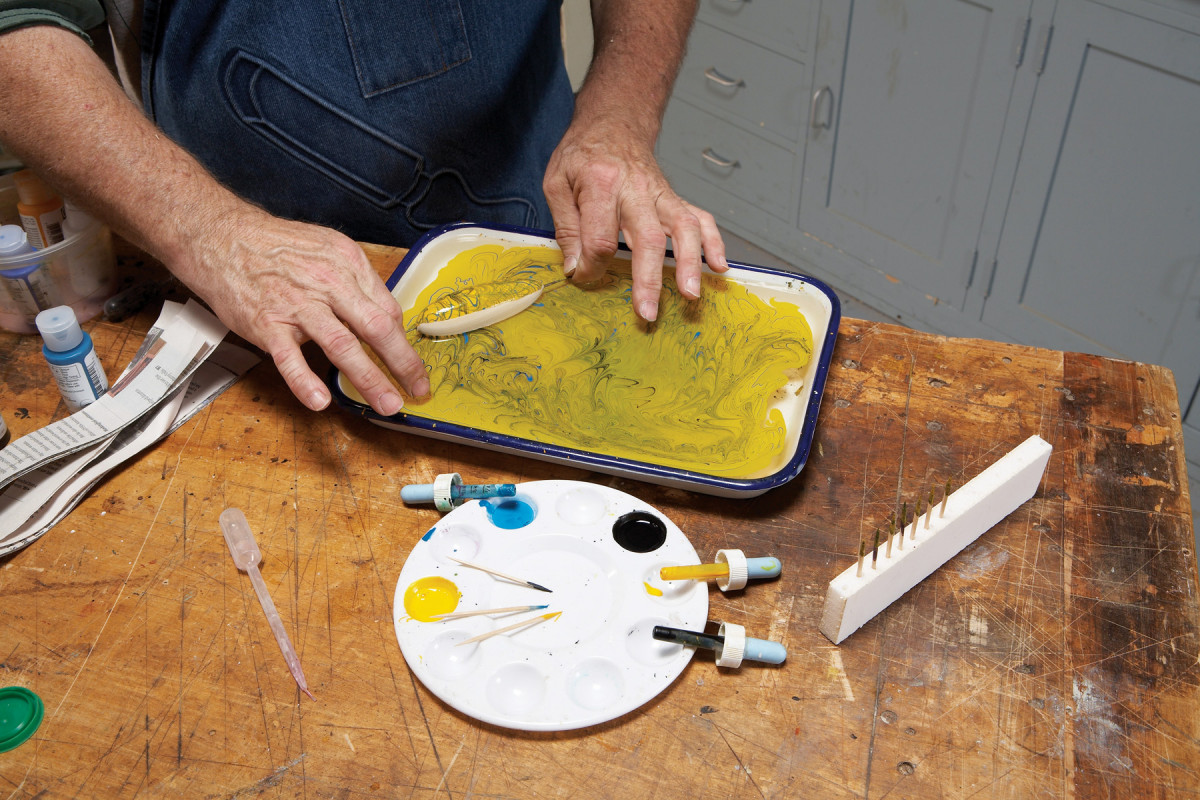
8. Gently dip the workpiece onto the paint and roll it across the pattern.
Transferring a pattern that you like onto the workpiece is the pivotal step (Photos 7-10). Starting at one corner (or edge), barely dip the piece into the paint pattern. Then gently and continuously roll it across the painted surface to transfer the pattern. This sounds easy, but it’s tricky, because it’s easy to miss an area or submerge the piece too far. The goals are to stay on the surface and move fluidly. A two-dimensional object (paper or a flat board) is often much easier to successfully dip and roll than a three-dimensional one.
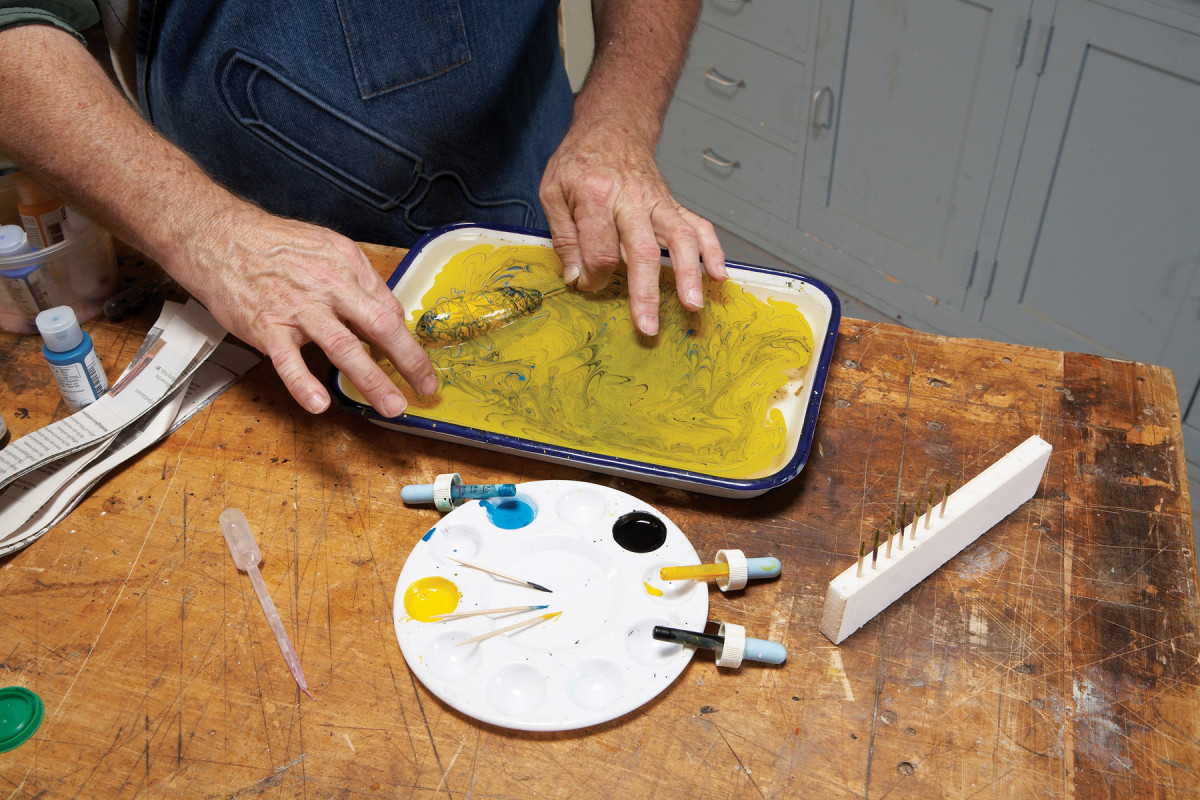
9. Be careful to stay on the surface as you continue rolling.
Pull the marbled piece from the tray and examine it to see what you’ve achieved. This is the moment of truth, when you learn if everything came together. I can say from experience that each success is thrilling—when I teach marbling wood to my friends, there’s always lots of celebratory yelping at each “reveal.”
Immediately dunk the marbled surface in a clean pail of water to rinse off any carrageenan and paint that didn’t adhere. You can also hold the piece under a trickling faucet—just don’t smack the surface with a high-pressure water stream.
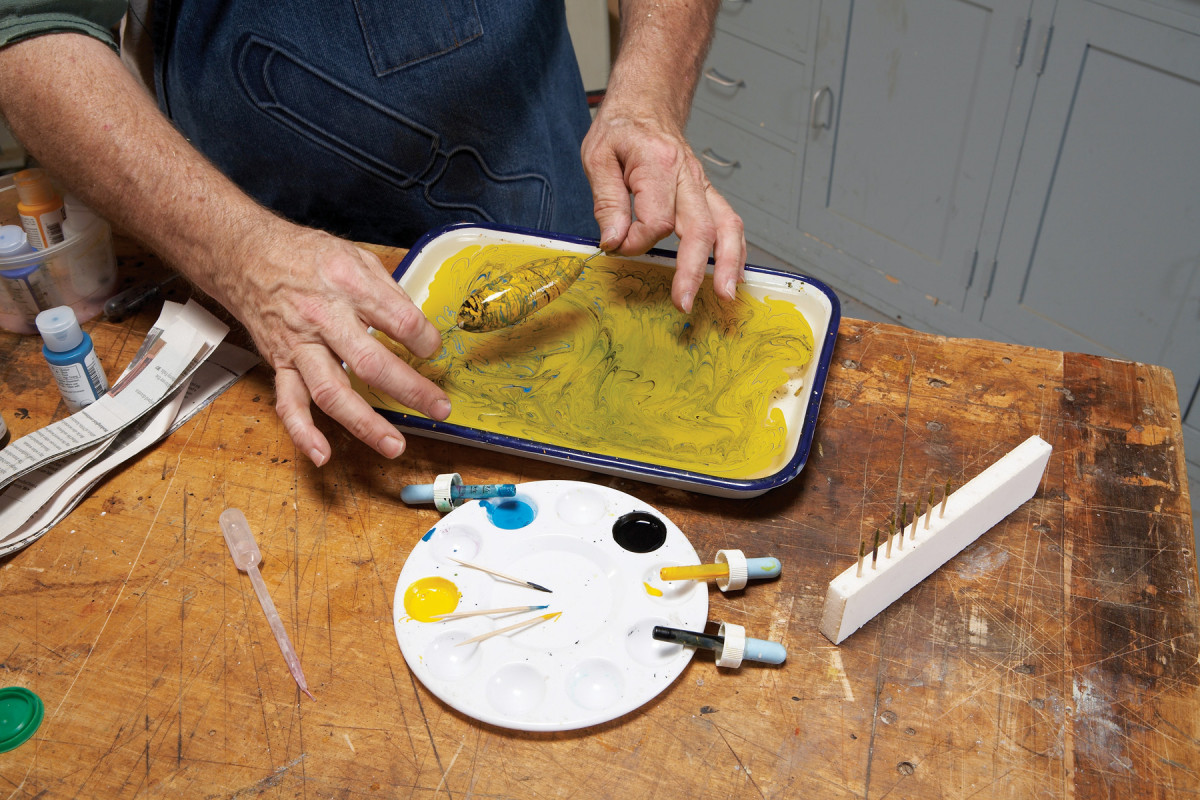
10. The goal is to cover the entire surface in one continuous motion.
What you see now is the permanent pattern. Don’t touch the marbled surface at this point—it’s far too tender. Set the piece aside to dry for at least an hour. If you intend to put a finish on top of the marbled surface, wait at least a week to allow the paint to cure. I’ve successfully used a variety of topcoats, including wax, shellac, water-based polyurethane and epoxy.
You can usually marble several items from the same batch of colors, but eventually the patterns will start to start to break down. When this happens, simply skim the surface three or four times with newspaper strips to remove the paint (use a fresh strip for each pass), and the carrageenan solution is ready for another round of marbling. When you’re done for the day, thoroughly clean all of your equipment. I use only hot water for cleaning, as soap residue may cause problems in future marbling sessions.
Here are some supplies and tools we find essential in our everyday work around the shop. We may receive a commission from sales referred by our links; however, we have carefully selected these products for their usefulness and quality.