We may receive a commission when you use our affiliate links. However, this does not impact our recommendations.
Apply this Classic Finish Like a Pro
If you aren’t brushing shellac, it’s either because you’ve never tried it or you’ve had a bad experience. Let’s see if I can change that. The number one reason people abandon shellac is they expect it to behave like polyurethane. But shellac and poly are different animals. For starters, shellac uses fast-drying 200-proof grain alcohol, or ethanol, as a solvent. The non-toxic ethanol is “poisoned” with small amounts of toxic solvent such as methanol or acetone in order to render it undrinkable and escape liquor taxes. Ethanol evaporates quickly and requires a different method of application and tools than slow-drying polyurethane varnishes.
Like any skill, applying shellac takes practice. Practice brushing on a two-foot square panel before you touch anything of value. It’s easy to sand the panel back down to the wood and brush it again and again. After you get comfortable with brushing the panel, go to a garage sale and purchase a small table or chair. Lightly sand it with some 320-grit sandpaper and practice brushing on real furniture.
Shellac’s Advantages
There are two reasons for using any finish: The first is to enhance or change the original appearance of the wood; the second is to protect it. Shellac creates a warmth and depth that makes inexpensive woods look expensive and expensive woods look even more impressive. As a rule of thumb, use light-colored shellac on light woods and dark-colored shellac on darker woods.
Let’s look at the protection issue. Many people refrain from using shellac because they’ve heard it offers little protection. But how much protection does the project really need, and from what? A kitchen table needs a whole lot more protection than a jewelry box or a grandfather clock. Shellac may not be the best choice for a kitchen table, but for many other projects shellac offers plenty of protection.
Besides beauty and protection, shellac has other distinct advantages: Unlike polyurethane, shellac is repairable and can be fixed without stripping off the old finish. Also, shellac’s rapid cure leaves little time for dust to settle into the wet finish and you can recoat in less than an hour. Finally, shellac does not require sanding between coats saving you time and elbow grease. In recent years, protecting the environment has become another criteria for choosing a finish. Shellac stands out as one of the greenest and least toxic coatings available. Shellac is a pure, natural finish that’s often used to coat fruits, vegetables and candy. As always, good ventilation and an organic vapor mask are recommended.
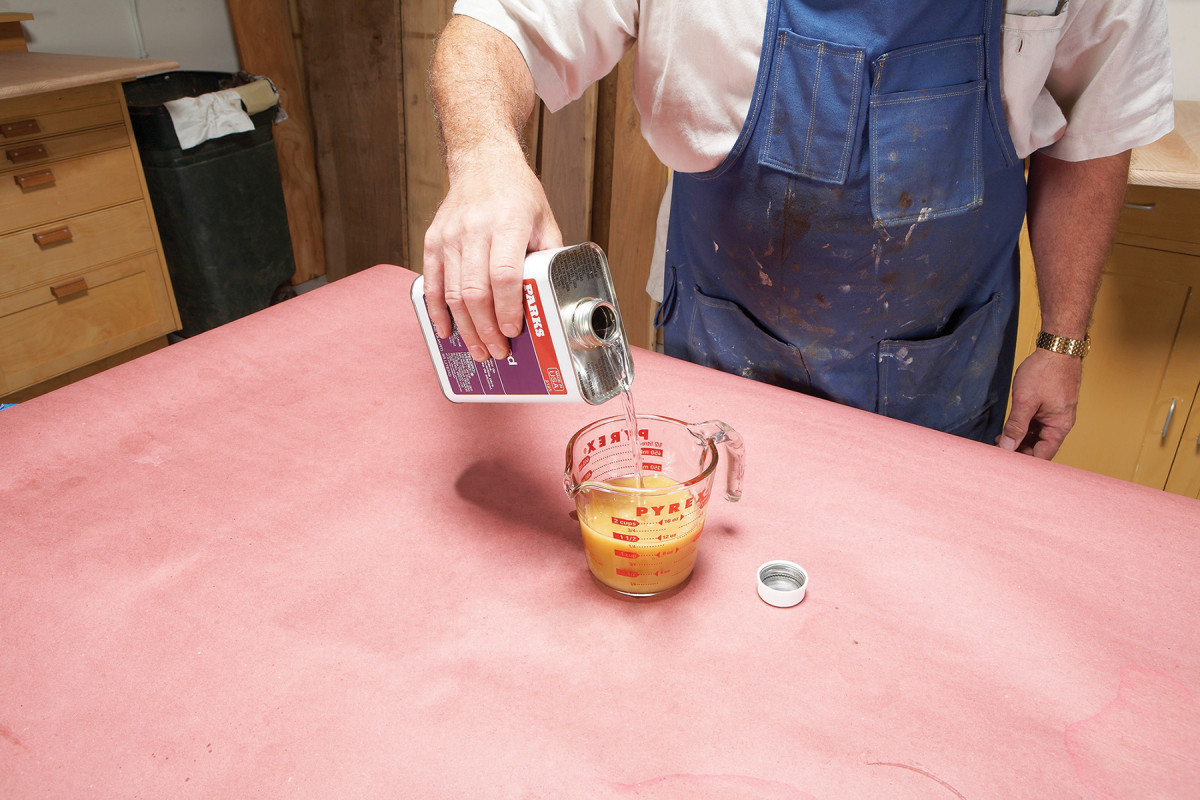
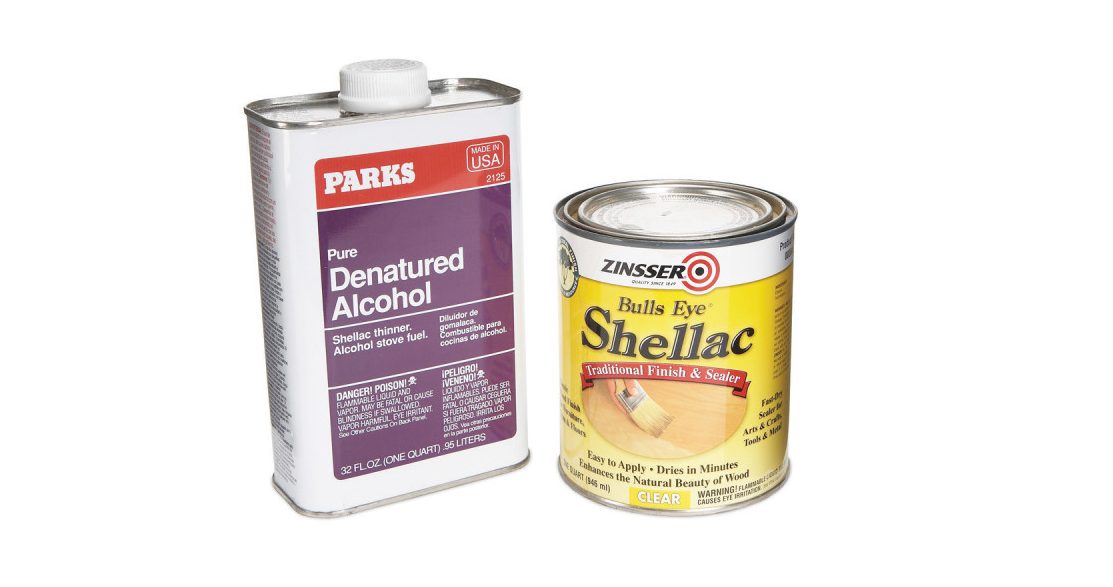
Thin your shellac before use. Store-bought shellac is typically a 3 lb. cut. Mix it 1-to-1 with denatured alcohol for a user-friendly 11/2 lb. cut.
Two Keys to Success
1. Thin your shellac to a water-like consistency. A 1 to 1 1/2 lb. cut is ideal for beginners. Pre-mixed shellac is usually a 3 lbs. cut (the exception is Zinnser Bulls Eye Seal Coat, which is a 2 lbs. cut). This means 3 lbs. of shellac has been mixed into 1 gallon
of alcohol.
2. Use a high-quality brush. A good brush will hold a lot of shellac and apply an even coat without leaving ridges or pronounced
brush marks. A good place to start is one made with Taklon synthetic nylon.
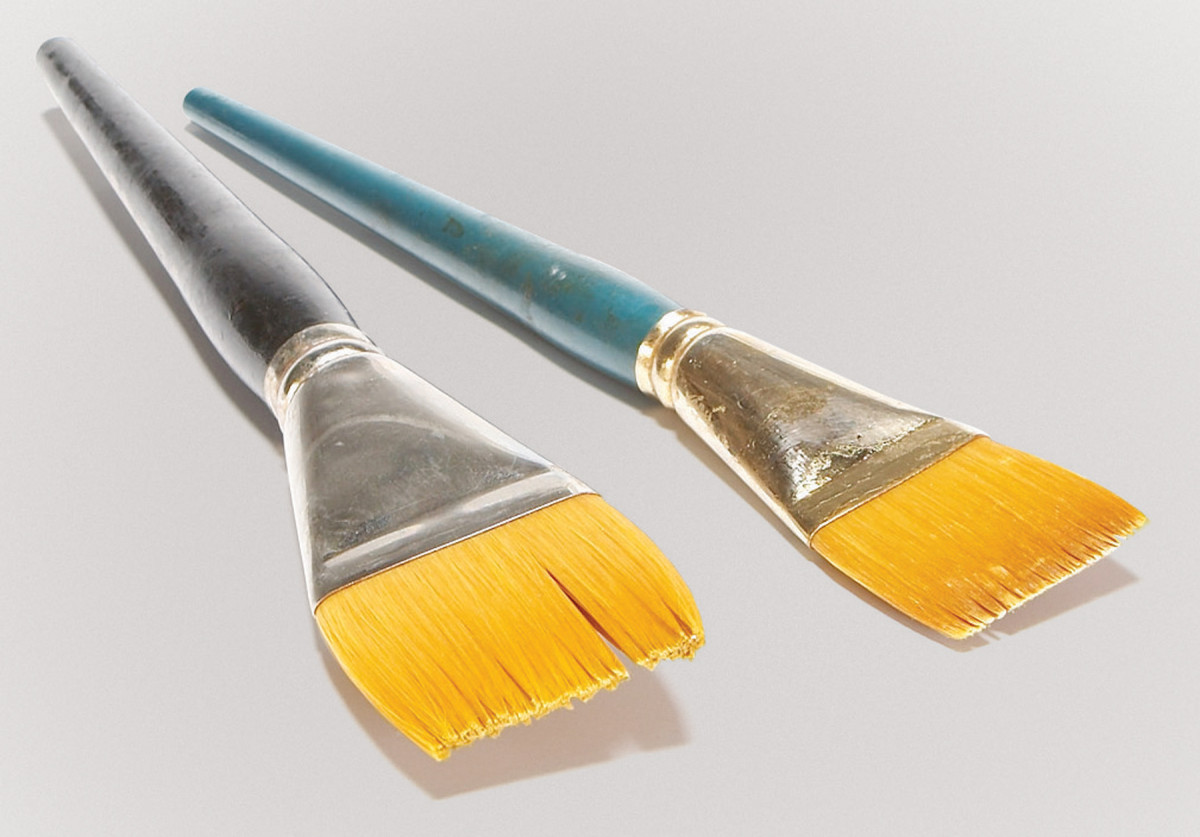
A 1 1/2 or 2″ square flat brush made with golden nylon, or “Taklon” bristles is a great starter brush for applying shellac. It’s best on flat surfaces but it can handle a cabriole leg with a little practice, and it won’t break the bank.
Brushing Techniques
There are two ways to brush shellac: Lay down a thick layer using a slow gravity-feed method or paint it on thin and work fast. I use both of these brushing techniques on a small tabletop: the gravity-feed method on a molded edge and the rapid brushing method on a top. I prefer the gravity method on the edges because the brush can cover the whole edge and leave a relatively thick, even coat without worrying about ridges. I use the fast and thin method on the top of the table because it’s less prone to leaving ridges and brush marks.
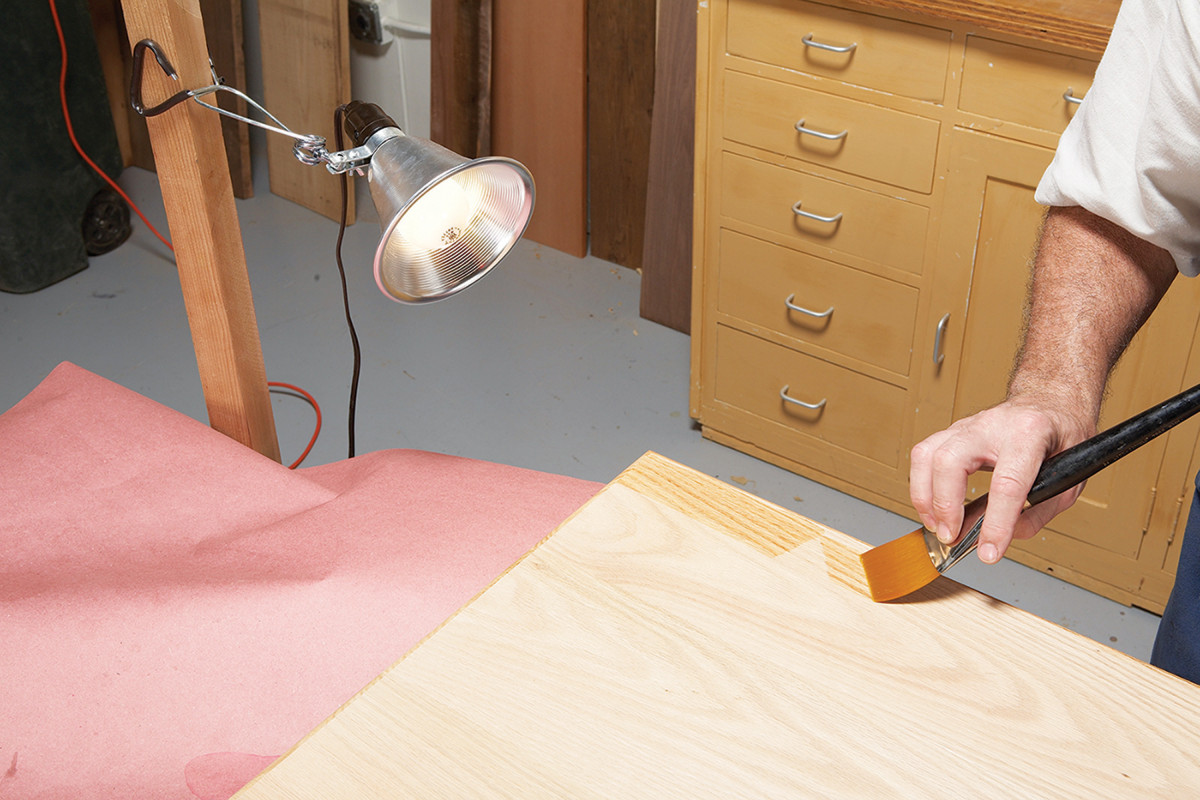
Set up a light source at a low angle so it rakes the work area. A raking light will show defects like drips and “holidays” (places you missed) before it’s too late to correct them.
For this table I will use a 1 1/2 lb. cut of shellac and a 2“ Taklon bristle brush. Set up a raking light so it washes across the area you are brushing. Shellac sets up fast and is pretty unforgiving if a brushing defect goes undetected even for a minute. The light will illuminate any runs and “holidays” (missed spots) before the shellac has time to set. If you notice a brush mark or a holiday, and it’s been longer than 10 seconds, leave it alone. Going back will only make it worse. A minor amount of sanding with 320-grit sandpaper will get rid of the brush mark. A holiday will disappear when you apply the next coat.
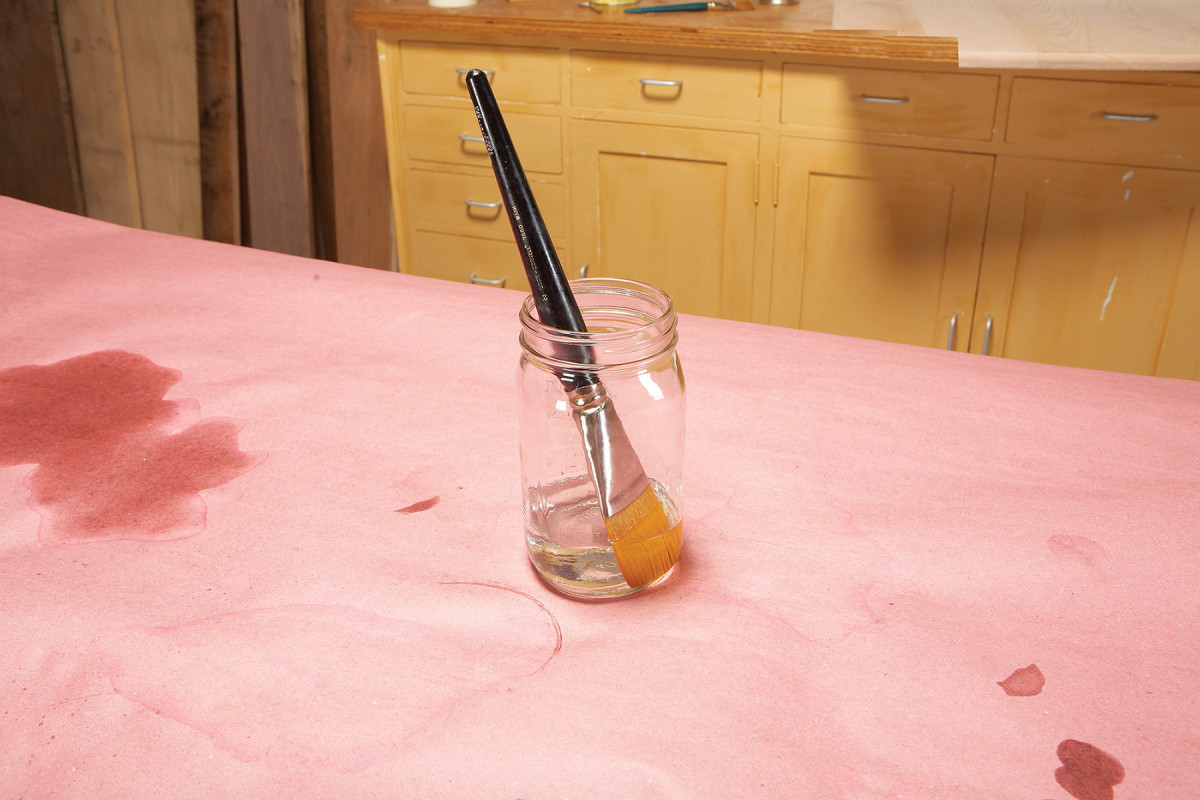
Charge the brush by soaking it in denatured alcohol for a few minutes before use. This helps the shellac flow better from the brush.
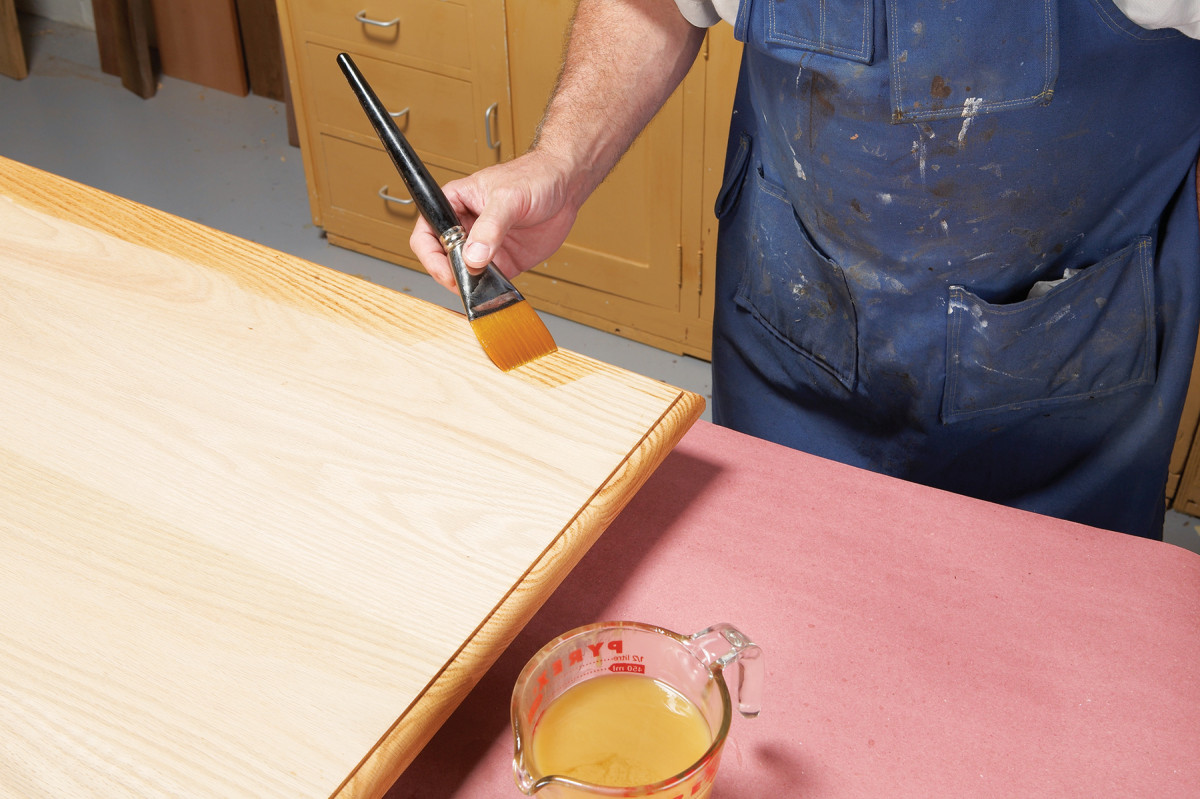
Charge the brush with some denatured alcohol. Then brush some clean paper to draw out the excess alcohol. Dip your brush into the shellac 3/4 of the way up to the ferrule. Hold the brush with your fingers firmly on the ferrule. When brushing a tabletop, I do the edges first using the gravity feed technique. Don’t lay down the shellac so heavy that it forms a run, but do maintain a consistent wet look. End the stroke by exiting off the edge of the table like an airplane taking off. Return to the corner where you began and land your brush in the opposite direction like an airplane touching down.
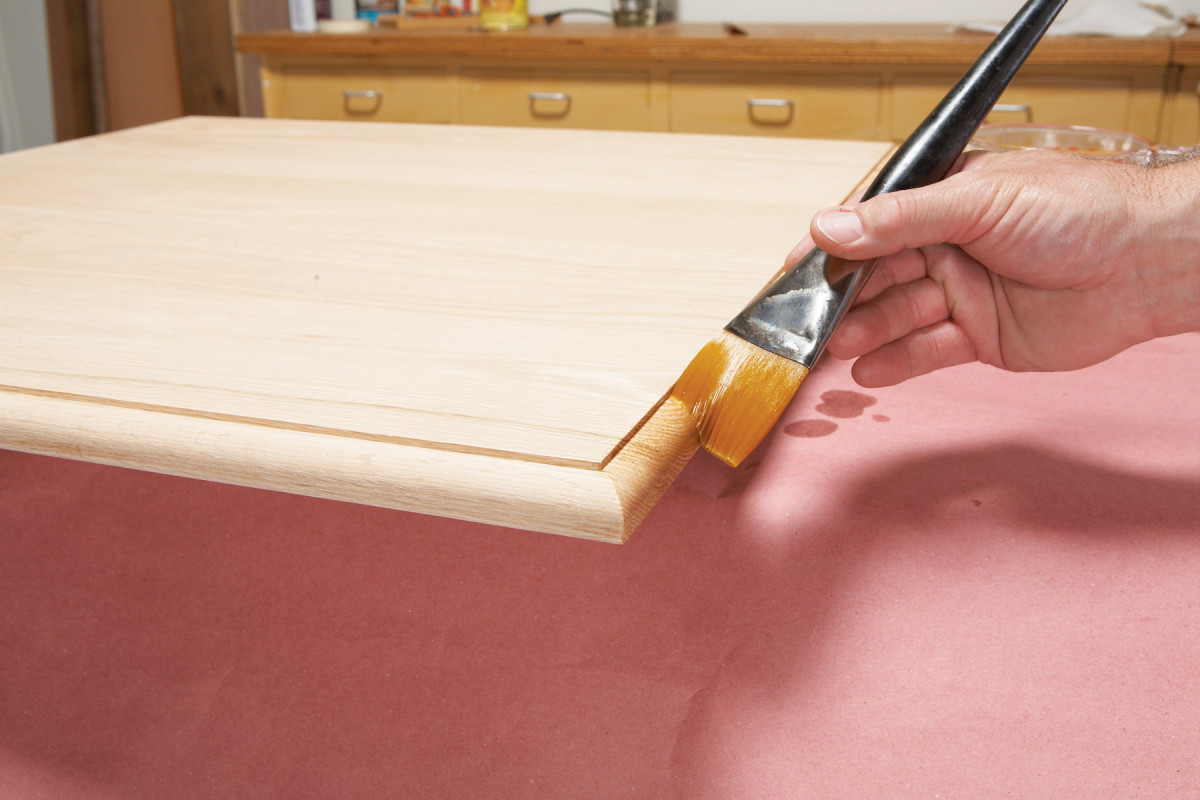
Shellac the edges first. Start the brush stroke an inch or two from the end. Move the brush slowly to lay down a long, consistent wet layer of shellac. Nestle the edge of the brush in the fillet to keep excess shellac from accumulating and running when your back is turned.
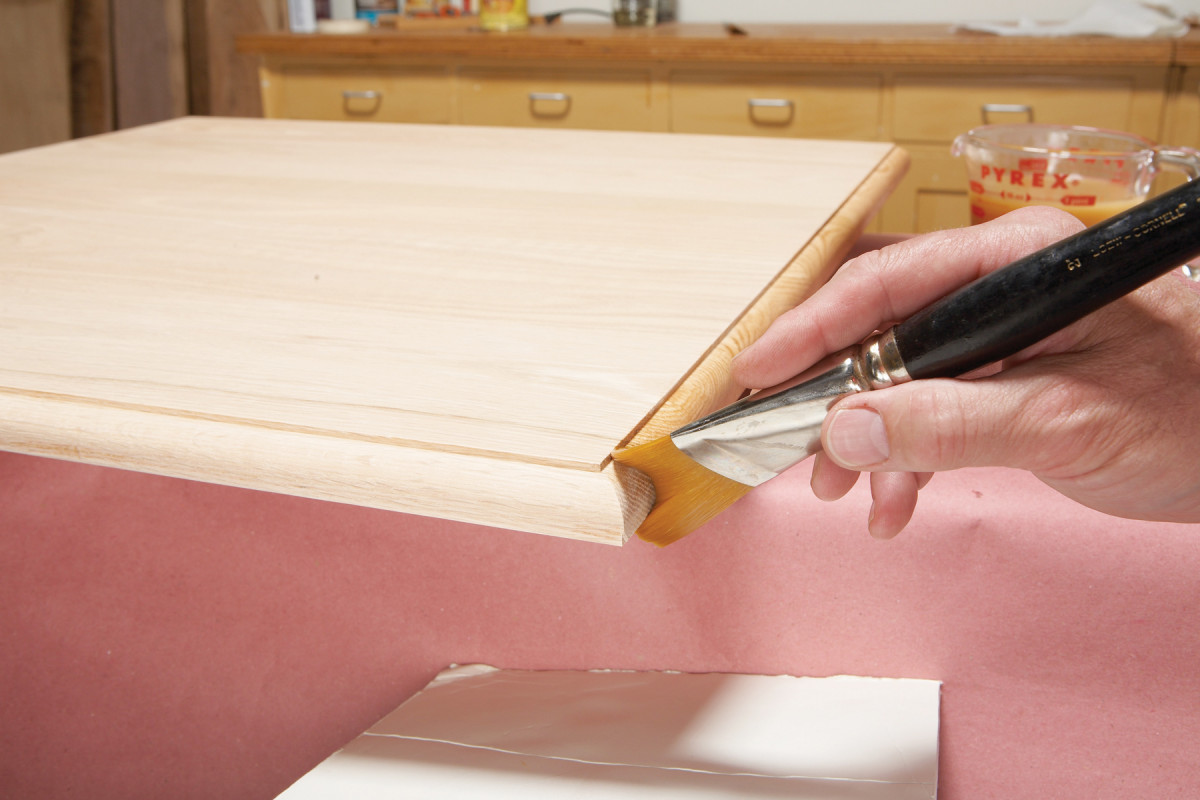
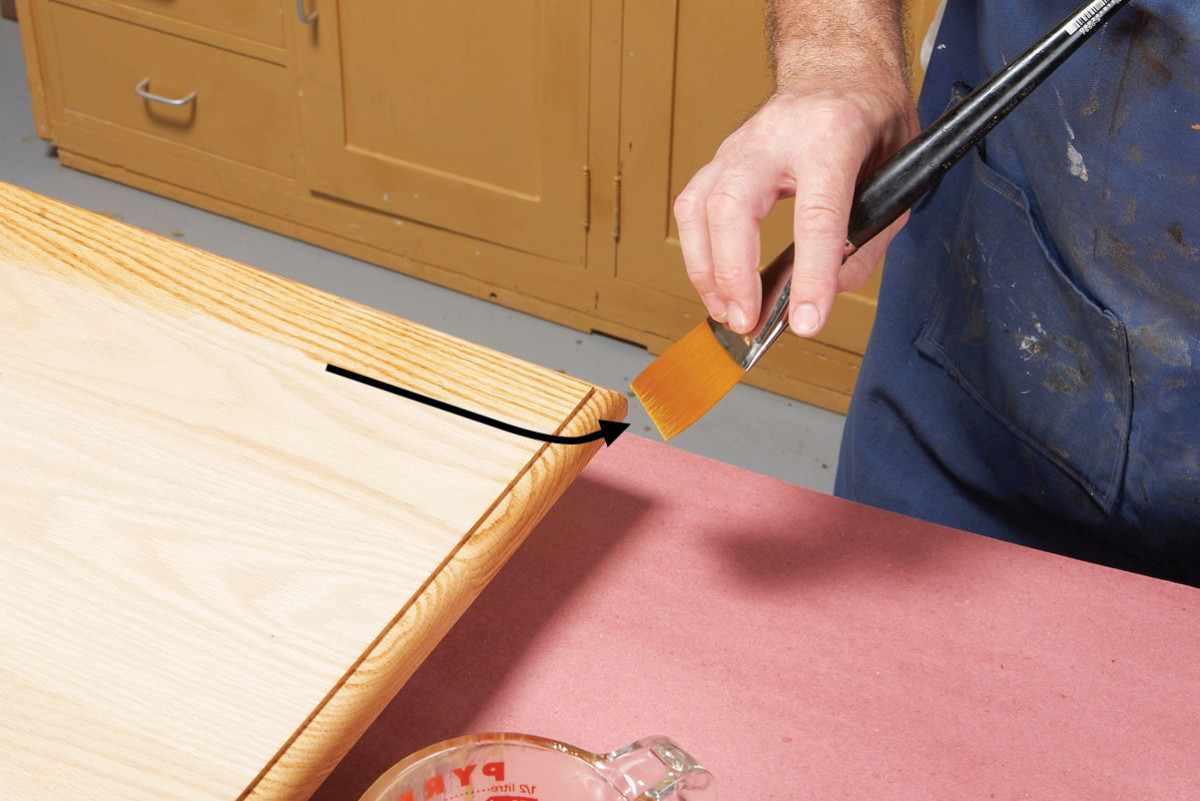
Come back to finish the bare spot where you started the stroke. Think of your brush as an airplane. Land the brush near the unfinished end and then lift off right at the edge to avoid snapping the bristles over the edge. Lifting off prevents pools of shellac from being left at the edge and turning into drips.
Aim for a few inches inside the wet shellac and run the brush past the corner, taking off as you did in the first stroke. Work your way around all four edges, taking off and landing as you go. If you should accidentally hit the top, immediately wipe it off with a clean rag. Switch techniques to brush the flat part of the top and use small rapid strokes to lay down a thin coat. Start the stroke by landing your brush near an edge. Brush on the shellac with a rapid back and forth motion. Shoot for three 10“ strokes every second. When the brush begins to empty, recharge the brush and land it in the dry area just ahead of where you left off.
A different brushing technique is used on the top surface. Instead of a long and slow stroke, use short fast strokes. Land the loaded brush in a dry area and with rapid back and forth strokes work the shellac back into the wet area. Aim for a thin, even layer of shellac.
Finish the stroke at the edge. Lift the brush as it passes over the edge just like an airplane taking off. This prevents the brush from pushing shellac over the edge and dripping down the freshly finished edge.
Do the airplane takeoff stroke once you reach the table edge. Don’t let the brush hit the edge of the table on a return stroke or you will create a drip for sure. Brush with the grain all the way across the table. On a large surface it is necessary to overlap your strokes. Unlike the gravity feed method that lays down a heavy coat in one continuous motion, this technique lays down a thin layer of shellac with multiple brush strokes. A thin layer sets up fast and does not leave brush marks. By the time the first coat is done the shellac will be dry enough to apply a second coat.
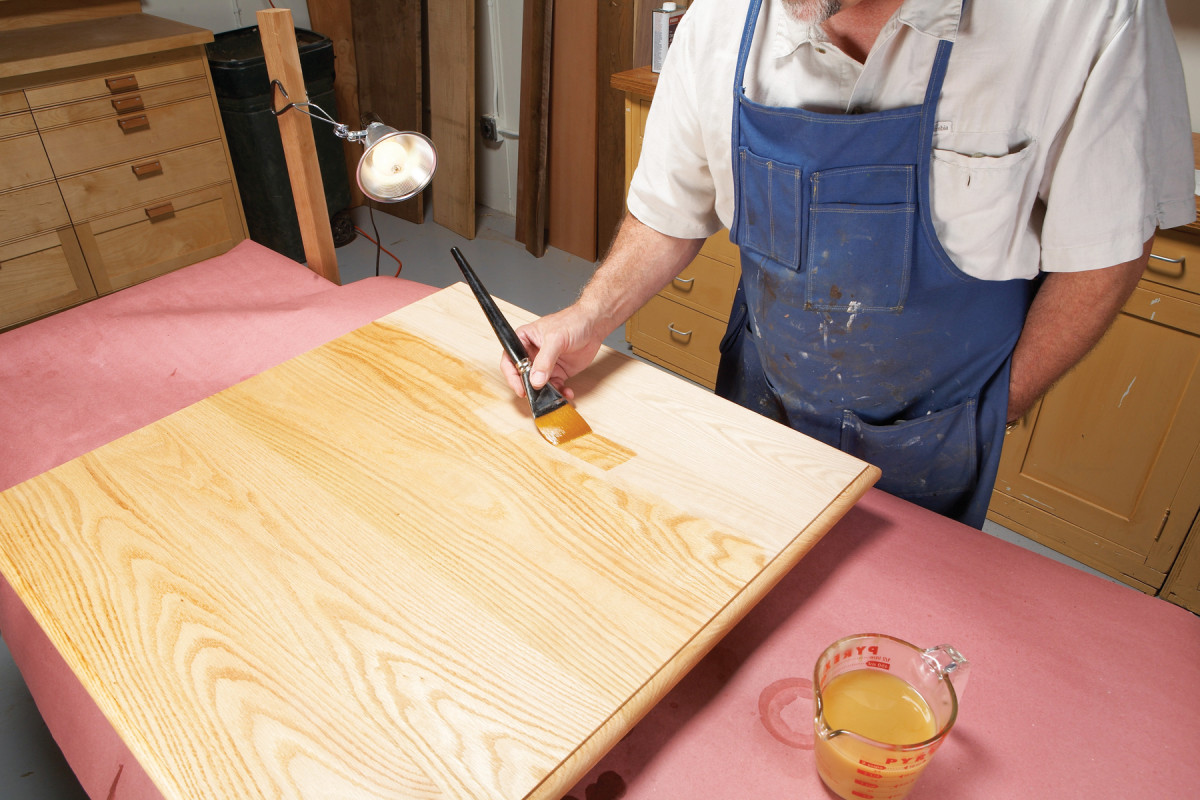
Overlap your strokes on a large surface. Any time you re-wet the brush, land the brush in a dry area. Use a back and forth stroke to blend the new stroke into the wet shellac ahead of it and beside it and lift off right at the edge to avoid snapping the bristles over the edge. Lifting off prevents pools of shellac from being left at the edge and turning into drips.
You can take advantage of shellac’s fast drying time to apply three coats one after another with no time for dust to settle in and ruin the finish. With a 1 or 1 1/2 lb. cut of shellac it will take about three coats before you start to develop a noticeable build. I generally try to give the object three light coats for the first setting to seal the wood. I like to lay down a minimum of 9 layers in 3 or more settings for a good build. The time frame for additional coats is dependent on temperature and humidity.
If your bristles seem to be dragging while applying another coat, then the previous coat has not yet cured—give it more time to dry. The first setting will leave the surface of the wood rough. A light scuff sanding with some 600-grit sandpaper will remove the whiskers. After that, sanding is not necessary until after the final coat has cured and it’s time to rub out the finish. Allow the shellac to fully cure for a few days. Then, do a final rubout. Shellac can be rubbed out to any sheen you want, high gloss or matte.
With enough practice, you will develop your own preferred blend of shellac and alcohol, your own speed for brushing and your own feel for how wet and thick to lay down the shellac. Eventually, you’ll get into the different types of brushes and shellacs that are at your disposal. Trust me, it’s a lot of fun.

When the brushing is over, cleaning your brush is a breeze. Just swish it around in a container with clean denatured alcohol. This will clean out most of the shellac from the brush. Unlike varnish or water-based finishes, it okay to leave some residue in the brush.
Brush Cleaning
A few sloshes in some clean alcohol will get 95% of the shellac out of the brush. Pad the brush with a paper towel or clean rag. Then form the bristles in their proper shape and you’re done. The next time you need to use the brush, place it in some clean alcohol for a few minutes, wipe off the excess on a paper towel, and rock and roll. Finishing with shellac is like any other aspect of woodworking—it takes time and practice to develop the skill.
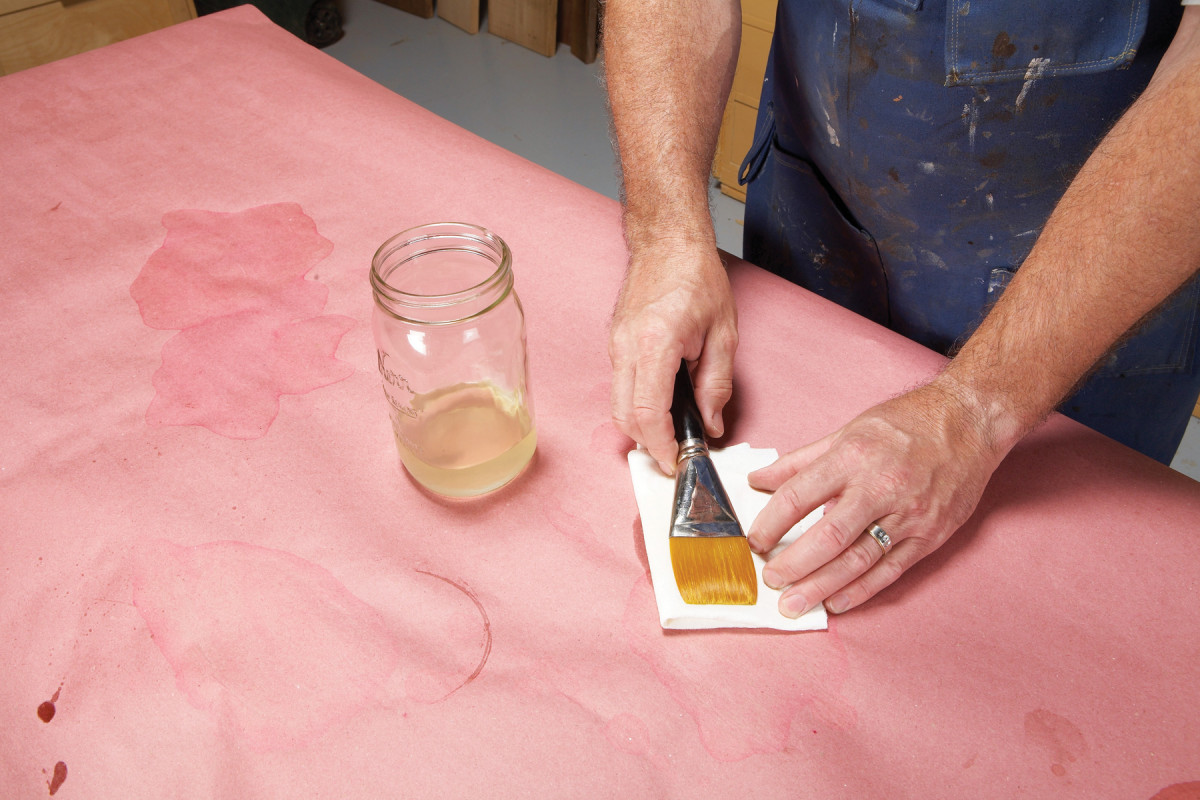
Pull the brush across a folded paper towel or rag to remove the excess alcohol. Form the bristles so they dry in their proper shape. The brush will dry stiff from the shellac left in the brush. To use again, soak brush in alcohol for a few minutes
Ultimately, you will find yourself joining the ranks of those who enjoy using a finish that is safe, fully repairable and has a proven historical track record for stability and beauty. That’s something really nice to pass on to future generations. Good luck, and have fun!
Here are some supplies and tools we find essential in our everyday work around the shop. We may receive a commission from sales referred by our links; however, we have carefully selected these products for their usefulness and quality.