


We may receive a commission when you use our affiliate links. However, this does not impact our recommendations.
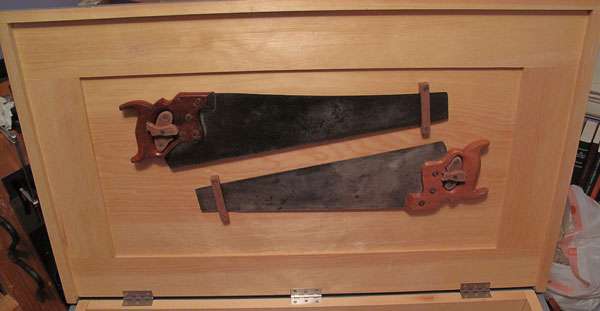
My two panel saws have a snug home on the underside of the lid.
I don’t know why, but I didn’t like the idea of a saw till on the floor of my tool chest full across the front, walled off from the rest of the floor space (like what Christopher Schwarz installed in his “Anarchist’s Tool Chest“). Instead, I put my panel saws on the underside of my lid (with custom toggles to hold them in place) – then spent weeks fussing with where to put my backsaws.
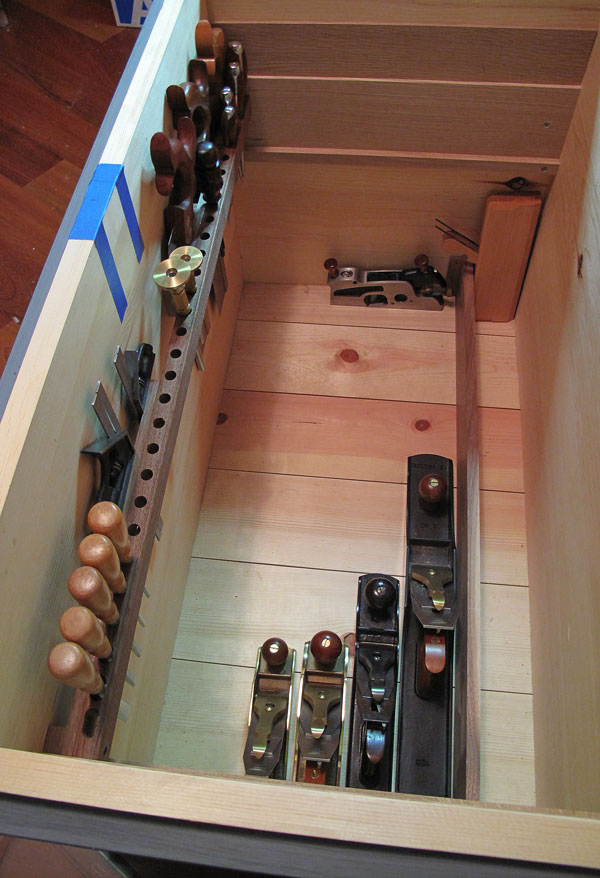
Initially, I made a rack that hung off the front wall of the chest, but I want to be able to store four backsaws in the chest, so a rack large enough to accommodate that juts far into the air space and severely limits the travel of the three sliding tills.
One half of the failed hanging sawtill.
I know that if it’s inconvenient to access stuff in the two lower tills, I’ll get frustrated, and things will end up all over my shop (as they are now) instead of neatly stored. Plus, having a saw rack on one side of the (yet-to-be-bought-and-installed) lock would limit how long of a tool rack I could install for chisels, drivers and the like. (Not to mention the lack of symmetry would bug me.)
And besides, when I was installing that hanging rack, I dropped one of the two parts and a finger snapped off. Clearly, it wasn’t meant to be. (And that’s why there’s but one part of it shown in the picture; I tossed the broken one in a fit of pique.)
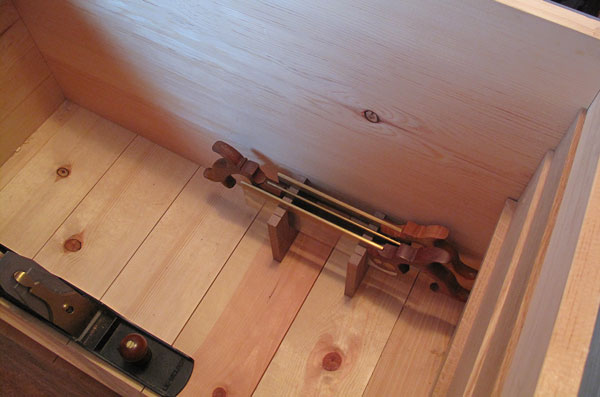
A sawtill on the floor didn’t thrill me.
Following that failed experiment, I thought about building a rack like the one at the back of my workbench – slots into which the saws could slip. But I couldn’t fit four saws on one side of the lock, and again, I’d be limiting the length of my tool rack. (And again, there’s be that pesky lack of symmetry.) So, I experimented with a sawtill that sits on the chest floor. Because my panel saws don’t have to fit, it could be smaller than what Chris shows in his book, and take up less space. But I didn’t like it. (Had I gone with this arrangement, I’d have installed a wall to protect the saws from the other tools on the chest floor.)
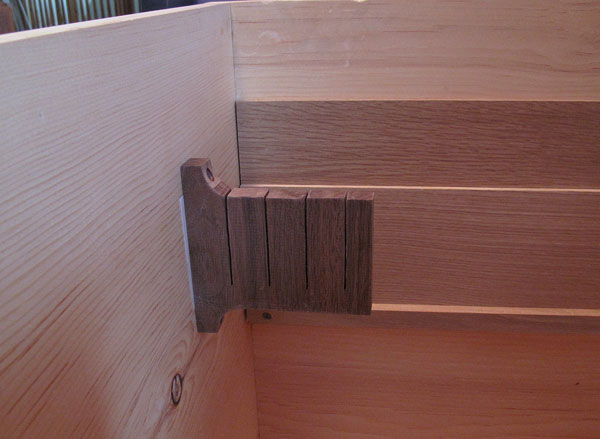
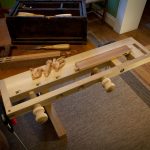
Finally – a decision (and execution).
So I finally decided to build saw slots all along the front (with room for the lock in the middle, as denoted by blue tape), and attach a tool rack to the front of the slots, all the way across. The symmetry pleases me.There are six saw slots, but adjustable squares fit nicely into the extra spaces, and I’ve 29 holes in the tool rack. The slot spacers are 5/8″ thick x 2″ wide, and the front wall of the slot rack is 3/8″ thick x 2″ wide. The tool rack is 7/8″ thick x 1-1/8″ wide). So, the entire assembly, which was glued together flush at the top before installation, juts into airspace only 1-7/8″, and holds a lot of tools.
To attach it to the chest wall, I drilled countersunk holes at either end through the entire assembly, and in the middle to either side of where the lock will go through just the wider sawtill/spacer assembly. Then I simply screwed the assembly to the chest.
Now on to the three sliding tills – about which there will be no indecisiveness; the runners are already installed, so there’s no room for second-guessing. And no time – I’m ready to be done…so that I can build storage for the tools that I keep in the PWM shop.
p.s. In most cases in our blog posts, you can click on the pictures to make them larger, should you wish to see more details.
• Looking for storage ideas for your own home or shop? In addition to “The Anarchist’s Tool Chest,” check out “The 100 Best Shelving & Storage Projects” from Popular Woodworking Magazine and Woodworking Magazine, a CD chock-full of great projects in a variety of styles, sizes and skill levels.
Here are some supplies and tools we find essential in our everyday work around the shop. We may receive a commission from sales referred by our links; however, we have carefully selected these products for their usefulness and quality.


Megan,
This is an excellent post. The mix of photos and discussion are really good. I really like the saws up front like that freeing up more floor space and being really easy to grab.
Alan
Now for the dumb question: when you fasten the internal elements (saw till, drawer runners, etc.) are they glued or nailed in place?
The box part of my chest has been done for 10 weeks. I need to get moving on the build-out.
Very nice. It seems so natural it’s a wonder you don’t see it more often.
Are you left-handed Megan? Shutting my eyes I would have had them on the right-hand side … or at least with the handles to the right.
But for the sake of symmetry, maybe you need two on each side – handles in opposite directions 🙂
Cheers.
This is the same idea I was thinking of, but your execution is much simpler and cleaner that what I would have done. You’ve also future proofed your chest since a wider joinery saw will still fit in the saw rack. I’m totally going to steal this idea. 🙂
Great post. I enjoyed the tool chest tool placement design analysis.
http://www.woodworkingwithajo.com
I like the idea of having dedicated space for the combo squares. I also like the idea of the chisel rack in the chest. How do you and Chris deal with flash rust and the like? In all the photos the planes are always just out — is that just for the photographs and periods of heavy use? I’m assuming OH is at least as humid as the northeast.
In my own chest I have all my planes in their own plane socks and all my chisels in rolls made of metal appropriate fabrics to keep them free from rust and also as added protection from banging around in travel though I dislike how much space all the tool rolls take up in the free spaces, but the engineer in me figures they also work like airbags in packing boxes. 🙂 I also include a small container with those little desiccant bags hoping they will absorb some moisture in the air in the box before my tools do.
In the classic response of Wayne and Garth, “Excellennnnnnt!”
always,
OUTSTANDING! Your thought processes and trials, attempts and mock-ups really resulted it a fine solution. I understand that the chest will be transportable and will have its normal place adjacent to the work bench, but will it be equipped with a caster/roller platform to allow it to be easily moved once loaded with all your tools plus its tare weight?
*stands up. slow claps.* Well done.
Excellent solution for the small saws and small up front tools!
I have a question though regarding wood concerns from the images of the chest’s floor: I don’t recall a discussion on the woods that would be suitable for long term tool storage from a corrosive standpoint, only from a weight standpoint. Elsewhere I read of a concern for storing tools in an oak case; but so far it appears that both Chris and you have stuck with pines. Are you concerned with sap from the knots sticking to your planes’ soles (or getting on the other tools), or are you going to be sealing the chest’s interior in some manner? Would one of the perforated gripper-type of cabinet liners offer both a cushioned substrate as well as separation, or would it bring its own troubles?
Thanks for your insights.
VERY nice solution, Grasshopper.
I like that idea .. a lot! Hmmmmm .. now you’ve got me thinking.
That’s a very nice solution. Kinda like the same principle as the rack on the back of a bench. The tools that you use the most often should be the most accessible. Good work!
Beautiful, just like the maker!