


We may receive a commission when you use our affiliate links. However, this does not impact our recommendations.
After I accepted Bruce Johnson’s completely-out-of-the-blue invitation to exhibit my work at the 32nd Annual Grove Park Inn Arts and Crafts Conference in Asheville this February, I scrambled to find some pieces to take. There was no time to build anything new–well, other than an end wall for my booth–because I was already juggling multiple deadline jobs at the bench (and at the keyboard). I couldn’t say no to the opportunity; I’d wanted to be part of the event for years, but it has always been exceedingly hard to get in. So I decided to follow Michael Fortune’s advice and take pieces that were already made, borrowing them from others and raiding our own home. (Mark will get to savor the minimalist surroundings he always claims to wish for when our kitchen/dining table and sideboard are gone.)
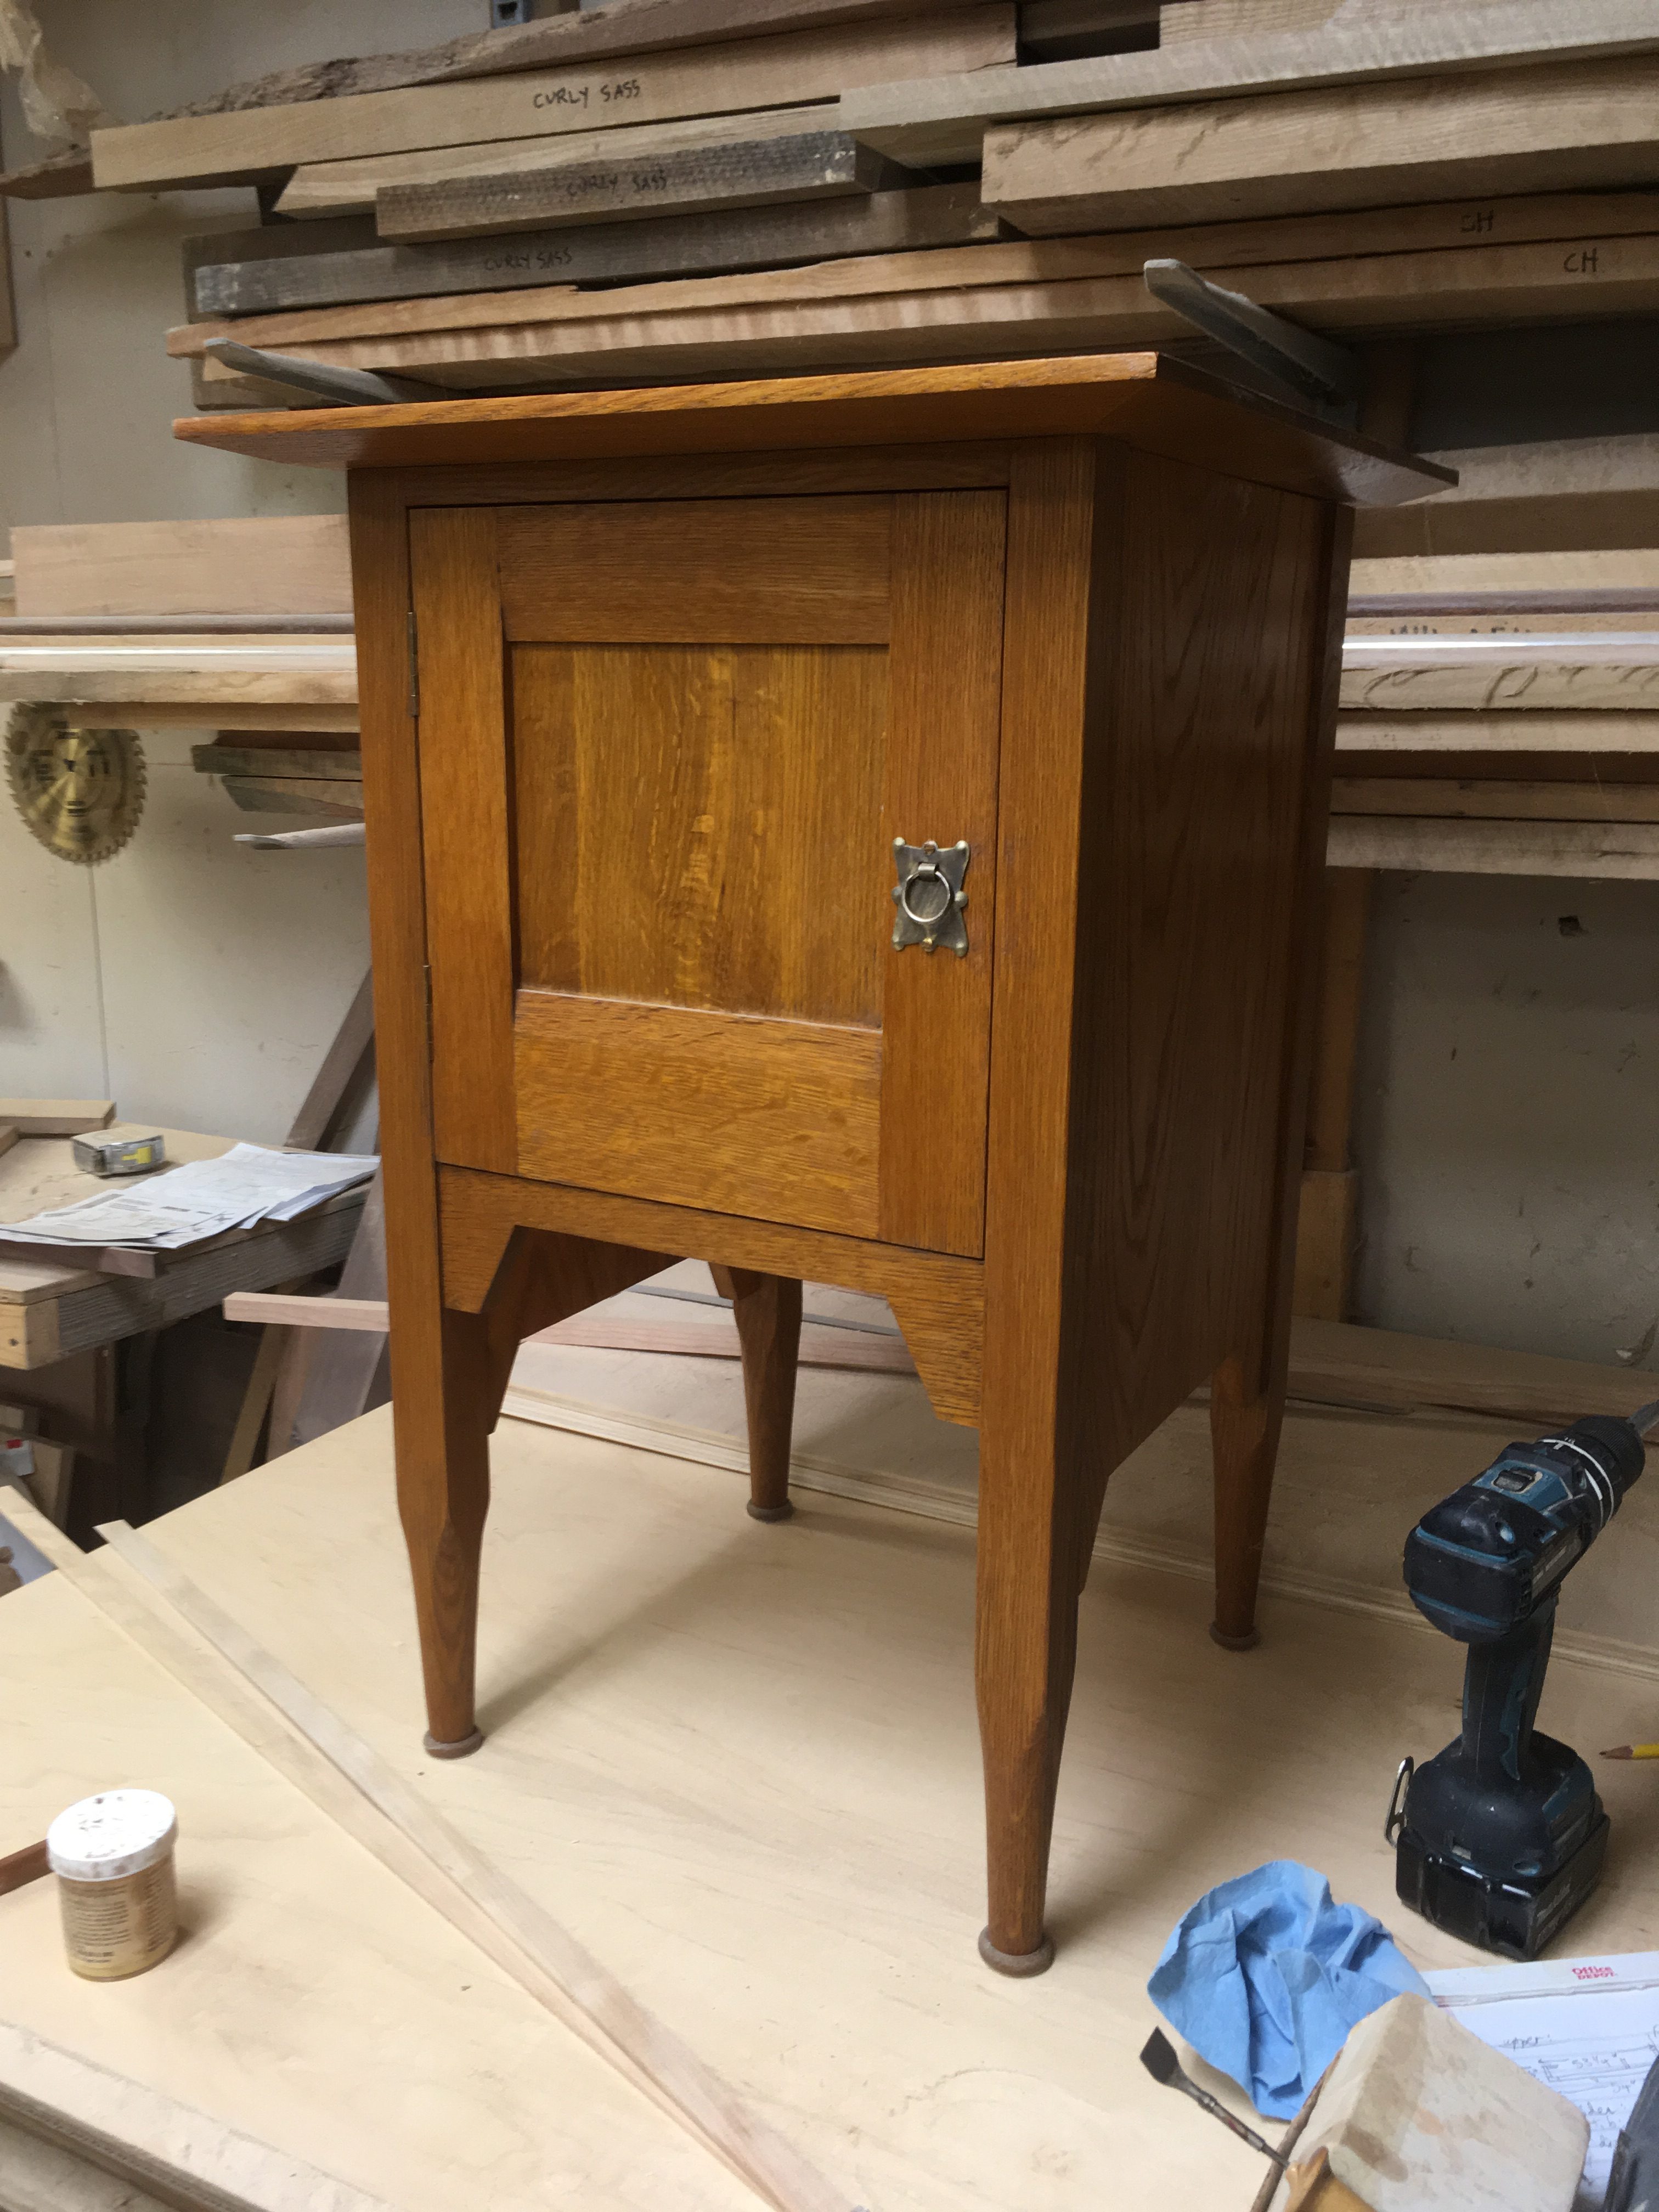
One of the pieces I wanted to take is a bedside cabinet I built several years ago for a commission. I based some critical details of the design on a line of work manufactured by Harris Lebus of Tottenham, though that company never made a piece like it. To keep costs down, I fitted it with a salvaged surface-mounted latch. The latch was fine for the customer’s needs, but it was not really right for the piece. What would have been perfect is a reproduction Lebus pull such as this one, available through U.K. antiques dealers Puritan Values, but the version they have on offer is too large for a small door like the one on the bedside cabinet.
So I contacted metal artist Adam Nahas of Cyclops Studios, who has fabricated custom hardware for some of my other pieces. Not only is Adam an accomplished sculptor with a broad range of techniques; he’s also very good at solving problems and coming up with ways to produce a desired effect without breaking the bank. We discussed the design and budget, and I gave him the green light to make a couple of door pulls clearly related to the Lebus original, but simpler (because budget…). Next week’s post will go through the process he used to make the pull. For now I want to talk about the finish.
When I picked up the pulls this morning, they looked like new brass (as they should have, being new brass)–not shiny, but totally lacking in the character that comes with age. Adam suggested coffee grounds as a naturally acidic material to age the brass but said that method takes a few days. So I saved a few batches of coffee grounds and put one of the pulls face-down in them.
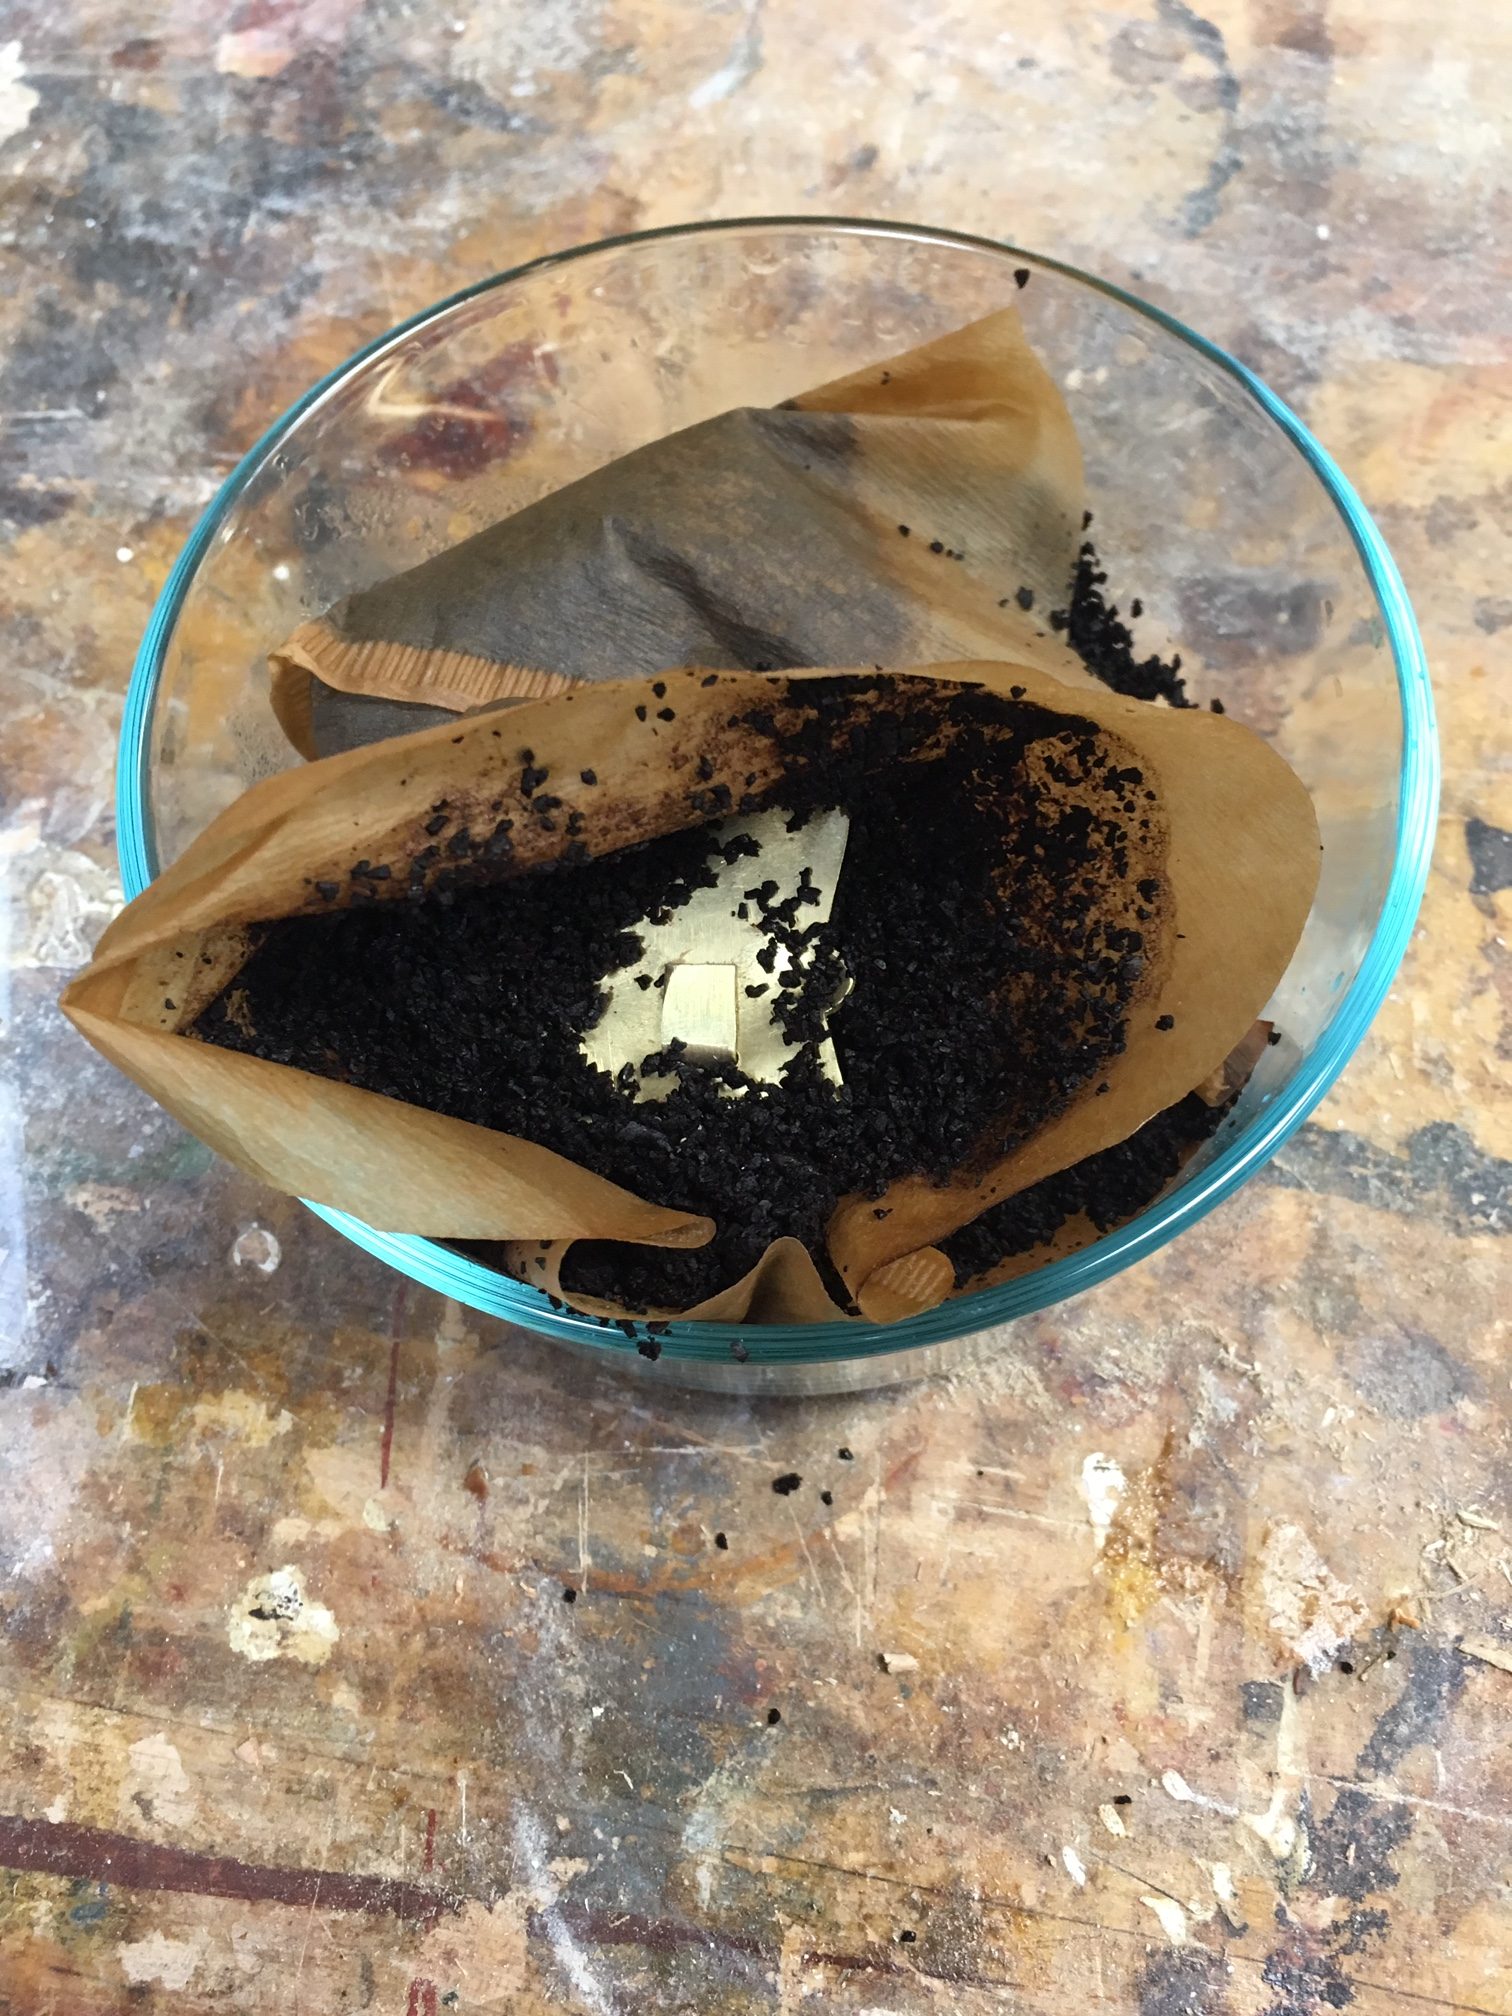
A new use for coffee.
The problem was, I didn’t have time to wait for the chemical reaction. I’ll be leaving Monday morning, and thanks to the forecast for snow and freezing rain on Sunday, I moved my pick-up for the rented trailer up a day to Saturday. There are not enough hours between now and then (as I write, it’s Thursday evening), so I decided to take the Patina Express for the door pull that will go on the bedside cabinet.
I’ve written about my favorite antiquing solution elsewhere, but I’m including it here for two reasons. First, it’s the fastest stuff I’ve ever used. It really just takes a minute or two to turn shiny new brass (it has to be unlacquered) a medium bronze color. Second, you can modify the effect and create highlights by lightly abrading the surface with fine steel wool or a Scotchbrite pad.
Step 1: Dip
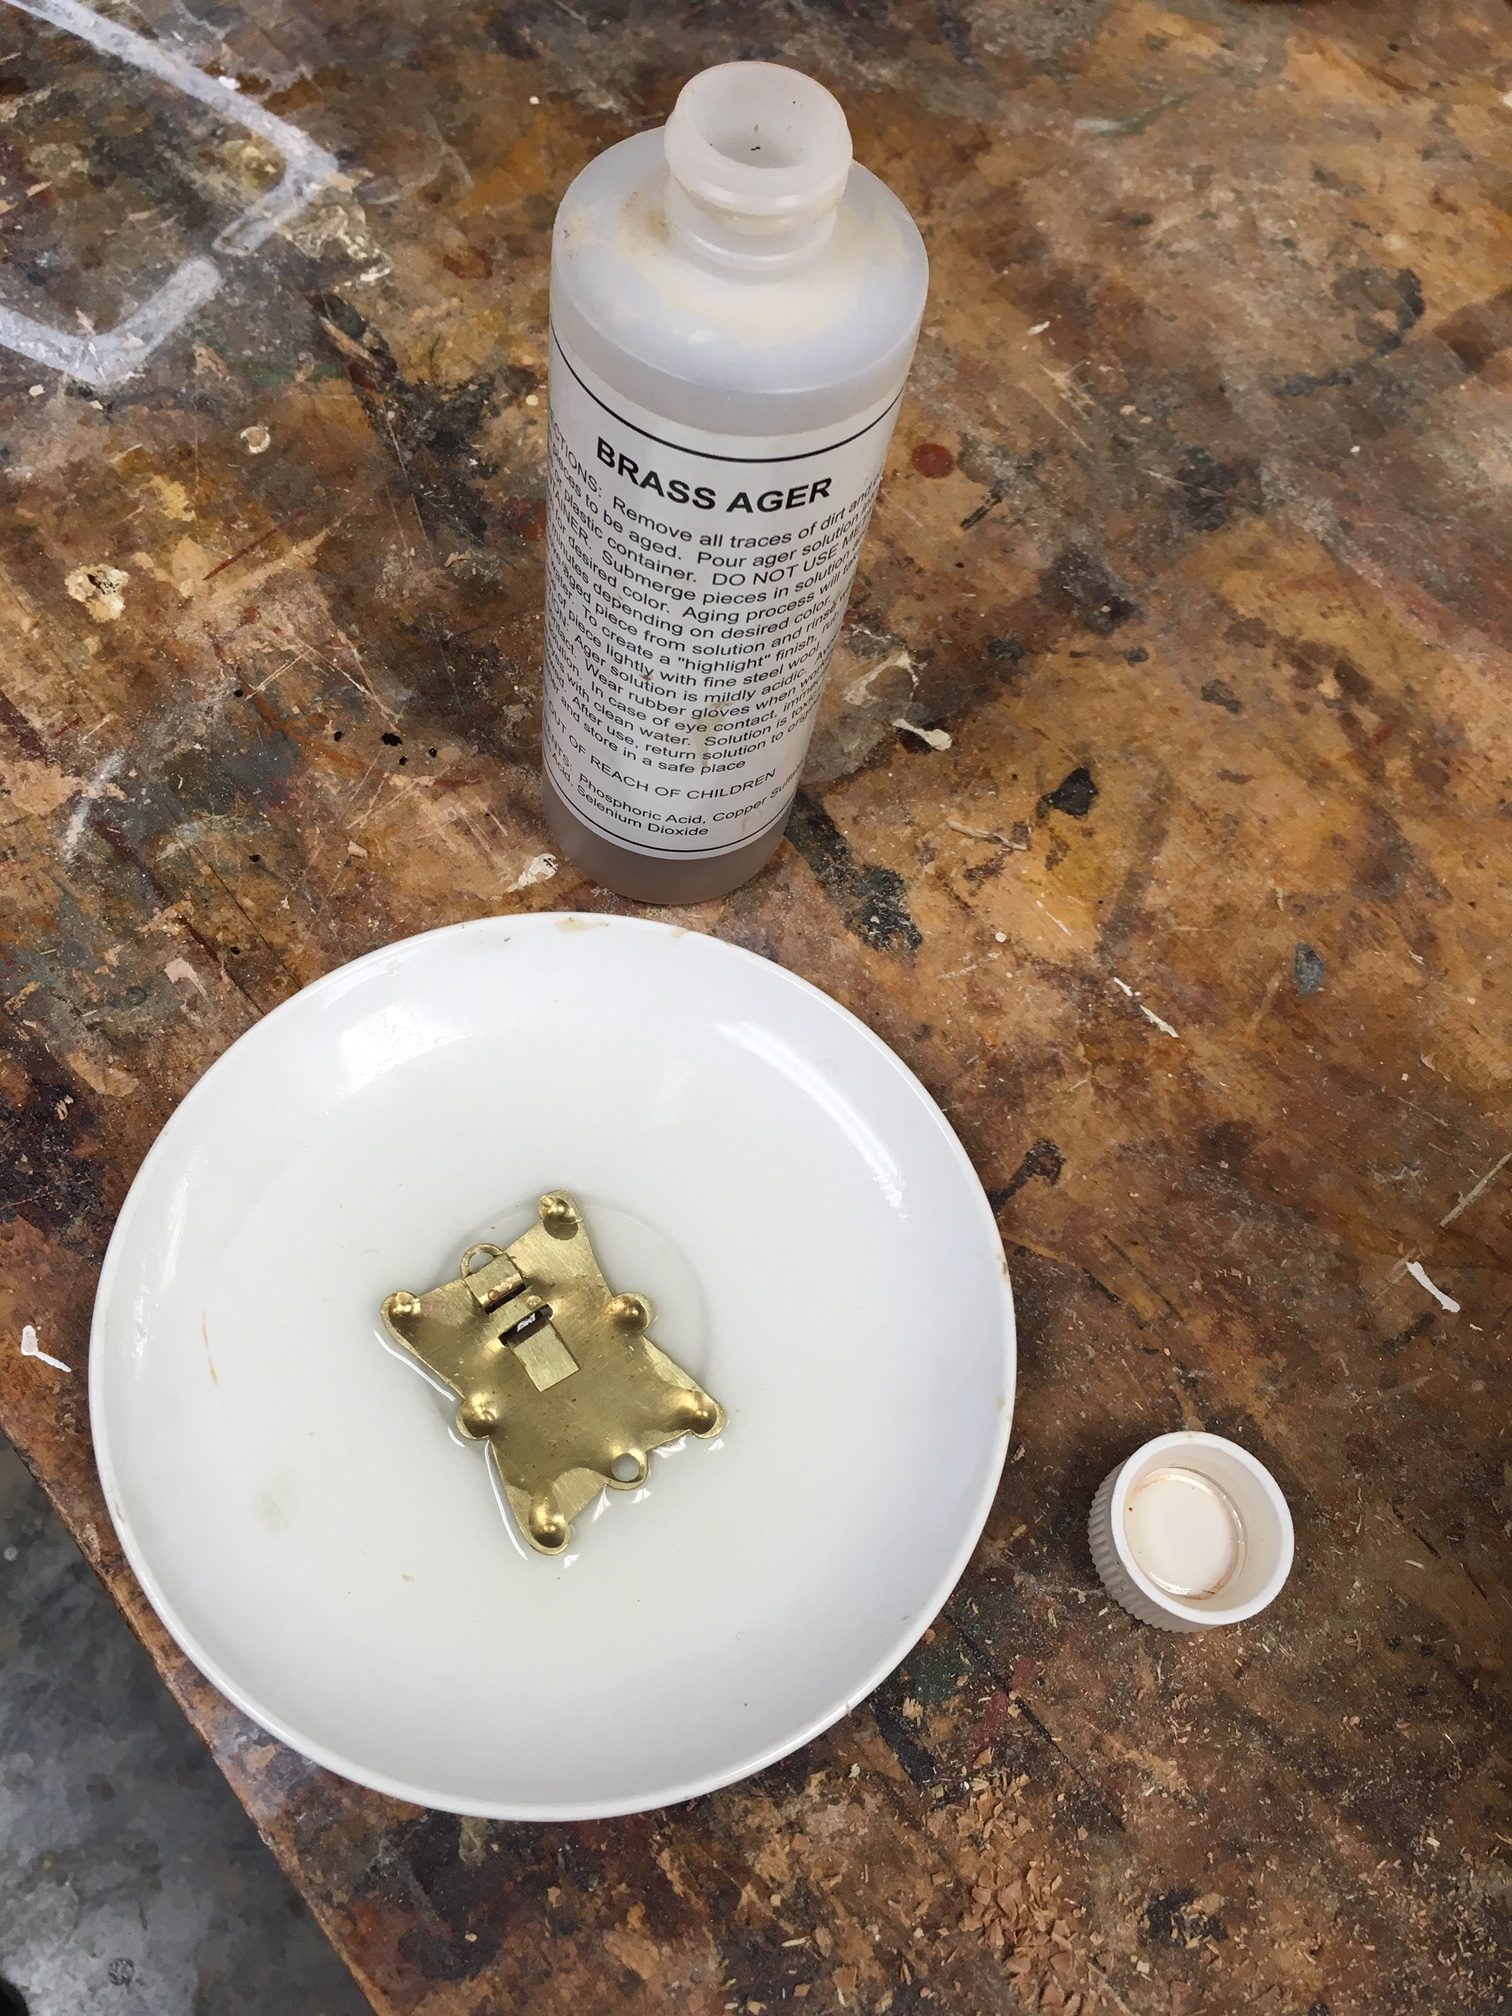
Freshly dipped. The door pull lies face down in a small pool of brass ager with two screws for company.
Step 2: Pull ’em out
When I remove hardware from the acid solution, I blot it on a shop cloth, then rinse thoroughly in water to stop the chemical reaction (and save my hands, as well as the work piece on which I’m going to put the hardware).
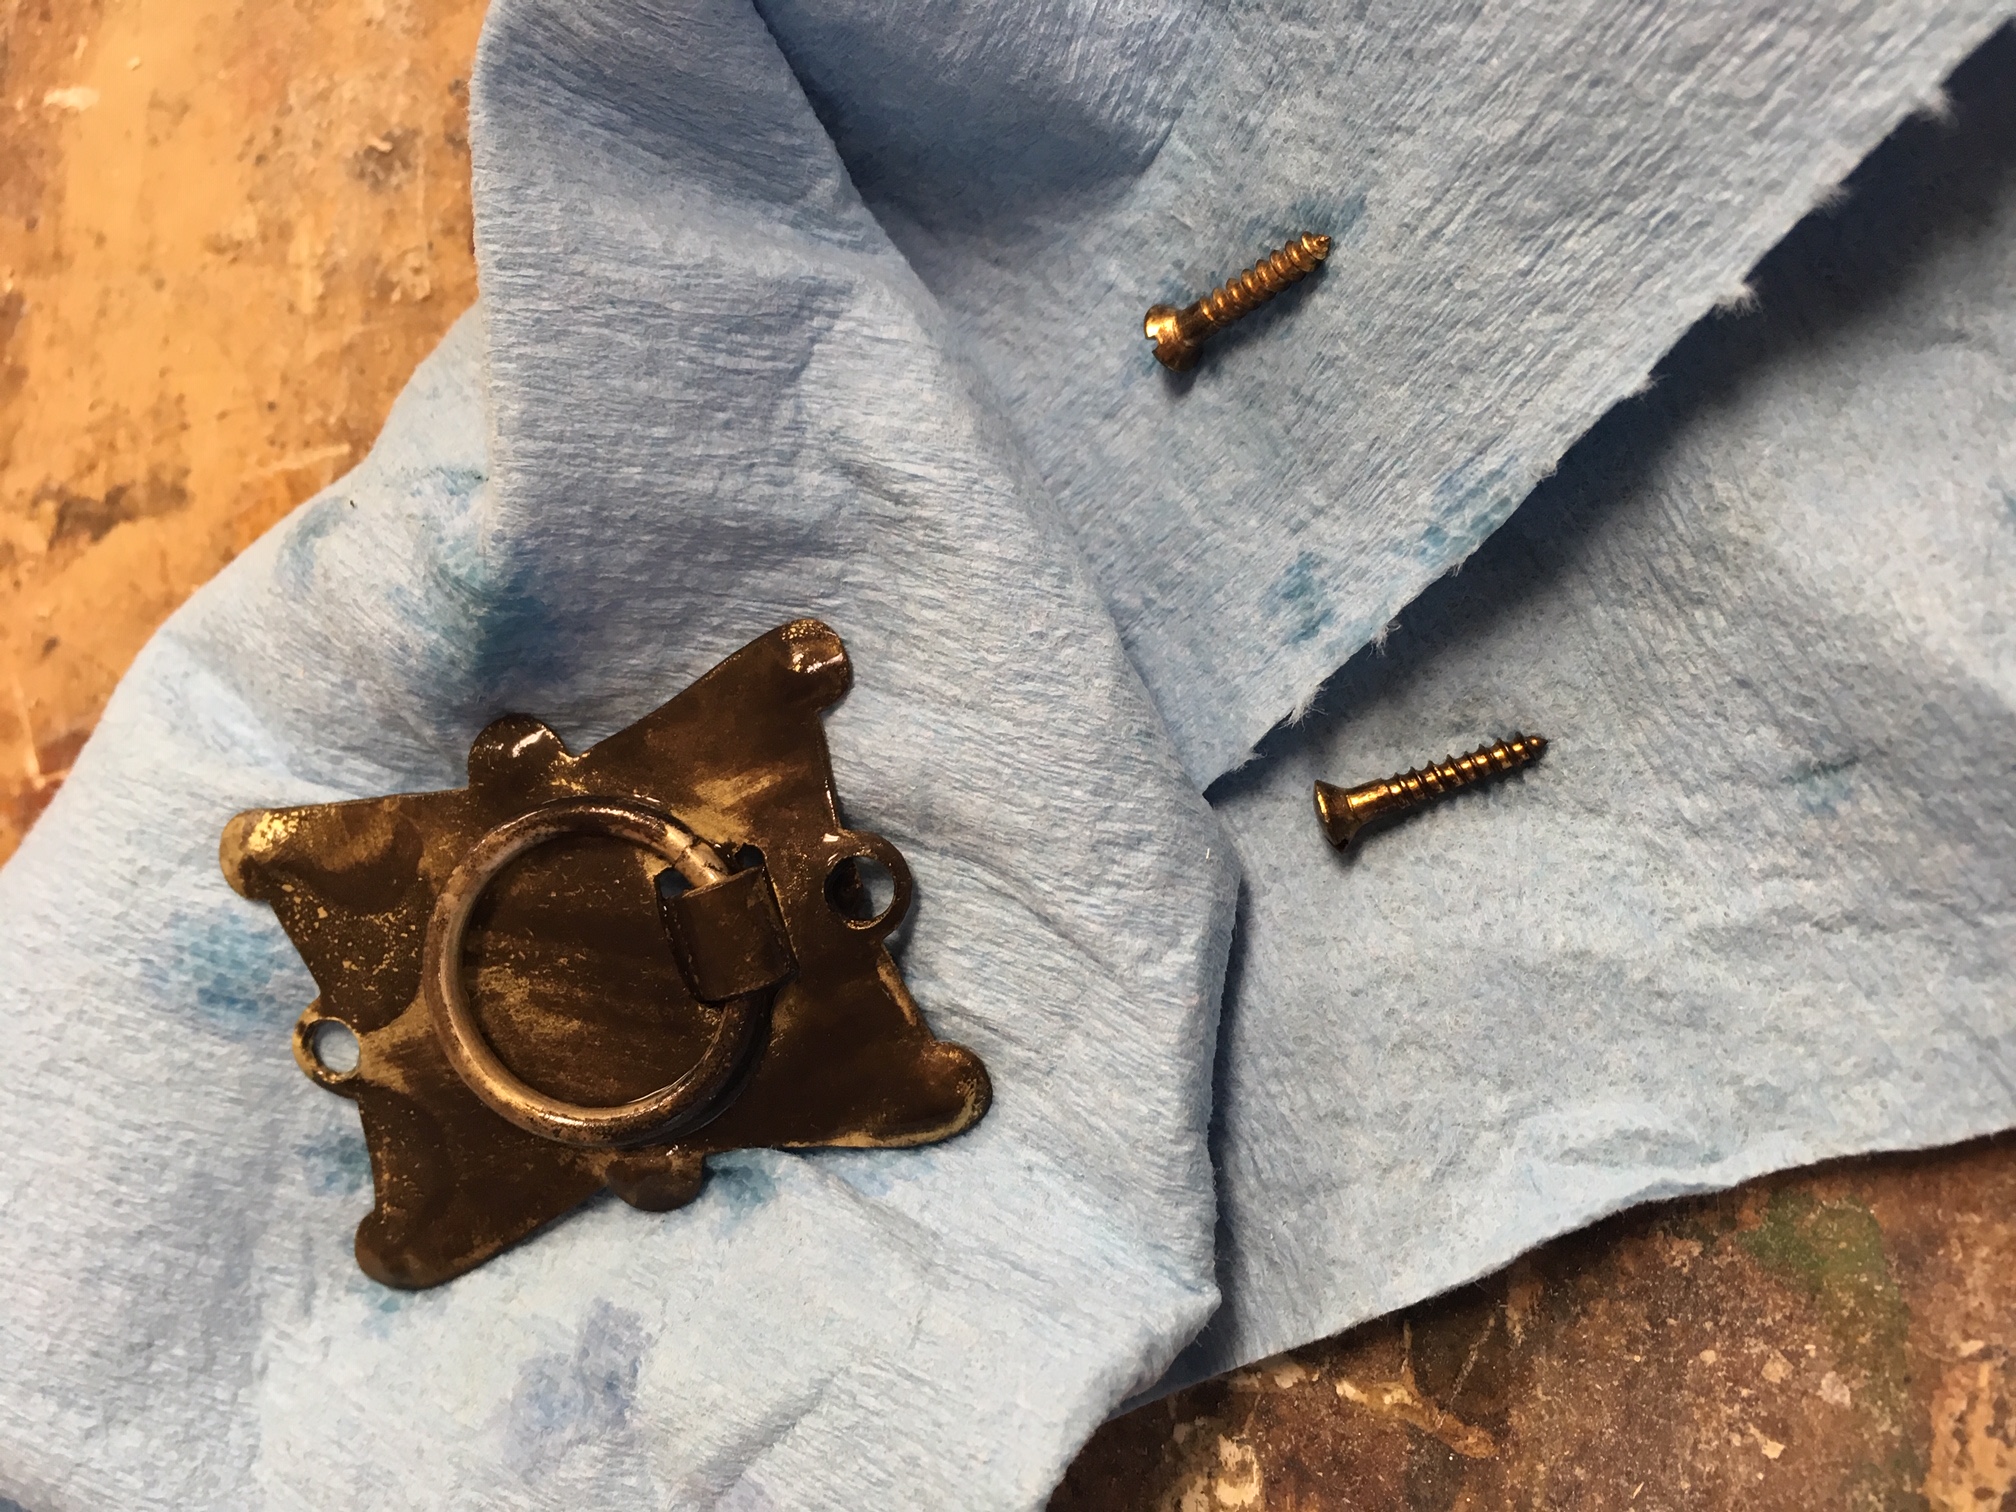
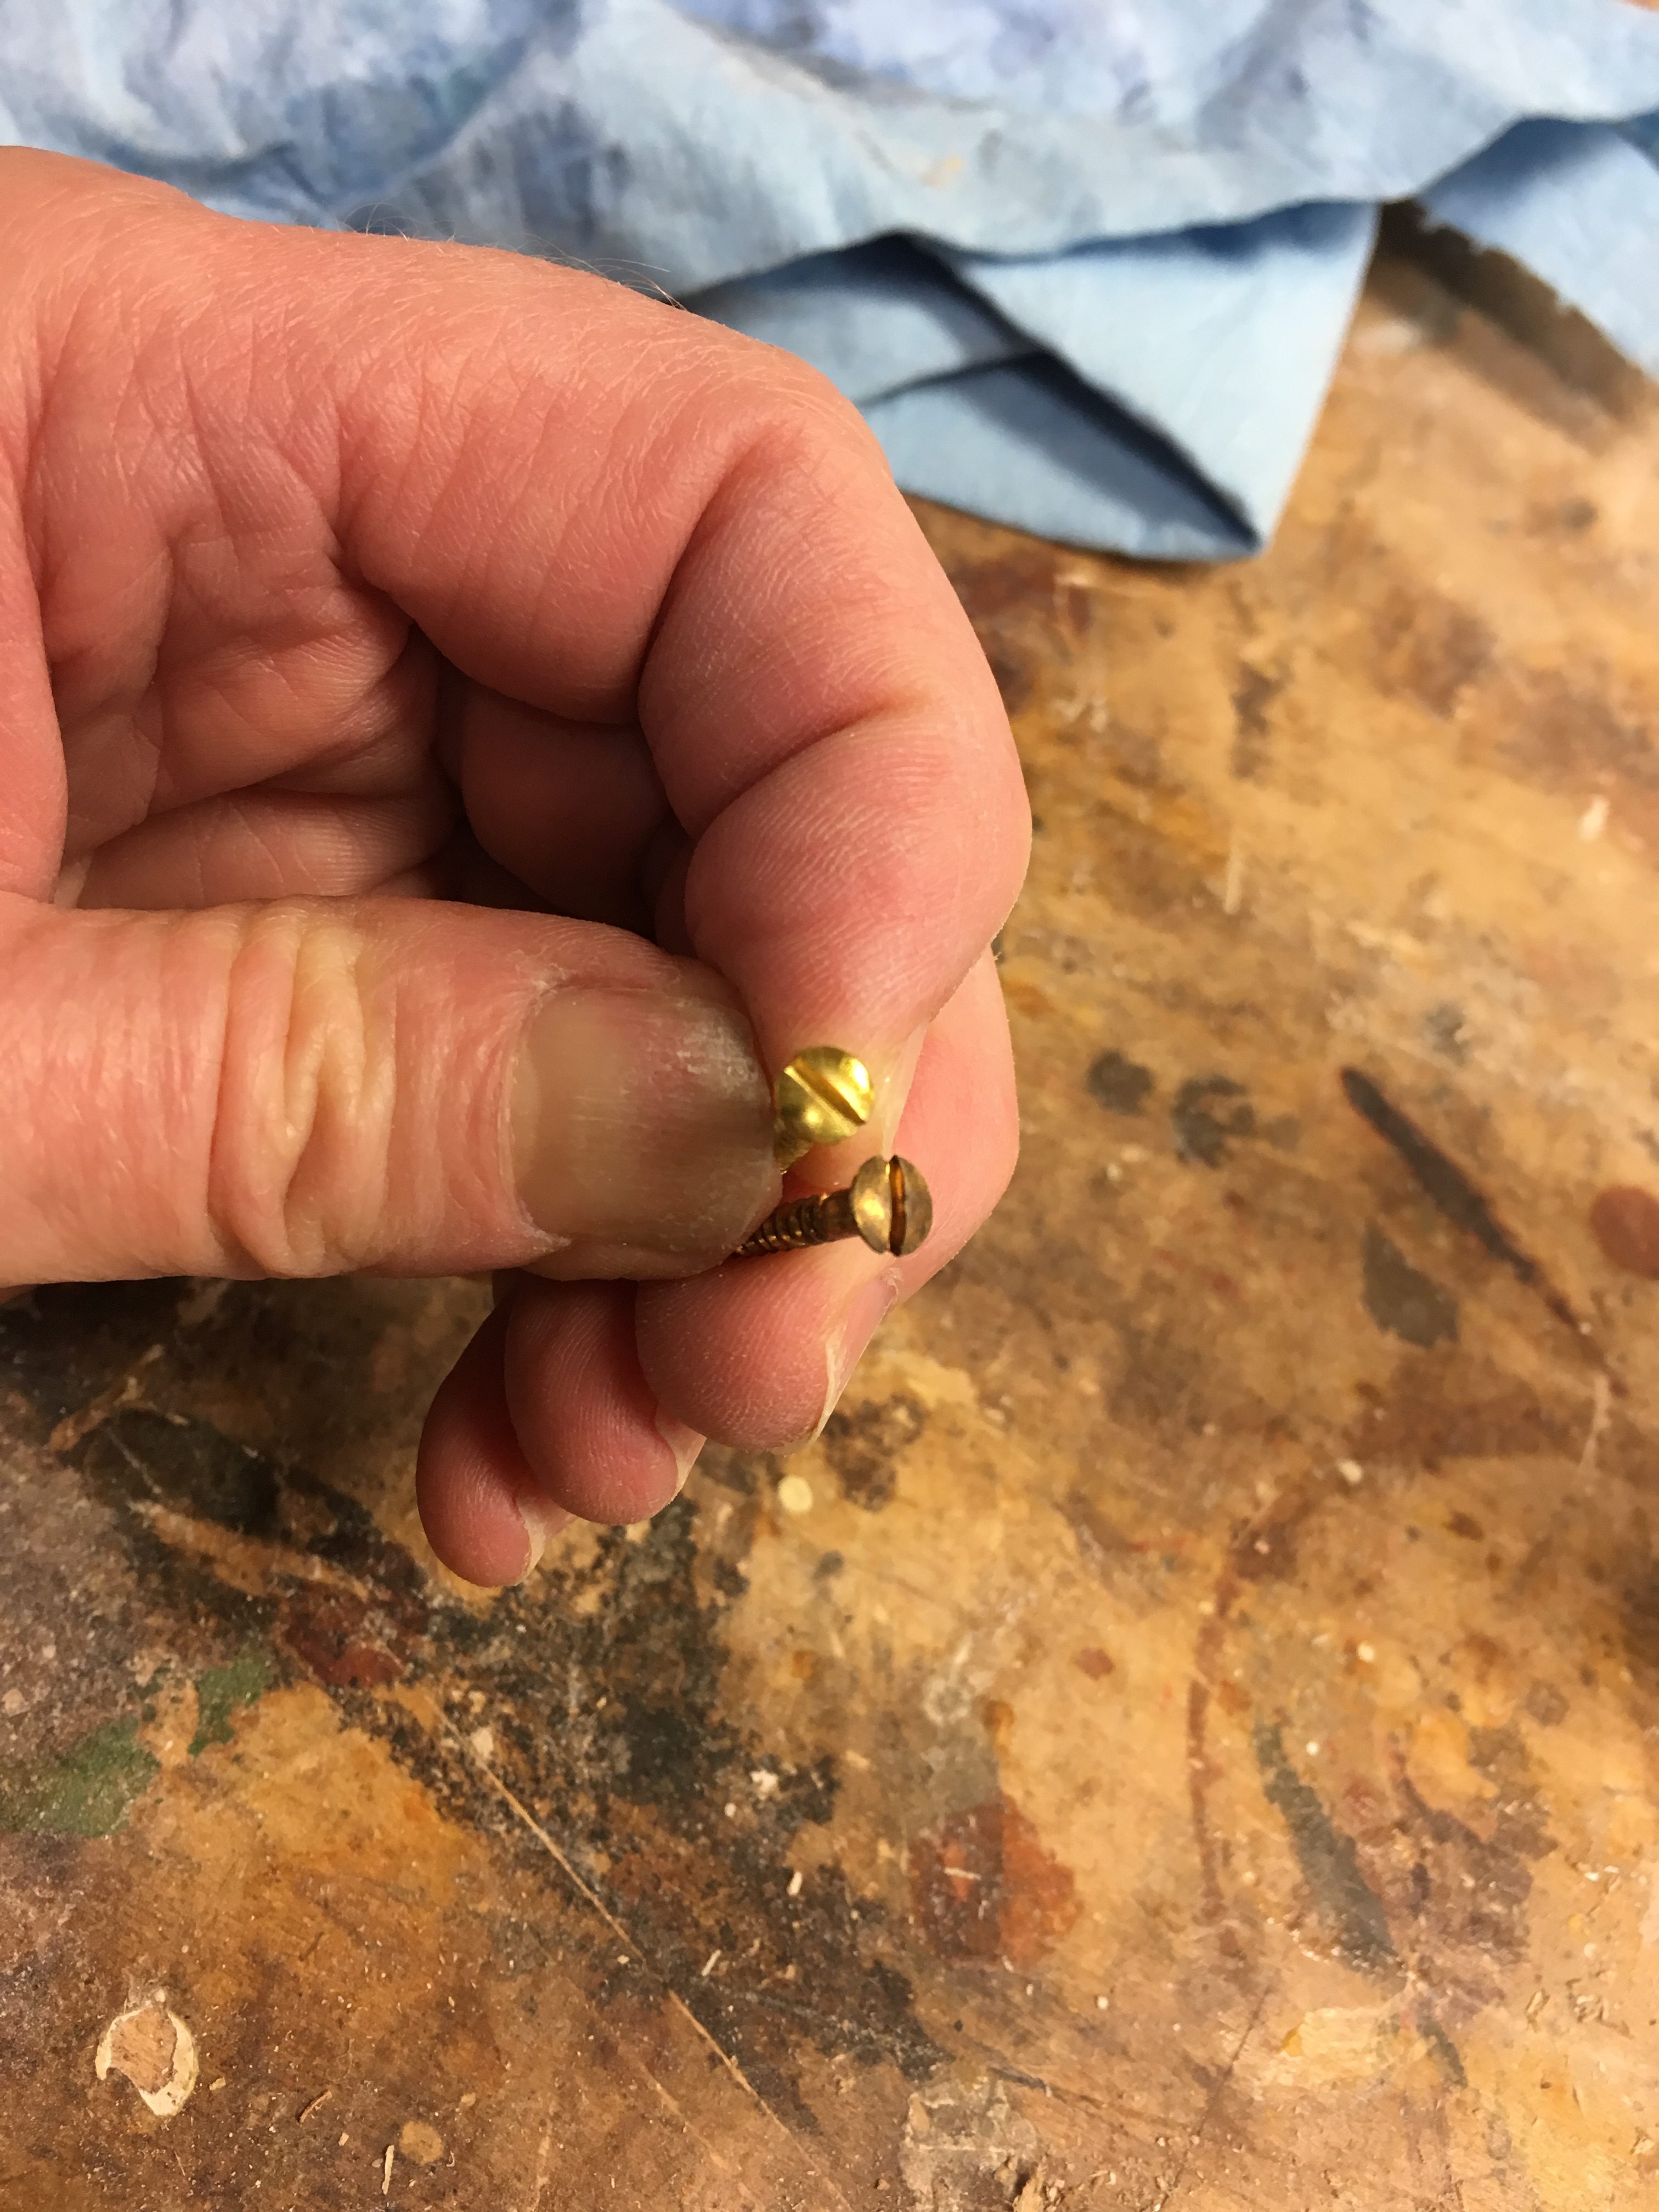
In less than two minutes, the screws that once matched the shiny new slotted oval head one on the left here (from Jamestown Distributors) had “aged” to match the kind of old hardware I often use in my work.
Step 3: Highlights
To simulate the built-up effect of the Lebus hardware, I rubbed the surface of the plate in strategic places.
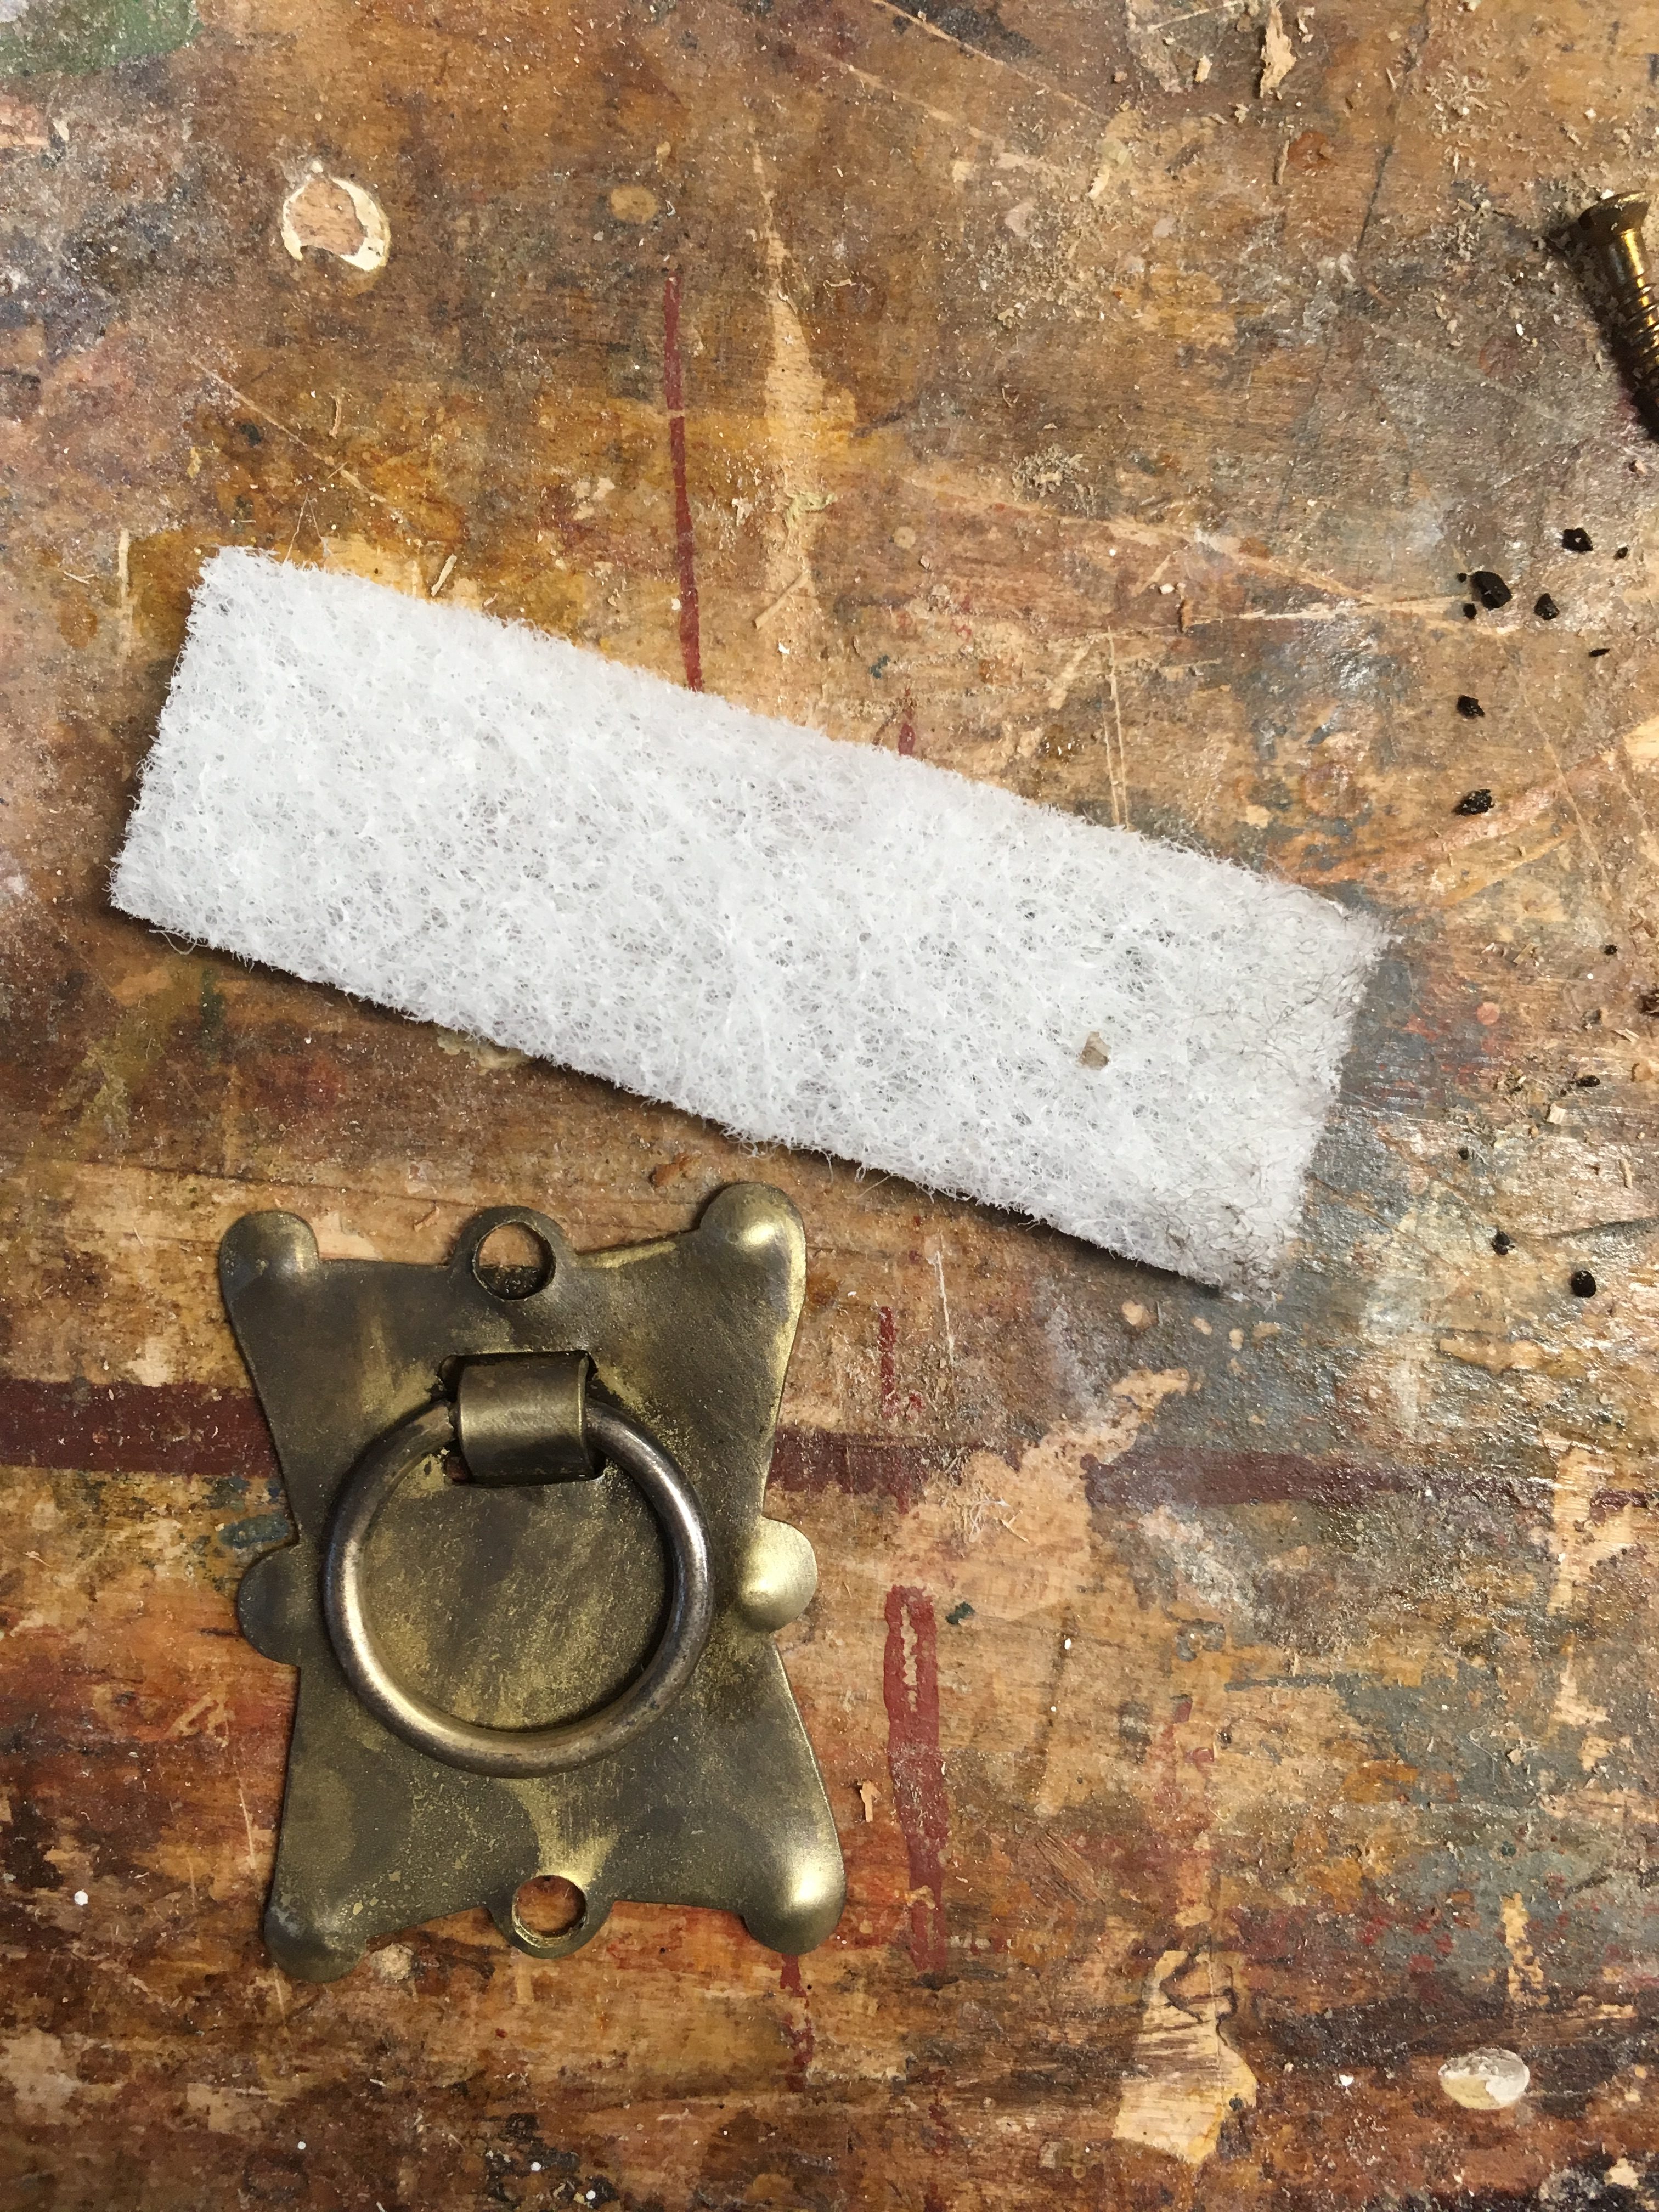
Texture duly evoked. The right side of the pull has been rubbed with this scrap of Scotchbrite pad. The left side is as it appeared when pulled from the acid.
Let me add that the solution I used for this pull and its screws has been used and reused multiple times. The stuff’s not cheap–and you can make the most of it by pouring it back in the original container after use. It remains effective.
***
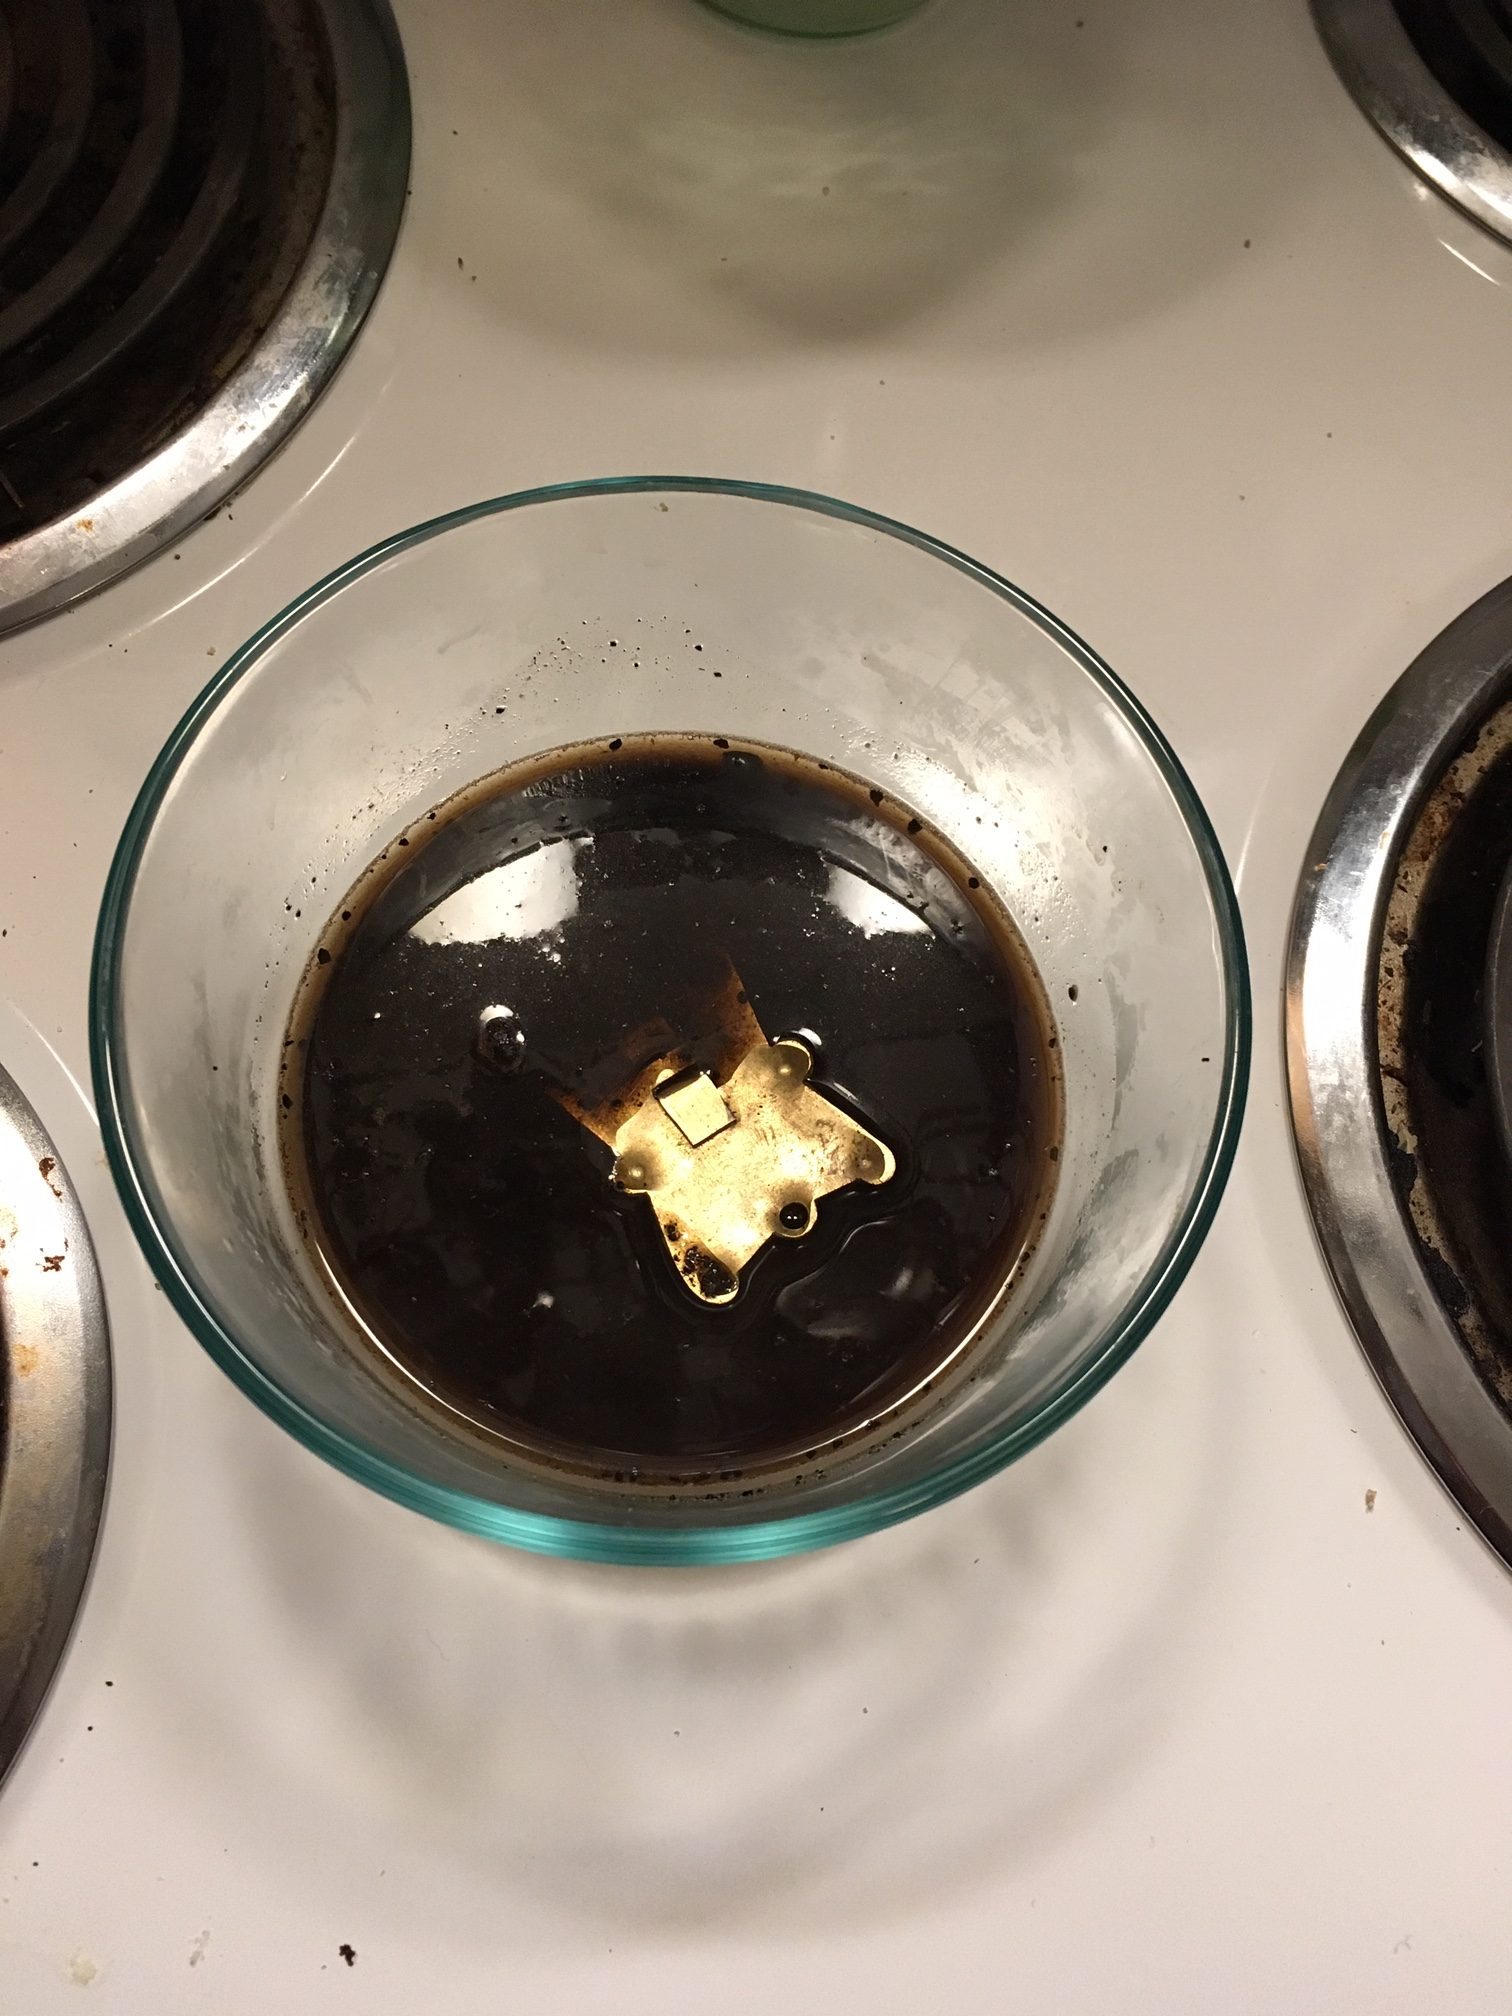
And now back to that coffee. Here is what the brass looked like after about 30 hours face-down in the grounds:

Something is definitely happening. Note the darkened dots.
The thing is, I have to leave on Monday morning and don’t have the leisure of allowing the brass to brew. So I decided to try adding heat as a means of hastening the reaction. I poured out some grounds and made them into a slurry with boiling water, then plopped the pull back in.
Here’s how the brass looks after 48 hours of caffeination. The effect is much more subtle than that of the proprietary acid mix. I like them both and am grateful to Adam for telling me about this alternative technique for aging brass.
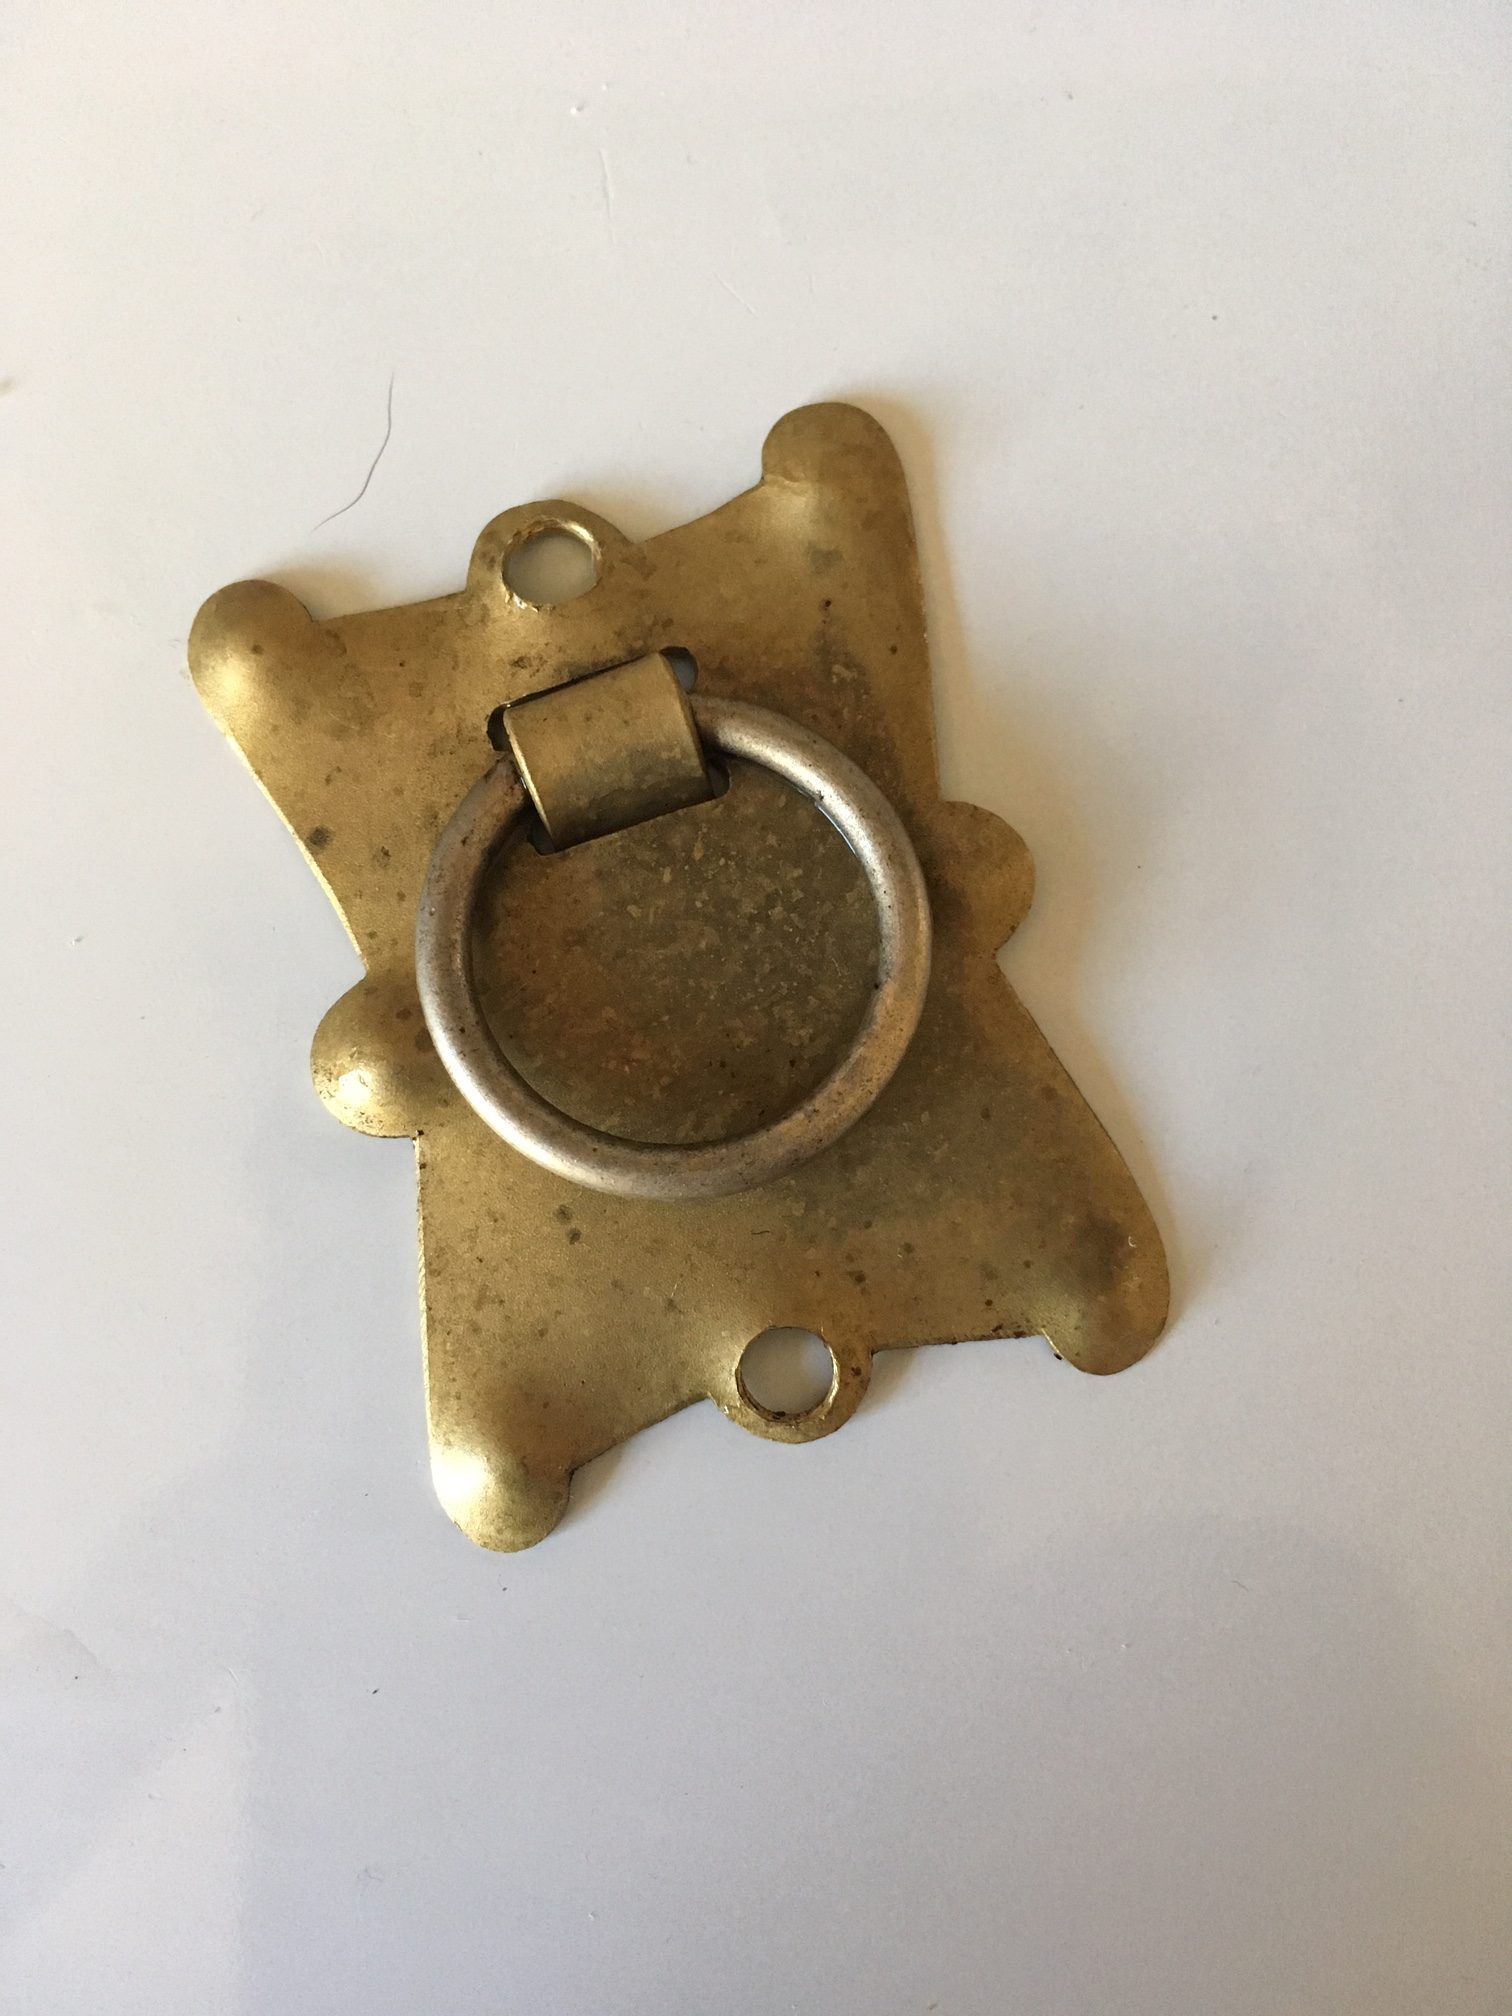
After 48 hours, the coffee-ground pull has changed significantly. I can’t leave it any longer, because I have to finish prepping for my trip, but according to Adam it would continue to darken if left a few more days, at which point I could burnish some highlights.
Here are some supplies and tools we find essential in our everyday work around the shop. We may receive a commission from sales referred by our links; however, we have carefully selected these products for their usefulness and quality.


I really love that small table/bedside cabinet.
That would make a great project article for Popular Woodworking!
You are the THIRD person to suggest this as an article! I will send in a pitch. Glad you like the table.