We may receive a commission when you use our affiliate links. However, this does not impact our recommendations.
It is very easy to install thin plywood splines in mitered corners of boxes and frames But, to do so successfully, you will have to design the placement pattern of the splines and spend some time carefully laying out your design on the corners. (Read part one of the micro splines story here)
Design
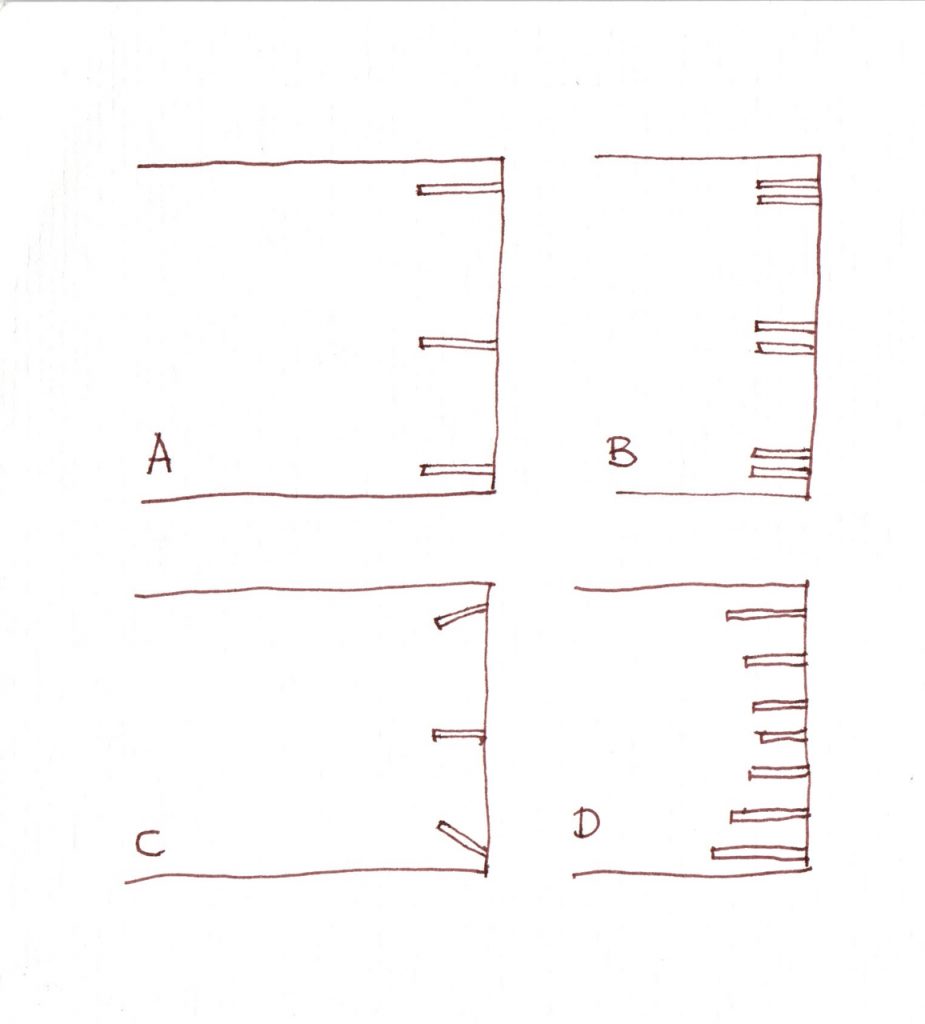
Above (in the lead image) you can see a few optional designs that can be easily cut with a hand saw.
Splines can placed apart from each other (A, above) or be grouped together (B, above). Splines can be cut at a right angle to the corner or be elongated to it (C above, F below). You can create splined corners that look like an arc made out of splines (D above and below) and you can even alternate the length of the visible splines on each sides of the corner (E below ). In short, the possibilities here are endless.
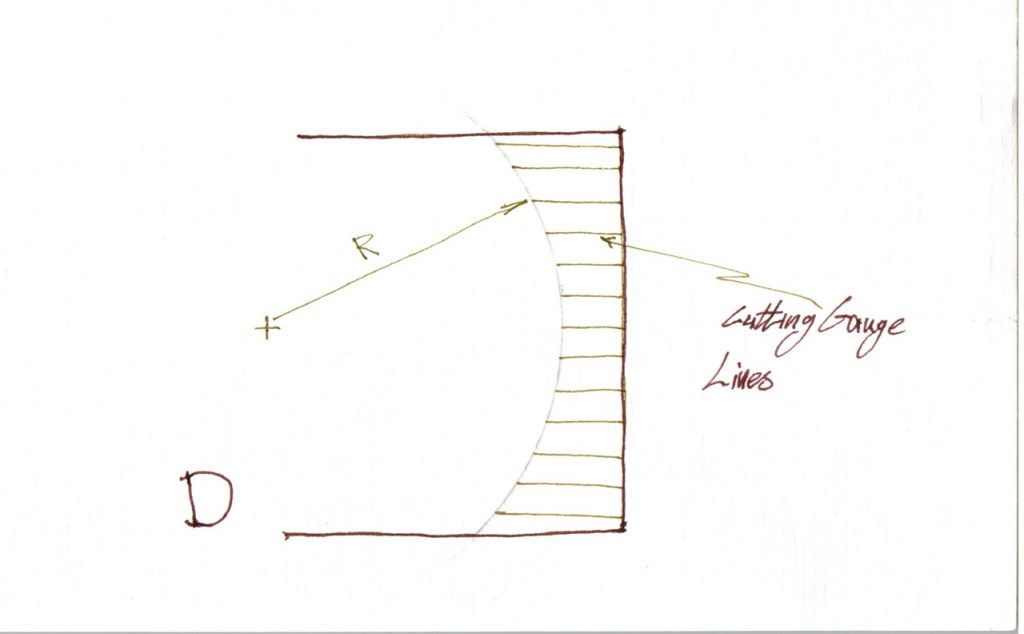
To lay out a kerf pattern for an arced splined corner, start by opening a compass to the appropriate radius (R) then draw an arc from center (C). Now use a marking or cutting gauge to draw a number of parallel lines that intersect with the arc to create the effect of a decorative arc.


Lay Out
To lay out the location of the splines, I use a marking gauge, cutting gauge or pencil gauge, and a square. I begin with indenting or marking parallel lines to the edge of the box that are a bit longer than the length of the splines (1-6). Then I take a square and a pencil and draw an intersecting line (or a latitude line) across the face of the corner to indicate when to stop the kerf. If your corner is well-made you can use the pencil gauge instead of the square and pencil.

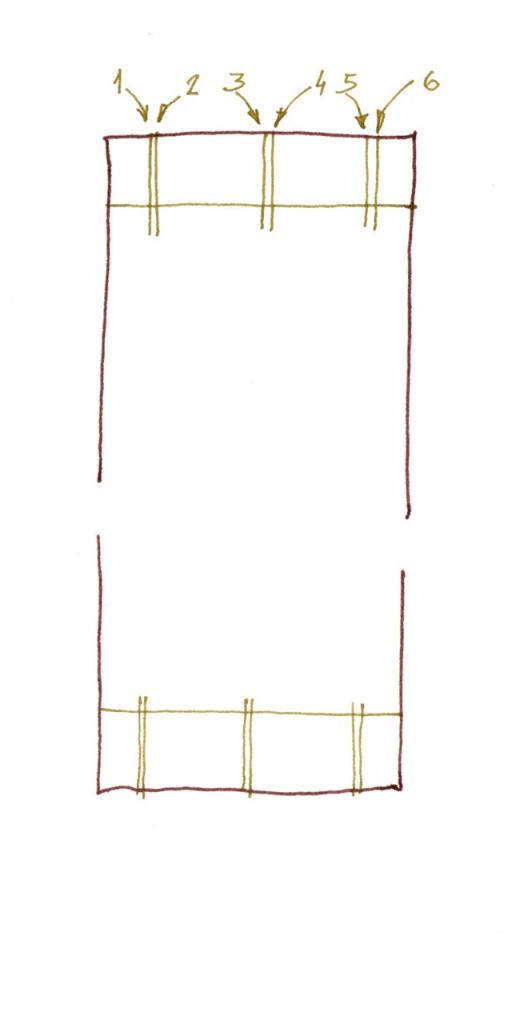
To lay out a six-spline corner, start by scoring the splines’ kerf locations with the help of a marking or cutting gauge. You will have to readjust the marking tool three times and score from both sides of the box. Then with the help of a square, draw an intersecting line to indicate how deep should the kerf be cut.
Cutting the Kerfs
To cut the kerfs, hold the object in the vise at a convenient angle and begin the kerf slowly. Once you have established a deep enough divot, increase your sawing audacity and saw until you reached the square’s lines. Next, cut rectangular splines form a long strip of micro plywood and glue them into the kerfs.
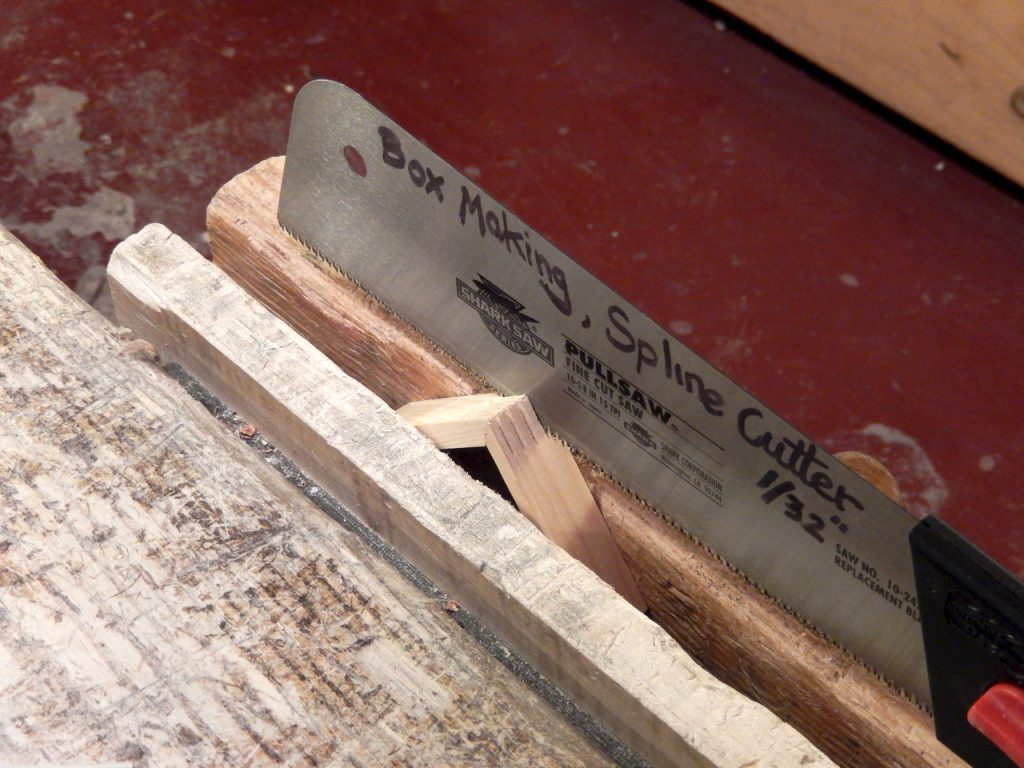
Sawing a 1/32″ kerf
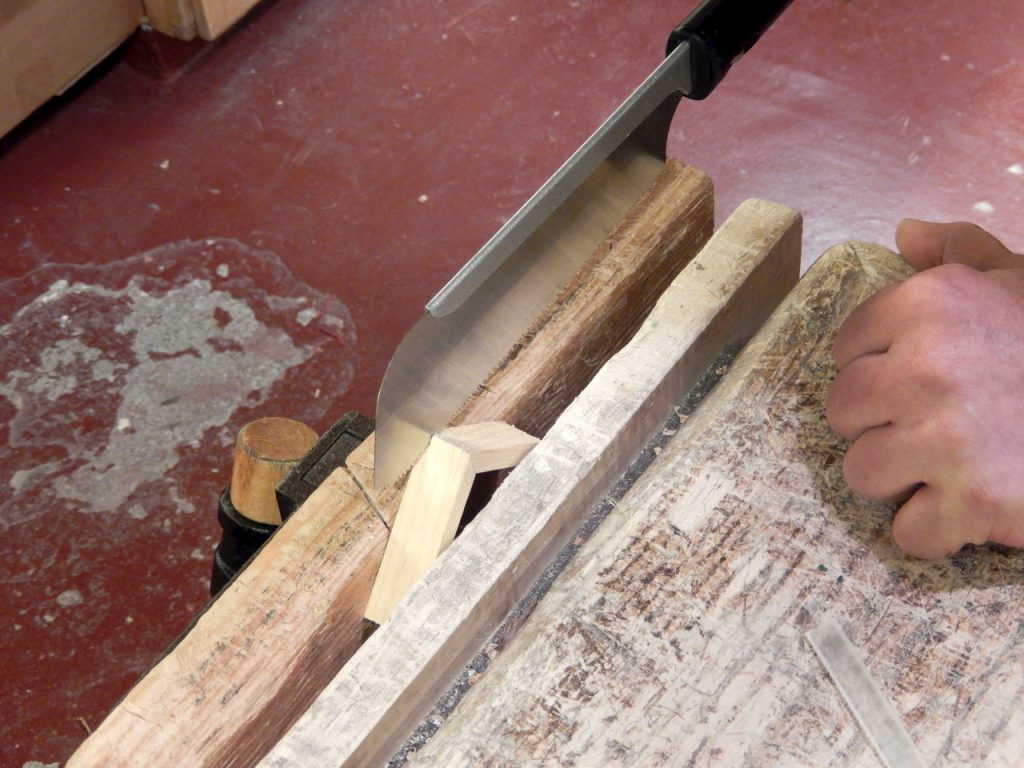
Sawing a 1/64″ kerf.


After the glue has dried, cut off the extra length with a flush-cut saw, then plane or sand the corners smooth.


After applying a coat of finish on the object, you will witness how the splines amplify the appearance of the box or frame. The micro-plywood splines technique is an easy way to boost both the look and the strength of miter joints, and is a great way to train students to use hand tools and increase their dexterity and confidence. It provides the object with an elegant look that is achieved without the use of power tools and a jig, thus it makes an appropriate project for young children. Give it a try and you will not regret it.


In the future, I’ll write a detailed story of our box project and the souped-up miter boxes that we used to ensure accuracy and repeatability in the way we sawed our box’s parts.
Editor’s note: If you’re looking for a wealth of box projects, check out the many books, project downloads and videos at ShopWoodworking.com.
Here are some supplies and tools we find essential in our everyday work around the shop. We may receive a commission from sales referred by our links; however, we have carefully selected these products for their usefulness and quality.