We may receive a commission when you use our affiliate links. However, this does not impact our recommendations.
Most of my house rehab work to this point has been destruction rather than construction. For that, I’ve used a small kit a hand-held tools, both hand and power. I’ve gone through probably 50 blades on my reciprocating saw (there were a lot of plaster walls and inappropriate mid-century built-ins to take out), used up many multi-tool E-cut blades and spent a lot of quality time with my sledgehammer and cat’s paw.
With the plumbing rough-in finished on two new baths (and a minor HVAC issue sorted), I’m ready to start putting things back together. And as much as I love hand tools for making furniture, no way am I planning to not plug in for flooring and framing, and everything that comes after.
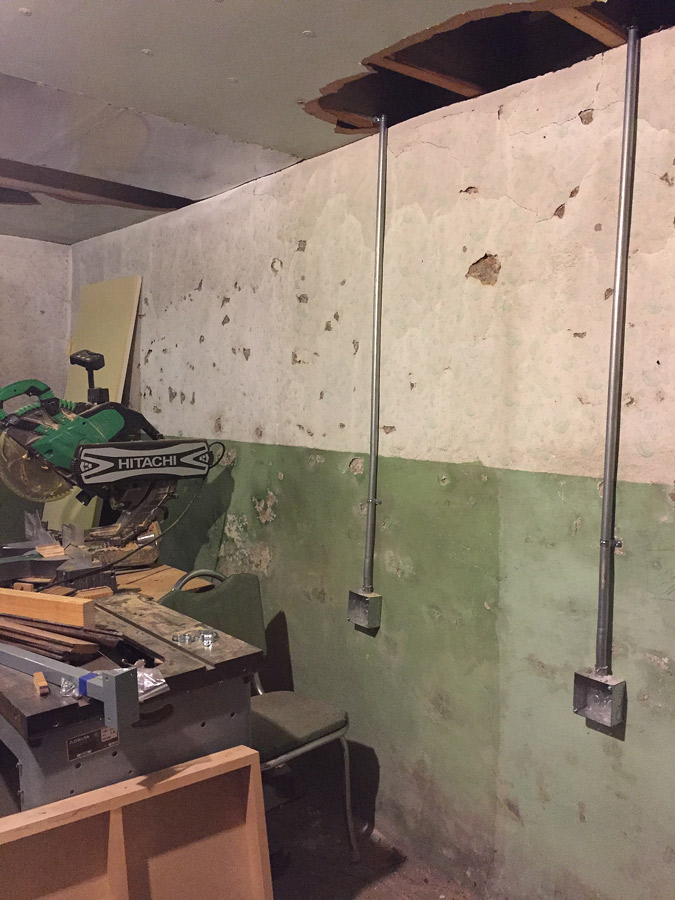
I have a Delta Unisaw sitting in pieces in the basement and a perfectly good chop saw (plus a line on a good used jointer), but I can’t use them. There are no plugs in the basement. Yet. By the time I get home tomorrow night, my electrician assures me there will be.
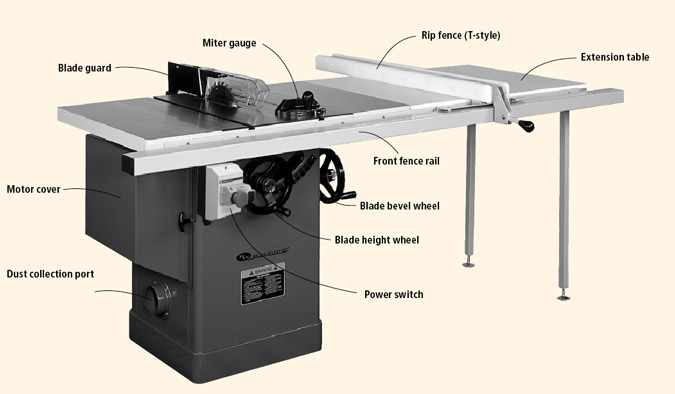
So, it’s time to set up that table saw.
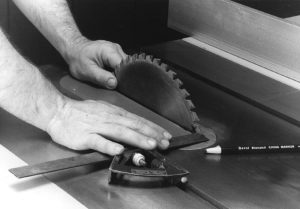
To align the blade, mount a blade and mark a tooth. Rotate the blade so this tooth is near the front. Place a square against a miter gauge slot and slide the rule until it touches the marked tooth. Then rotate the blade so the marked tooth is near the back. Move the square and measure the distance from the slot to the tooth again. If the measurements match, the blade is parallel to the slot.
To that end, I’ve been paging through our book “Woodworking Essentials” to refamiliarize myself with the process.
Here’s the important stuff to remember, á la Bill Hylton (after you’ve made sure the table and wings and any extension tables are flat to one another by placing a straightedge across them and looking for gaps)
Three Important Alignments
There are many parts to check and adjust on a table saw, and each saw will be slightly different, depending on its construction. However, there are three important alignments that affect the machine’s accuracy and ease of operation more than any others – the blade must be parallel to the miter gauge slots, the rip fence must be parallel to the blade and the splitter must be parallel to (and in line with) the blade.
■ Aligning the Blade
Before you can align any part of the table saw, you must select a base of reference – a line or plane from which you can measure the position of every other part. The reference most often used is a miter gauge slot, because these positions can’t be changed.
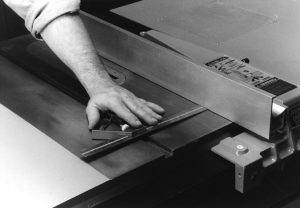
Once you know the blade is parallel to the miter gauge slots, check the fence alignment. Position the fence near a slot. Rest a square against the side of the slot, near the front of the saw. Slide the rule until it just touches the fence;repeat this near the back. If the measurements are the same, the fence is parallel to the blade.
Use a combination square to measure the distance between a slot and a saw tooth near the front of the blade. Then rotate the tooth to position it near the rear of the table and measure again. These measurements must match for the blade to be parallel to the slot. If they differ, consult your manual to adjust for parallel. The steps are different for contractor and cabinet saws.
■ Aligning the Rip Fence
Position the fence near a miter gauge slot and lock it in place. Use the combination square to measure the distance between the slot and the fence face near the front and back of the saw. If the measurements differ, adjust the fence to be parallel to the slot. When both the fence and the blade are parallel to the slot, they will also be parallel to each other.
■ Aligning the Splitter
Lay a straightedge against the blade and the splitter to check the alignment. If the straightedge doesn’t lie flat against both parts, the splitter is misaligned. Bend or adjust the splitter into position according to your owner’s manual.
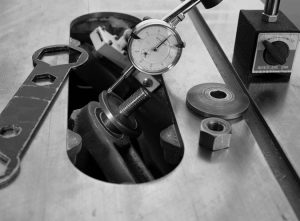
Use a dial indicator to check the flange for
runout. It needs to be flat or “true” for the machine to work
optimally.
Another important alignment you should check is the arbor flange for runout. Unfortunately, if there’s significant runout (about .003″), there’s not much you can do about it short of replacing the part. — BH
I hope by Tuesday to be sharing with you a picture of my at least semi-operational basement shop, and a table saw that serves as more than a flat surface on which to pile things. (Well, more semi-operational, anyway. My hand tool room has been in usable since the day I brought my bench and tools home from work.)
Here are some supplies and tools we find essential in our everyday work around the shop. We may receive a commission from sales referred by our links; however, we have carefully selected these products for their usefulness and quality.




Thanks Megan, I like the quick way to check for alignment using the sliding square. Just got up from the computer and checked my saw and it was dead on! I pretty much knew the blade was okay, more concerned about the fence, which was adjusted by a ruler a month ago. The sliding square is a much easier, “no brainer” way to go… surprised I didn’t think of it myself! “?” Again thanks, Ted
PS – Remember the trouble you were having moving around your work bench a few years back… did you ever resolve that problem? I might have a simple solution!
Instead of using a straightedge to check that the saw top and the extensions are even with each other simply lay a nickel on its side and slide it back and forth across the joint. It will catch on the slightest misalignment.
Are we talking about plugs or outlets?
You don’t need plugs if you use “air” tools.