


We may receive a commission when you use our affiliate links. However, this does not impact our recommendations.
If your painted finish feels a little rough, you need to go to the liquor store.
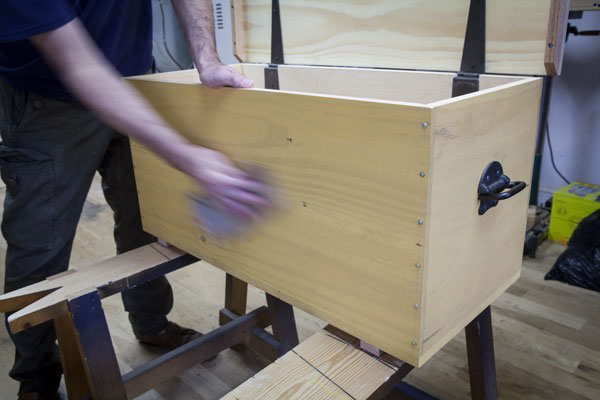
OK, that doesn’t make sense, so let’s back up a couple weeks when I was teaching a bunch of young woodworkers how to build a tool chest by hand at the Marc Adams School of Woodworking.
After building the 18 chests, we finished most of them with milk paint, a modern and quite easy way to paint furniture and interior trim. We bought a bunch of bags of milk paint from the Old Fashioned Milk Paint Co. and then mixed up the powder.
I’ve been using powdered milk paint for about 20 years, and my first step when mixing up the paint is to throw away the manufacturer’s instructions. The official instructions makes paint that is too thick for my taste.
I mix the paint with two parts warm water to one part paint – and I might thin it even a little more than that. (Most instructions recommend 1:1 – too thick for me.) I dump the water and powder into a mason jar and shake it for 10 minutes. I let the mixture sit for 20 to 30 minutes. Then I strain it through cheesecloth to ensure there are no lumps (but there almost never are).
Then I roll on the paint with a foam sponge roller and massage the details with a natural-bristle brush.
If I want a translucent finish that I can see the wood grain through, I apply one coat of paint only.
If I want a finish that shows a hint of wood grain, I use two coats.
If I want a solid color, three coats.
The real trick to milk paint is what you do after you apply the paint. If you are using multiple coats of paint, sand the paint between coats with a #320-grit sanding sponge. If you are applying only one coat, however, don’t use the sanding sponge. That will remove too much pigment.
Wait for the paint to dry overnight. Then brush the entire project with the palm of your hand to remove any big chunks of pigment on the surface.
Now go to the liquor store. Buy something (anything) that they will put in a brown paper bag. Take the bag to the shop and fold it like a sheet of sandpaper and rub the entire project vigorously. That will smooth and burnish the paint without stripping off pigment. I think you’ll be surprised how smooth and touchable a surface is produced by a paper bag.
— Christopher Schwarz
Here are some supplies and tools we find essential in our everyday work around the shop. We may receive a commission from sales referred by our links; however, we have carefully selected these products for their usefulness and quality.


Chis, can you give me info on the hardware you use on the chest? It looks awesome!
Chris,
This is great info. About 2 days from starting to paint my chest so great timing. On your LAP forum you had suggested putting a coat of varnish on between my dark coat of milk paint and my lighter top coat to keep the colors from bleeding together. Can you recommend something specific varnish wise given that that term seems so broadly applied? I am planning to do a test board regardless but want to short cut it as much as possible.
Or, would a light coat of shellac work between them and the milk paint top coat still bind?
Thanks,
Derrick
I was told the same thing about my oak stair bannister. I worked like a charm and burnished the wood to a baby bum smooth finish.
Now I know what to do with all that brown paper Lee Valley stuffs in their boxes.
Not only paper bags but beer cartons. I cut them into strips and use on my lathe turnings. I’m guessing about 1500 grit.
Makes sense to me. We use coffee filters to rub down our primer coats in model making all the time!
Your instructions are incomplete. What do I do with the contents of the paper bag?