We may receive a commission when you use our affiliate links. However, this does not impact our recommendations.
 Because we have just about put to bed the current issue and due to the upcoming holiday weekend, I had a little free time to be out in the shop. Look out workbench, here I come – again. Today I worked on the shop drawers that slip into boxes that will eventually fit inside the base of my bench.
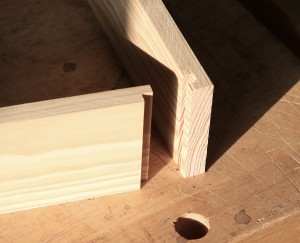
 In the left-hand photo you can see how my parts come together. I made the drawers with simple-to-assemble joinery; I don’t need dovetails in this scenario. These drawers are small and shallow, so I decided to use a dado & rabbet joint (some woodworkers call this a lock joint). Download a copy of “Joinery Tips & Techniques” to learn more about simple joints and how to make them. I keep a copy close by.
The dado is cut into the drawer sides, leaving the rabbet in the front and back. I used the two blades of a dado stack (no chippers required) to cut the dado. Because my material is 1/2″ thick and my dado is 1/4″ wide, I positioned the cut 1/4″ in from the ends of the drawer sides. With the depth of cut set at 1/4″ – one pass at each end, then it was on to the rabbets.
 Cutting the rabbets required that I slide the fence tight to my blade (without changing the cutting height). Again, one pass at each end and I was ready to assemble the boxes. Piece of cake.
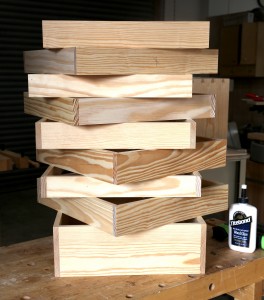
Assembly is easy, too. I added a small amount of glue to the dado then slipped the rabbeted pieces into place. Next, to act as clamps while the glue dried, I shot a couple of 23-gauge pins into each connection. (I have to add here that I growing fond of the Titebond No-Run No-Drip wood glue. The thicker consistency and the quicker drying times of this glue is making me a fan.)
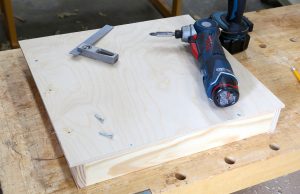
 With the boxes assembled, I needed to add a drawer bottom. Of course, plywood is my answer. I cut each piece of plywood to size and made sure that these would easily slide into the cases. With the drawer box on a bench, I positioned the bottom flush with the box front and centered from side to side. I used no glue here in case I need to reposition or move the boxes for some reason – I may even need to replace the bottoms sometime and glue would make that a pain. For the same reasons, I chose to use screws instead of nails or brads. When I finished assembling the last box to bottom, I slipped all the drawers into place.
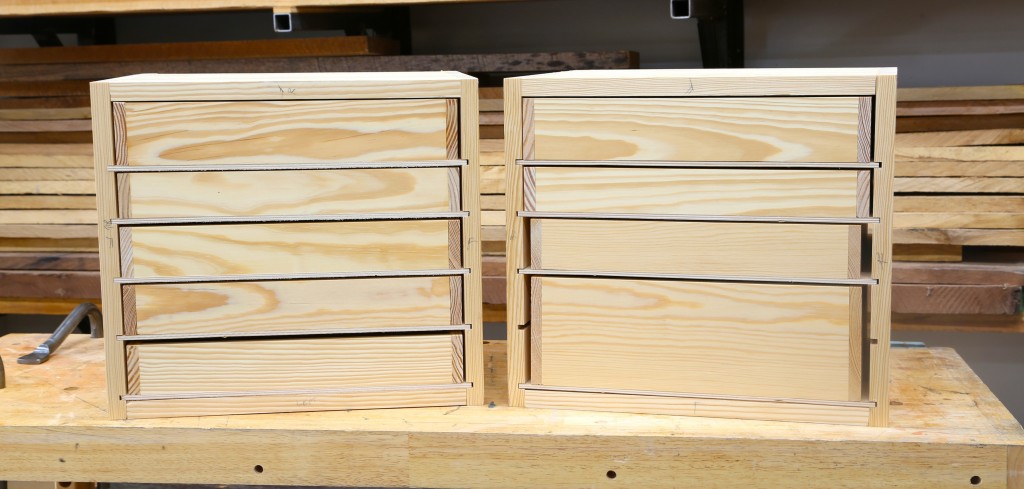
You have to admit that shop drawers of this design are great for shop furniture. They are so easy to build and assemble. And best of all, you can make them out of offcuts and scraps. Checkout the fit of the two lower drawers in the right-hand case. Notice the wider gap at the edges? The pieces I had to work with were a bit shorter than the other parts. But because these boxes attach to plywood (the pieces that need to be sized correctly), I can use almost any size box. After I mount the drawer fronts, you’ll never know which boxes are smaller. Until, that is, you slide out the drawers.
If you’re looking for other drawer construction options, download a copy of Bill Hylton’s “The Drawer Book: A Comprehensive Guide for Woodworkers.”
Here are some supplies and tools we find essential in our everyday work around the shop. We may receive a commission from sales referred by our links; however, we have carefully selected these products for their usefulness and quality.


I’m late to the conversation, but about to build drawer units to go under four of my existing shop stands I plan to use this 2″ spaced drawer design – this post and the related one about Bob Lang’s cabinet were exactly what I needed.
My question is how wide of a drawer can the 1/4″ baltic handle loaded with heavy hardware – such as bins full of screws?
I’ve settled on a standard 24″ width for all four drawer units. I plan to glue the bottoms to the drawer sides, backs and fronts. Using 1/2″ baltic for the drawer sides, the drawer will be about 21″ open span between the sides and 18″ between the drawer front and back. Can the 1/4 baltic birch handle that span without bowing in the middle?
Anyone have experience with 1/4″ ply for drawers this wide? Appreciate any guidance.
Steve
I spend 15 years as a wood shop apprentice. I’m now taking semester course called Wood Tech CAD/CAM and CNC
I have been looking for “Simple-to-build” five-drawer flat cabinet (that holds 36″ x 48″ sheets, my preferred dimension size.) project for years but to no avail.
Does anyone of you could provide me this project if it does existed?
I look forward hearing from you again soon.
Hi Glen, those appear to work quite well for drawers not meant to be heavily loaded. I saw them some time back in a book Jim Stack did, found at the following link.
http://www.amazon.com/Building-Perfect-Tool-Chest-Stack/dp/155870650X
Jim showed a couple of tool boxes in this book, using that same shelf/drawer support.
Megan, I would have provided a link at Shop Wooworking, however the search tool there kinda sux, and all I was able to get were individual papers for each of the many boxes in the book. Of course Amazoo came right up with a working link. A good book for someone making boxes to hold tools, sandpaper, what not`s in a shop environment, and well worth the 6bux asked of a used copy
Excellent choice for the workshop Mr. Huey! I have a chest of shallow drawers like these near my bench. They’ve lasted years with no problems opening and closing the drawers, or pulling them out as trays to use on the bench top. Ideal for chisels, marking out tools, screwdrivers, pliers, and a handy Stanley push drill. Your double depth drawer is a great idea, and so is keeping the dados uniform, so you can switch drawers around so they make sense in use.
Glen:
As a quick and cheap way to make utility drawers this works well. Being able to easily remove the entire drawer will add to the usefulness.
My carp is that you should have made the drawer depth modular so that drawer position could be changed. (I know Monday morning quarterbacking – or is it Tuesday morning). I would start with 3/4 or 1 inch sides and scale up from there.
Dan