


We may receive a commission when you use our affiliate links. However, this does not impact our recommendations.
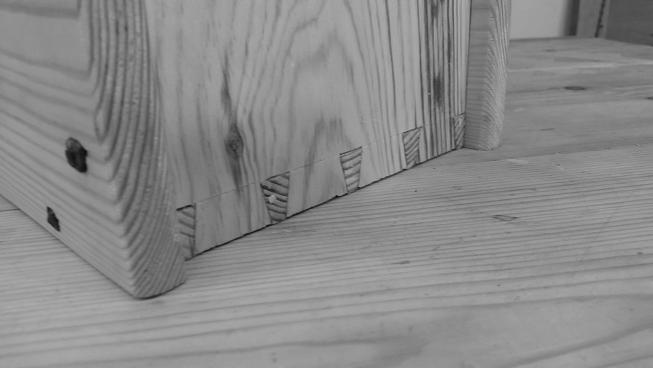
This post is less about the virtues of building a tote and more to do with some personal navel-gazing. Let’s deal with the tote first. I don’t think I’ve broken any new ground; my only aim was to keep it simple and strong. Attaching the base to the ends with dovetails gives a really strong foundation as this is where most of the stress and load is transmitted. All the wood grain is in the same orientation which is a bonus for long-term durability too. Dado joints on the sides lock the dovetails in and prevent the dovetails being able to lift out. The handle has a barefaced tenon giving a nice wide shoulder below the mortice to drive a nail in. I was tempted to go glueless – and I’m sure it would be plenty strong without – but a bit of PVA wood glue never hurt.
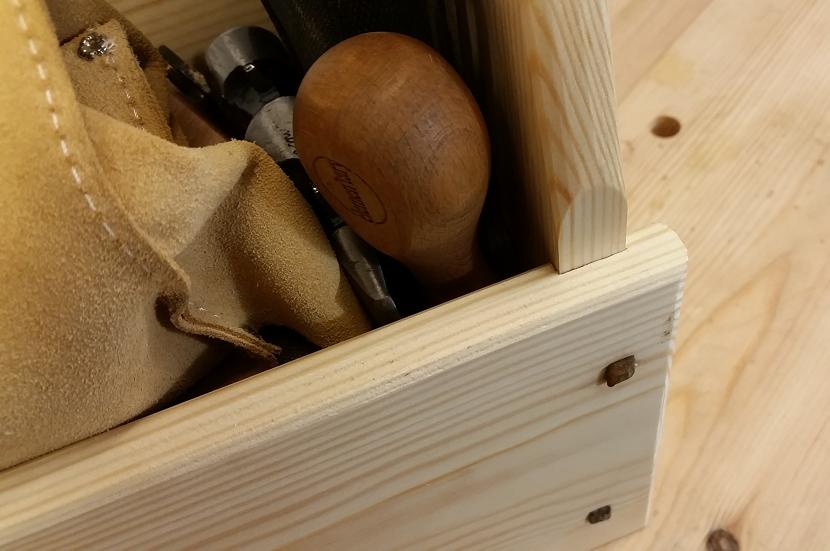
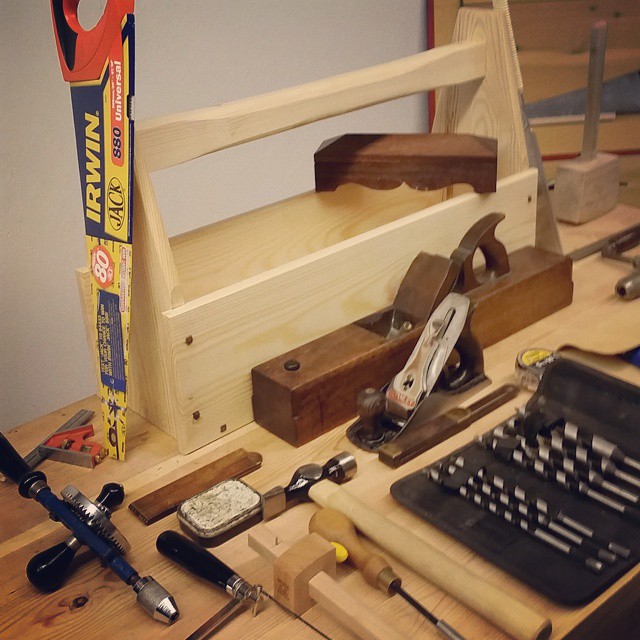
The nails were just what happened to be around (a legacy of four generations of hoarding). The design makes use of a single length of 1″ x 7″ pine with a 2″ x 4″ cut back cut back for the handle. The base needed to be cut back by 1/2″ to allow an 1/4″ dado in the sides. Apart from that it’s minimal stock prep. The tools inside are not the “essential list”; more it was to demonstrate how much you can load into one (skip to the end of the video below to see how much can be packed in).
That leads me to the navel-gazing. I’m highly likely to develop this style of video and blogging. Not so much basic tool totes but to be in the shop, let the camera run, edit the junk out and write about it. I’ve found when I’ve tried to do a series of things or the like, things get bogged down. I have a table to glue up the last drawer for and then the finish to apply. I’ve also got to get the jack plane done! Once those are out the way, I can hopefully make some tweaks.
The bogging-down is a real issue. Time is short, as I know it is for us all, and having projects stretch over months makes progress hard and less rewarding for me. The longer projects can still be done but like I said, I can have the camera running and do an update when progress is made. Anyway, if you have time, watch the video below and let me know if you think it’s something you’d like to see on other projects.
— Graham Haydon
Here are some supplies and tools we find essential in our everyday work around the shop. We may receive a commission from sales referred by our links; however, we have carefully selected these products for their usefulness and quality.


Great idea, would be a great project to introduce scouts to woodworking.
Hi Graham
Several noted the fast speed, but nobody mentioned how much fun they had with the same old noises sounding like power tools in real time. Loved the vid, probably didn’t learn a thing, but was still worth watching. I enjoyed watching. Versus the competition you are kickin butt, keep up the good work.
One question, you had some soft whitewood by the looks of it, yet when shooting you used a massive old woodie, and then probably a #5, was there something different you were trying to accomplish, or just changing stuff up to see if we were dozing? Or maybe I did learn something, and didn’t know it yet 🙂
The video was fun to watch. I have a Nicholson bench and just got my Moxon vise in. My first dovetail projects will be drawer trays. Please keep this up!
Did you use the same Western-style saw to size the lumber, both for the cross grain and the rip cuts?
If so, what saw was that?
I do understand your use of the Ryoba and Dozuki. I’m using them more and that’s why I’d like to find one Western-style hand saw “hardware store saw” for both ripping and crosscutting.
Graham,
I found it fun to watch and very informative. Could you comment on why you use Japanese saws for the joinery rather than western saws?
I enjoyed the video and thought it was helpful. Thank you
PS I was especially amused by the “jackhammer chisel”! If I could make a chisel work like that I wouldn’t avoid them so much!
That was a wonderful video– keep up this kind of thing– I am so used to power tools it is refreshing– and optimistic– to see such beautiful hand-work~!
Also, I have yet to cut my first dovetail and now am tempted to try it. Thank you!
For me, the fast-motion filming gave me a much better idea of what’s involved in the project. It was also easier to stay focused on what was going on. Although I like dovetails, watching someone cut dovetail after dovetail in real time can get boring, and it’s easy to lose track of what role a given part plays in the whole project. Your video was very informative as well as entertaining — I liked the couple of super-slow-motion plane strokes. Thanks.
Graham, I loved the video feel and speed. Very Diresta. I’m looking forward to more of these type of videos.
Graham, what was the total build time?