


We may receive a commission when you use our affiliate links. However, this does not impact our recommendations.
Leaf mortises: to chop by hand or rout?
Because I specialize in work for period interiors, many of the kitchens and built-ins I make for houses from the early 20th century have inset doors hung on traditional butt hinges. By traditional butts I mean the kind with two leaves that “butt” together (yes, this is the origin of the hinges’ name), as distinct from the no-mortise variety that offer easy adjustment.
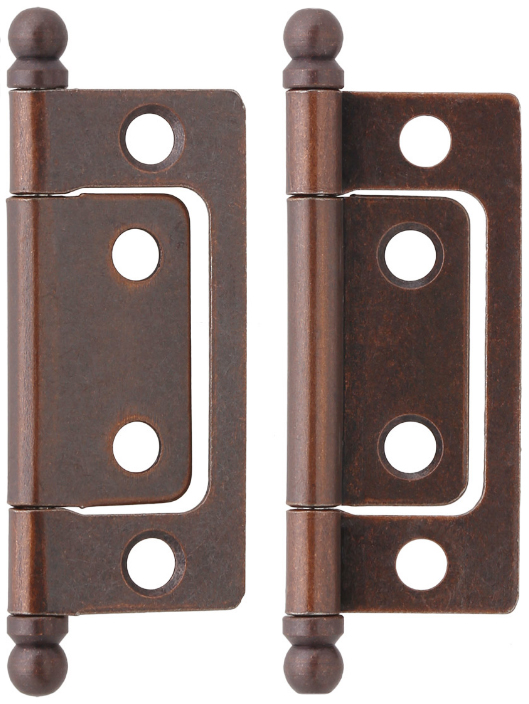
No-mortise butt hinges have a small leaf that fits into a hollow in a larger one, obviating the need for mortising. The screw holes in some brands are elongated to allow you to adjust the door’s position.
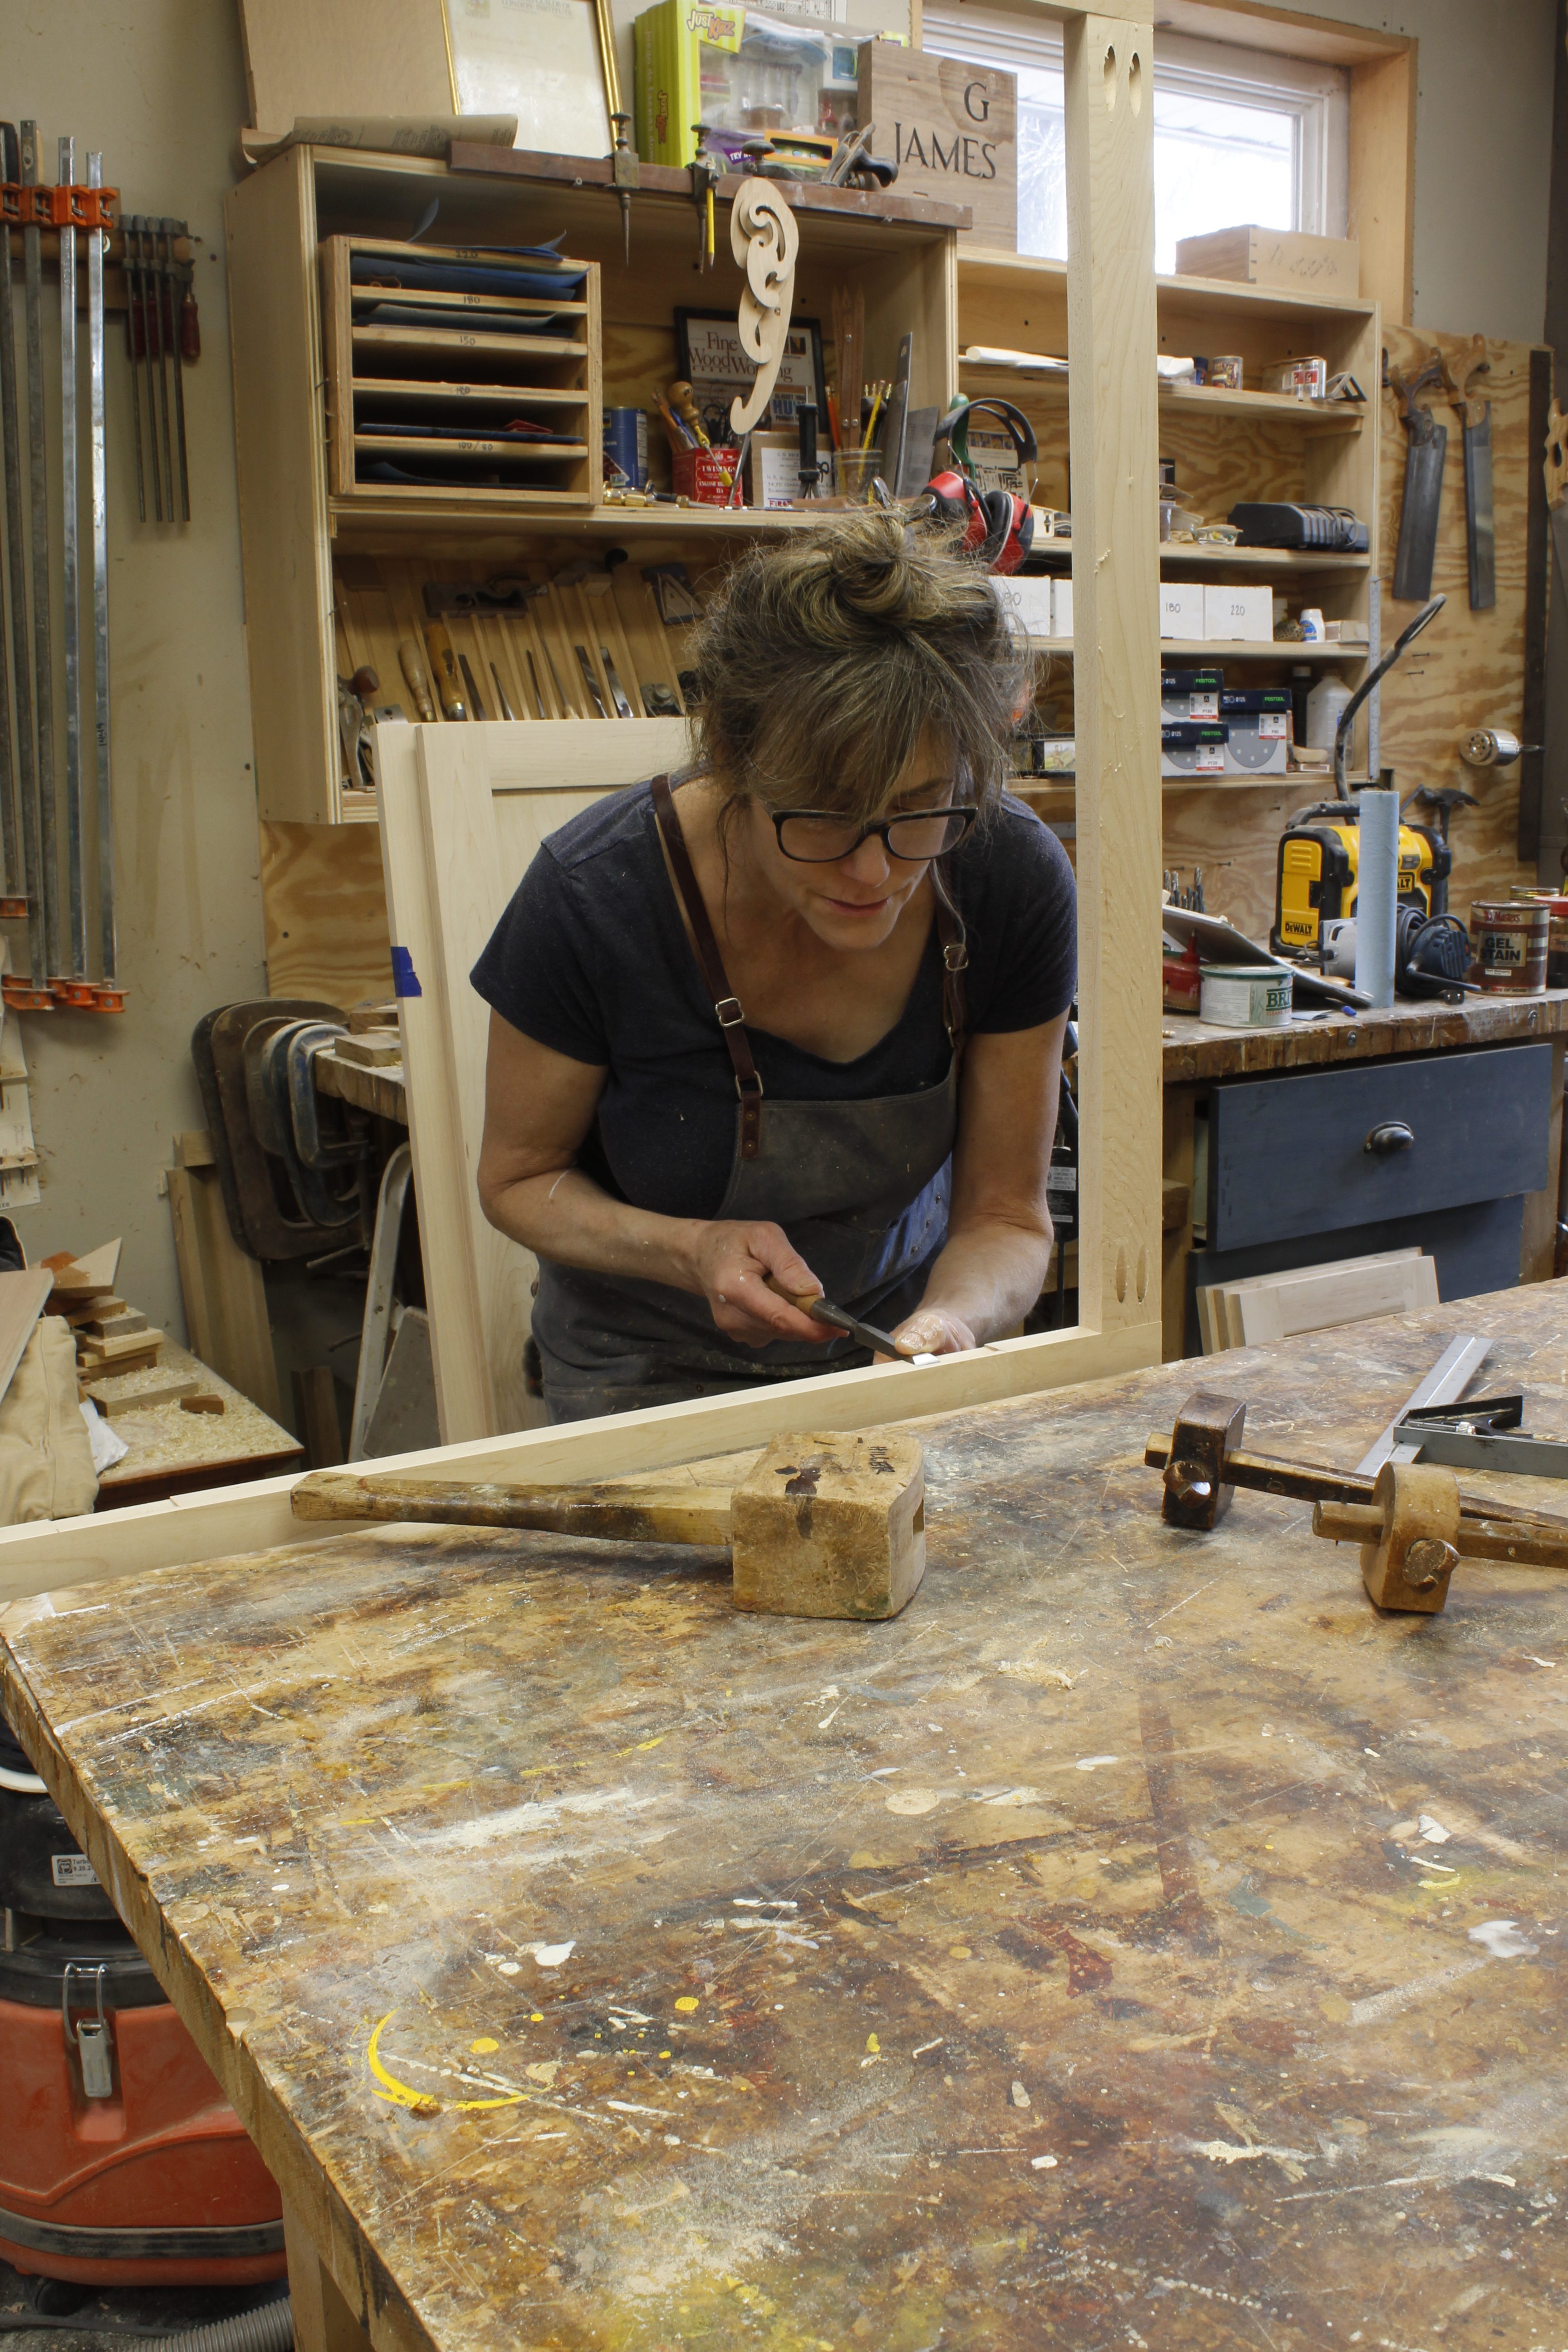
At this point in my career I’ve cut enough hinges into doors and face frames that I’m reasonably fast. I timed myself the other day, just for the heck of it. With a sharp chisel and a pair of marking gauges I laid out and chopped four mortises in 14 minutes, which translates to 3-1/2 minutes per leaf. (I am not going for a speed record, but for accuracy. If you can do it faster, great.)
For my current kitchen job I’m mortising the hinges into the face frames and doors–one leaf in each part.* Due to the position of the hinges on the face frames, it was simpler and more efficient to cut those mortises by hand. But sometimes it makes sense to rout hinge mortises, especially on the doors, with a jig, as I plan to do after fitting these doors in their openings once the cabinets have been installed on the job site.
Most people assume a router will be vastly quicker, but in my experience that’s not always the case. You still have to position the jig precisely on the edge of the door so that the mortise will line up with the knife marks made during onsite fitting. Once the jig is in position, it’s clamped to the door, and I rout the first mortise. Because the cutter produces a radius at the corners, I then have to square the corners up with a chisel. Once that’s done, I can move on to the door’s second hinge mortise. In other words, although I haven’t timed this process (yet), I’m not convinced it’s any faster than chopping by hand.
Still, I lured you here with the promise of a mortising jig, so here you go.
Step 1: Choose your router and cutter
A hinge mortising jig must take into account the size of your hinge (in three dimensions: length, width, and thickness), the type of router you’re using**, and the diameter of the cutter. For this job I wanted to use my lightweight Bosch laminate trimmer with a 1/8″-diameter straight cutter. This jig is made accordingly. Most hinge mortising jigs are made for use with a guide bushing attached to a router base. If you want to go that route, just modify the design accordingly.
Step 2: Layout
The point of this jig is to cut a mortise that will be a nearly perfect fit for your hinge leaf. (I say “nearly perfect” because you’re still going to have to cut the corners square by hand.) The jig will guide the router cutter around the perimeter of the mortise, then you’ll move the machine back and forth to hog out the rest of the waste.
Start by laying out the mortise with marking gauges, as you would if you were going to cut it by hand.
(Want more detailed guidance on layout and the principles behind butt hinge mortises? See my earlier post, learn more about installing butt hinges by hand.)
Step 3: Scale up for the machine
Now you need to translate the outline of the hinge leaf so that your router will cut it. I find it useful to compare the principle to using a pantograph.
In my example, I laid the laminate trimmer with the 1/8″-diameter cutter in place in each direction–to the left, to the right, towards the back, and with the cutter set to the depth of my hinge leaf thickness gauge line. I traced those points onto a scrap, then proceeded to the next point.
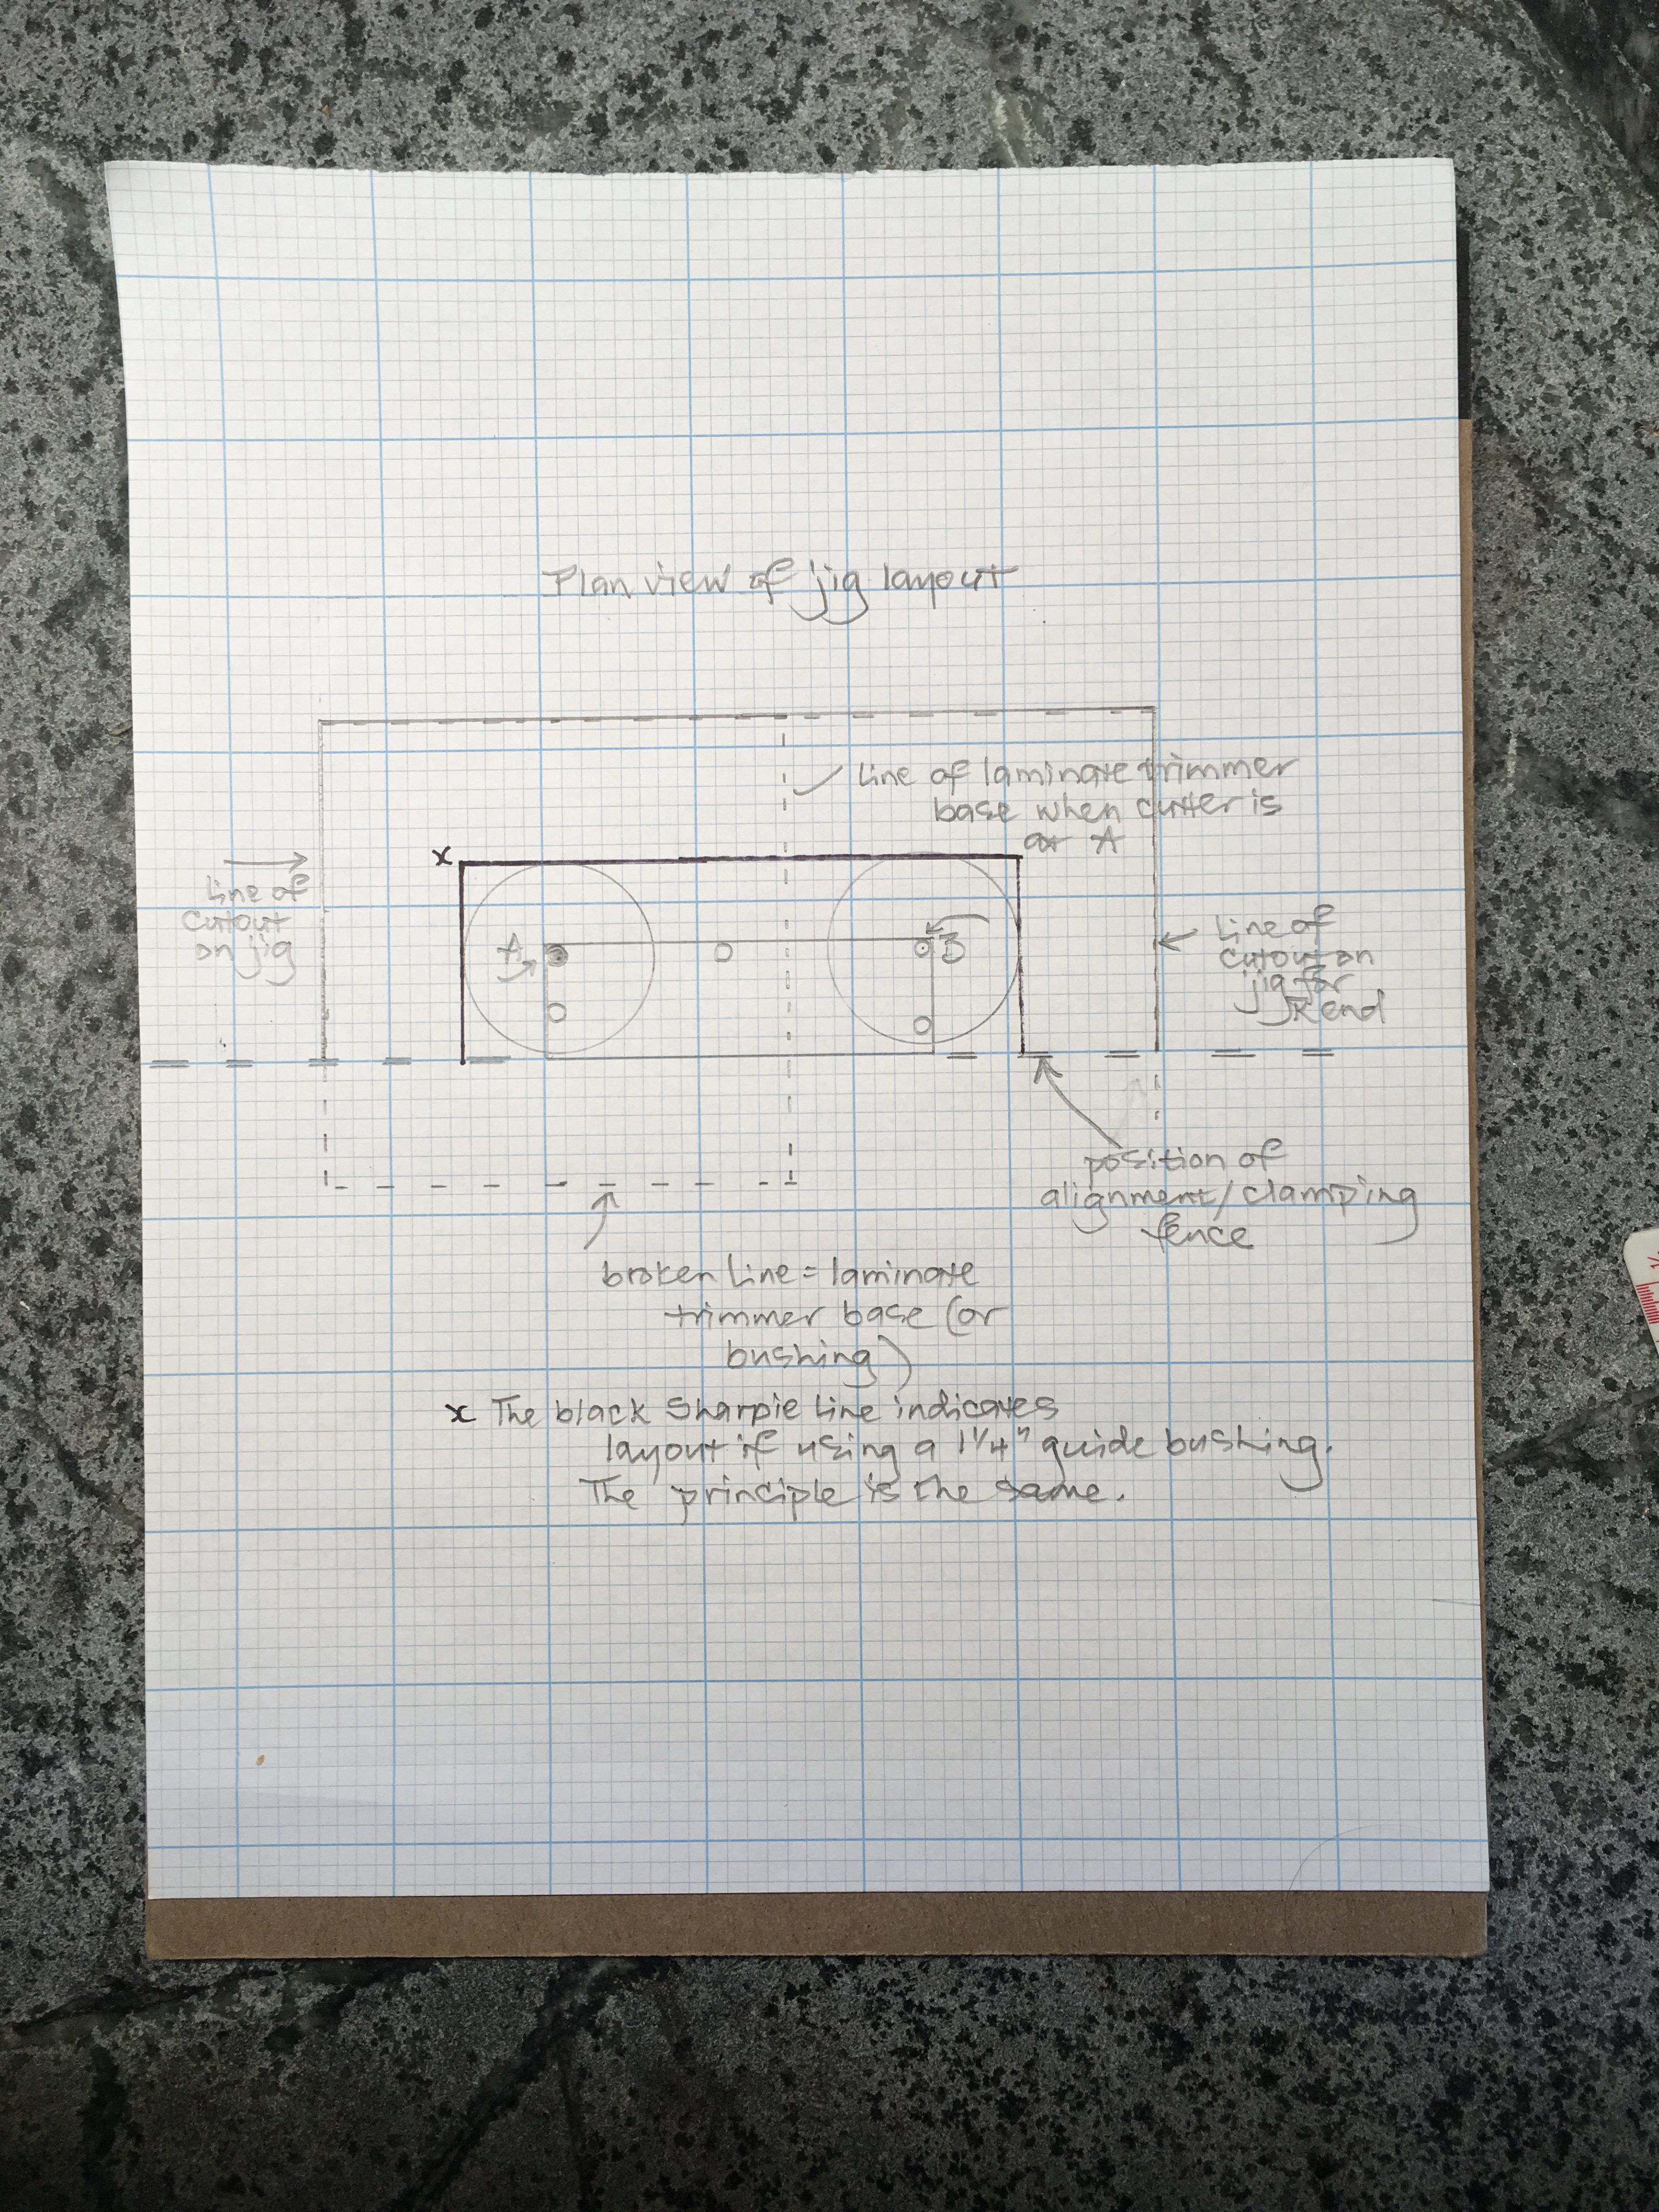
This drawing shows how I determine the position and size of the jig cutout. The drawing shows two types of guide: the 3″ square broken line refers to my laminate trimmer base; the 1-1/4″ circle refers to a router guide bushing. In either case, you need to base the cutout on the distance from the points where your cutter will fall as it traces the outermost lines of the hinge mortise.
Step 4: Make the jig
This jig consists of a guide for your router cutter and a fence you can clamp to your door. The guide for the router cutter is a strip of 3/4″-thick plywood; it has to be wide enough that your router base (or bushing) will be supported at the back and long enough to sit securely on your work piece.
Attach a sturdy strip of material (I prefer solid wood) to the front of the guide with glue and screws. This strip will snug up against the face of your door and allow you to clamp the jig to it.
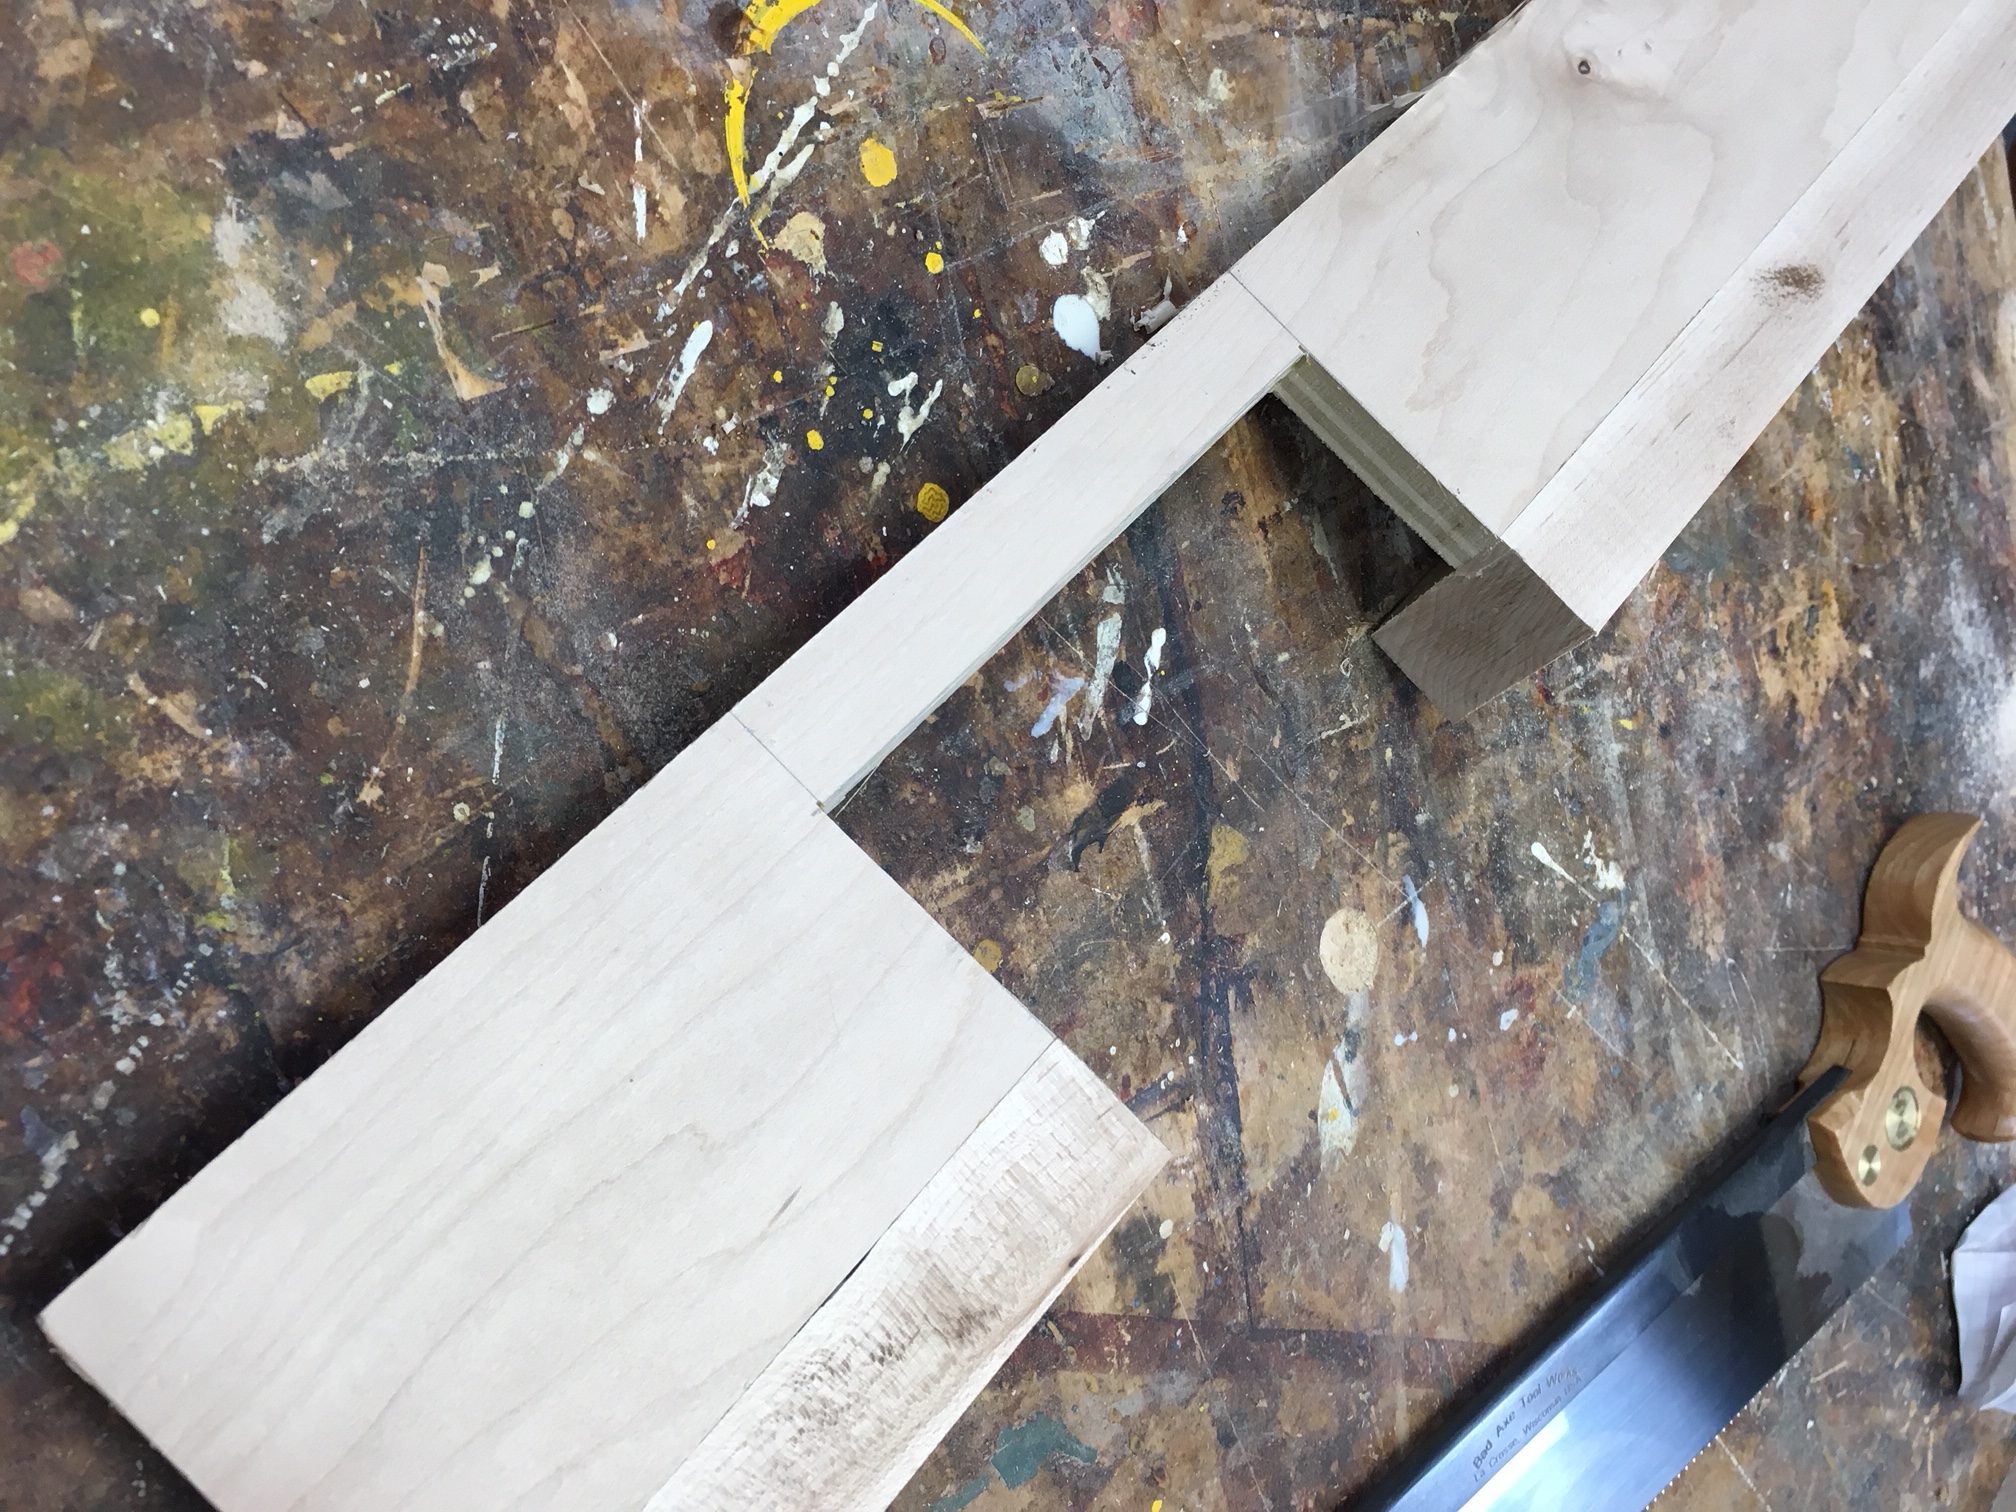
This is it. Ultra-simple. I had to add an extra notch at the back of my jig to accommodate an adjustment knob, but if you’re using a guide bushing, you should only need a rectangle.
Set the cutter depth to your gauged line.
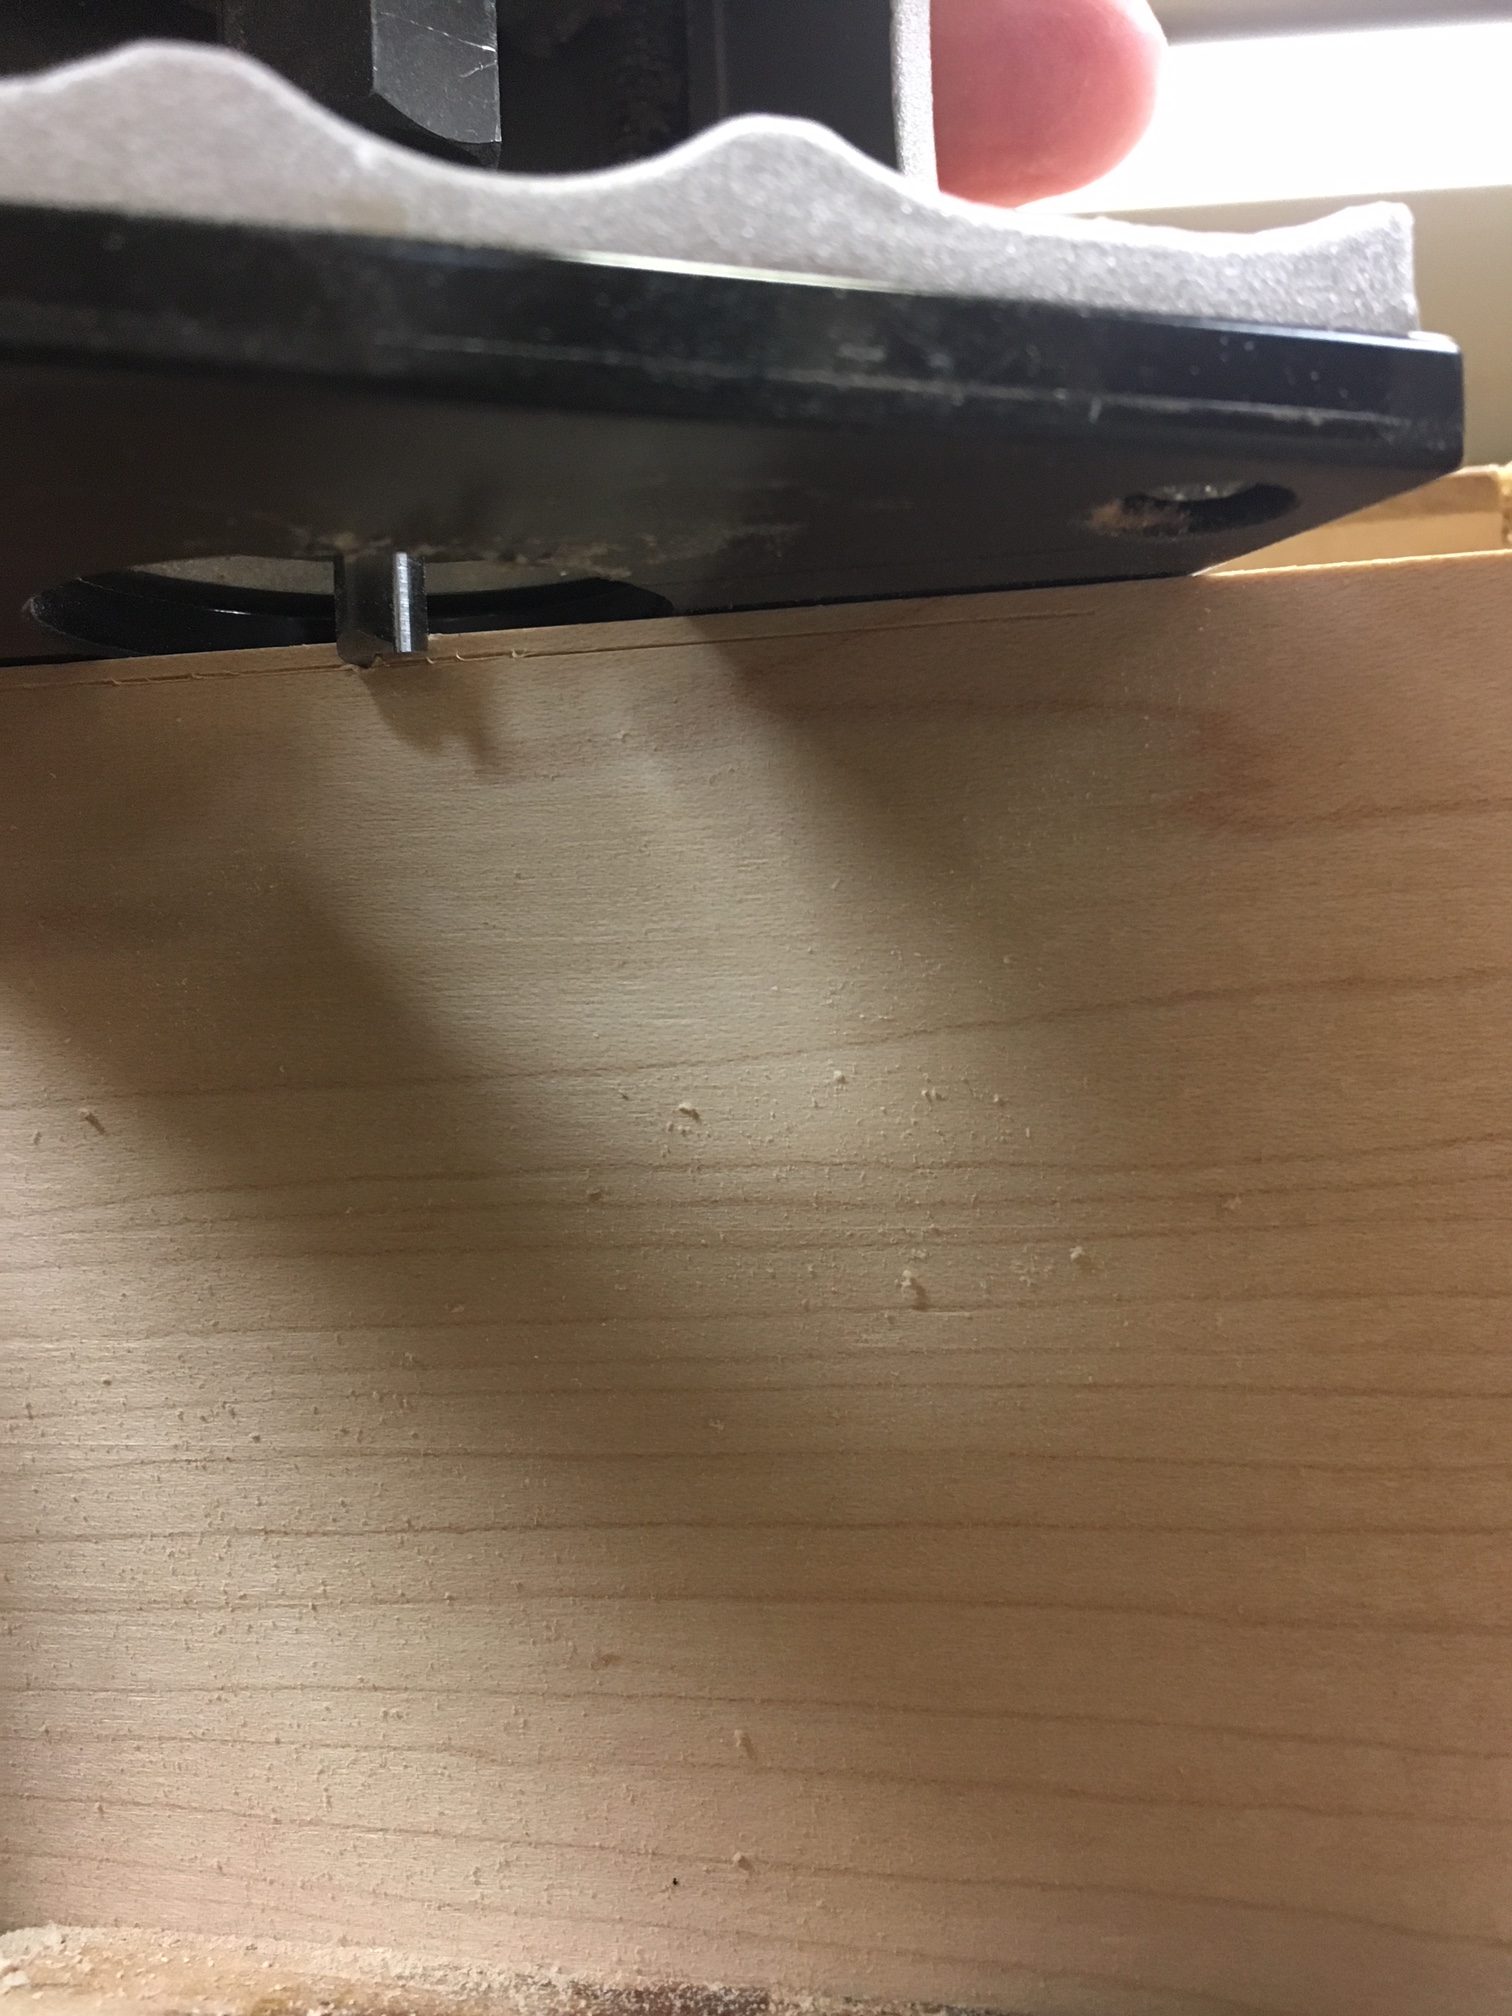
Step 5: Try it out
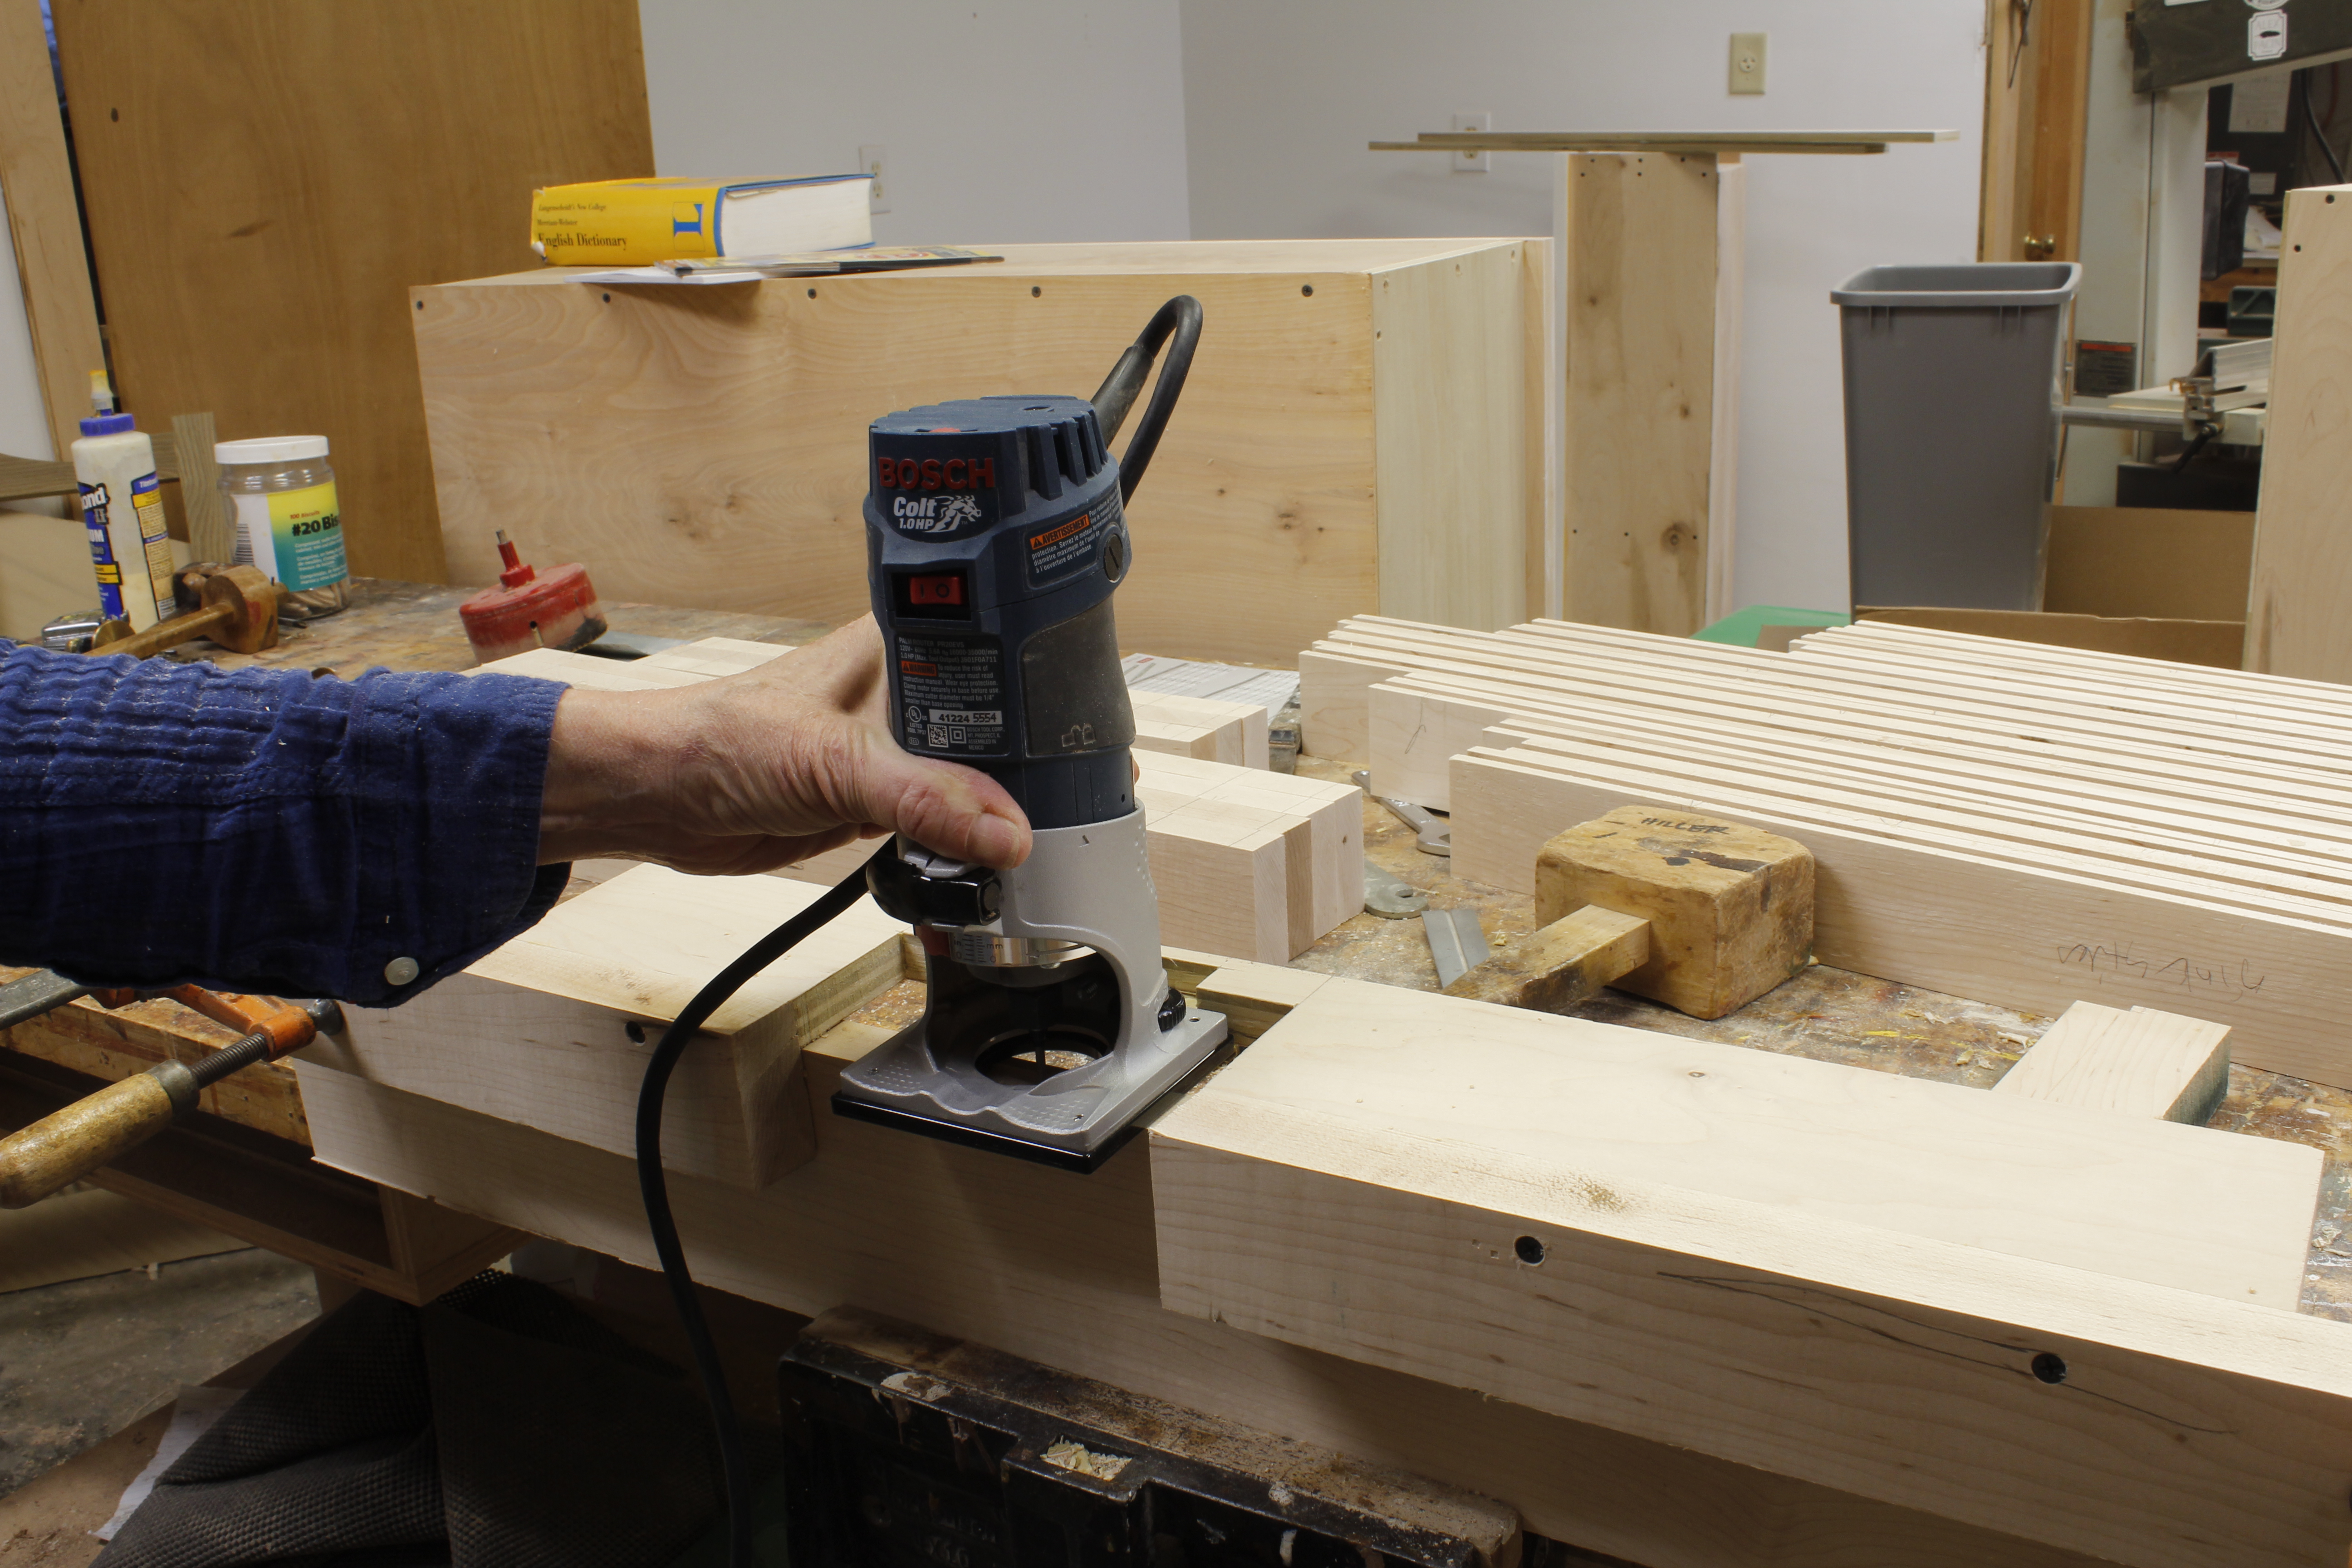
The strip at the front functions as a fence and allows you to clamp the guide (the horizontal portion) securely to the edge of the door. (Yes, that is a dictionary in the background.)
Step 6: Pare the corners
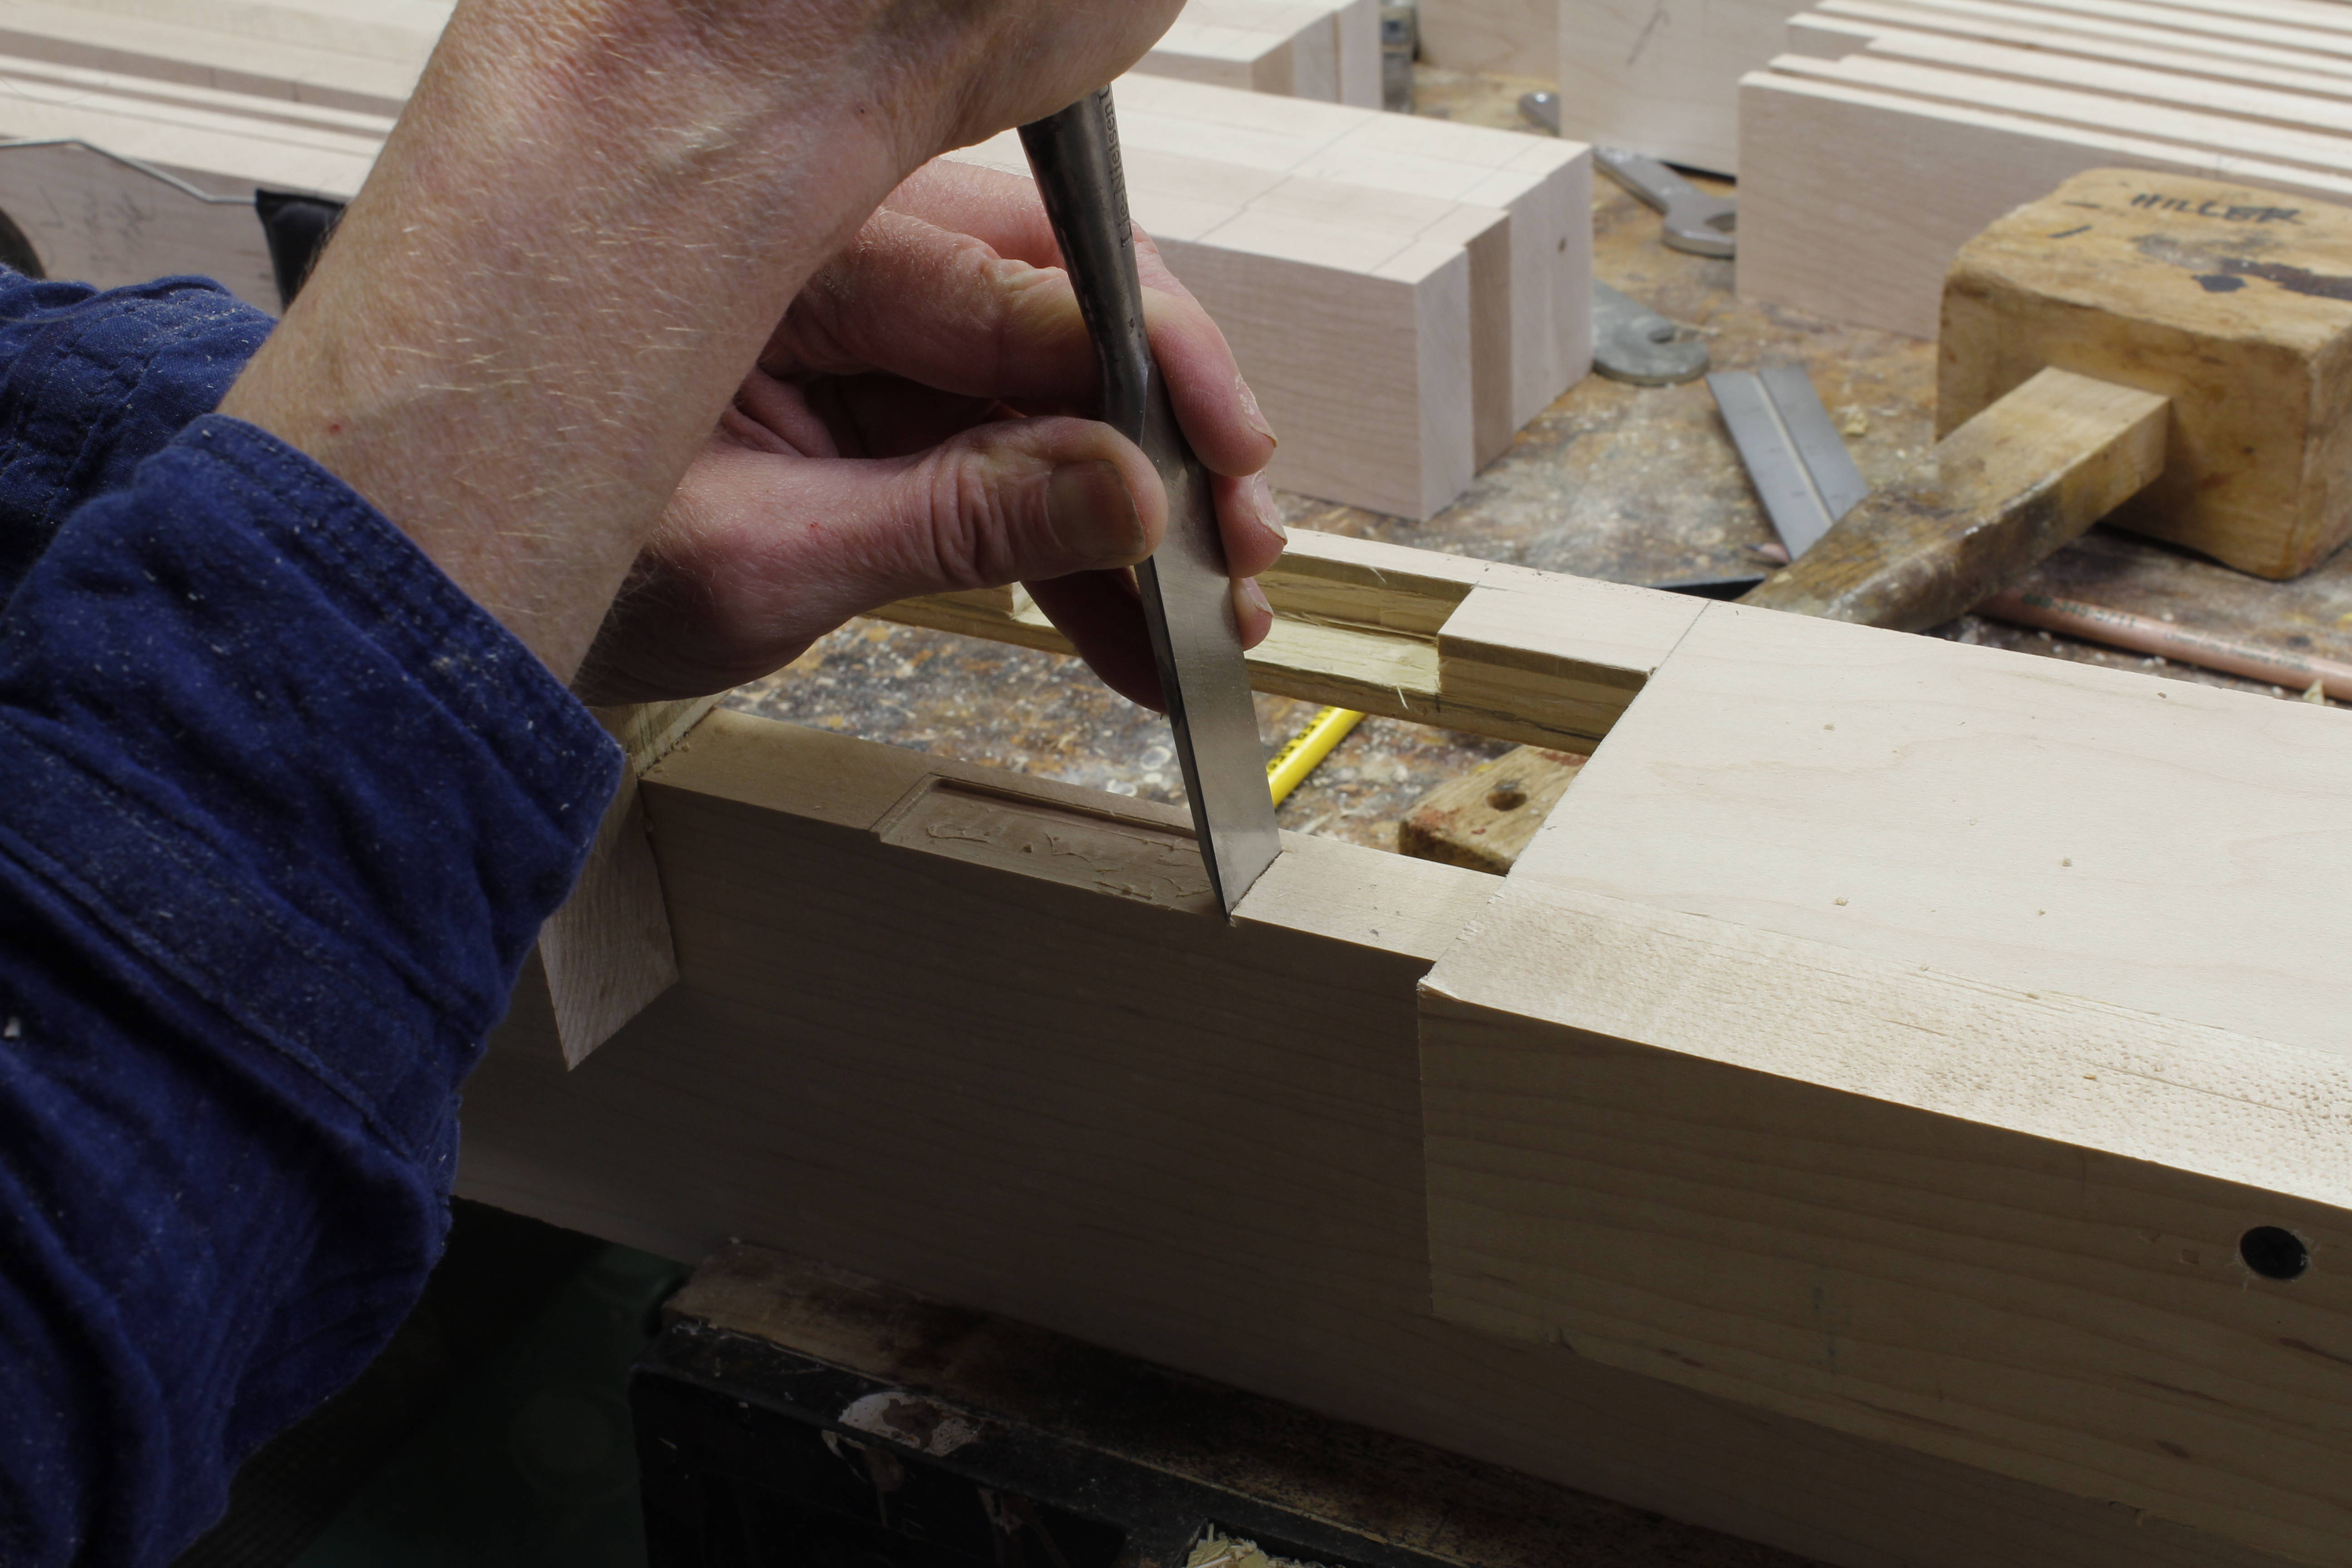
Pare the corners square with a chisel.
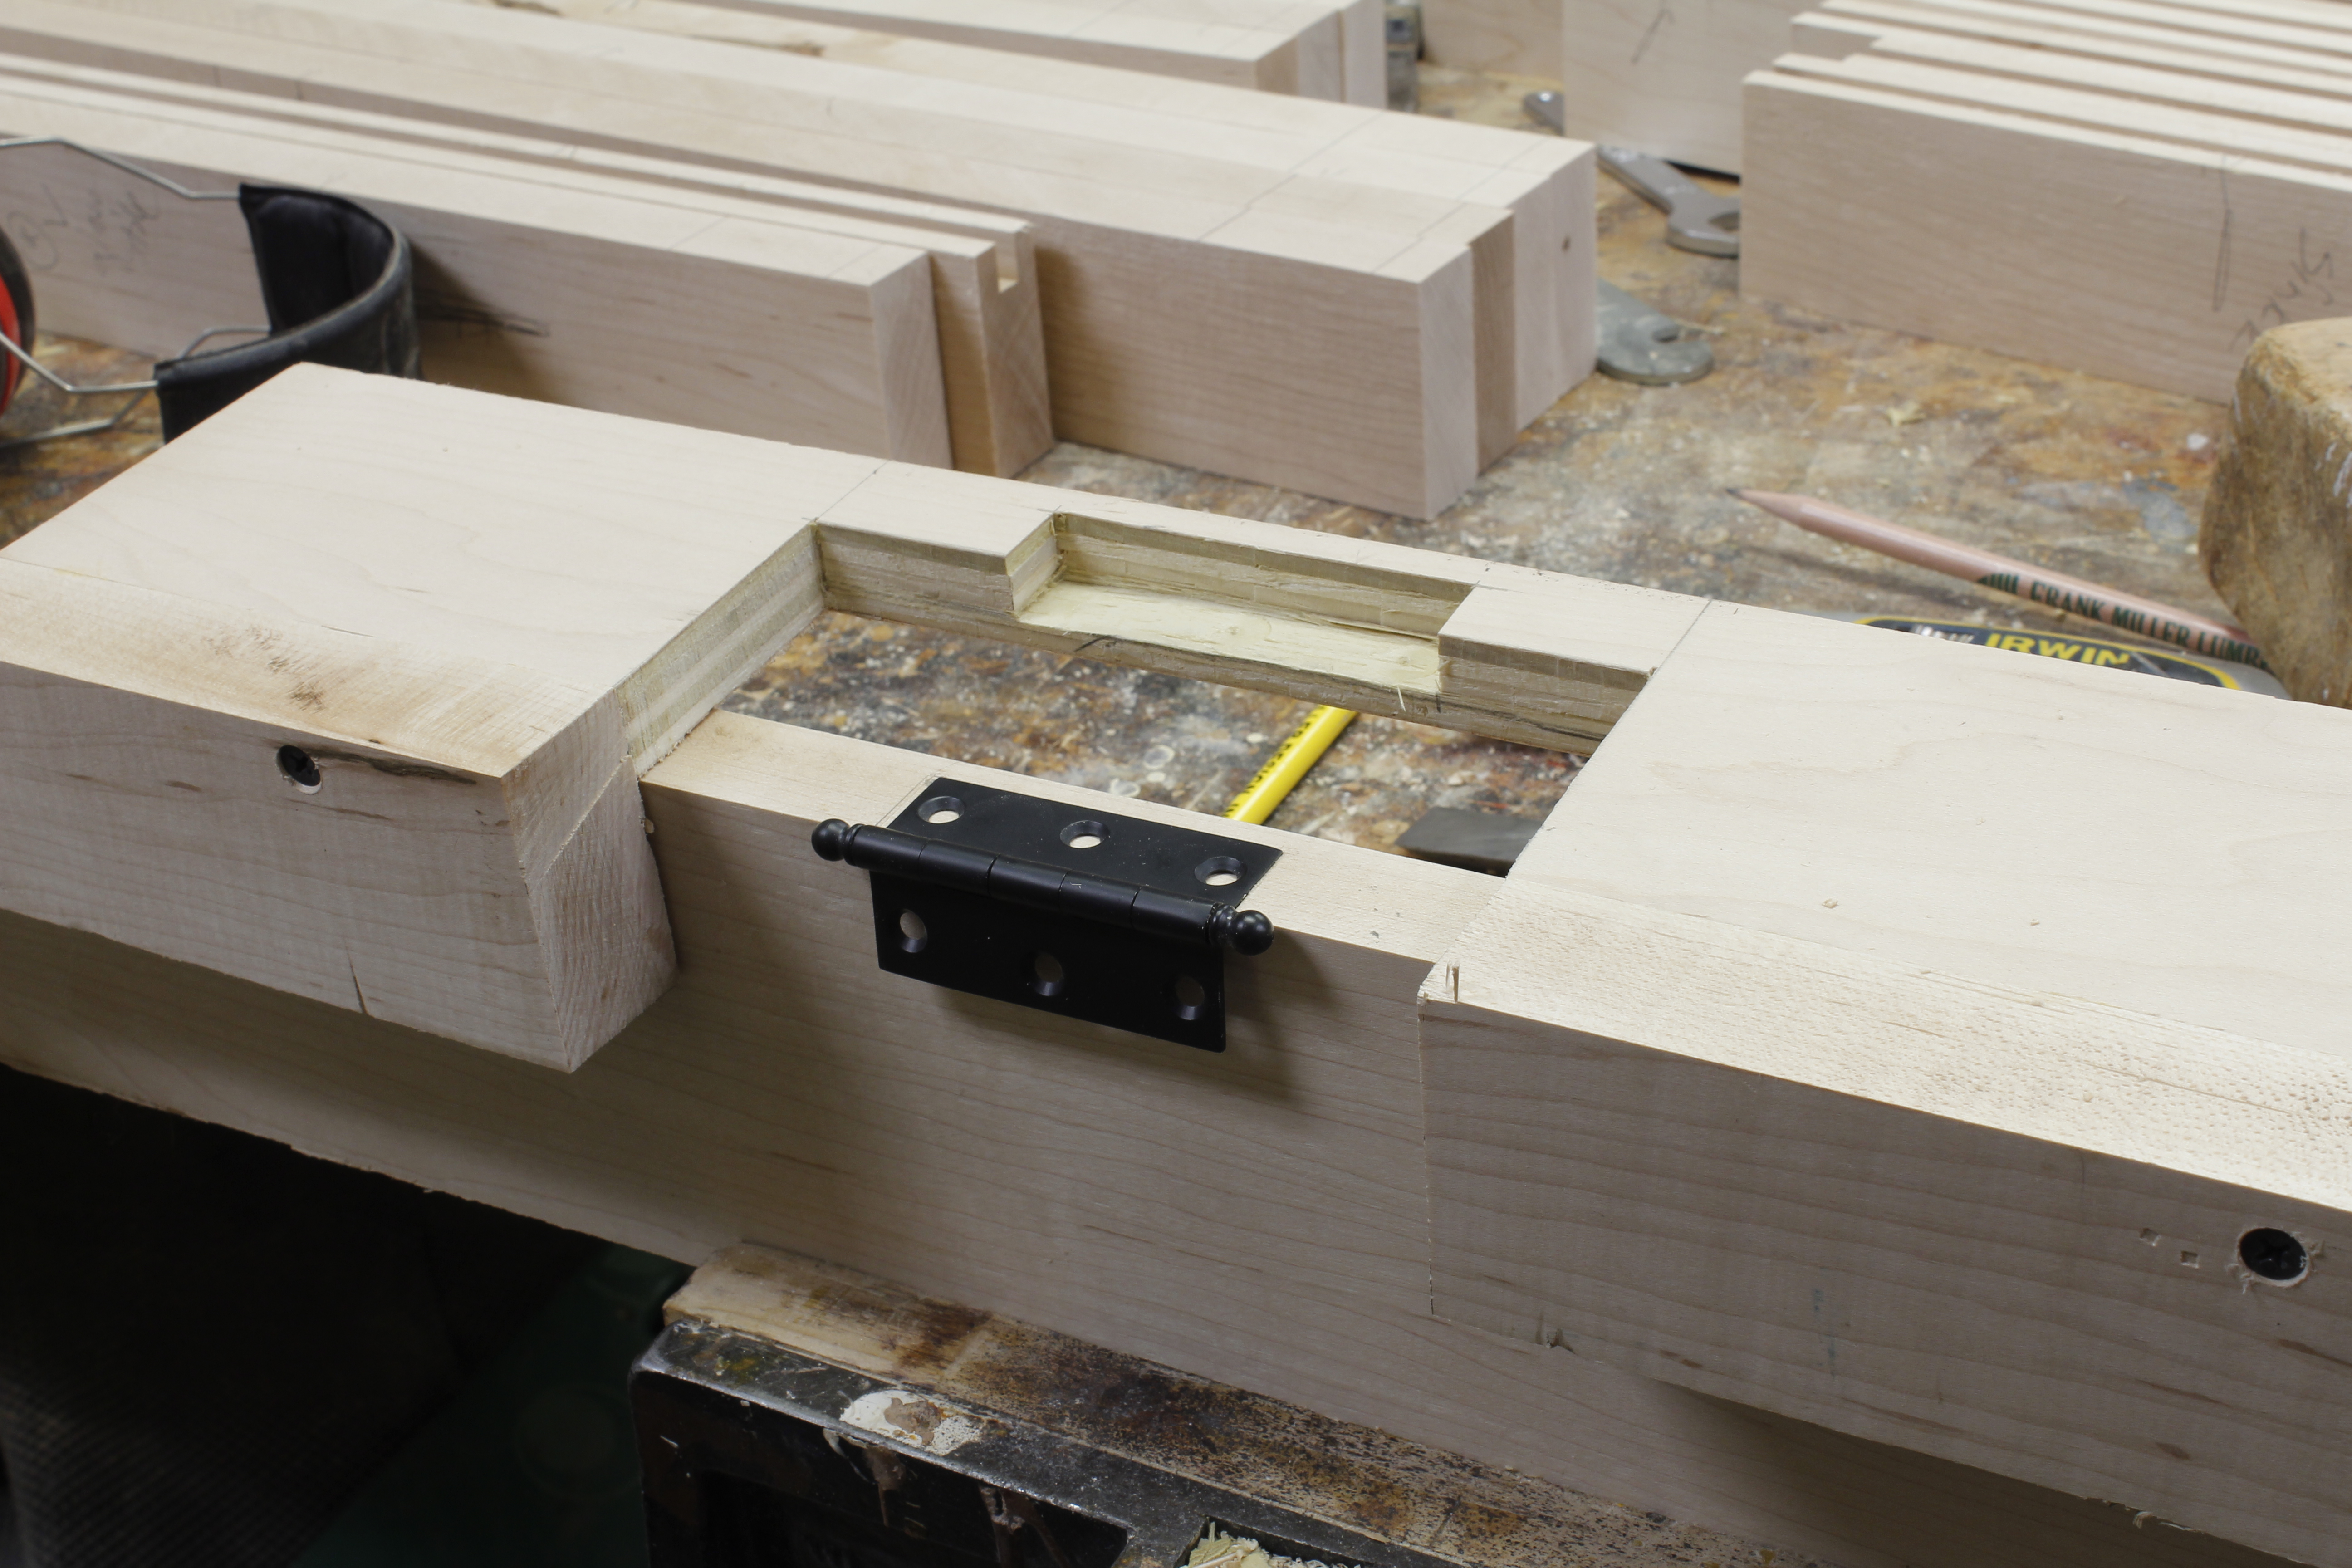
It fits.
*Sometimes I let the full thickness into the door alone, as we did in the shops where I worked in England, and as I’ve seen a few times in U.S. kitchens. I don’t do this because I’m lazy; I do it because I am attentive to context. If the room’s original cabinets were done this way, I want to respect that.
**For example, your jig has to be stout enough to support the router’s base. If you’re using a guide bushing, the type of router is less important, but if you’re going to use the router’s base as a reference point, as I did with my laminate trimmer here, you’ll need to take account of those dimensions.
Here are some supplies and tools we find essential in our everyday work around the shop. We may receive a commission from sales referred by our links; however, we have carefully selected these products for their usefulness and quality.


[Tee-hee] She said “butt”! [Tee-hee]
She did! When a former boyfriend introduced me to Beavis and Butthead, I thought they were totally pathetic and stupid. A few years later I realized that the producers of the series were probably commenting critically on slacker culture through that bit of, uh, art. At least it introduced me to “she said ‘butt'” followed by puerile snickering.