


We may receive a commission when you use our affiliate links. However, this does not impact our recommendations.
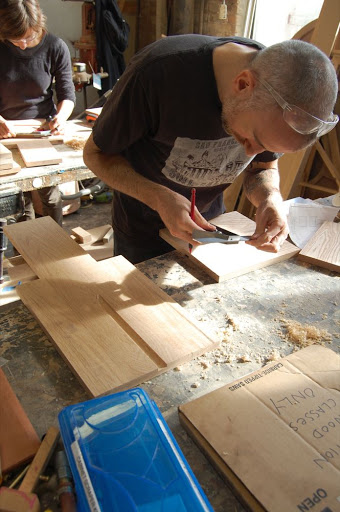
In my first posting on the Intro to Woodworking class, I showed a drawing of the students' project. In this entry I will show some pictures from the classroom and will provide two drawings that explain how the stool's parts were cut and glued.
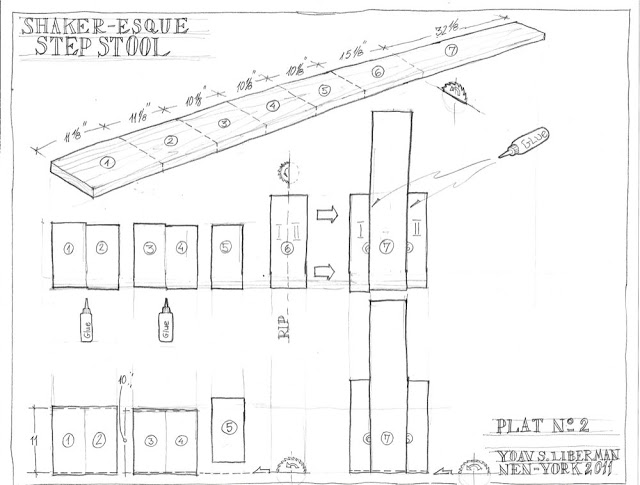
The first drawing shows the board and the marking for the cross cutting locations. We used the miter saw to cut: 2 parts of 11-1/8" long; 3 parts of 10-1/8" long; 1 part of 15-1/8". Then we took the remaining board and measured 32-1/8" from the edge we just cross cut. We marked the cut line with a combination square. At this point I introduced my students to the table saw and showed the basic operations we can do on it – mainly ripping and cross cutting. After cross cutting the remaining board to the 32-1/8" length on the table saw, my students continued and ripped the 15-1/8" part in half (part # 6).
Following this they glued together 3 groups of board which later became the front legs, the seat and the back.
They glued together two of the 10-1/8", two of the 11-1/8" and lastly they flanked the long 32-1/8" back main board with the two parts that were had been ripped form the 15-1/8" part.
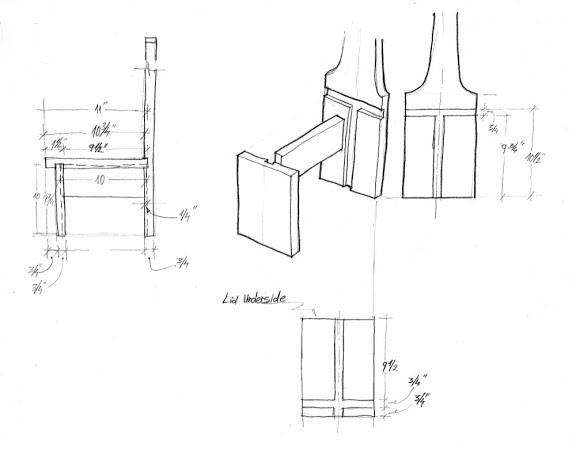
In the following week we cleaned all of the glue residue with a carbide scraper and then evened out the glue seam line with a card scraper. Some students found it difficult to arch and push the card scraper but after some practice and some minor learning curve, including changing the "angle of attack", they successfully managed to produce a nice bundle of curly blond shavings; the smile on their faces surrendered the fact that they really loved the results. Then we trued and squared each of the glued parts to the designated length (see drawings). I can't stress enough the importance of good measuring, laying out and squaring habits. The reason we cut the parts longer then their designated length, I explained, is because in the proses of gluing them together they might move on us. It is difficult to keep them in perfect alignment during an edge gluing. Once the glue sets alignment needs to be readjusted not only on the seam lines, as we did with a card scraper, but also on the edges of the end grain. This is why we needed to check, and re-cross-cut, the parts to length and squareness. Thus, the 11-1/8" pair became 11", the 10-1/8" became a 10" and the bottom of the back was cross cut again to make sure it is square to its sides.
Next time I will show how we grooved and dadoed the stool's parts.

Here are some supplies and tools we find essential in our everyday work around the shop. We may receive a commission from sales referred by our links; however, we have carefully selected these products for their usefulness and quality.


