


We may receive a commission when you use our affiliate links. However, this does not impact our recommendations.
 Now that I have been at Popular Woodworking for a while, and finally settling into my new home (apartment), it’s time to do some actual woodworking. While it’s true that I have a laundry list of furniture that I want to build (or my better half wants built), I think I will wait a bit longer to get started on that list.
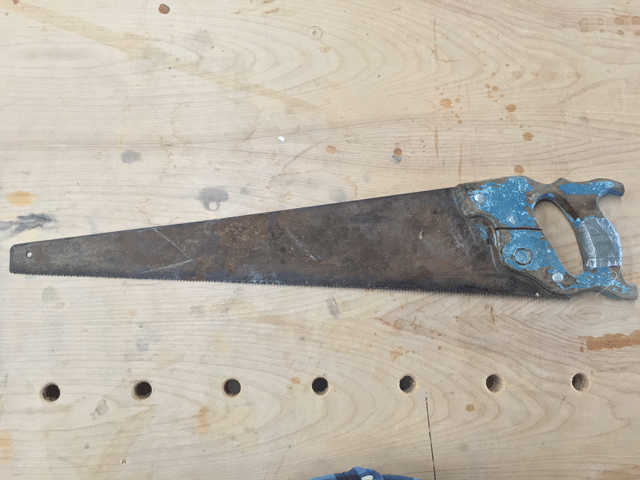
Instead, I decided I would restore an old handsaw that belonged to my late grandfather. (After all, I will need some tools to put in my Dutch tool chest after I build it.) It’s a Disston crosscut saw that he used for more than 30 years, until my dad inherited it and gave it to me.
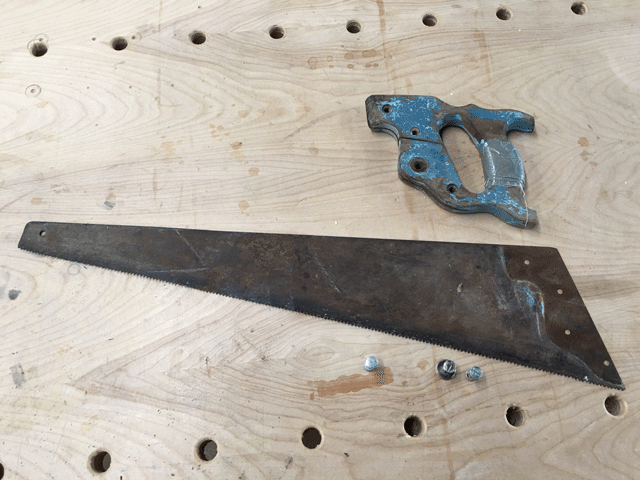
I took the saw apart to see what I was dealing with. Its condition is…not great. The tote has been painted. Judging by the color and knowing my grandpa, it probably used to be University of Kentucky blue. I would just refinish it, but I quickly found that duct tape was the only thing holding it together. I would expect nothing else from my grandpa, he was the type to put a band-aid on a head wound and get right back to work.
The blade is rusted, but not rusted through. The teeth need to be sharpened, and the blade also needs to be straightened. I am about to get a crash course in saw restoration.
I’m going to start with the tote. It’s too far gone for repair and, honestly, I’m OK with that because it’s terribly uncomfortable. So I will make a new tote. The tote is small enough that I can make it from a piece of scrap in the shop.

I will use the old tote for a rough idea of what my new tote will look like. Then I will use a rasp and file to mold it into a shape that feels comfortable in my hand.
Luckily, I am surrounded by a wealth of resources on the subject (not to mention the knowledge of the woodworkers that I share an office with). I would also welcome any reader’s tips along the way.
Cover me…I’m going in.
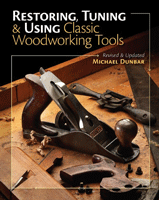 Are you restoring a vintage tool for the first time (or do you just want to brush up on your skills)? Check out “Restoring, Tuning & Using Classic Woodworking Tools” by Michael Dunbar to learn how to update quality tools for a fraction of the price of brand-new tools.
Here are some supplies and tools we find essential in our everyday work around the shop. We may receive a commission from sales referred by our links; however, we have carefully selected these products for their usefulness and quality.


Whatever you do, I agree with the notion of saving memories – in this case, display Gramp’s old handle somewhere.
Also, I assume you’ll be covering how to sharpen that old blade? I’d appreciate that education.
I have had success using the fore part of the original handle with the bolt holes and then use a saw that I like the feel of to get a good handle design. I tend to like the earlier period saw handles designed for the 3-finger grip. It works well and you get a saw handle with good geometry that fits your hand.
Hi Jon: Good luck with this project. I’m in the midst of trying to fix the toe and knob on an old Stanley #4. I found this link on Lee Valley’s site helpful: http://www.leevalley.com/US/wood/page.aspx?p=63262&cat=1,46168,63262
If you take a look at some of their instructions for making a replacement tote (or saw handle), you can apply what you learn to your job. I found the dimensions on their Stanley No. #3 and #4 tote template to almost exactly match what I needed. You might search for a template for that Disston handle. Someone must have posted one somewhere. Or, better yet, search the archives at PWW and then post a link to what you find.
Best,
Bruce.
Jon, go for the restoration! Tools were meant to be used. (Unless you have an original Henry Studley or the like with provenance) you are unlikely to hurt the value of it. I’m totally fed up with the Antique Road Show. They get everyone believing that you can’t do this or that with a piece of furniture because it will hurt it’s value. The odds of having a $20,000 dollars item is astronomical.
Anyway, I’m anxious to see the result. I’m sure grandpa would be proud! He used it to near death, why shouldn’t you!
Good Luck!
I understand your desire to restore this because it belonged to your Grandfather and I am good with that as I have had a similar issue… BUT…. Is it worth it… If I were to be dealing with this I would mount it in its original condition on a framed panel with a description of the past owner as it was last used and then find another one at a lawn sale that felt good in your hand…. Mount it proudly on your work shop wall and I will bet that it would create a lot of conversations that would be worth talking about… Once you restore it the character is lost… It’s like restoring a antique… Value has diminished… In this case the value is the memories… John
I’d glue the existing handle back together, carve and rasp it until it’s comfortable, then use it as a guide for shaping the new handle. You can use putty to build over-shaped areas back up for another try on the
old handle with little pain; on the new handle, not so much…
Also, some custom saw makers shop-make their own cross-laminated handle blanks to reduce horn/handle breakage issues due to wood grain direction. This also has some ‘bling’ potential…
Jon,
You have the unique chance to properly orient the grain, and the way it sets is not exactly like I would choose. I’d try flipping it to the other direction, to avoid straight grain at the horns, as they can snap off easily.
Hoping you will start with that kerf first, after planning the stock to the proper thickness. If the kerf is too fat, shim it with paper.
I still use my grandpa’s tools, and I’m a grandpa.