We may receive a commission when you use our affiliate links. However, this does not impact our recommendations.
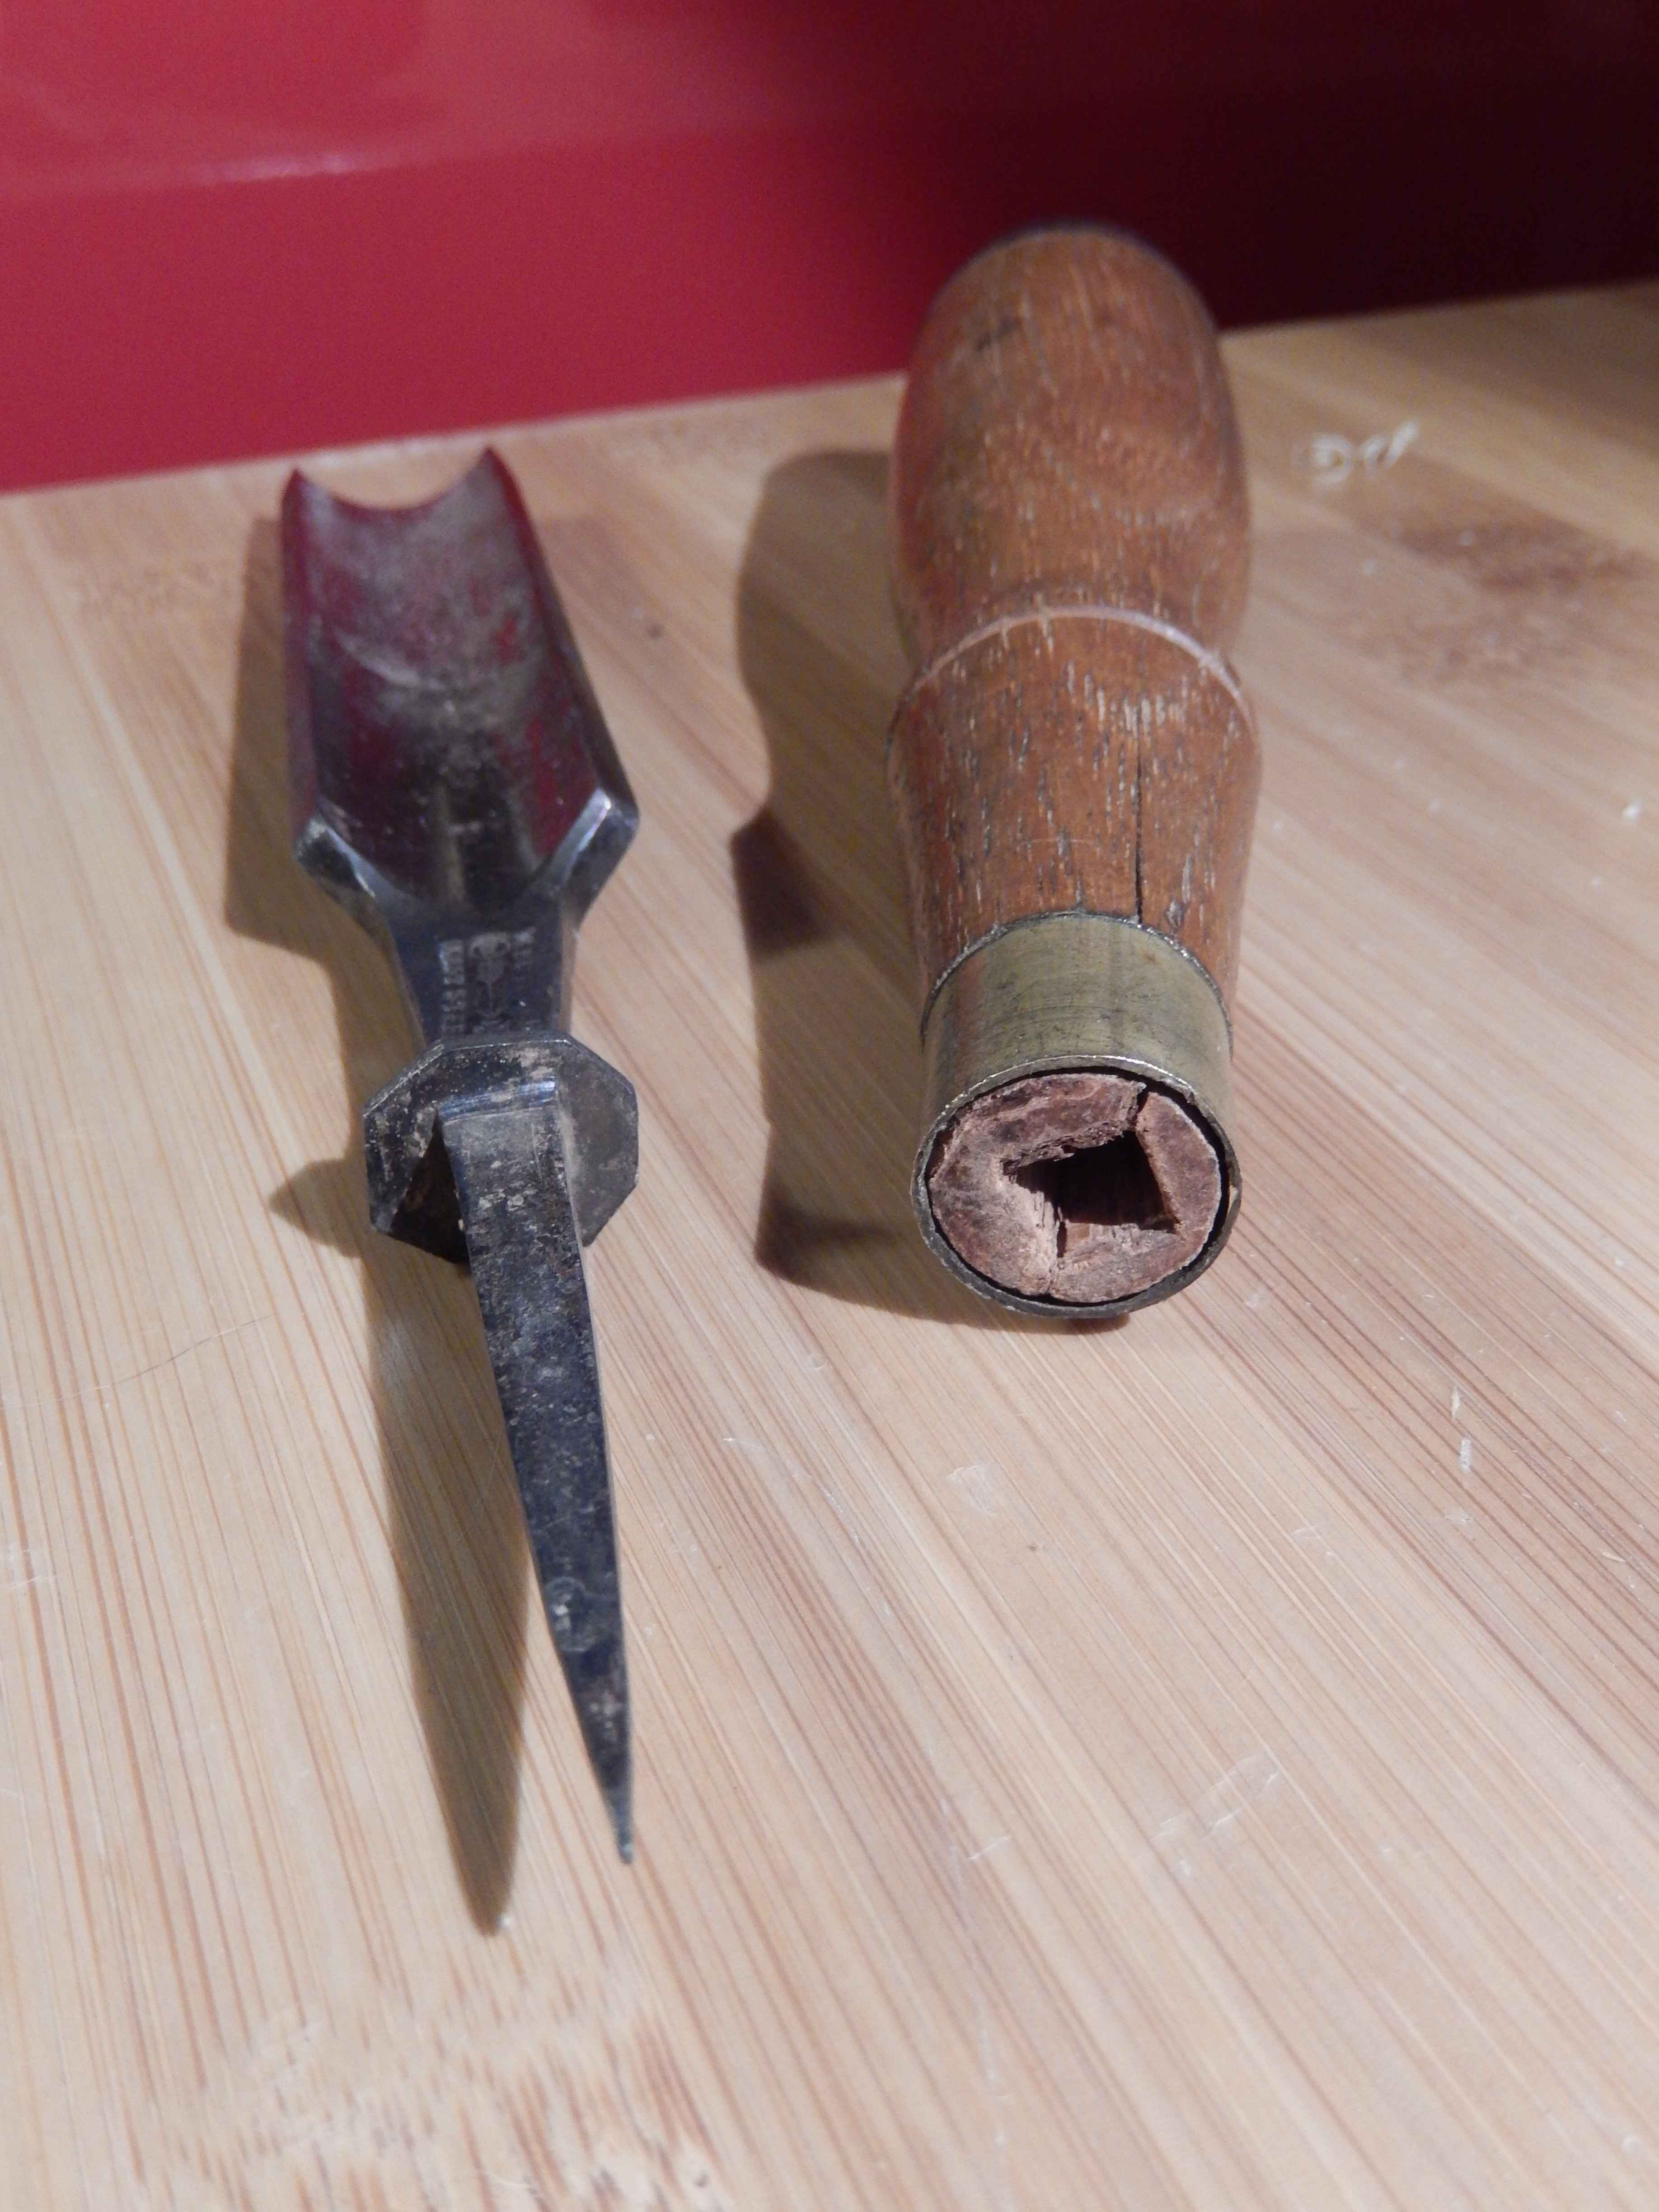
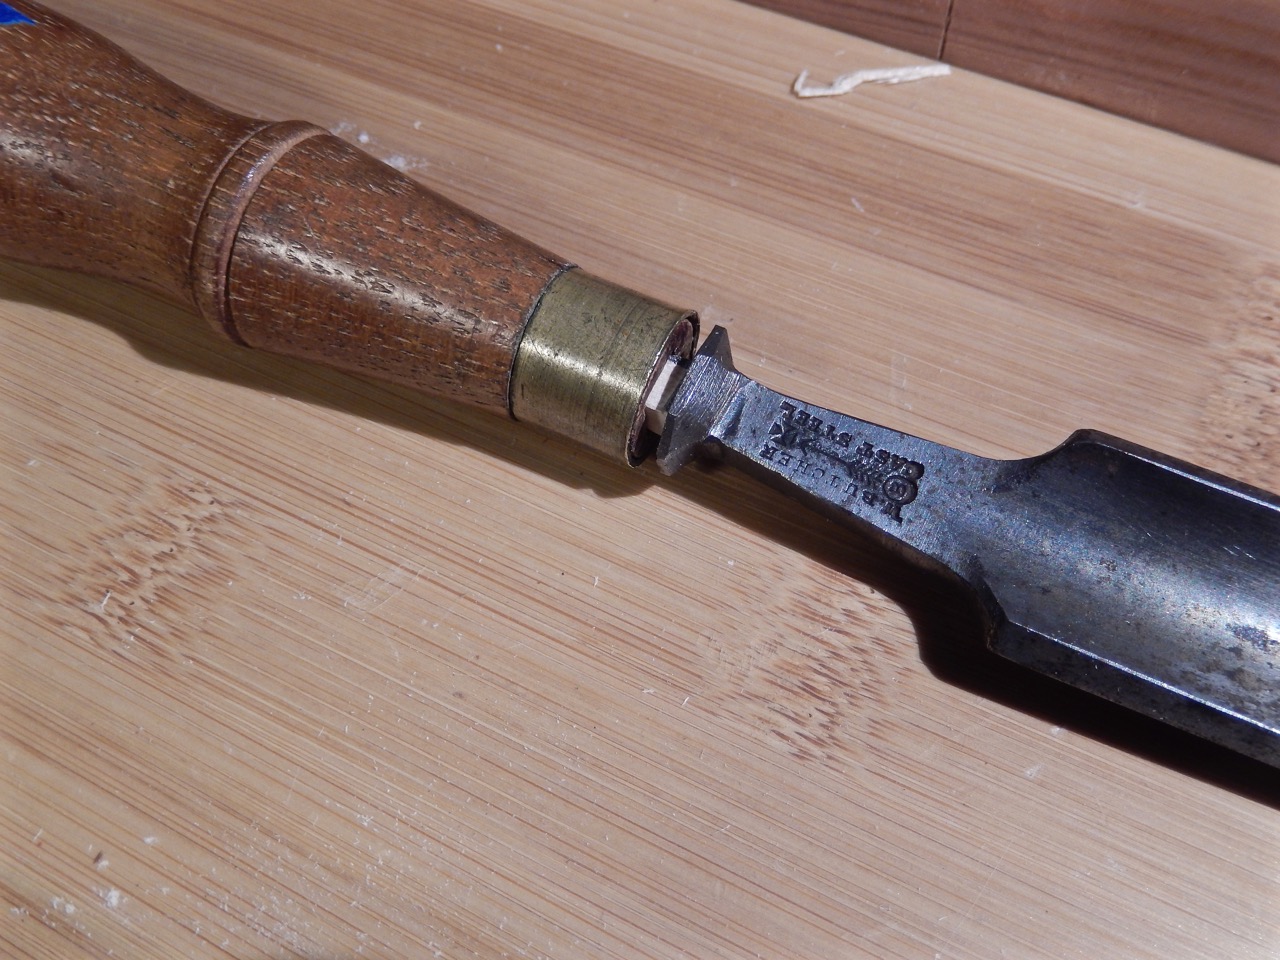
My W. Butcher gouge and its handle. Notice how elegant the tang looks.
Re-setting a tang into a loose handle is a challenge I take often, but in the case of my newly acquired W. Butcher gouge, I wanted to do the job with extra reverence. I was so impressed by the quality of my new – but actually very old – gouge, that I was willing to spend the time and do careful restoration work. (Read more about setting tangs and about my repair approach in my previous entry on this subject.)
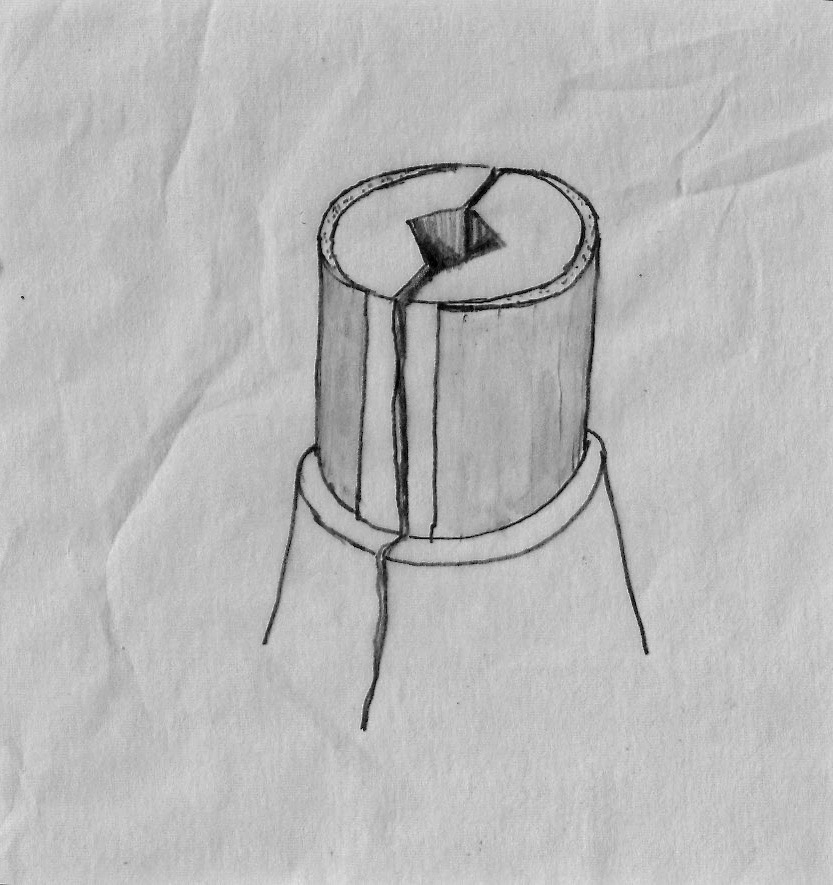
Before I started dealing with the loose tang I had to do something with the small splits emanating from the mouth of the handle’s neck. The main reason for the development of these splits was shrinkage of the handle’s neck. Although the factory may have inserted the ferrule over the neck with the utmost precision, later deformations of the neck can happen, which consequently leads to splitting. For instance, if the handle’s moisture level is higher at the factory than at the purchaser’s locale, it will shrink and potentially lead to the development of one or two crescent-shaped gaps between the ferrule ring and the neck. These gaps “invite” the creation of cracks, because they give room for the tang to cleave the handle when the chisel is being struck, or when the tool’s blade is subjected to leverage.
There are a couple common ways to fix this.
1) Find or turn a new ferrule with a smaller internal diameter that will fit tightly on the handle’s neck and will “persuade” the splits to close.
2) Glue a piece of veneer on the area(s) of the neck that have shrunk and file the excess away until the round geometry is restored and the neck fits back into the ferrule tightly, forcing all the cracks to close. Remove the ferrule, pour glue into the split (hide glue for high-end restoration, epoxy, PVA or CA adhesives if reversibility is not your goal, but rather a stronger fix). Insert the ferrule and wait for the glue to cure.
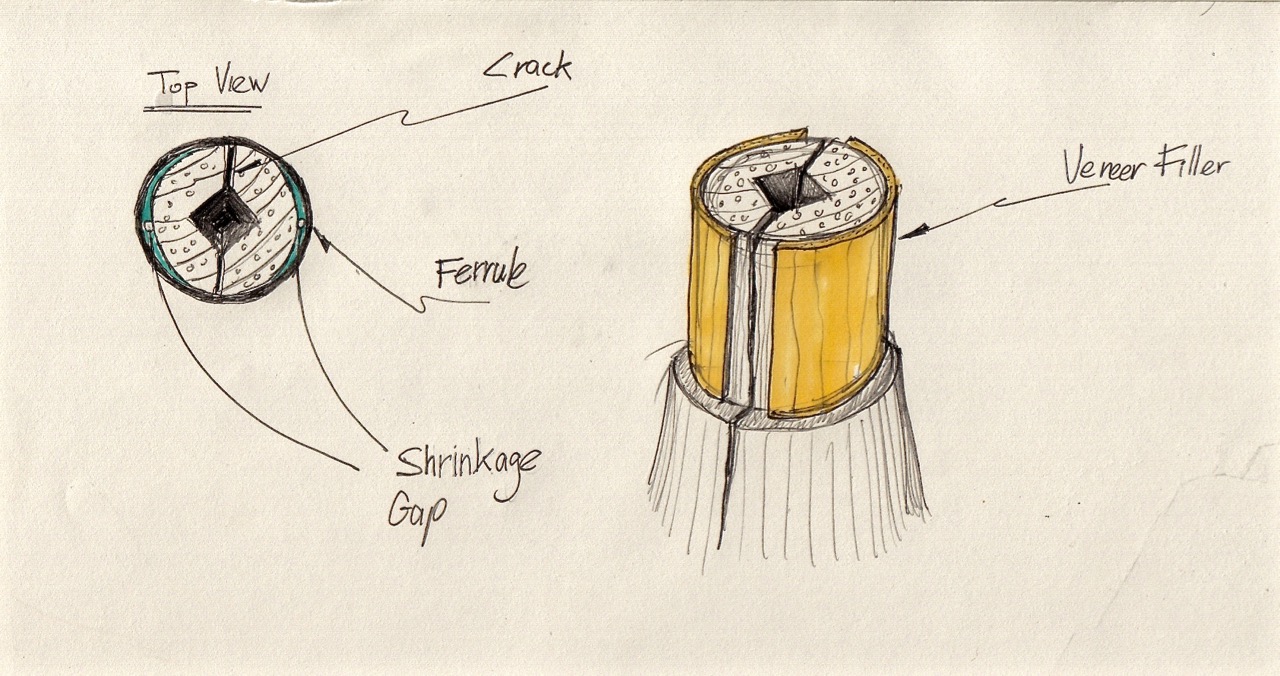
The main reason for the development of these splits was shrinkage of the handle’s neck. Glue a piece of veneer on the area)s) of the neck that have shrunk and file the excess away until the neck’s round geometry is restored.
3) Make some thin shims and glue them carefully into the splits using one of the glues I mentioned. It is very tricky to make thin and fragile shims. One way to do it is to cut a long and narrow shim on the band saw, etc, then sand, plane or file its tip down to a nice feather edge. Finally, cut the tip and glue it into the split.
In the case of my gouge, the neck/ferrule gap was not that big, so I decided to only pour some CA glue into the splits. In hindsight I should have chosen option (1) because it provides a remedy that is more in line with proper restoration ethics.
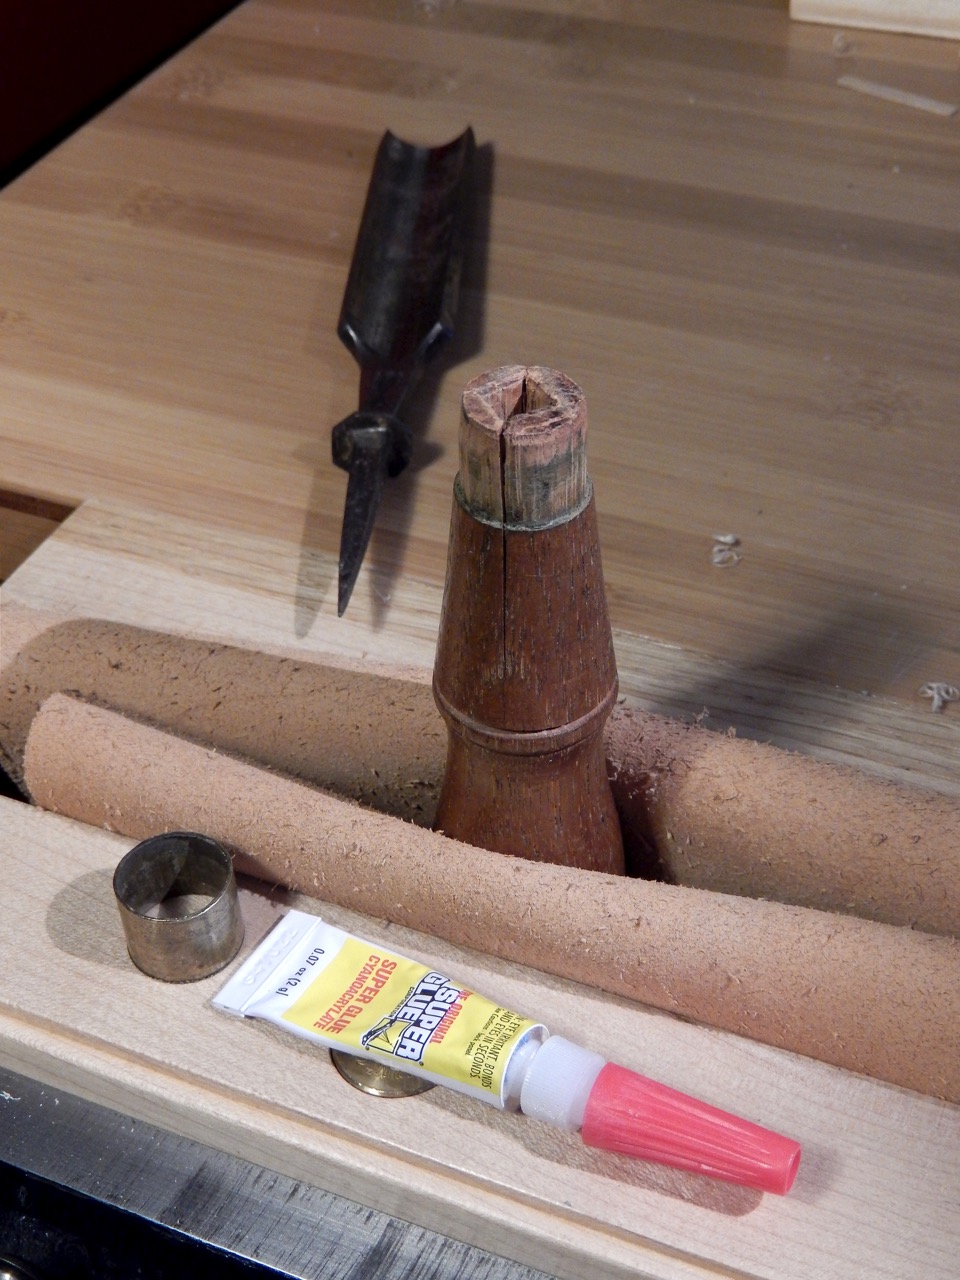
Securing/filling the crack with CA glue.
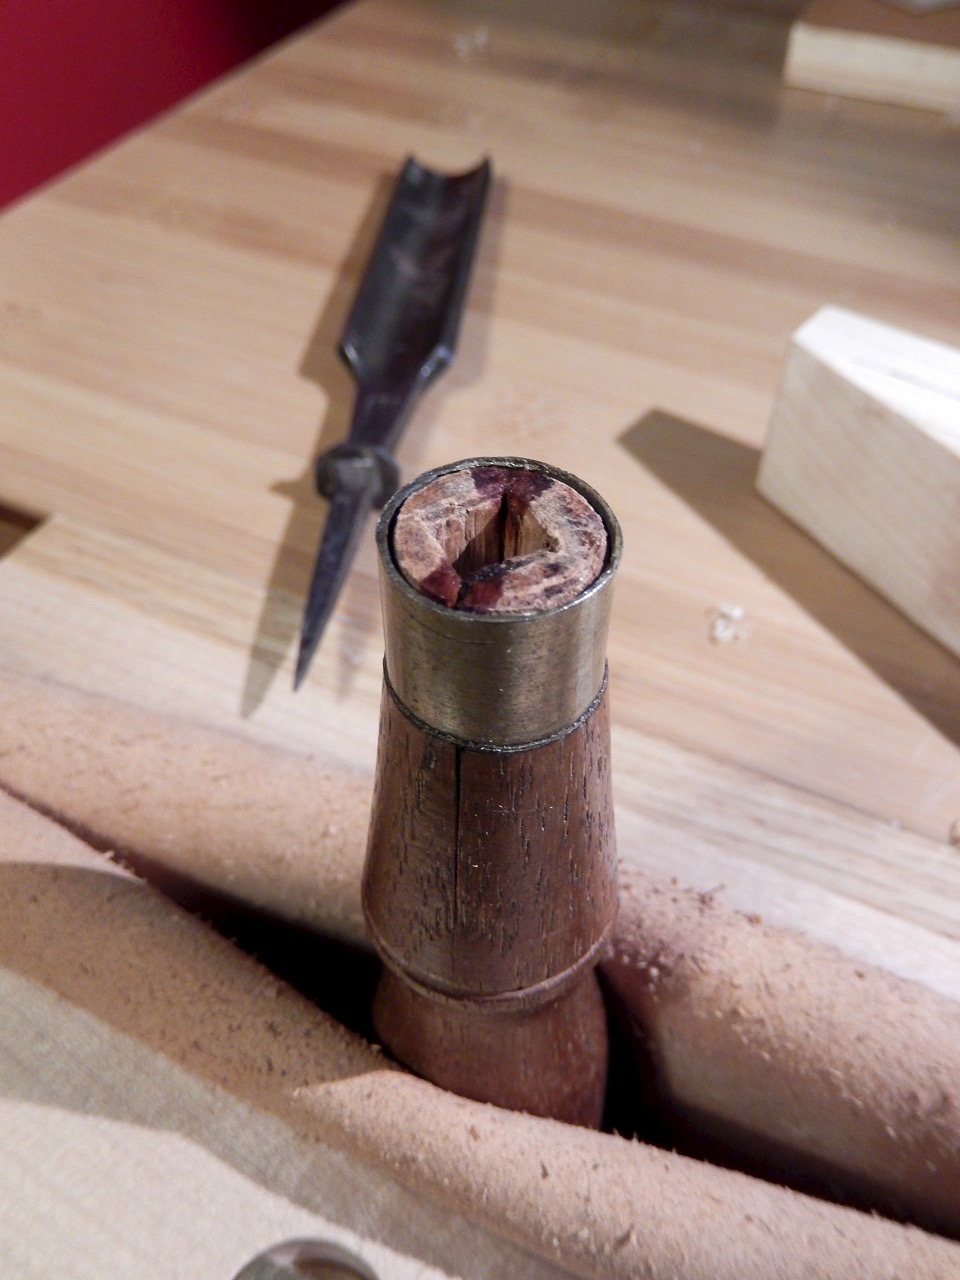
Inserting the ferrule over the handle’s shoulder.
Re-setting the Loose Tang
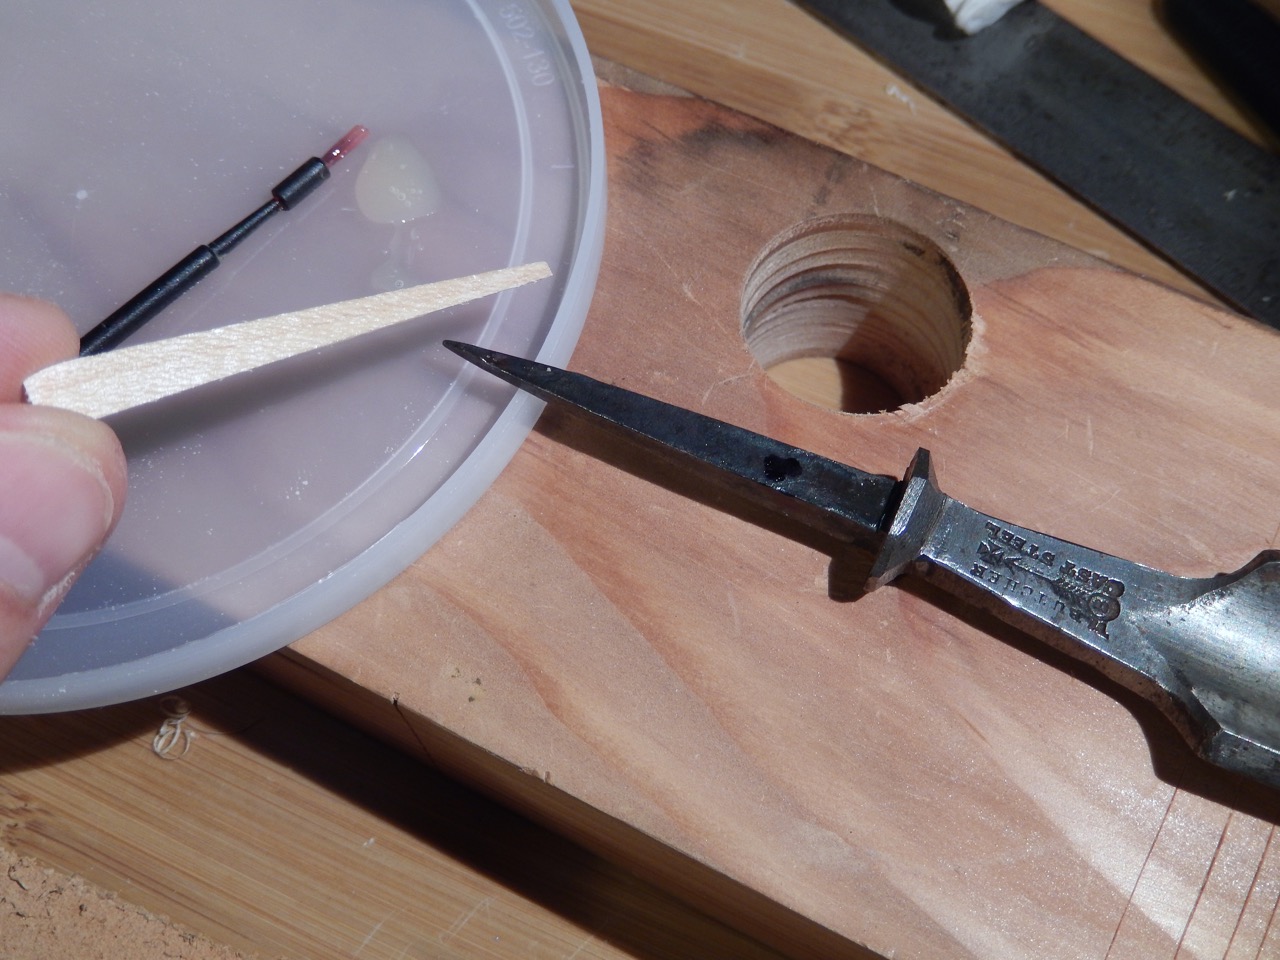
I decided to glue some shims to the inside walls of the handle’s pyramidal socket. I knew I needed to use a technique that enables fine-tuning the exact amount of added wood by trying the fit, correcting it and trying it again. I also knew I would have to do this a few times before I could feel confident enough to strike the handle all the way toward the gouge’s shoulders.
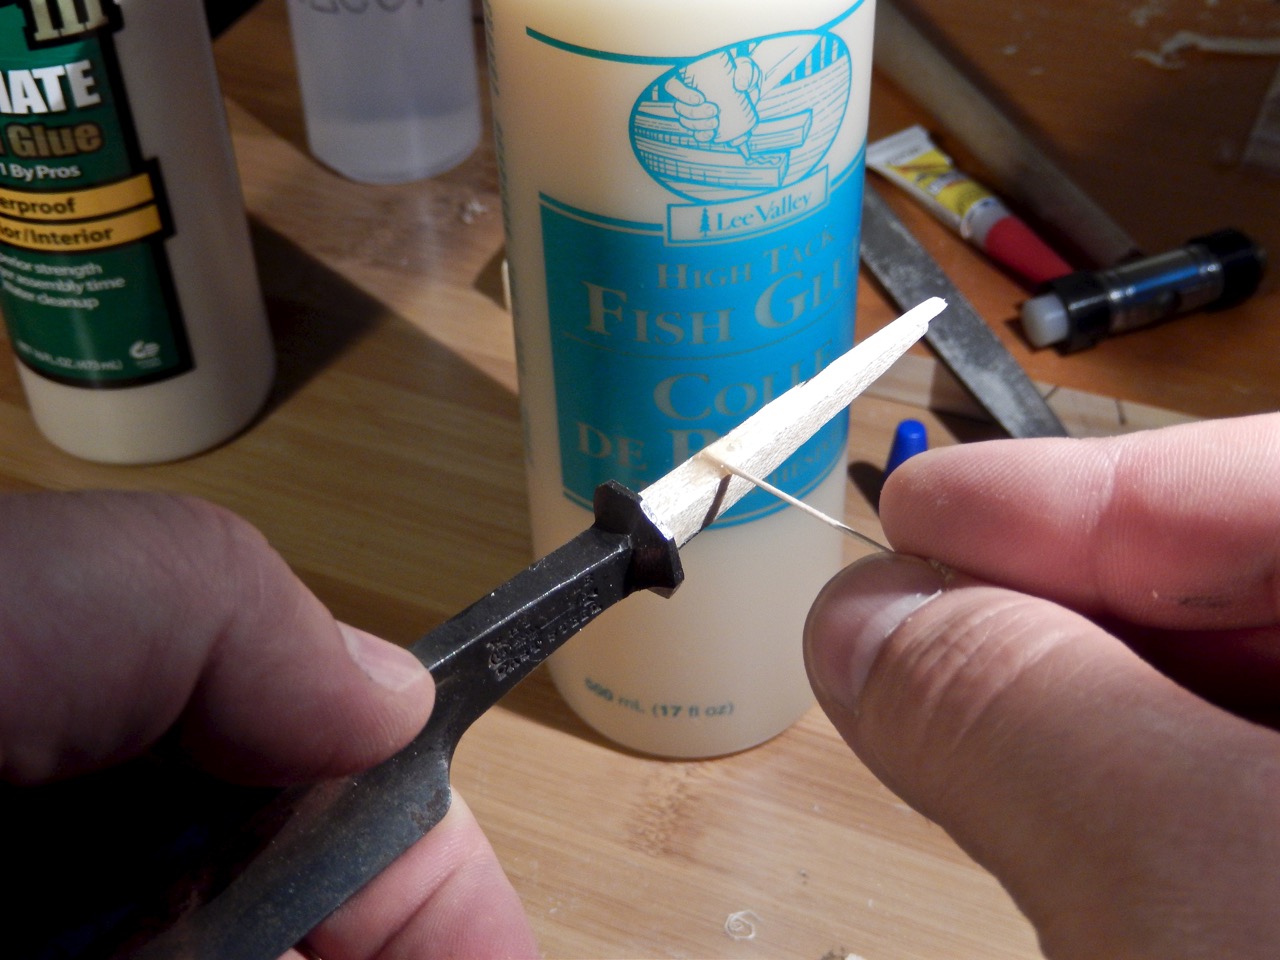
I realized that if I glued the shims to the tang facets, I would be able to file them down as needed without worrying about splitting or breaking them. I chose water-based reversible glue for this job, a medium-strength glue to keep the shims on the steel just enough to allow me to file them but that also can easily be washed away if I accidentally broke a shim and needed to start over again. Lee Valley offers a high-tack protein-based glue that is made of fish. Once it is applied it immediately becomes tacky and it provides initial adhesion faster than any liquid hide glue that I know of. If you don’t have this glue you can use any commercial liquid hide glue or regular hide glue.
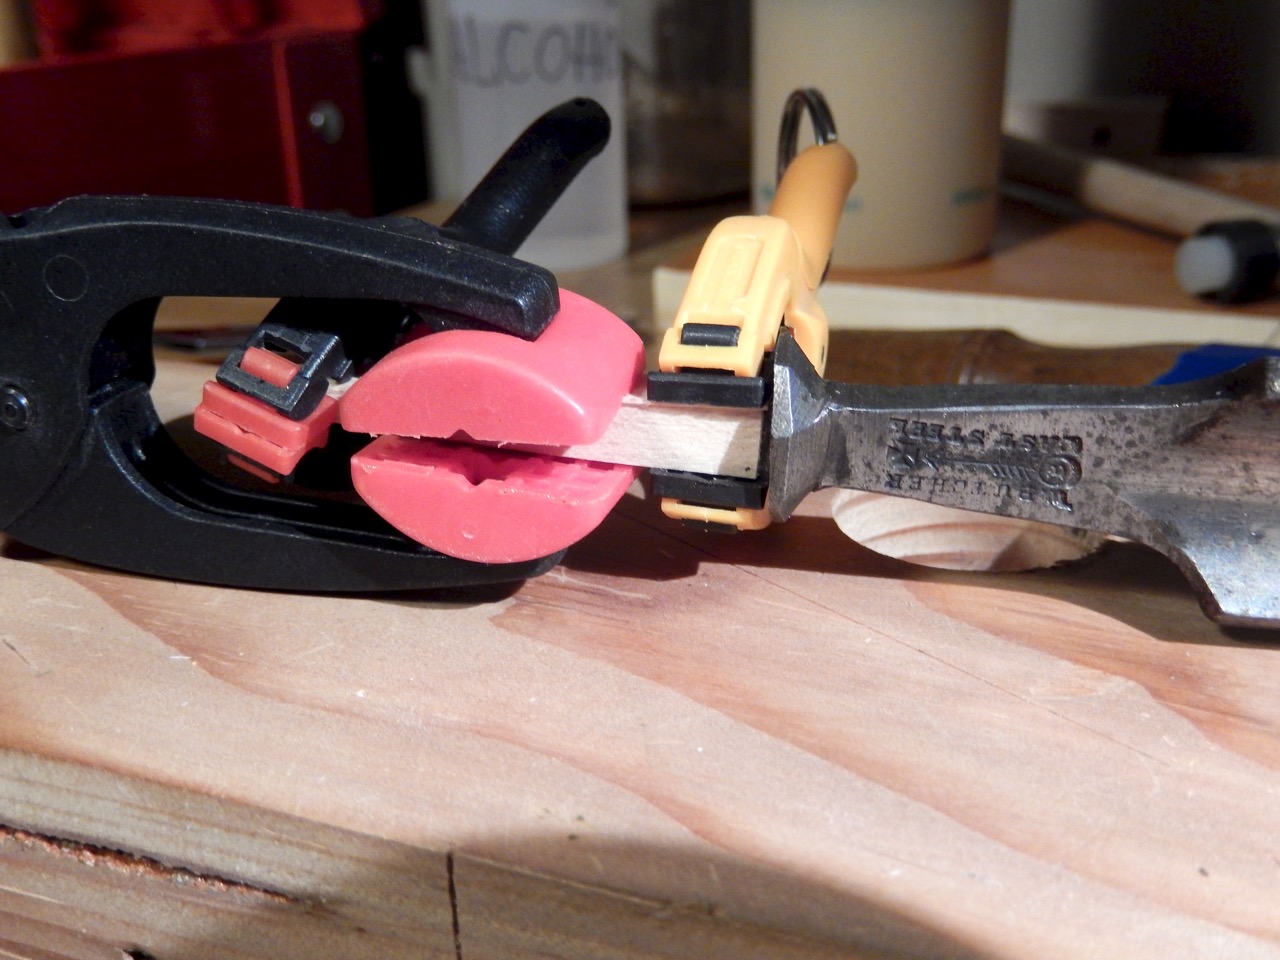
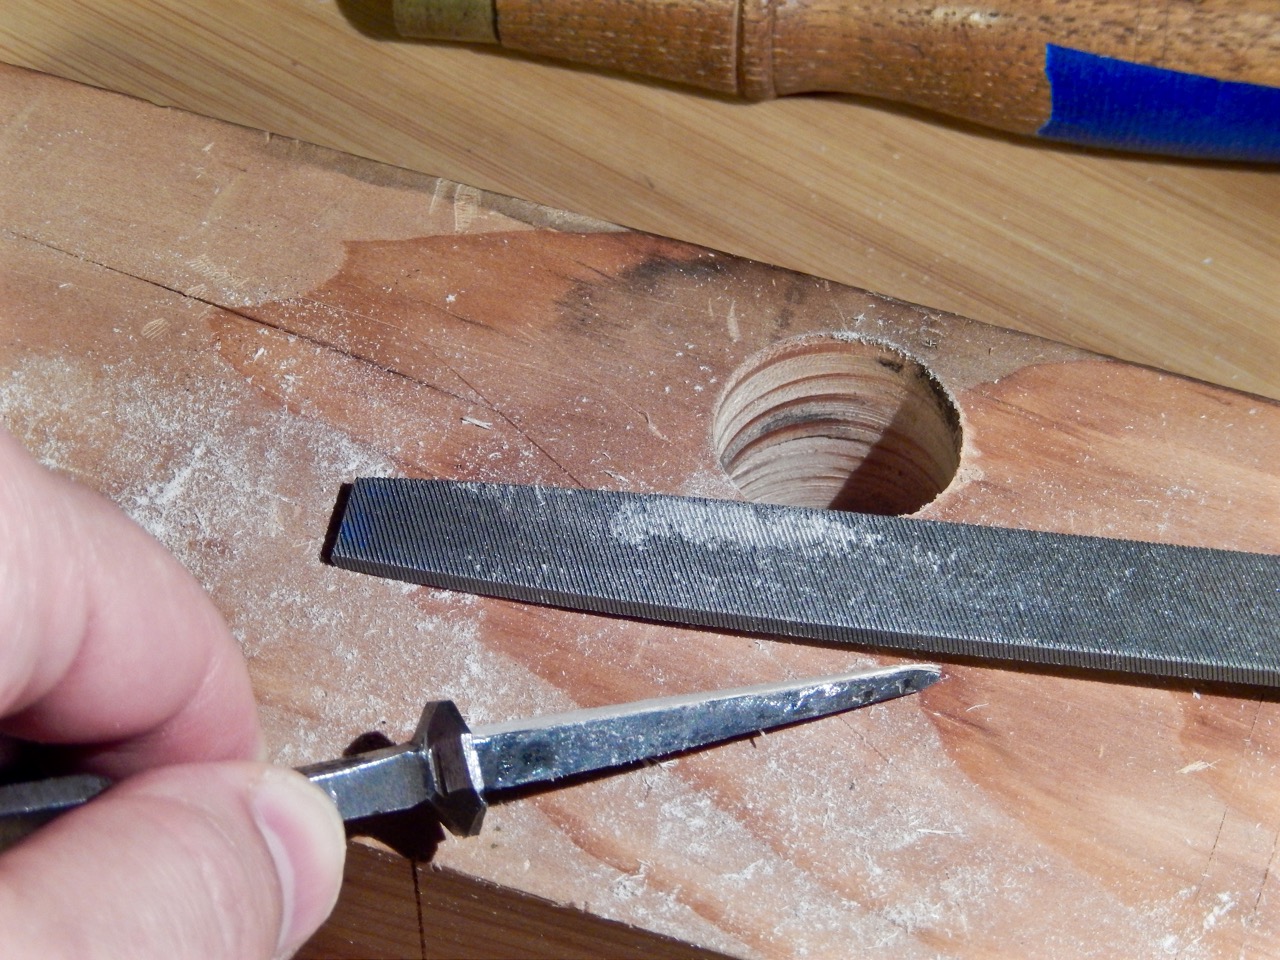
I began by assessing which facet of the socket required additional wood. I continued by cutting some shims, then I glued one of them to the tang, clamped it down and waited for the glue to dry. I removed the clamp, filed the shim flush with the tang, then glued and clamped another shim adjacent to the first one.

Cutting the shims from a small piece of veneer.

The shims are ready.
A small amount of fish glue is all that is needed to glue the shims to the steel. Make sure that the steel tang is clean before you glue the shims to it.

Secure the shim with a few clamps for an hour or so.

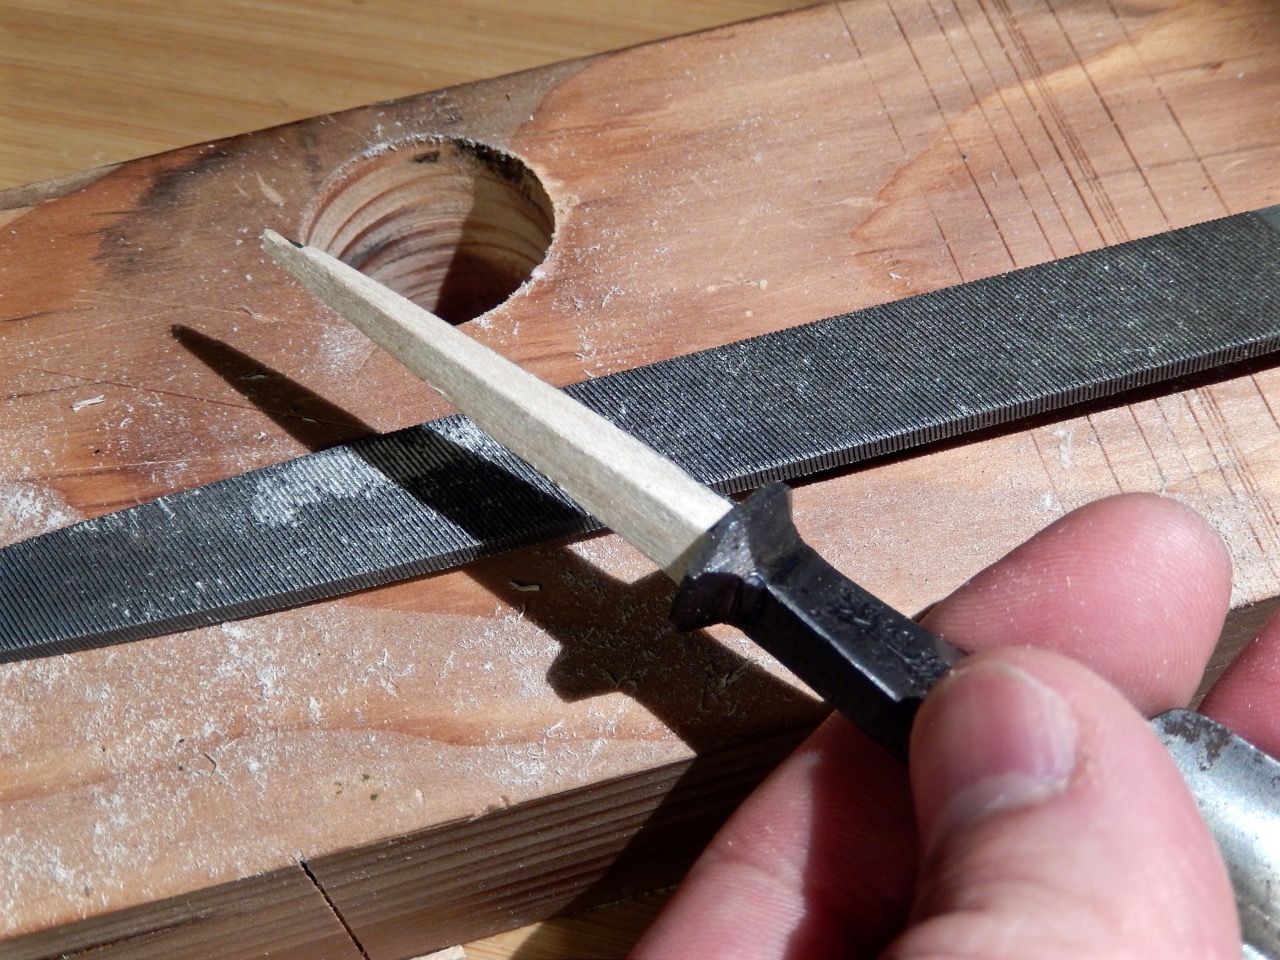
File the first shim flush with the tang before gluing the adjacent shim
After this I filed the excess off and commenced with the final fitting. I tucked the tang into the socket and assessed the areas where the two compress against each other. I filed these areas and tried again until the tang slid into place and settled in so the gouge’s shoulder was about 3/16″ from the top of the handle. I extracted the tang and spread some glue on the wood shims. Then I reinserted the tang and drove it home completely, knowing that the shims would adhere to the walls of the socket with the tightest possible fit to provide my gouge with many years of reliable use.
To glue the shims to the socket walls, I recommend using a stronger glue than the fish glue, as you want a long-term wood-to-wood bond. Room temperature liquid hide glue or traditional “hot” hide glue are great if you take the “Restorers” way. For your less precious tools, I am quite sure PVA glue will be just as good.

Carefully file away the shims with a fine file. Occasionally check the fit inside the socket and keep filing until the gap between the tang shoulders and the top of the handle is about 3/16″ or so.


Spread some glue on the shims and with confidence drive the tang back home

Here are some supplies and tools we find essential in our everyday work around the shop. We may receive a commission from sales referred by our links; however, we have carefully selected these products for their usefulness and quality.