We may receive a commission when you use our affiliate links. However, this does not impact our recommendations.
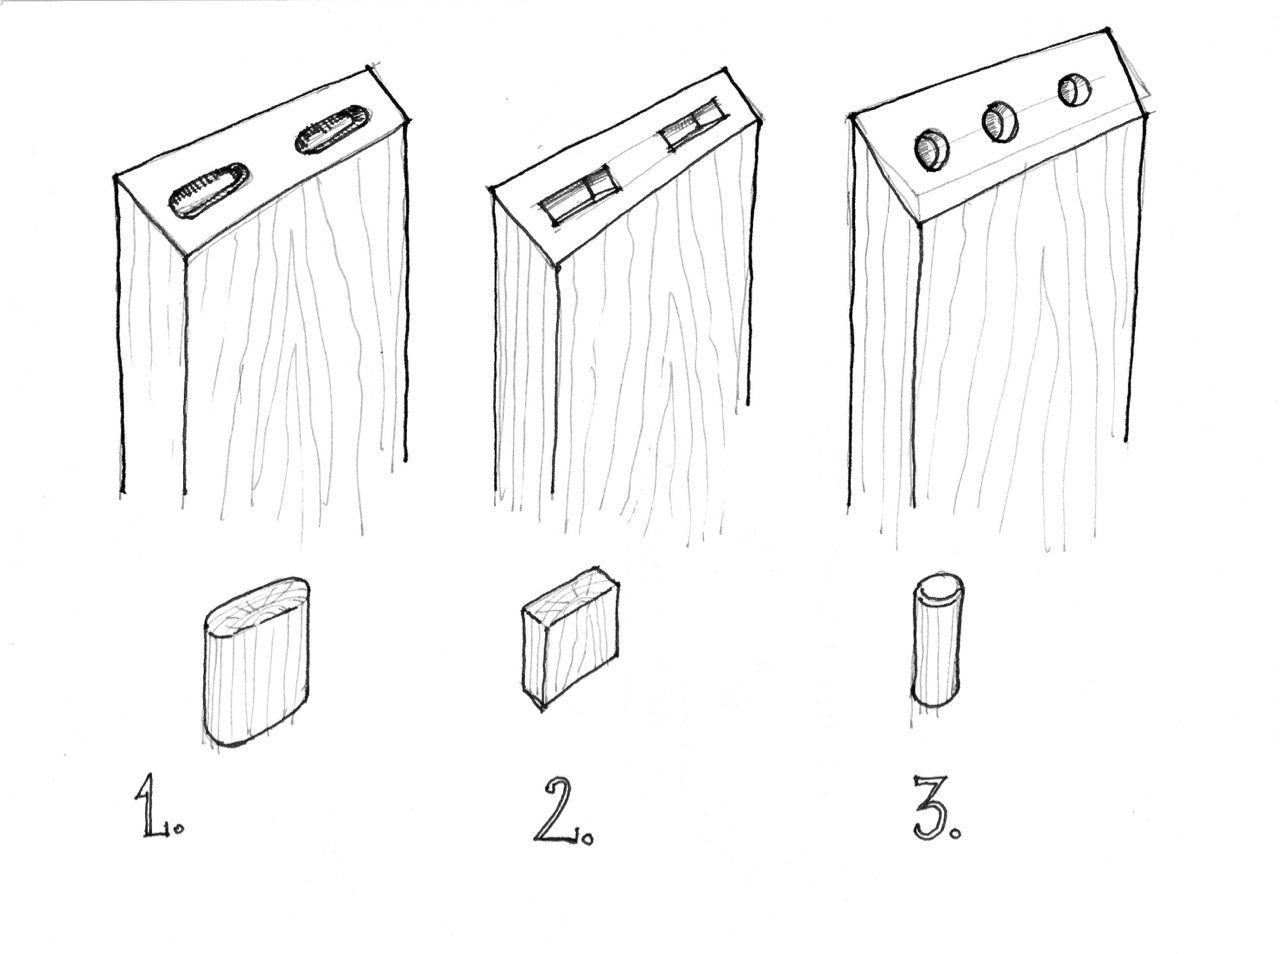
Domino (1), floating tenons (2) and dowels (3) are all good choices for reinforcing the joint.
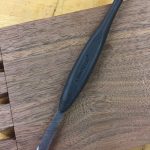
Once you finish creating a nice miter joint, then comes the time to think about making the joint stronger. As glue alone will not suffice, adding splines or keys in between the two banks of the miter can ensure a long lasting joint. If you have a Festool Domino this is going to be a cakewalk, but since many of us don’t have access to one here are a few other options.
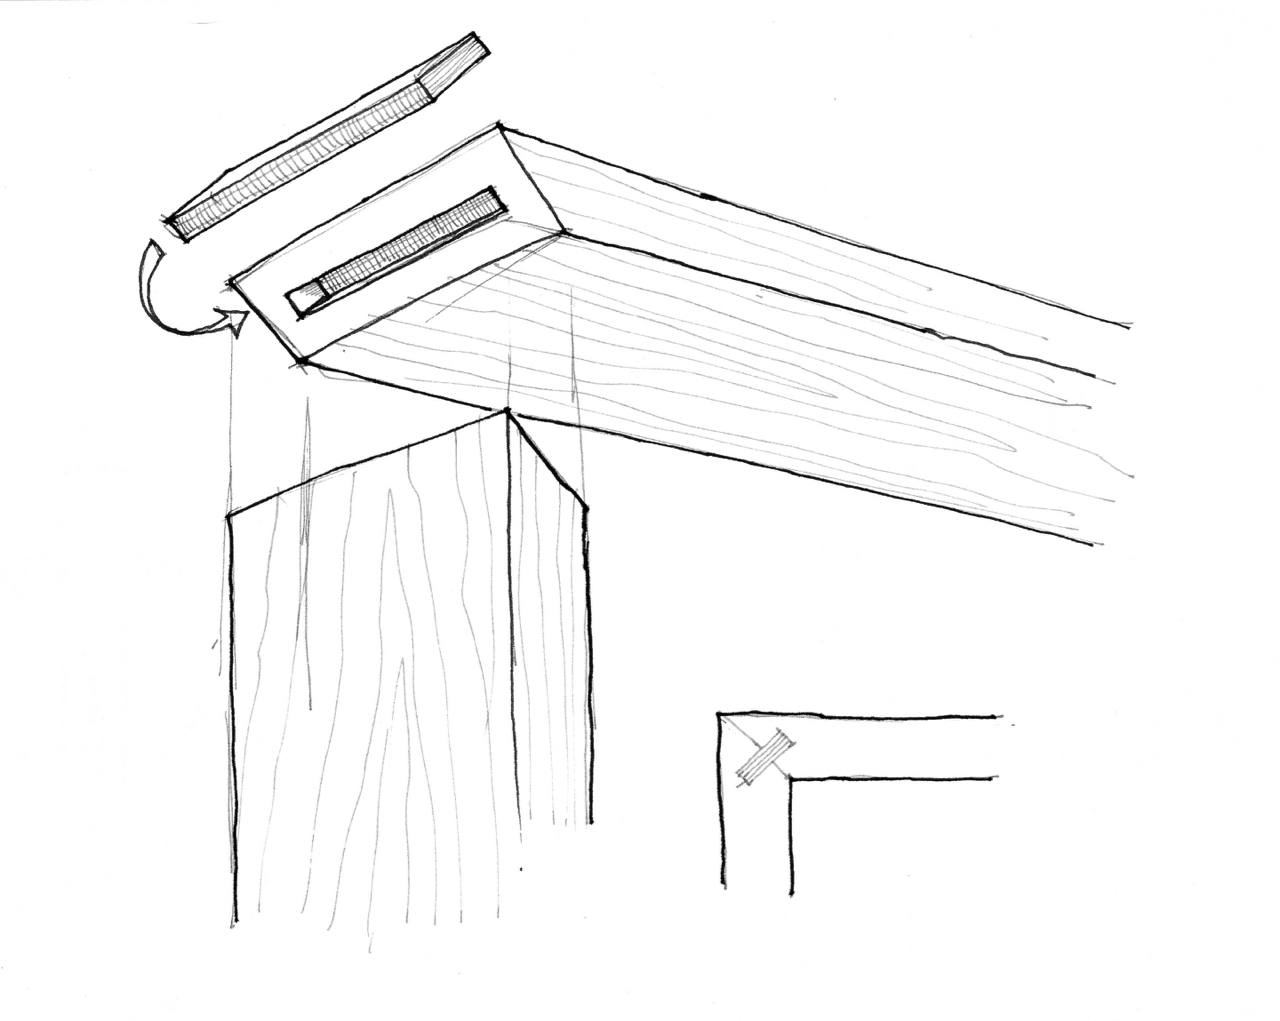
- Splines: Usually made of plywood, splines can be installed into two matching grooves routed in the mitered banks. If you choose to use hardwood for the spline make sure to align the splines’ grain perpendicular to the surface of the miter bank. Or, instead of a long spline, make two or more individual keys to be glued into corresponding mortises. By the way, the keys in this case should actually be called “floating tenons.”
Plywood spline
- Biscuit joint: Generally speaking, two rows of #20 biscuits will work well for small and low coffee tables, etc. But I would not recommend using them on big and tall waterfall joints, in a setting that sees heavy floor traffic or where the leg is at a risk of incidental trauma such as a blow or a kick.
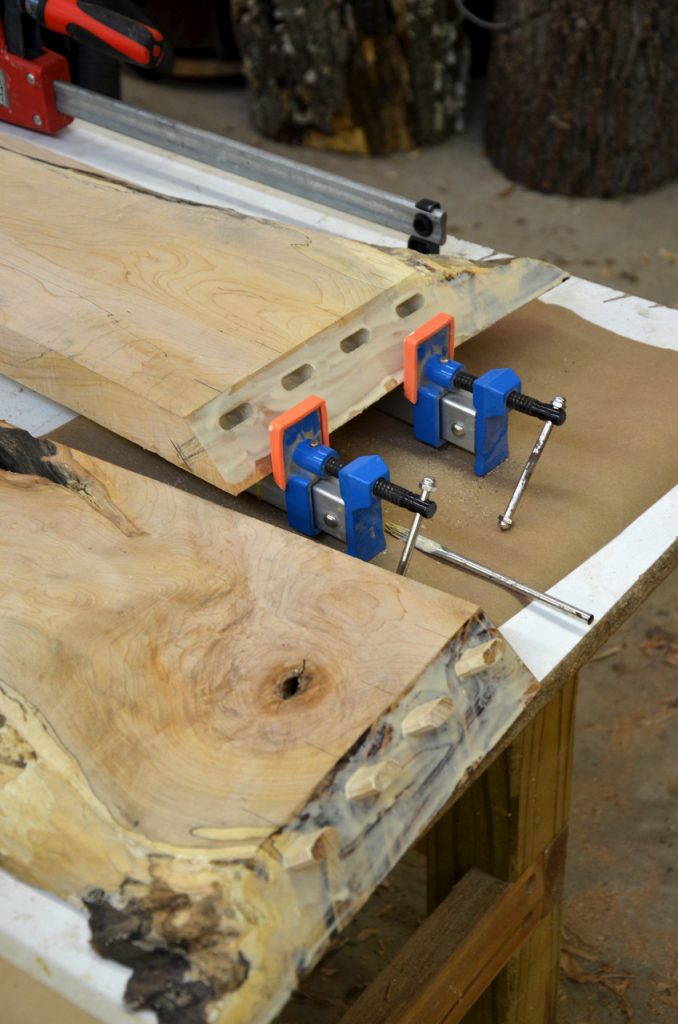
- Dowels: Another good choice as long as the reciprocating holes are drilled accurately. There are two main ways to ensure alignment between the holes on the two banks:
- One way is to drill one bank. Insert dowel centers into the holes, then marry the two banks by hinging them closed with the help of tensioned masking tape strips that pulls the joint together. Finally, drill the second group of holes using the impressions that the dowel centers left.
- If you don’t have dowel centers around you can do the following: (A) hammer thin brads or nails into the first miter bank to 1/4” or so deep. (B) Now snip their heads proud of the surface to allow for a 1/16” or so protrusion. The brads need to be cut tall enough to provide for sufficient purchase for their extraction later. (C) Marry the two banks as explained above, (D) extract the brads and drill the holes for the dowels by centering the bit in the mirrored brad holes.
- Note: Whenever you drill mirroring dowel holes freehand, you run the risk of one or more holes becoming misaligned (with a doweling jig it is less likely to happen). The remedy for this is to enlarge one of the mirroring holes and use a thick gap filling glue (I prefer epoxy) to compensate for the gap. As half the dowel is anchored tight in one of the miter banks, the remaining length has some wiggle room to conform to the enlarged hole on the other bank. This gives you some room for adequate adjustment of the waterfall corner.
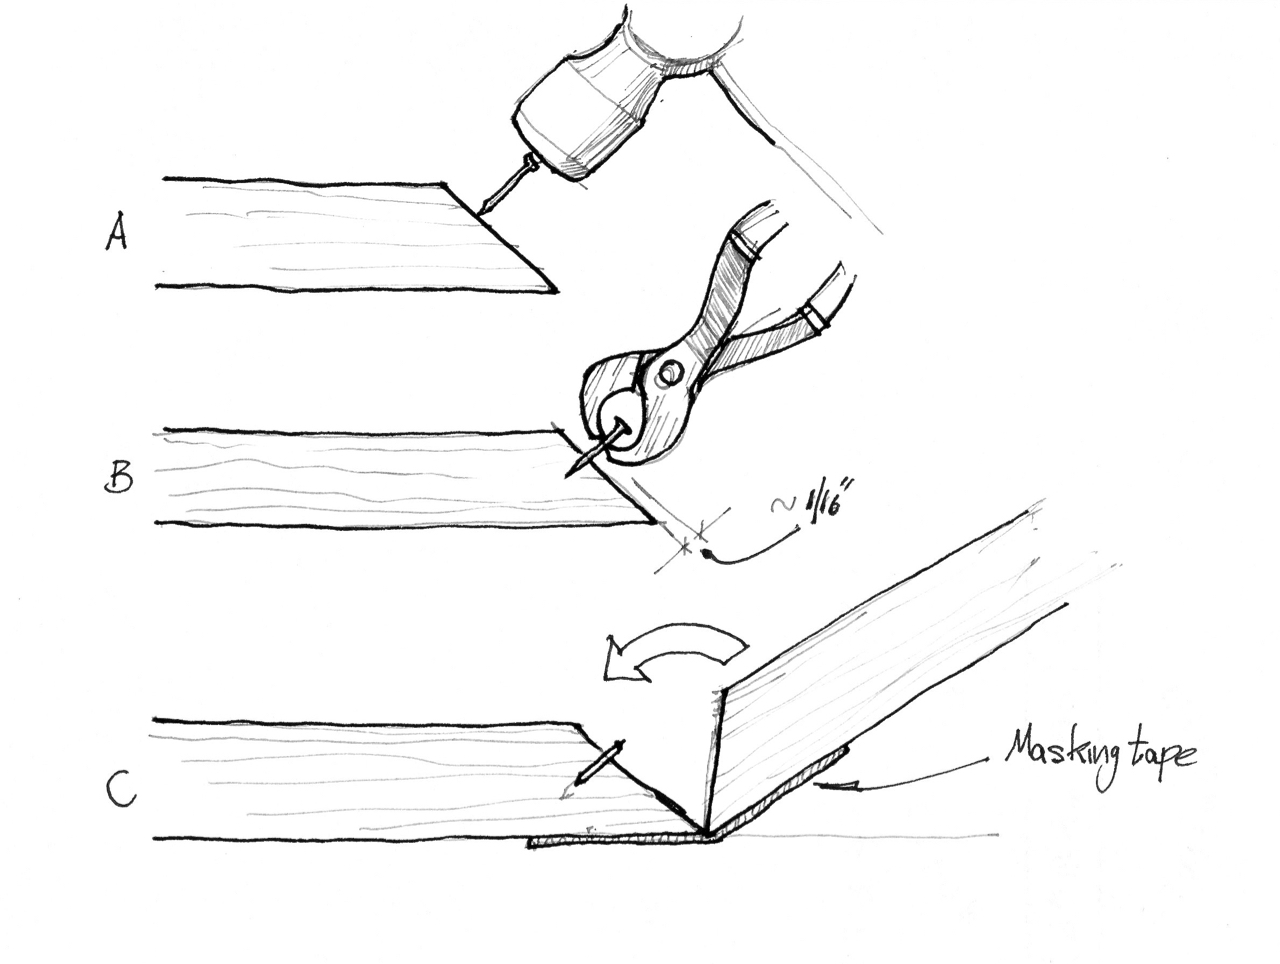
Co-centering dowel holes prior to drilling them using snipped brads.
- Keys routed in the direction of the grain. This is probably the strongest miter joint I can think of. I used this technique when I built a recent tall piece and I can tell you that in order to route the triangle mortises you will have to spend a lot of time on the router table elevating the bit and moving the fence in increments. I talked about and showed this technique in my Popular Woodworking University class that you can purchase here.
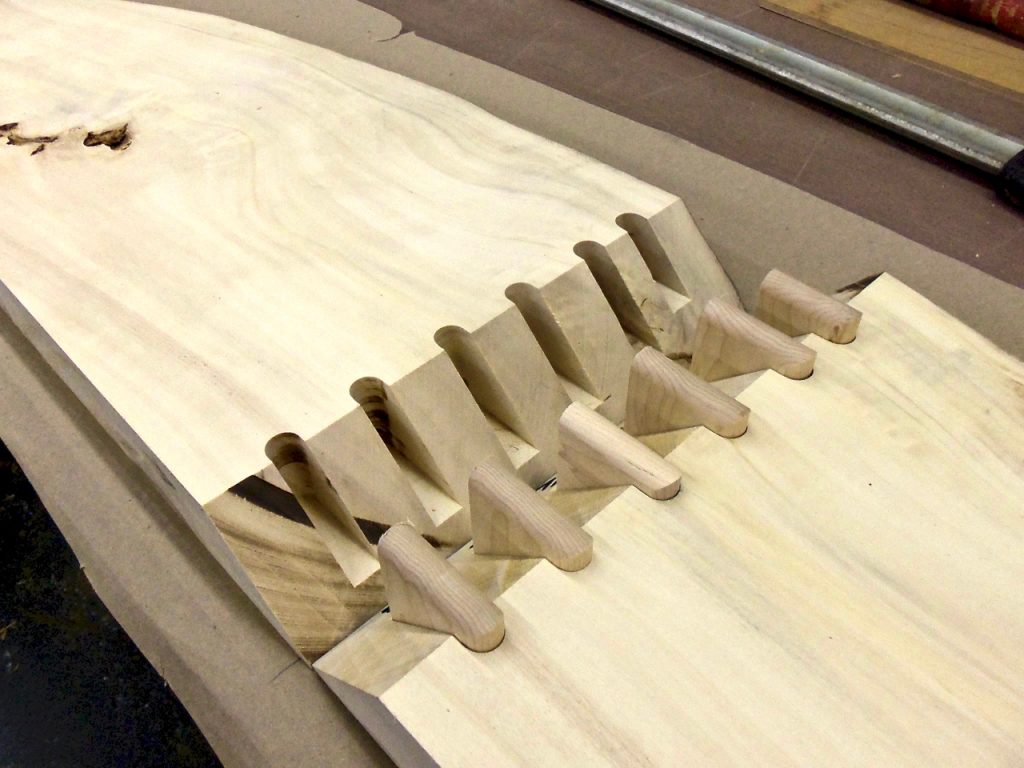
Keys and mortises routed in the direction of the grain are probably the strongest miter joint reinforcement method out there, short of concealed dovetails.
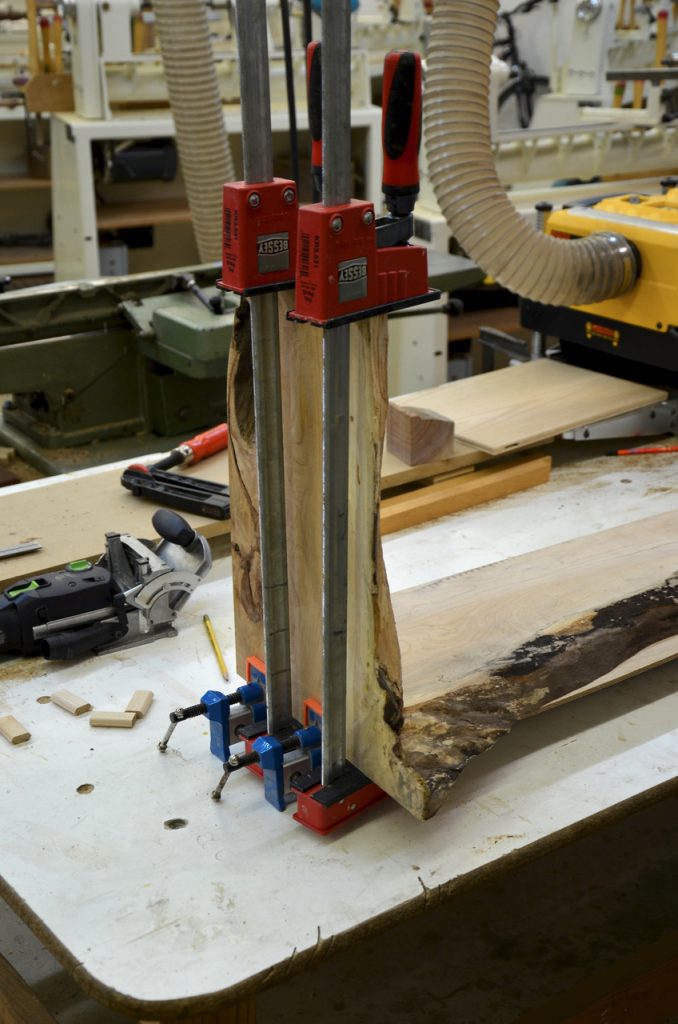
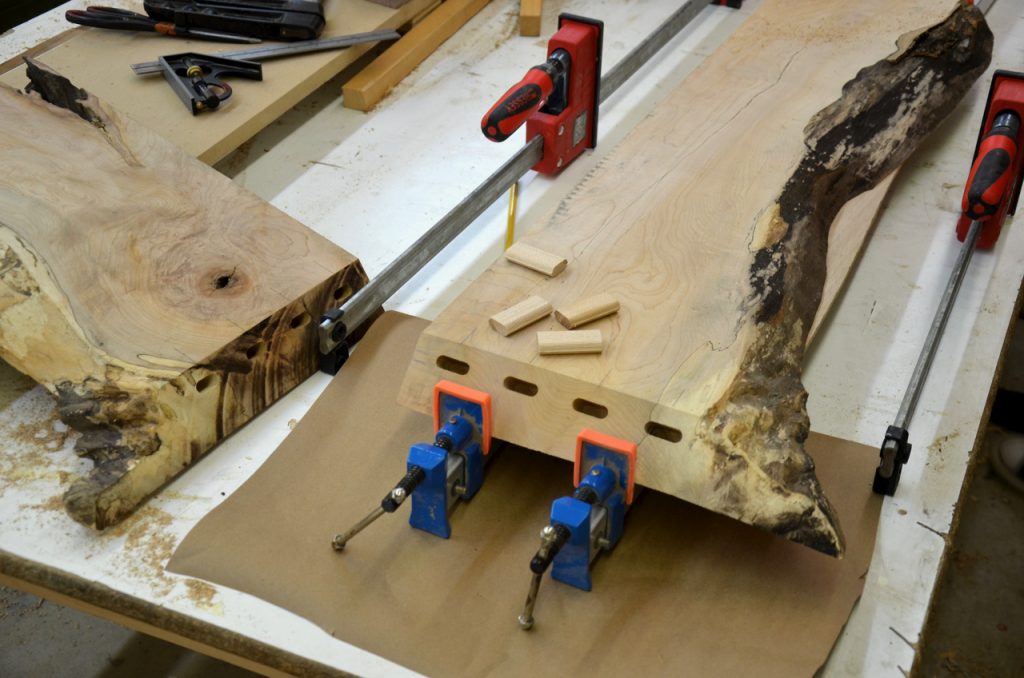
Gluing up the joint
After spreading glue on the mitered surfaces, the inside walls of the grooves and on the splines (or domino, dowels, etc), marry the two miter banks together and reinforce the joint with masking tape strips applied on the outside. Now add a few clamps from both sides of the joint to press the miter even further.
Dry fitting the joint to find out about any “surprises”
Spreading glue on the Domino keys, inside the mortises and on the miter joint banks.
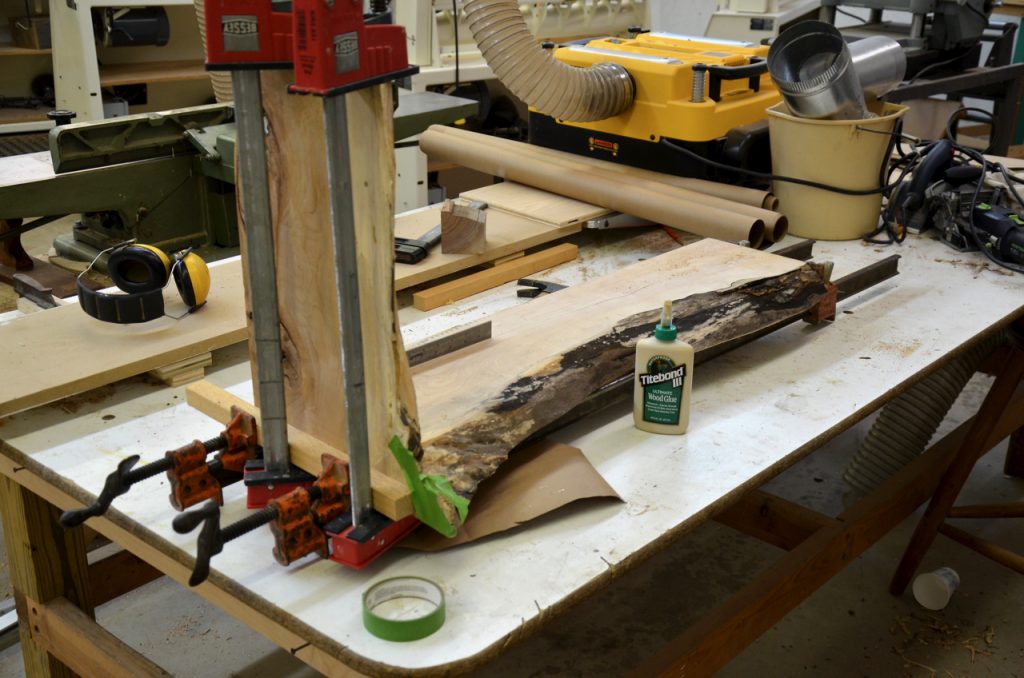
Clamping the miter joint together.

Next time I will show the finished table.
Here are some supplies and tools we find essential in our everyday work around the shop. We may receive a commission from sales referred by our links; however, we have carefully selected these products for their usefulness and quality.