We may receive a commission when you use our affiliate links. However, this does not impact our recommendations.
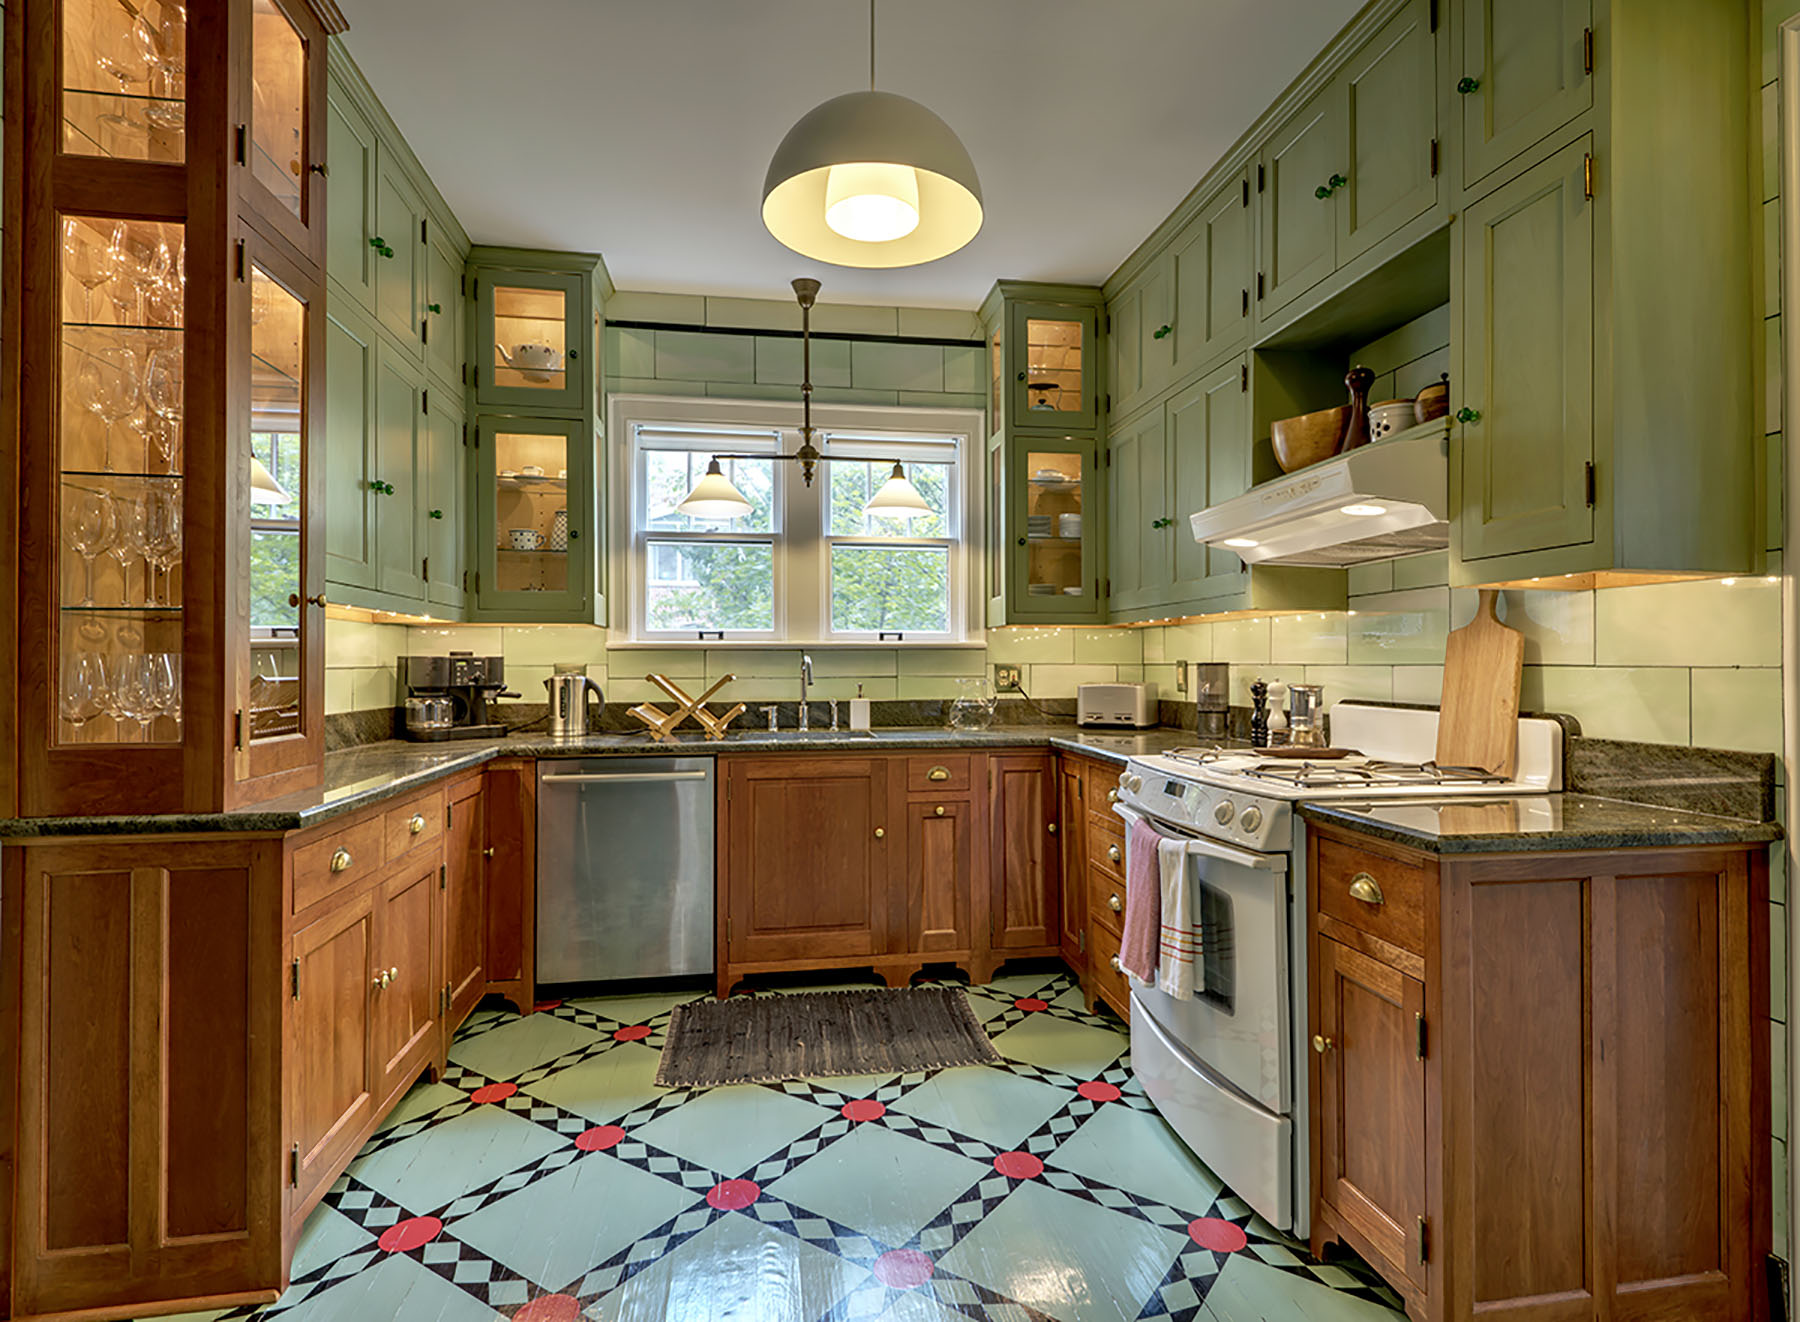
Milk-painted upper cabinets, cherry bases. The milk paint is a custom mix of colors from The Old Fashioned Milk Paint Company. I applied two coats of oil-based polyurethane by brush. This photo was taken after the kitchen had been in use for 12 years. Cabinets by NR Hiller Design, Inc. General contractor: Golden Hands Construction, Inc. (Photo: Spectrum Studio)
A few weeks ago a reader requested advice on refinishing his kitchen cabinets with milk paint. He wondered whether he could apply the paint over the existing finish (after appropriate prep work) or would need to strip the doors, drawer faces, and face frames down to bare wood. I told him I’d answer his questions here in a post.
The long and the short: Milk paint adheres best to bare wood. It’s self-priming and forms an excellent bond. That said, stripping a kitchen’s worth of cabinets is no walk in the park. If you really want milk painted cabinets but aren’t ecstatic at the thought of scraping and sanding umpteen cabinet parts down to bare wood, there’s an alternative route–though I still strongly recommend stripping.
Step 1: Sand to provide a key
Being fresh out of discarded doors from cabinets pulled out of clients’ kitchens, I used a scrap of prefinished plywood to demonstrate this method. I sanded the panel with 120 grit.
Step 2: Remove all dust
This is crucial to all finishing. Do it.
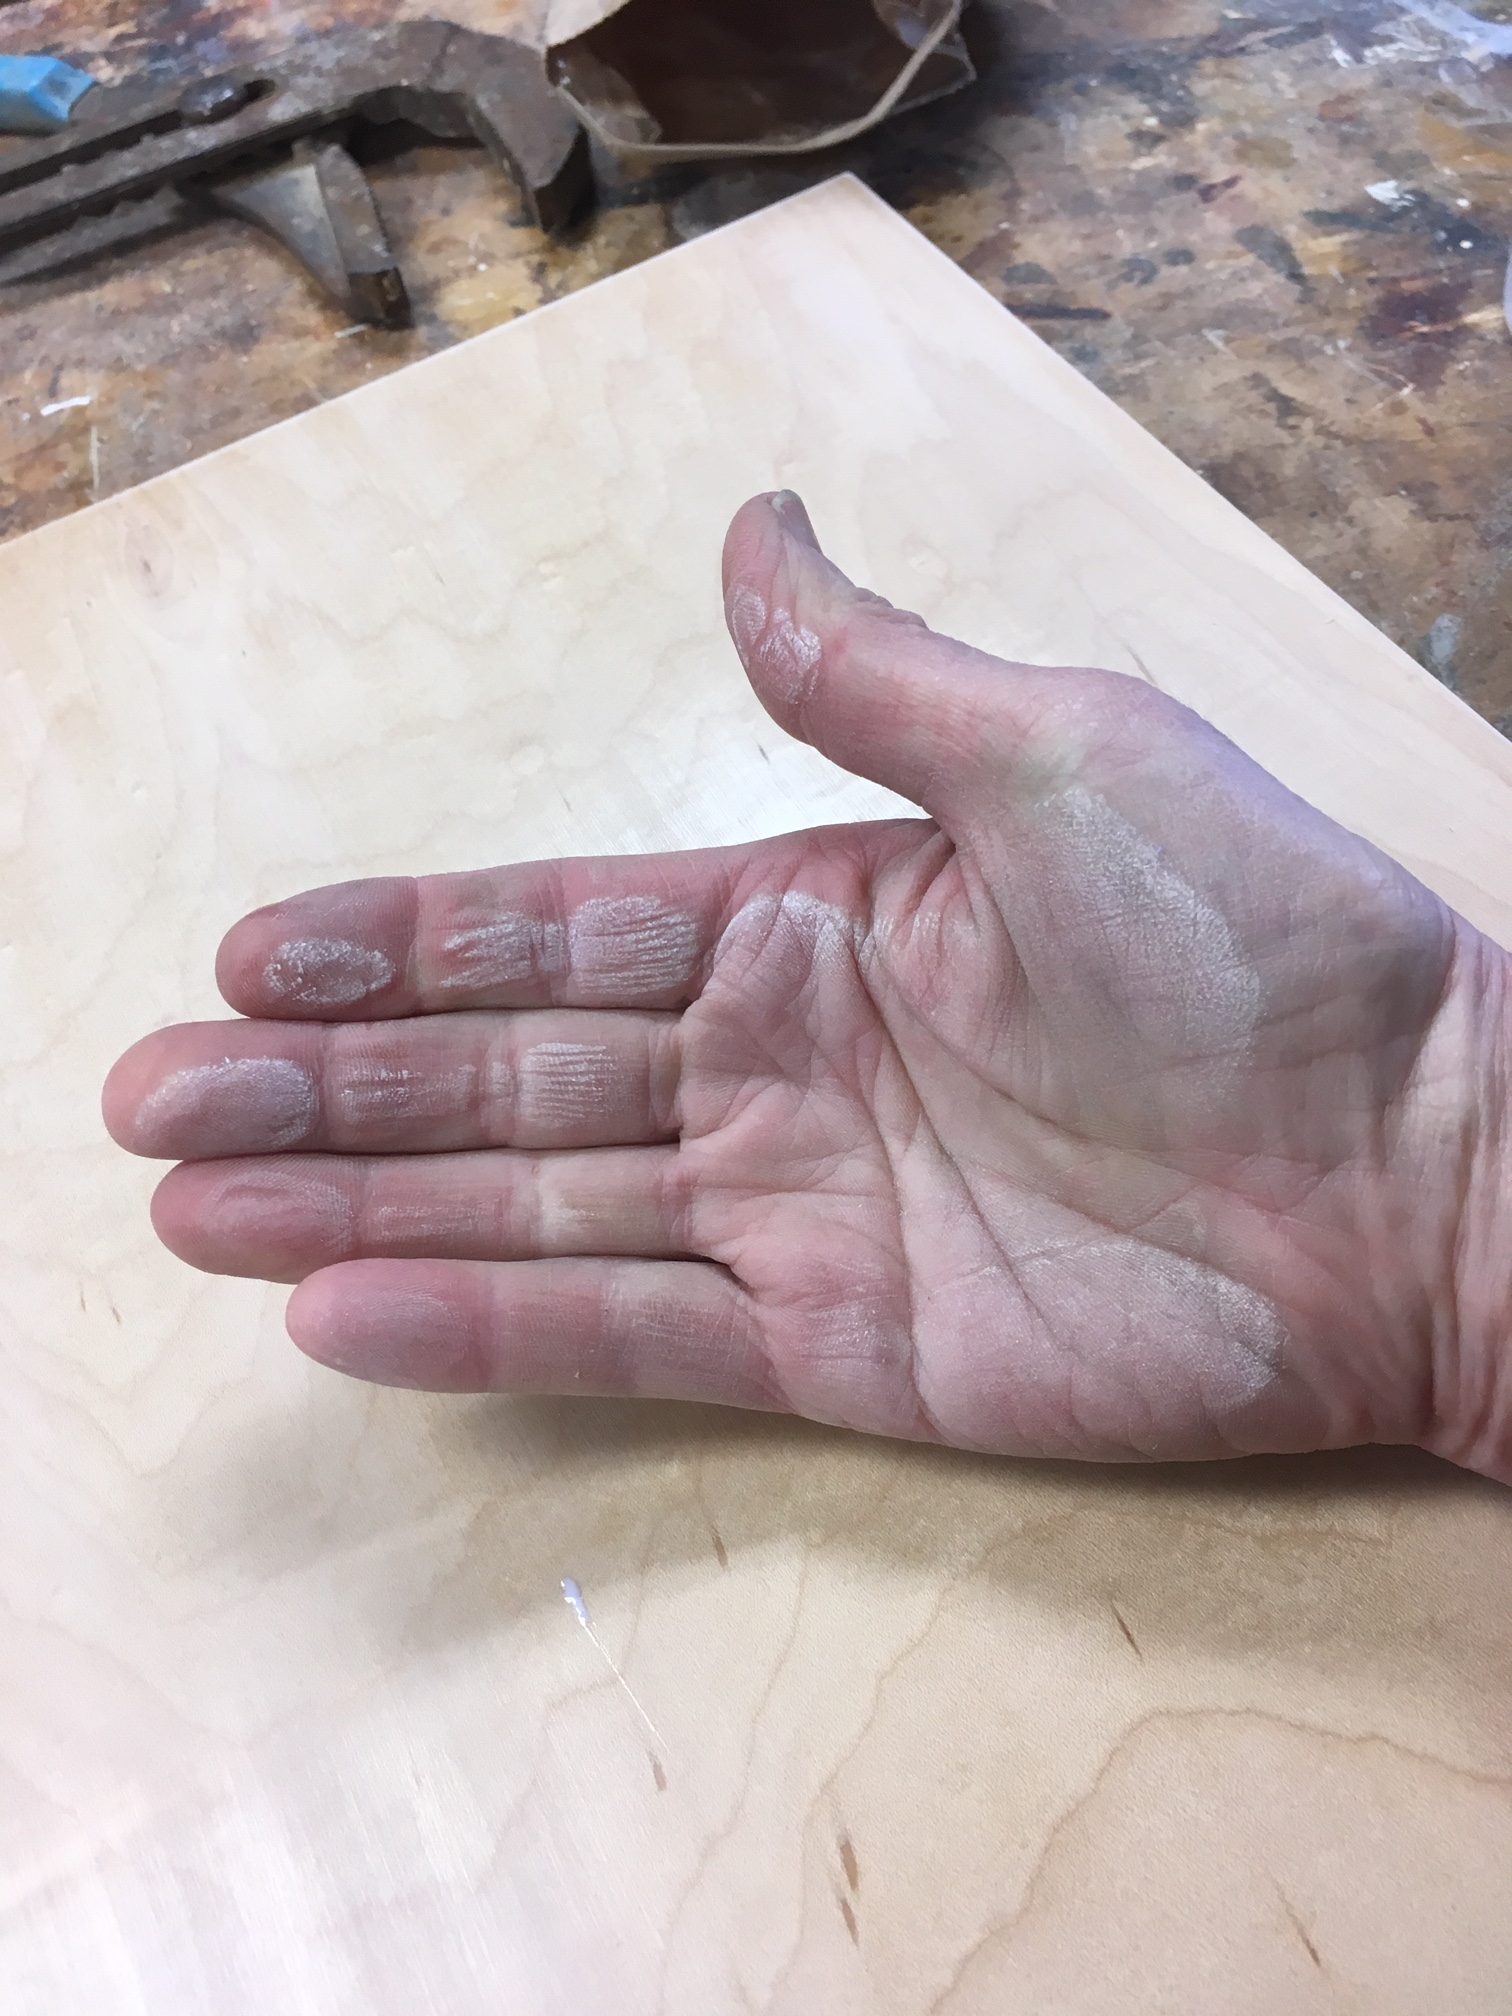
If you don’t remove the dust, the paint will stick to it–and not to your cabinet parts. Even when you can’t see dust, a quick pass of your hand will show its presence.
Step 3: Mix milk paint and bonding agent
Purveyors of pre-made milk paint sell products you can mix with paint to help it adhere to prefinished surfaces. For this sample I mixed 1 part made-up milk paint (The Old Fashioned Milk Paint Company’s “Federal Blue”) with 1 part of bonding agent (the same company’s “Extra-Bond”). I applied the mix with a bristle brush. Because the substrate was already sealed, the mix took far longer to dry than milk paint applied directly to bare wood.
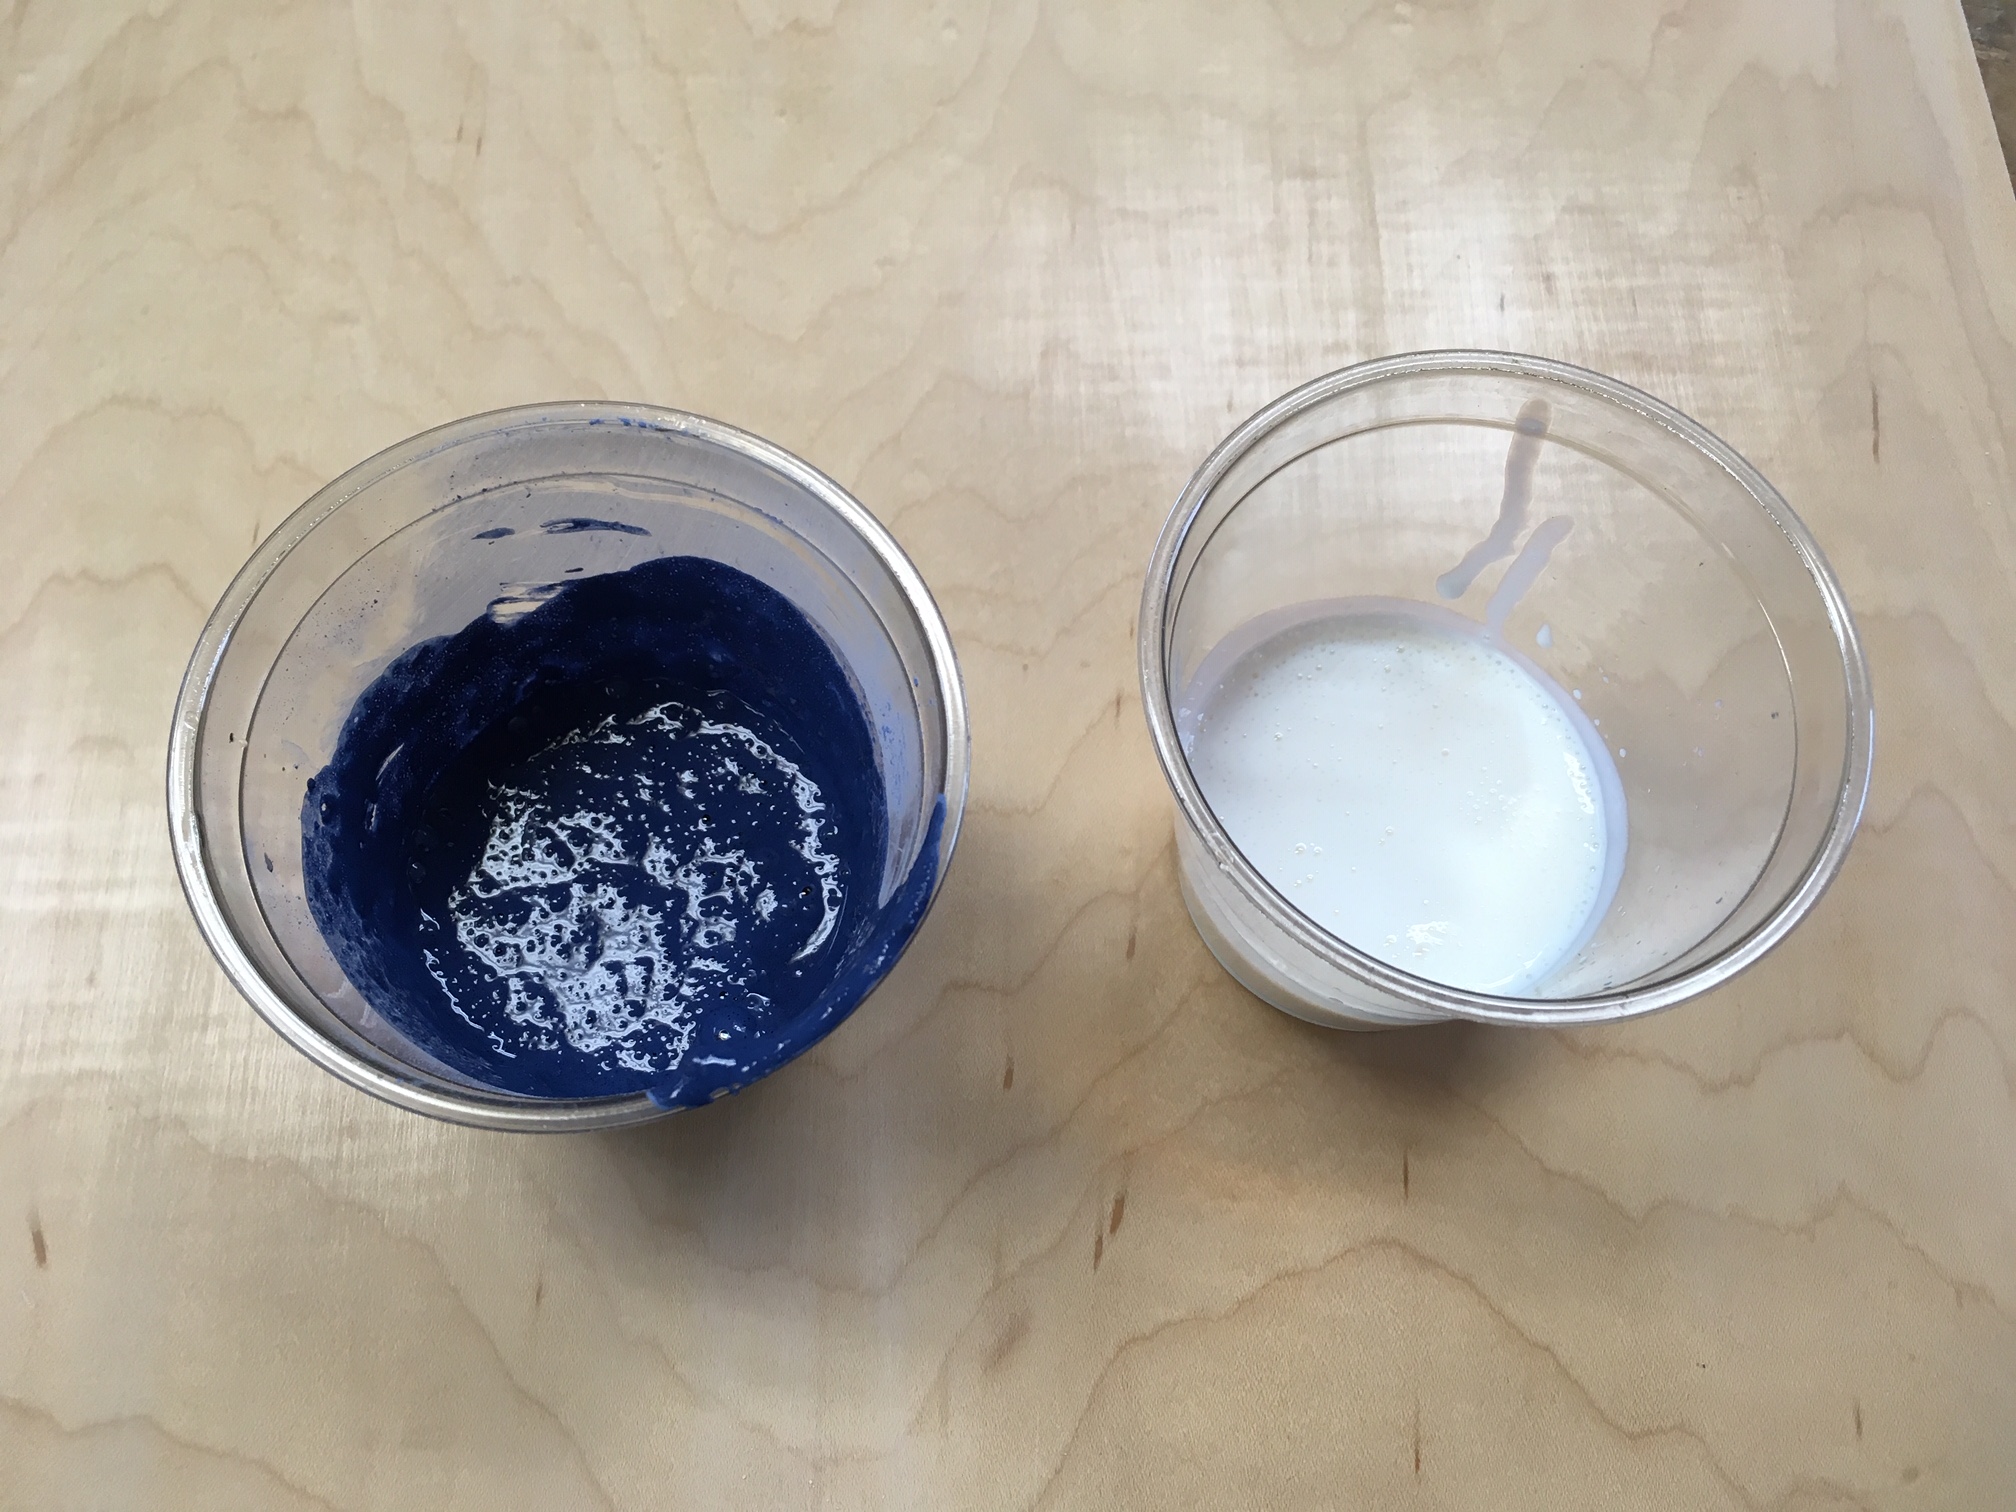
Equal parts maximize adhesion.
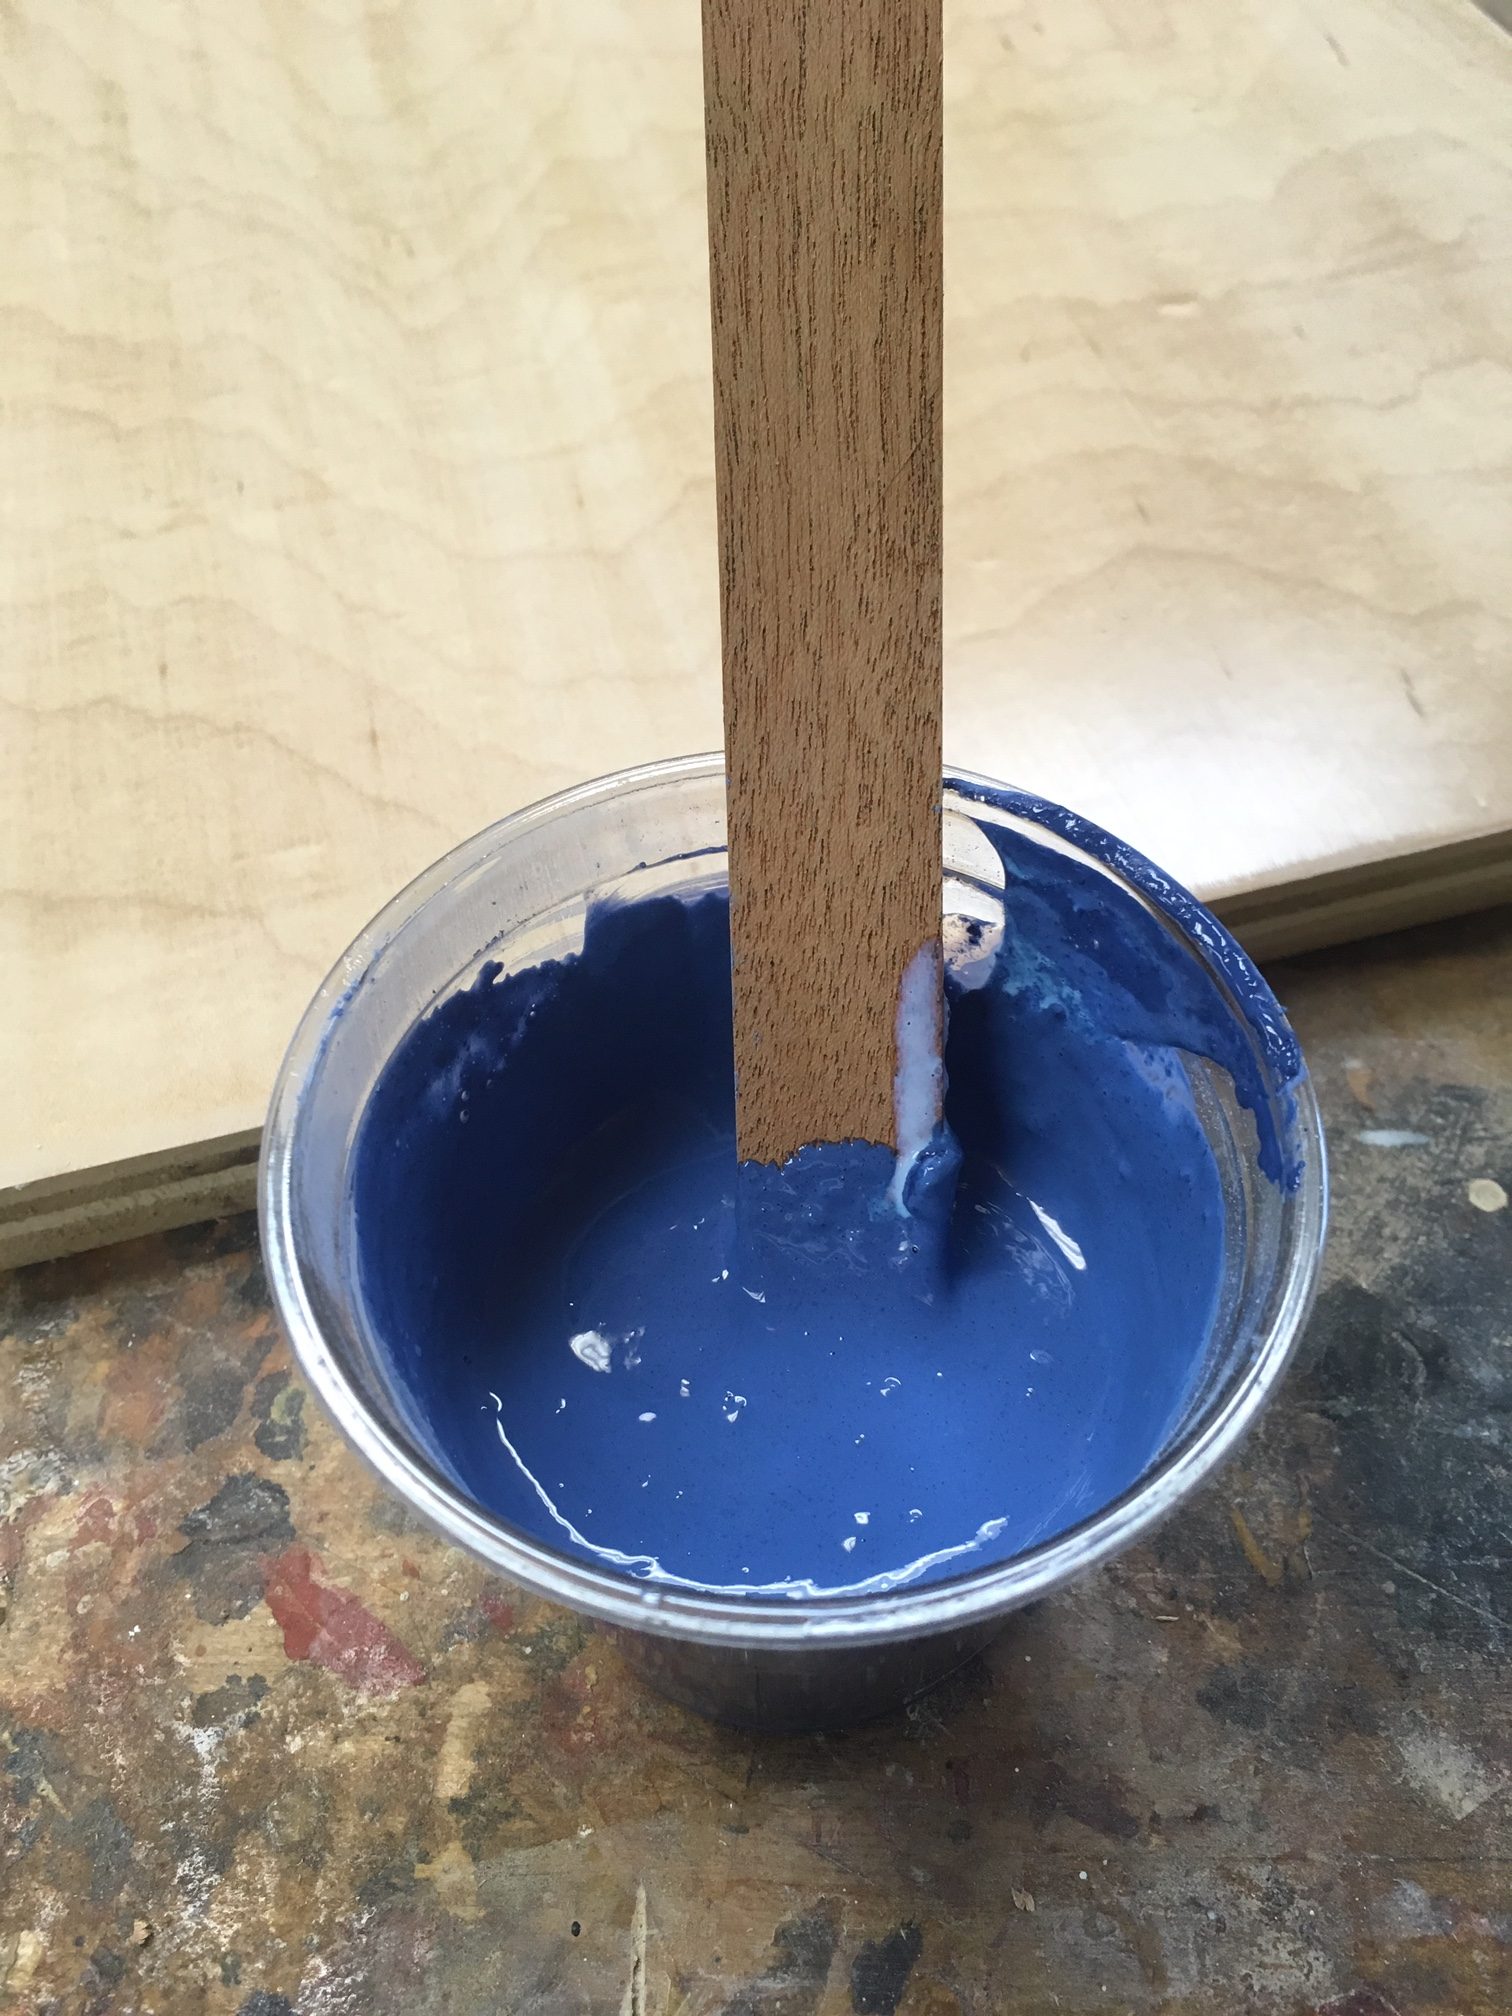
Stirred, not shaken.
If you apply a second coat, you needn’t incorporate the bonding agent–you can simply apply the paint.
***
All well and good. But if you’re going to finish kitchen cabinets with milk paint, I strongly recommend applying protective topcoats over the paint. Milk paint has a matte finish and will show marks. Although it’s quite durable, it will be stained by many common kitchen substances, including oils (whether from a bottle, a stick of butter, or just your hands).
You can topcoat milk paint with almost anything, but the protection provided will differ from one finish to another. It’s extremely important to do a test of your chosen finishing system all the way through–i.e., not just a test of the milk paint, but of the top coats as well.
In addition to offering different levels of protection, different top coats will affect the look of the finish, so be patient and allow each coat to dry.
Finally, subject the finished sample to the kind of wear and tear it’s likely to get in use. I do this by dividing the sample into a grid and applying a spoonful of different substances–red wine, rubbing alcohol, mustard, hot sauce, olive oil, butter, and so forth–to each. Lay the sample down flat and leave it overnight. Sure, most cabinet surfaces are vertical, but this way you’re getting the worst-case scenario.
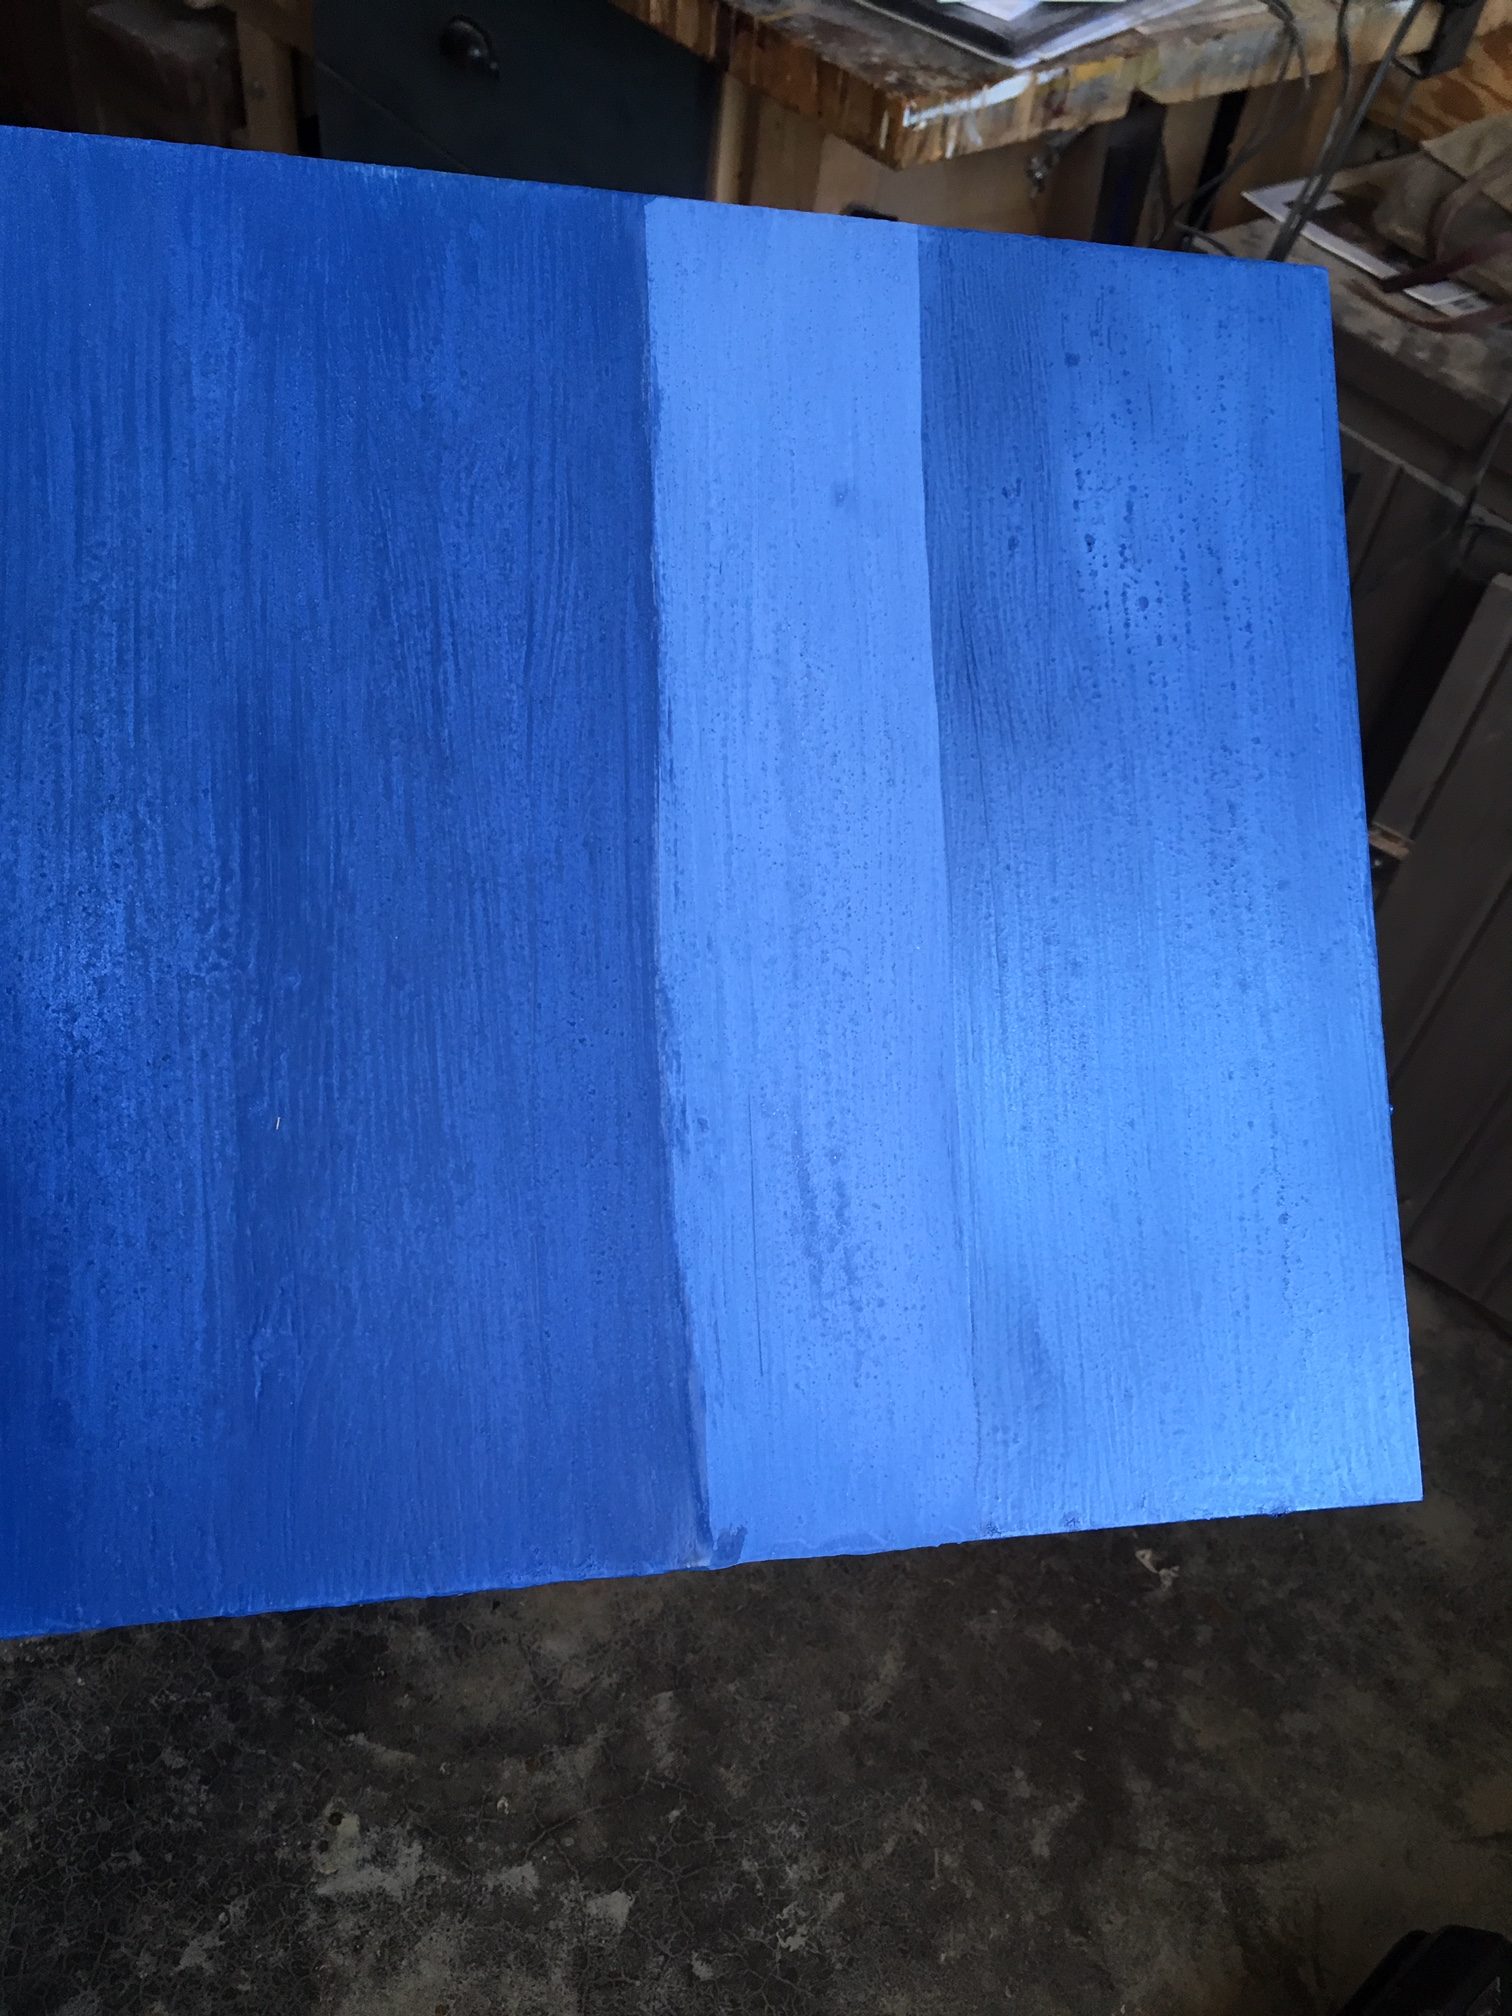
Here’s my quickly made sample board.
I mixed the milk paint powder with water using a stick, then mixed it with the same quantity of bonding agent. I didn’t mash out all of the lumps, as a result of which there is more texture in the milk paint than you might have if you made more effort to obtain a smooth finish. I simply sanded out the lumps after the first coat had dried; the marks visible here are scars from where the lumps had been. In my experience, increased viscosity of the mix with the addition of bonding agent makes brush marks more noticeable.
To be honest, I love the textured look that results; when using milk paint, I am not looking for a perfectly uniform film. If I were, I would just use acrylic or latex. Notice how dramatically the top coat finish will alter the appearance. From left to right: 2 coats of Osmo Polyx in “Clear”; bare milk paint without topcoats; 2 coats oil-based Minwax polyurethane (satin).
Here are some supplies and tools we find essential in our everyday work around the shop. We may receive a commission from sales referred by our links; however, we have carefully selected these products for their usefulness and quality.