


We may receive a commission when you use our affiliate links. However, this does not impact our recommendations.

Kitchen island refaced in dyed eucalyptus panels from Heitink Veneers.
Last week I finished refacing a large kitchen island, a job that had dragged out for months due to my packed schedule. (Thank goodness for patient clients. Seriously.) The job comprised transforming the island from a neoclassical-wannabe (massive mouldings, lots of faux frame and panel work, painted black) to something more streamlined and modern, befitting the clients’ preference for mid-century style.
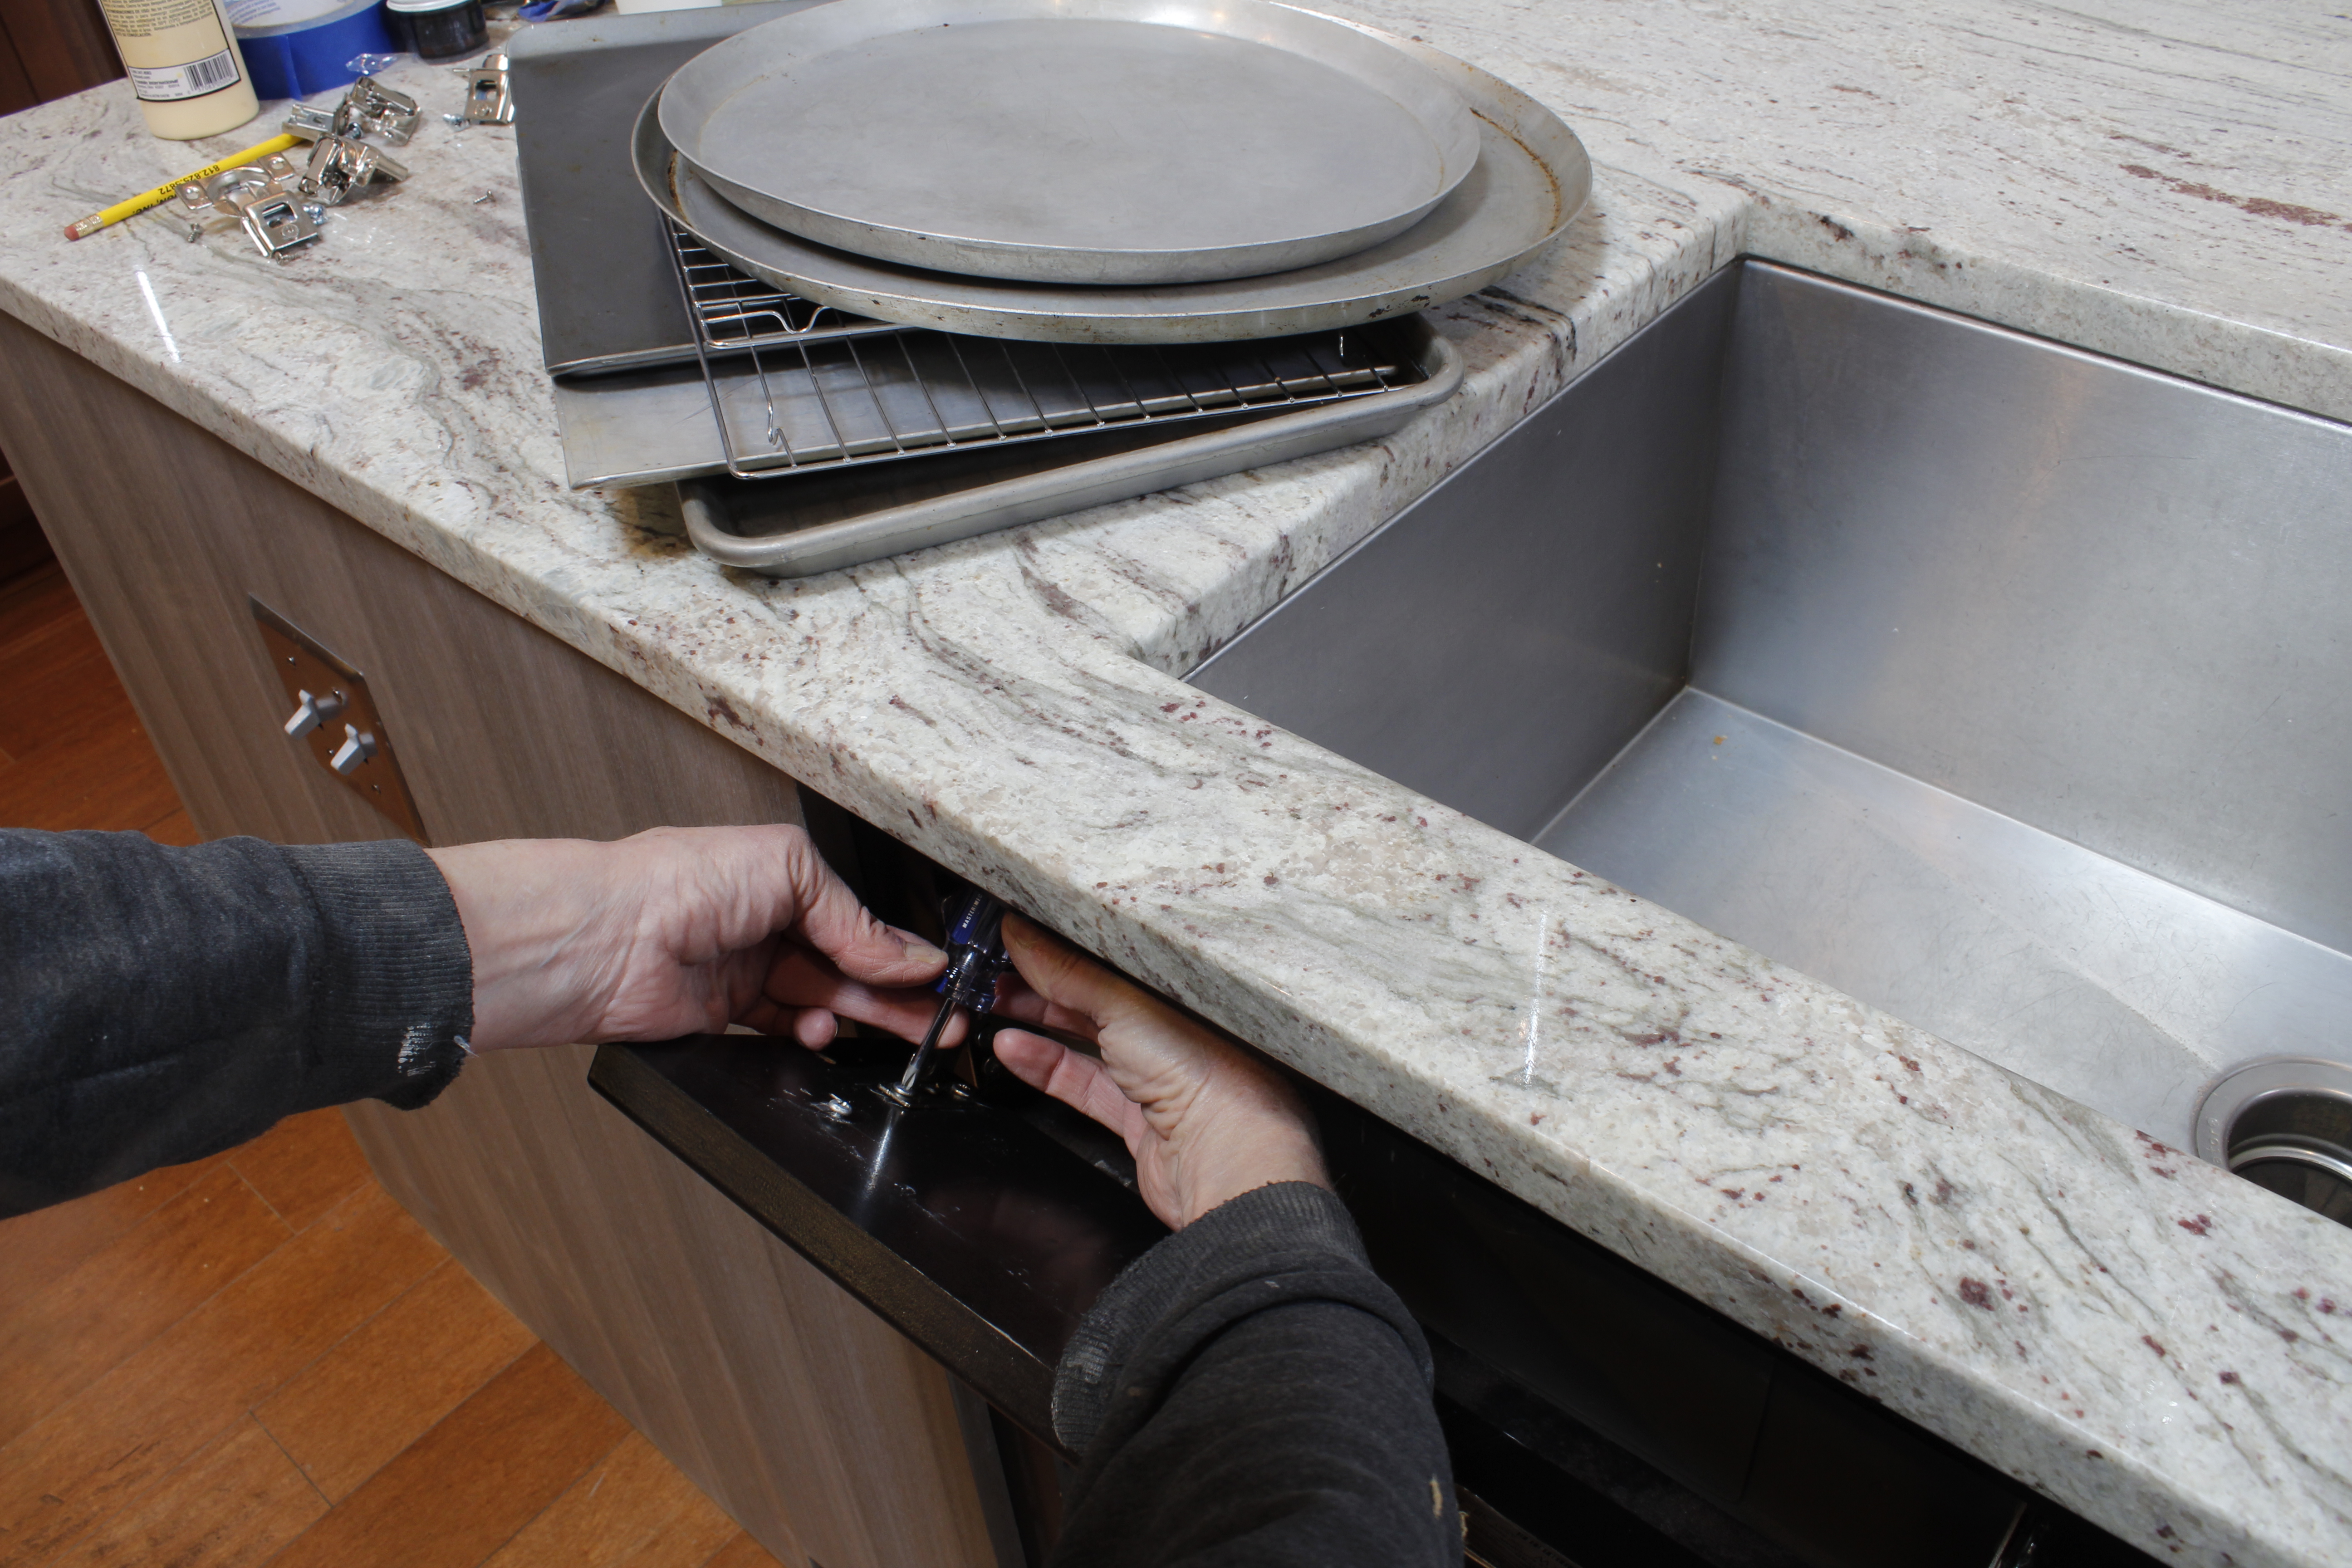
I’m not going to detail the entire refacing process here but want to focus on one small part–the part so small that it caused me one large headache. The island houses the kitchen’s sink, with a dishwasher next to it. The cabinets, manufactured by one of those national firms that specialize in low-cost cabinets for the mass market (the kind of cabinets that, by virtue of their skimpy construction details and super-affordable price, encourage homeowners to redo their kitchens often), were fitted with faux drawer faces with tilt-out storage pockets for sponges and so forth). The mechanism for these tilt-outs is screwed to the face frame opening at each side, then to the back face of the “drawer front.” All of this assembly takes place in the factory before the cabinets are delivered and installed in their destined setting.
Usually when I’m refacing cabinets, my work is part of a larger project as part of which the sink may be removed temporarily, if not replaced. Changing the fronts of these tilt-out storage deals is easy when you have access from the back; even if you’re working from the front, there’s plenty of room to get your hands inside the cabinet to drill holes or turn your screwdriver.
Ugh. We’ve all been there.
In addition to being able to work more easily inside the cabinet when the sink is not installed, marking the holes for the screws that attach the tilt-out hardware to the back of the faux drawer fronts is a cinch when you can clamp them to the face frame, reach inside the cabinet, and mark the holes’ positions from behind.
At this point, those paying close attention may have a suggestion. “Just use the old drawer faces to mark out the screw holes on the new ones. You’re throwing them out anyway, so just screw all the way through to the back of the new faces.” That’s what I would have done, had the new faces been the same dimensions as the old ones. But the redesign involved narrowing the spaces between the doors and drawer faces for a more streamlined look; as is typical of mass-produced cabinets, the original doors and drawer faces had large distances between them–about an inch–to minimize the appearance of misalignment when the cabinets are installed.
I had to work my magic with the sink in place.
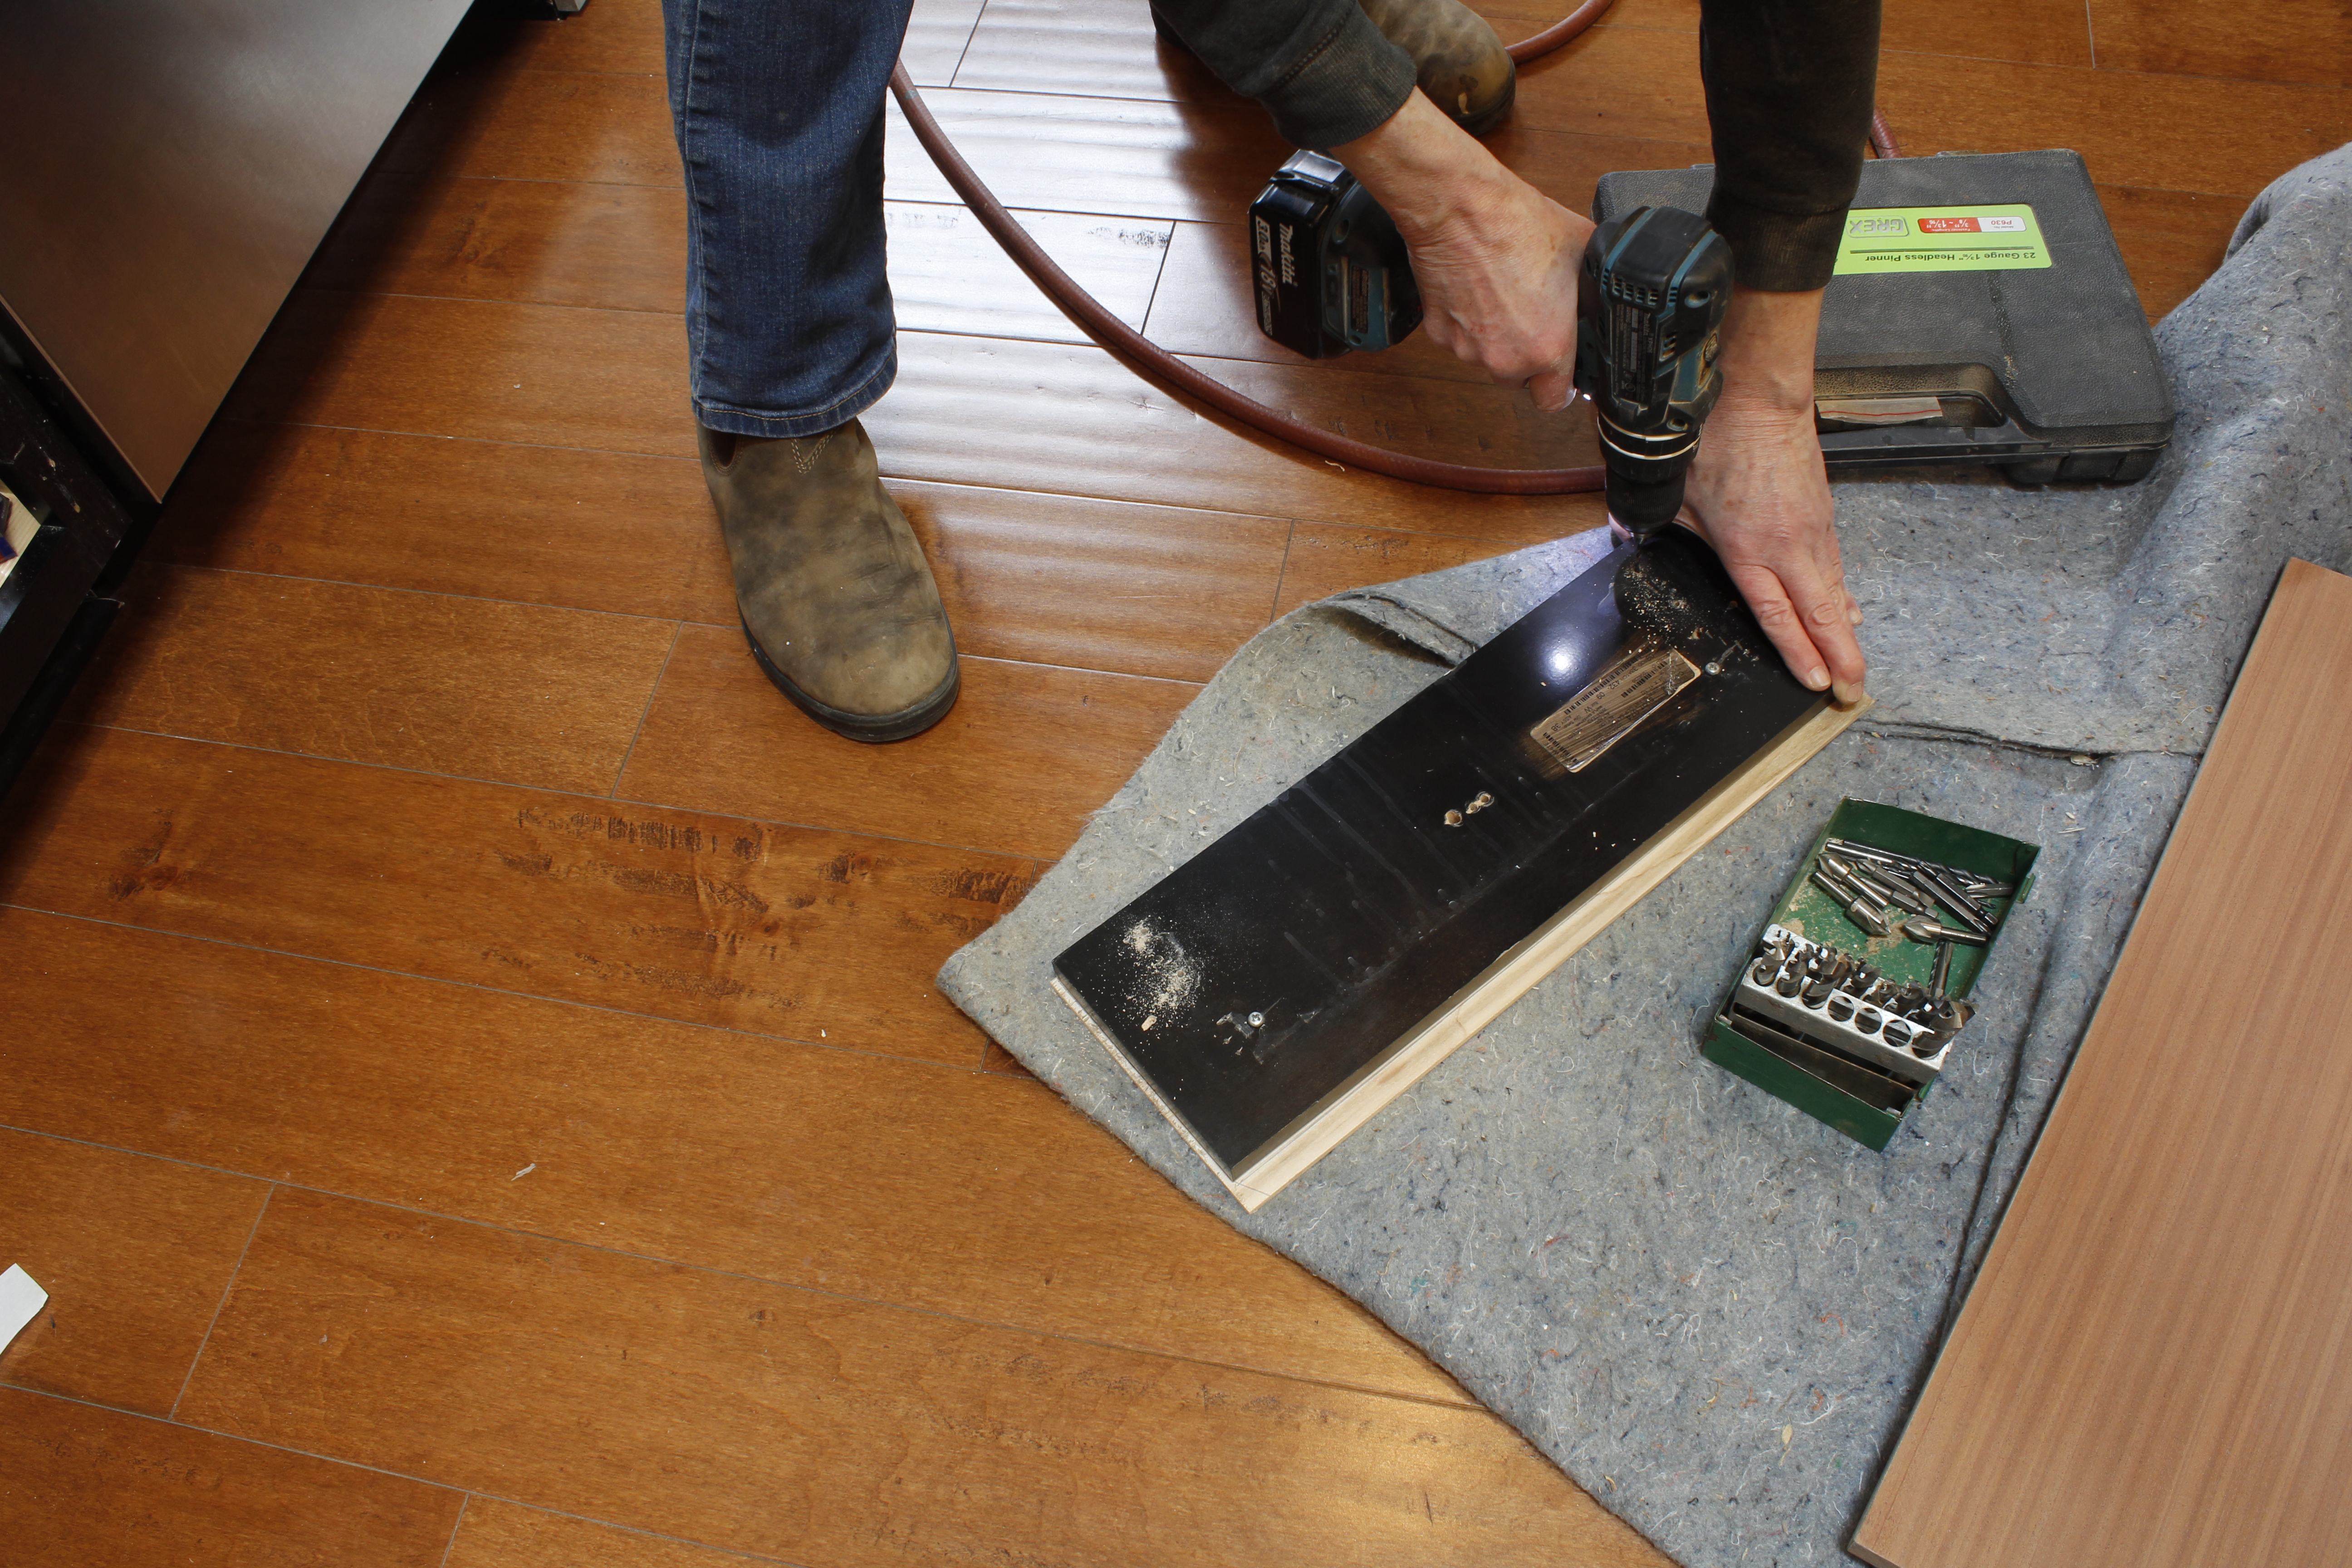
Step 1: Mark the screw hole positions
I made a template by cutting 1/4″ plywood to the dimensions of the new drawer faces. After removing the pulls from the existing faces, I stuck the template onto the first one using double-sided tape.
Step 2: Remove the old tilt-out faces
With the template adhered to each face, gently open the tilt-out and remove the screws holding the face to the hardware. If you have enough space to accommodate a close-quarter drill, great. I didn’t. Instead, I used the shortest stubby screwdriver in my tool box. It took some doing; a couple of screws had been tightened down so hard (probably with an impact driver in the factory) that I had to use a cranked screwdriver to loosen the grip. Some screws took more than 15 minutes to remove.
With the template still taped to the old drawer face, drill through the front of the old faces to mark the back of the template. (You can drill all the way through if you’re working on an expendable surface; I was not.) Remove the template from the old drawer face and drill all the way through.
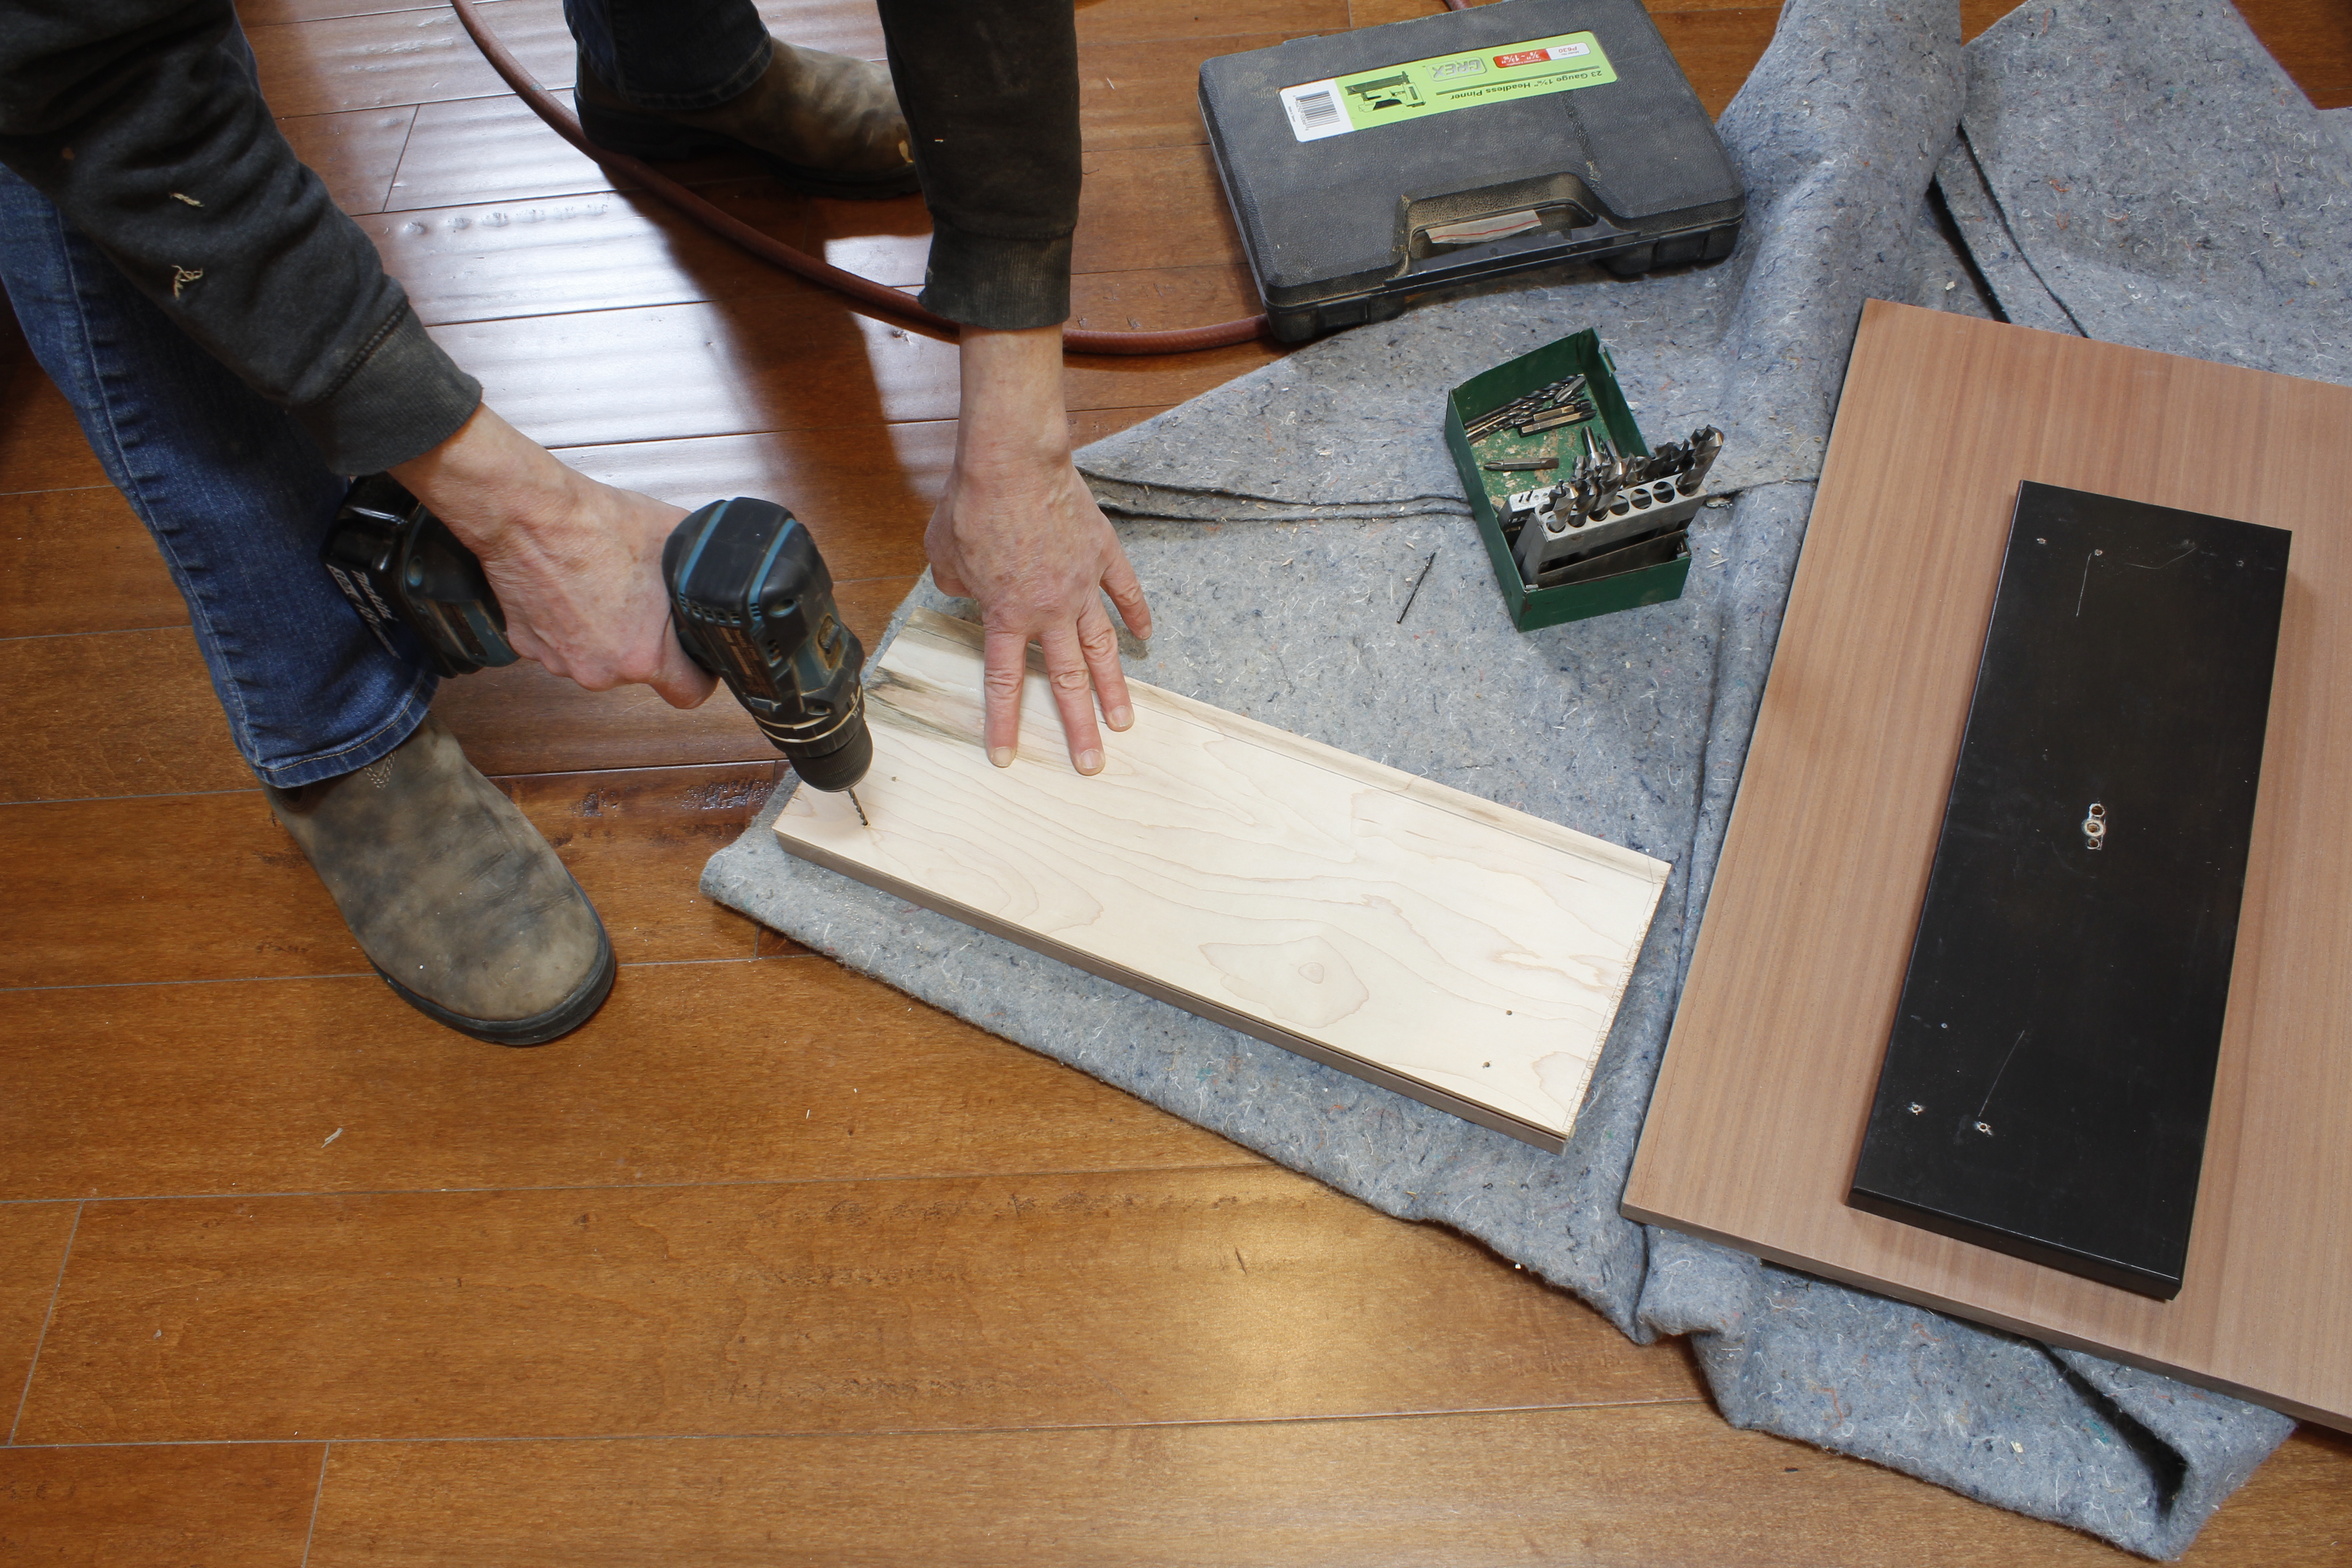
Step 3: Transfer the holes to the new drawer faces
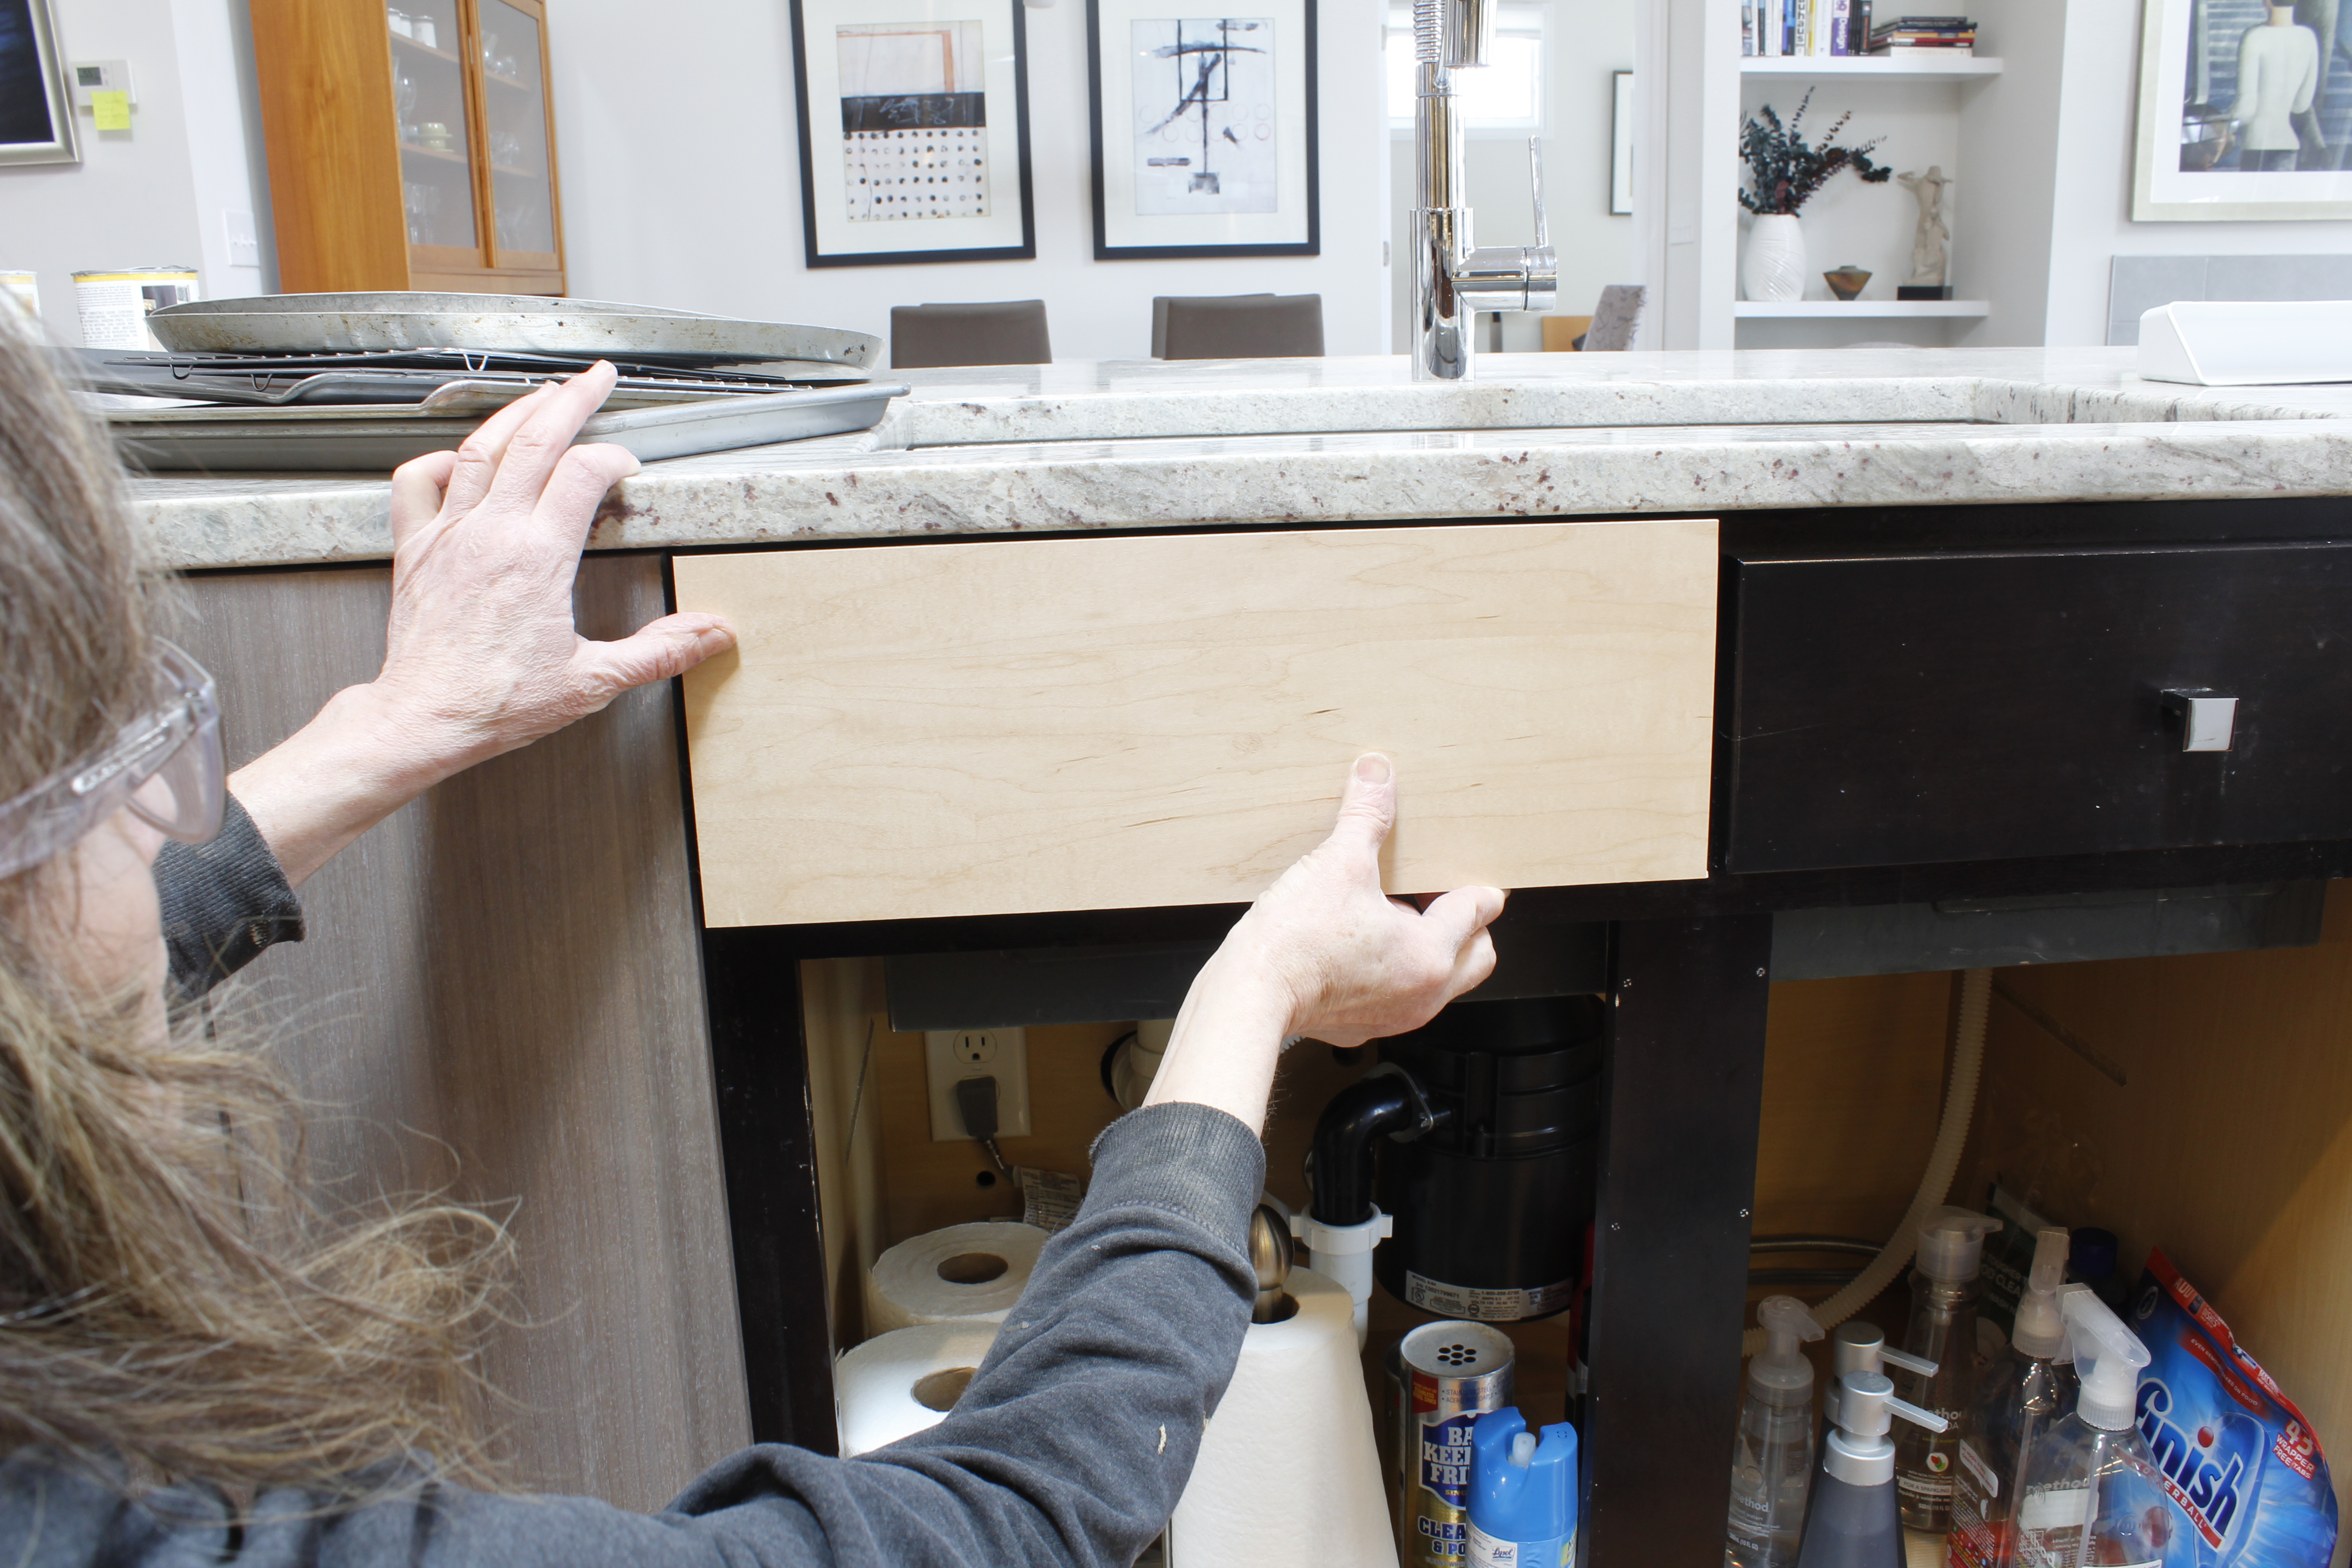
Clamp or hold the template firmly in position on the back of the new drawer face. Be sure you orient the drawer face correctly, with the top facing upwards, and that you’re working on its back. (Do NOT drill through the face.) Now drill through the template into the back of each new drawer face.
Step 4: Put the handles on
If your pulls will be screwed through the front, you can put this step off until the faces are installed. In my case, the hardware screws on from the back. Knowing how much easier it would be to install them before mounting the faces to the cabinet, I did so while the faces were still loose.
Step 5: Install the new faces
If you have unobstructed access to the cabinet interior (i.e., if the sink is blessedly elsewhere), you’re home free. If you have to work in the kind of constrained space I did, be sure you have access to some appropriate tools.
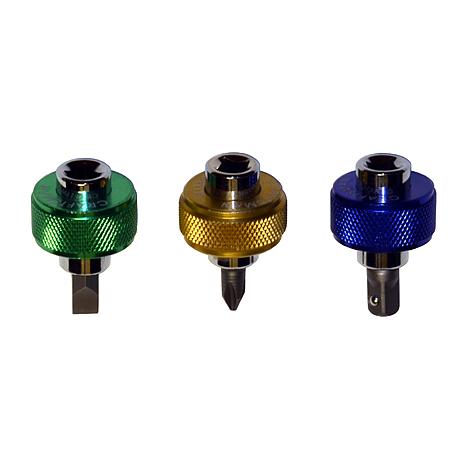
Finger bit screwdrivers are a lifesaver. Unfortunately I didn’t have mine with me on the job yesterday, and neither of the local hardware stores I visited had them in stock. It’s amazing how much force you can get on a screw with these large-diameter knurled handles.

Cranked screwdrivers, another life saver.

Here are some supplies and tools we find essential in our everyday work around the shop. We may receive a commission from sales referred by our links; however, we have carefully selected these products for their usefulness and quality.


Another really helpful close-quarters screwdriver is a ratchet – like the ratchets used in socket sets – with a 1/4″ hex drive socket built in. This gives you more leverage than the screwdrivers shown. I like the Mac Tools E131601, $24, with a lifetime warranty and very well built (note: no affiliation with Mac except as a satisfied customer, intermittently since 1973): https://www.mactools.com/en-us/Expert/Screwdrivers-Bits-and-Keys/E131601/1-4-Hex-Drive-Mini-Bit-Ratchet.
You can get cheaper versions of these in the hardware store, and I’ve owned the cheaper versions until they broke, which didn’t take long.