We may receive a commission when you use our affiliate links. However, this does not impact our recommendations.
 After I learned to make stick chairs in a class, I returned home and set about to build jigs that would let me reproduce every aspect of the chair we built in class.
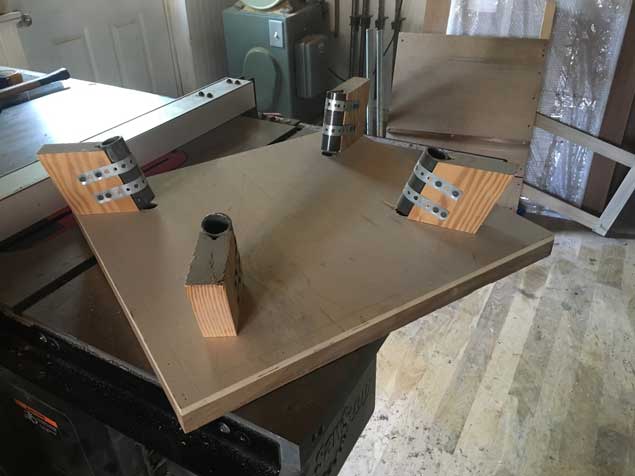
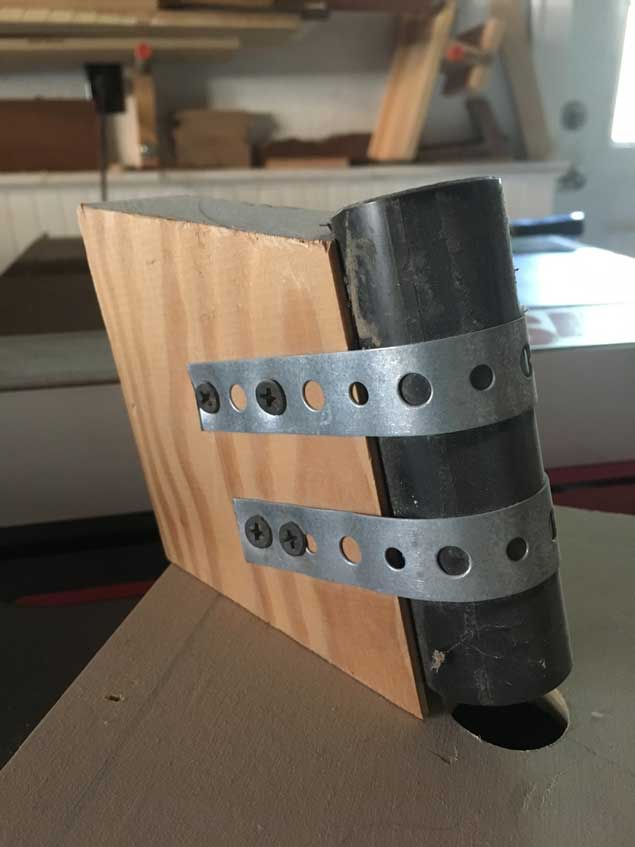
I spent an entire week planning and building the jig shown in the photo above. Though it looks like a platform for holding Roman candles, it actually allowed me to drill four legs in a seat blank without worrying about rake and splay.
I would simply clamp a seat blank inside the jig and let the pipes guide my auger bit as it bored the perfect angles for the front legs and back legs. Then I removed the seat blank from the jig, shaped it and built the undercarriage – joining the legs and stretchers.
I built a dozen chairs using this jig. It worked brilliantly. But one day I put it on a shelf in the basement and haven’t used it for more than a decade. Why? Because the jig was perfect – and a perfect prison.
 Every chair out of my shop had legs with the same rake and splay – it didn’t matter if it was an interpretation of a Welsh stick chair from the early 19th century or a modern design of my own. The jig never faltered. So I used it for everything, perhaps even when I shouldn’t have.
The other downside to the jig is that it allowed me to make chairs without truly understanding rake, splay, sightlines and resultant angles. Because I didn’t have to know those things in a deep way to make bang-on mortises, my understanding of the concepts was a bit dim. And that held back my ability to design new things.
What was the turning point? A deadline. I had to build a stool, which wouldn’t fit in my jig. And I had to do it really fast, so I didn’t have time to build a second jig. So one night (yes, that’s all it took), I sat down with the trigonometry tables in Drew Langsner’s “The Chairmaker’s Workshop” and figured out the calculations behind chair angles.
(Since then I’ve figured out a way to do this without trigonometry. I wrote the article “Compound Angle, No Math” for the June 2015 issue of Popular Woodworking Magazine to explain this process.)
The next day I made the stool and put the jig away. On the one hand I was happy (I understood the trig), but I was a bit disgusted with myself (that I had put it off for so long).
The experience made me look around at what other jigs I had in my shop that were holding me back. And I’m still looking to this day.
— Christopher Schwarz
Here are some supplies and tools we find essential in our everyday work around the shop. We may receive a commission from sales referred by our links; however, we have carefully selected these products for their usefulness and quality.


Here’s another way to avoid trigonometry – the Babylonian way!
https://www.theregister.co.uk/2017/08/25/plimpton_322_babylonian_trig_table/
This is seriously spooky. I just created a jig (http://imgur.com/7ZUUZ0H) this week for my kiddie version of the Schwarz ADB chair so I can quickly make a full set. Now I’m having second thoughts as to if it’s holding me back.
I can model up a new design and 3D print the drill guides pretty quickly so I don’t think it’s keeping me from rapidly iterating or hampering my design process. But I can see where it’s preventing me from developing the skills to create multiple identical pieces by hand.
Definitely a lot to think about here.
I don’t know about the “handcuffs” analogy. It sounds like the jig did exactly what you needed while you needed it to. It helped you getting your confidence up in a new technique and let you just worry about building. As soon as you had the a-ha moment and outgrew it, you stopped using it. We should all be so lucky to get to that point and realize it. Perhaps “training wheels” is more appropriate?