We may receive a commission when you use our affiliate links. However, this does not impact our recommendations.
Rob Millard knows a little about furniture history. But what I discovered in talking with Rob last week is that he knows even more about enjoying the craft. Rob makes authentic reproduction furniture with a minimum of fuss, employing some innovative and simple tactics. Here’s our interview.
Dan: What’s the history of the Pembroke table?
Rob: I’m not entirely sure about the origin of the name. Some say it was named after the woman who commissioned the first example. Whoever it was, the name stuck. The original table spawned a lot of variations on the theme. These variations spanned the late Chippendale and early Federal periods, to my knowledge.
They are typically oval tables with drop leaves. At various times, they were also called breakfast tables.
Dan: How much inlay is involved with the Pembroke table plans that you teach in your latest DVD?
Rob: These Pembroke table plans feature bellflowers on the legs, in the New York regional style. The flowers are attributed to William Whitehead. There is some basic stringing around the edge of the table top. The cuff banding in this project is done as a multi-species linear inlay. I included sand-shaded fans flanking the drawers.
Dan: What are the special tools you used for the inlay?
Rob: Nothing too special. I use a Dremel tool fitted with a router base, various gouges and, for the sand shading, a hot plate. The most specialized tool is probably a bit called a carbide end mill. It’s a machinist’s tool.
Dan: Can you tell us more about the joinery for this table – anything really unusual?
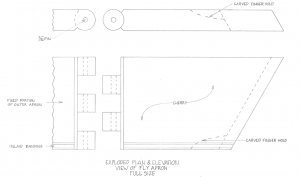
Rob: The fly leaves are made with a knuckle joint. It’s not a difficult process, but it does take some time and you need to work within close tolerances. The tools I use are a drill press, router and carving gouge. Also a shoulder plane, a block plane and a dovetail saw. I use the Dremel tool again to relieve space in between the projecting knuckles.
The other joint you get to learn with this project is the rule joint.
Dan: What kinds of modifications will woodworkers want to think about with this project?
Rob: You could change the inlay. Read some period furniture catalogs and decide on a style you like. No matter what you do with the inlay, the underlying construction will be the same.
Dan: Thanks, Rob!
Buy the new DVD and get started on your Pembroke table plans today!
–Dan Farnbach
Here are some supplies and tools we find essential in our everyday work around the shop. We may receive a commission from sales referred by our links; however, we have carefully selected these products for their usefulness and quality.


How interesting the way terms differ between the US and the UK. There’s no rule in Britain that it needs to be oval – quite the opposite. but it needs drop leaves. Google will show lots of uk examples… and I have one in my living room – no ovality here