


We may receive a commission when you use our affiliate links. However, this does not impact our recommendations.
Though I’m still coughing and sniffling a little, I just couldn’t bear to sit home while there’s work to be done in the shop. And I want my kitchen done. So, I came in to work on the base of my kitchen island.
I won’t be writing about it for the magazine (the dimensions and purpose are too particular to my narrow needs), so I’ll share bits of it here.
The two legs will be secured in open-sided mortises in the top supports and feet using countersunk screws (I’ll be plugging the screw holes, of course). So the first order of business (after prepping the lumber and cutting parts to size), was to cut said mortises.
Click on this and the following pictures if you wish to make them larger.
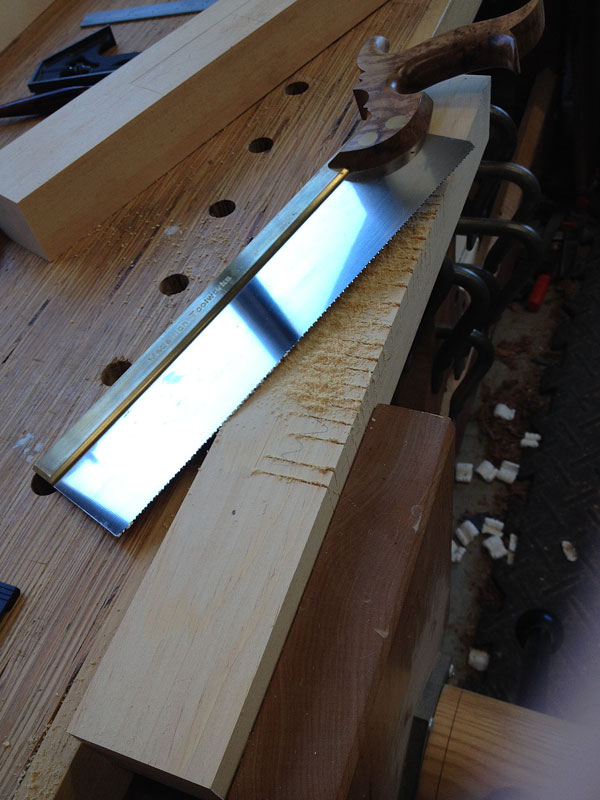
I basically treated them as really big hinge gains. After knifing in the layout lines for the mortises in all four feet/supports, I used a backsaw to connect the corners on the top and side. Then I made a series of (really lazy and not at all straight) saw cuts down the length of the waste, being careful not to cross my lines. The more saw cuts, the easier the chisel waste pops out (but unlike when I cut each edge of a half-blind dovetail socket, I did not want to overcut; here, those cuts would show).
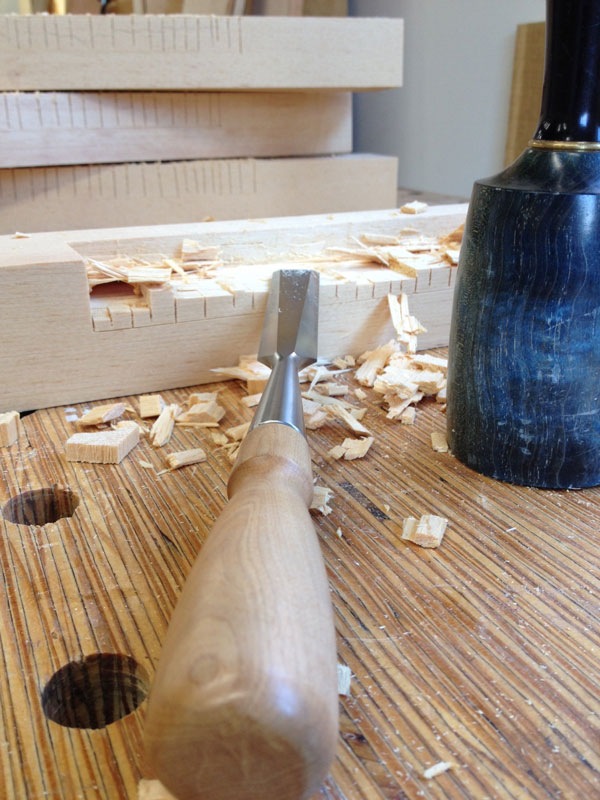
Next, it’s just a bit of chisel work (and as always, it helps tremendously to have a sharp tool). First, I came in from the front edge and pared away a thin layer of waste to the back of the mortise, then used the chisel to deepen the layout lines (bevel toward the waste, of course). And repeat. I continued working between deepening the layout lines and waste removal, until I got close to the floor of the mortise (1/16″ or so).
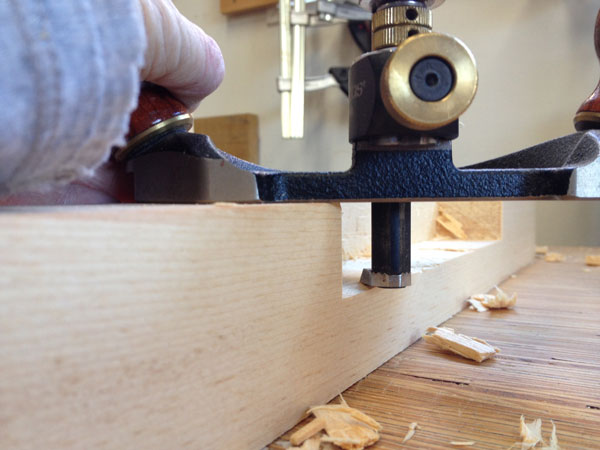
 With the majority of the waste removed, I set up my large router plane for a 1″ depth, using my knife line as the unit of measure. (I don’t actually know if it’s precisely 1″ – but it doesn’t matter. As long as I don’t touch the plane’s setting, all four mortises will end up at the exact same depth – and that matters far more than a precise measure in my preferred world of woodworking.)
I then planed away the remaining thin layer of waste (see the picture at the top), using the back of the workpieces to support one side of the router plane. Were I not confident in my ability to do that, I could simply secure another of my same-sized workpieces alongside the open “wall” (leaving enough room to maneuver the iron in between) and have ample support on both sides.
 And then I did the same thing three more times, then did a dry-fit of the uprights into the feet and top supports.
There’s still some work to do before I can screw them together. I still need to shape the edges of the feet and top supports (a simple angled cut) and cut 1″-deep dados into which the shelves will fit. I’ll post on that tomorrow.
And I still have to decide how I’m going to attach the top. Right now, I’m leaning toward blacksmith-made pyramid-head nails. through the top and into the top supports, simply because that will look cool – and because nails move a bit. Otherwise, I’ll screw through elongated holes in the supports and into the top from underneath. But I’m liking the idea of the nails.
Here are some supplies and tools we find essential in our everyday work around the shop. We may receive a commission from sales referred by our links; however, we have carefully selected these products for their usefulness and quality.


Hi Megan
I noticed that your Large Veritas Router Plane still sports the old style depth stop. It is a dog. Contact LV and they will replace it. The newer version makes changing depths so much easier – and this is important when using a router plane.
Regards from Perth
Derek
Megan, I’m not downplaying this excellent display by any means, but what is gained by doing these open mortises, versus a simple shallow half-lap on the upright pieces?
Really – not calling you out – just curious if there is a benefit I can’t see.
Thanks
Hi Megan,
Kind of a side question based on one of the pics, but how do you like the angled handles on the router plane?
Hope you feel better.