We may receive a commission when you use our affiliate links. However, this does not impact our recommendations.
Upgrading tools is a really touchy subject. As a hobbyist/enthusiast there’s a fine balance between needs, desires, and budget. I can remember those nagging mantras…“buy once, cry once,” “buy your last tool, first,” “get the best money can buy.”
That’s all great if you have an endless supply of cash burning a hole in your pocket, realize that your hobby will stick with you for the rest of your life, and you know exactly what you’ll be doing five years from now. Well, it’s been six years since I started furniture making and I can safely say that the tools thought I needed and what I can afford have drastically changed over the years as my skills and lifestyle have changed.
Here’s how I evolved from having a dedicated long-bed 8” jointer and 15” wide planer to a 12” combination jointer/planer.

A Cinderella Story
Like most hobbyist woodworkers, I started my woodworking machine collection on Craigslist, scouring the classifieds in hopes of finding that diamond in the rough. Most of what I found were some pearls that needed a little TLC. At the time, space wasn’t much of an issue with the third bay of my 3-car garage dedicated to woodworking.
I didn’t have an assembly table, miter saw bench, or traditional workbench; all of which I now have in my shop and consider to be crucial to my workflow. My first jointer was a used Harbor Freight 6” jointer and my first planer was a used Jet 13” planer with an open stand that I refurbished. Both machines had straight knives and were great learning tools.
After two years, several promotions at work, and my wife graduating college, our finances changed. With the sale of my used machines, I was able to afford some new machines. You know the saying, “Go Big or Go Home!” I opted for a 7-foot long 8” wide jointer and 15” wide planer. I believe the Grizzly line of tools to be a great value and I never had an issue with either tool. But these machines were big, and while I was able to move both our cars out of the garage in order to mill lumber, it was a lot of work to set up these large tools. I’d often mill up extra material at the start of a project and then roll away the milling machines in hopes that I wouldn’t need to set them up again until the next project. That was rarely the case. I did this for over three years and I was happy with my setup for the most part.
Take It for a Test Drive
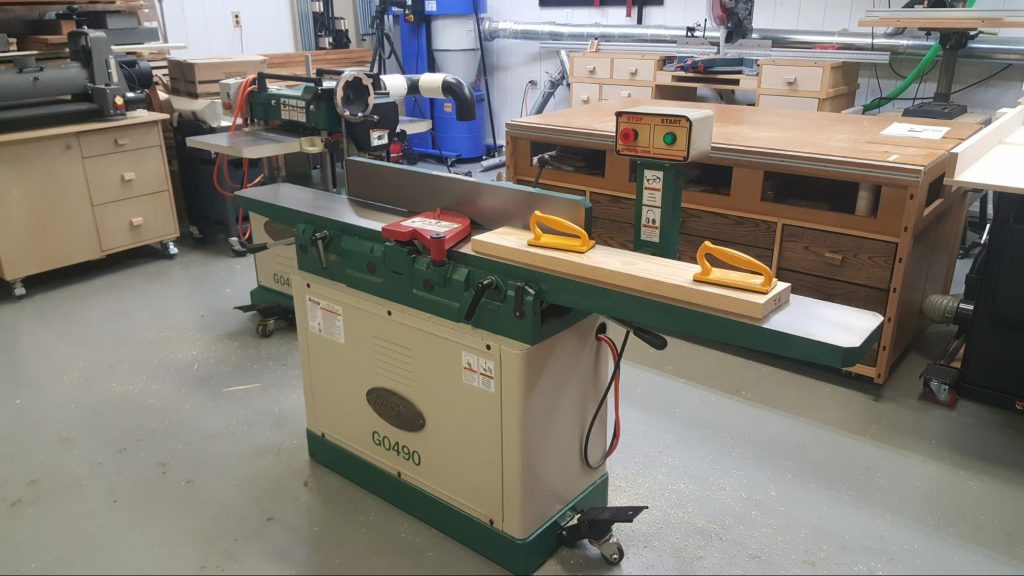
In March of this year, I took a week-long woodworking vacation visiting my friend, Tim Fuller, as he guided me through a sculpted rocker build. It was wonderful to work in a perfectly laid out shop. Each tool had proper infeed and outfeed with plenty of room for egress.
At the center of his shop was a handsome 16” Hammer A3-41 jointer/planer combo machine (a line of Felder Group machines). Most of what I’ve heard about combination machines was negative. “They don’t do any one thing well,” “they take too long to switch over,” they lose calibration between tasks.” All of which were untrue and myths of the past. The three most impressive aspects of this particular machine was the jointer capacity, the space savings, and the helical cutterhead (Silent Power®). I was completely sold.
Like most of us, I listened to the conventional wisdom of those before me. Dedicated machines are great for shops that have the space to accommodate the workflow. For me, the large machines made my workshop feel tight. It became difficult to do anything but mill lumber when the jointer and planer were set up. Once I got home from my trip I placed an order for a 12” Hammer A3-31; the smaller brother to the A3-41. With the sale of my old machines, I was able to afford this new upgrade.

Test driving the 16” Hammer A3-41 during a woodworking vacation.
Getting Used to European Tooling
Hammer is a line of machines made by Felder Group, an Austrian based company. Combination machines are not a new concept to the company. They pride themselves as being specialist when it comes to combination machines. That being said, there are a couple of things, particularly with jointer/planers, that take a little getting used to.
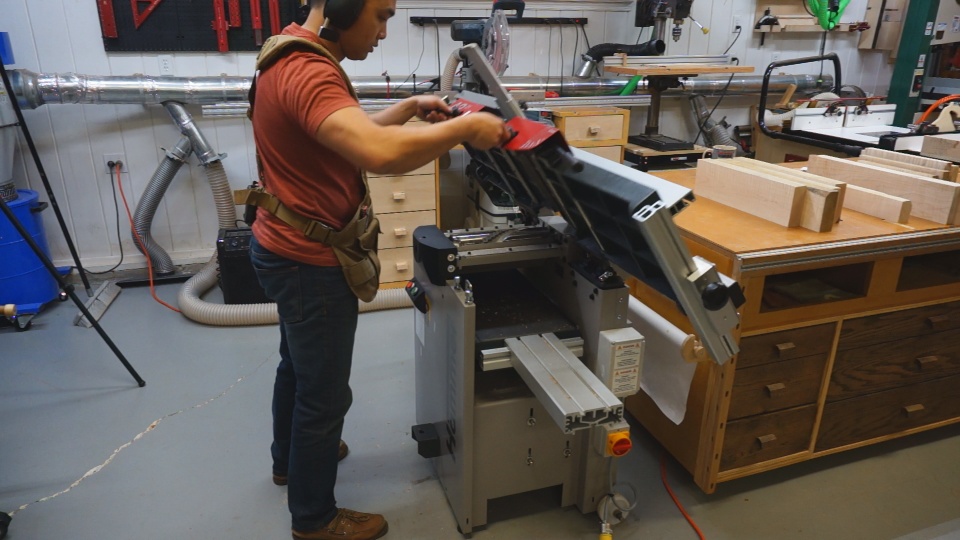
Unlike the pork-chop style blade guard that swings open as material passes over the cutterhead, a Euro-style blade guard stays in place. Material is fed between the blade guard and the cutterhead as your hands run over the blade guard staying clear of the business end of the machine. I’m used to using push blocks and the idea of running my hand over the blade guard took a little getting used to. However, the operation felt safe and comfortable. I made sure I slowly practiced this technique.
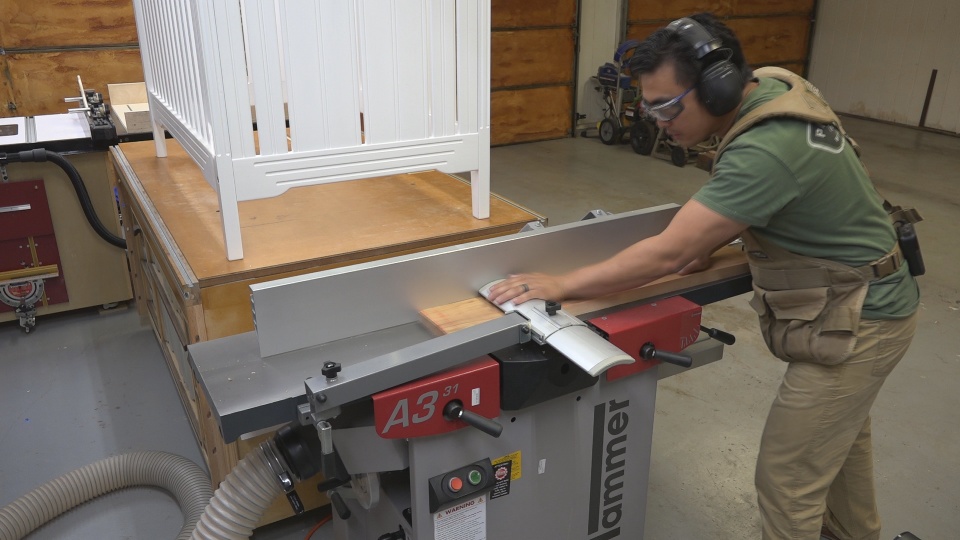
My hands running over the Euro-style blade guard during jointing operation.

My hands stay clear of the cutterhead because the guard is adjusted to only allow the material to be fed through.
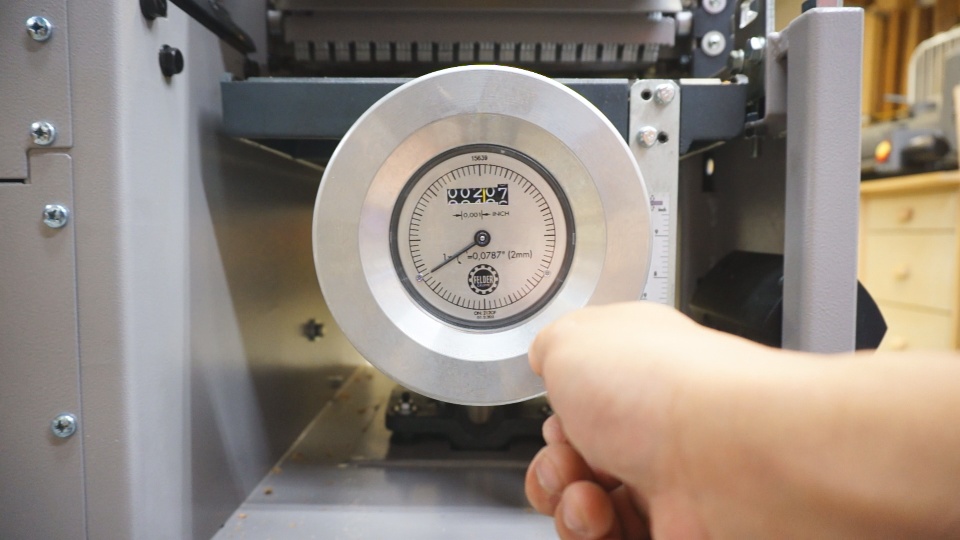
The jointer fence is made of an extruded aluminum that is machined flat. The supporting brackets to the aluminum fence are stamped steel. When I first saw the aluminum fence during my woodworking vacation I was hesitant of its ability to hold calibration. The dedicated jointers that I’ve used have cast iron fences. The lightweight aluminum fence is nothing short of precision and held calibration just as well as my cast iron fences of the past.
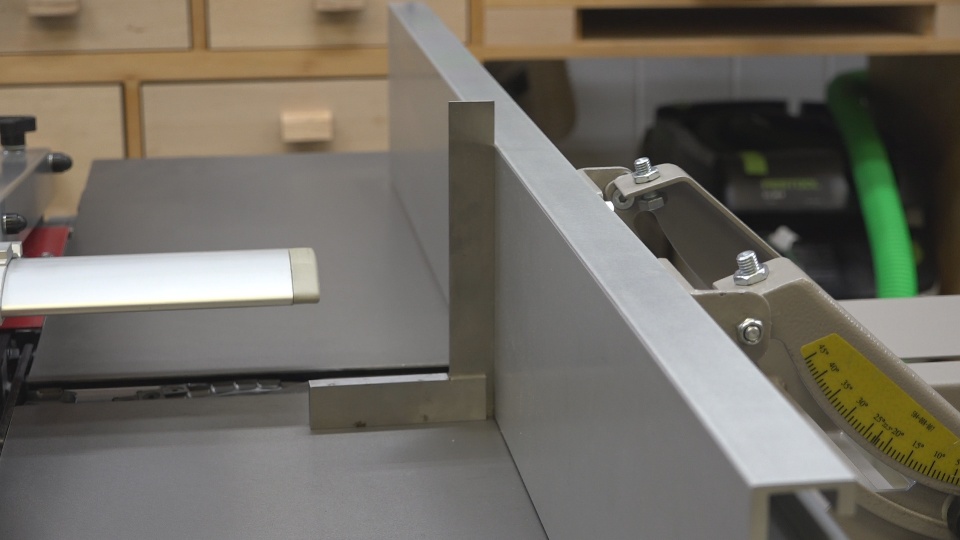
A machined aluminum fence hold calibration just fine.
Transitioning from jointing to planing mode is simple. I first unlock the jointer bed and lift the spring assisted bed to the upright position. I then rotate the dust collection shroud and raise the planer bed to my desired height (based on the thickness of the material being planed). Switching between the two operations takes less than a minute and there are safety switches in place to ensure the machine isn’t turned on while the cutterhead is exposed.
Unlocking the jointer bed to transition into planer mode.
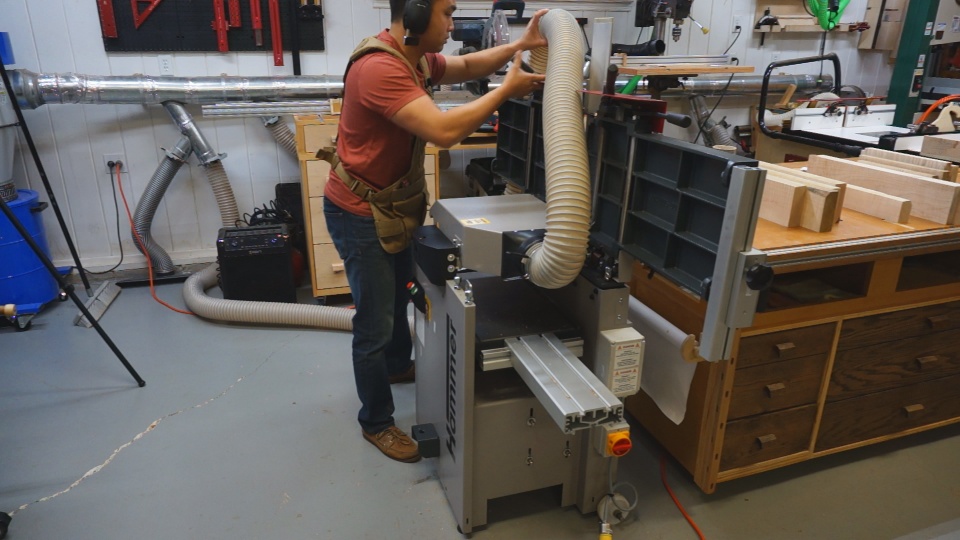
Flipping over the dust collection shroud for planing mode.
Lifting the planer bed to the desired thickness.
The Three Major Advantages
My decision to purchase a jointer/planer combination machine came down to three specific reasons. A jointer/planer combo machine saved me a lot of space. My Hammer now lives at the end of my assembly table with plenty of infeed and outfeed and ready to be used at a moments notice. I now have the ability to plane and face-joint stock of the same width. The fact that I had an 8” jointer and 15” planer seemed mismatched. While this may seem like a reduction in capability, I consider having a jointer and planer at the same width as a huge advantage to workflow. Finally, I now have a helical cutterhead which almost completely eliminated tear-out. This was especially impressive while milling highly figured woods, and not having to set and calibrate knives.
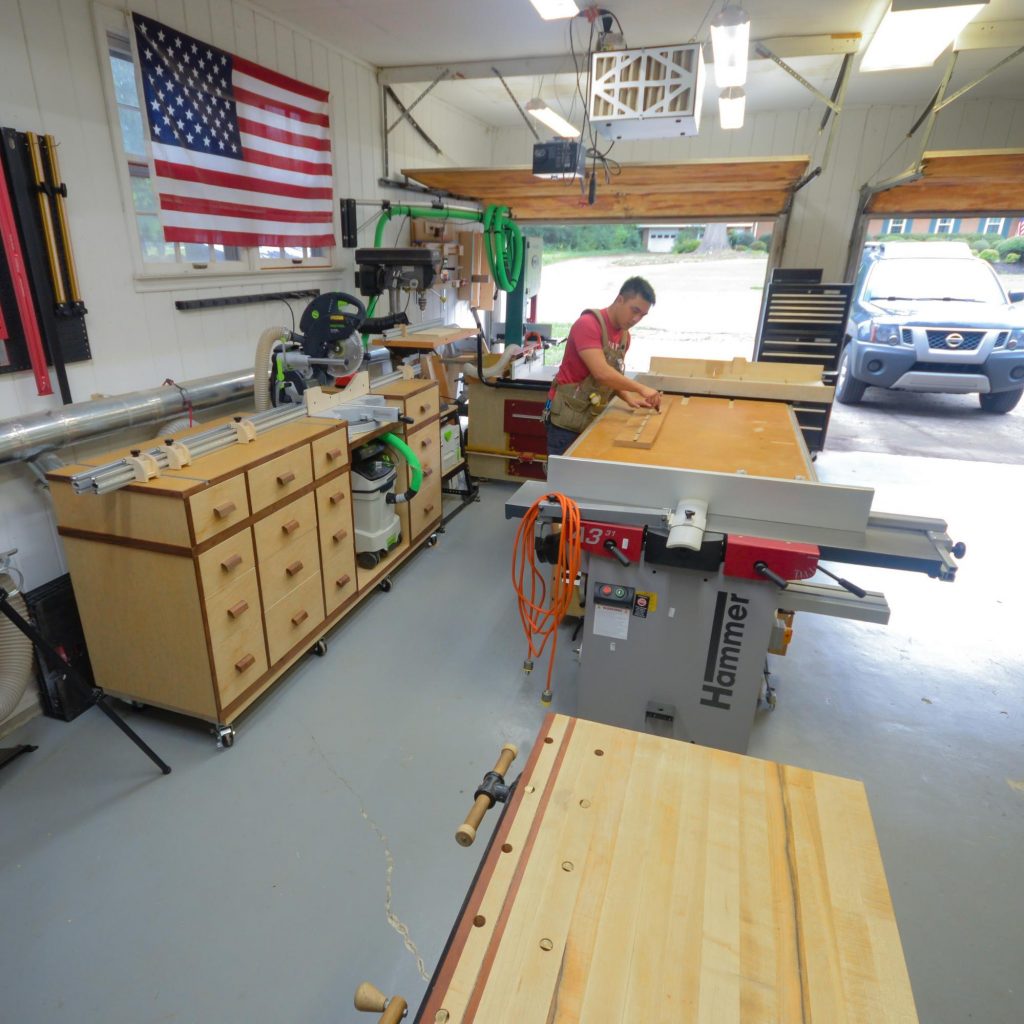
A combo jointer/planer saved me a lot of space and is now centrally located in my shop.

Having a single cutterhead allows me to face-joint and plane stock of the same width. The Silent Power® cutterhead leaves a nearly tear-out free cut.
– Huy Huynh
For more from Huy, head to his Instagram profile @alabamawoodworker or check out his website.
Here are some supplies and tools we find essential in our everyday work around the shop. We may receive a commission from sales referred by our links; however, we have carefully selected these products for their usefulness and quality.