


We may receive a commission when you use our affiliate links. However, this does not impact our recommendations.
Lumber from large commercial suppliers typically comes with straight-sawn edges. But when you saw your own logs or buy from smaller outfits, you have to find your way along the live edges and around the defects to get the best yield from a board. Or maybe I shouldn’t say you “have to”; a happier way of thinking about live-sawn lumber is to realize that it affords creative, structural and aesthetic possibilities for utilizing a given piece of lumber that you often don’t have when a business-minded sawyer has already made the decisions for you.
A table I recently started building provides a perfect example. I’m building the table in sassafras – the legs, apron and stretcher system from one log that was sawn into boards with straight edges, and the top from another, that my supplier, Joe Davison, left with live edges. The first thing I do when making a top for a table or a sideboard is pick through the boards to find the best ones. With luck, I can get what I need out of those. This time I milled the five decent boards, beginning with the best, and found myself still a few inches short in width. For this project, I’d have to use the last board — definitely the dregs of this batch. Groan.
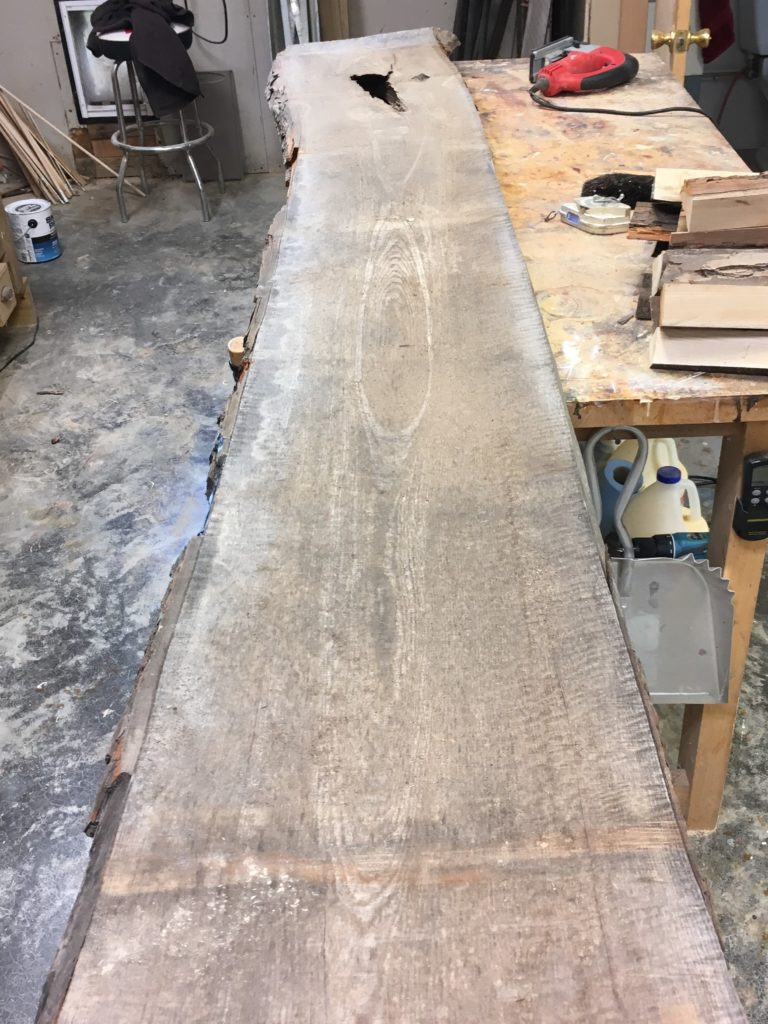
Photo 1. The good face.
The better face (Photo 1) didn’t look so bad. There was a large knot towards the far end, and also some superficial checks. The boards were just over 8 feet long, and I only needed 65″ in length, so that knot wasn’t likely to pose a problem.
But the reverse side (Photo 2) was another matter. As you can see, this board was cut right through the middle of the tree: a textbook example of why you want to avoid the pith.
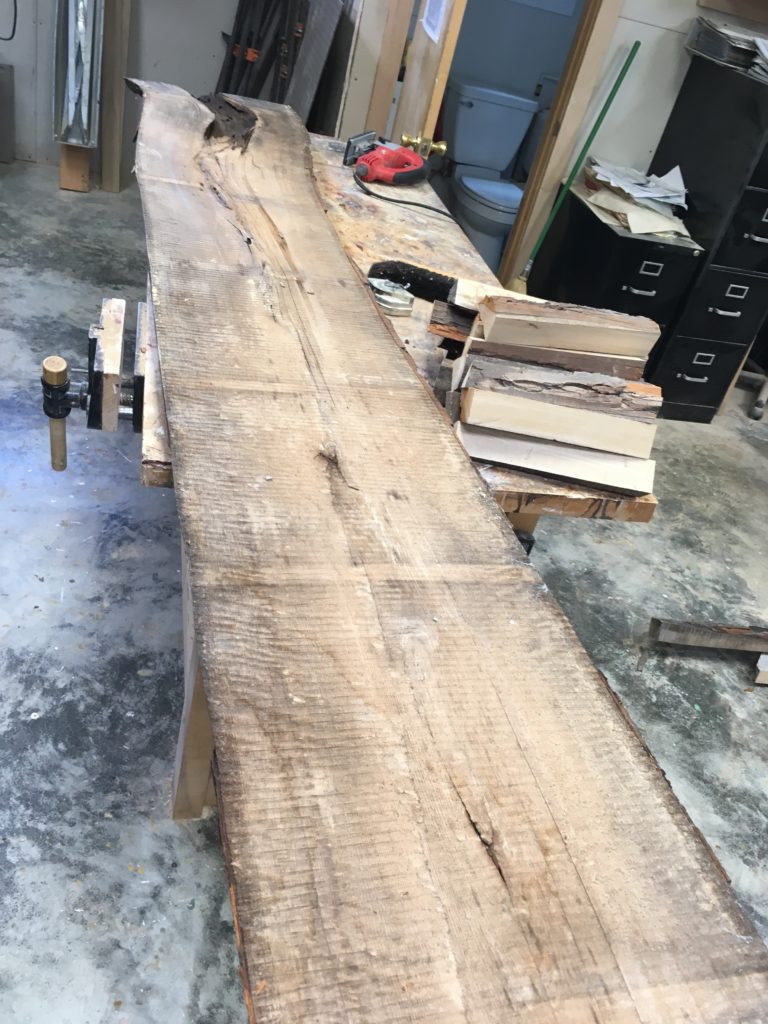
Photo 2. Pardon the open bathroom door as you take a self-guided tour around Pith And Check City.
The 15″ wide board offered just a few inches of clear material on each side of the pith. The following is a short clip of how I began navigating the board to end up with the material I needed.
Here’s a closer view of the defect-filled pith.
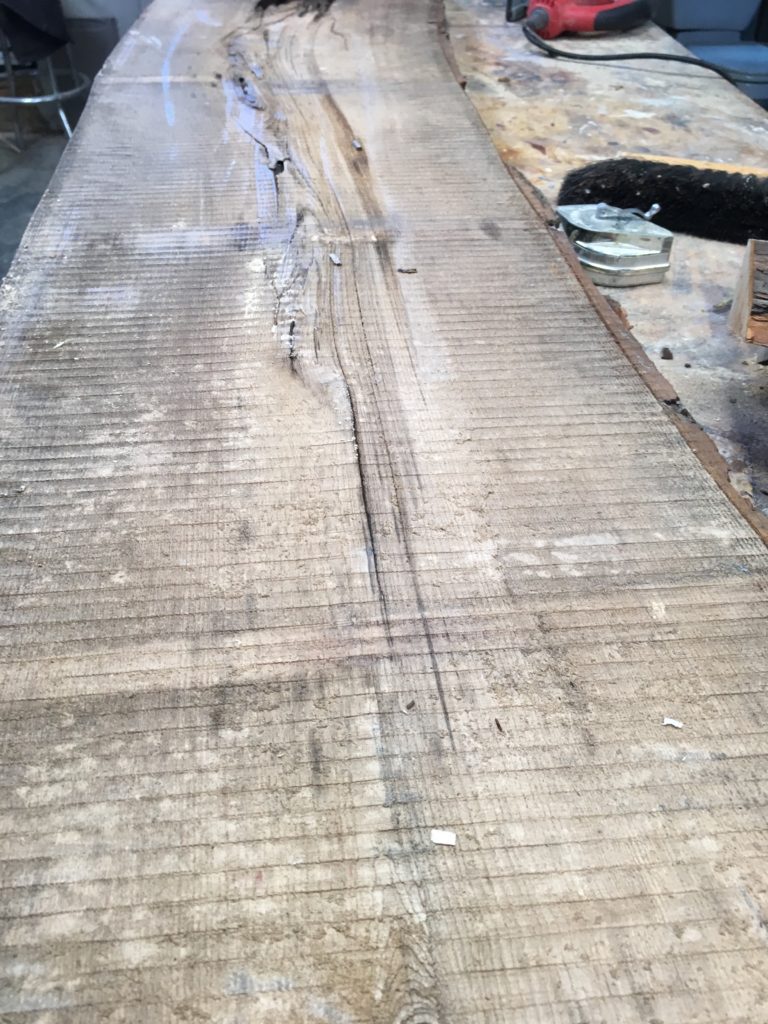
Photo 3. Gnarly
To get a 65″ part out of the board once the section with the huge knot was gone, would require that I use as much as possible of the remaining length. But the <choke> “better” end of this board also had splits. Of course, you’d expect some splitting at the end of any rough-sawn board, but judging by the disaster that is the pith of this one, I was concerned that the splits might run more than a few inches. So, I started by removing a couple of inches from the, um, good end, with my jigsaw.
This is what I found: a couple of checks about 1/2″ deep. I had plenty of leeway in the thickness, so I’d be able to plane out these checks.
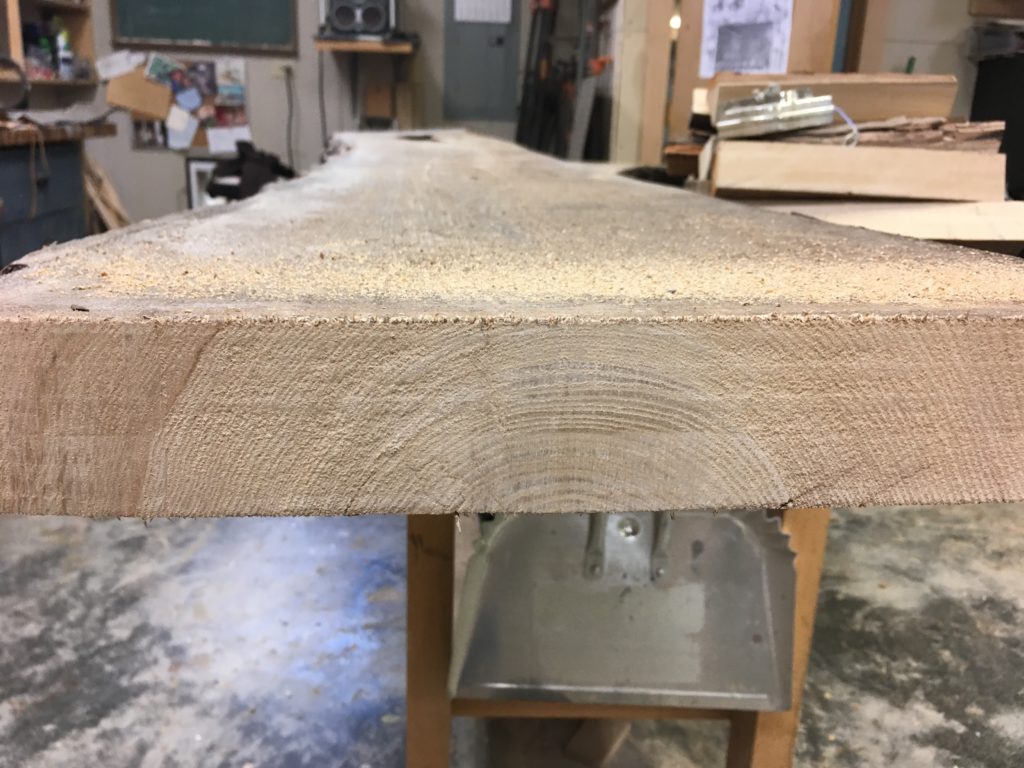
Photo 4.
I returned to the knotty end of the board and sawed off the unneeded length with my jigsaw to make the large board easier to handle.
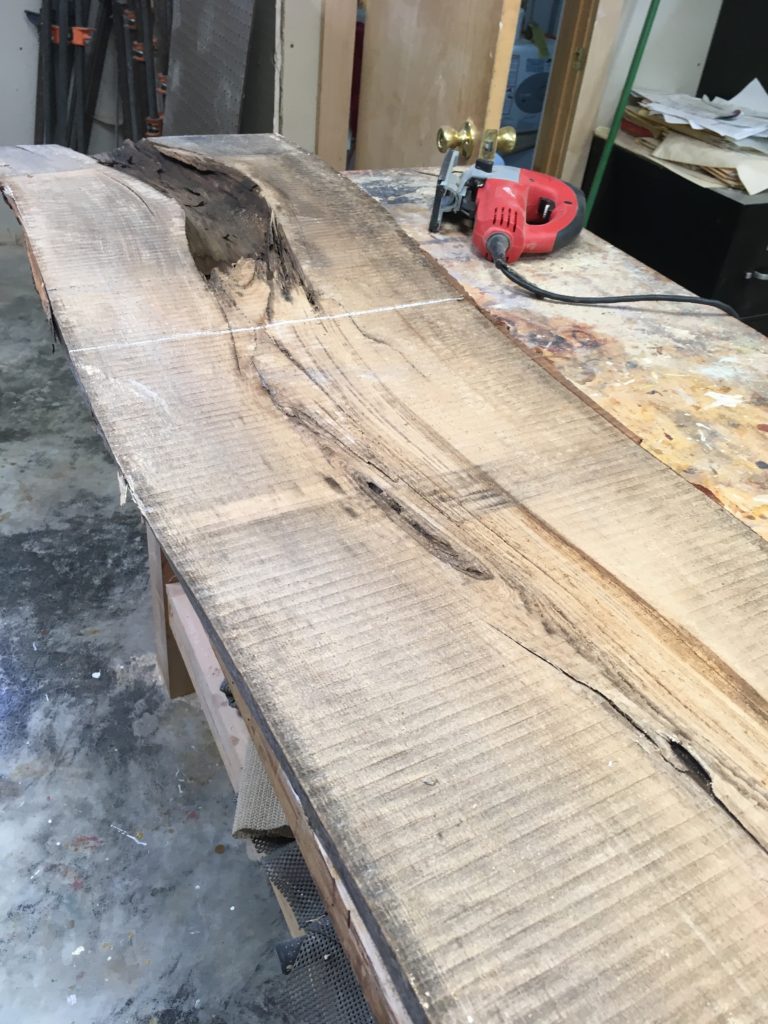
Photo 5. Ready to cut off the large knot section.
Next, I moved onto the edges. I used a builder’s chalk line to snap a straight line along one edge of the board just inside the inner (or living) bark.
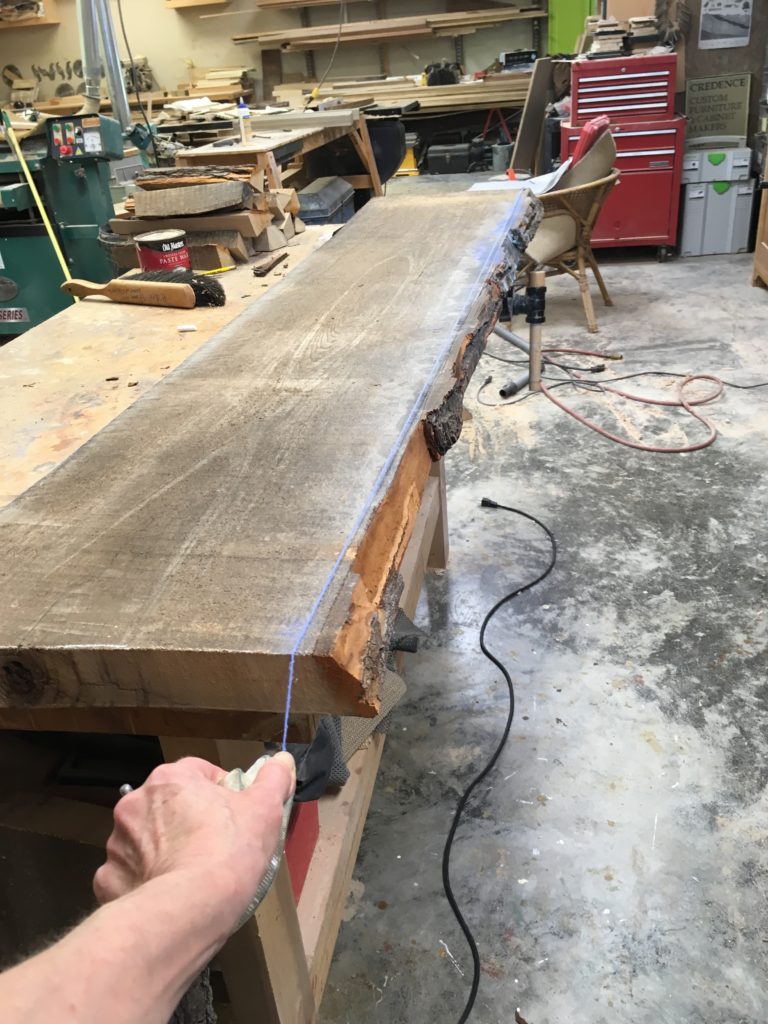
Photo 6. A builder’s chalk line makes it easy to mark a straight edge on a long board.
I cut this straight edge on a bandsaw. If you don’t have a bandsaw, or if your board is too large to handle, you could cut the straight edge using a jigsaw fitted with a coarse ripping blade.
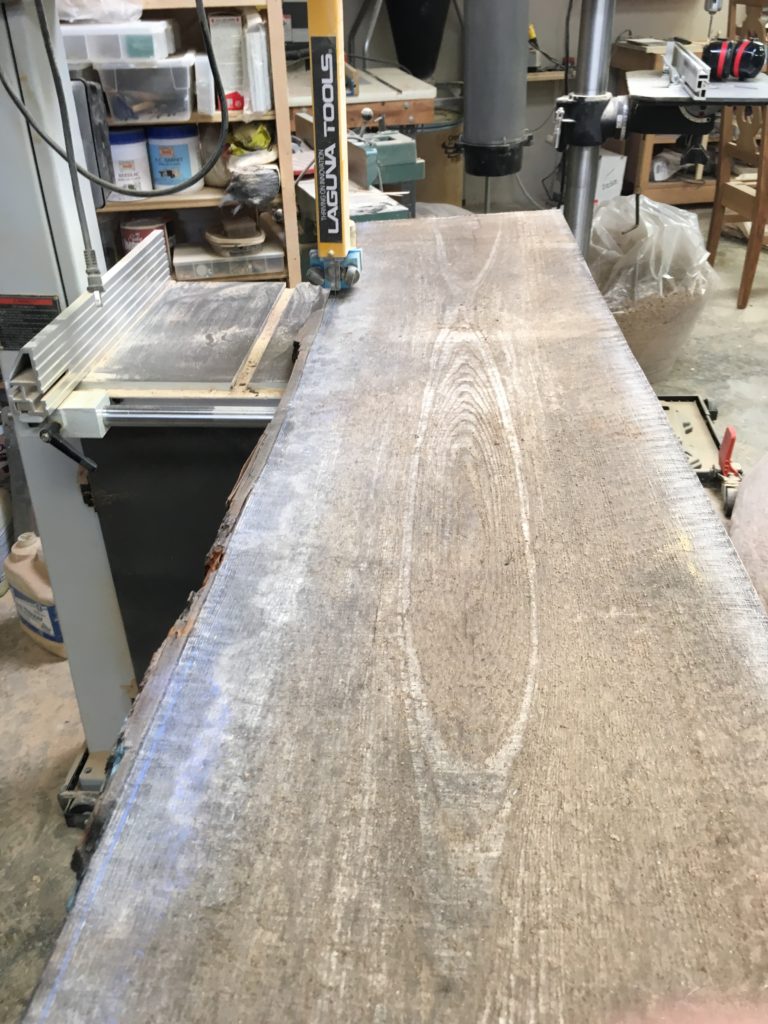
Photo 7. Here I’m cutting the second straight edge.
The next step was to straighten one of the bandsawn edges on the jointer.
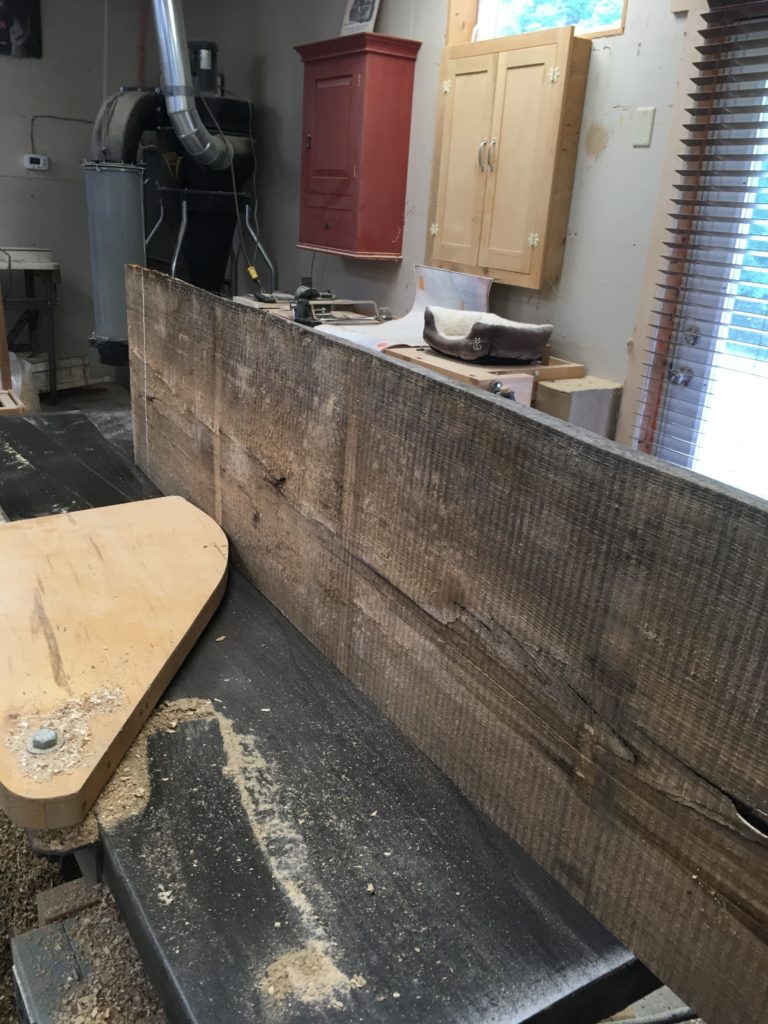
Photo 8. Jointing one edge
Now I was ready to rip the board into usable sections. I started by setting it on the table saw and taking a good look at each end to see how much of the pith should be removed. I could see that I would get one piece about 3-1/2″ wide from this side of the pith.
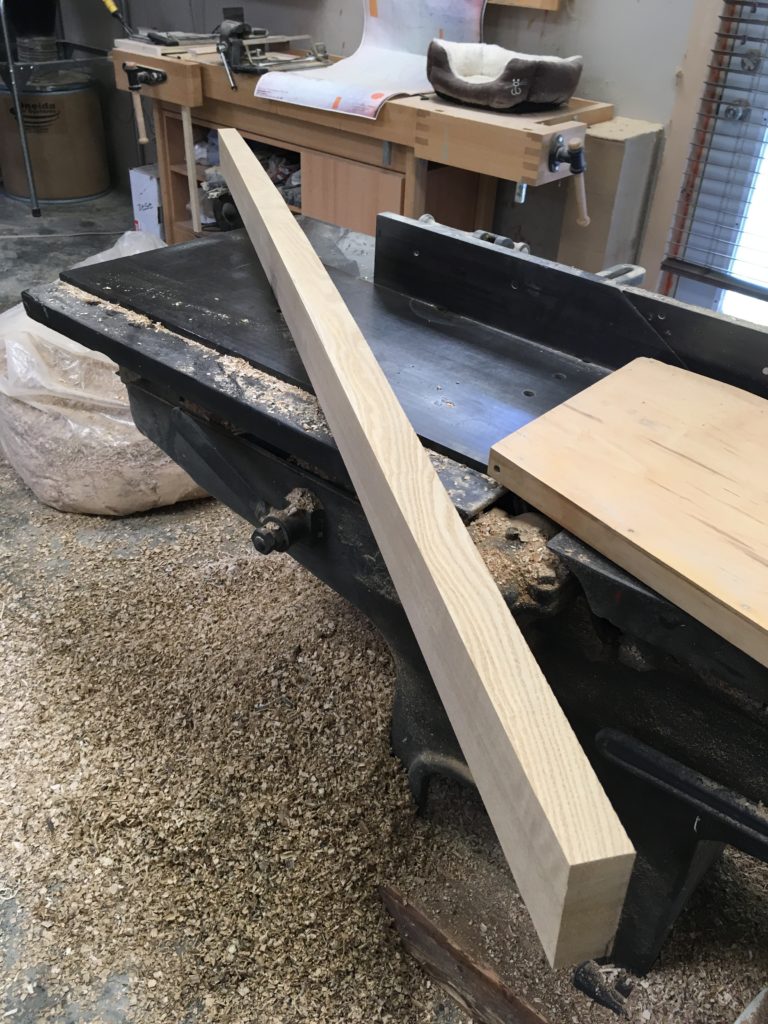
Photo 9. Here’s that board, with one face flattened on the jointer. The face on the right will be flattened when I run it through the planer.
Next, it was back to the table saw to rip the second board, which demanded a thorough assessment of the remaining material. It yielded just about 4″. Slim pickings, indeed. But this was the last of the sassafras for the table top, and I only needed 3″, so I wasn’t complaining.
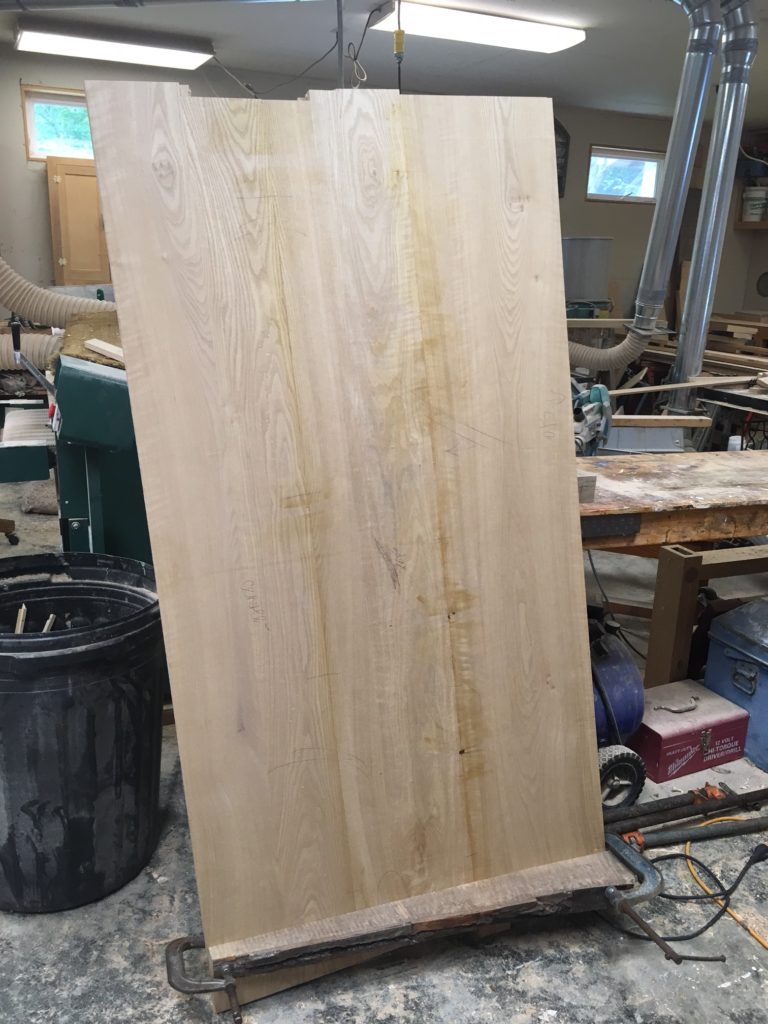
Here’s the table top straight out of clamps. Stay tuned for later stages of the table’s construction.
Here are some supplies and tools we find essential in our everyday work around the shop. We may receive a commission from sales referred by our links; however, we have carefully selected these products for their usefulness and quality.


One would think that because live edge lumber goes through much less processing that it’s ciost would be reflected in the price .Unfortunately Megan due to the popularity of live edge lumber here in the West it’s cost is way higher than the normally milled and stocked lumber !
When making the first straight cut you mention alternatives to the bandsaw “if your board is too large to handle”. Another possibility is to make it easier to handle by cutting into into 2 along the center of the pith. That could possibly have been done before the initial length was reduced, possibly letting the better side at the bad end substitute for its other end, if necessary.
Your bathroom looks a lot better than Megan’s.