


We may receive a commission when you use our affiliate links. However, this does not impact our recommendations.
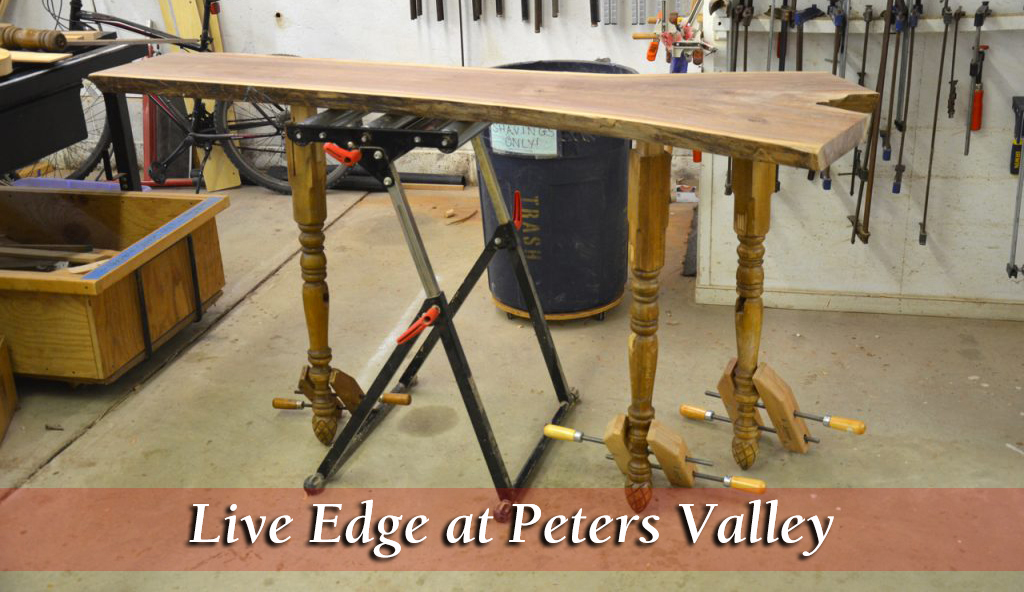
After Colm created all the tenons, he attached a clamp to the foot of each leg and staged a few options for leg locations: closer to each other, further apart, etc. After a few trials he settled on the configuration that seemed the most compelling in terms of overall balance – both metaphorically and literally. Then he traced the location of the mortises on the underside of the leg, turned over the top and carried it to the drill press to drill the mortises.

Colm began by drilling nine initial holes coming from the underside of the top.

 He then turned over the slab again to expose its heart wood, and used the holes as indicators to outline the borders of the mortises with a knife. After this, he used a wide Forstner bit to bore most of the mortises out. He grabbed a chisel and cleaned the mortises, working from the top down to approximately half the depth, then worked from the underside of the slab to clean out the rest.
 Once the mortises were ready, he cut kerfs at the top of the tenons and made three wedges. Then he sanded the legs, followed by a two coats of white milk paint. At this point we were ready to glue up the legs.


Next time I will show how Colm finished his table.
Don’t miss Yoav Liberman at Popular Woodworking in America, September 16-18 in Northern Kentucky. Sign up here…

Here are some supplies and tools we find essential in our everyday work around the shop. We may receive a commission from sales referred by our links; however, we have carefully selected these products for their usefulness and quality.


