


We may receive a commission when you use our affiliate links. However, this does not impact our recommendations.
 Walnut is probably my favorite wood. It is rich in color and texture, easy to work with, grows domestically and has the right density and strength to serve well in almost every woodworking deployment.
So, when Chad showed me the walnut slabs that he brought over to our class I immediately developed expectations for the great furniture that would grow out of them. Chad milled the walnut during a lumber milling class which he took at Peters Valley two years before. He left the walnut to dry in his home and once he noticed that I offered a live edge class, he was thrilled for the opportunity to turn them into a furniture which would display and celebrate the slabs’ natural edges.
Chad wanted to use one of his slabs as the coffee table top and legs while designating the other slab for the shelf. He began the work using a circular saw guided by a makeshift track, crosscutting the more massive slab into three portions, one large and two smaller. The large portion was for the top. He then ripped the two smaller portions on the bandsaw to create the four legs.
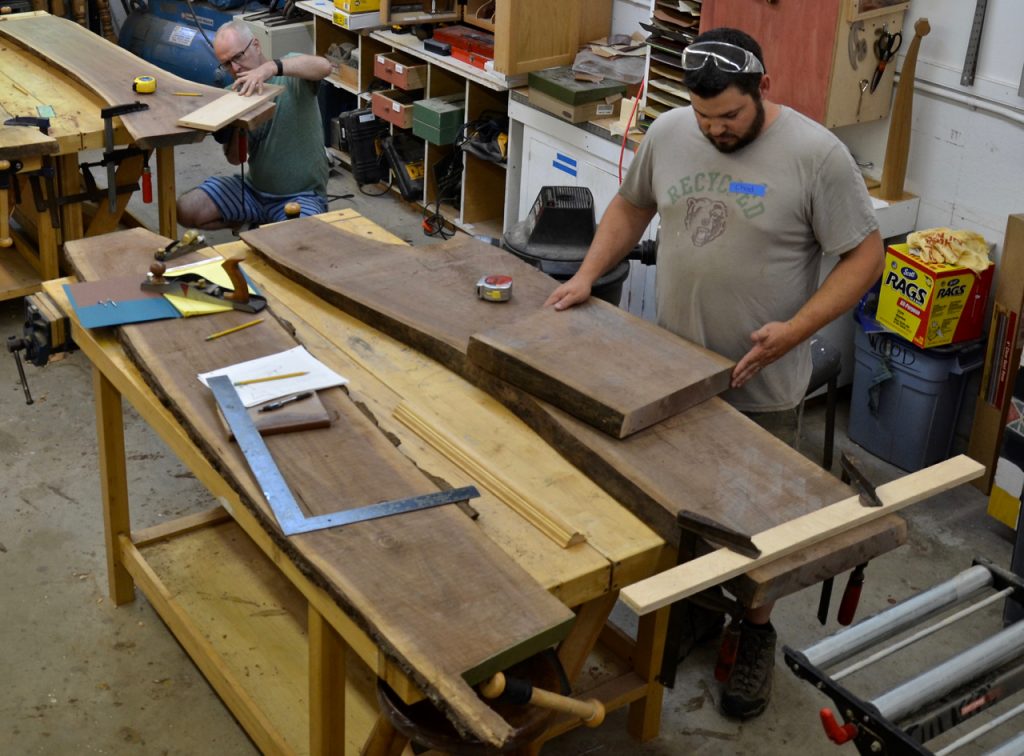
Using a circular saw guided by a makeshift track he began the work, crosscutting the more massive slab into three portions: top, and two portions to be the legs.
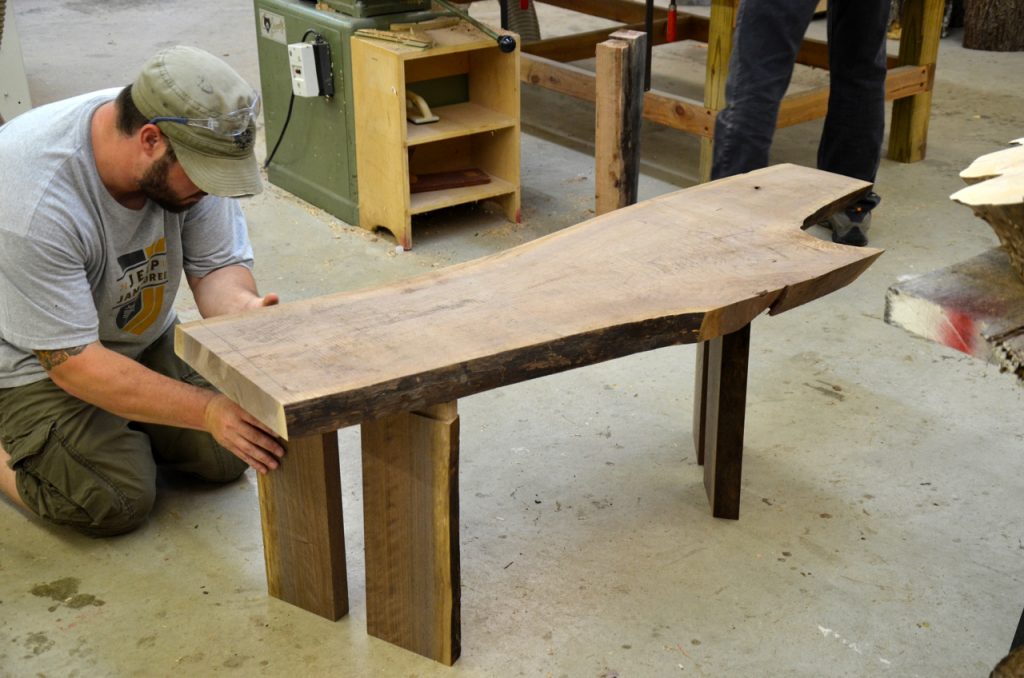
We decided to connect the legs to the top with a mortise and tenon joint, so Chad’s first step was to form a tenon on the top of each leg.
I often find that it is challenging to cut a joint on a part where both of its long edges are live edges. As woodworkers we know that it is convenient to rely on a straight line (edge) positioned against a fence, a miter gauge or a tenoning jig in order to ensure cutting the joint safely and accurately. But with a live edge piece things get trickier as one or both of the part’s long edges are wavy or erratic and cannot be placed stable against a fence to be pushed reliably.
In the case of Chad’s tenons our solution was not to rely on the long edges of the legs but rather on their shorter crosscut, or in other words the end grain surface of the tenon. We planned on pushing the legs against the table saw fence to cut shallow and narrow dados, moving the fence in increments of 1/8” to form the tenon shoulders. I thought, this way we could remove the excess wood safely without risking a kickback.
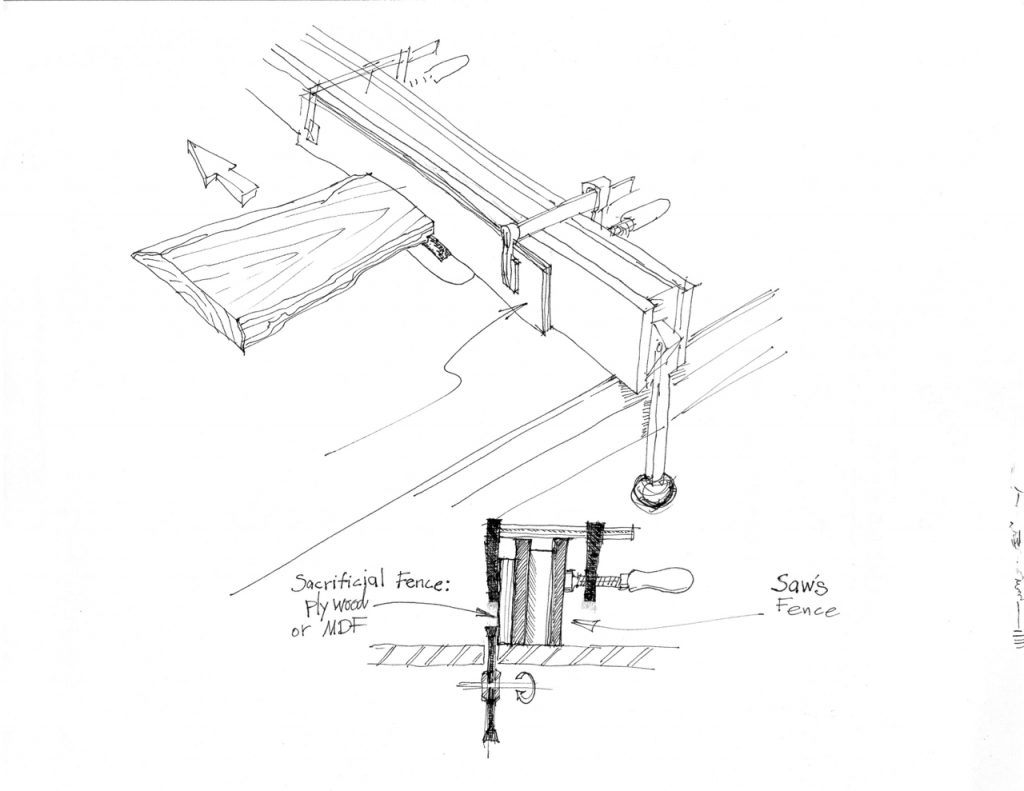
The sequential way to do this is:
- Mount on your table saw’s fence a sacrificial strip of MDF of plywood.
- Raise the blade to cut a thin crescent into the sacrificial fence.
- Lower the blade to a height that equals the depth of the tenon’s long shoulders.
- Heal the leg’s top against the beginning of the sacrificial fence and pass it along and over the blade.
- Repeat on the other side of the leg and on the remaining legs.
- Move the fence a 1/8” to the right and repeat the above.
- Once you reached the intended dimension of the tenon’s long shoulders use a band saw or hand tools to form the tenon’s narrow shoulders.
After all four tenons were completed, Chad staged a few optional locations for the legs positions under the top and, when satisfied, he traced them with a marking knife.
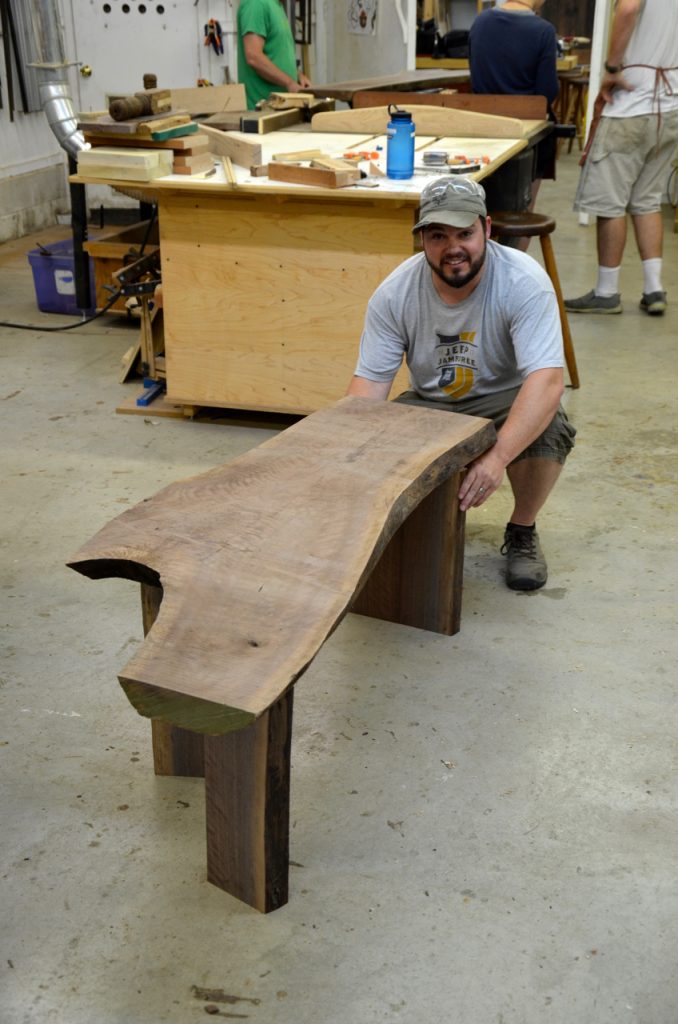
Chad staged a few optional locations for the legs positions under the top. Here is one of his first choices.
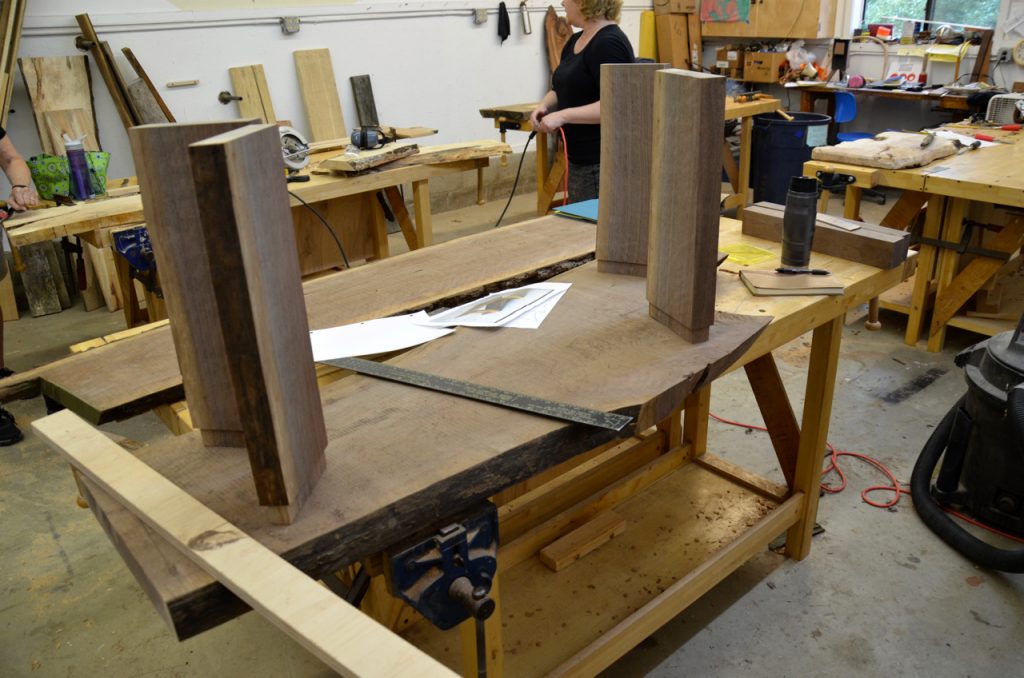
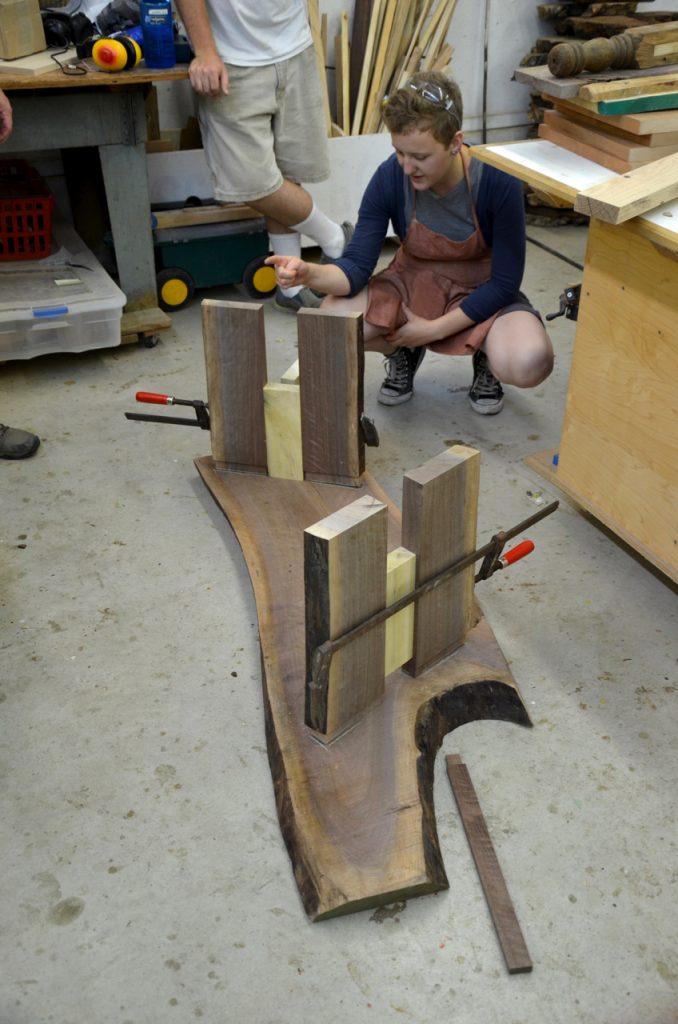
Another optional location for the legs was to add a space between them to add stability to the table but also to lighten up the design.
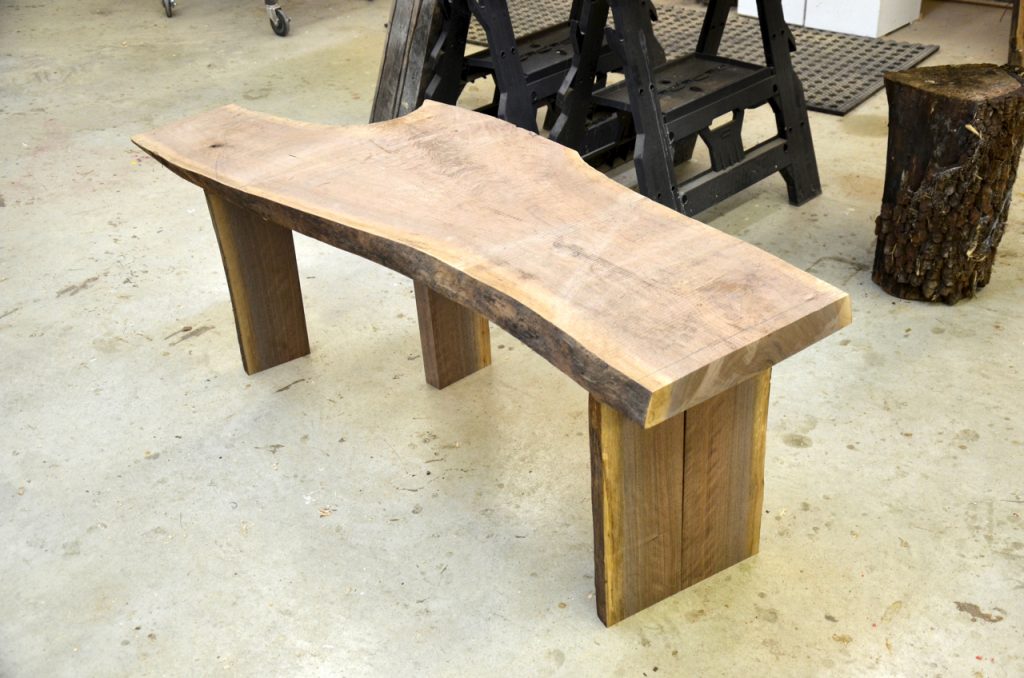
Next he used a drill press and a Forstner bit to excavate most of the mortises. Once the drilling was done he grabbed a chisel and carefully trimmed the remaining wood until the mortises fit nicely into the tenons.
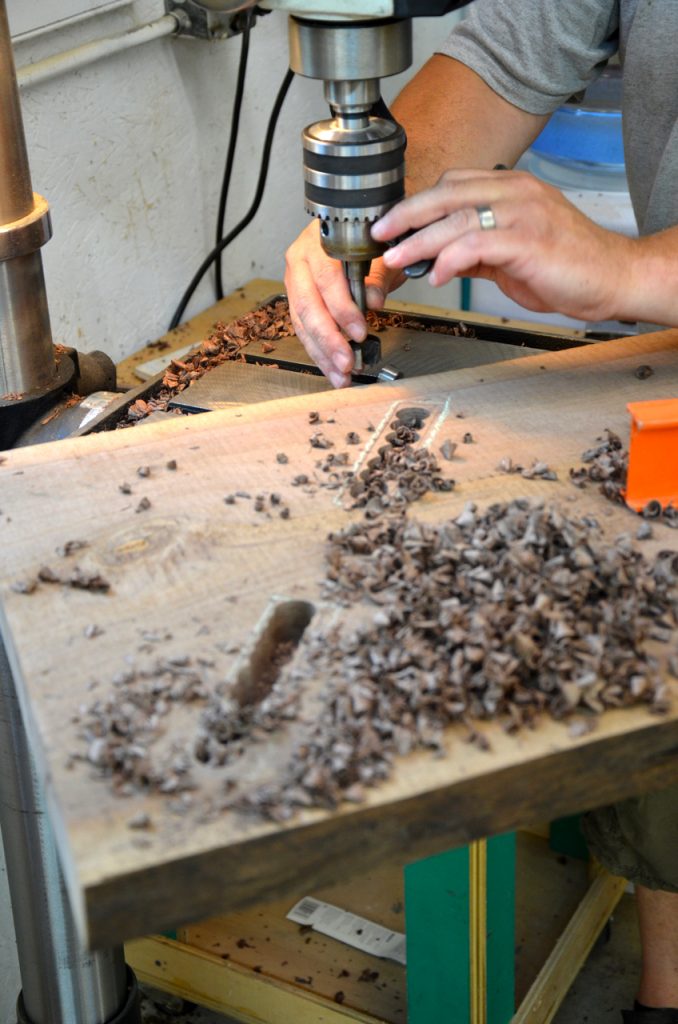
Using a Forstner bit Chad drilled out most of his mortises. He then clean the remaining wood with a chisel.
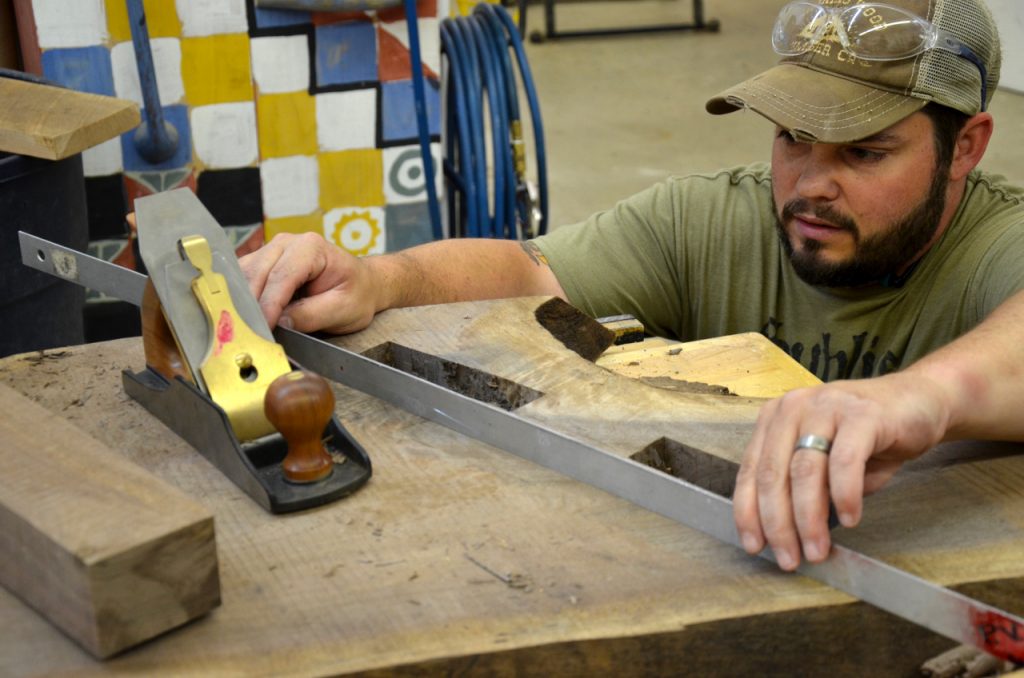
Once the mortises were ready Chad used a hand plane to level the few high points on the underside of the top.
At this point he tucked the legs into the mortises and was ready to work on the next stage – making the shelf. Next time I will show how Chad traced the shape of the shelf using and makeshift pattern, and how he finished his table.
Here are some supplies and tools we find essential in our everyday work around the shop. We may receive a commission from sales referred by our links; however, we have carefully selected these products for their usefulness and quality.


Yoay–
Was any thought given to using a fox wedge to keep the tenons tight, especially on the widest leg? Or will glue hold it tight over the long run?