We may receive a commission when you use our affiliate links. However, this does not impact our recommendations.
By Mario Rodriguez
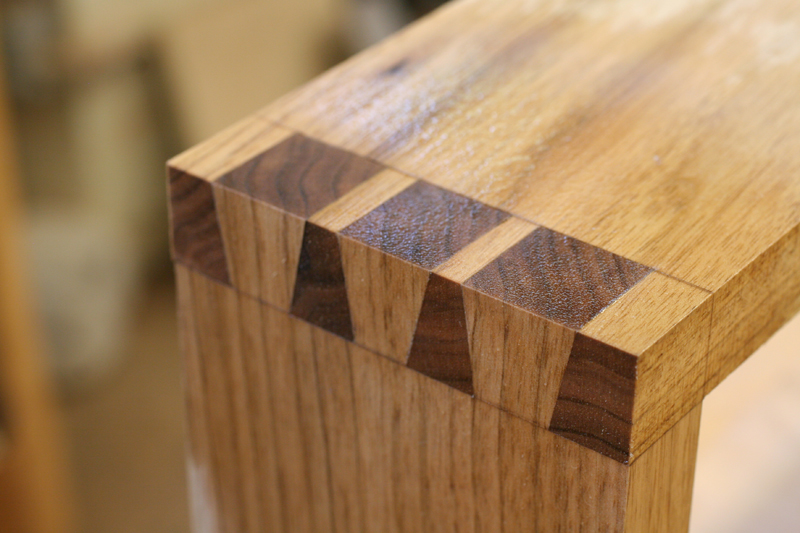
A blanket chest is the perfect project to further develop—or test—your dovetailing skills. You’ll find the complete plans for this chest in AW #157, December/January 2012. In that article, I skipped over the fine points of how I cut the dovetails. Here, in this companion article, I’ll go into those details. I’ll assume you’re already familiar with basic dovetailing techniques.
Tails first!
The argument still rages. Some woodworkers think pins should be cut first, others feel that tails should be cut first. I’ve tried both ways, but I consistently get the best results with the “tails first” method.
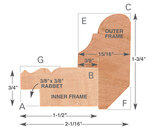
Since all the corners of this chest are the same, I make a dovetail template from aluminum flashing material (Photo 1). I space all of the tails 7/8″ apart, with a 3/8″ neck, and at a 10-degree angle. Considering the number of dovetails required, a uniform layout makes the task more manageable.
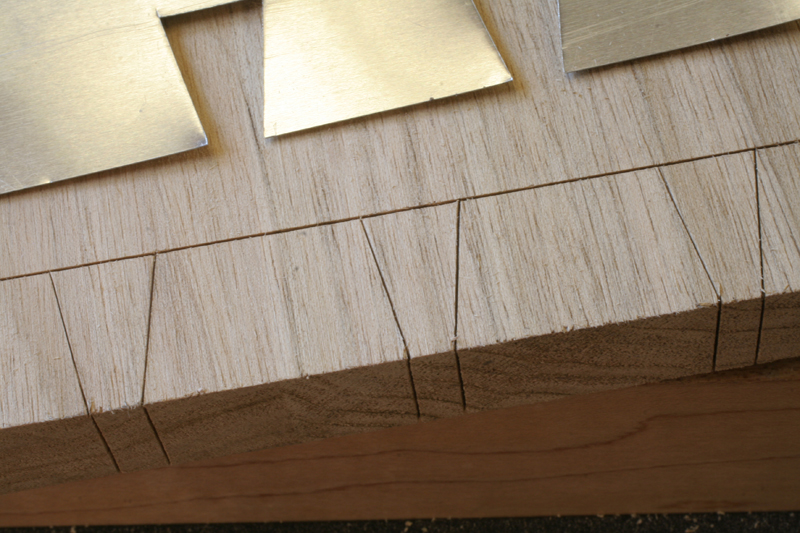
1. Use a template to lay out joints that have many dovetails, such as the sides of this blanket chest. Make the template from aluminum flashing material.
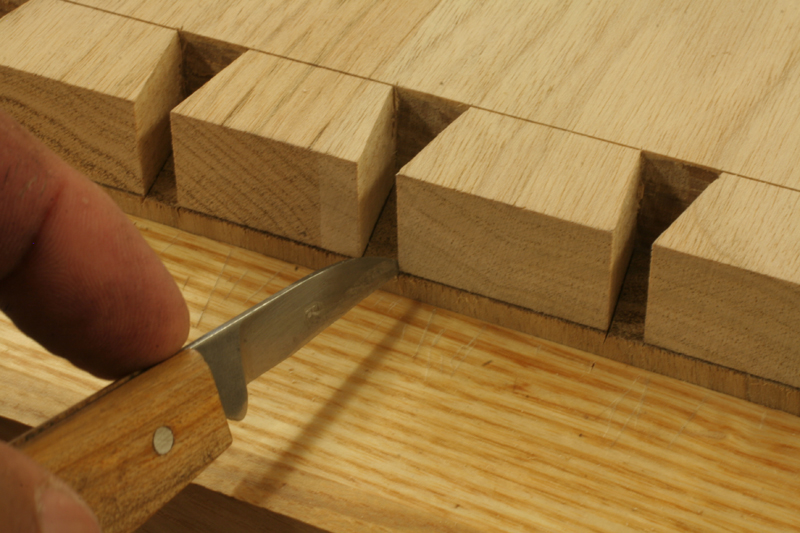
After scoring the baseline on both sides of the tail board with a marking gauge, I use the template to mark the tails with a sharp, pointed knife (Photo 2). I also use this knife to deepen the baselines. A well-sharpened knife leaves a clean, crisp, easy-to-follow mark.
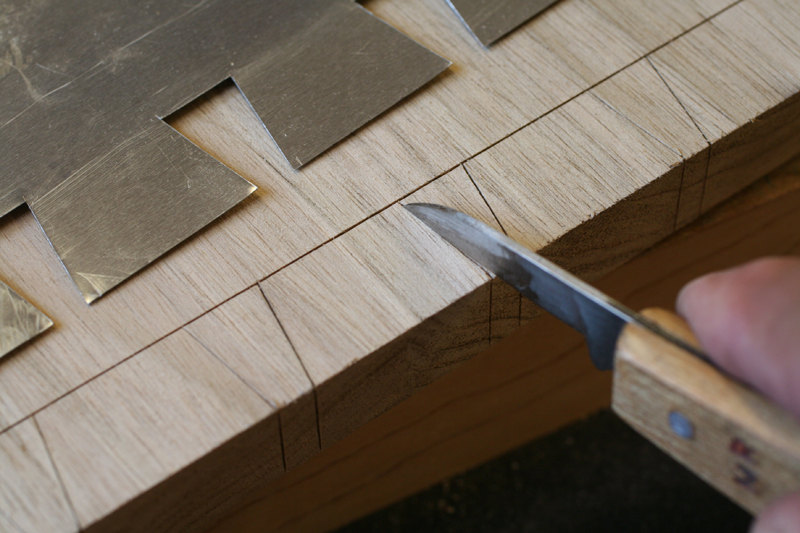
2. Deepen all of the layout lines with a sharp marking knife.
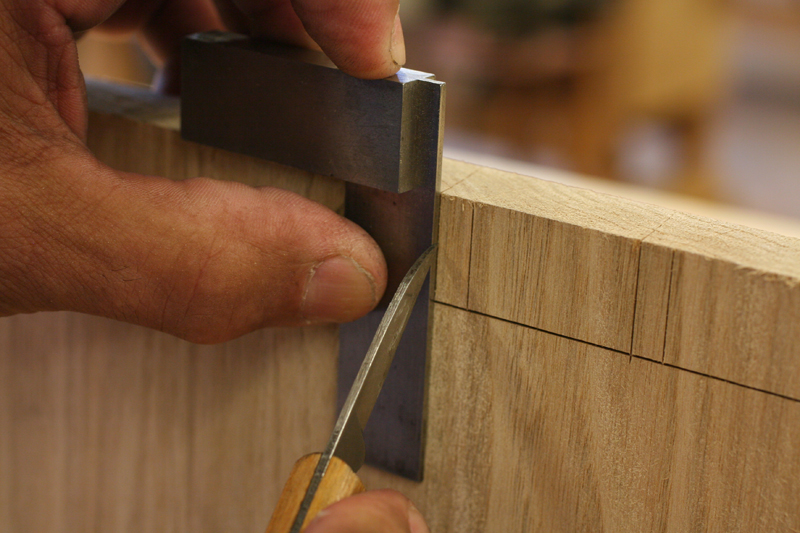
Next, using the knife and a small 2″ square, I mark out the necks of the tails across the thickness of the board, making sure to keep my cuts straight and square (Photo 3). These critical lines will guide the saw, so I work carefully.
I saw right to the lines, leaving nothing to pare later. I concentrate on a straight, clean and square cut. However, if I miss a line, I’m not too concerned. Any error or deviation can be accommodated when making the pins.
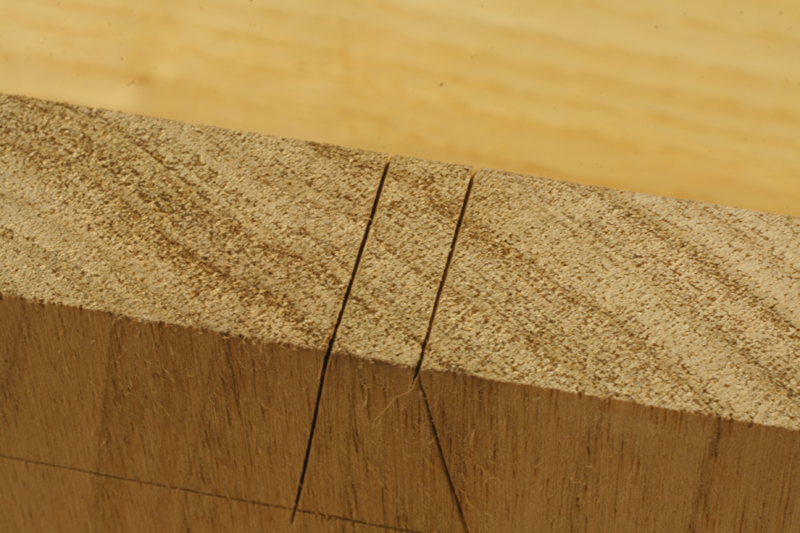
3. Square across the thickness of the tailboard using a 2″ square and the marking knife. Saw right to the lines.
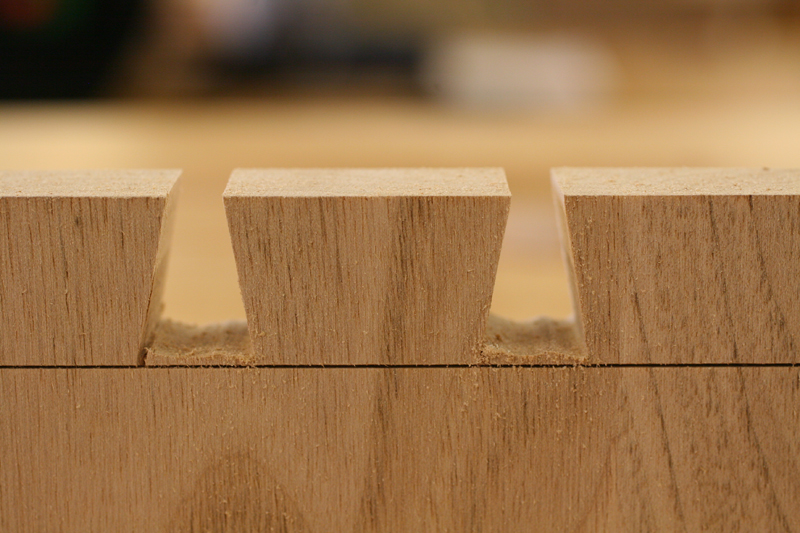
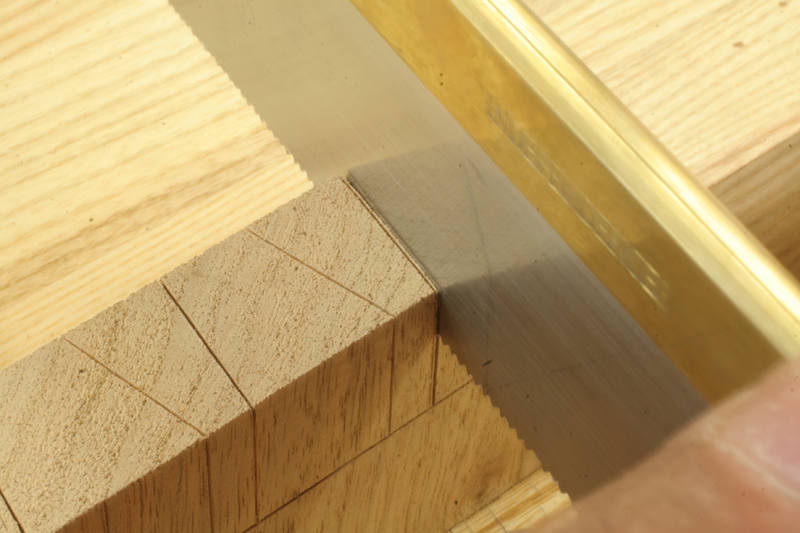
Rather than chop out the waste, I remove the bulk of it with a jeweler’s saw (Photo 4). Using a fine blade, I cut as close to the baseline as can safely be managed (Photo 5). Using a narrow chisel, I pare the waste to the baseline—from both sides—while carefully avoiding the corners. Finally, I use a slender marking knife to clean out any remaining slivers (Photo 6). I’m not done until all of the internal corners are crisp and sharp.
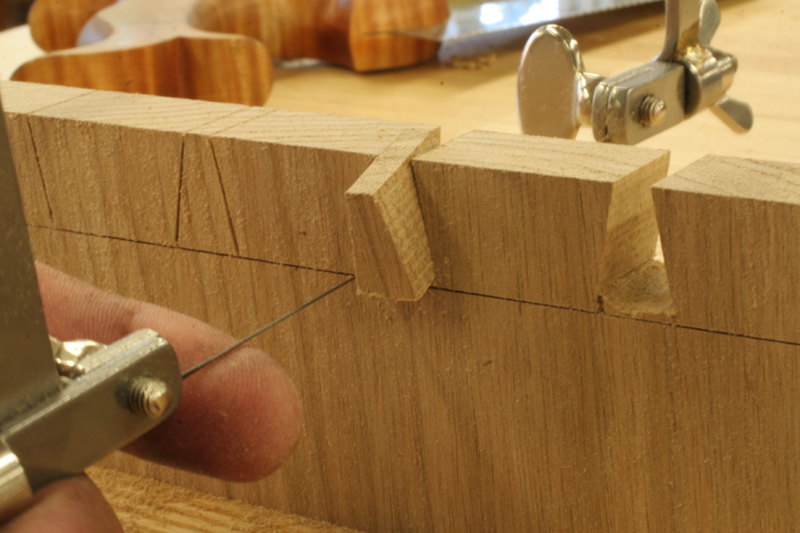
4. Remove most of the waste with a jeweler’s saw.
5. Cut very close to the baseline, but be sure not to go below it. Pare to the baseline with a narrow chisel, coming in from both sides.
6. Clean out the internal corners with a slender marking knife.
Pins second
Using a slender, pointed marking knife, I transfer the outline of the tails onto the end of the pin board. Then I extend the outline of the pins down to the baseline on both sides of the pin board (Photo 7). A clear, crisp outline will eliminate tear out and chipping later.
7. Lay out the pins with a knife, too. Score deeply to make lines that are crisp and clear.
I cut the pins fat, leaving a little extra on both sides of the layout lines (Photo 8). After removing the waste (Photo 9), I trim the pins to the lines. I also undercut them, carefully paring a slight hollow on their inside faces. This method of undercutting removes any hindrance to an easy fit and makes it easier to achieve a tight-fitting joint.
8. Cut the pins about 1/32″ inside the layout lines. (The pins shown here belong to the base of the blanket chest.)
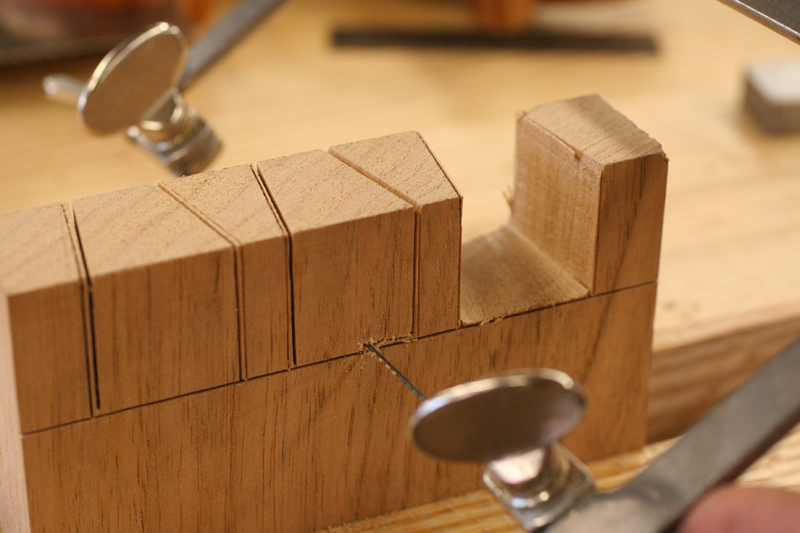
9. Remove the waste, then pare to the lines.
Before test-fitting the joint, I use a marking knife to chamfer the inside corners of the tails (Photo 10). The chamfer helps ease the pins into place and eliminates chipping and blow-outs.
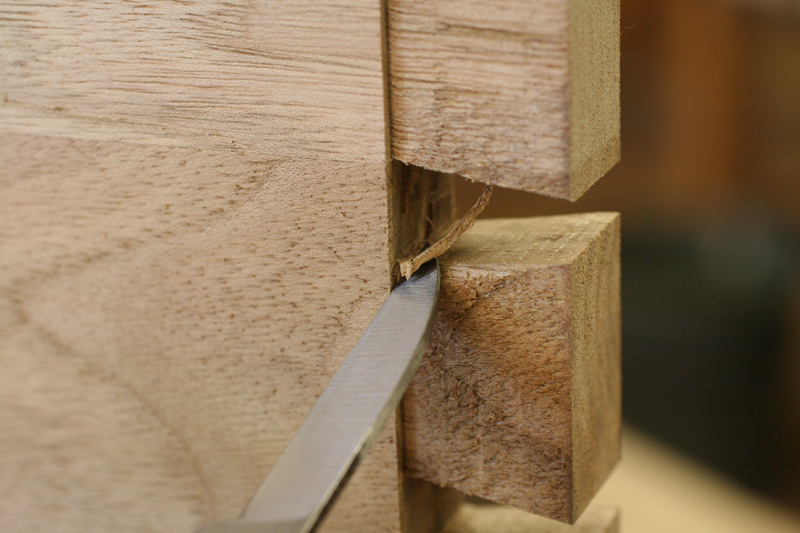
10. Pare a small chamfer on the inside corners of the tails, then test the joint’s fit.
Test fitting
When test-fitting the dovetails, I watch closely for any developing problems; caught early, they can be easily avoided—or invisibly repaired. I drive the joint together with uniform mallet blows. Each blow should slowly close the joint in an even manner. If any portion of the joint hangs up, I check it out. As I drive the joint home, I look, feel, and listen. If the joint is coming together easily, I hear a solid “thunk” when I strike the tail board. If the joint is too tight, I’ll hear a sharper sound.
Once the joint has come together, I spray it with a small amount of water (Photo 11). Wetting the wood imitates the slight swelling that takes place during final glue-up, giving me a preview of how the assembled joint will turn out. Perfect, I hope!
11. Preview the joint’s fit by wetting the wood with water.
This story is a companion piece to “New Hope Blanket Chest”, which originally appeared in American Woodworker, December/January 2012, issue 157.

Here are some supplies and tools we find essential in our everyday work around the shop. We may receive a commission from sales referred by our links; however, we have carefully selected these products for their usefulness and quality.