


We may receive a commission when you use our affiliate links. However, this does not impact our recommendations.
Hey, welcome back. It’s me again, Daniel Fishkin. In my last post, I introduced you to the musical instrument called the daxophone and discussed the principles of building its tongues, which are the thing that makes sound in the instrument. The tongue is one of four parts which, when combined, constitute the instrument. The other parts to the daxophone are the bow, the “dax”, and the soundbox. In this post I’ll tell you about the soundbox, so you can amplify your daxophone.
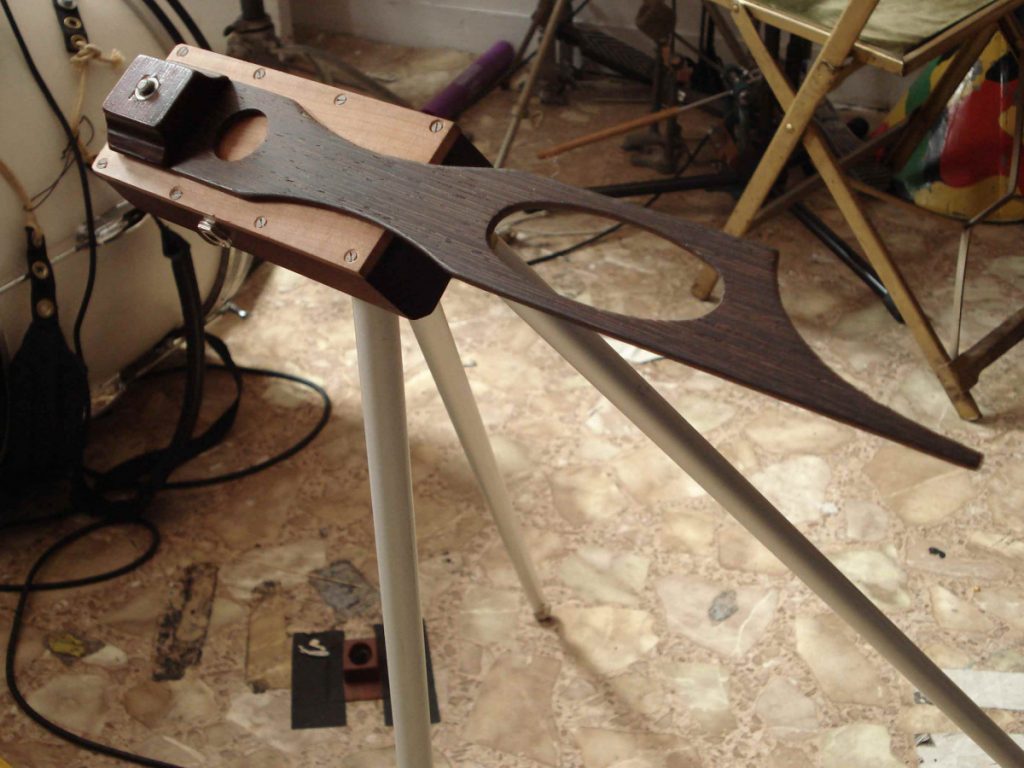
A picture of the tripod that I made with Hans Reichel in 2006.
Hans Reichel’s plans for the daxophone describe the great nuances involved in his soundboard construction. “The wooden tongue with its attached soundbox has to be fixed and installed so that they cannot wobble. The edge of a table was always good enough for this purpose, but once I was given a table which was almost as big as the stage. As a result, and after several years of thought, I made myself a tripod which can be fixed on the floor and be dismantled and taken away in a carrier bag.” The labor that goes into making this tripod soundboard is rather complicated. When I visited Reichel in Wuppertal in 2006, it took us about 7 days to complete the tripod. After we were finally done, while drinking at Hans’ favorite pub, Café du Congo, one of his friends asked, “So what’s next for you?”, to which I replied jokingly, “Next, we will build one of Hans’ guitars.” Hans looked at me seriously and said, “It’s much easier to build a guitar than a daxophone.”
This classic Hans Reichel tune comes from the 2002 daxophone operetta, Yuxo.

Your author with one of the early “butt daxes,” 2013.
Concurrent to my adventures with Reichel, I was building my own versions of a soundboard, in the lineage of my daxo mentor Mark Stewart. Mark’s design, affectionately titled “the butt daxophone”, eschews the tripod for a long plank of wood that the player sits upon, therefore stabilizing the instrument with one’s body weight. I explored this style of soundboard for years, inspired by my mentor’s use of recycled materials—many of these soundboards utilized dimensions of construction lumber! But, it wasn’t so comfortable to sit on that 2×6 for extended periods of time. Years later, I developed a fancier version of the “butt dax” made from finer materials, with a considered, comfortable platform for sitting. I call these “daxophone starships” because they slightly resemble the Enterprise.
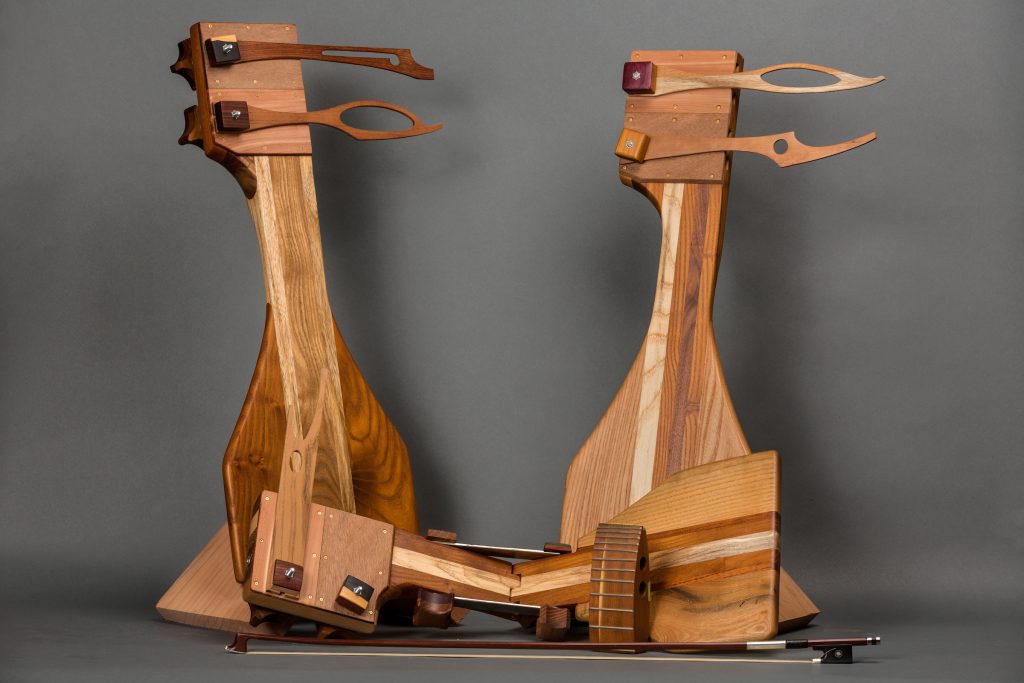
A fancy picture of a group of daxophone starships. Made during my Windgate ITE Fellowship at The Center for Art in Wood, 2017. Photo by Ben Tran.
The purpose of the soundboard is twofold: affix the tongue so that it is absolutely stable, and then amplify it. For amplification, we use piezoelectric microphones, or “contact mics”, as true heads call them. A piezo, named from the Greek word piezein, “to squeeze” is a thin wafer of crystal, which, when flexed, creates a voltage. Unlike a traditional microphone, which amplifies sound waves in the air, the contact mic only picks up vibrations through solid objects—perfect for the daxophone. I usually use two piezo elements wired in parallel, but you can get a great sound with just one. I favor super glue to affix the contact mic, but wood glue does work! I don’t really like epoxy for this task—it dries too thick. You could also clamp the piezo with double-stick tape or putty…whatever works.
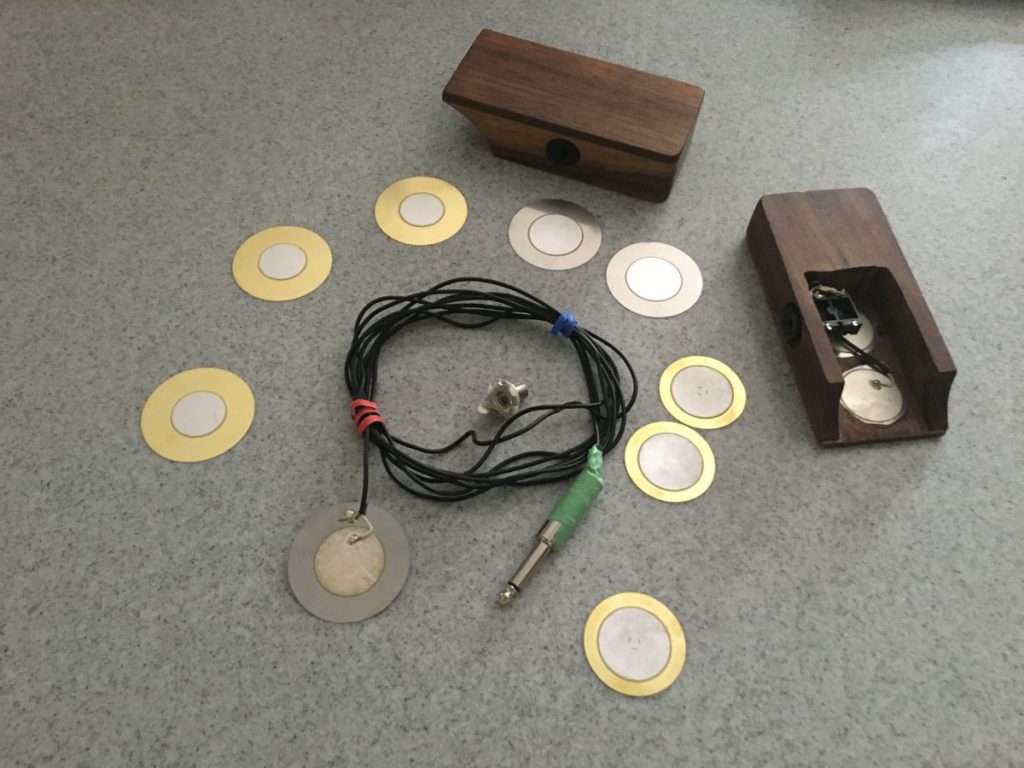
Installing piezos in a soundboard.
Though I am somewhat partial to a particular piezo disc (now obsolete) that was manufactured by Radioshack, I’ve experimented enough over the years to conclude that the type of disc might not matter so much. The sound of the amplified daxophone has a distinct murmury undertone that isn’t heard acoustically, and carries a lot of the low-end tonal nuances. Once I hear that undertone coming out of the speakers, I know I’ve attached the microphone correctly.

Design, Ergonomics
In comparing my starships to the Reichel tripod, you can immediately see a difference in design philosophy. The Reichel soundboard is completely minimalist—there’s only as much wood there as needs to be. My approach is larger—perhaps less elegant and more American—yet the sculpted curves and wood laminations are meant to be a treat for the player to enjoy. One aspect of my soundboard that I really prefer is that it does not require setup, as the Reichel Tripod does. I’ve played enough punk shows to know that I can’t exactly predict the surface of the floor, and I like not having to worry about the setup time required for screwing together the tripod legs. Having both versions of the instrument in my life, I prefer to take the starship to gigs, though if I’m playing with an orchestra, or in a room where I can set up for months, I’d take the tripod. Another aspect is ergonomics—of course the Reichel tripod has this perfectly right, setting the instrument at a nice height, and positioning the tongue at a 39º angle, which is nice for the position of the bow arm. In years past, I’d just set a large wooden wedge under the soundboard to correct its angle. Recently though, I designed a version of the starship with hinges, which fixes the ergonomics of my instrument really nicely.
I also follow Reichel’s lead by including a wooden clamp and locking nut in my soundboards. This clamp, made from laminated hardwoods, makes changing the tongues while playing an efficient and standard procedure. It is somewhat difficult to make, and Reichel’s DaxInfo.pdf packet covers this procedure well enough, so you can look there for guidance.
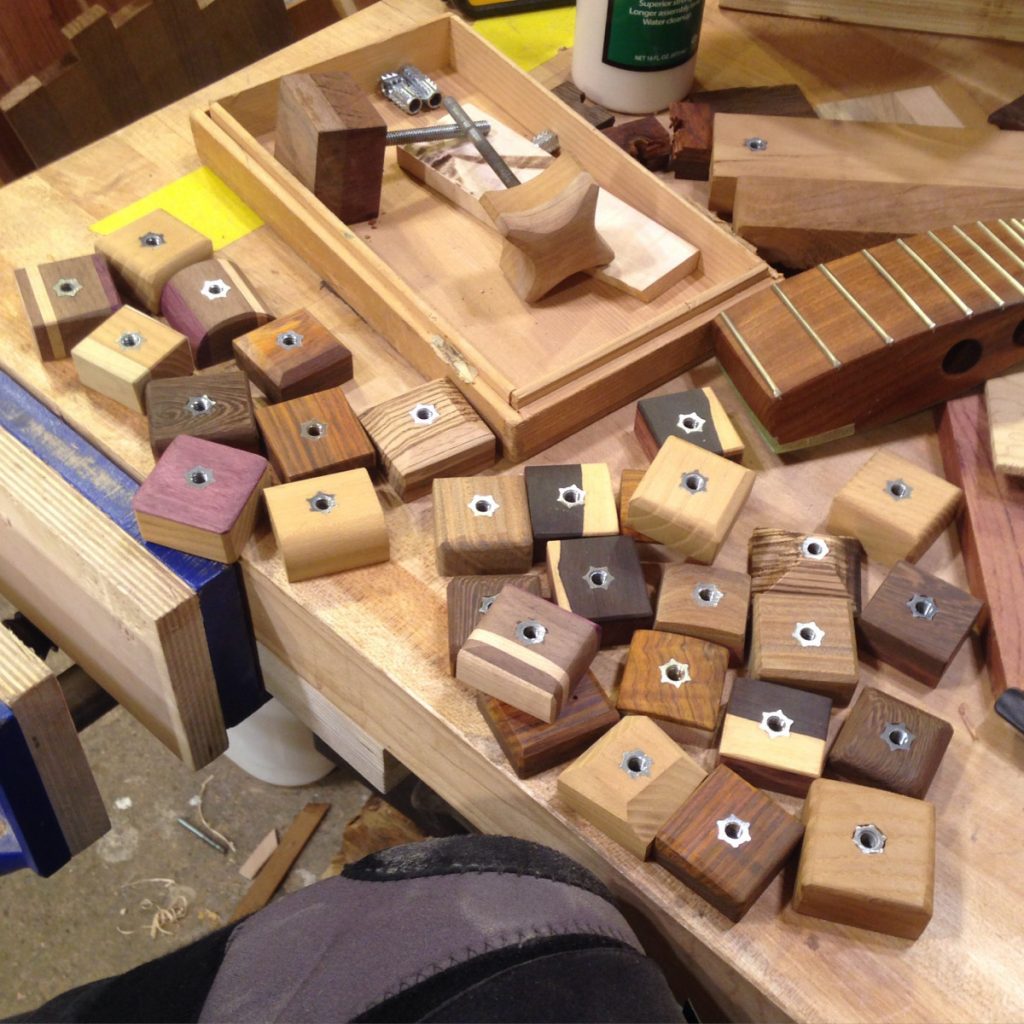
I usually make a batch of clamps and knobs at a time.
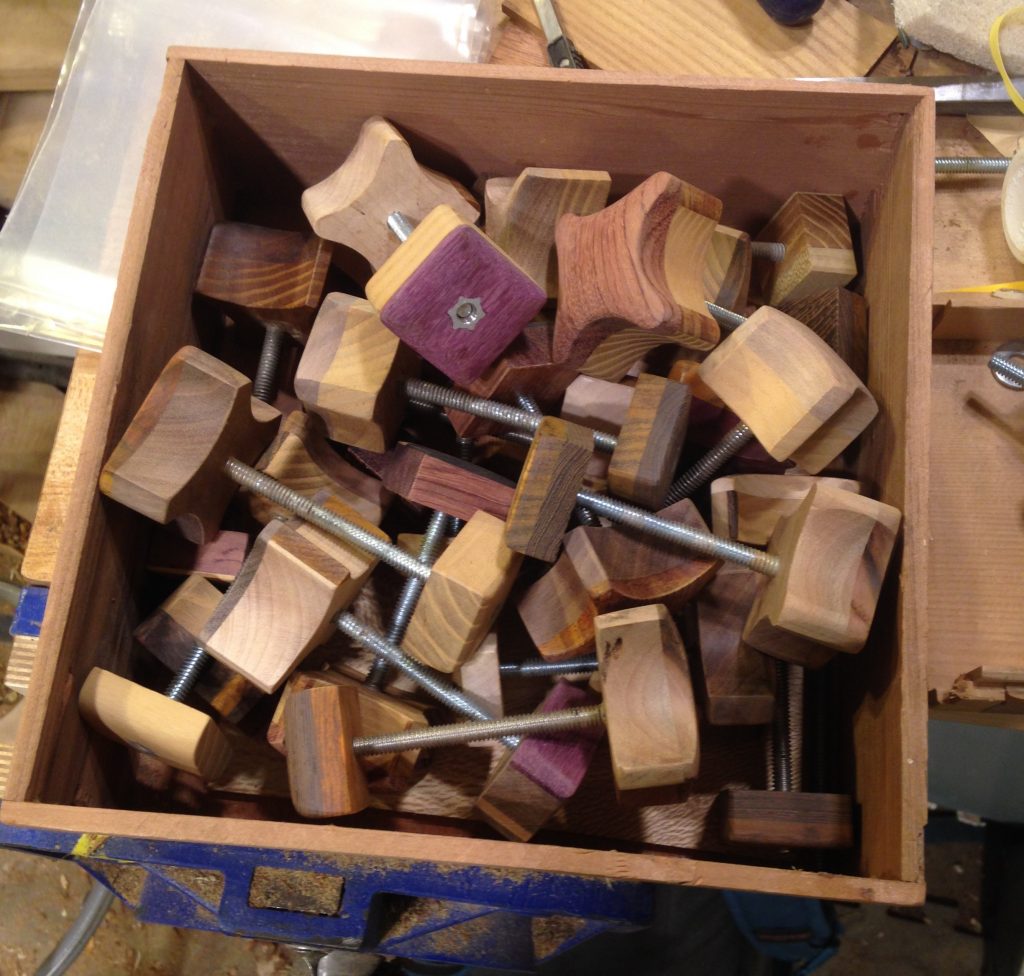
I find this work rather tedious, but I like to takes risks in form and the repetition really helps me improve my craft.
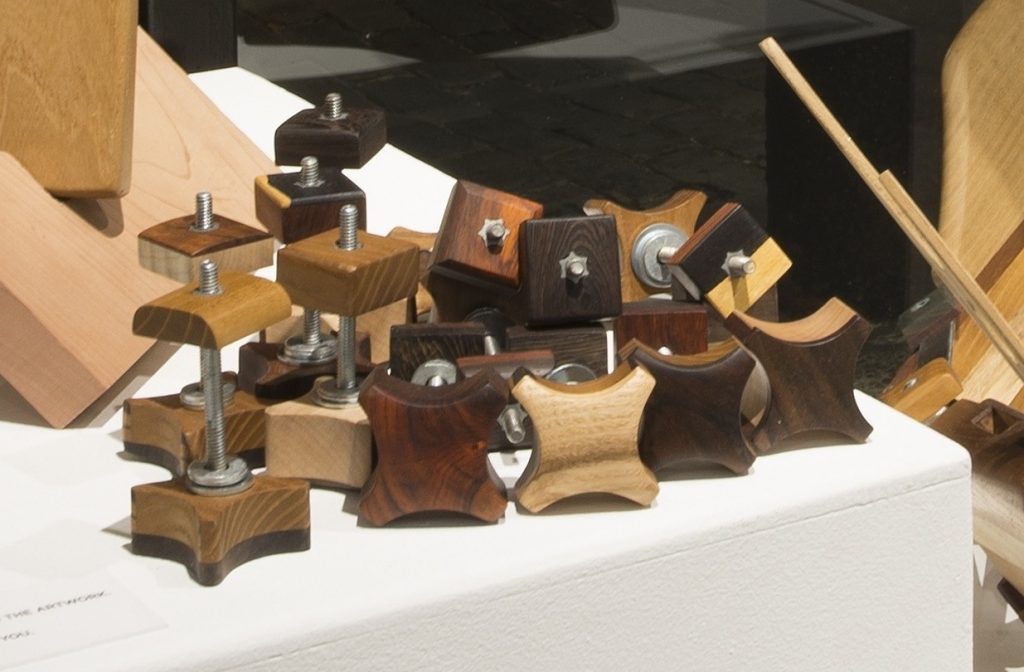
The subtle variation in depth and size of the clamp might affect the sound when matched with different soundboards. I try several clamps before picking the right one.
Oh, yeah—since 2012 I’ve been making most of my soundboards like “doubleneck” guitars—there are clamps and amplified cavities for two tongues to be mounted at the same time! It’s rare that I play both tongues simultaneously, though it is nice to be able to switch right away to another voice.

Mark Stewart, my daxophone mentor, doing a little live looping with his daxophone.
The “Student Model”
However, one problem that both the Tripod and the Starship share, is that each are really involved builds. This makes the resulting price for a customer or build-time for a luthier quite high. So, I’ve always had Reichel’s original 1987 daxophone drawing in mind for its simplicity—the soundboard is there, sandwiched with a woodclamp between a daxophone tongue and the table. You can see a slightly more detailed picture of this soundbox if you look carefully in Reichel’s 1987 article for Guitar Player magazine.
So, I have endeavored to bring back the soundbox-on-table idea, which I dub the “student model daxophone”, as a simpler build. This doesn’t offer the minimalist ergonomics of Reichel’s tripod, nor the practical advantages of my own starship soundboards. Also, it is missing the wonderful wooden clamp that makes removing the tongue so easy. But, on the basis of sound alone, the “student model” is equivalent to these other versions—the sound itself comes from the tongue. Since the “student model” is simpler to build, I can sell it for much more affordable prices, and it’s easier to build for a beginning daxophonist who just wants to hear the instrument. The idea is: after you get (build!) some tongues and play around, if you really want to devote yourself to the instrument, you can graduate to a “concert” model soundboard, using the same tongues you’ve been learning on.
This student model is also excellent in that it works for right-handed and left-handed musicians!

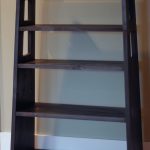
A few student models sitting around, waiting to be installed in playing position.
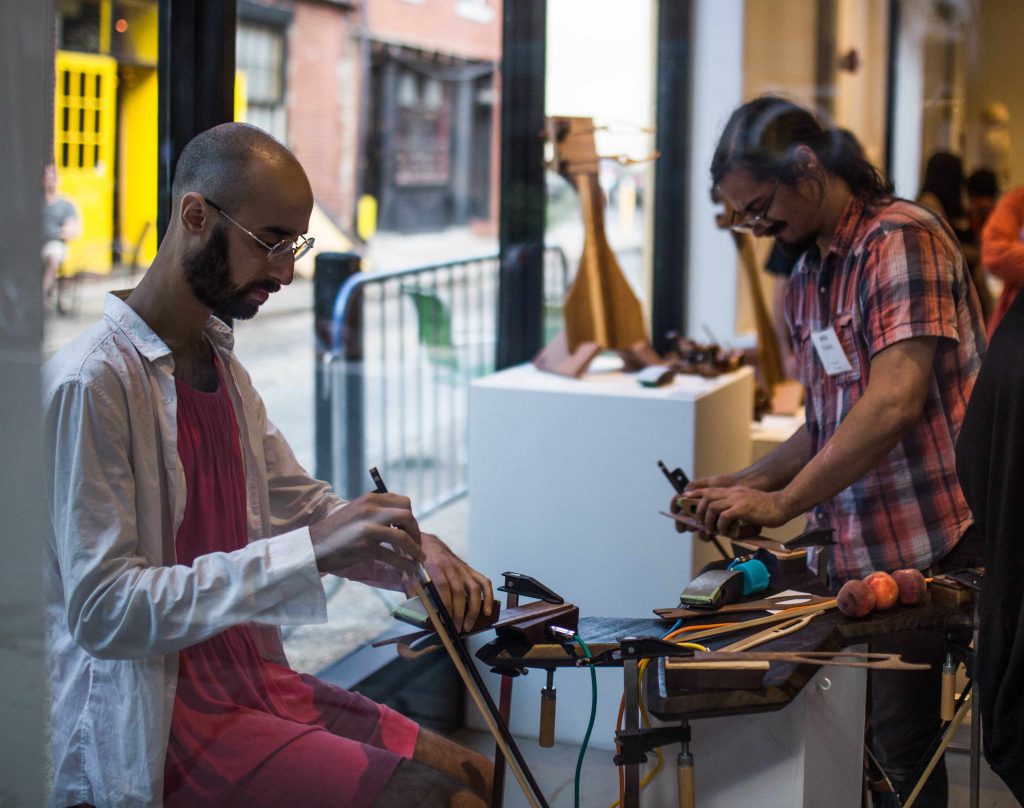
Here you can see the student model affixed to a table, played by myself and daxophonist Ron Shalom.
Follow along with me and I’ll guide you through how I build a “student model” daxophone soundbox.
Building a “Student Model” Soundbox
The idea is basic—take a piece of dimensioned lumber, carve out the recess on the bandsaw, and then glue the soundbox’s top on. Then, drill a hole for guitar jack, and install microphones. For many readers, the following set of pictures will be quite basic, but I’m presenting them as a sort of montage so you can see my workflow.
The dimensions on this soundboard can vary, of course. My approximate, working dimensions are: 5”L x 2”W x 1-1/2”D. Each soundbox in the following batch will have little nuances and design flourishes to distinguish them.
Building the Soundbox
Here’s a lot of random wood scrap that I will cull and use for my next batch of student models.
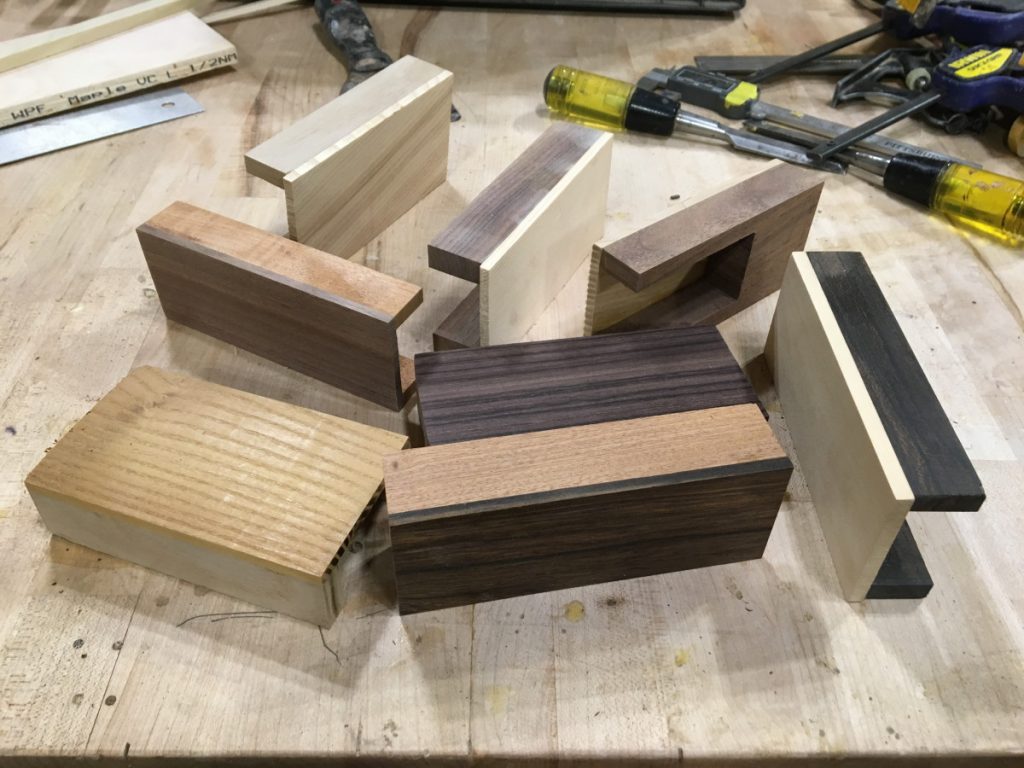
In the following pictures, I used a variety of woods, from precious rosewoods to black walnut. In this batch, I wanted to test my current hypothesis that the particular wood type for a soundbox doesn’t matter so much. I’m also using up material from my box of “fancy scrap wood” in doing so. I tend to be kind of a wood miser, but that’s another story. When stashing scrap wood or preparing new wood for soundboxes, make sure that the top and bottom faces of the wood are jointed and planed, and thus parallel.

Top row, left to right: catalpa/ash, walnut/spruce, sapele/cocobolo, walnut/ash; bottom row: claro walnut/Indian rosewood, catalpa/mulberry, ziricote/spruce, mahogany/walnut.
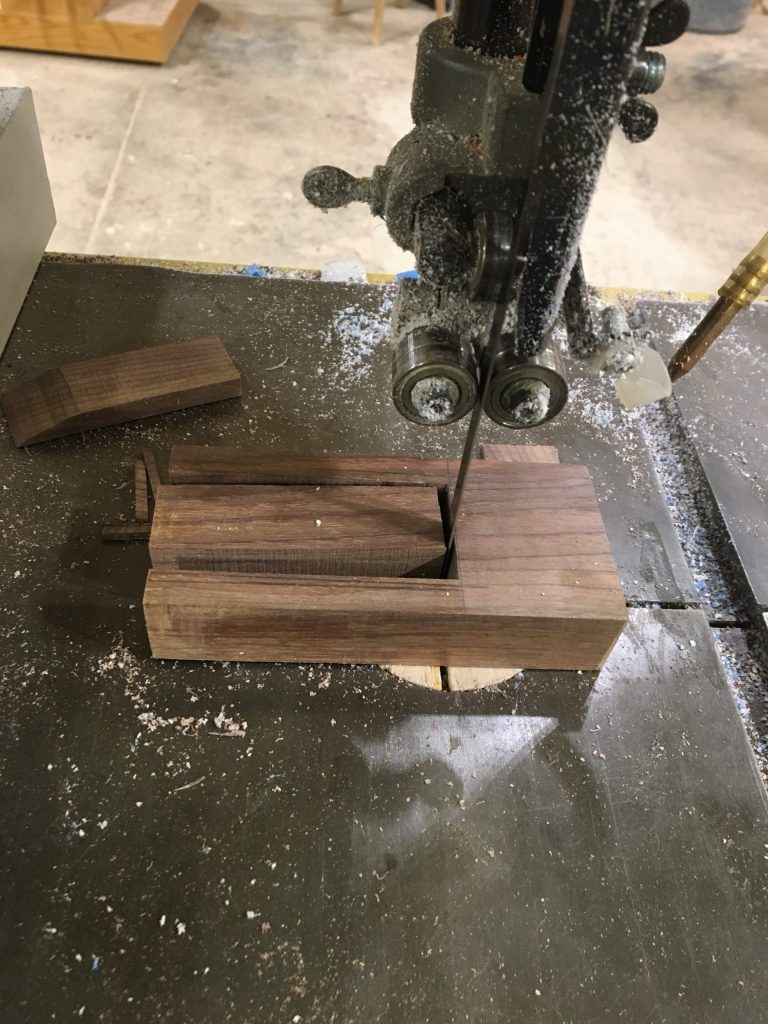
So, here’s the rough working shape of the student model, seen from upside down. The solid body of wood on the left is where the clamp will register, and the empty space in the middle will be the sound chamber, with microphones attached. The thin piece of soundboard on the top of the soundbox should be no thicker than 1/4”, no thinner than 1/8”.
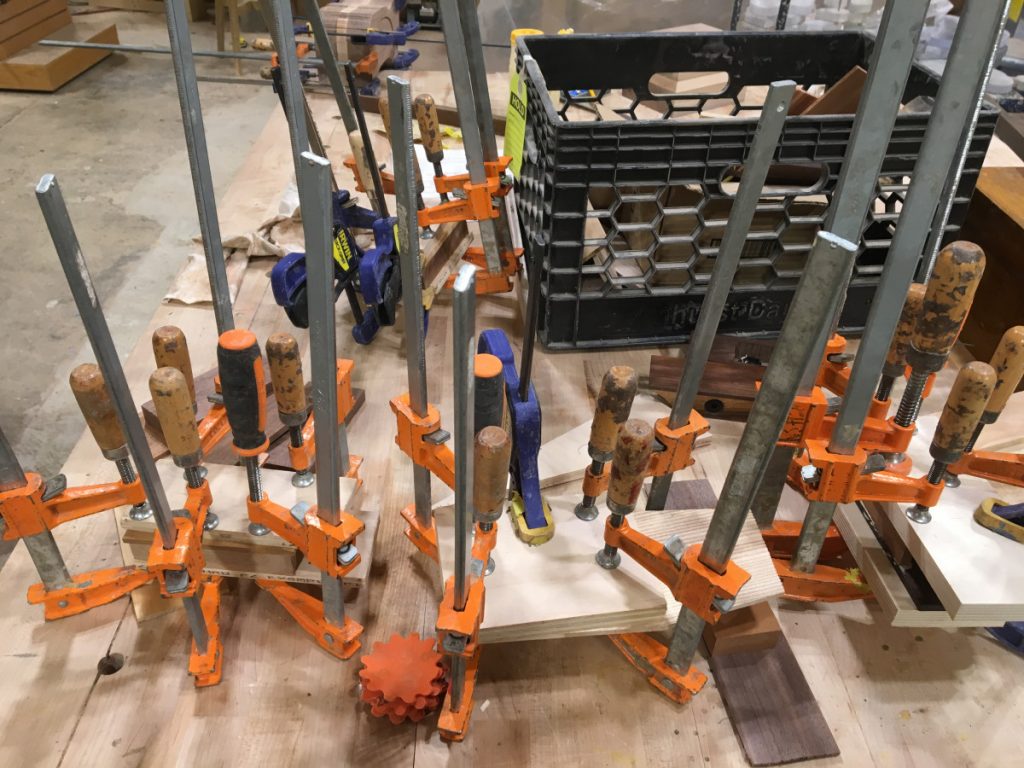
Time to glue.
You probably could get away with fewer clamps!
Glued and shaped.
After taking off the clamp, bandsaw off the edges and sand the sides so the surface is flush.

I’m cutting a little flourish on the far edge of the soundbox. This detail is kind of important to me, for it breaks the rectilinear form of the soundbox. With each soundbox, I explored a different design.
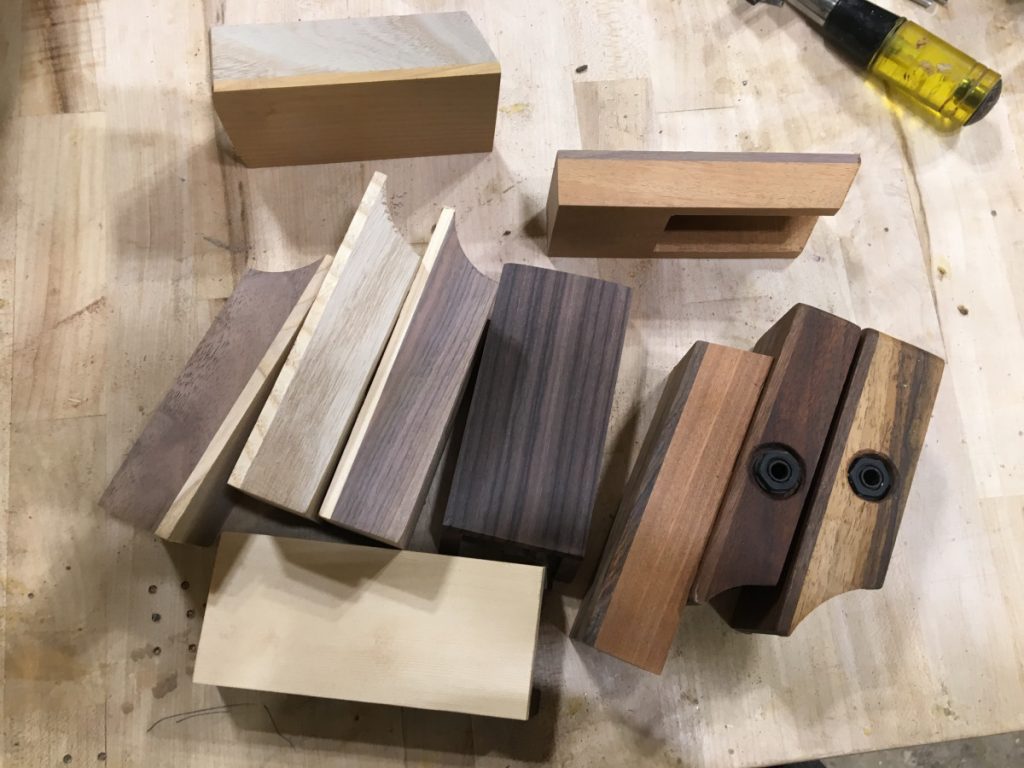
Here are the different designs I played with for this batch.
Mounting the Output Jack
Now, the next thing I’ll do is prepare the guitar jack for installation. I’m not notating measurements here, because most ¼” jacks have varying dimensions. So if you get the principle, you can modify the specific drillings for whatever jack you manage to get your hands on. There are two drilling operations—usually, the threaded shank of the guitar jack is not long enough to protrude through the soundboard, so you can use a large Forstner bit to reduce the thickness of the platform, thereby creating a little recess for the jack to hide in, so its nut and washer don’t protrude too far. It’s an important part of the design! The depth of this counterbore is again contingent on the thickness of the soundbox sides. After you get this depth right, drill right through the center mark from the Forstner bit so you can install the jack.
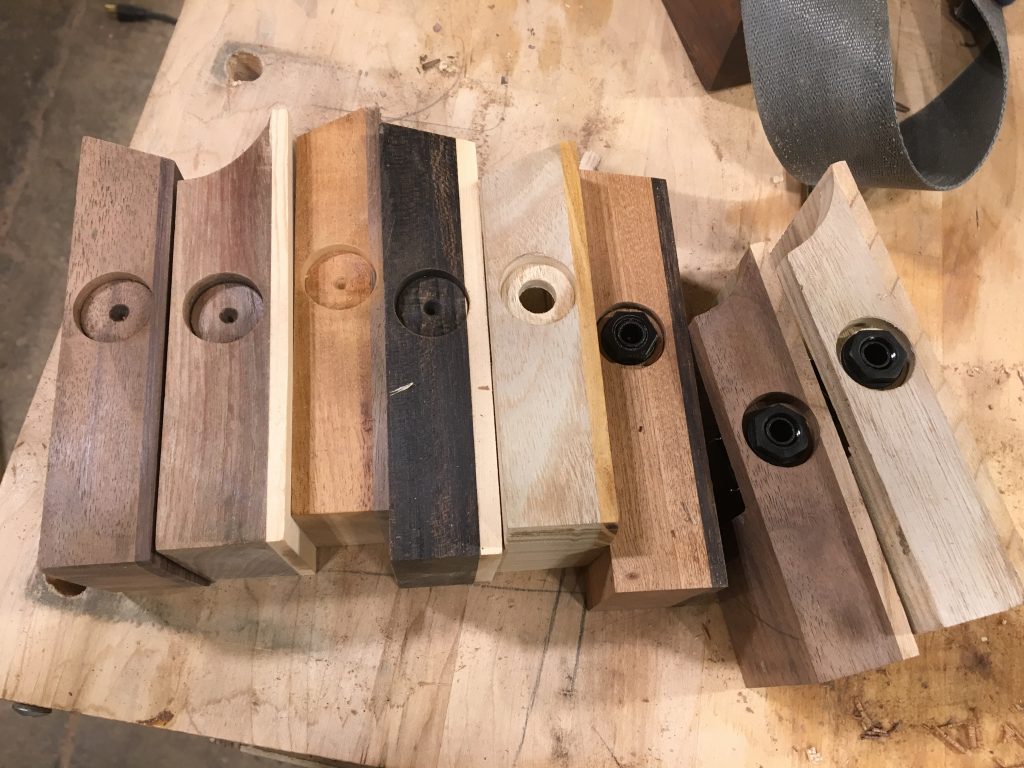
You can see all stages of the drilling operation here—first the counterbore to the left, then the second hole drilled, and then a few jacks installed.

By the way, you have to think about how the jack will “grip” the interior. You might need to fix the interior of this cavity with a chisel, depending on how your bandsawing went. Or you could use a table saw to cut this part of the interior wall, which guarantees a flat surface. I don’t know. It’s up to you. You could even glue the jack in place. One thing is for certain—that it took more time to write this paragraph than to chisel the bandsaw-kerf surface flat.
Sanding and Oiling
Well, now it’s time to sand and shape the soundboxes. You might want to establish a curved surface on either side of the soundbox—in the following examples, the thick sidewalls of this walnut soundbox seemed a little clumsy, so I tried to shape it so that the soundbox would feel comely in the palm. Conversely, the angular jutting on the catalpa soundbox happened because the humble lumbers allowed me to take a risk in building. It’s fun to build in batches and explore different approaches. The end user for a musical instrument is a musician—and there are as many types of musicians as there are trees. Not every musician feels compelled by a warm curve, or at home inside a “classical” form (whatever that is). Some musicians need a weird angle!


Well, you know this part: time to finish your soundbox. I use PolyX oil—I am not sponsored or anything, I just really like their product!
Installing Piezo Microphones

Finally, we need to amplify the instrument by installing the microphone. This part isn’t really woodworking, so I’m going to be brief here, suffice to say that if you’ve ever built a contact microphone before, this part will not seem so esoteric. If you haven’t, there are at least two dozen articles online detailing the process. Solder first the two-wire cord onto the disc. Use a tiny bit of superglue to affix the disc to the wood. Then trim the two-conductor cable to size and solder the other side onto the ¼” jack. That’s all! I don’t fuss at all about covering up the exposed electronics on the bottom of the soundbox.

The “student model” is not an original idea, nor one to rush off to the patent office. It’s a riff on a concept I rescued from the margins of Hans Reichel’s many innovations. There could be hundreds of ways to imagine the daxophone. But this one should get you started.
Stay tuned for part three, when we will cover how to build the last part of a daxophone, the “dax”, that special curved piece of wood you use to change the notes.
Daniel is the type of composer that is more likely to reach for a soldering iron than a pencil. He has performed as a soloist on modular synthesizer with the American Symphony Orchestra, developed sound installations in abandoned concert halls, and played innumerable basement punk shows. To see more of his work, please check out his website here. Thanks again to The Center for Art in Wood, and to NextFab for the support and inspiration.
Here are some supplies and tools we find essential in our everyday work around the shop. We may receive a commission from sales referred by our links; however, we have carefully selected these products for their usefulness and quality.


