


We may receive a commission when you use our affiliate links. However, this does not impact our recommendations.
You don’t need a lot of holdfast holes to hold most work on your bench. In fact, I’ve found that somewhere between eight and 10 holes is more than enough for most work.
And if I used a tail vise, I probably could get away with just two or three holdfast holes.
The topic of where to put holdfast holes stresses out a lot of bench builders, especially if they’ve never used a traditional workbench. So here is my perspective on the topic. It is informed by two things: tradition and my own experience.
When I first plumbed this topic more than 10 years ago, I translated A.-J. Roubo’s 18th-century writing on workbenches, but I didn’t find it helpful. In fact, some of the advice was at odds with the illustrations of workbenches that Roubo shows throughout the five books he wrote (and illustrated) on the craft.
After much hand-wringing, I decided to pay more attention to the drawings of holdfast holes and less to the text describing them (Note: This confusion could relate to my less-than-stellar translation skills). I also salted my approach with the evidence from hundreds of old workbenches I have examined.
So thanks for making it through my caveats.
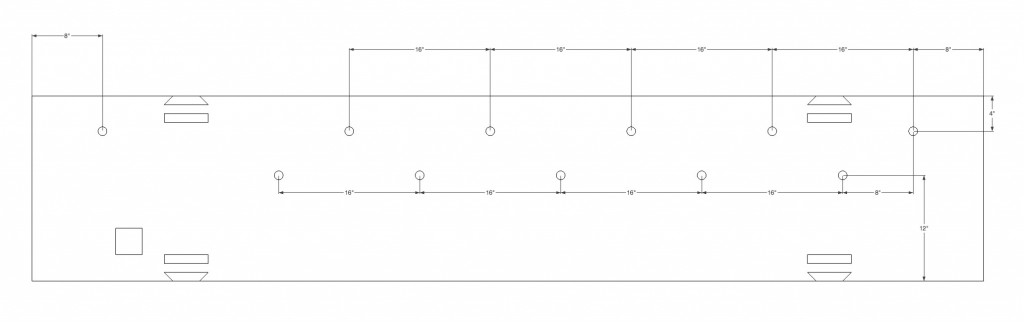
I use two rows of holdfast holes that are staggered. One row is 4” from the back edge of the bench. The second is 12” from the front edge. What is important about the holes is where on the benchtop they begin and end. What also is important is how far apart they are. For that you will need your holdfast.
Let’s start with the row that is 4” from the back edge of the bench. This is the most difficult to lay out. The first hole to lay out is the one at the back left. It is 4” from the back edge of the bench and about 8” from the left end of the workbench. This hole is positioned so that the tip of the holdfast reaches to the right so that it is just in front of your planing stop. That allows you to clamp down a batten that is against your planing stop – allowing you to work wide panels with ease.
The next critical hole is the one at the far right of the bench. It’s also 4” from the back edge and 7” from the end. This hole allows you to secure long and wide stock on your bench with a doe’s foot (aka a notched batten). I would have put it even closer to the right end of the bench but I don’t want to risk splitting the bench in twain with the holdfast. Yes, this can happen.
Now you need to divide up the space between these two holes. Measure the length of the reach of your holdfast. Mine is about 8”. So I put the holes on 16” centers so that I could get full coverage with these holdfasts.
Avoid putting holes into the joints of the workbench’s base.
Then turn your attention to the row of holdfast holes that are 12” from the front edge of the benchtop. These should also be on 16” centers but should be staggered to be between the holes in the back row. This allows you flexibility when securing battens and doe’s feet.
You also need three holdfast holes in the front right leg of the bench for edge-jointing panels and long boards.
You might need a hole or two more for mortising or holding down work on your bench hook when crosscutting, but those are for you to divine.
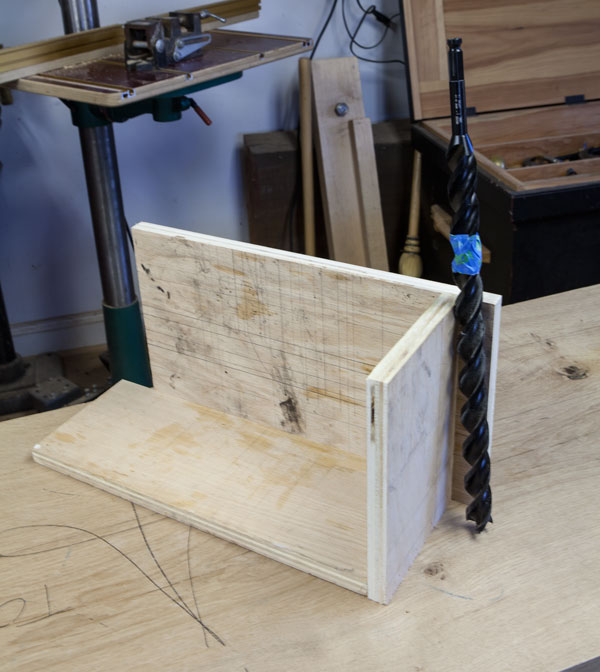
Making the Holes
After you lay out your holes, you need to make them dead vertical. I make a jig out of scraps as shown here. I can clamp this jig to the benchtop and it helps guide my auger bit as I bore down.
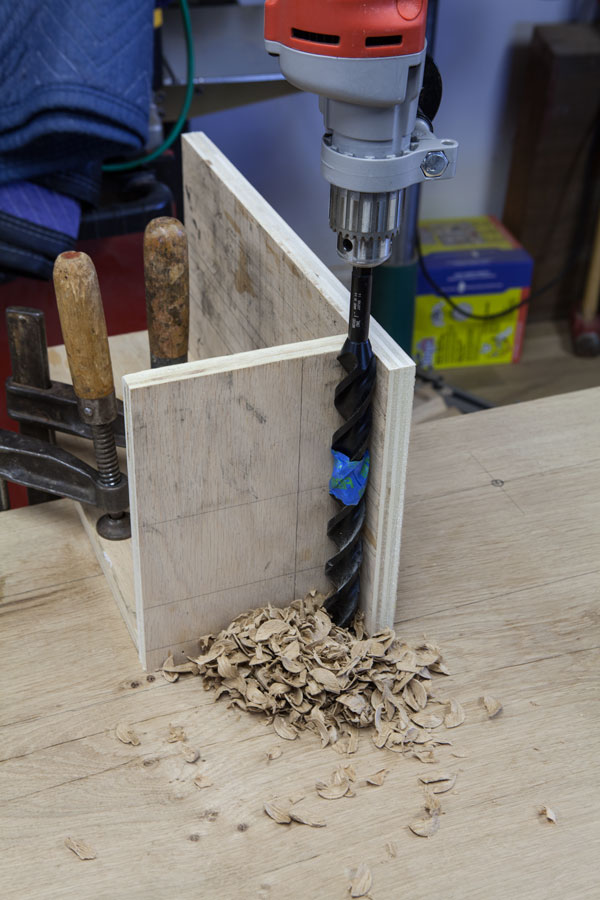
To bore the holes I use a WoodOwl auger bit that matches my holdfast’s shank (in this case it’s 1” in diameter). These bits work with a brace or an electric drill. They work amazingly well. Better than any auger I’ve used.
— Christopher Schwarz

Editor’s note: If you’ve a bench build in your future, check out Christopher Schwarz’s revised edition of “Workbenches: From Design & Theory to Construction & Use.”
Here are some supplies and tools we find essential in our everyday work around the shop. We may receive a commission from sales referred by our links; however, we have carefully selected these products for their usefulness and quality.


On dog holes – I put where I need them! Also (as my bench proves) where (sometimes) I don’t need them! OK, so not so cool but that is the reality of the matter. I was pretty picky at the beginning (even built a guide for the holes) but now I just pickup the drill (electric – so sue me), put a 3/4″ bit in it and add the new dog hole wherever I need it. Now I just ‘try’ to keep it perpendicular to the bench top. My workbench is solid, doesn’t move but is no piece of art. I have stopped worrying about.
Very cool. I’ve been waiting for this blog post ever since you somewhere mentioned you were researching the subject. I’ve bookmarked in my future bench plans folder. Thanks Chris!
what’s wrong with lots and lots of dog holes? they don’t hurt anything, and if you’ve got the tools out to drill one, it’s not too hard to drill 50. It takes a couple of hours, and then you’ve got the flexibility to hold things in lots of ways. I love my holdfasts, and I can use them anywhere, including the sides of the bench. I probably have about 50, and I use them a lot.
What if your using a tail vise?
And the last picture didn’t load.
Why not just put two of the raise-able planing stops at the left end of the bench?
(What other things will the hold-fast be used for in the “left-rear” position?)