


We may receive a commission when you use our affiliate links. However, this does not impact our recommendations.
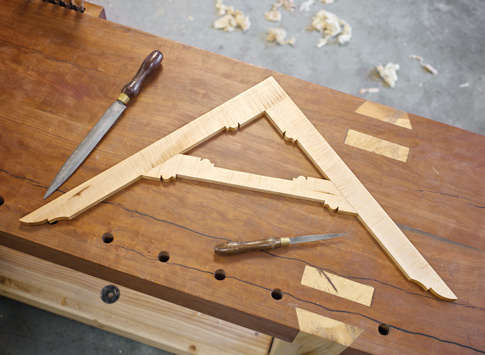
When I first built an English layout square in 2011, it took me about 20 minutes to cut one of the six bead details on the square. Four years and more than 100 beads later, each bead is less than 5 minutes of work.
If you have ever thought of building one of these beautiful squares, here are tips for the tools and processes that make it easy.

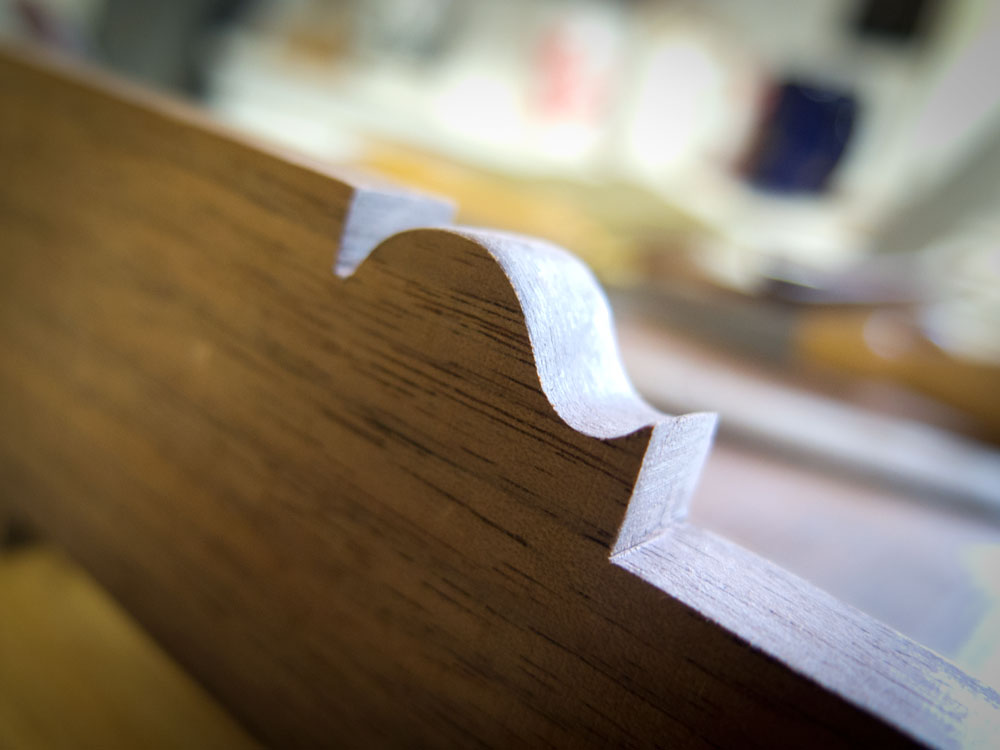
Make a good template. Draw the bead on paper (or get it from the plans) and make a precise template on some 1/8”-thick Masonite. Carefully draw every aspect of the bead, including the square fillet behind the bead. Cut and shape the template with all of the care you would give to fine furniture. A good template makes every subsequent step easy. Mark the bead shape on both faces of the work.
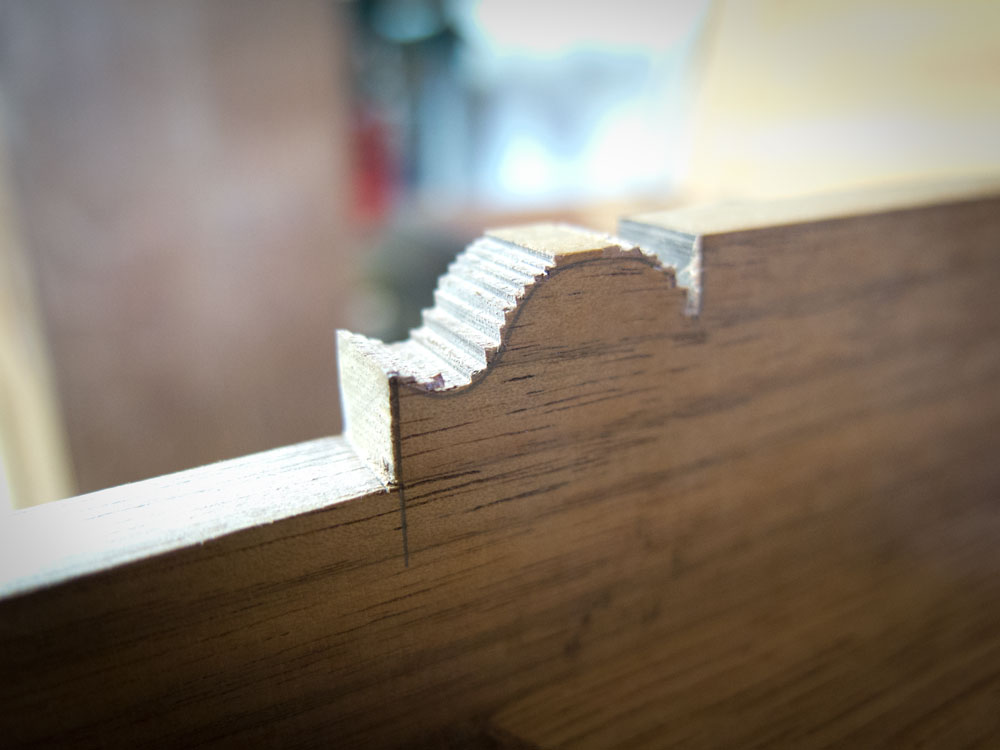
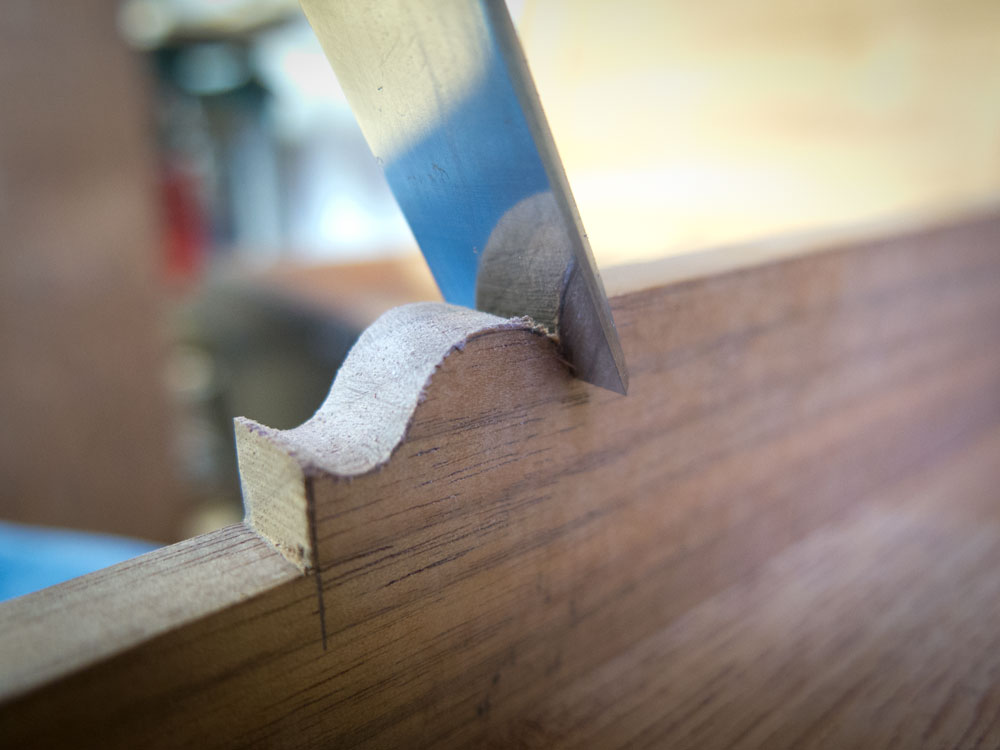
Kerf the waste. Cut the fillet behind the bead with a small backsaw. Then kerf out the rest of the waste down to your layout lines on both faces of the work.
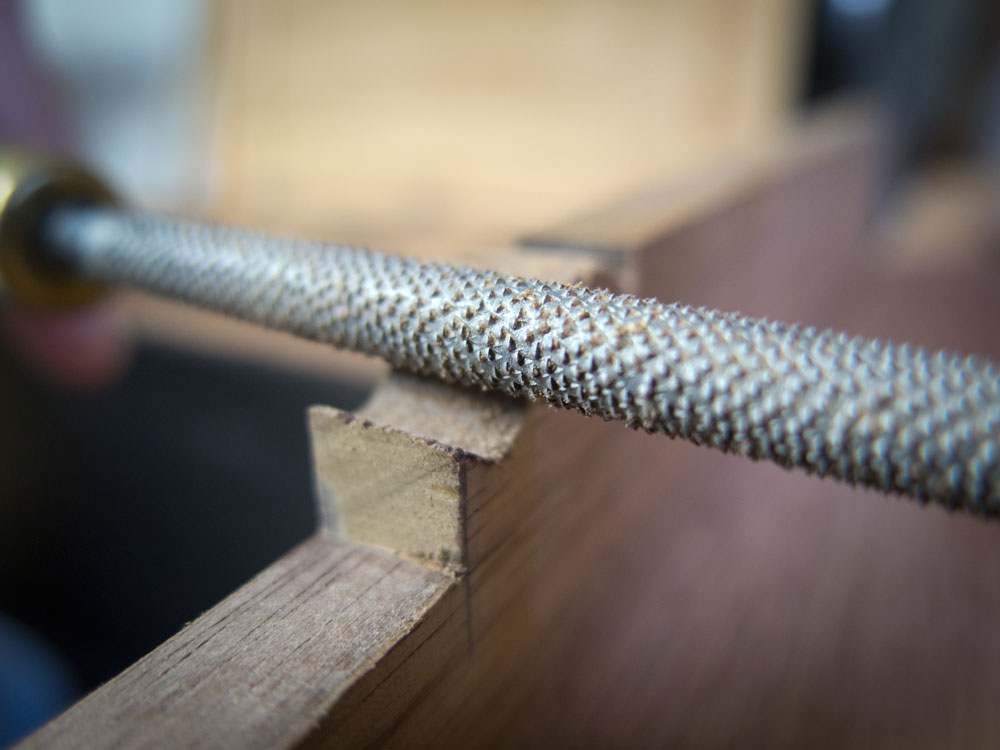
Start with a rattail rasp. Clean up the concave part of the bead with a rattail rasp. I used an Auriou 6” rattail with a 13 grain. How you use the rasp is important. Move it laterally while spinning it with both hands. Spin it like the rasp is trying to climb up the hill out of the concavity. Use little downward pressure. This will start to clean up the kerfs on the way up to the top of the bead.
Rasp the convexity. Use a fine, flat rasp to shape the top of the bead. The rasp won’t reach into the bottom of the fillet, so don’t force it. (Here I’m using an Auriou modeller’s rasp, 6” long with a 15 grain). If you cannot afford good rasps, buy PSA sandpaper and stick it to dowels and popsicle sticks.
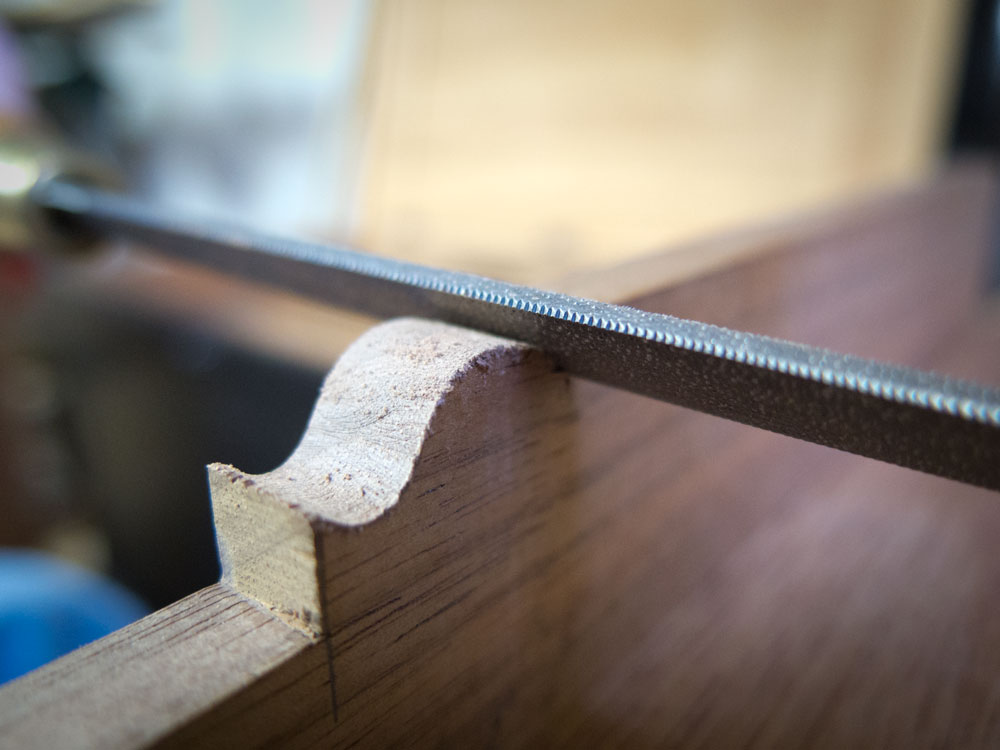
Chisel the fillet. A bench chisel reaches right into the fillet to trim the back of the bead. You should be able to do this with one or two downward strokes.
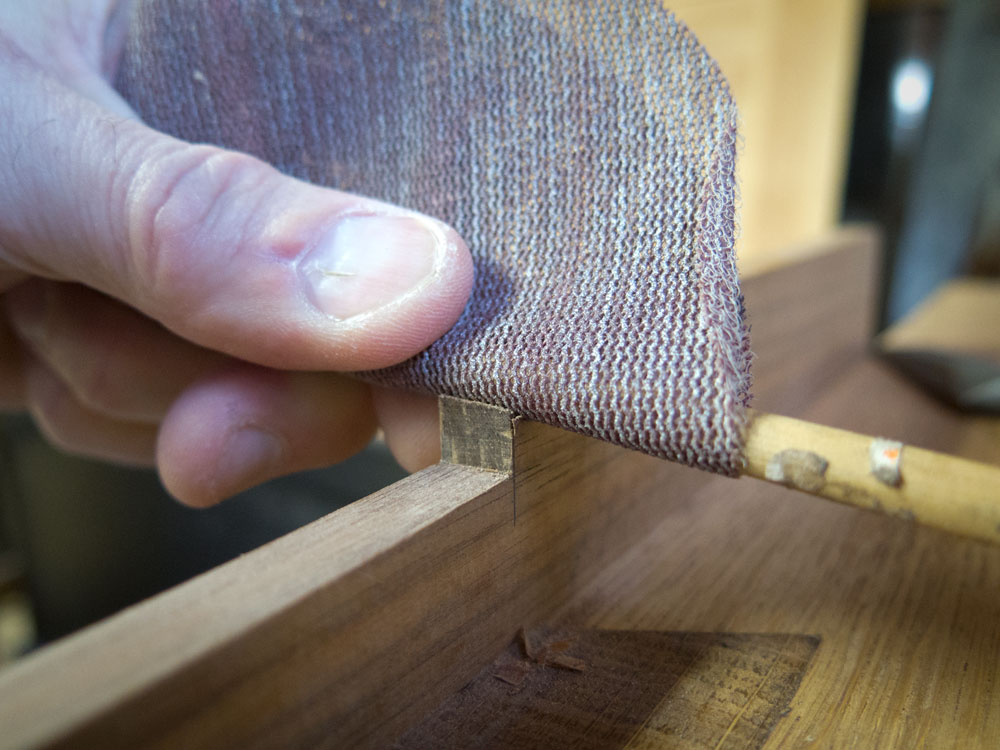
Start sanding. I wrap #180 sandpaper around a dowel to finish the concave area. Then I switch to #220.
Homemade rasp. For finishing the back of the bead, I apply some #180-grit PSA sandpaper to a popsicle stick and whittle the thickness of the popsicle stick until I can reach the bottom of the fillet.
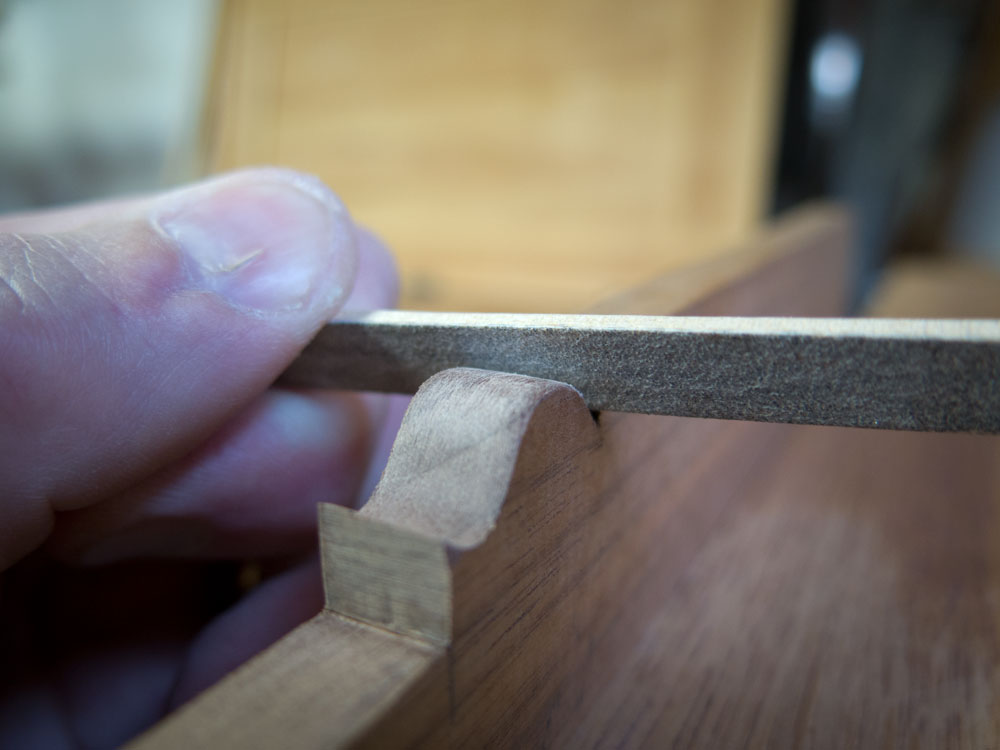
Finish the front of the bead. Then I use the same popsicle-stick “rasp” to finish the front of the bead. The nice thing about my fake “rasp” is there is no abrasive on its edge, so it won’t abrade the flat area in front of the bead.
You can read more about the English layout square in blog entries here.
— Christopher Schwarz
Here are some supplies and tools we find essential in our everyday work around the shop. We may receive a commission from sales referred by our links; however, we have carefully selected these products for their usefulness and quality.


Aren’t these easier to do with gouges? I have some in cannel gouges that really shine for the parts a standard gouge works poorly. A combination of the two, working cross-grain seems like it’d be faster.
Another substitute for the Popsicle stick is one of the disposable fingernail files that are sold in beauty supply stores. They come in a variety of styles and my wife picks them up at Sally’s.
OK, the English layout square climbs a little bit higher on my to-do list now…
I hope you will forgive me for pivoting here to another subject (for me the thought process goes, hmmm, layout square … shop tool … been meaning to ask about another shop tool … )
Did you ever have a chance to follow up on the half moon winding sticks you posted about here:
http://blog.lostartpress.com/2014/06/20/a-cool-way-to-make-winding-sticks/
I’ve kept my eyes peeled following the ‘stay tuned’ at the end. Did I miss it? Thanks! Josh