We may receive a commission when you use our affiliate links. However, this does not impact our recommendations.
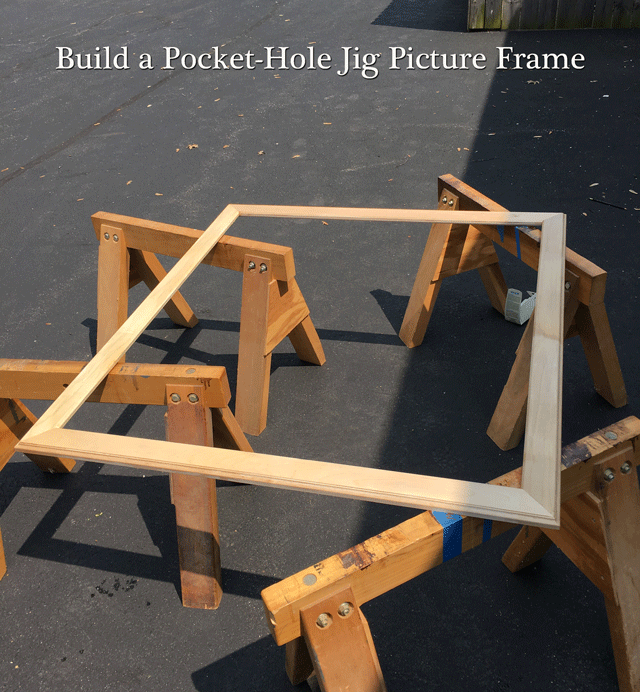
A few weeks ago, I was asked to build a frame for a 36” x 40“ map of northern Kentucky. I had some leftover maple and decided to build the frame quickly with a pocket hole jig. It may not be the most sought after joint, and some woodworkers may turn their noses at pocket holes, but it can be an extremely useful joint and can be hidden behind the frame.
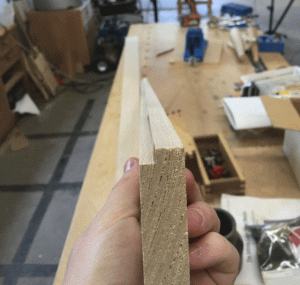 Ripping & Rabbets
I started with four boards that were already milled down to 3/4″. I ripped each board to 2-3/4″ on the table saw, leaving them a little heavy so I could clean the saw marks off (you can use whatever method you prefer for this application: jointer, smoothing plane, etc.).
Next, I needed to cut rabbets. Usually, I would wait until the frame was assembled and use a router to cut the rabbet out of the back to fit the glass and poster. But, after a few minutes of unsuccessfully searching for the proper router bit, I realized that it would be faster to cut the rabbets on the table saw.
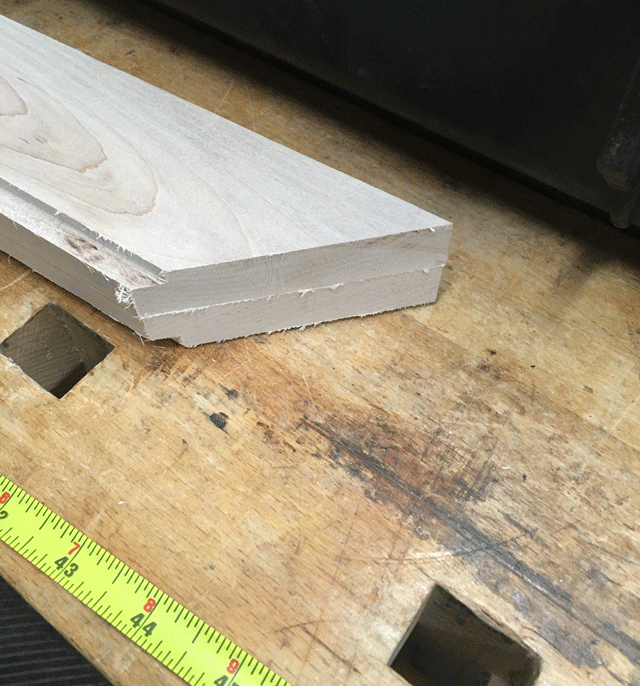
I set the table saw blade for a 1/4″-deep cut, and set the fence at 1/4″, too, to start the first cut. I put the face of the board against the fence, and ran the edge of the board over the saw. (Remember to always use the proper protective equipment when using the table saw.)
For the second cut to remove the waste, I left the saw blade set at 1/4″ in height, but moved the fence to 2-1/2″, then ran the board on its face.
45 Degrees & Other Various Math
My next step was to cut 45-degree angles on both the the stiles and rails. The quickest way that I have found to do this is on a miter saw (some prefer the table saw; still others prefer a miter box and handsaw). Before you cut angles on a miter saw (or any saw for that matter) be sure that you have it squared up. The slightest imperfection can lead to huge gaps, especially in a picture frame. When one corner is off, it throws the entire frame off.
First, I made a 45-degree cut on one end of all four boards. Here is where the math comes in. The frame was supposed to fit a poster that was 36″ x 40″. So when the frame is glued up, it should measure 36″ x 40″ inside the rabbets on the back of the frame. This provides a lip to keep the glass and poster from falling out.
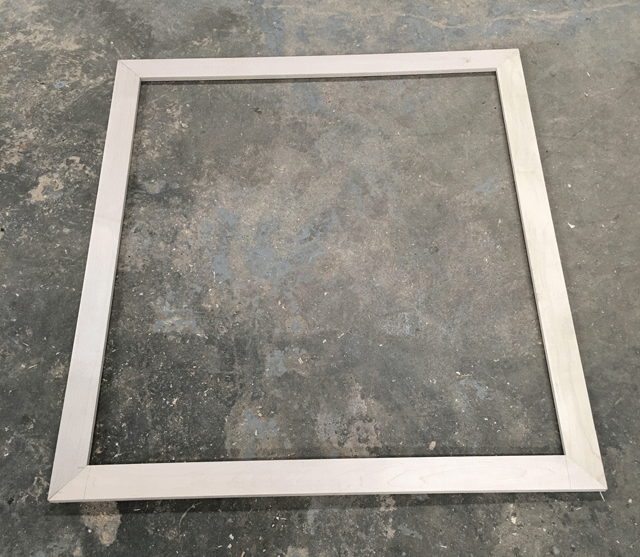
Because my rabbets were 1/4″ deep on the stiles and rails, I added the 1/4″ for two stiles together to get 1/2″ and repeated the process for the two rails. Then I subtracted that 1/2″ from the overall size of the poster. So the inside of the front my frame needed to be 35-1/2″ x 39-1/2″.
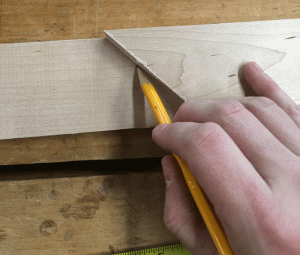
Mark your second style and rail to the exact length of your first.
I measured from the inside of my first 45-degree cut to 35-1/2″ on one rail and 39-1/2″ on one stile and made a mark on each. I then positioned my miter to cut at that line. Be sure to take your time on these cuts; they are easy to get wrong (or backward, which I did on a stile – thankfully I had enough lumber to repurpose it as a rail).
At this point, you should have one rail at 35-1/2″ inside to inside and one stile 39-1/2″ inside to inside. The next step is to line up your stile with both ends cut to length with the second stile, which should only have one end cut at 45 degrees (shown above). Transfer your final length to the second stile with a pencil mark.
Use the miter saw to make the 45-degree cut on the second stile. Repeat this process for the second rail. If you don’t trust yourself to get it right the first time, you can cut them a little heavy and shave the end of the second cut so that your two stiles and two rails match each other exactly.
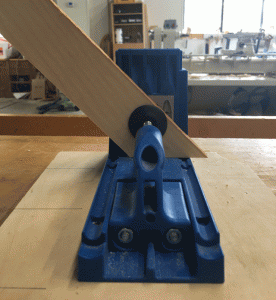
Make sure that your board is covering the holes of the jig. I would not be able to drill into the hole on the far right and keep it hidden.
Pocket Holes
Before using the pocket hole jig, it’s best to dry-fit the frame and make sure your stiles and rails are the correct length and that your angles are also correct. It’s better to find any screw-ups now, rather than when you have already glued the frame and are screwing it together!
Now it’s time to drill the pocket holes. I used a Kreg Jig K4 for this process. Place your freshly cut 45-degree ends on the jig and clamp it tight. Make sure the ends are flush (as pictured) or your pocket hole will be off-center.
Another thing to watch out for is that your board is fully covering the hole that the drill bit goes into. This keeps you from drilling out of the side of your frame, and keeps the pocket hole hidden in the back. For example, in the picture above, I would not have been able to drill a hole in the far right of the jig; it would have blown out of the side of the frame.
For this frame, I only had room to drill one hole on each rail and stile. If your board is thick enough for two pocket screws for each corner, alternate the board that you drill the pocket holes in. That way you can use the screws to exert clamping pressure from both the stile and rail.
Routing Options
For the next step, you have a few options. You can glue the frame together then rout the details on the face of the frame, or you can rout the details then glue the frame up. It’s usually faster to glue up the frame then rout the details, but for the sake of writing about the process, I chose to rout first, then glue up.
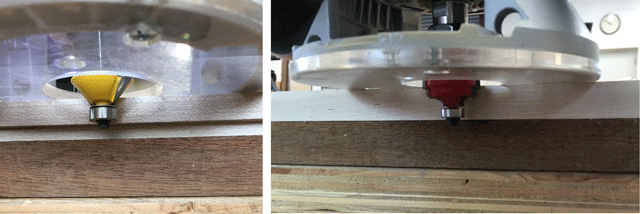
For the inside, I used a simple chamfer bit to give the inside of the frame a slight shadow line. You can adjust the depth of cut to whatever your personal preference is, but make sure you leave some room on the inside of your frame (so the lip that holds the glass is robust enough). For the outside, I used a more decorative bit that gave me a nice bead all the way around the frame.
Clamp your work down to the workbench and rout the edges.
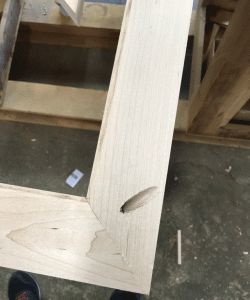
Cover both ends in glue and pocket screw them together. If you have room for a second pocket hole, alternate the board that you drill the hole into so there is pressure on both sides.
Glue-Up
The best part of using a pocket hole jig is that it eliminates the need to clamp the work together. (Christopher Schwarz wrote a great article on this use of pocket holes.) But you still need a clamp to hold the corners straight while screwing it together. Then you can release the clamp, and the pocket screw will hold it until the glue dries.
Cover both ends of the frame with glue and clamp the ends to the table to keep them from moving while you insert the screw. Drive it in slowly to keep it from moving the joint around and to be sure that it doesn’t blow out the side of the boards. (This is probably unnecessary, but after enough blow-outs in a cabinet shop, I tend to be overly cautious.)
Let the frame dry then sand the machine marks out of the wood. Keep a close eye on the corners, routers have a bad tendency to burn the wood in corners.
When you have the frame sanded to your liking, you can finish the frame with your favorite variety of finish. I used a simple wipe-on lacquer because we had it in the shop, and I didn’t want to make a trip to the hardware store.
Using pocket screws is not for every project – choose the joinery that will be the best fit. Perhaps on the next frame I will use splines, but it’s nice to be able to start and finish a project in only a few hours, and using a pocket hole jig can make that happen.
 p.s. If you’re looking for a collection of handsome, simple projects (many of which use pocket screws) that can be built in just a few hours of shop time, check out our “I Can Do That Book” and series of videos from ICDT host Chad Stanton.
Here are some supplies and tools we find essential in our everyday work around the shop. We may receive a commission from sales referred by our links; however, we have carefully selected these products for their usefulness and quality.




Biscuits work too if the frame is wide enough. And probable planing the mitre is the most accurate way to get there unless you own a guillotine.
Pocket hole joints certainly have a time and place. They do a nice job of making a simple, non-structural face frame, and when done correctly they are actually a better alternative than traditional glue blocks for attaching a table top to its base.
I’ve never considered using them to make a picture frame, but maybe it’s worth a try, if for nothing else than to experiment with the method.