We may receive a commission when you use our affiliate links. However, this does not impact our recommendations.
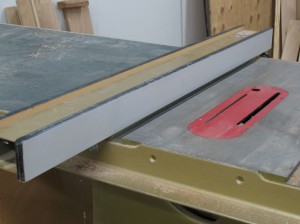
In the Popular Woodworking Magazine shop, we’ve been using a Powermatic 66 table saw equipped with a Biesemeyer table saw fence for going on 17 years. Do you think the fence face was finally due for some rehabilitation? You betcha. It had a couple minor encounters with a powered-up blade and a few screws had been driven into it damaging the laminate face and leaving behind small bumps where those screws were inserted, sans pilot hole.
The fence face is a piece of 1/2″ “Apple” ply, the U.S. answer to Baltic birch back in the day. The ply was faced with plastic laminate and edged with T-moulding on three sides. Problem is, the plywood is screwed to the fence’s steel tube and then the plastic laminate was applied. Removing the face, then, is somewhat problematic.
So here’s how I went about the less-than-two-hour project of renovating the old fence face. I found the T-moulding was easily removed and was not damaged, so it was fine to reuse. Just start at one end and gently pry out enough to get a grip then pull it straight out from it’s slot. Be careful at the corners as it gets thinner there.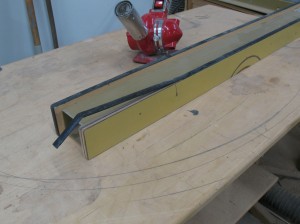
To remove the old laminate I used my heat gun although a regular clothes iron would likely also work well. I started heating one end then gently pried up a corner, then began lifting more with a plastic drywall knife. Once I got a few inches of laminate lifted I could slowly lift it off as the heat gun did its work. All in, it took perhaps 20 minutes to remove the old laminate.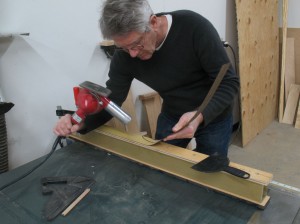
At the start of the project I thought I’d replace the plywood part of the fence face. But because the original plywood was not damaged and already had the slot milled for the T-moulding, I decided to reuse it. Those bumps from the screws were in the laminate, not in the plywood. The heavy-duty sheet metal screws that held the plywood were easy to back out.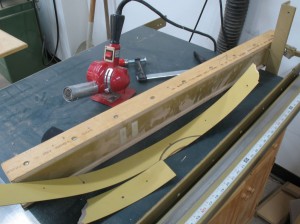
We had a small piece of plastic laminate in the shop (I think it’s been around for a dozen years, at least) so I cut a piece to just about 1/4″ wider than the plywood. Next I sprayed the back of the laminate and the plywood with 3M’s Super 77 adhesive. While I was waiting for the glue to tack up – I recommend 10 to 15 minutes – I reattached the plywood to the fence. Make sure your screws seat completely. Then I applied the laminate taking care the plastic laminate overhung the plywood along the edges. I also laid a thin stick on the plywood to prevent the pieces from accidentally sticking. I pulled it back as the laminate was stuck, moving from one end to the other. Because the adhesive is contact cement, you don’t want the glued faces to touch until you have them exactly where you want them. Press the laminate and plywood to make a good bond between the two.
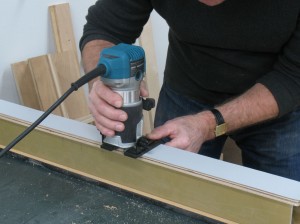 I used a laminate trimmer to remove the bit of overhang. You can use any router set up with a flush-cutting bit with a bearing on the bottom. You can also use the edge of a file if you don’t have a router. Use a sawing motion following the plywood edge. You’ll have to do some filing regardless because the “T” part of Biesemeyer T-Square fence prevents the router passing by it. After all the trimming, give a quick sanding to the laminate edges because they can be sharp. Finally, I reinstalled the T-moulding. Start at on
 e end, push it straight into the slot until you get to the other end. To make sure it’s seated all the way, tap it with a hammer with a block of wood between.
Your fence refacing is complete. Lastly, though, check your fence alignment and reset your hairline measurement gauge as needed.
Here are some supplies and tools we find essential in our everyday work around the shop. We may receive a commission from sales referred by our links; however, we have carefully selected these products for their usefulness and quality.




Steve, I’m in the process of doing this, although not on my old fence ,but on my brand new Biesemeyer fence. I’m upgrading to a 3/4 inch thick piece of Baltic Birch with an aluminum t- track mounted in it so I can use my feather boards as a hold down. Next time you go tearing into something think up-grade ! I got the 48 ” t-track on sale and I had some plastic edge banding left over from a previous job. I won a brand new Delta Unisaw, so I sold my old Powermatic 66 for almost what I paid for it 17 years ago. Hated to see her go, but the new Unisaw had just enough new upgrades on it to persuade me to keep it.
Nice work Steve! A good how to, now if we could only do that with aluminum fences so easily LOL… ahh, live and learn, eh?
Great info Steve.Thanks for showing us how.
Nice job Steve! Thanks for the “how to”.
That fence looks ready for a hundred more projects !