


We may receive a commission when you use our affiliate links. However, this does not impact our recommendations.
 Perhaps the most important instrument for the hand-tool oriented woodworker is a sturdy workbench. A reliable bench is fundamental for the success of sawing, chiseling, planing, grooving, drilling and more. The heavier the bench the better, and a bench with plenty of holdfast holes is the best. But there are many situations where you will benefit from a small elevated clamping platform installed over your workbench – mainly when you need to have a workpiece closer to your shoulders and eyes. It’s also useful to have a “bench on bench” for clamping small workpieces that are too cumbersome to clamp on the main bench using a stationary vise or holdfasts.
The Moxon Vise (Benchcrafted, Lie Nielsen, Texas Heritage, Tools for Working Wood, Lake Erie Toolworks…or make your own) is a good examples of an auxiliary clamping platform. So is the “Portable Workbench” that I built and wrote about for American Woodworker in 2014.
This is the “Portable Workbench” that I built a few years ago; it is feature in American Woodworker #171, April/May 2014.
Last year I built yet another “Bench on Bench” contraption that helped us tremendously with our 9th-grade box-making project. But I think it’s more than for just boxes – it can become your bench to take on a journey, a bench for the space-deprived woodworker (such as in a one-bedroom apartment or a college dorm), and is an inexpensive gateway bench to be gifted to friends and the children in your life.
The advantages of this jig are:
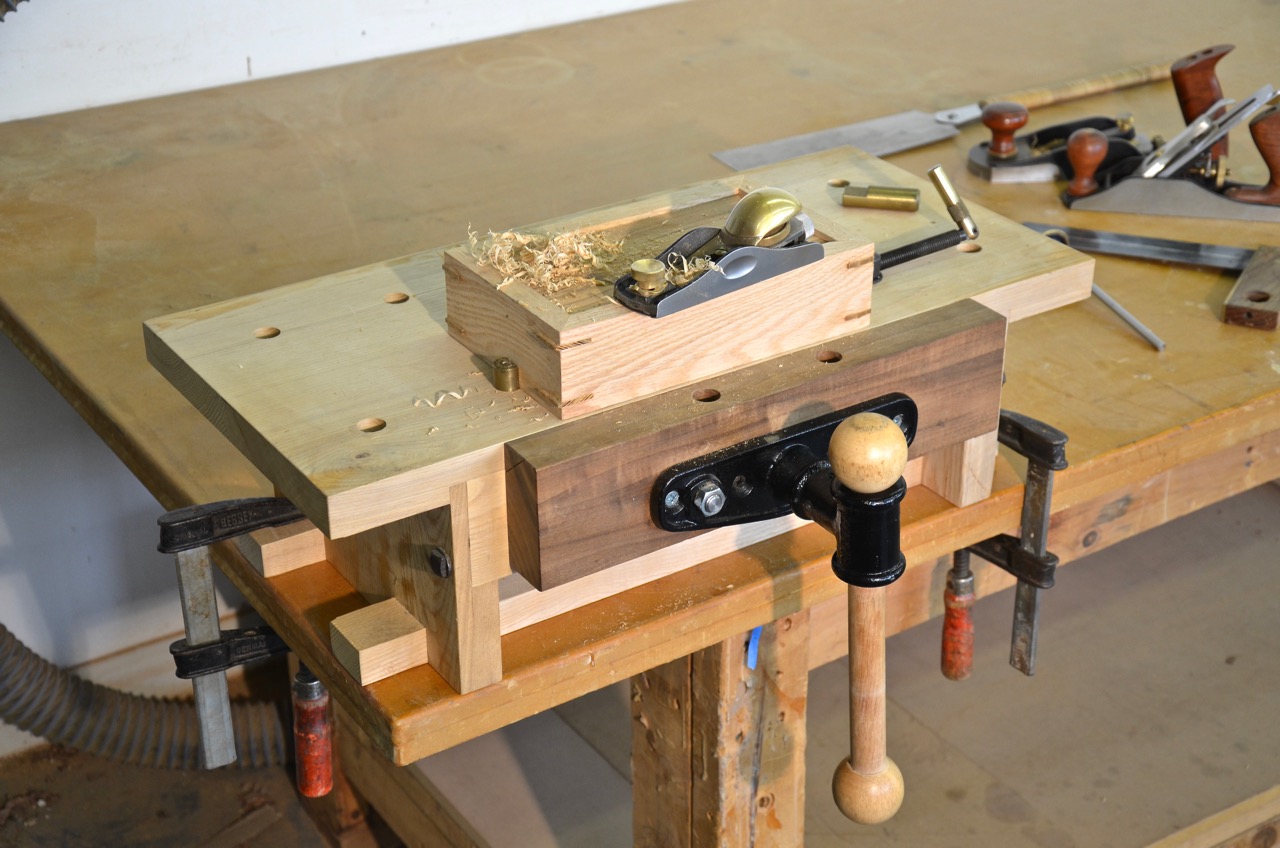
1. It can be clamped onto any flat surface such as a tabletop or a countertop, or you can put it in a bench vise to serve as a platform to work on other objects.
2. It allows you to comfortably clamp small workpieces for planing, ripping and crosscutting in a vertical or horizontal configuration.
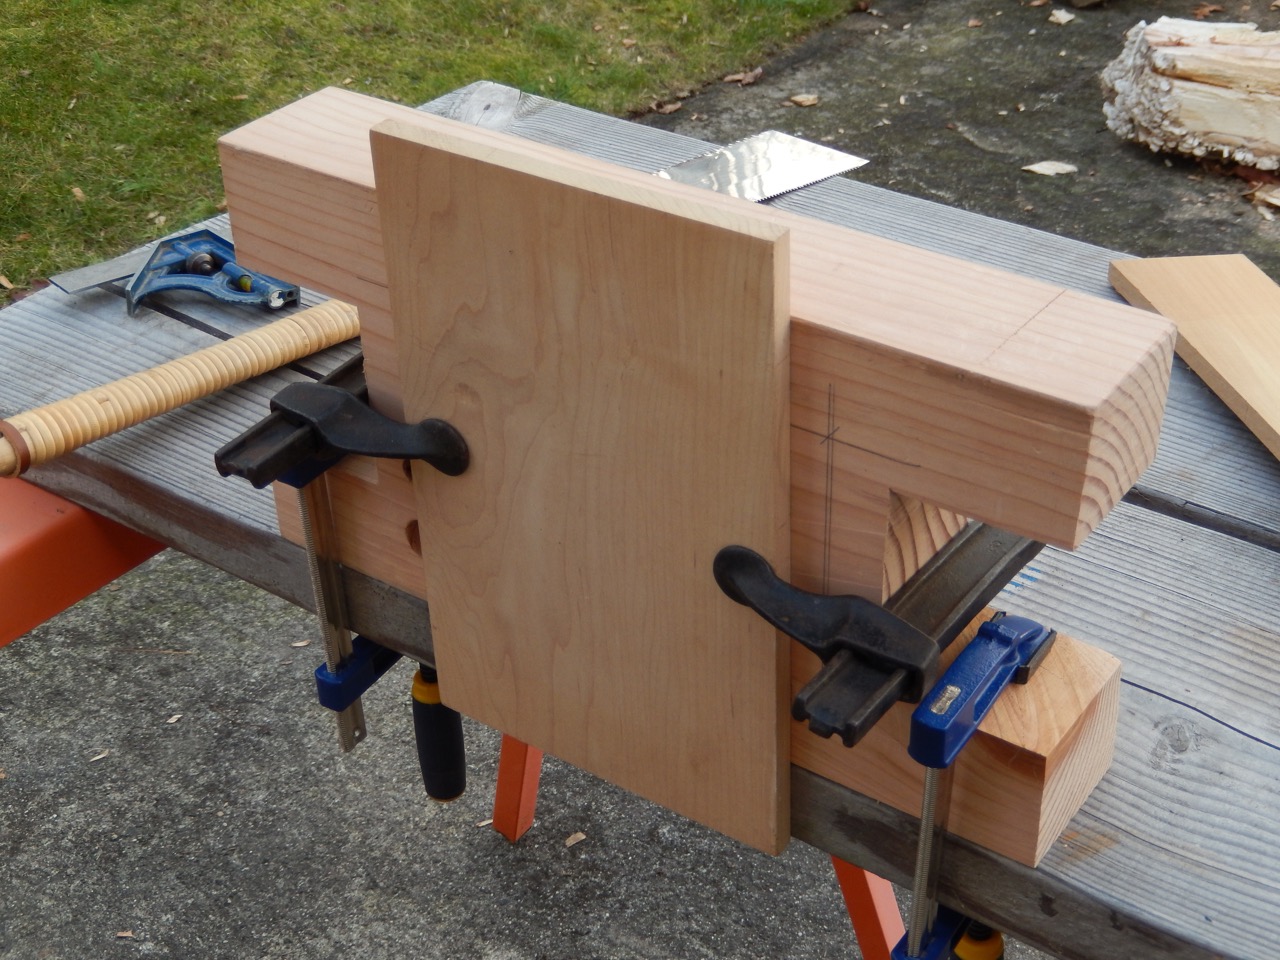
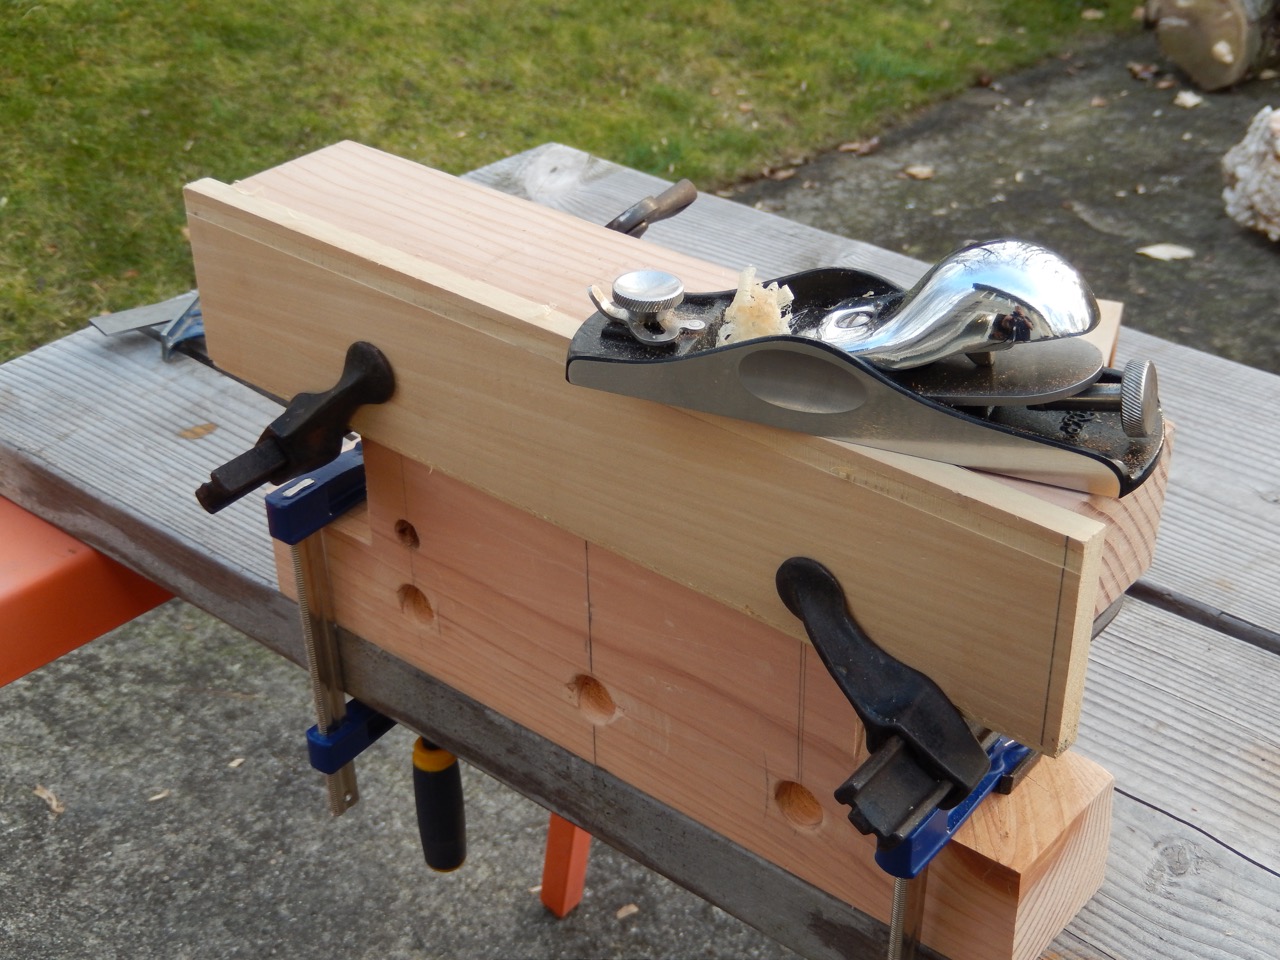
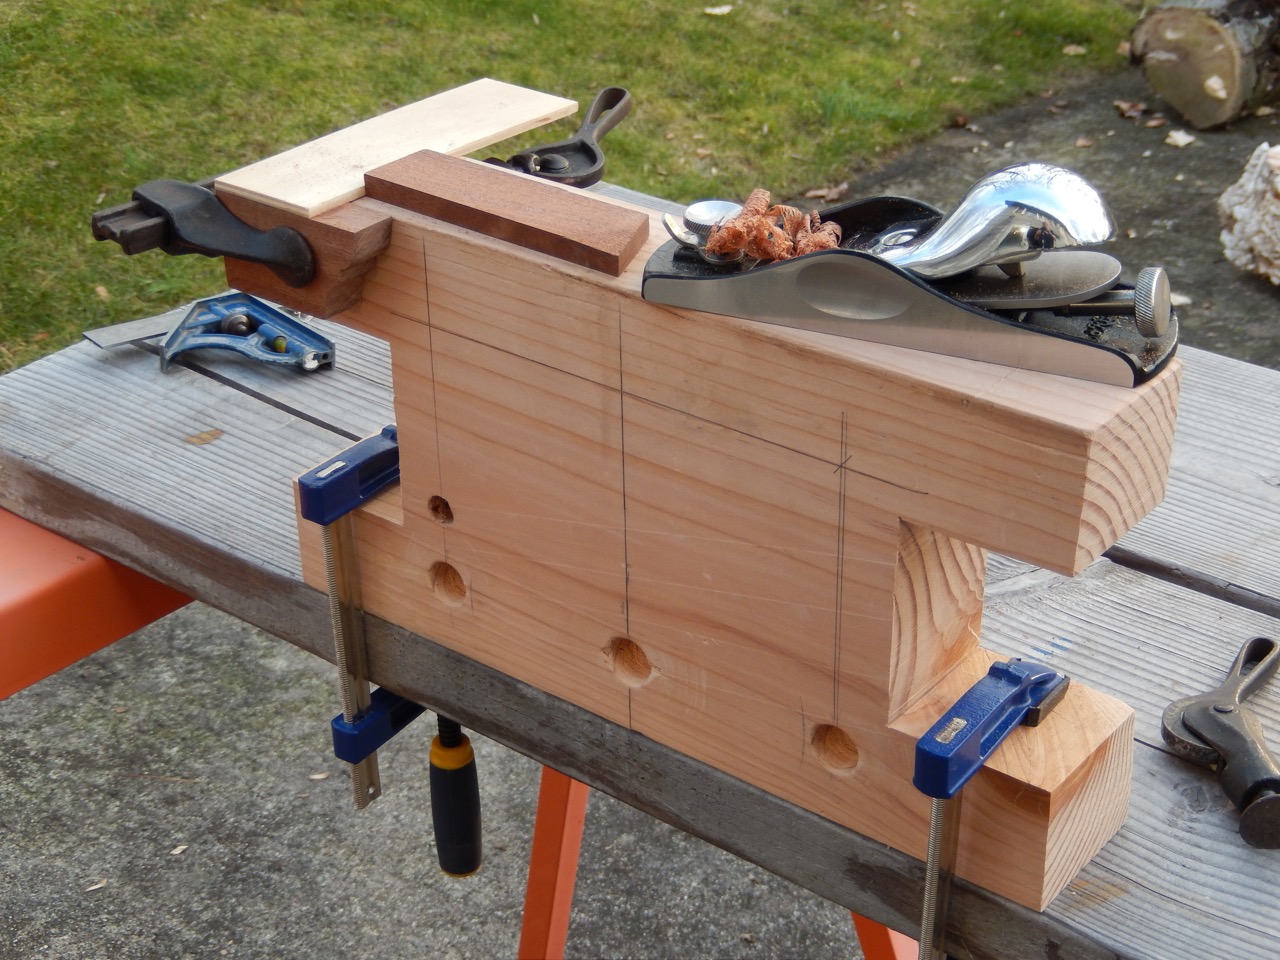
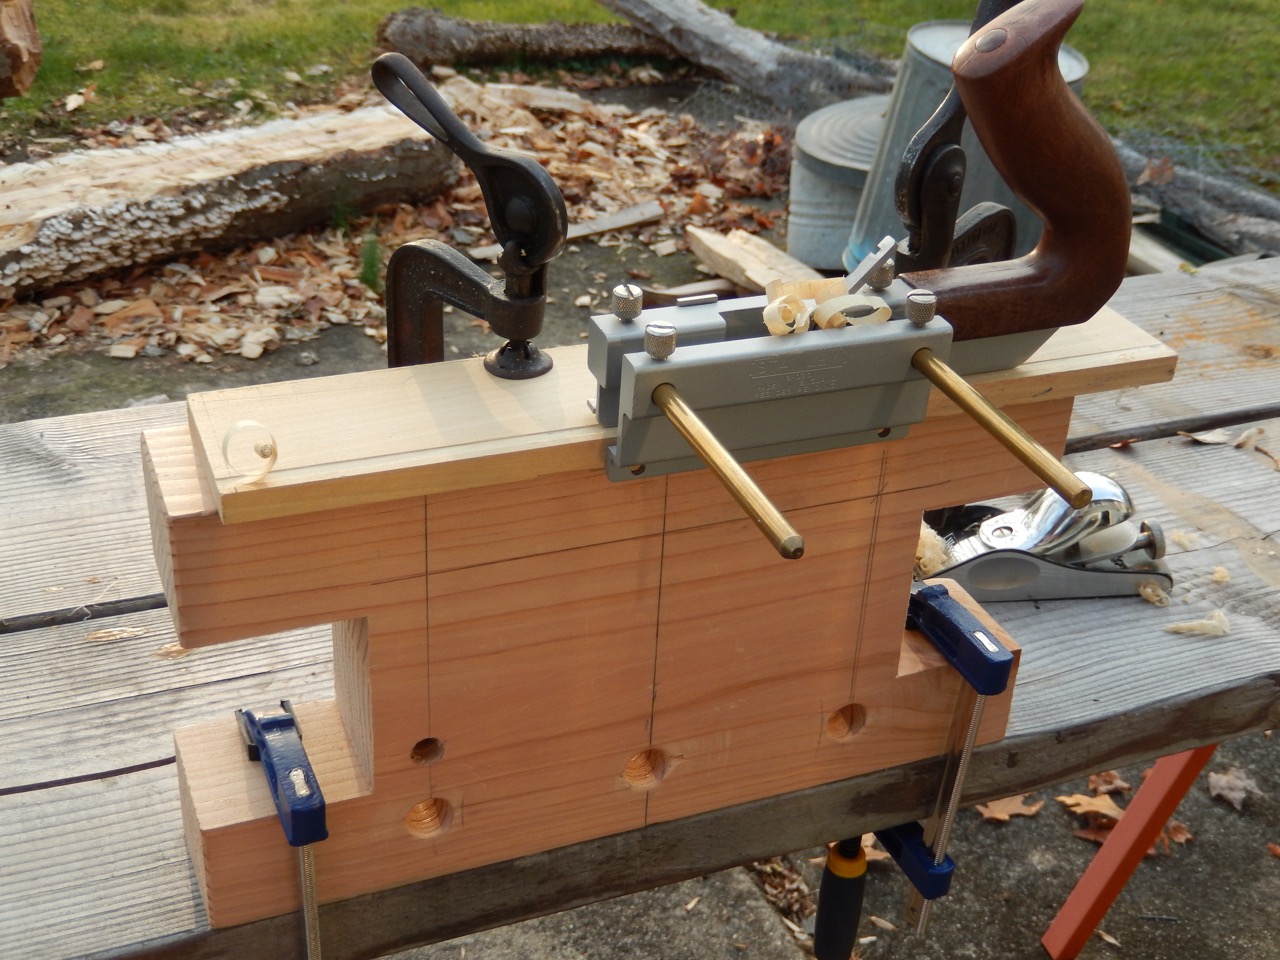
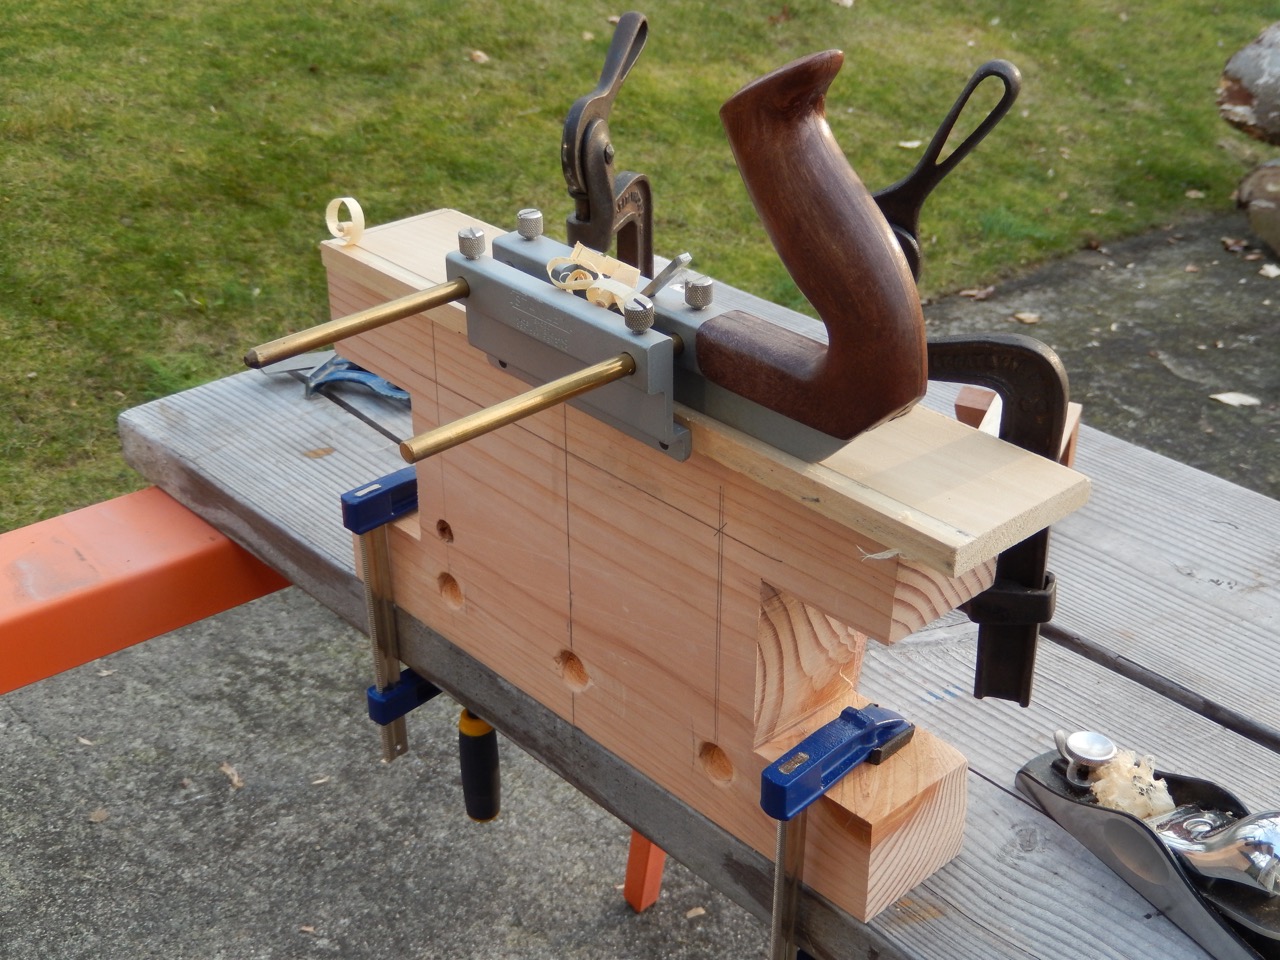
3. It allows you to clamp narrow pieces by positioning two clamps from the jig’s inner face to facilitate grooving, dadoing and rabbeting. This is particularly important in cases where your bench does not have holdfast holes drilled into it. (See pictures)

Without holdfast capabilities, it is difficult to clamp a thin and narrow workpiece from the edge of a bench for wide chamfering, grooving and rabbeting. The clamps that hold the piece down will be in your way and the workpiece will hang too far out in space and might break or flex. To overcome these situations, we use our “Bench Bulls.”
But, before I start let’s name the jig. I thought a good name would be “Bench Bull” because of its “horns” and its steadfast functions, but another great name is: “Bench Mule.” As you can see, the jury is still out, but for now lets call it The Bench Bull.
A Bench Bull is inexpensive to build and requires as few as four F-style clamps to allow it to fully function.
In this entry I will show how to make use of a simple Bench Bull, and in following entries, I will show how to build a deluxe version that incorporates two pipe clamps or holdfasts.
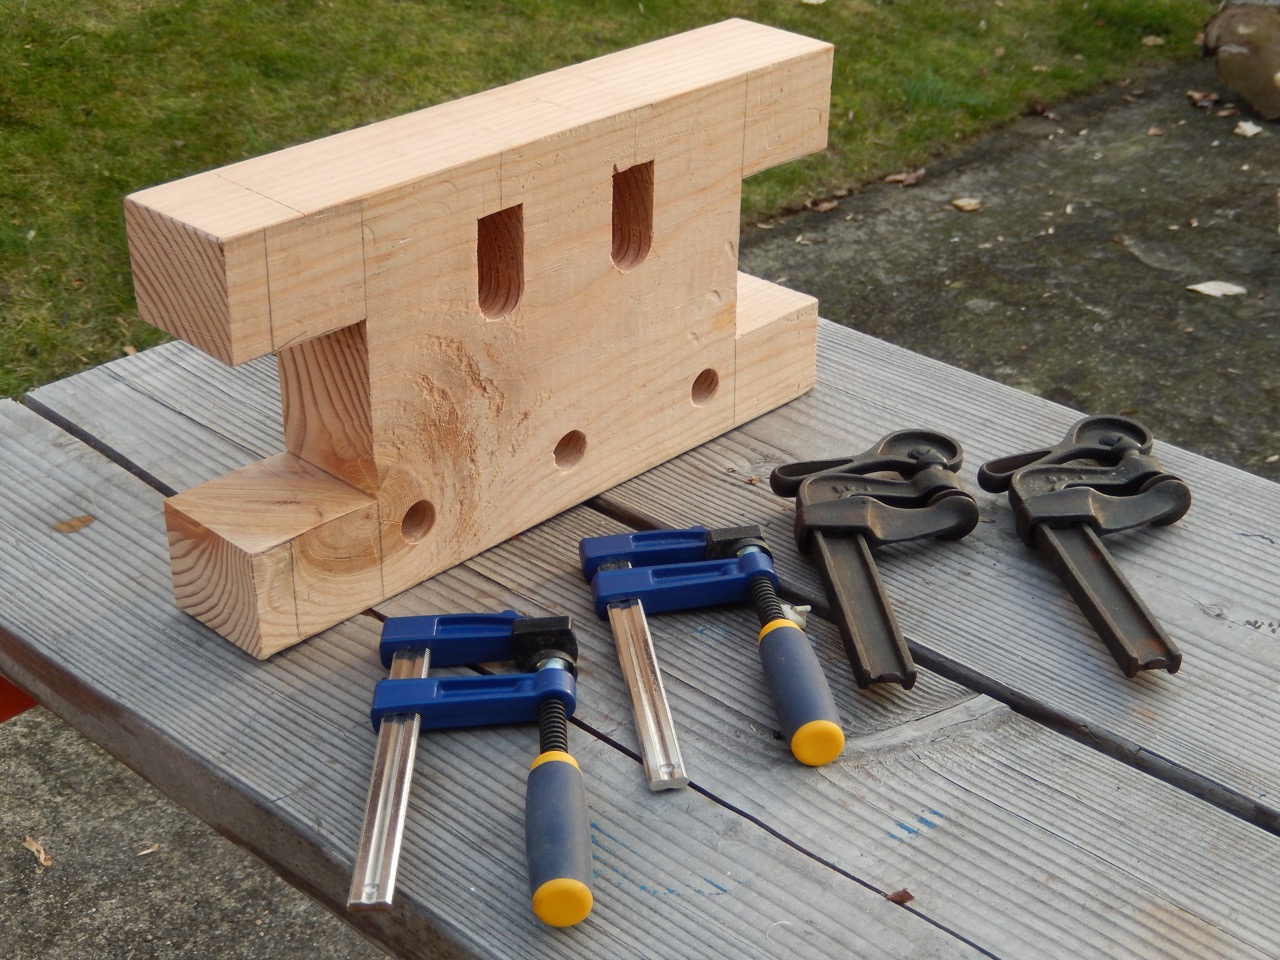
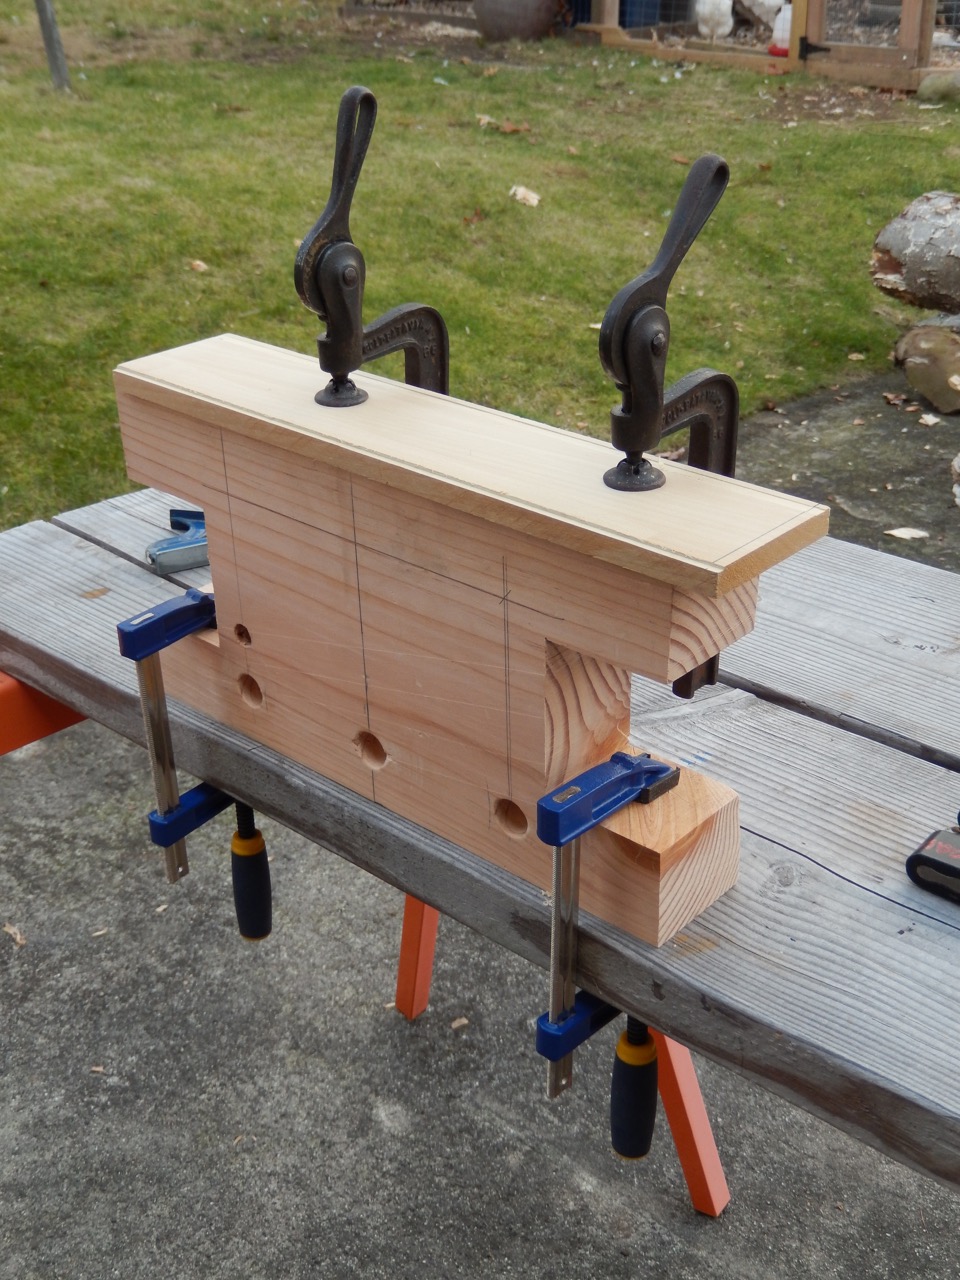
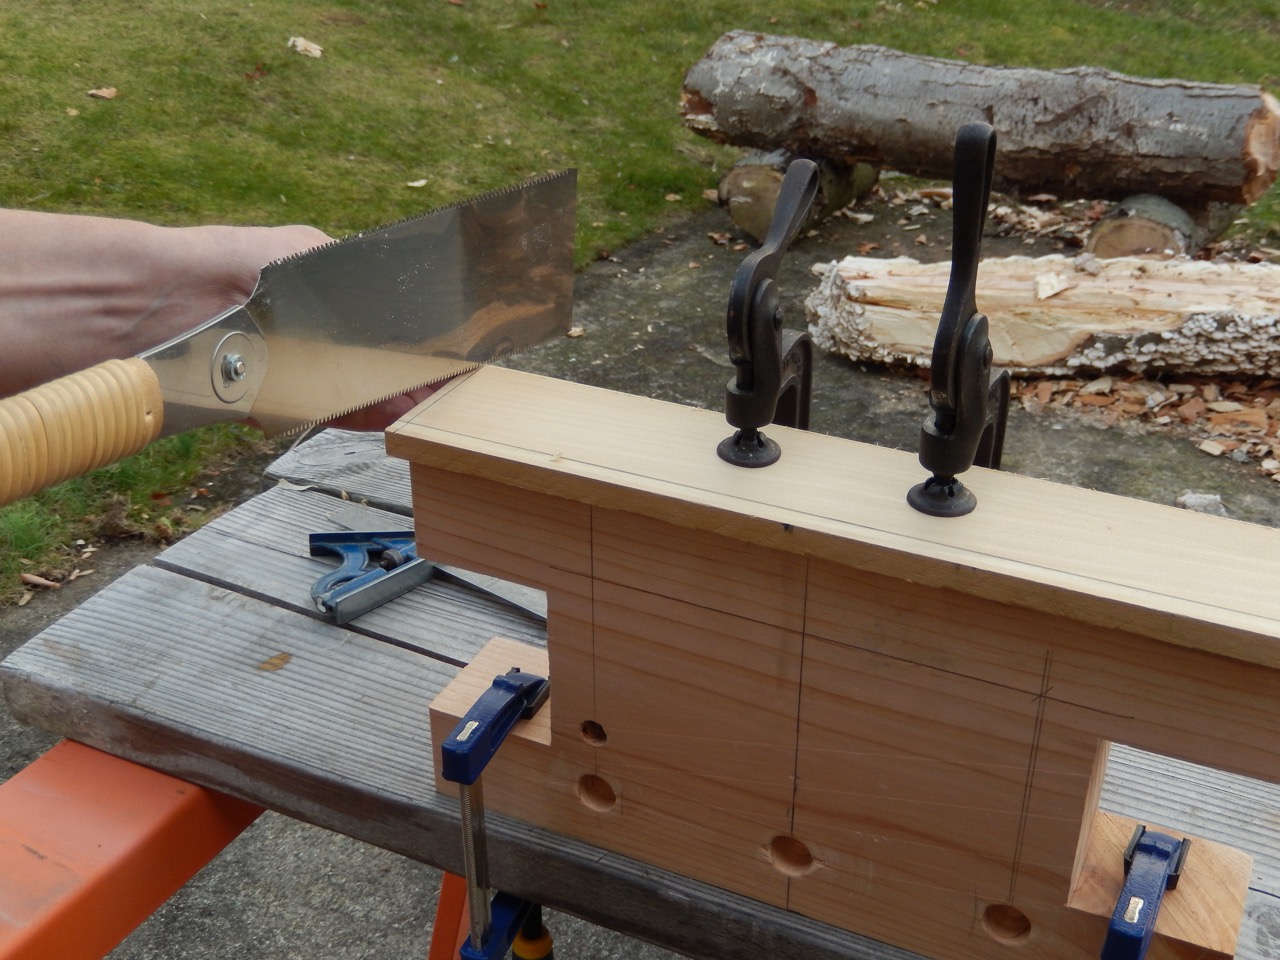
The simplest way to build one is to cut a 2×4 board into a few segments and sandwich them together (see the drawings below). This can be done with a handsaw – and it’s a good activity to teach kids so that each of them will end up with a jig. If you have more time and lumber, and access to heavier tools, you can build the Bench Bull from hardwood, or cut it out from a massive beam.
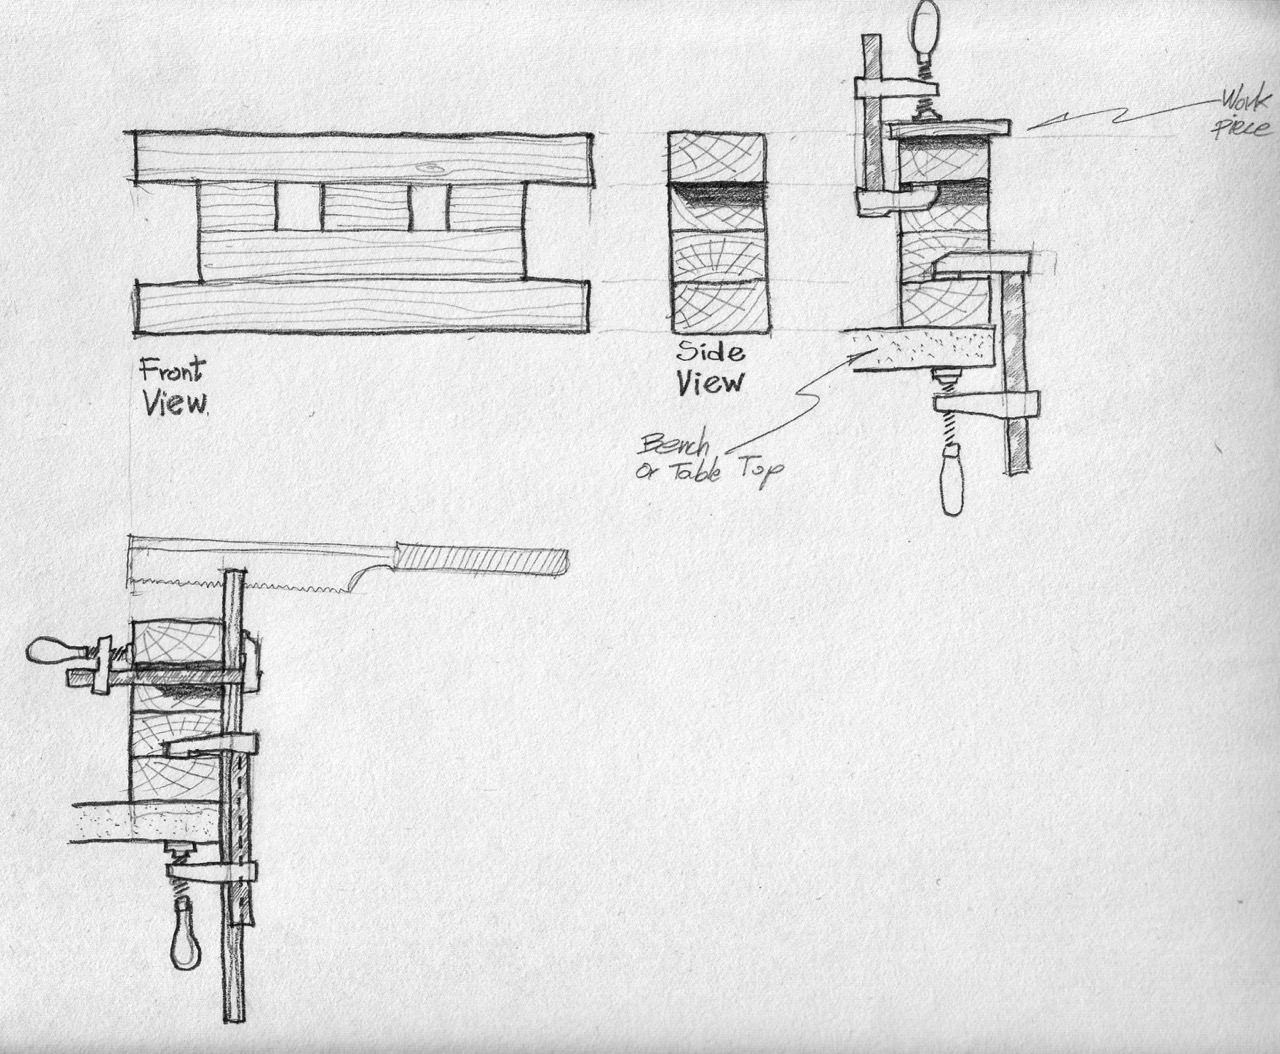
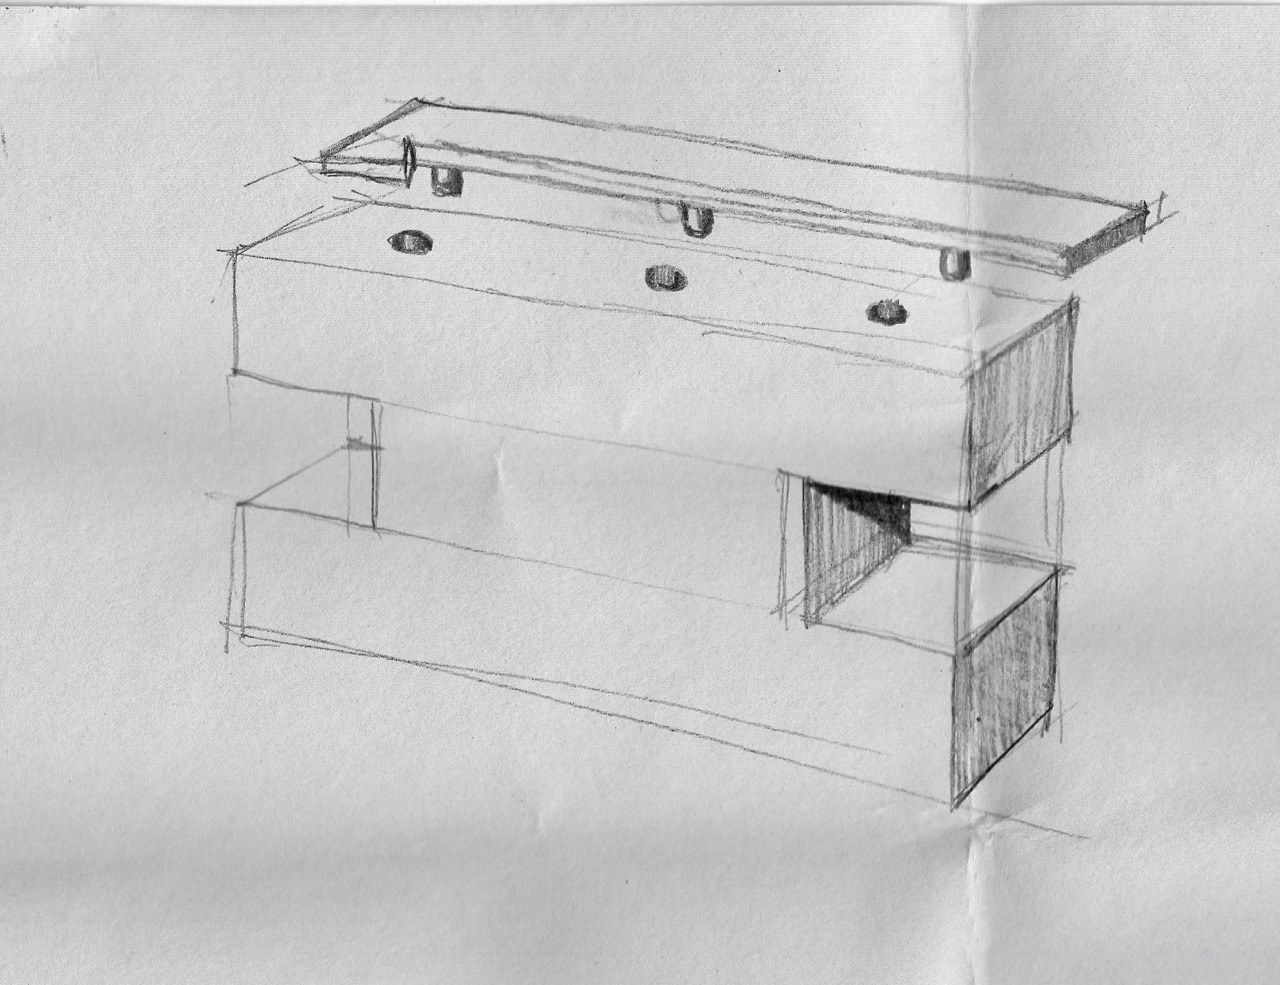
The Bench Bull shape resembles an “H.” It should include a few holes (or gaps if you build it from 2×4 segments) in between the horns of the “H” to allow for convenient clamping along the back of the jig – in addition to the use of the horns.
See the pictures below to understand the Bench Bull’s full scope of advantages – and stay tuned. In my next entry, I’ll show additional Bench Bull designs.

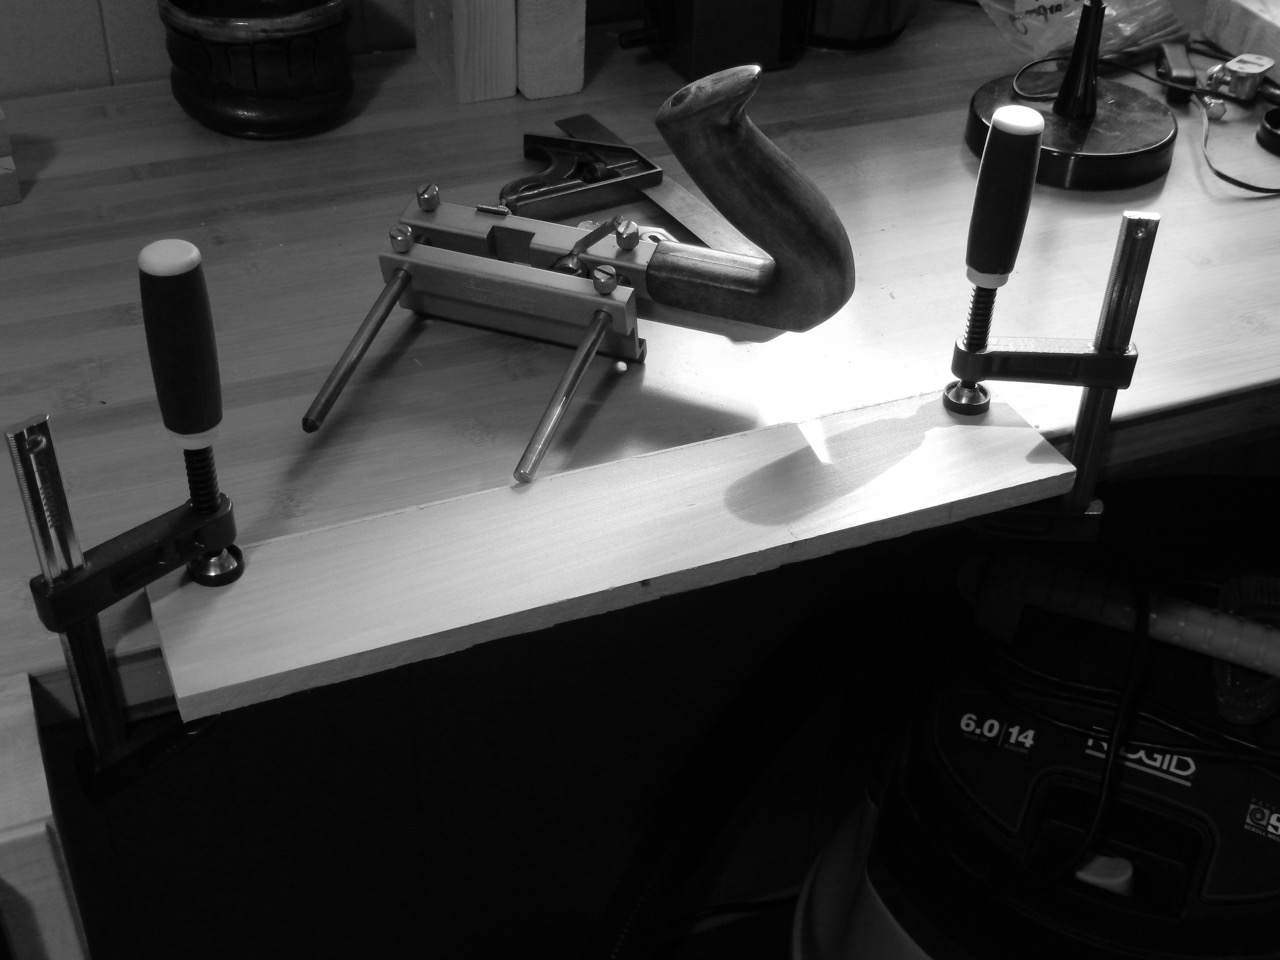
A simple shop-made T- square is all you need to keep a workpiece put for planing.
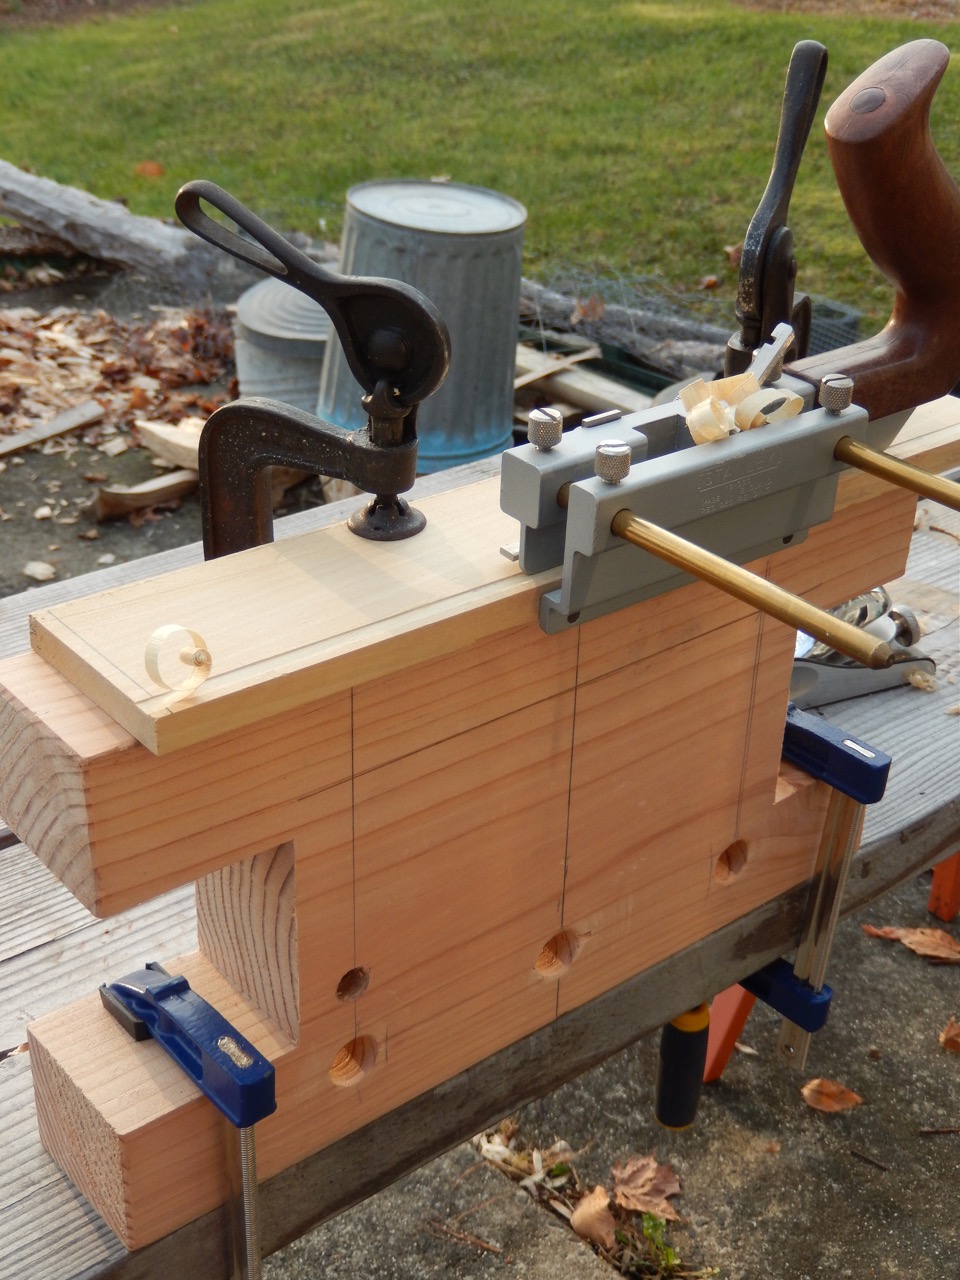
The Bench Bull allows you to clamp narrow pieces by positioning two clamps from the jig’s inner face to facilitate effectively grooving, dadoing and rabbeting. This is particularly important in cases where your bench does not have holdfast holes drilled into it.
Here are some supplies and tools we find essential in our everyday work around the shop. We may receive a commission from sales referred by our links; however, we have carefully selected these products for their usefulness and quality.


Bench Bully Beast
This is my version of the Bench Bully that I just finished today. Made from laminated white oak stair newel post blanks, it’s 34 inches long x 3 ½ inches wide by 12 inches high with 1 ½ x 2 ½ inch mortise and tenon joints and it weighs a ton. All holes are ¾ inch diameter thru holes. I added the t-track today which were the only things I bought besides the two 44 inch long newel posts and I got them almost next to nothing from my local millwright.
Plan on getting a lot of use out of it once the weather warms up. Photos available.
Mac McConnell
Great jig, I made one yesterday and love the versatility of it. Made a number of dog holes for Veritas surface clamps, also added two anchors for Leigh cam-action clamps. Will probably add the planing stop also. It is so simple, but works so well. I am amazed I have not seen this before. Great article, thank you.
What are the dimensions of the bull in the pictures?
Where did you find that Stanley plow plane? I googled around and could not find anything like it.
nice idea but I am more impressed with the fact that your school if placing emphasis on woodworking. In 1960 when I was looking at high end boarding schools to attend one of them had a significant emphasis on woodworking and all students (juniors) built a desk for there dorm room to use their senior year. I liked the concept but did not get in.
I am curious about the lever/toggle bar clamps you use to secure stock to your bench bull. I’ve not seen these before. Would you please tell us something about them? Thanks.
What size is the bull shown in the pictures?
I am confused. Sketch 2 showes a 1 by(?) with pegs and mating holes. What is that for? Thanks.
I would like to know where you purchased the steel clamps that have a cam on the top? I have looked at the normal stores and can’t find anything like your clamps. They seem like you can put a lot of pressure by just engaging the cam. Also, when is part 2 going to be out? Your jig is great and I am looking forward to the second series. Thanks for the information.
Larry
Great item! I just might whip one of those out this weekend. However, for planing the small stuff I flip my #8 upside down on a jig/holder I built years ago that jacks everything up and allows me to adjust the blade too. I move the work-piece instead of the plane. You can check it out here…
lumberjocks.com/jcees/blog/4145
Yoav,
Thank you for this article. As a fledgling woodworker I have been struggling with the whole Moxon vise dilemma but the Bench Bull has given me an excellent low cost “first step” until I figure out what I truly need/want.
BTW the name Bench Bull is a keeper 🙂
But why is it a “goof” activity to teach kids? I think it’s a good activity…
Sorry, couldn’t resist.
In all seriousness, I really like this project. With a nephew heading to college soon this might be a good thing to outfit him with.
Thanks Yoav.
Thanks Yoav. This is such a simple alternative to a full-on bench-on-bench. I plan to build one.
It is a nice idea that opens the door to even more expansive thought when it comes to making bench jigs! I will be making one in the near future.
Interesting idea. I may build one of these, but perhaps using 2 x 6’s rather than 2 x 4’s. A wider surface would seem handier.
My big question is – What or whose is the rabbet or plow plane your using. I’ve never seen one like it, even a google search failed to show it.