


We may receive a commission when you use our affiliate links. However, this does not impact our recommendations.
 I’ve been trying to find time to make a narrow (very narrow) table to go alongside my couch and this weekend, I had the choice of time in the shop, or thoroughly cleaning my house. No contest.
This little table, inspired by a classic Shaker side table, will go alongside my couch next to the window. I’d like to claim it’s for a reading lamp; really, it’s so the cats can sit on it to look out the window (the arm of my new couch is too thin for cat comfort).
The finished table is 32″ long, 8″ wide and 24-1/2″ tall. Why the odd, skinny size? That’s all that will fit in the intended space (I do worry that for JJ – my fat cat – it will be a tight squeeze).
I foraged through the scrap bin for anything that would do, and found cherry thick enough for four 1-1/2″ thick legs. I also had a 9″-wide piece of cherry left over from another build, so I cut that to size for the top. And it was a simple matter to find enough 3″-wide scraps for the aprons. None of it is particularly striking wood, but as only one end of the table will show, and the top will quickly be covered in cat hair if not cats, I’m OK with that.
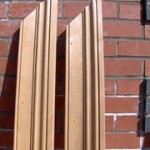
I fully intended to use square legs, and just pocket-screw the table together. I expected to be done in a couple hours. But, Glen was in the shop yesterday working on the November cover project, and he kindly gave me a few minutes’ instruction on tapering legs on the jointer (you can see a video of this technique, which Glen picked up from Troy Sexton, here). Very slick; very quick.
But with unexpectedly fancy legs, I decided I couldn’t in good conscience use pocket screws to join the aprons to them. So I set up the mortiser with a 1/4″ hollow-chisel bit, cut mortises, then cut the matching tenons on the table saw with a two-step cut…which ended up as a four-step cut, because my aprons weren’t quite 3/4″ thick, and I wanted a little extra meat at the front shoulder of the tenon (I had to reset the fence for cheek cuts on the other side of each tenon). You can read about how to make a jig for this technique here.
 After I got the base glued together, I realized I didn’t have any way to get inside (with the tools I had available) to cut slots or mortises for buttons to hold the top in place. So much for avoiding pocket screws! And, the Kreg jig couldn’t clamp in the 5″ inside the table, so I had to bug Glen again to act as a human clamp while I drilled the holes for the screws in the two sides. Thank you Glen!
I ragged on a coat of Watco Danish oil, let it sit for a half-hour while I caught up on celebrity gossip (I want the former Catherine Middleton’s wardrobe) then ragged on another coat and answered a few e-mails while the table sat for 15 more minutes. After wiping off the excess, I sat the table in the back seat of my car and took it home.
I’ll let it sit in my dining room to dry overnight (and leave the windows down in my car for a while – Watco is some redolent stuff in a small space). Tomorrow, I’ll find out what the cats think of their perch. But I am going to buy a small table lamp to put at one end – that way I can call it a sofa table instead of a cat perch…that sounds a bit less crazed cat lady-ish.
But unfortunately, there’s still plenty of time left over this long weekend to clean the house. Hmmm…now what else do I need to make….
• If you like the Shaker style as much as I do, you’ve got to get the book “Pleasant Hill Shaker Furniture” by Kerry Pierce, with measured drawings by Kerry and spectacular photography by Al Parrish (the same guy who shoots most of our covers and opening photos) as well as a look at the history of the Kentucky community.
Here are some supplies and tools we find essential in our everyday work around the shop. We may receive a commission from sales referred by our links; however, we have carefully selected these products for their usefulness and quality.


Been there done that….mine has a top of 3/4″ ply, banded with….somethingus woodicus….legs from leftover ash from another project, and aprons of old barn siding.
It`s amazing how a good design comes out of neccessity. I`ve built the exact same table, only one third of the size. It was meant to be a spot for the remotes, destined to sit in between our recliners….
Now it holds the DVD player.
Megan,
Find a way for that lamp to remain on the table and not the floor. I’ve seen tabbys lay claim to a lamps property and slowly ease it over the edge.
Neat table. I’m thinking about building one a tad wider.
Megan, that is a great idea. Maybe I should make one for my Rottie. I think its dimensions would have to be 48″ long x 36″ wide x 18″ high. The legs could be tapered but they would have to start out as a true 4″ x 4″ and the table top would be 5″ thick. I believe that I will skip the skirt or the piece might look chunky. 😮 Fred
Great Blog!
Thanks,
Mike D
I had a similar decision this weekend: Let’s see, shall I go outside and mow the lawn, pull weeds, and lay down some mulch, all in 90-degree heat, or design and build a new clamp rack for the shop? Hmmm…okay, clamp rack it is!
That’s a nice-looking table? Are the legs tapered on the inside, outside or both? (There’s a bit of barrel distortion in the photo, so it’s hard to say for sure.)
-Steve
Excellent! I’ve been wondering what to do about the cat beds, currently sitting on a hunk of furniture next to our chairs. The hunk will be moving soon and I really can’t displace their beds. This table looks to be the perfect solution. This way the cats can sleep and I can bother them.
Gary