


We may receive a commission when you use our affiliate links. However, this does not impact our recommendations.
So much better
My most recent kitchen cabinet job involved fabricating new door jambs, casings, and backband to match the original trim in the customers’ house.
Although the general contractor and I generally prefer to restore and reuse original trim (whether out of respect for its historic value, concern to avoid waste, or in an effort to keep job costs down), the job entailed widening the cased opening between the kitchen and dining room significantly, and none of the original pieces was* long enough for the head trim. Moreover, two of the original pieces of vertical casing had been mutilated in previous remodels, so they, too, were out.
Finally, the kitchen’s original trim was plainsawn fir, whereas the trim in the dining room was hardwood–nothing out of the ordinary in a house nearly a century old; it was typical for houses built in the early 20th century to have “better” flooring and trim in public rooms (the front entry, dining room, and parlor) and plainer stuff in the work rooms (kitchen and baths).** The different species were not a problem when there were doors in those doorways, which kept the kitchen out of view, but with the doors removed, it would have been jarring to see different species trimming out an opening.
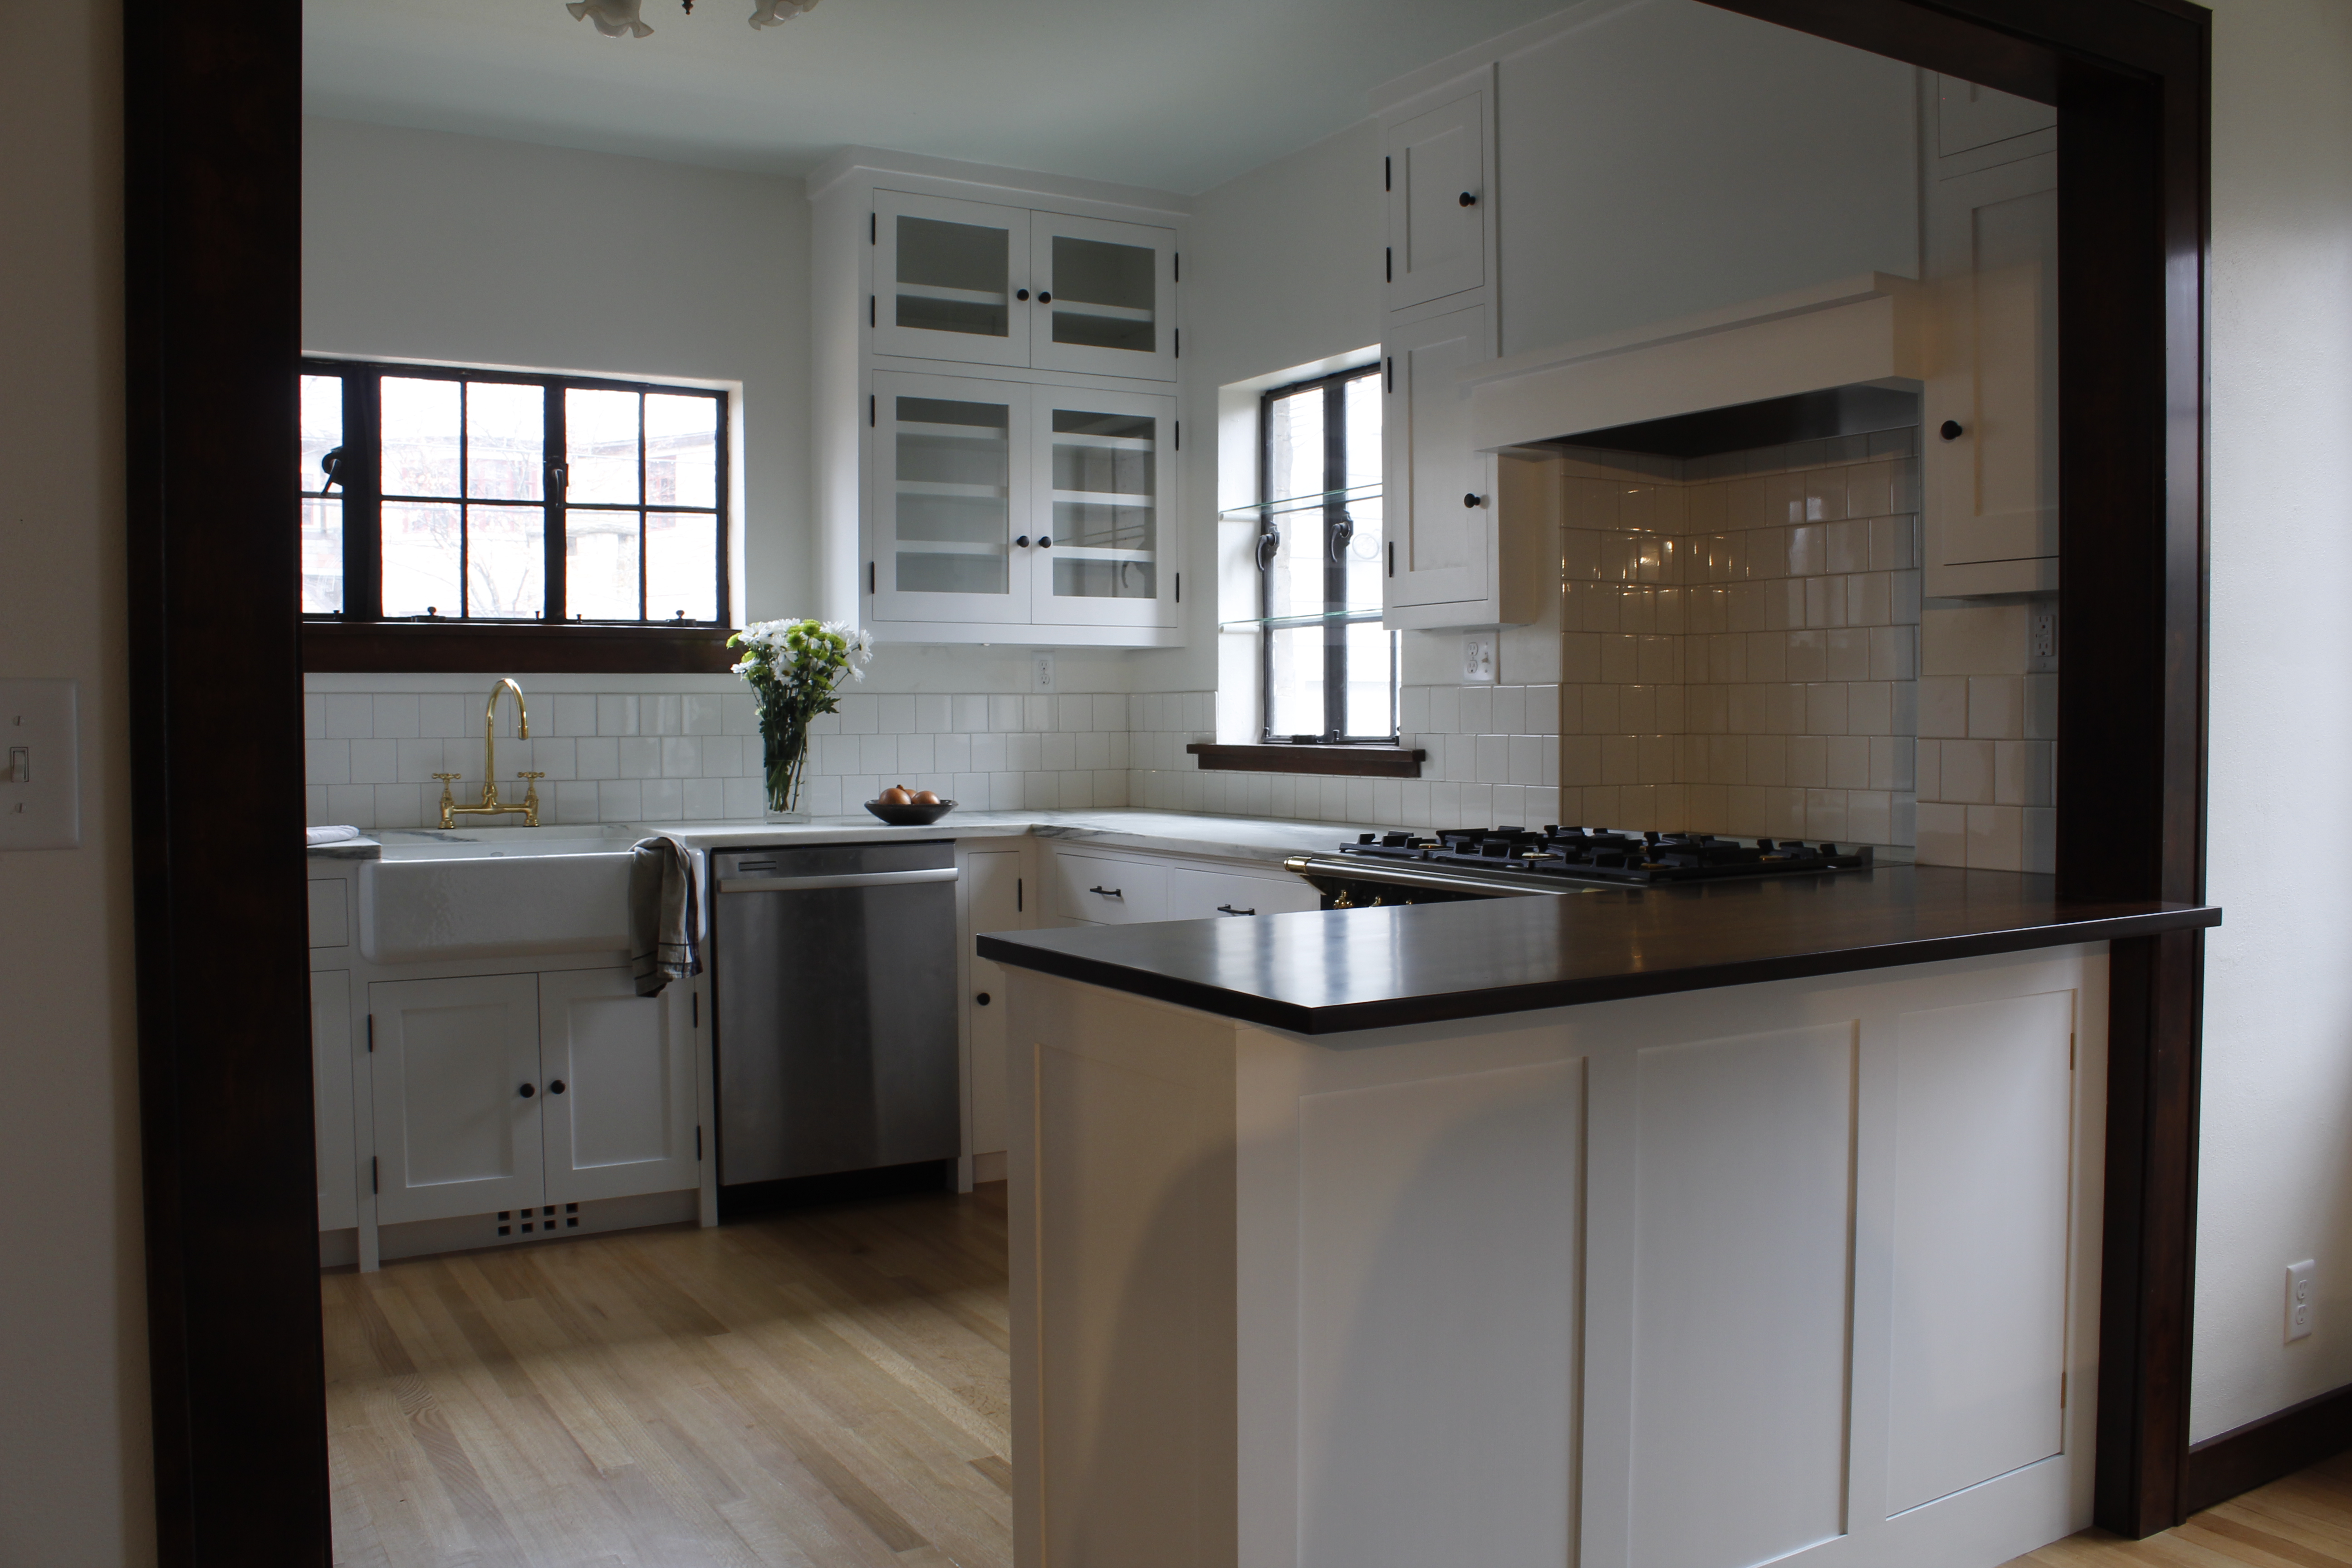
The finished kitchen
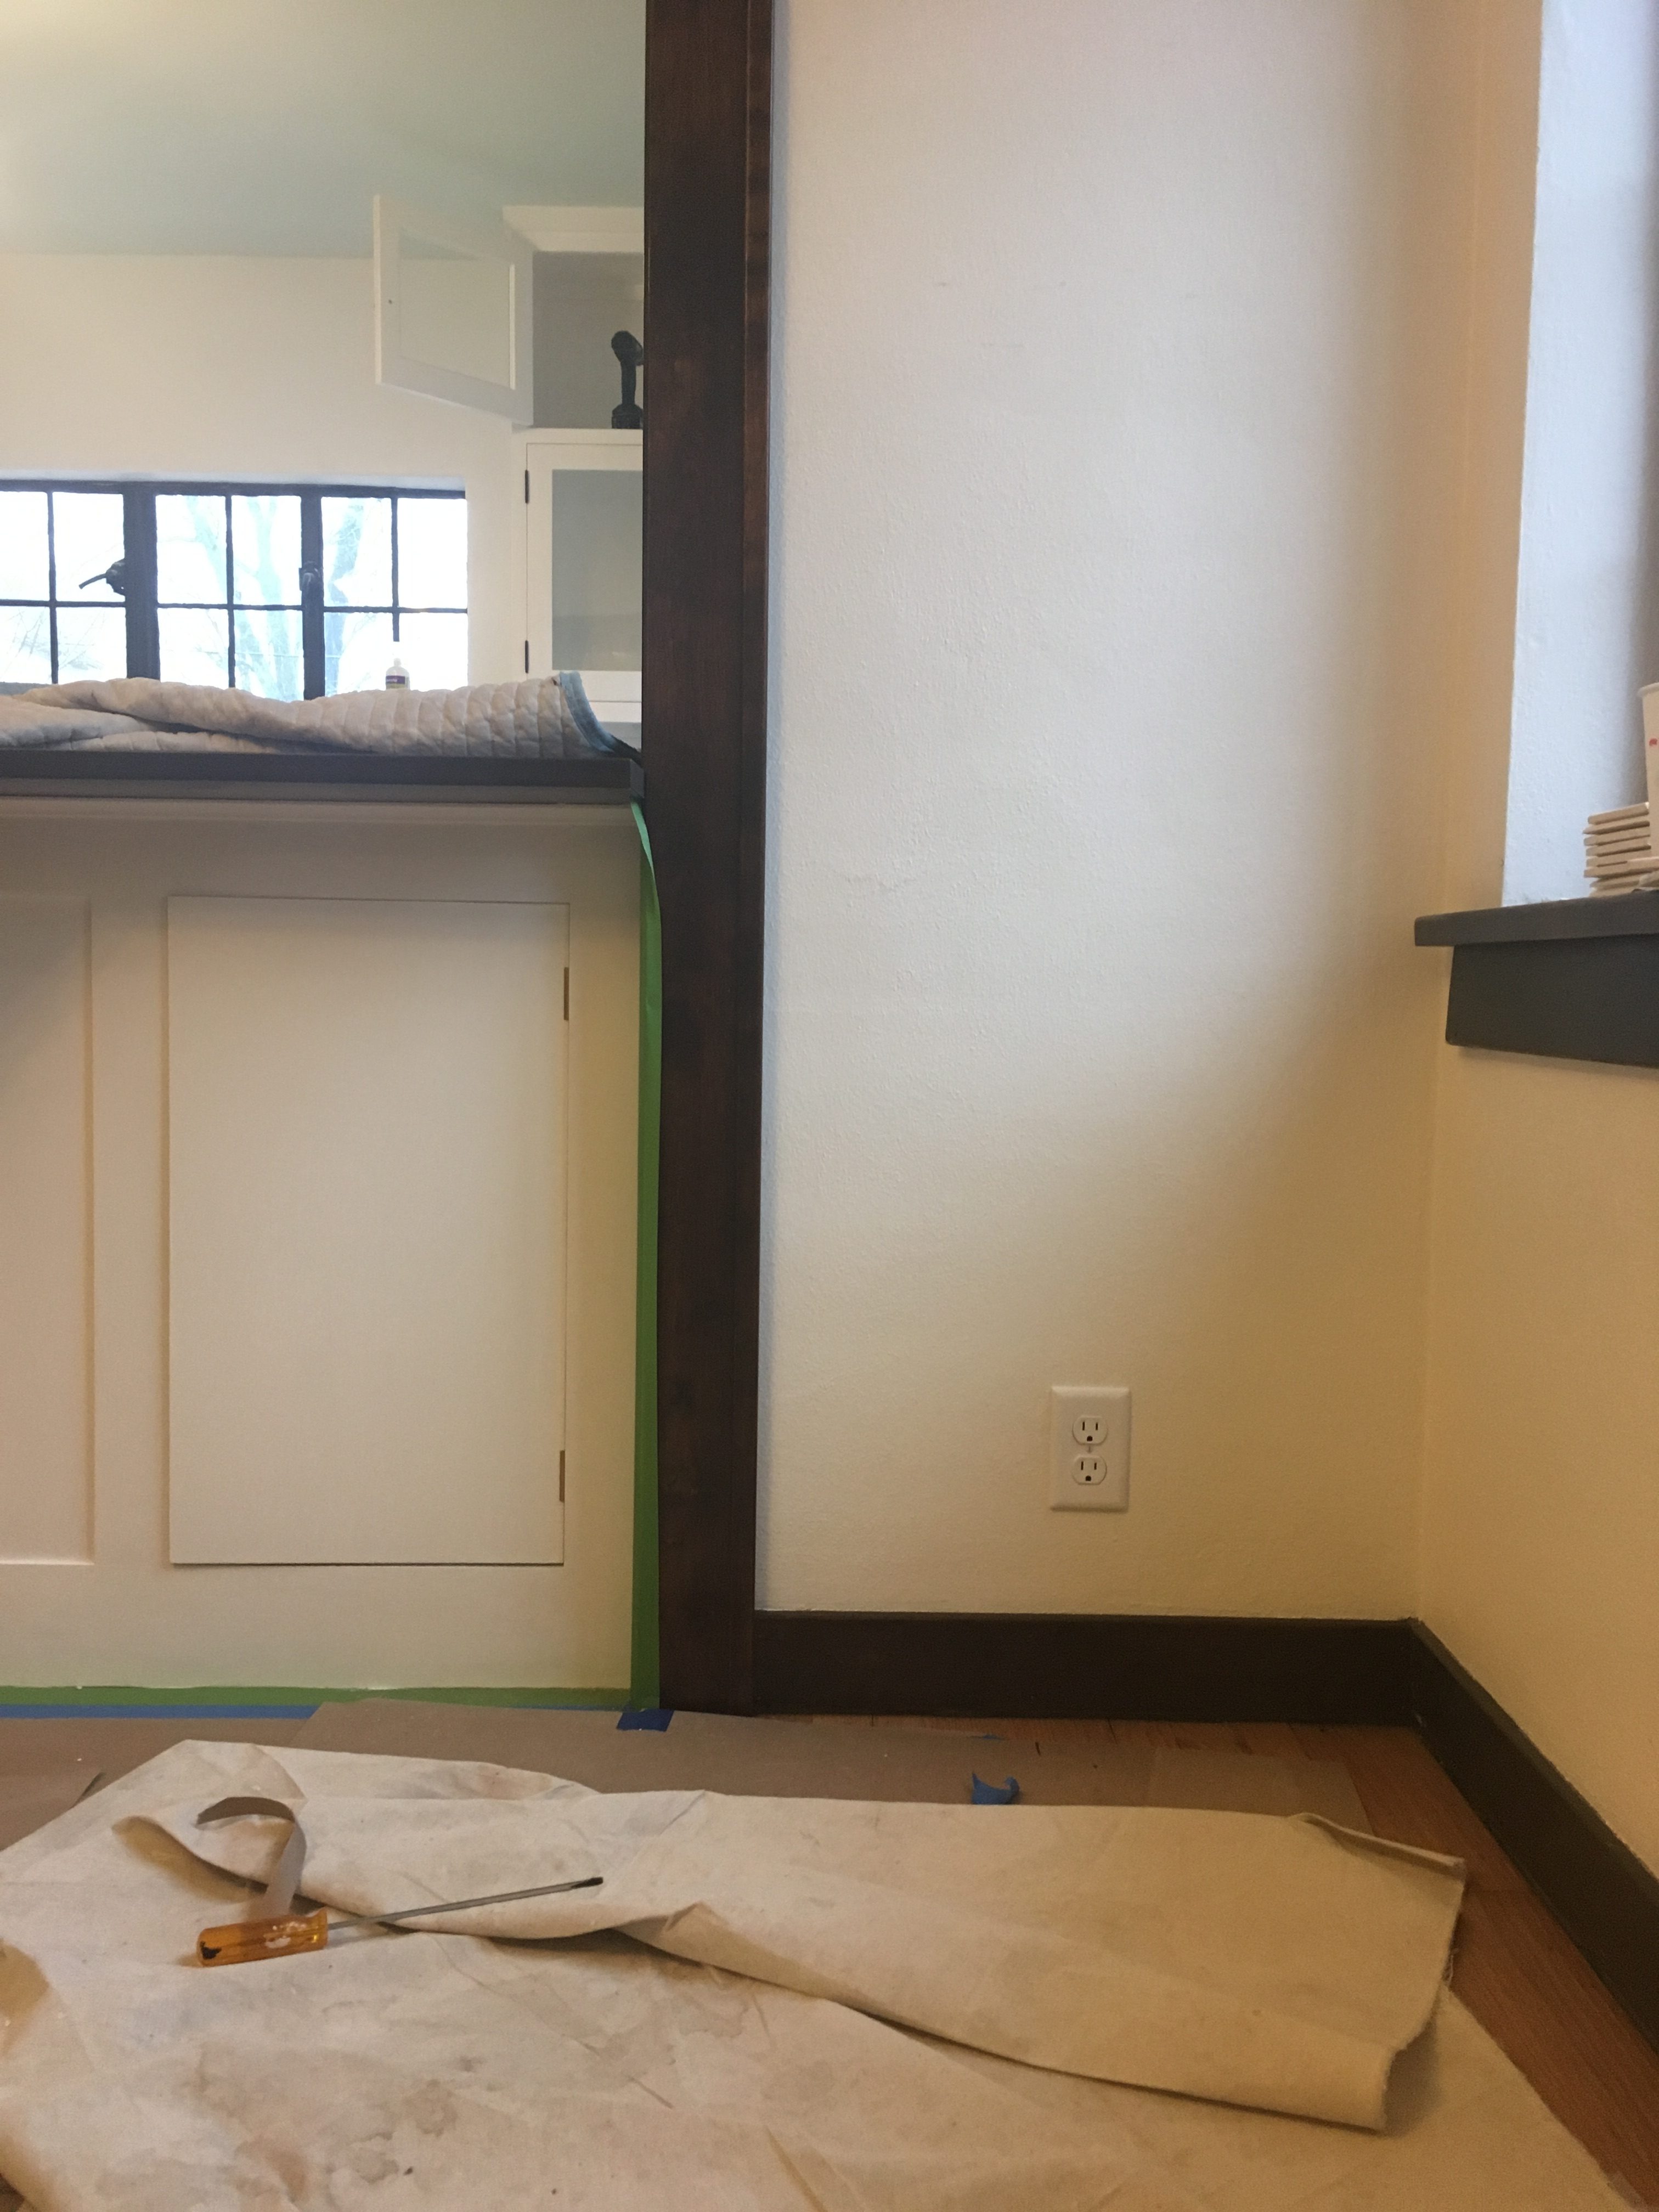
As we neared the job’s end, the time came to replace the baseboard on the walls that had been modified as part of the remodel. Not surprisingly, the original baseboard bore various scars. Nail holes–not a problem; they could be puttied. Scratches and dents? Those are signs of wear, to be expected in old house parts. Again, no problem. What did need attention was the paint: Over the years, painters had strayed from the walls on to the baseboard’s top edge. Some of the pieces were also seriously spattered.
Even if I restored all of the remaining baseboard, there was not going to be quite enough to complete the job.*** Fortunately, the contractor noticed that the baseboard was exactly the same stock as the casing–5/8″ thick x about 3-5/8″ wide. He still had some of the original hardwood casing from the doorway between the kitchen and dining room; the only problem was, it had been finished in place, after installation, so there was a narrow line of bare wood that had been behind the backband.
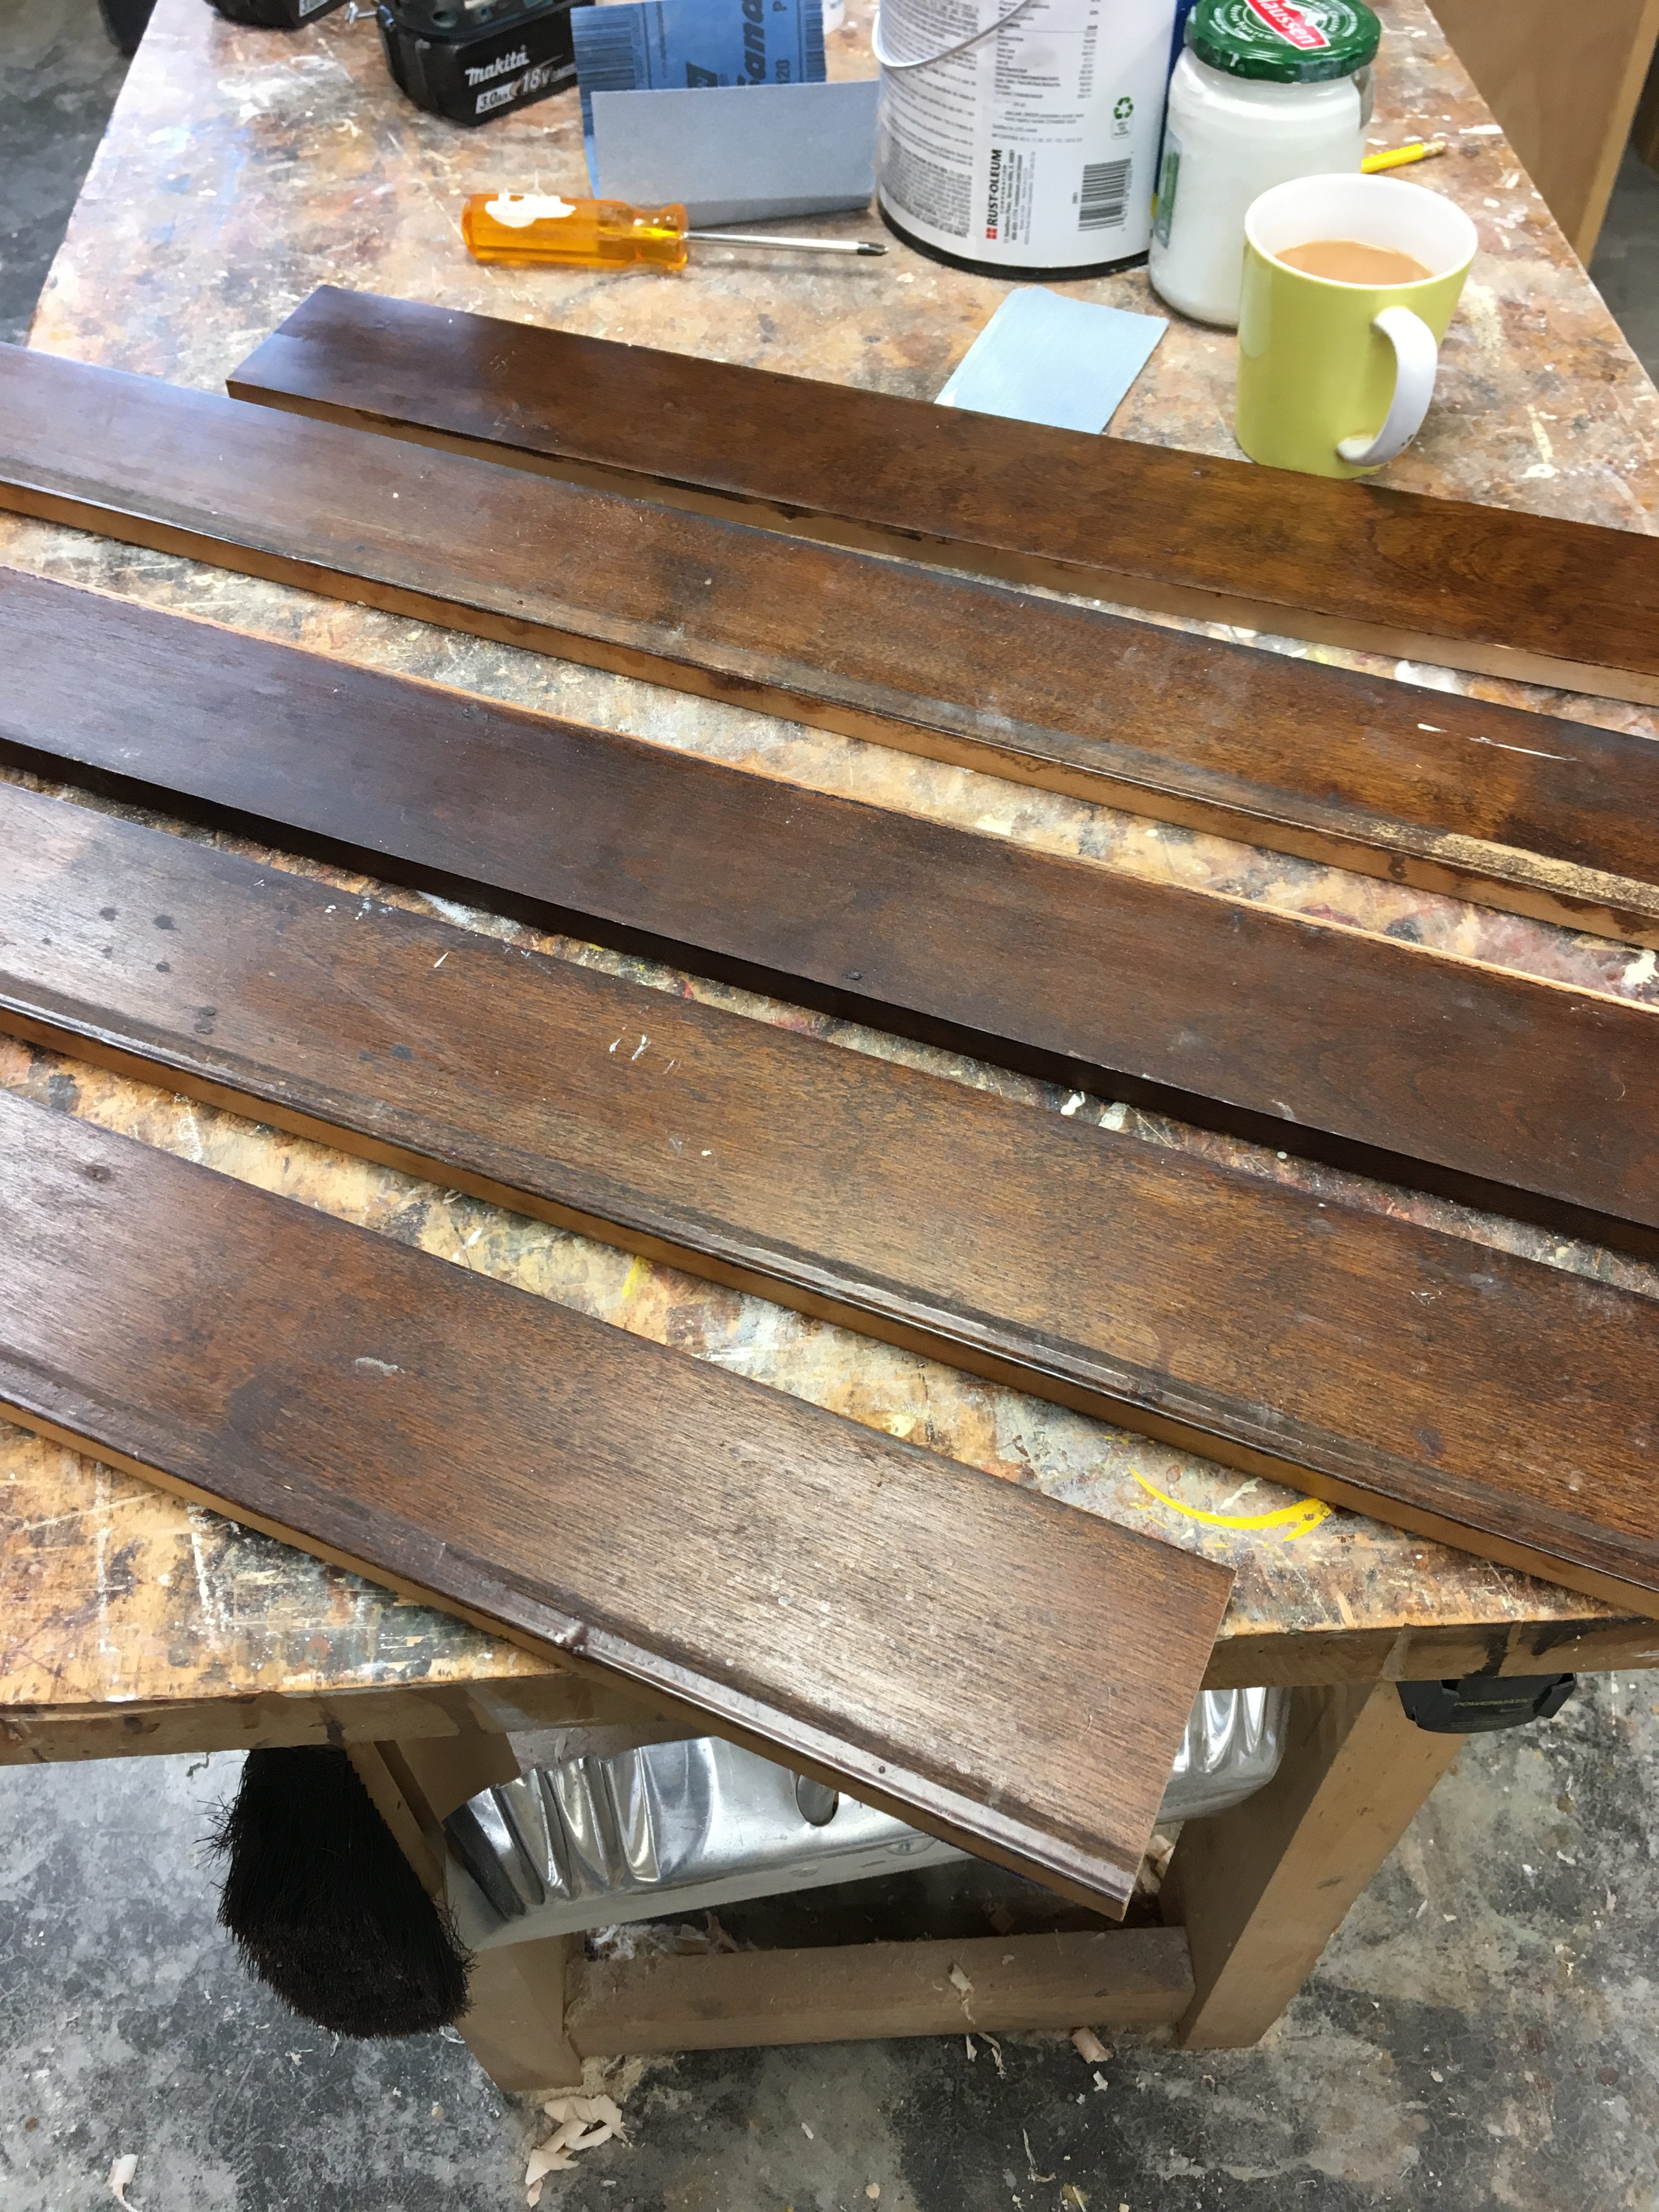
A motley crew. Some pieces of original trim were paint-spattered, others had marred finish at their lower edge, where shoe moulding had been added, and others (such as the one in the middle here, i.e. third from the top or bottom) had a bare strip that was originally covered by backband. A nice cup of tea is just the ticket for puzzling through such moments.
This, then, was my brief: make the rag-tag assortment of original trim look good enough to butt up against the new trim–and do it as inexpensively as possible, because the job had already entailed some costly mission creep. Here’s how I did it.
Step 1: Clean up
I started by scuff sanding the entire surface of each piece of trim with 320 grit paper, then removed the dust using a shop cloth dampened with mineral spirits.
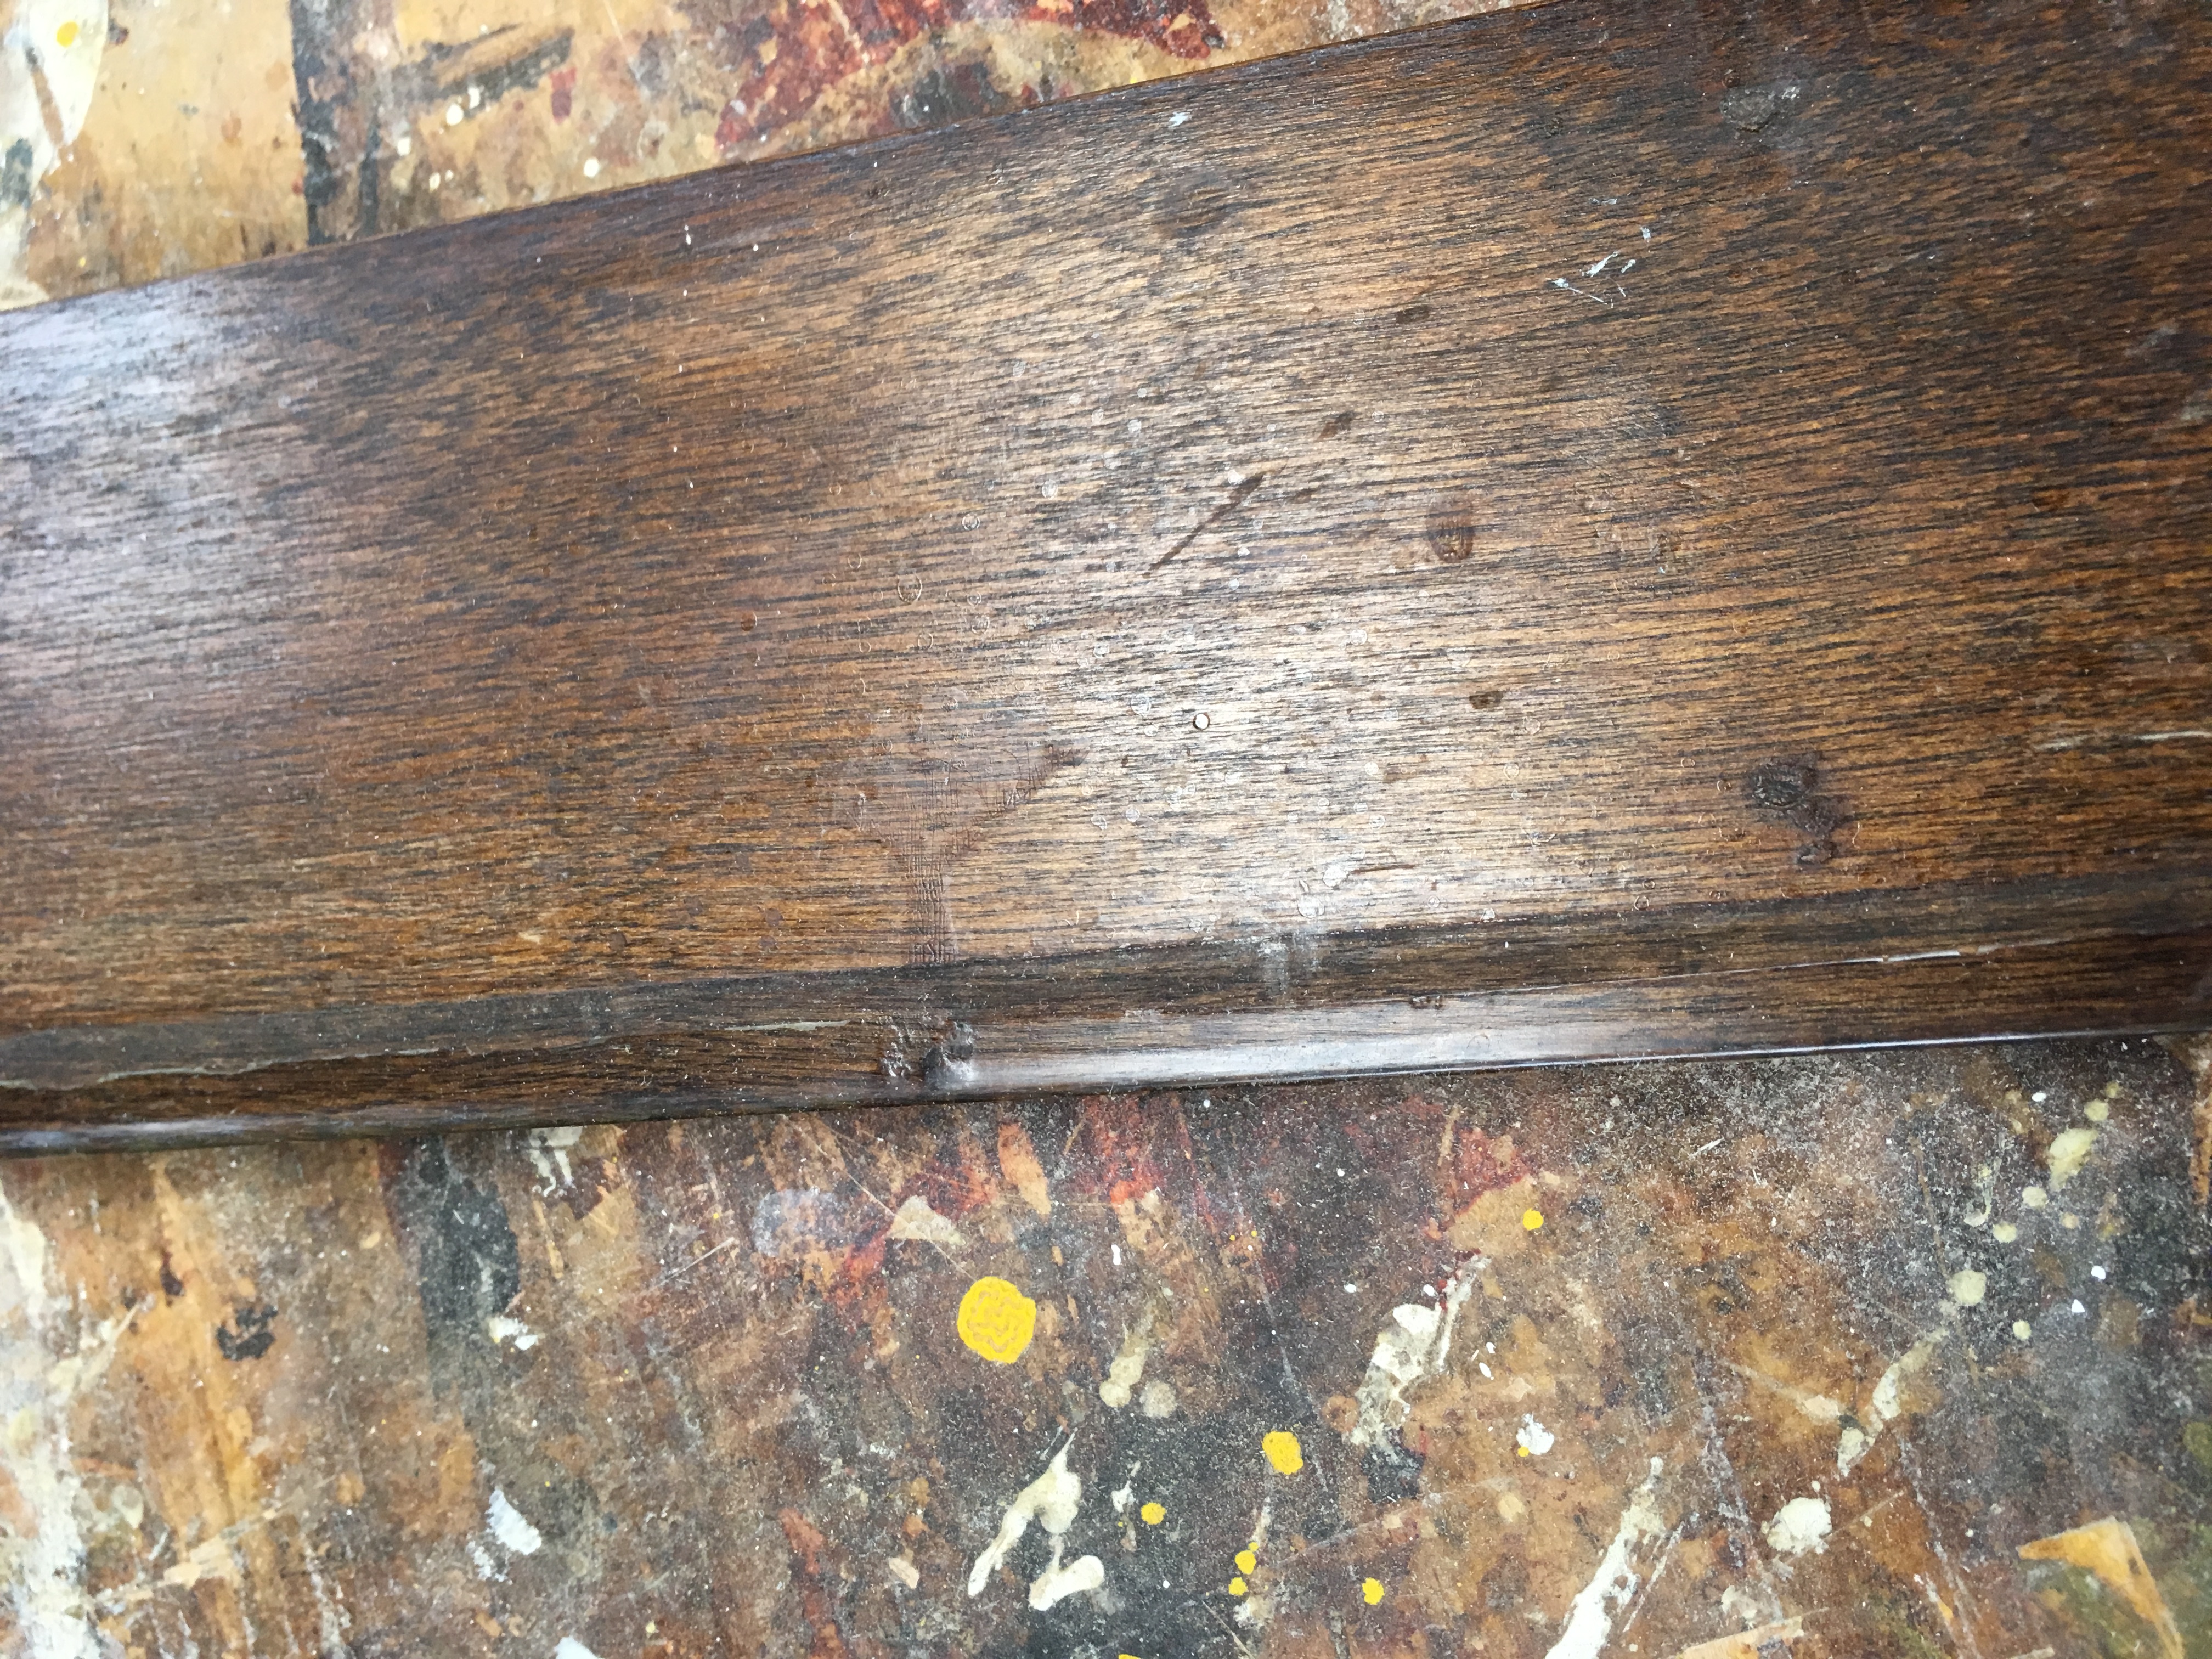
A close-up of an original piece of baseboard reveals the challenge. This was before scuff sanding.
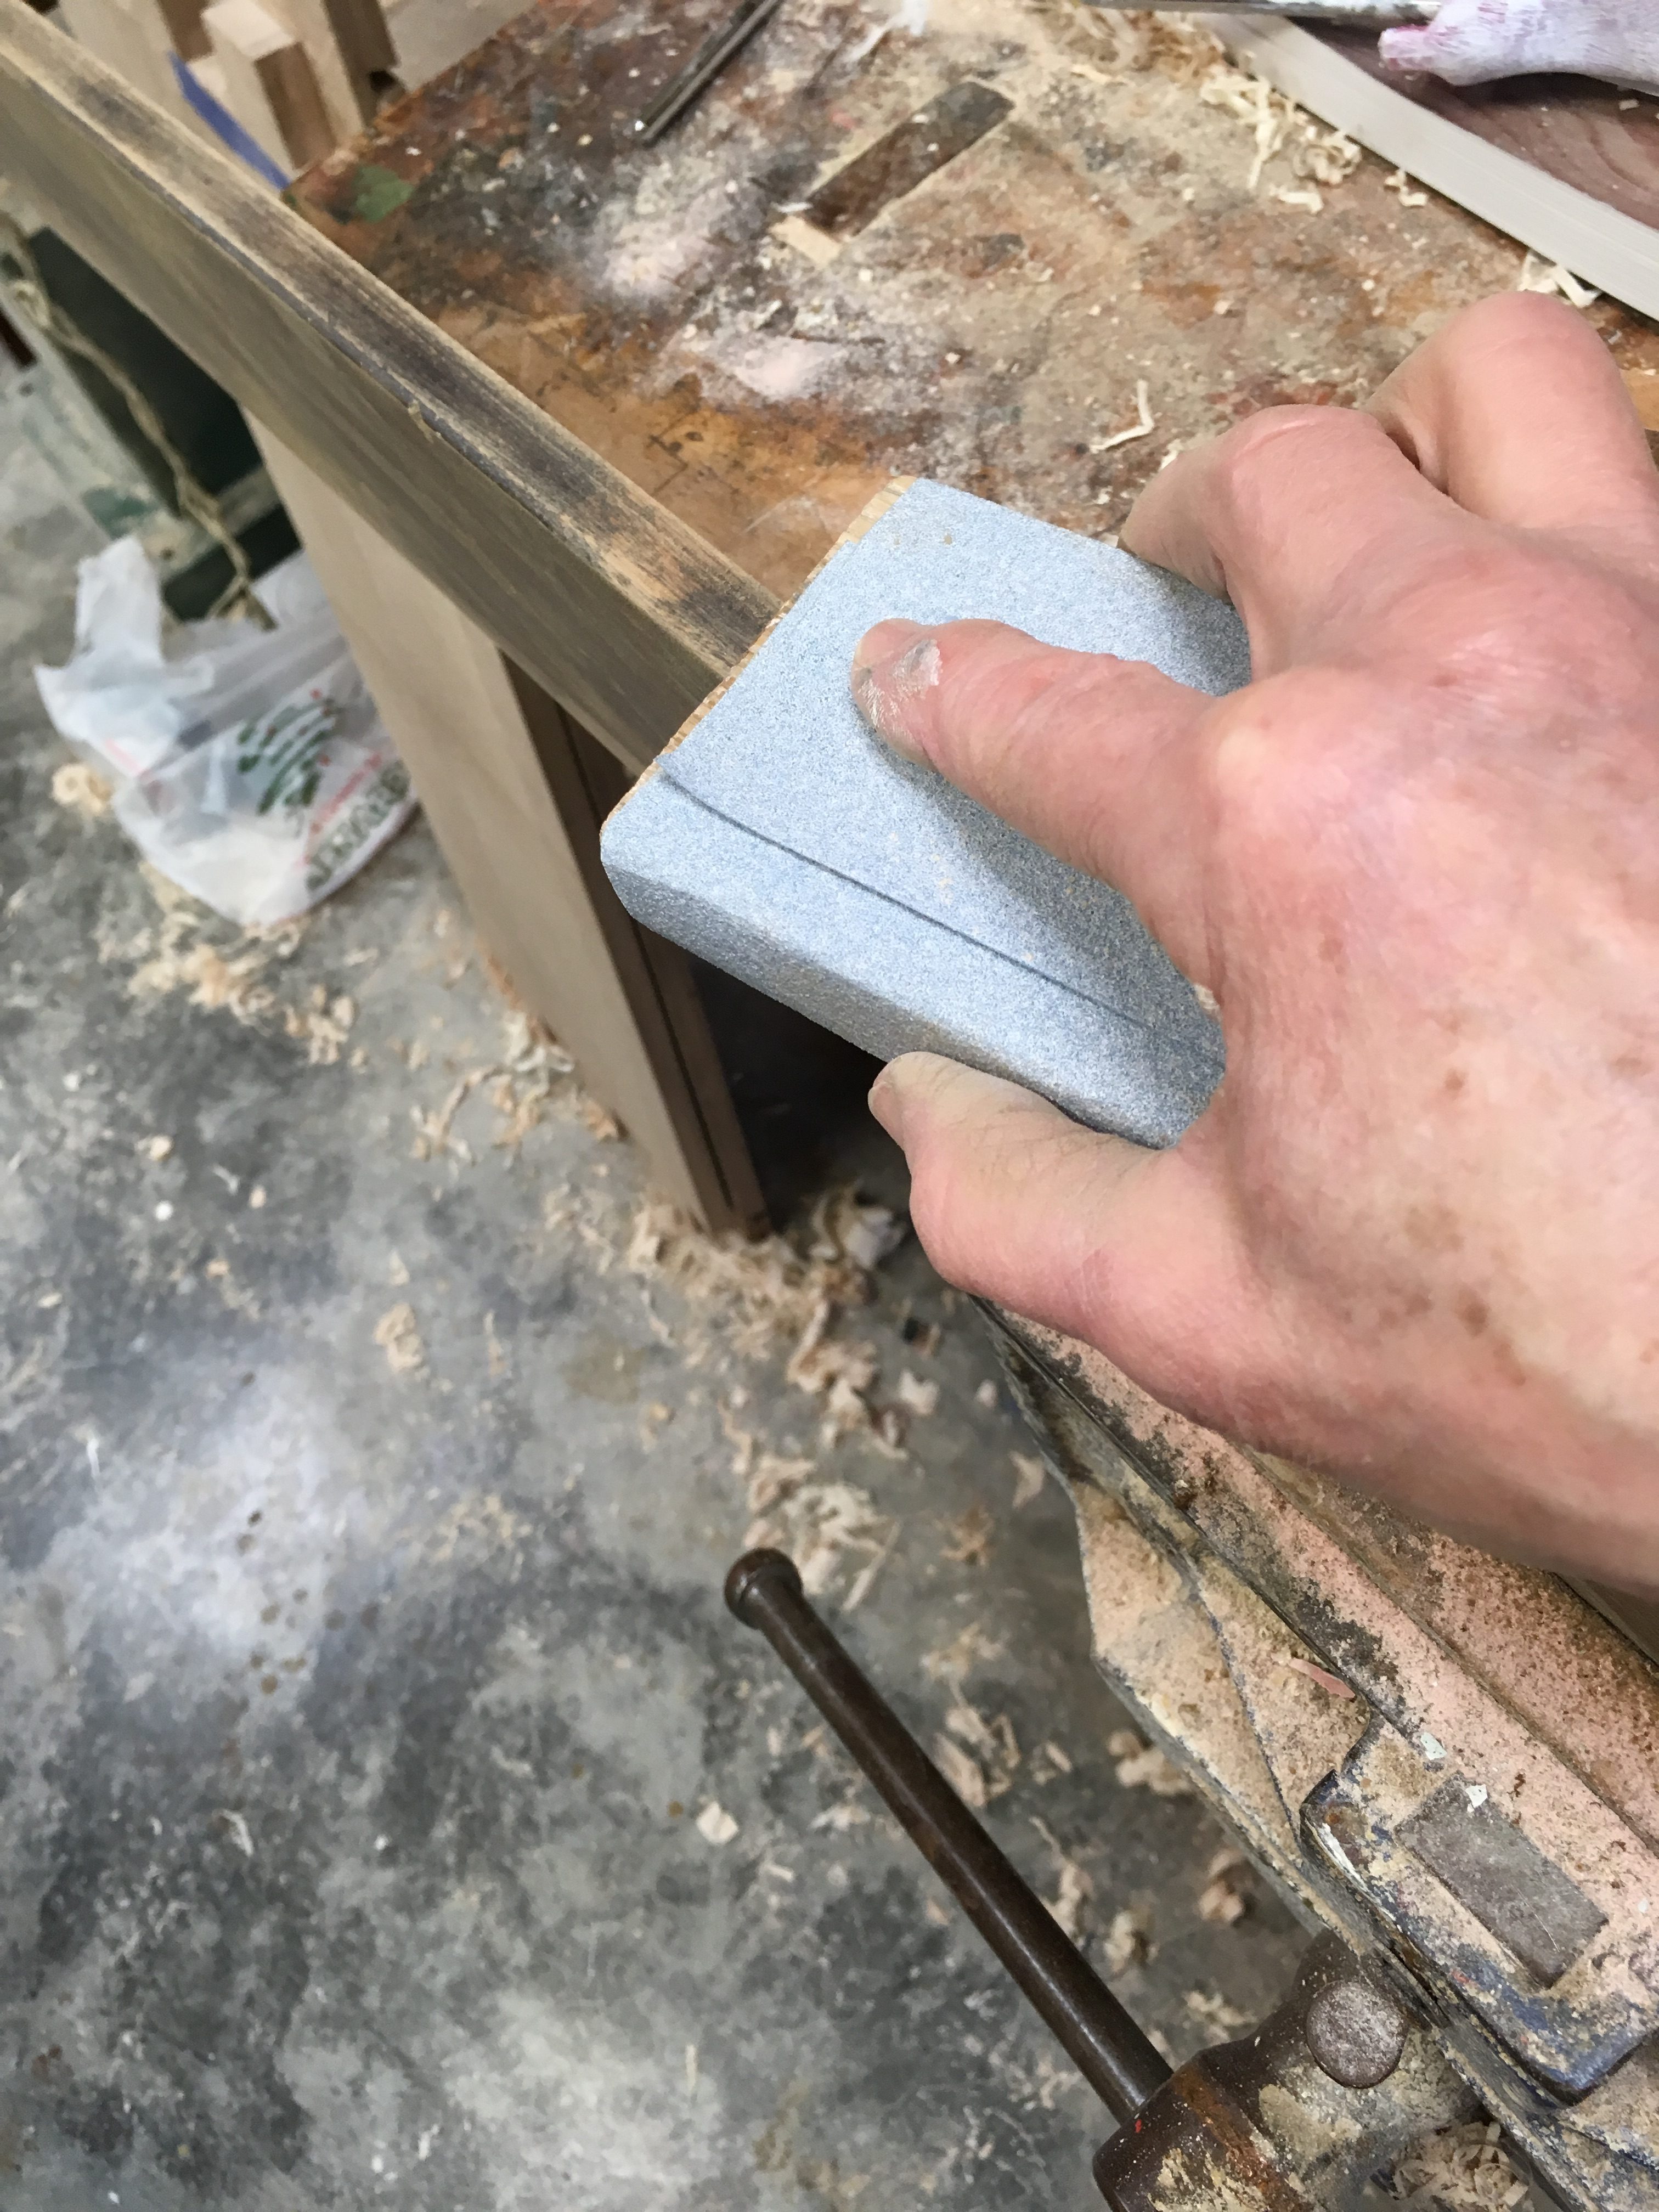
Next I removed the finish build-up at the intersection of the baseboard and shoe, using a sharp chisel. Be careful not to gouge the wood or remove too much material.

Some areas had so much paint spatter that I went ahead and sanded, removing only as much of the original finish as necessary to get rid of the paint.
Step 2: Restore the color
To start, I applied the same dye I had mixed up for the new trim I made to match the old. It’s a Transtint water-based dye. I applied it only in the spots where I had removed the old stain.
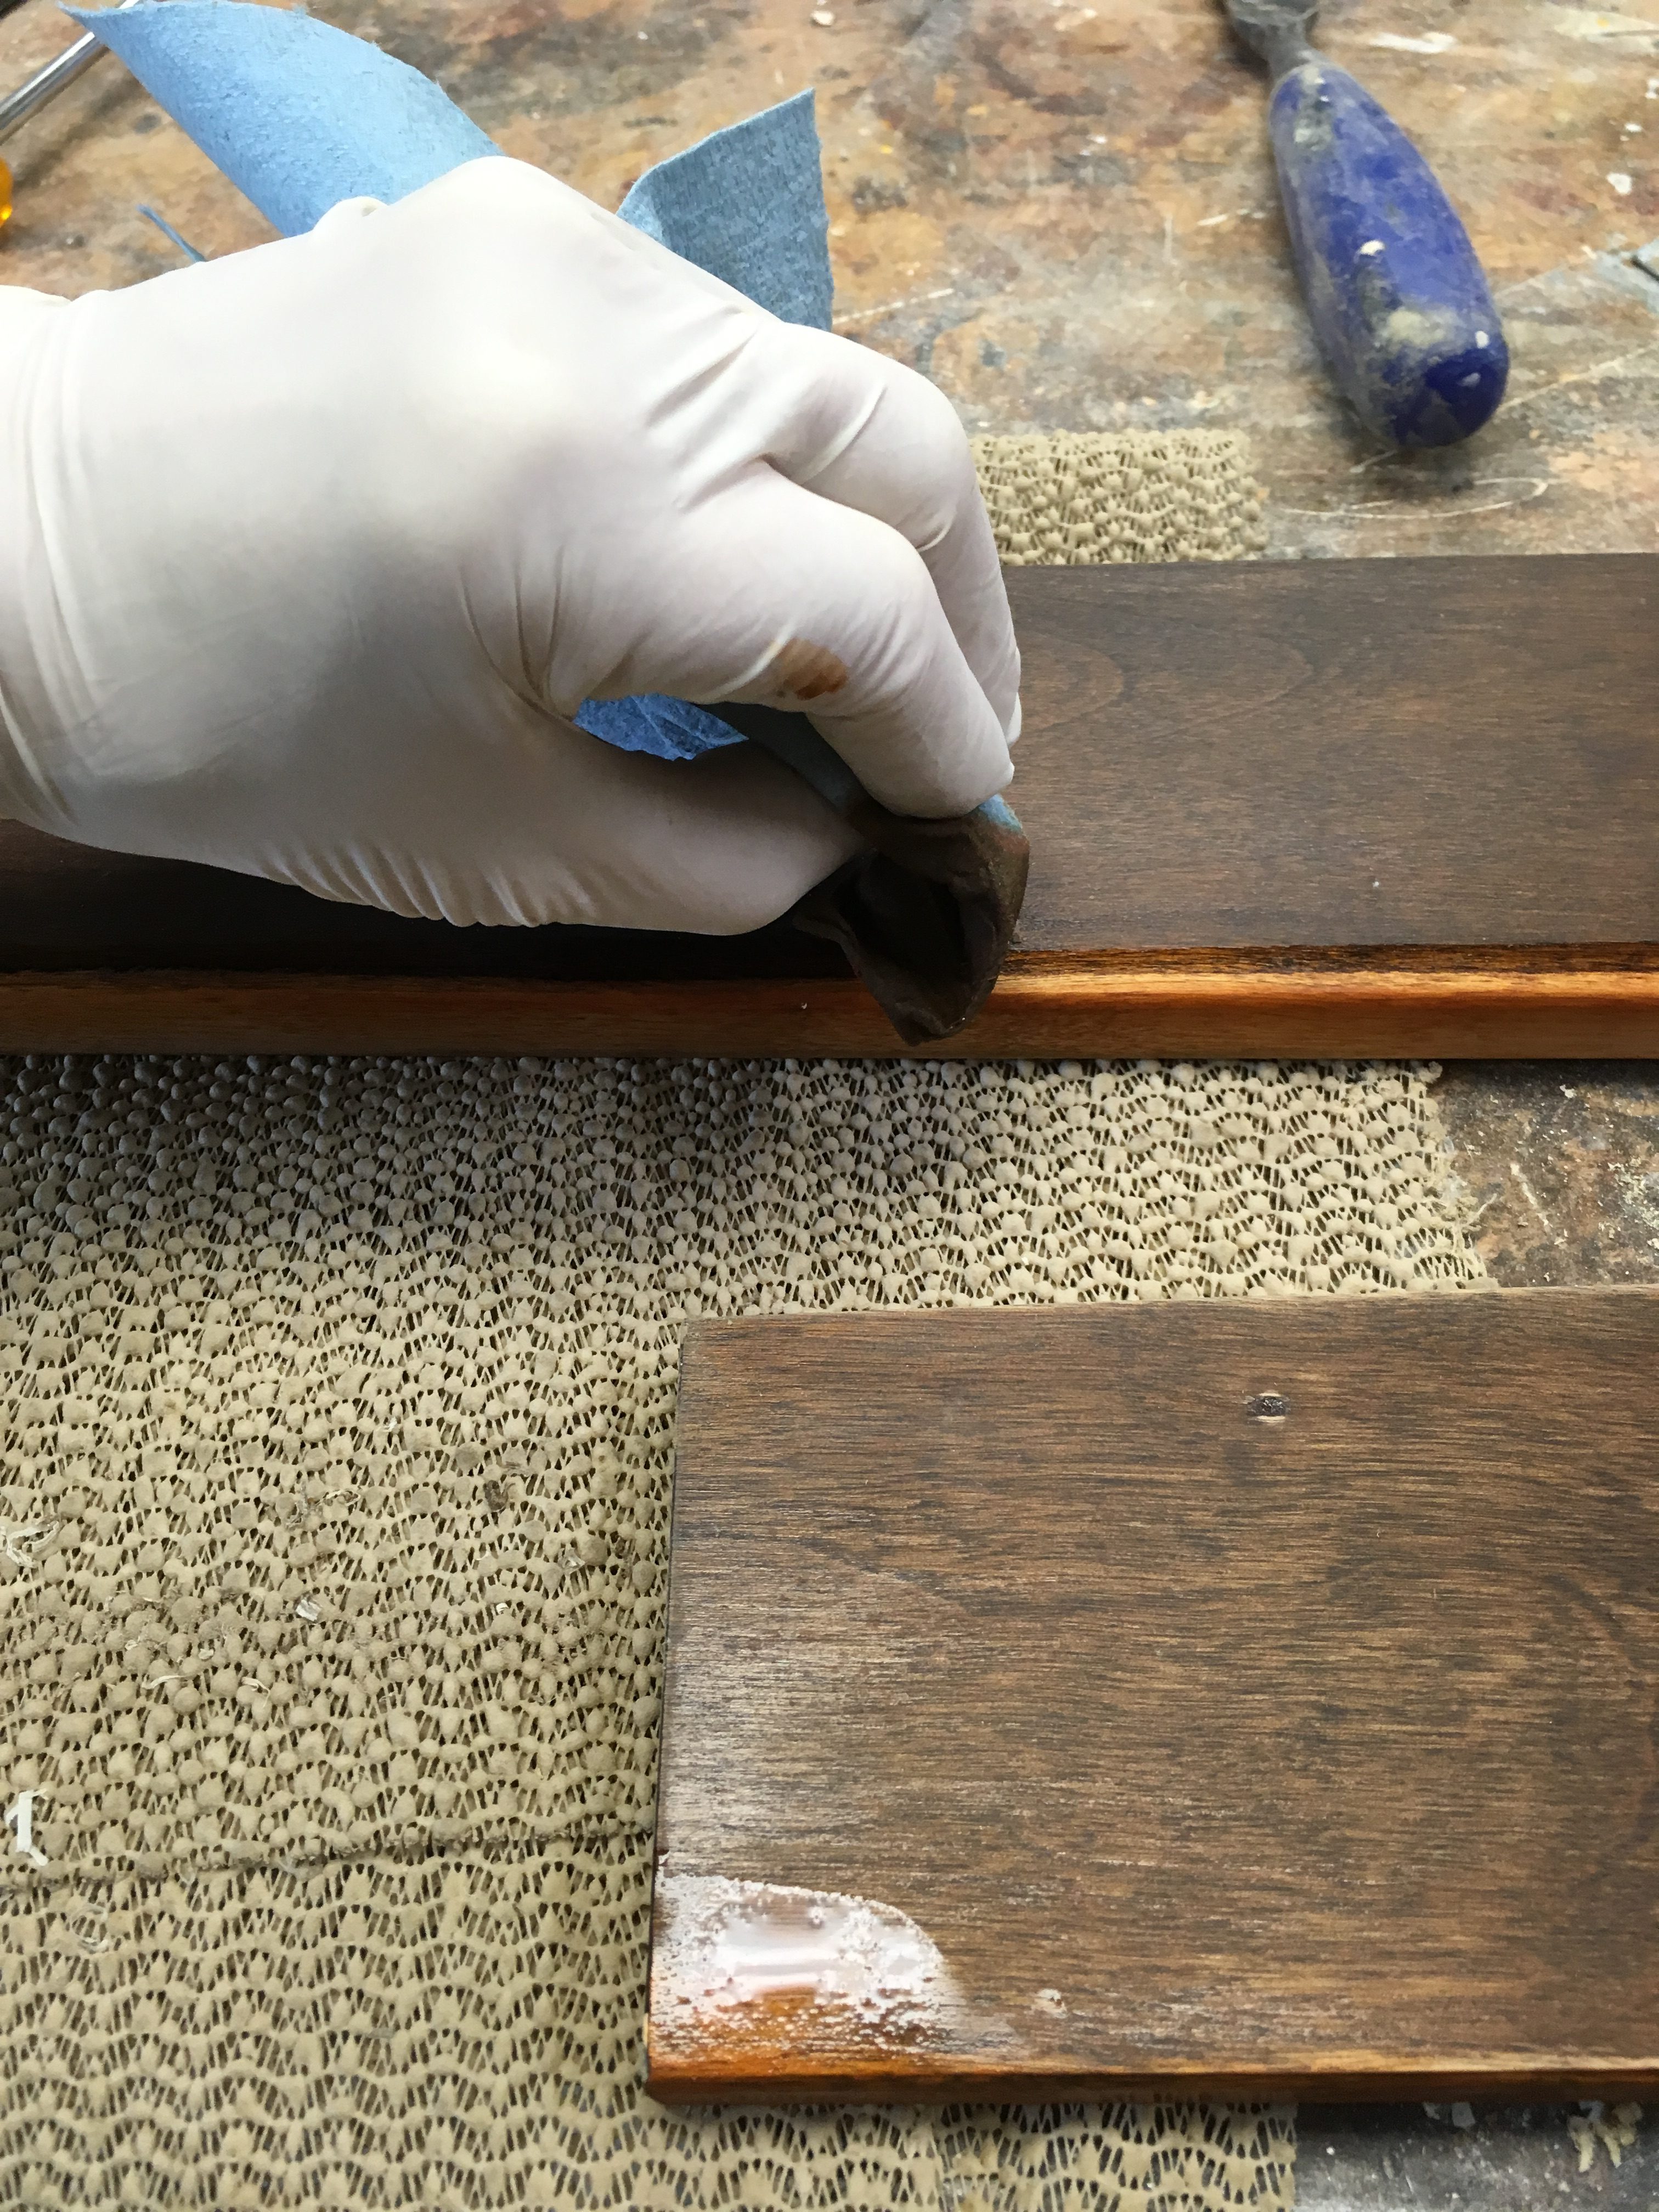
As you can see, the dye just made a base for succeeding coats, rather than getting close to the final color.
When the dye had dried completely, I applied a good coat of the gel stain I’d mixed up to match the original trim. I let that sit about 10 minutes, then wiped off the excess.
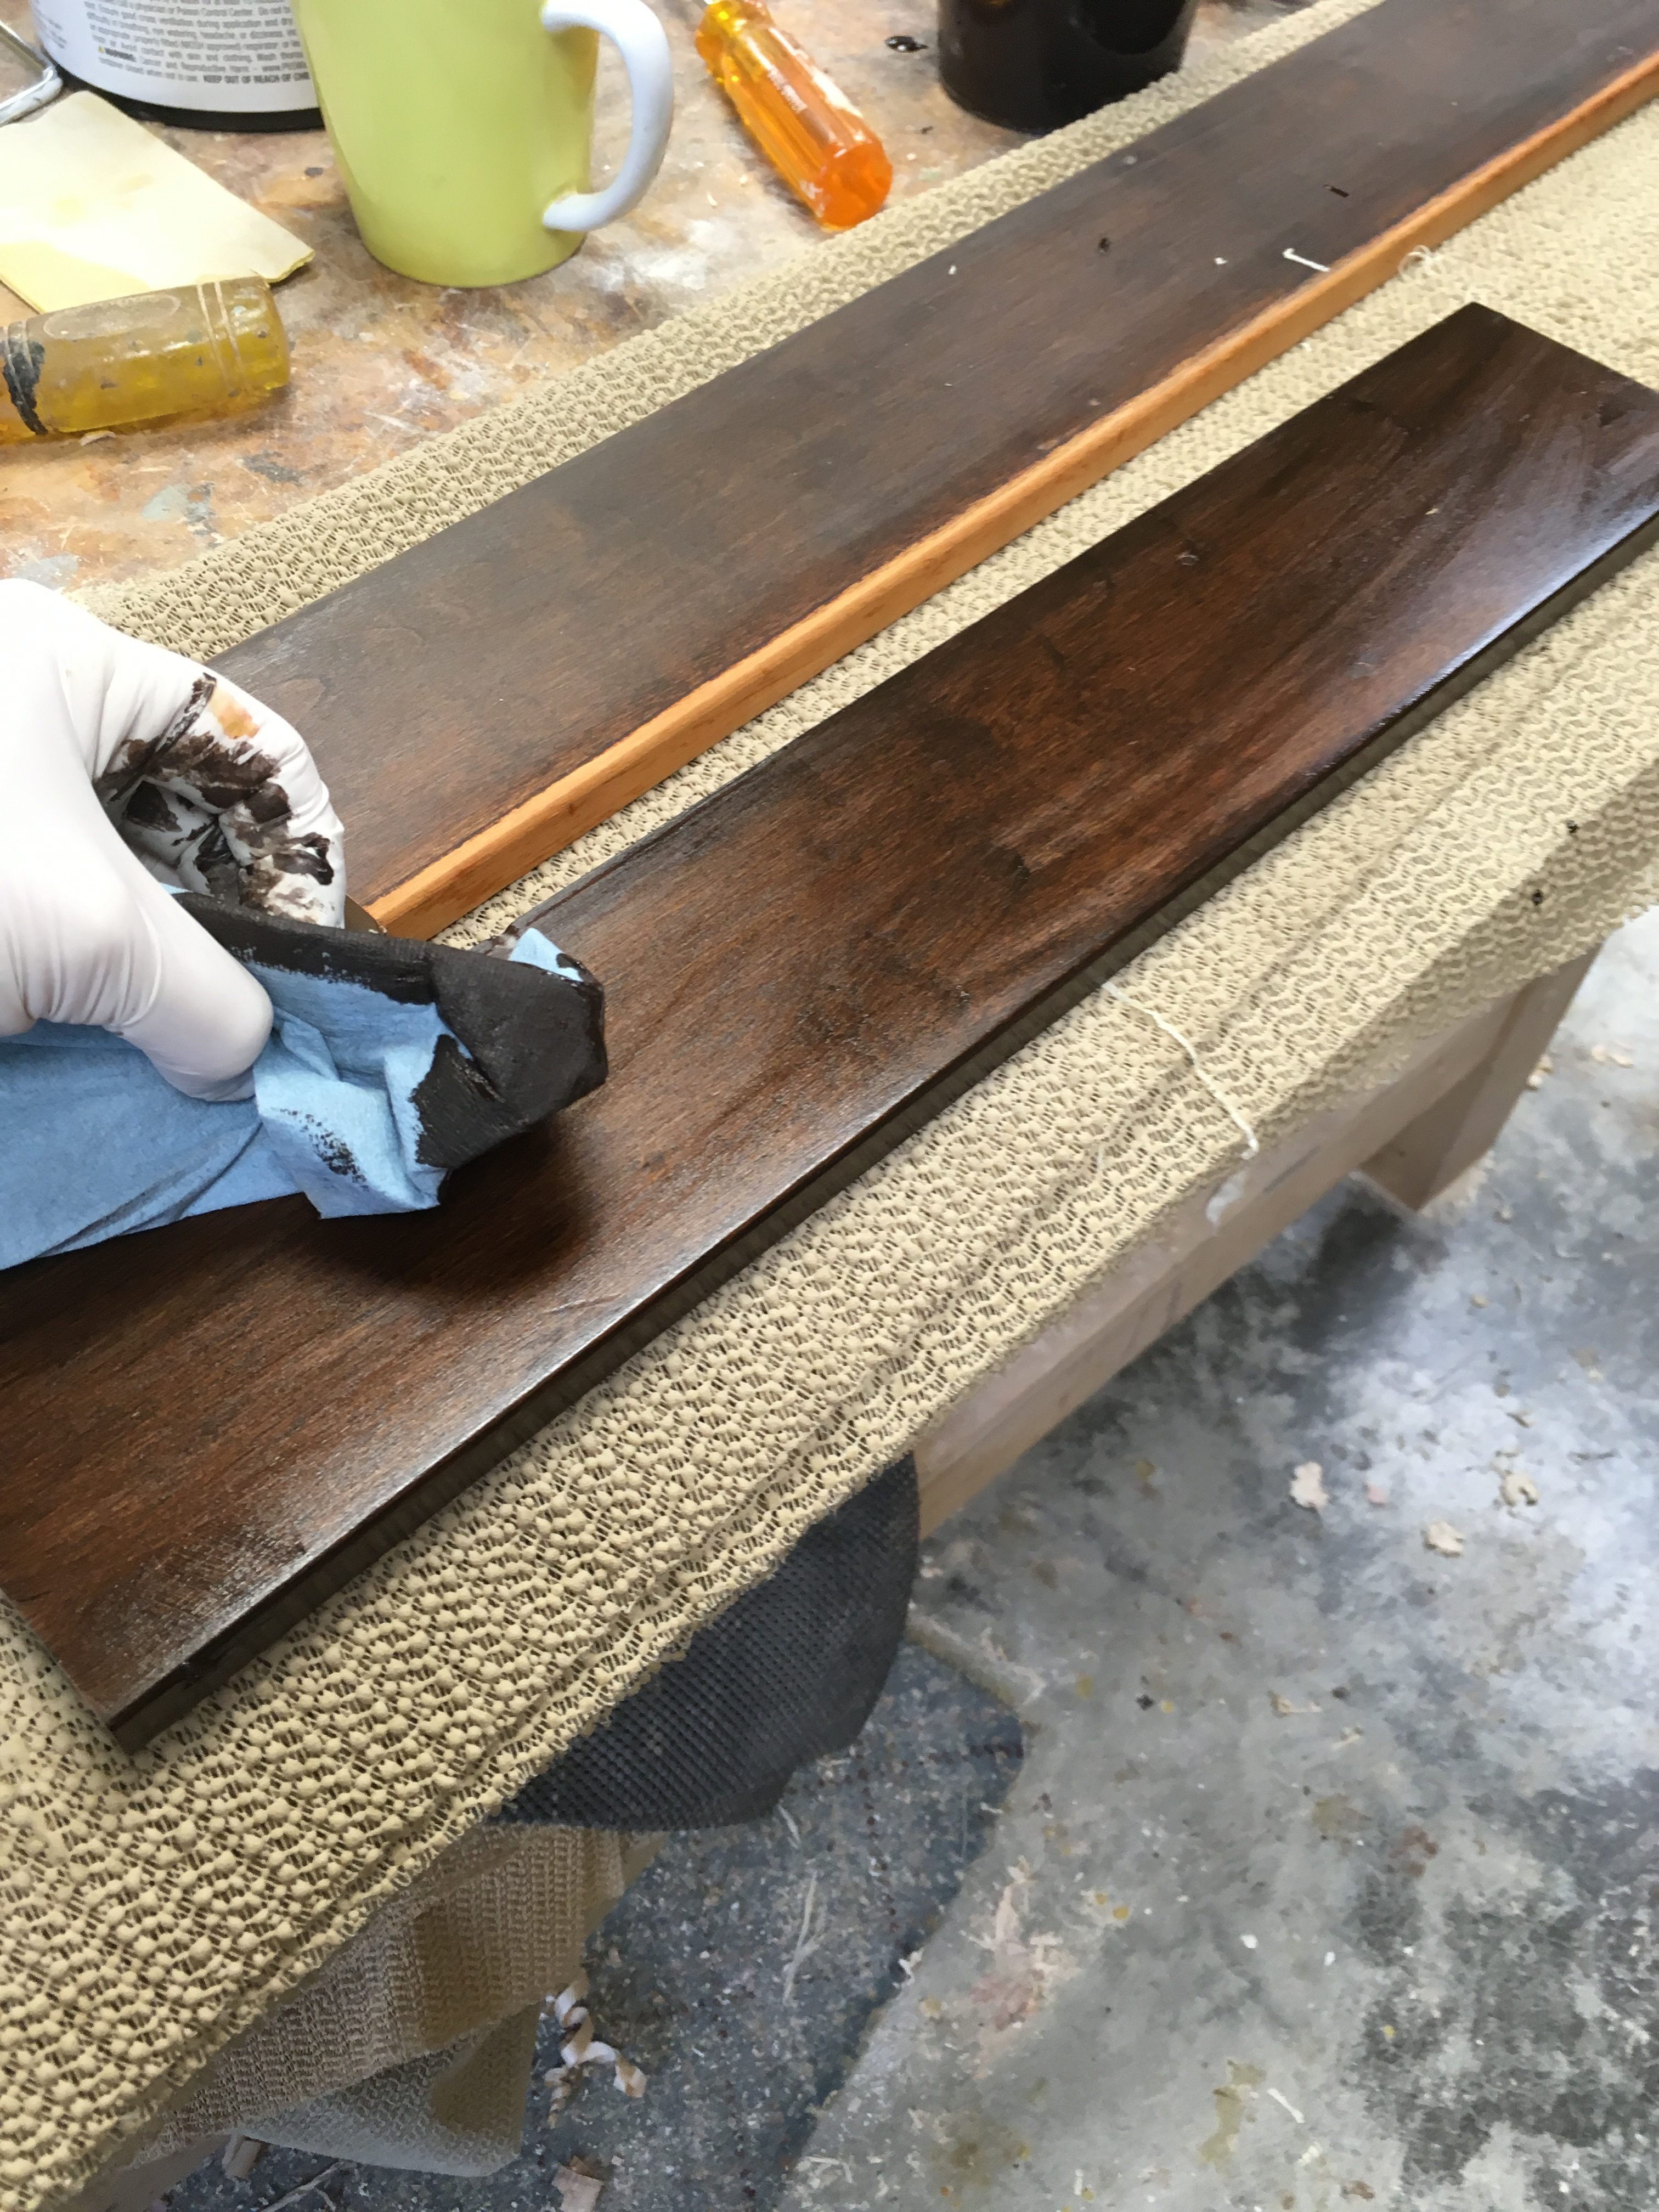
I let the gel stain dry overnight, then added a coat of Zinsser Seal Coat (dewaxed shellac) to lock it in so I could add more gel stain as a glaze, as needed, to build up the depth of color to match what remained of the original finish. When the color was pretty much evened out, I let the glaze dry overnight.
Step 3: Topcoats
I have learned from experience that finishing oil-based gel stain glaze with oil-based polyurethane, the finish I was going to apply to this trim, is trickier than it sounds. The solvent in the poly pulls stain off the work piece. The solution is to seal the glaze in with a sealer that is not oil based. In this case, I sprayed a coat of Zinsser Seal Coat over the glaze. Why spray this time instead of brushing? Because brushing could have left noticeable lap marks on the semi-opaque finish–another lesson learned the hard way.
After letting the sprayed shellac sealer dry for a few hours, I scuff sanded lightly with 320 grit and applied a coat of oil-based poly with a bristle brush.
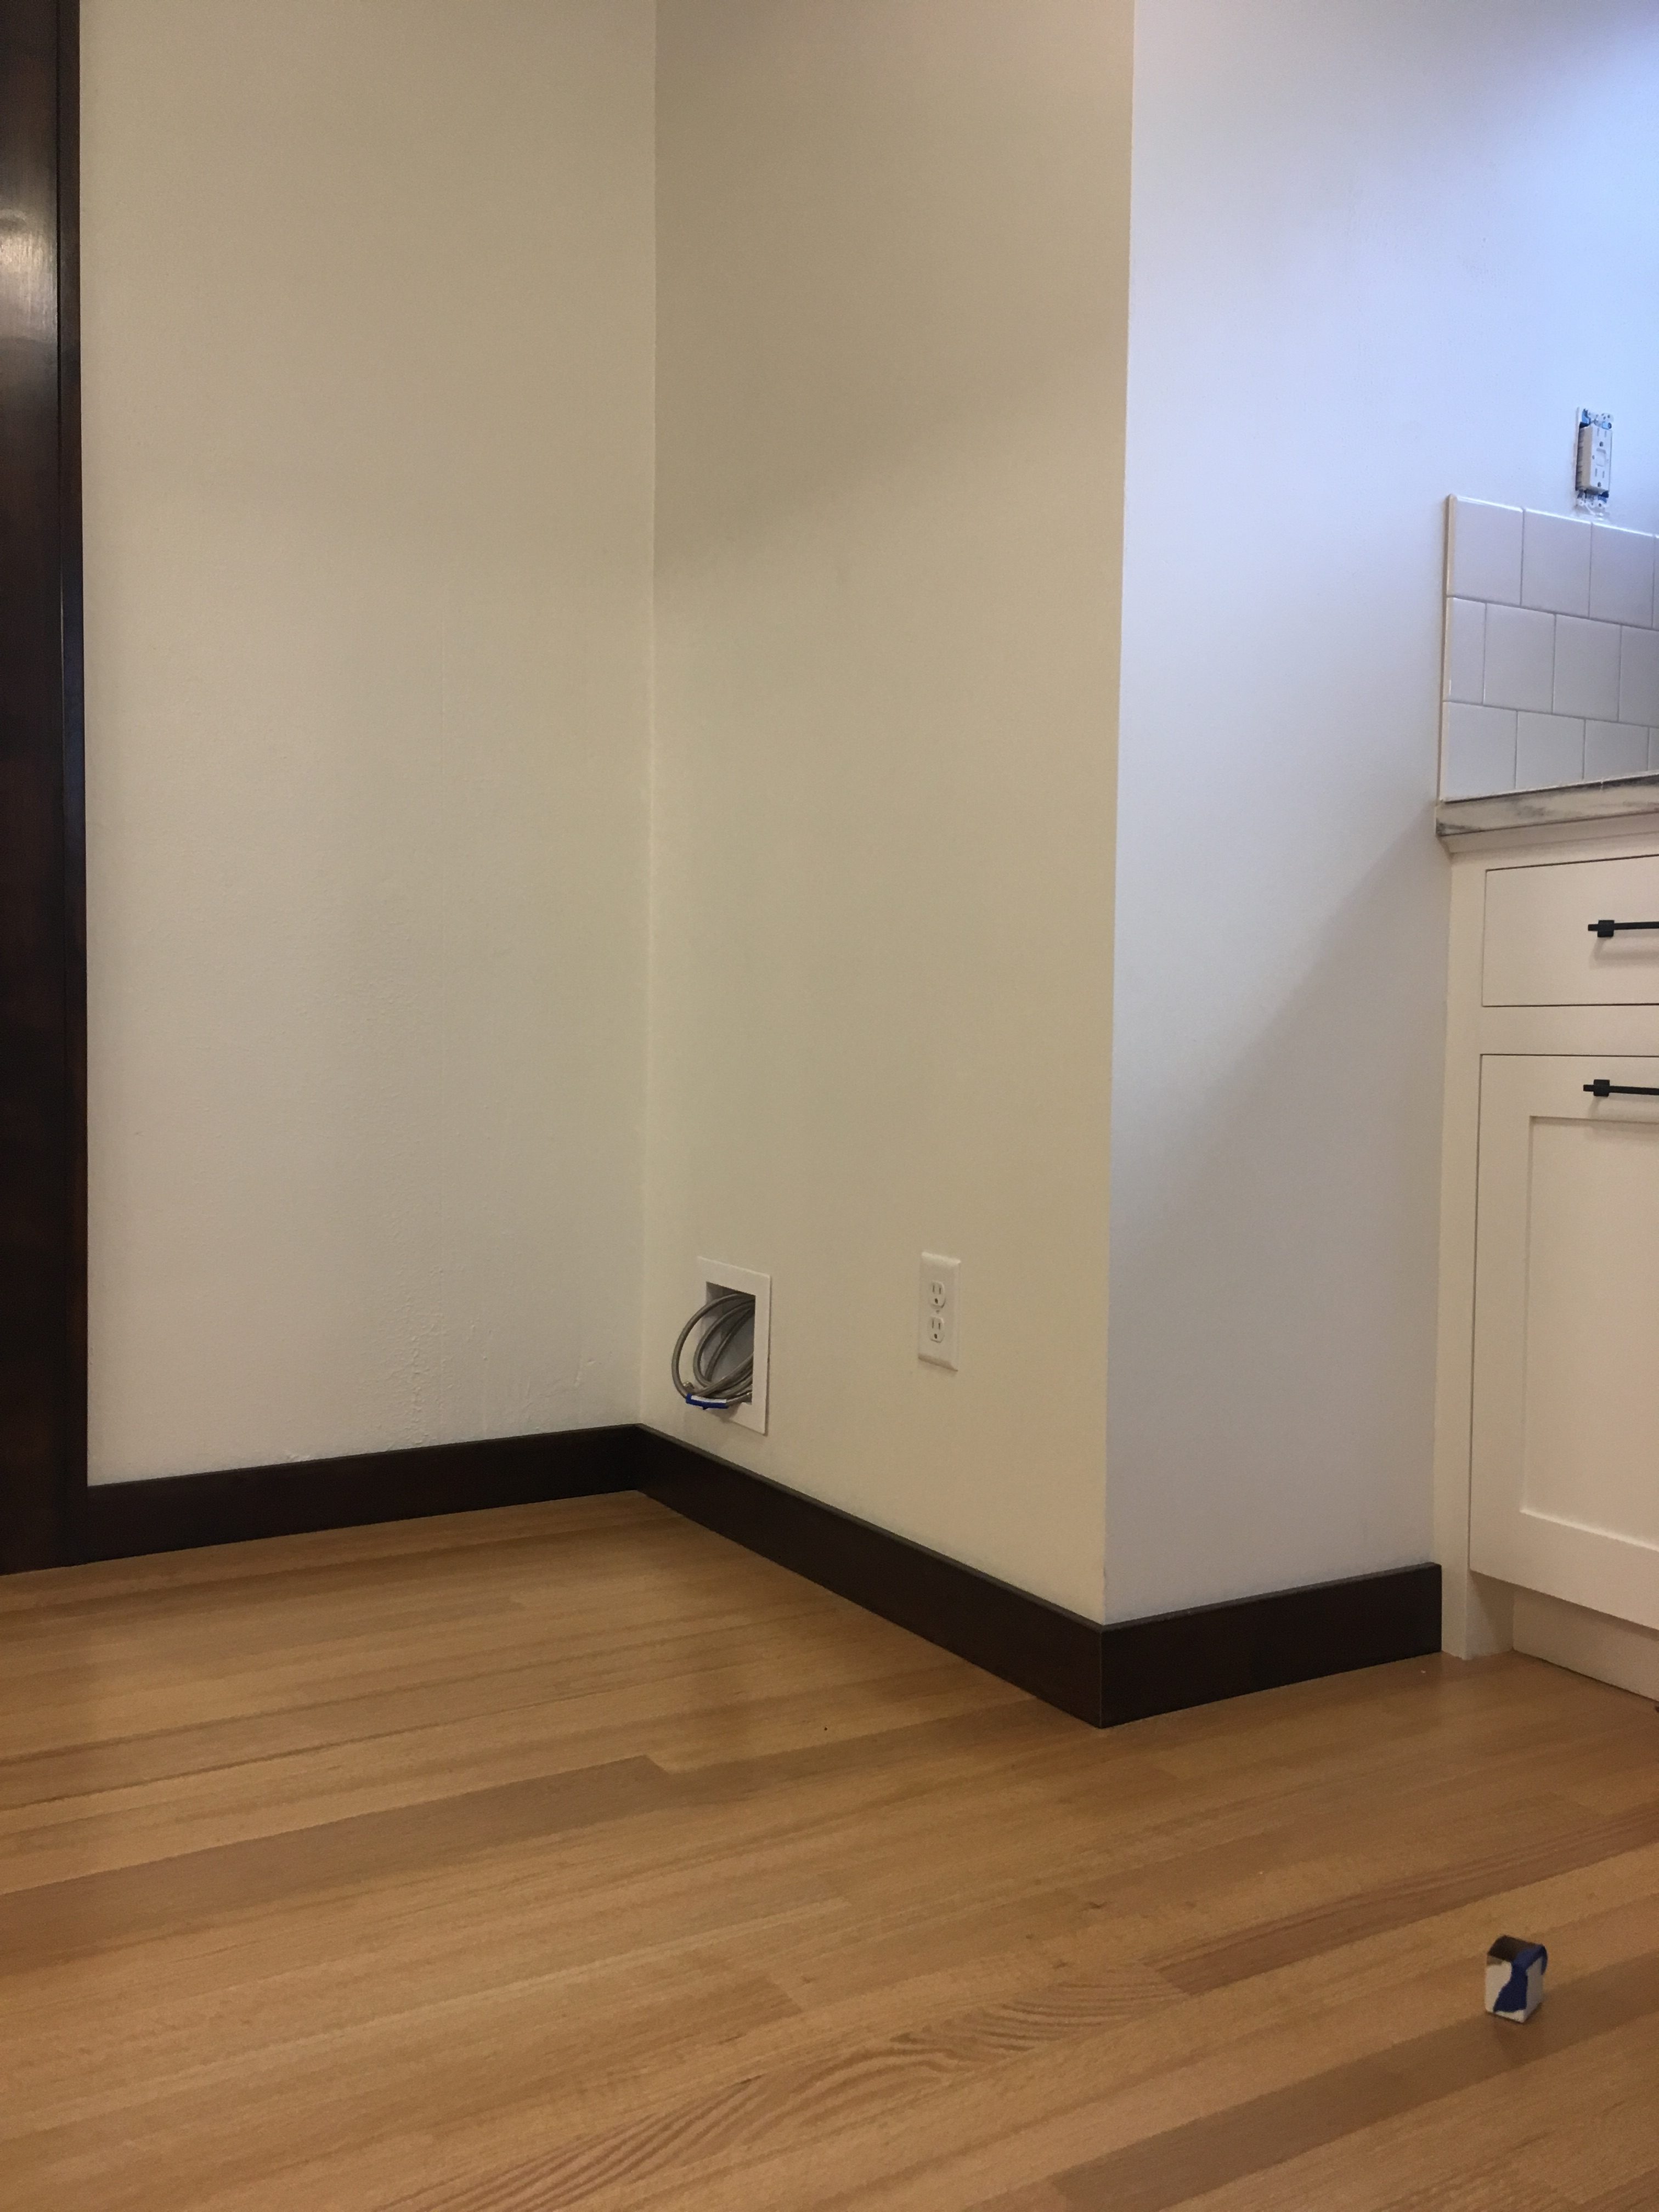
This corner was previously home to a 45-degree built-in. Now it has baseboard that matches the rest of the room.
*To the grammar police: This is correct. “None,” the subject of the sentence, is a contraction of “not one.” It’s singular, not plural. It’s not my fault that most people misuse the word as a plural.
**Sometimes the same species was used, as in my former home, a 1925 bungalow, which has fir throughout, but the door and window trim on the first floor has a backband moulding, whereas the upstairs rooms are plain flat casing. In other instances, such as my recent jobsite, the public rooms have hardwood, with softwood for the others.
***If you’re really paying attention (Craig Regan, I am looking at you), you will be thinking, “Wait, if you increased an opening from less than 3′ to more than 8′, there should be more than enough baseboard,” in which case you deserve a prize. However, the job entailed removing a built-in from the kitchen and installing baseboard there, along with a few other areas that had previously been covered.
Popularwoodworking.com is a participant in the Amazon Services LLC Associates Program, an affiliate advertising program designed to provide a means for sites to earn advertising fees by advertising and linking to Amazon.com and affiliated websites.
Here are some supplies and tools we find essential in our everyday work around the shop. We may receive a commission from sales referred by our links; however, we have carefully selected these products for their usefulness and quality.


Wait, if you increased an opening from less than 3′ to more than 8′, there should be more than enough baseboard??? Most contractors are looking for the fastest way out. Nursing back to health a rag tag assortment of trim could take longer than installing new? Glad you have a contractor that is flexible and willing to work with your ideas. That makes for the best kitchens.
Yes, Mark and I are always trying to balance what’s best for the house (too thorny an idea to defend in the comments section) with cost and time constraints. Sometimes the old trim has to go. Sometimes it’s well worth cleaning up and replacing.
(On the baseboard/opening size, you know what I mean: There was originally about 10 lineal feet more baseboard (the sum of both sides) than there is for that part of the kitchen now.)