We may receive a commission when you use our affiliate links. However, this does not impact our recommendations.
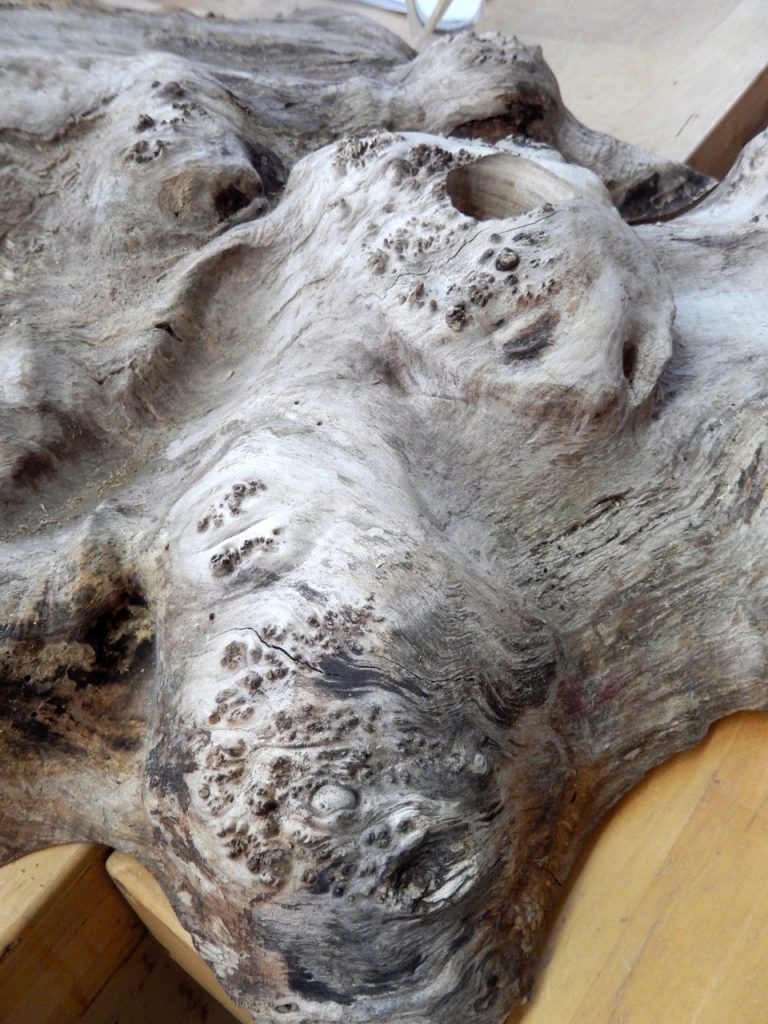
Helder Peixoto and the live edge coffee table that he built during my class at Peters Valley last summer.
A Coffee Table From a Burl Slab, Part 1
A Coffee Table From a Burl Slab, Part 3
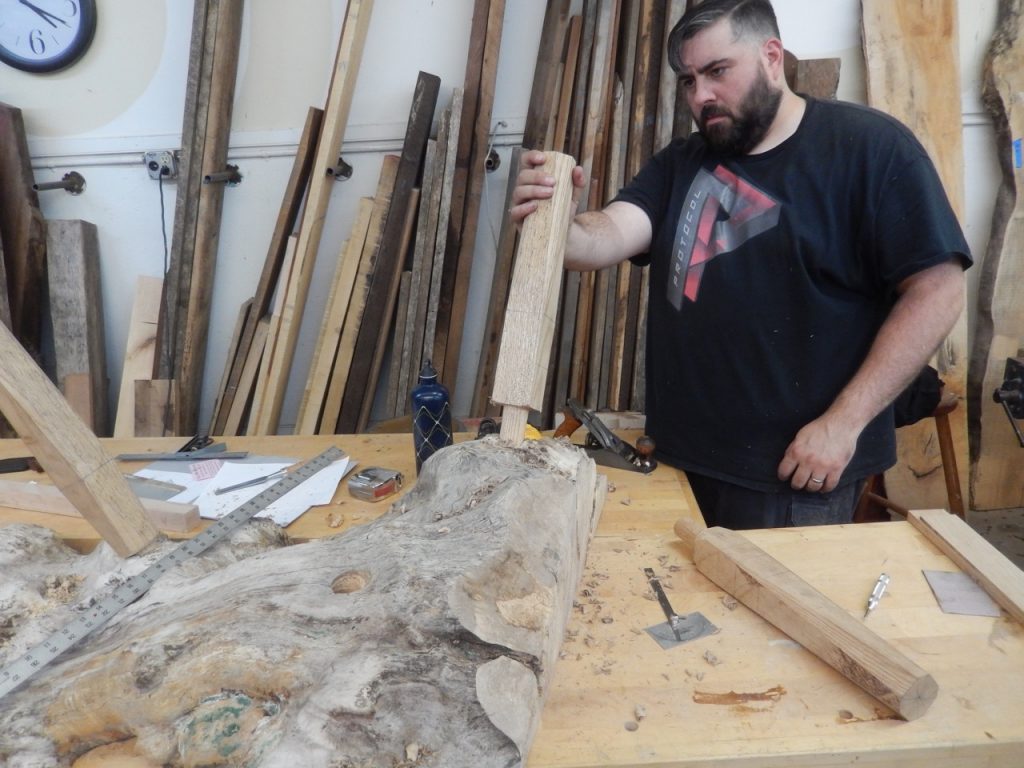
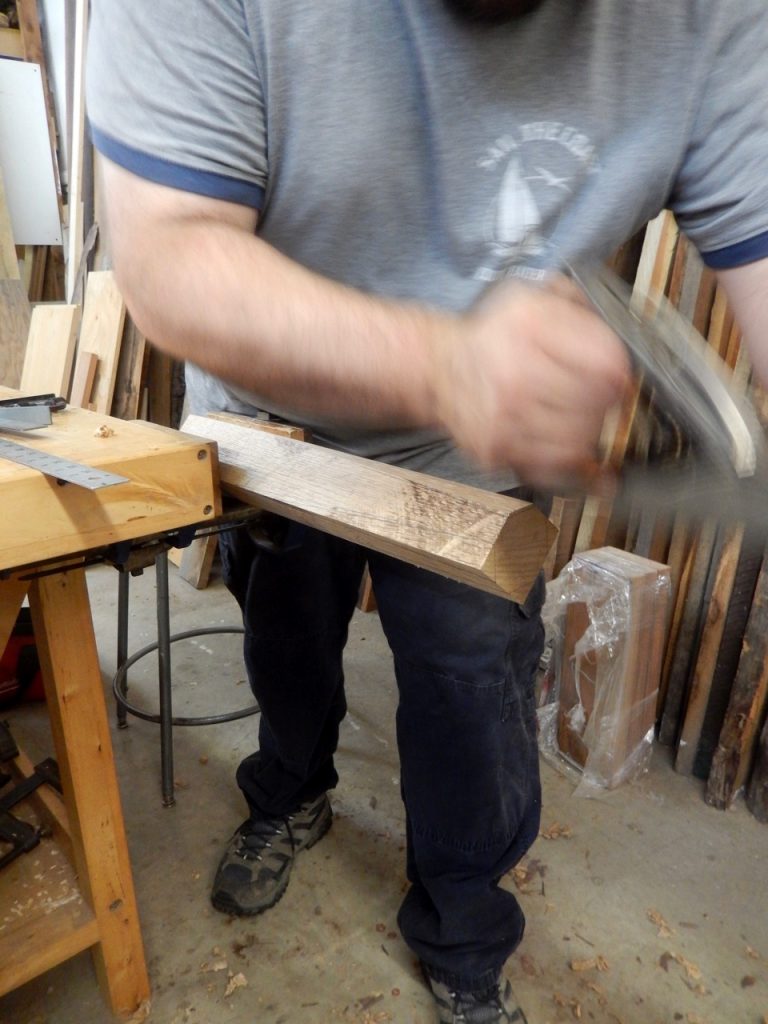
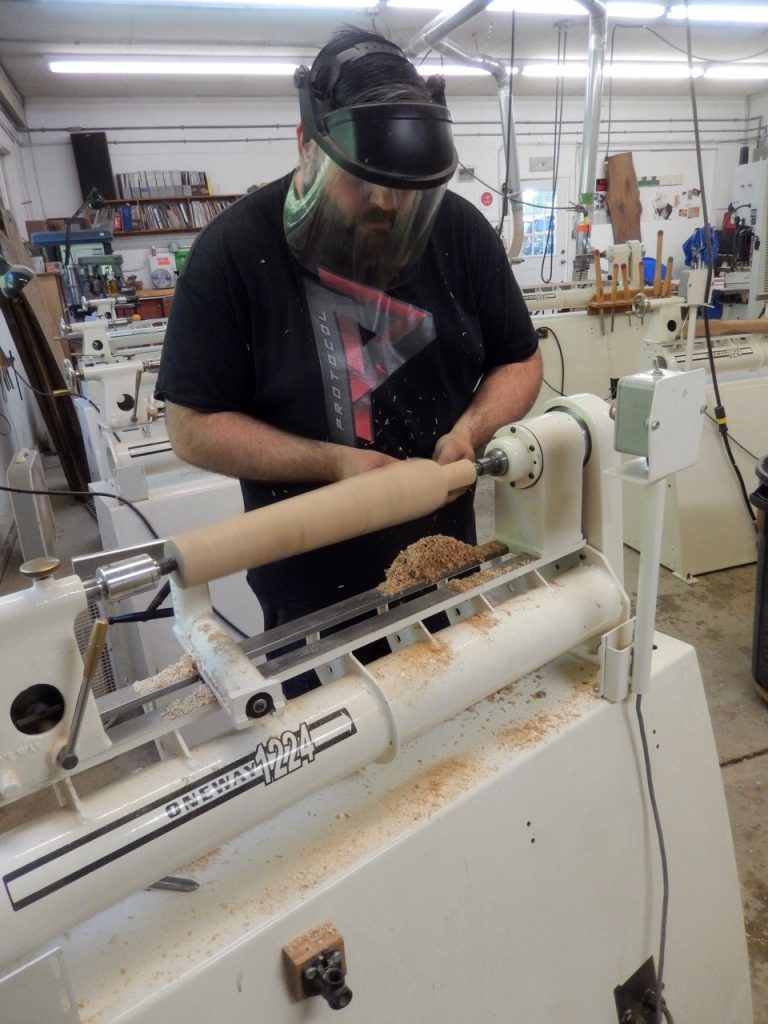
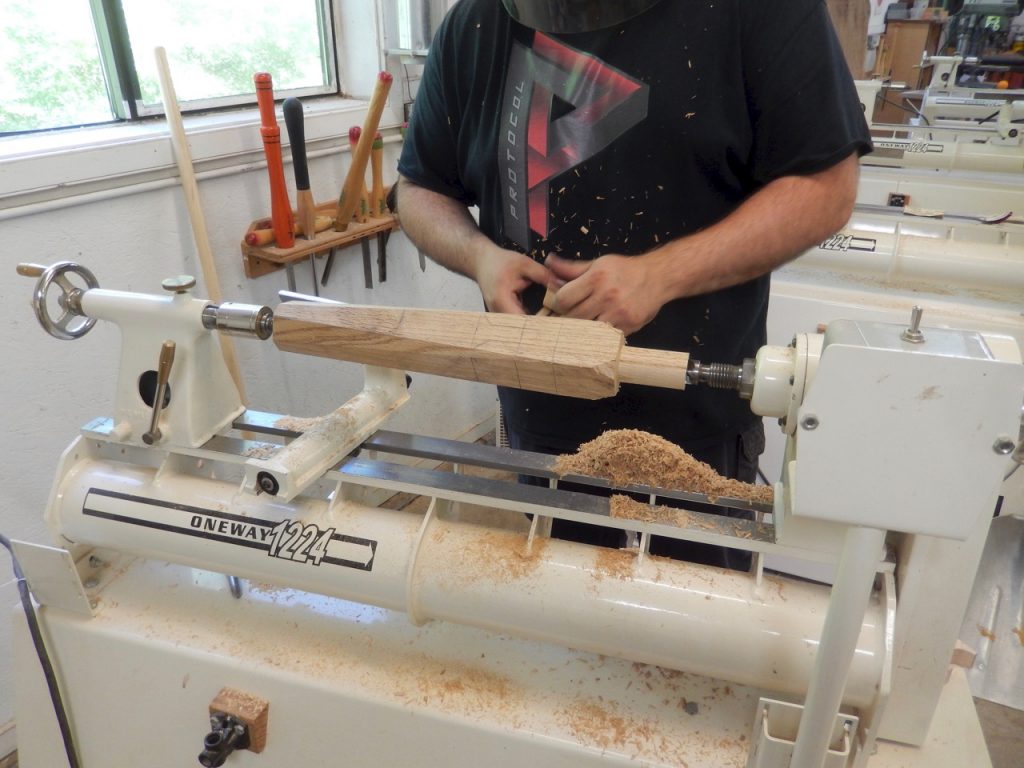
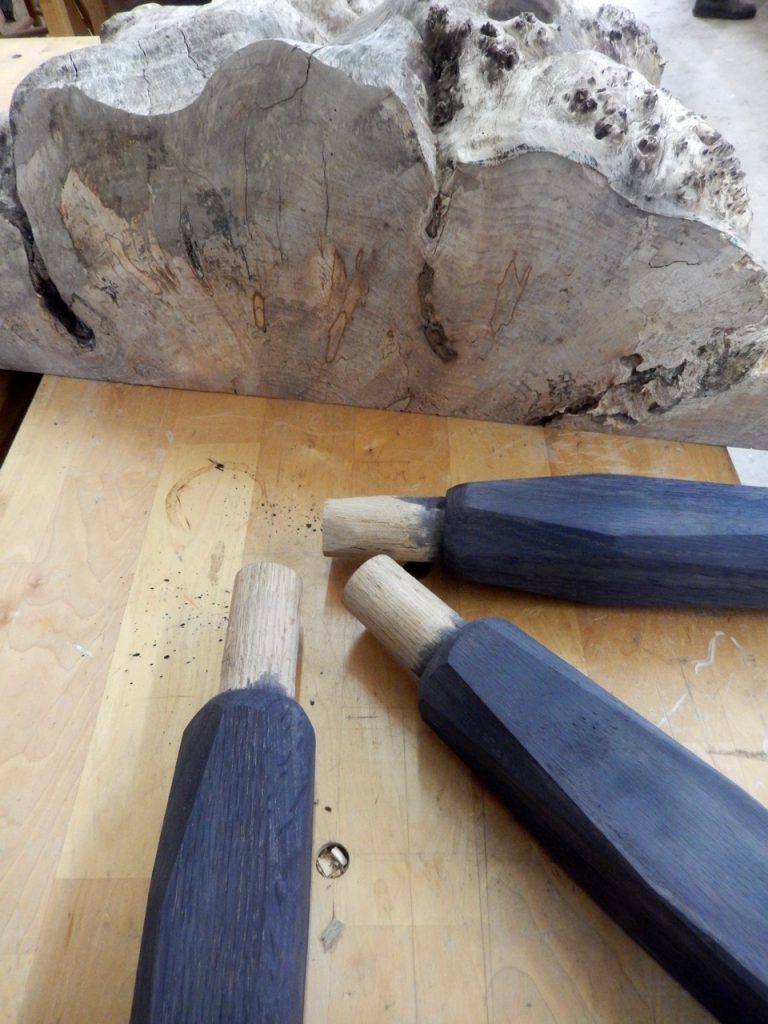
After Helder finished flattening the burl slab, he milled some oak and formed three blanks for the legs. The next morning I showed our group the style of faceted legs that I have developed for my stool making class (It’s our 8th grade project, and you can read more about this design in this link). Later that day, over a cup of coffee, Helder and I discussed the design of his specific legs. He decided to push the generic design even further and experiment with an octagonal leg. Helder drew the facets on the blanks and, with a plane, shaved off the triangulated facets. Holding the blank in an auxiliary vise jaw or, even better, a grooved jaw such as the one I wrote about in a past entry will allow you to hold the blank in the vise in a more reliable way.
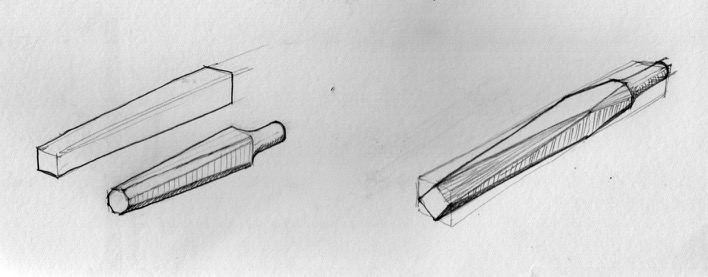
A double antiprism leg on the right and an octagonal antiprism leg on the left.

The legs on the right and in the middle have an octagonal base.
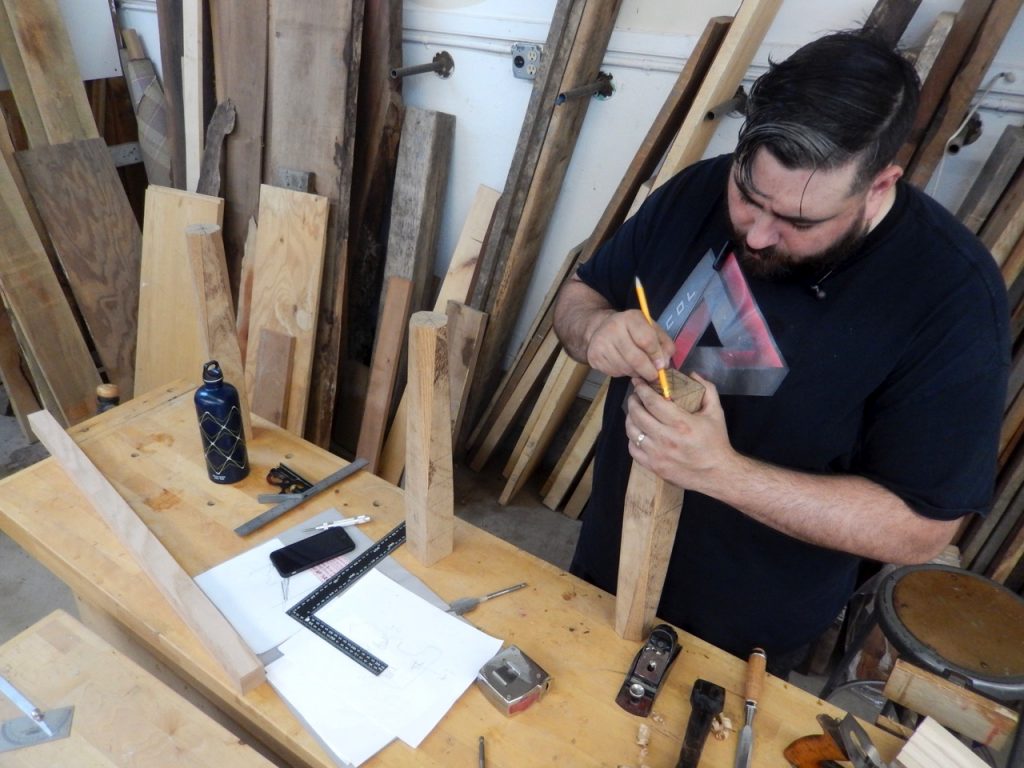
Laying out the design
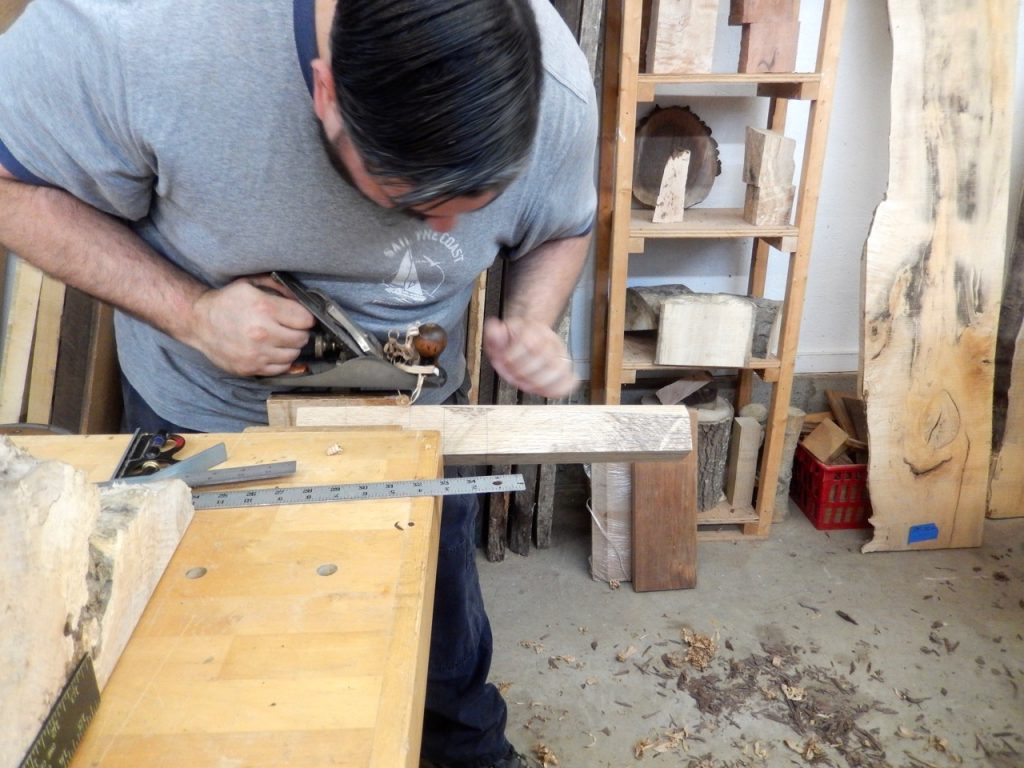
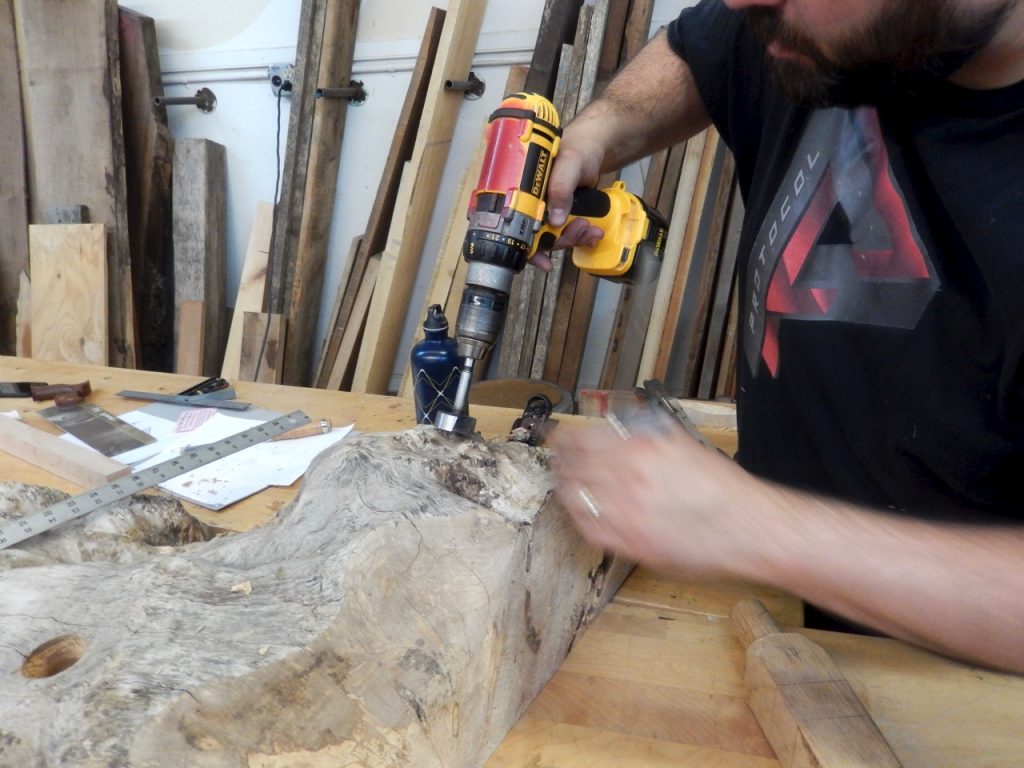
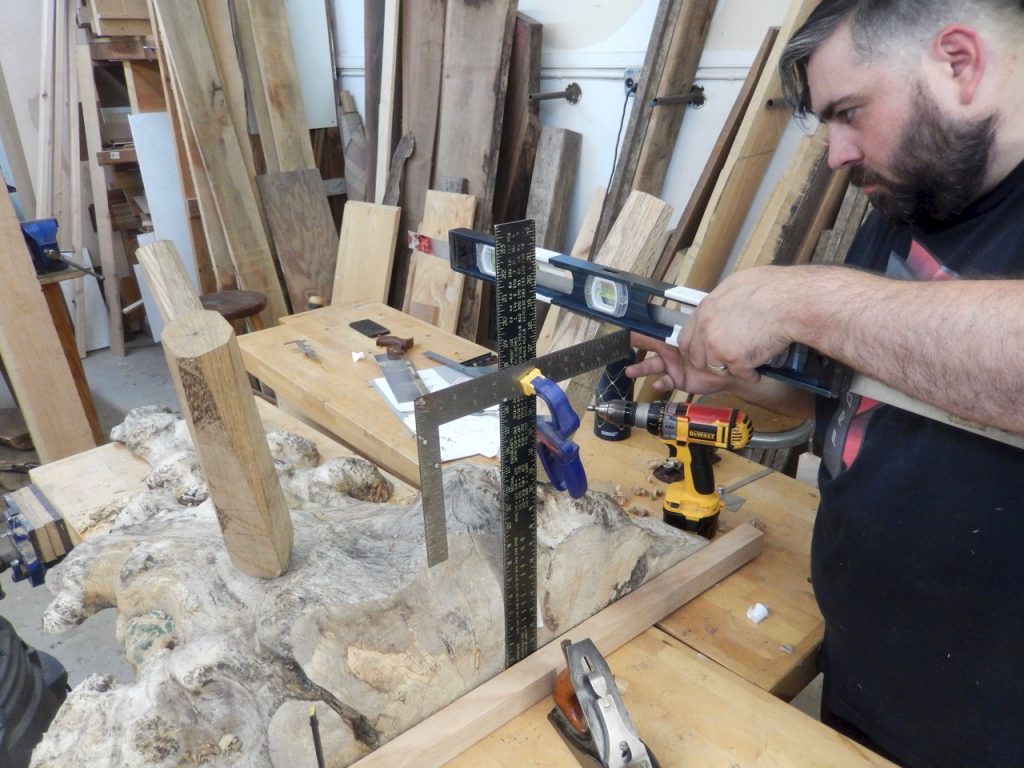
After all the blanks were shaped into multi-faceted legs, Helder turned a tenon on the first (and longest) leg. Then he inserted a wide forstner bit in the cordless drill and, with the help of a bevel to guide his drilling angle and keep it constant, he began drilling.
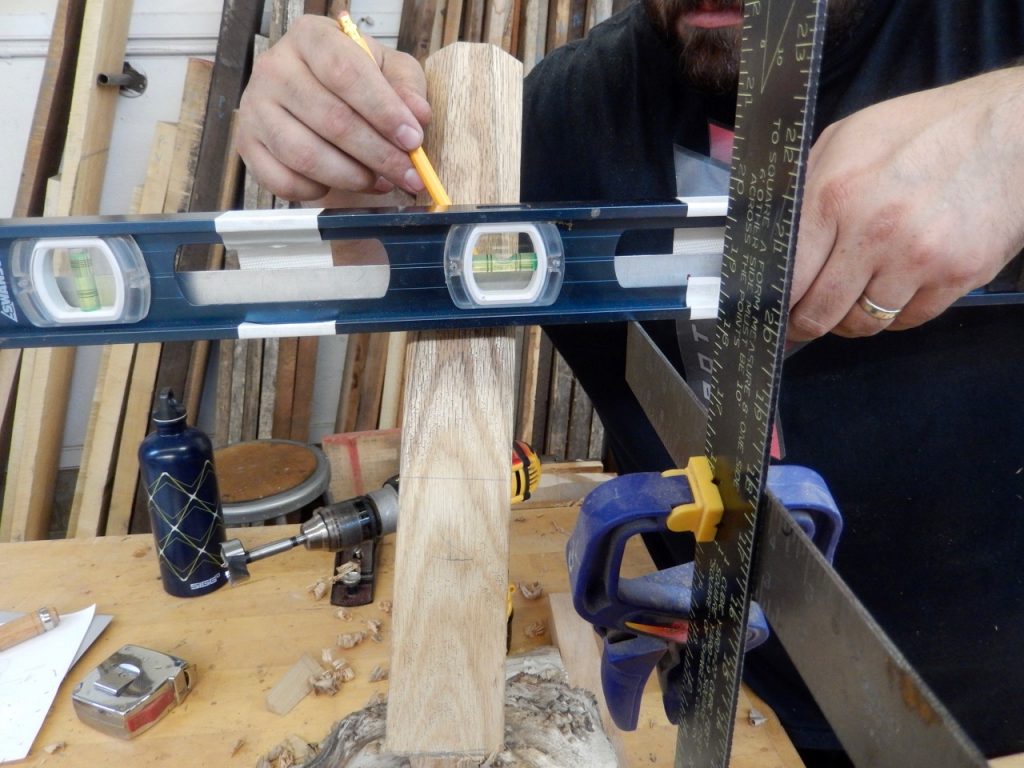
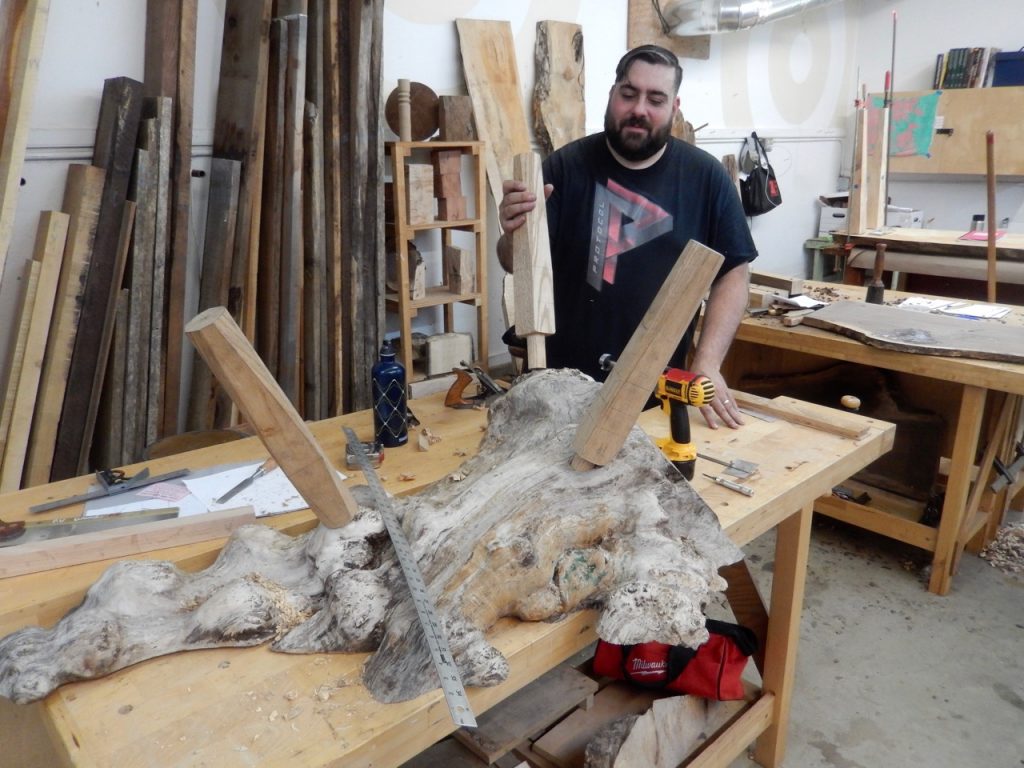
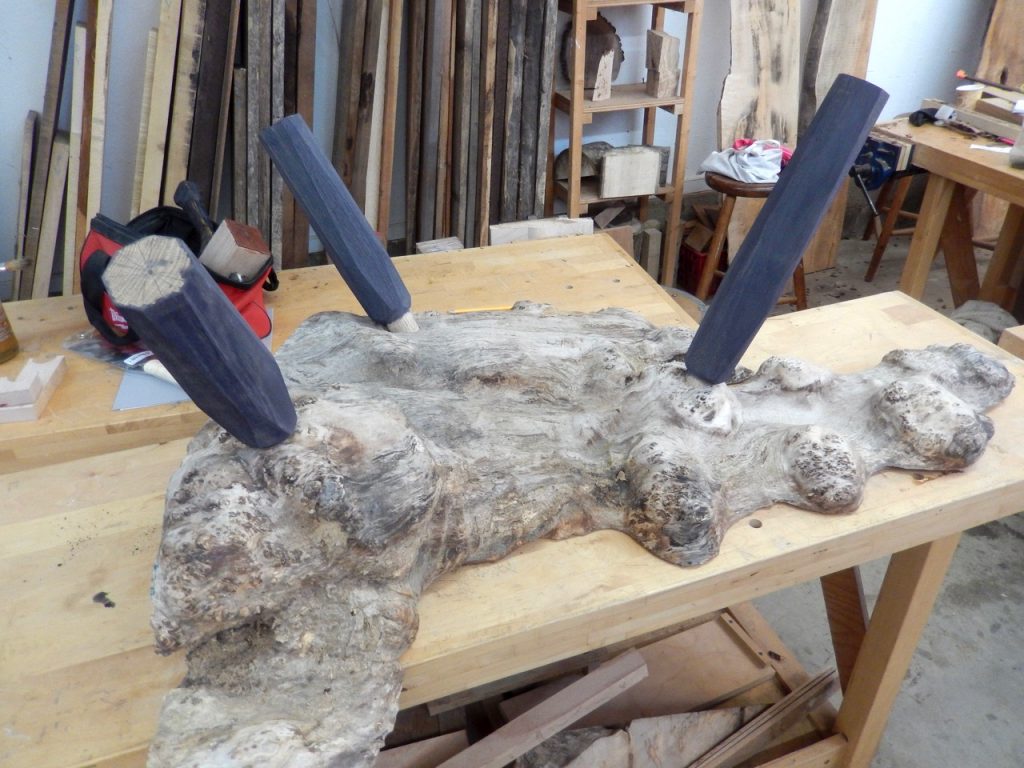
Once the first mortise was drilled, he inserted the first leg and then with a makeshift system of rulers and squares that were clamped together, he determined how long each leg should actually be in order to comply with the crazy topography of the slab. This was a preliminary estimate that helped us decide where to turn the tenon and whether we needed to reform the leg before gluing it into the slab.
Later, after the legs were already glued in place we cut them exactly to length in a technique that I will show next time.

The next day Helder brought a tanning concoction to class that he had made from steel wool and vinegar. This was an ebonizing solution* intended to darken the white oak legs and create a second degree of separation between them and the slab. I tell my students that, for me, in order to really let the live (or natural) edge become the star of a piece you have to differentiate it from the other wooden parts of the furniture through form, value (lightness or darkness) or color.
The first degree of separation can be the geometry of the legs (in Helder’s case) but if the polygonal legs would have retained their natural “wooden” properties (oak’s grain and color) they might have deflected our attention from the slab. However, unifying them using an ebonizing solution, lightning them up using ammonia or bleach, or dying or painting them, would allow us to harmonize and distinguish the underside of the base from the live edge and increase our ability to concentrate on the top.
A secondary benefit of this “two degrees of separation” approach is that the base of the table is perceived as a piece of intentional design by its own right – a fact that will make the combined piece stand out even more. Today we see more and more live edge furniture with a steel or even brass base. Using metal is another way to celebrate your live edge. A steel frame, for instance, speaks another language than the organic top both in terms of geometry and color.
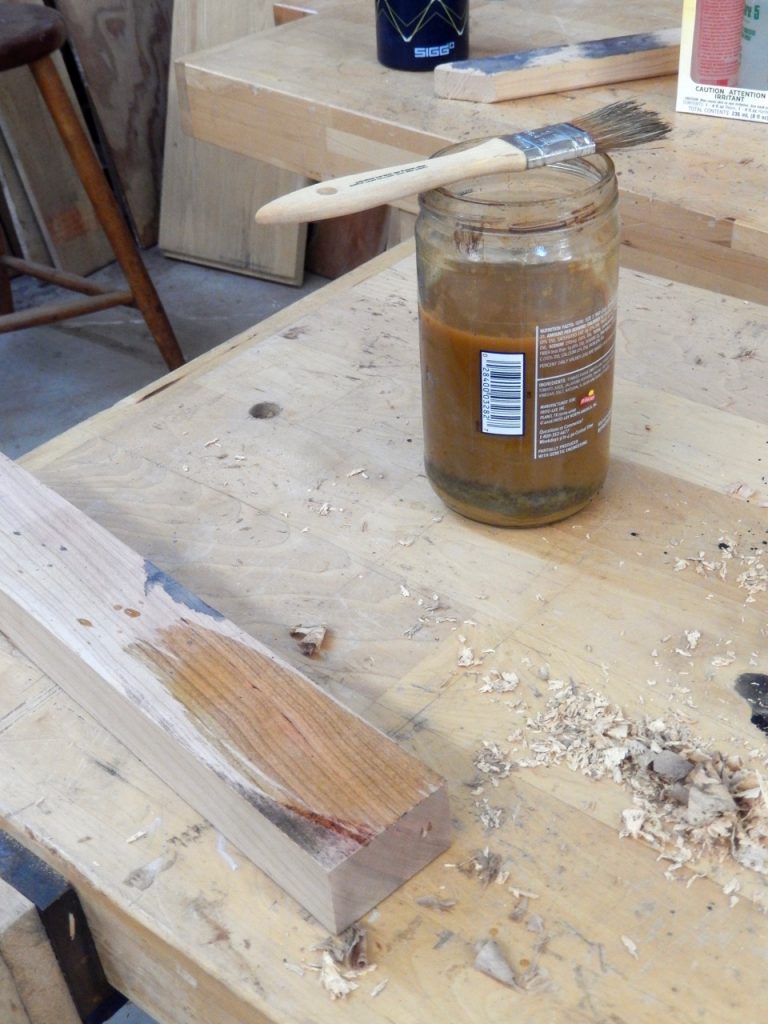
* This is how Helder made the solution:
“I used 24 oz of white distilled vinegar and a clean steel whole wool pad (000). I put the wool and vinegar in a glass jar and let it sit overnight. When the solution gets low I refill the jar with vinegar and add another clean pad. I don’t know if the grade of the steel wool matters though. I just used what I had available. I think the finer the steel wool the faster it will rust and dissolve into the vinegar.”
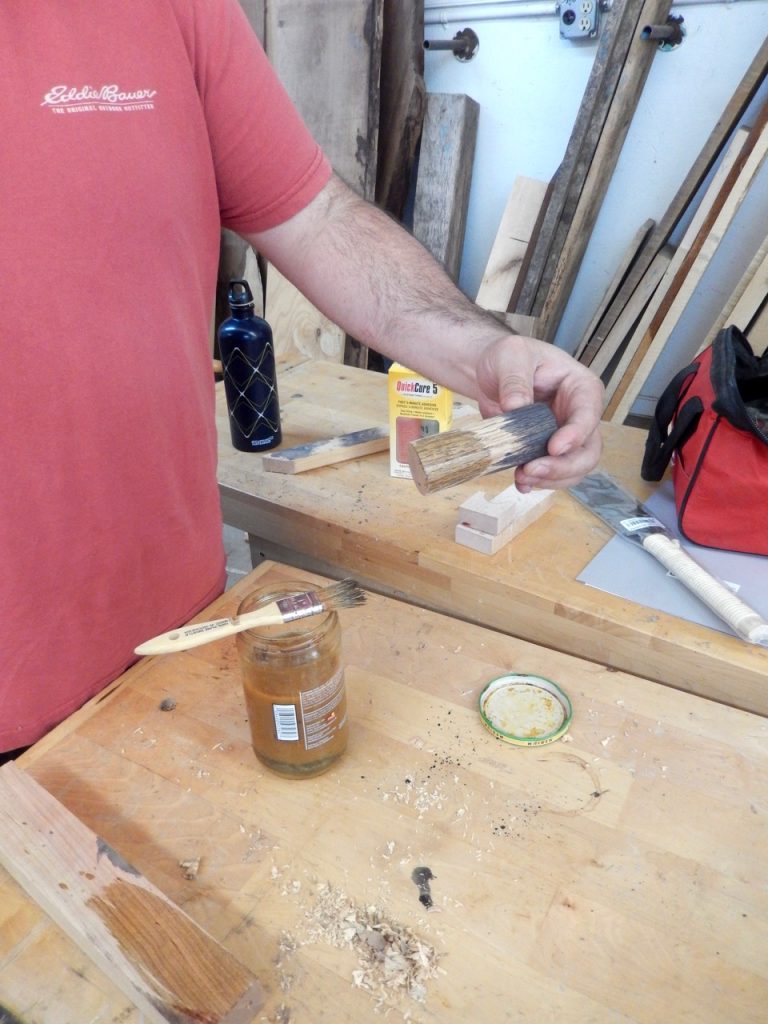
When Helder applied the solution on the oak the tannin in the wood reacted and turned the surface gray-black unifying the the grain and brown color of the surface under a cloak of monochromaticity.
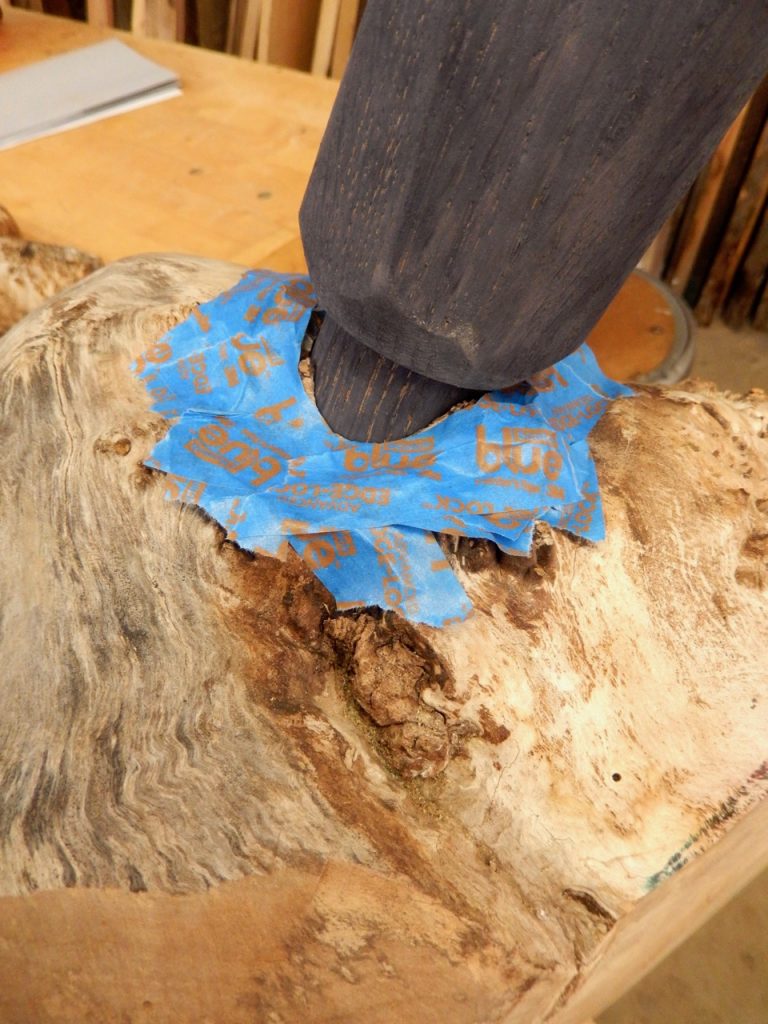
Protecting the burl slab from the epoxy we used to glue the legs in.
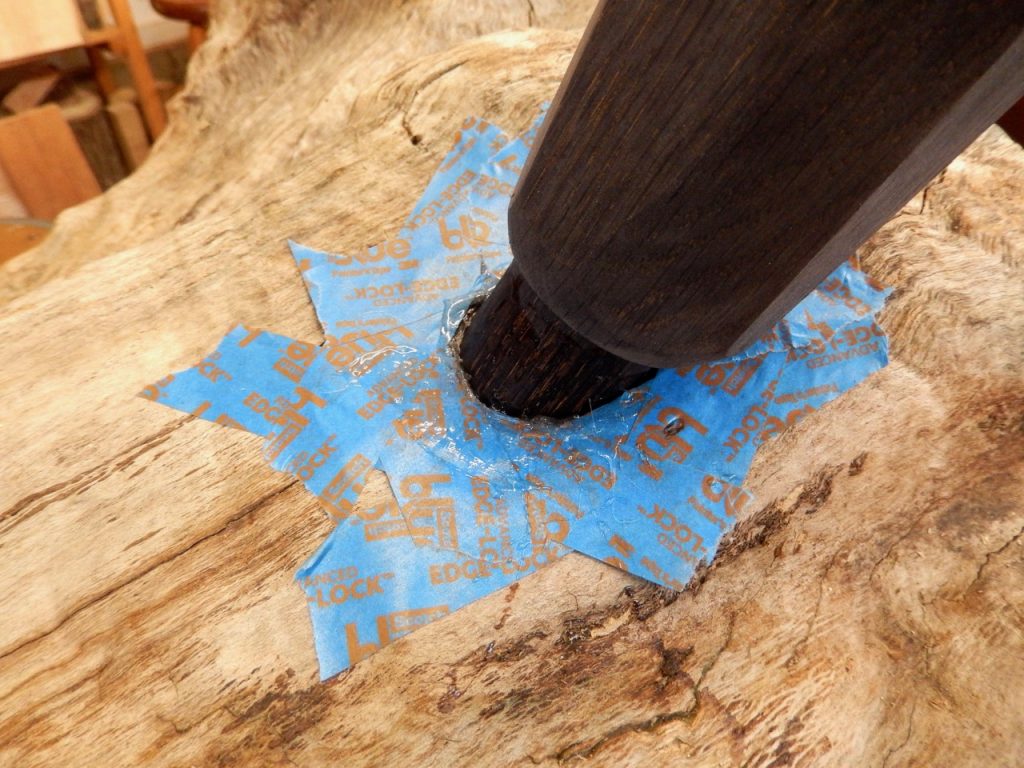
After the epoxy solidified Helder peeled off the maskingtape.
Next time I will show you how we finished the piece.
Here are some supplies and tools we find essential in our everyday work around the shop. We may receive a commission from sales referred by our links; however, we have carefully selected these products for their usefulness and quality.