


We may receive a commission when you use our affiliate links. However, this does not impact our recommendations.
The design journey isn’t a straight line.
I used to work with a guy whose nickname was the Wiz. He was an exceptional liar and a great storyteller. When the Wiz told a story he’d get all worked up, his arms waving and the veins popping out of his bald head. We used to joke that the reason he got so excited was because he didn’t know how the story was going to end either.
Design is a little bit like that idea that the ending isn’t always certain at the beginning. We might have an idea of what we want to build, how big it should be, or what sort of wood we might use. But the project starts out as just some sort of vision off in the distance that’s blurred and not quite in focus.
The whole idea of design is to take steps toward a vision and bring the elements into sharper detail until it’s all clear. The many steps along the design path are each meant to bring us closer to the vision. In practice, the design journey isn’t a straight line, but more like a series of zigzags that move us to our goal.
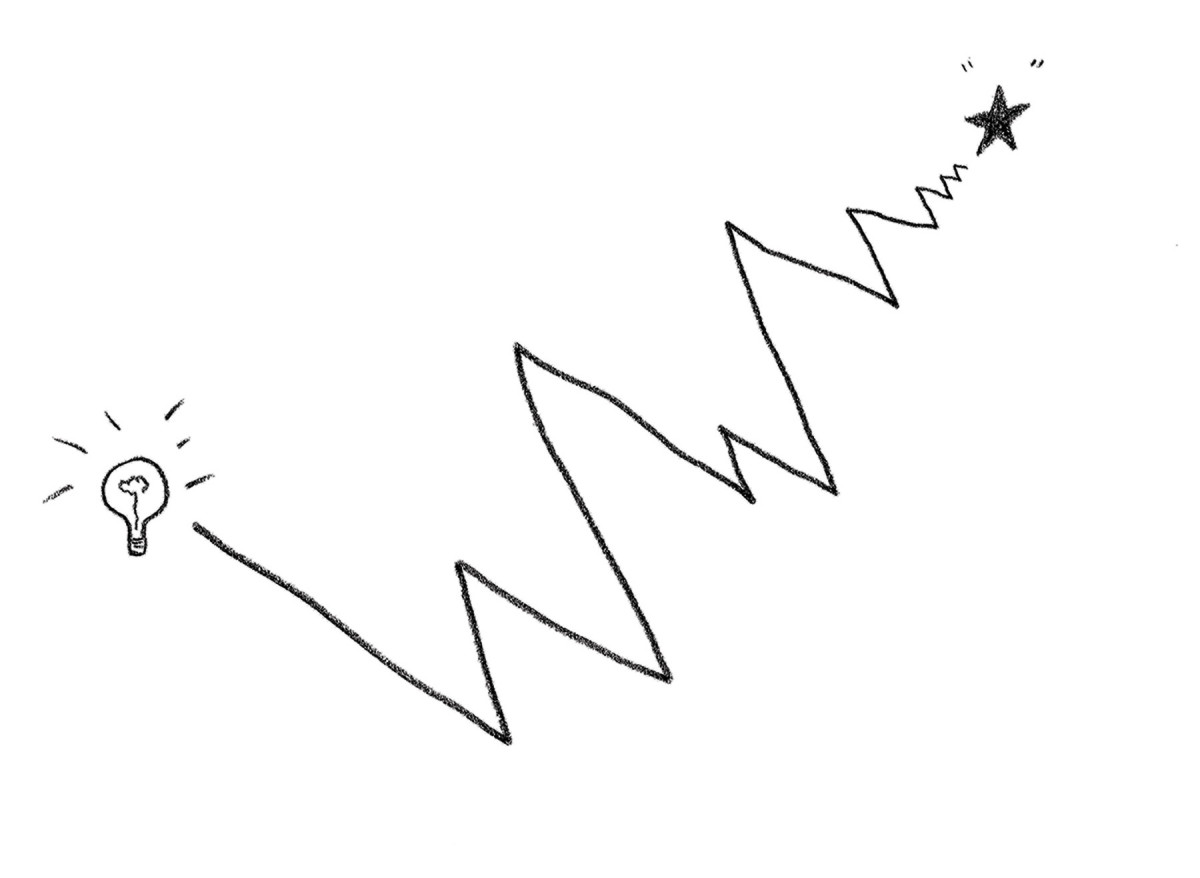
1. Each step moves us toward the destination, and ideally that zigzag line gets tighter as we hone in on the finished design.
I divide the design journey into three broad stages—Define, Explore, Refine. Each stage has a goal and all the steps within that stage are aimed squarely at reaching the goal.
Define
The define stage is when we establish the overall concept and requirements of our design. We’re getting answers to specific questions like size or function. Let’s say we want to design a sideboard: How big is the space it’ll occupy? Do we want shelves or drawers? What do we want to store in it? We’re starting from a vague idea, for example, that we need more storage in the dining room, and working toward a specific solution like building a cabinet tucked against the wall that faces the bay window. Our goal is to define all the major functional and site issues that our design must satisfy then establish overall size parameters to fit the space it’s intended to fill. It can help to draw a rough floor plan to get an idea of traffic and explore some different footprint options for a design.
Much of the define stage is about listing the requirements our design needs to fulfill. Yet there are helpful tricks we can use to sharpen our vision. Something as simple as mocking up the upper case on a sideboard out of cardboard and propping it up on a card table in the place it’ll reside can go a long way toward defining our design.
In the define stage we also clarify the vibe we hope to achieve. Are we after a sleek contemporary look, rustic, arts and craft, something architectural or organic? The define stage, when complete, gives us an envelope to work with so that we can move on to the next phase.
Explore
The explore stage is about playing with the many possibilities that might fit inside the envelope we’ve defined. Our goal is to take our basic concept and come up with a composition or structure that we can build upon. I like to draw a series of rectangles that mimic the proportions in the overall size parameters we’ve defined and do a series of rough sketches inside those rectangles.
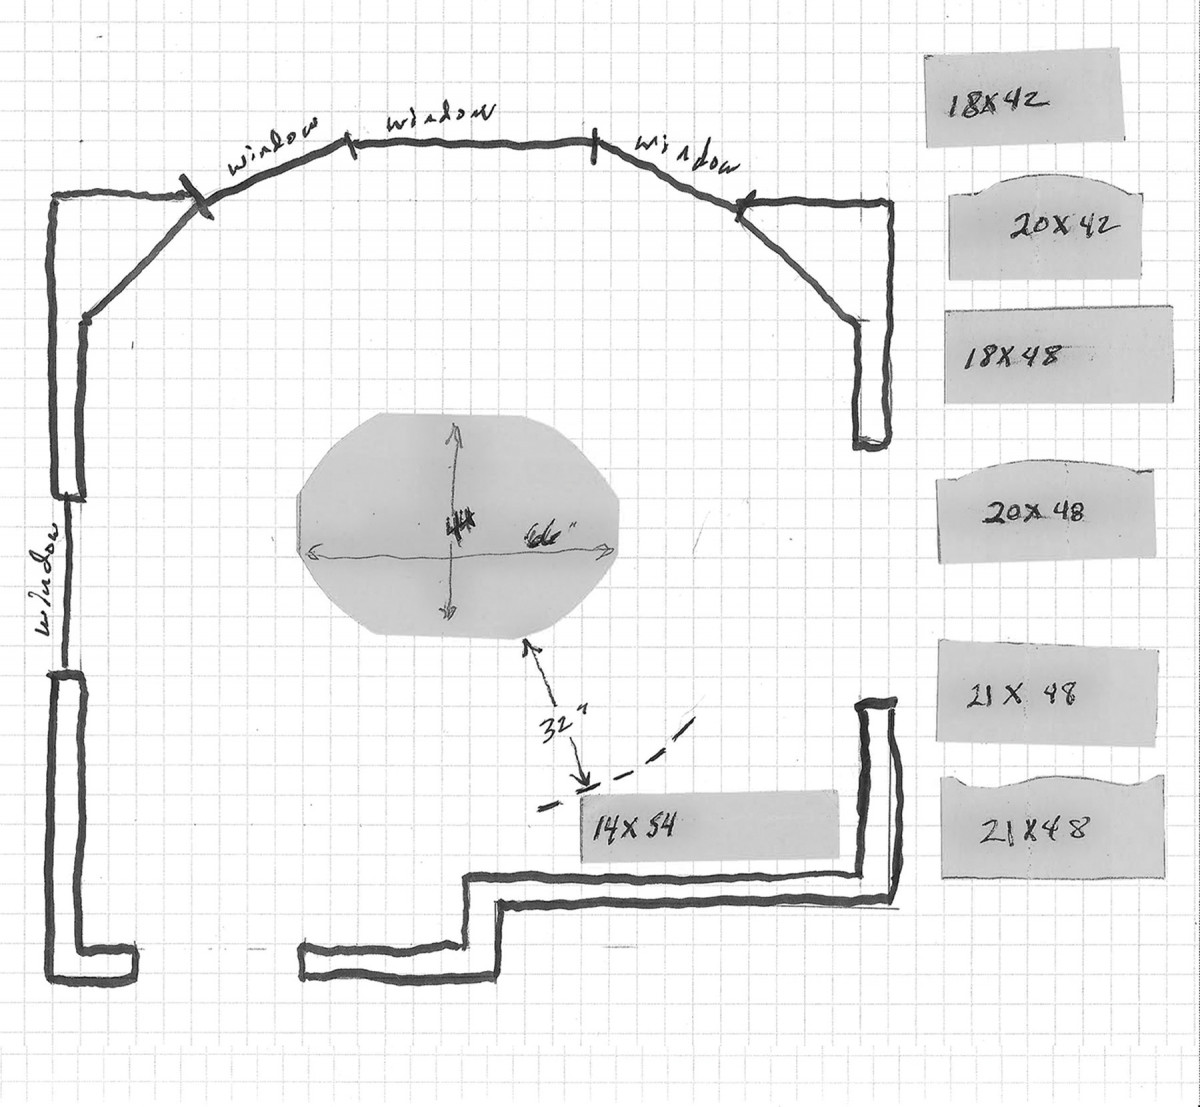
2. A floor plan with a few footprint templates helps to see how our project works—or doesn’t work—in foot traffic.
This allows me to explore different case configurations, the size and placement of legs, doors and drawers. It helps to do these rough sketches quick and dirty to imagine different possibilities. It’s not unusual for me to do 20 to 30 quick sketches during this phase. From these, one composition will float to the top. Armed with this I move on to the refine stage.
Refine
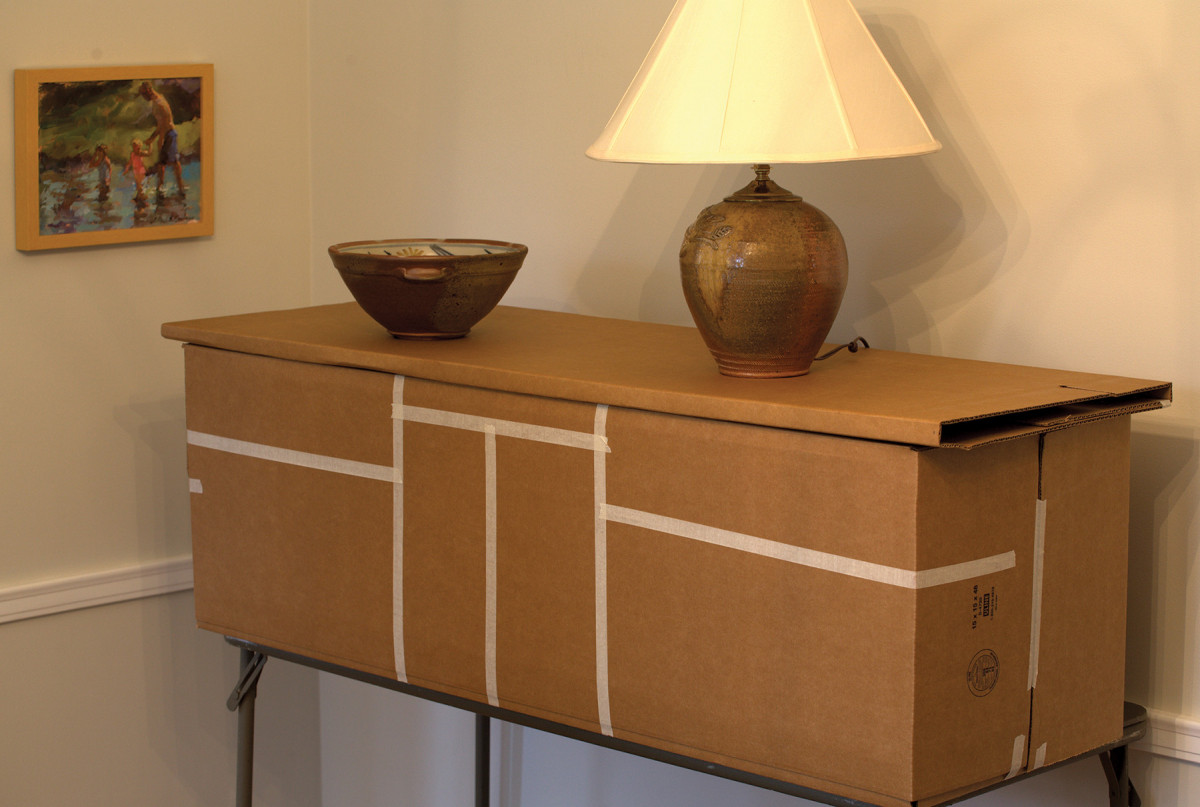
3. A full-size cardboard mock-up can clear up doubts about the mass of a project.
Refining a design is taking our composition and making it sing. Here we take the results of our exploration and play with the size of the different parts to create a pleasing harmony. In this stage I work up proportional drawings and gauge how each part relates to the one next to it, as well as the whole. In short, I push the sizes of adjacent parts up or down and compare how they play off each other visually. This is where we play with the thickness of legs or tabletops.
We can also begin to explore curves and try to get a handle on how bold or restrained we want to curve one part with another.
There’s lots of trial and error in this stage. You may bump a part one way or another looking for that sweet spot or the place where you know you’ve gone too far. Usually you’ll find that sweet spot or at least a range where it seems to work. When I’m happy with the small sketch, I might scale it up to a larger half- or full-scale drawing. Moving up to a larger scale will often help the eye make further refinements and see areas to adjust. Often what looks good in small drawings will look jarring at full scale.
Not a Recipe
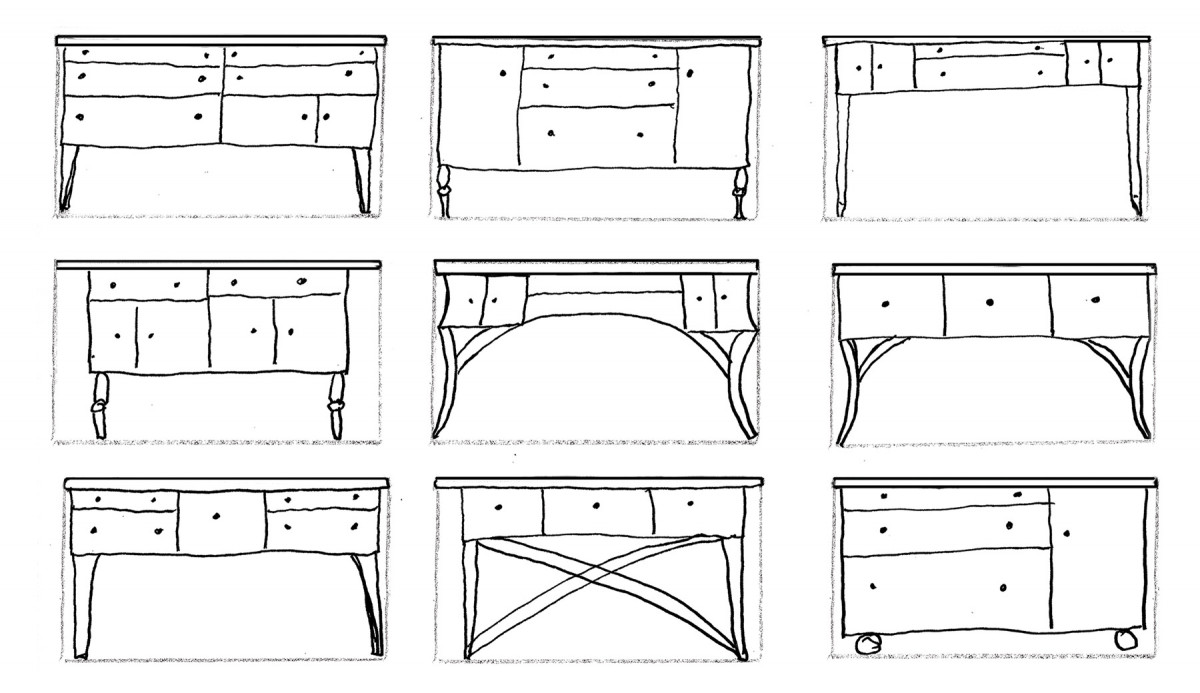
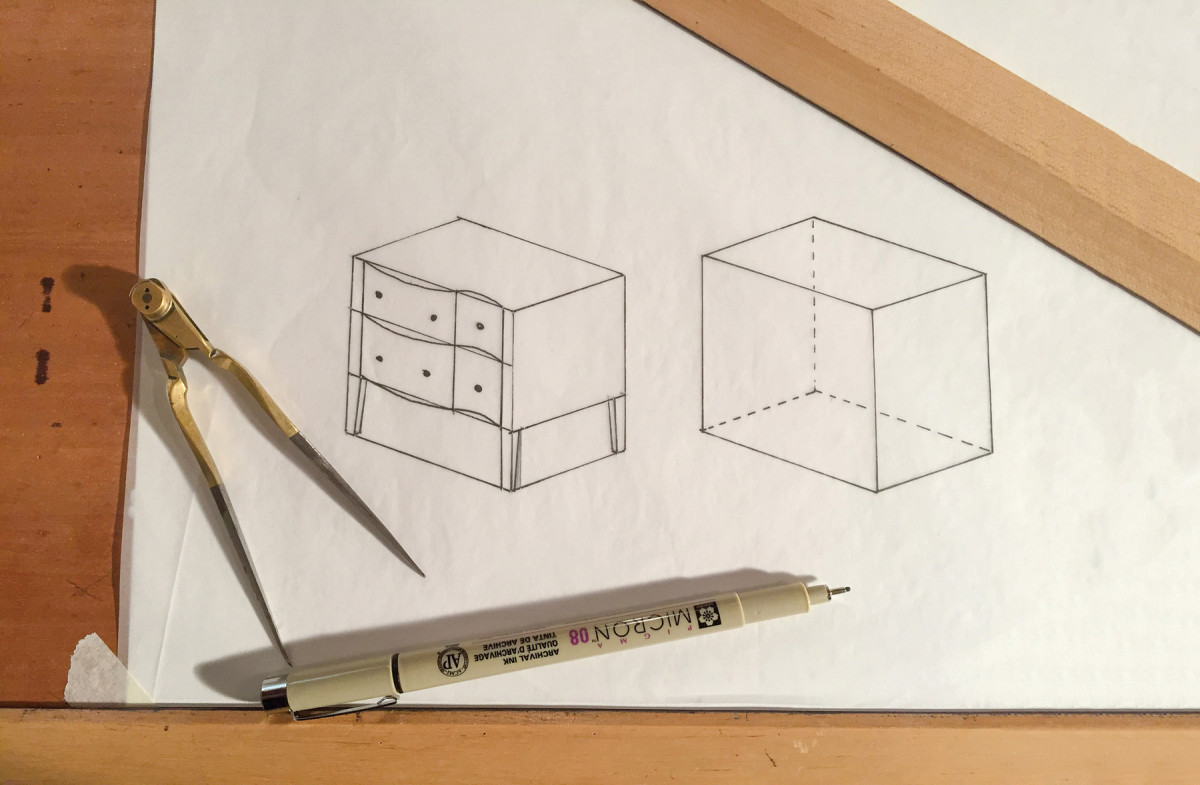
4. Quick sketches will free your imagination. One of these ideas will rise to the top.
This process is more like a map than a recipe. You may take a different route than me. Heck, I vary this approach a great deal depending on the customer and the complexity of the project. The important point is that each of these steps helps to focus our vision. To see this process in action, watch my video at byhandandeye.com. You’ll look over my shoulder while I design a work table for an artist’s painting studio.
Here are some supplies and tools we find essential in our everyday work around the shop. We may receive a commission from sales referred by our links; however, we have carefully selected these products for their usefulness and quality.


Good insight into the thinking that creates something special. I would like to make some additional observations based on my experiences. This process is enhanced with a simple but good method of documentation. As a hobbiest this part of a project can last a long time (months and sometimes years). If you don’t capture your thinking along the way, you can forget things. This can cause you to waste time rethinking them, make changes that are not consistent or needlessly add to the complexity. I use Fusion360 for drawings and Freeplane for my thinking (no affiliation).
Secondly, these phases are not linear. There is a lot of back and forth between them. A refinment can easily lead to a change in thinking for a requirement from the definition phase.
In essence this is virtual prototyping. On my last workbench project (fairly simple conceptually) I went through 23 versions before I cut the first piece of wood.