


We may receive a commission when you use our affiliate links. However, this does not impact our recommendations.
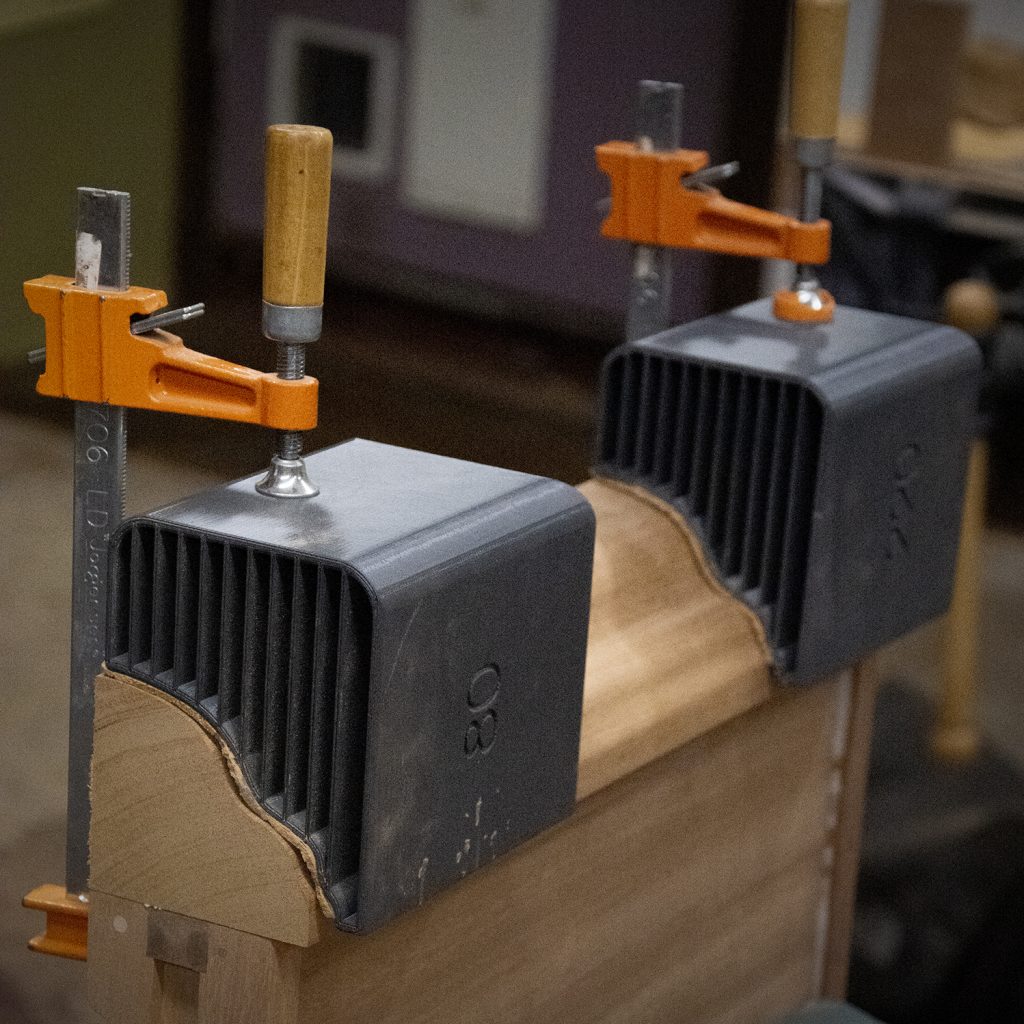
Custom 3D printed sanding blocks and clamping cauls. While teaching a class building his Greene and Greene themed game table, furniture maker Darrell Peart’s student, Kevin Harris, printed out these custom profile blocks to make sanding and clamping the ogee shape easier.
Digital woodworkers who use CNCs may not be aware that there are other digital tools they can use. Maybe even some you haven’t considered before. This is because digital tools all need CAD drawings. It’s another bonus you get for learning CAD. Often, these are the same or similar to the CAD drawings you create for woodworking projects. Laser cutters, digital metal cutting tools like plasma cutters and water jet cutters, use 2D CAD or drawing files. 3D printers use 3D CAD drawings to print three-dimensional objects. These are the same 3D files CNCs use for three-dimensional carving.
I agree. 3D printers and woodworking seem like an odd combination. Starting with the obvious, woodworkers make things out of wood and 3D printers make things out of plastic but as I’ve found out, you can make useful things with a printer. For example, after only a short time, I now regularly create CNC clamps, jig and fixture parts, new router templates and design, create and/or prototype new shop, CNC and equipment upgrades using 3D printers. A surprising use for me is that I’m now prototyping many of my wood and GFRC concrete sculpture projects with 3D printers. And, recently I’ve begun to experiment with 3D printed furniture joinery components.
3D printers are different
3D printing is quite different than the processes we use in a woodworking shop. All woodworking in a subtractive process. That is, we take wood off. Woodworkers remove wood by cutting, carving, routing, bending and shaping. 3D printing is an additive process in that to make something, material is added. The most common 3D printing process is called Fusion Deposition Modeling (FDM). Polymers in the form of wire-like filament rolled onto spools is melted and deposited in layers until the 3D object is complete.
Where woodworking processes work great is for making relatively large things: furniture, cabinetry, etc. 3D printing excels in ways woodworking can’t: small-scale, detailed, highly accurate objects made out of a consistent material. This difference makes 3D printing a complementary process for making things that can’t easily be made out of wood. Small objects and components with a utility or functional use around the shop are a good example. And, because the printing process is “hands-off” rather than “hands-on” like woodworking, it comes with a special advantage. You can start a print, leave the room and come back hours later for a completed result.
Simply put, 3D printers manufacture things. Woodworkers build things by making one part at a time and assemble them into a final result. Because the processes are so different, printers’ advantages are not what woodworkers are used to. For some, a 3D printer might be a tool to produce small, detailed, useful things that help or support us in the pursuit of our chosen hands-on craft.
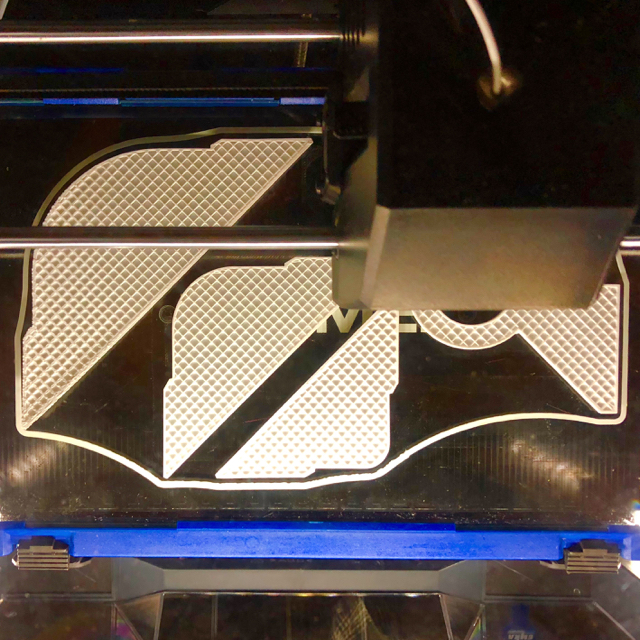
3D Printed corner round over templates being made on the very capable Dremel 3D45 printer.
Creating with a 3D Printer
To make anything with a 3D printer you start with a 3D drawing of the thing you want to make. You can create your own using 3D CAD software, such as Fusion360, Rhino3D (what I use) or other online or free CAD programs like TinkerCAD or FreeCAD. But, if you’re not yet comfortable using CAD software to create your own designs, you can download ready-to-go, printable files online. And, there are a lot of them. One of the biggest reasons 3D printers are so popular is the availability of literally millions of free 3D designs at websites such as thingiverse.com or myminifactory.com. On these sites, you’ll find things to print of every conceivable description from the practical (replacement parts for microwave ovens and refrigerators, T-track components, even toothpaste tube squeezers) to the impractical (toys, robots, cosplay character costume parts). Even if you expect to never even consider buying a 3D printer, I suggest you look around online to see what’s possible. It’s quite entertaining. You’ll be amazed at what you can find.
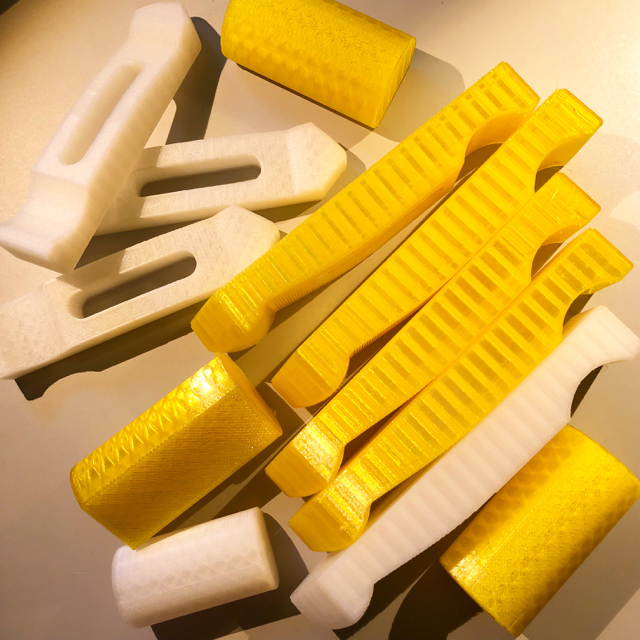
3D printers can make many useful things for woodworkers. In the photo above are several CNC hold down clamps designs made with different materials I’m testing for strength and flexibiliy. One advantage of using a 3D printer is you can quickly test things or make a tool for a specific situation. And, the cost of prints is usually very low. The clamps above cost about $.10 each in plastic and $.03 in electricity to make.
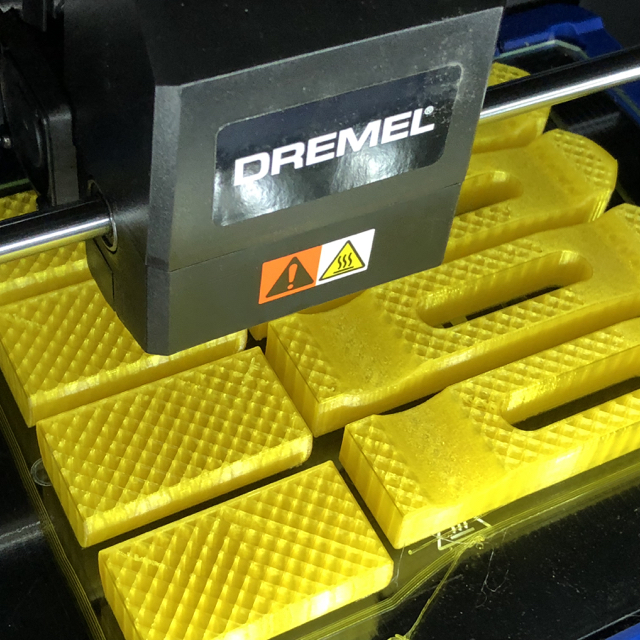
Hold down clamp 3D printing in action.
What’s it like to use a 3D printer?
At some point, I may do a more complete how-to, but for now here’s a quick version of the process of getting something 3D printed.
- Find a file online or create a 3D printable file on your computer. This usually comes in the form of a STL file.
- Open up the file in the program that comes with the printer that prepares yor files for printing. These are referred to as “slicer” programs.
- Apply the printer’s default settings for the kind of filament you’ll be using (PLA for example) for your print.
- Export the machine-ready file (this is a G-code file just like on a CNC) to a SD card or USB flash drive that the printer accepts.
- Load the filament of your choice onto the printer.
- Choose the file you wish to print and begin.
- Come back hours later to see the results.
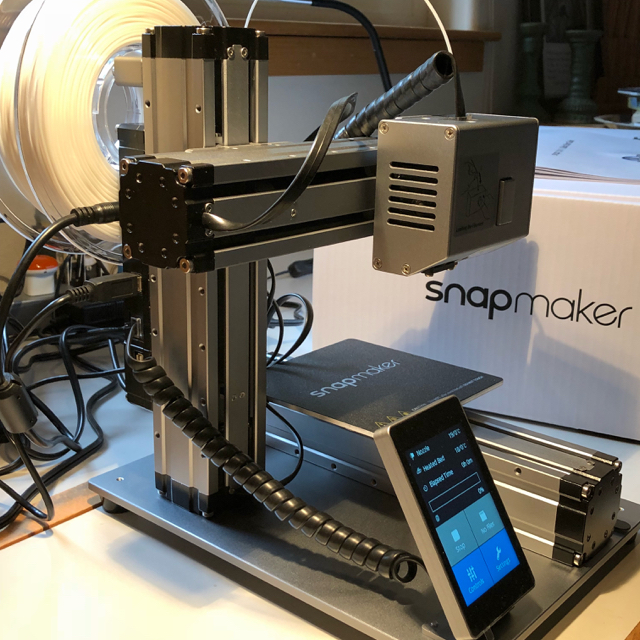
This little 3D printer is my first printer. It’s very small. The print area is just 5″ x 5″ x 5″. This little gem is called the Snapmaker and it has some rather interesting capabilites. A key feature is that it’s modular. The 3D print head can be swapped out with a Laser Cutter/Burner head or a minature CNC head in a few minutes. Now that’s a small CNC.
Is 3D printing difficult?
Generally, the answer is no. Most 3D printers have simple one-button controllers and an LCD screen. It’s on your computer where you set up your files to print. Compared to programming and setting up a CNC, 3D printers are far easier to use. Though, there’s quite a bit of magic going on under the hood, for the user 3D printing is not a particularly technical thing to engage in. You make a few setting choices and let the machine do its thing.
Essentially your key choices are to select the kind of filament you’re using and the quality level of your print. However, some people struggle a bit learning how to solve basic printer issues. Though 3D printers have far fewer variables than CNCs, users still need to understand causes and solutions to printing problems as they crop up. Most have to do with finding the right temperature settings for the extrusion nozzle and the bed and getting the first print layer to stick. I’ve found that most of the time, the default print settings for different kinds of filaments work fine. The good news is once you get things dialed in you just can print almost anything. To make the entire process simpler yet, 3D printer companies like Dremel are working hard to make printing even easier by automating many of the choices.
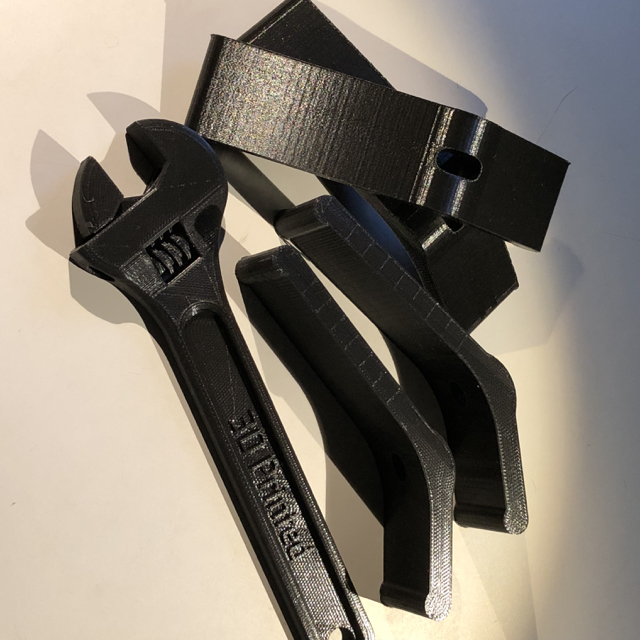
Yes, that really is an adjustable Crescent Wrench made out of ABS plastic. No, you can’t use it to over tighten or loosen snug bolts, but it does work and it was printed in one piece. The other items shown are CNC clamp designs I’m testing.
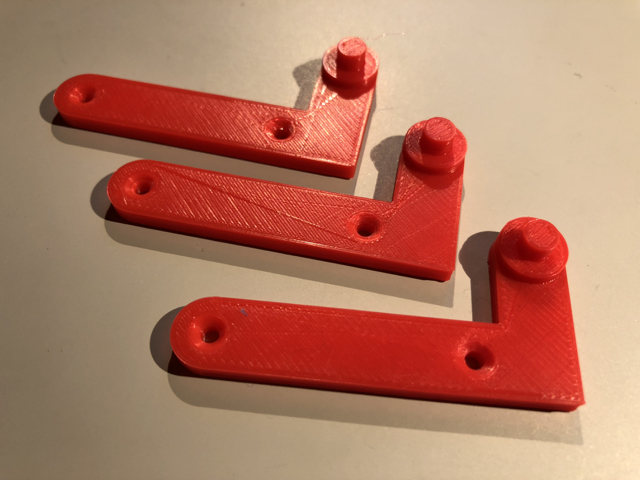
Knife Hinges out of plastic? These are tests made for a friend, furniture maker Bob Spangler to check the fit before he machined the final hinges out of brass for his beautiful custom Tansu cabinets.
What can a woodworker make with a 3D printer?
- Jig parts
- Fixtures
- Patterns
- Custom clamping cauls
- Shop upgrades
- Model projects
- Joinery components
- Lots more…
Testing designs on 3D printers
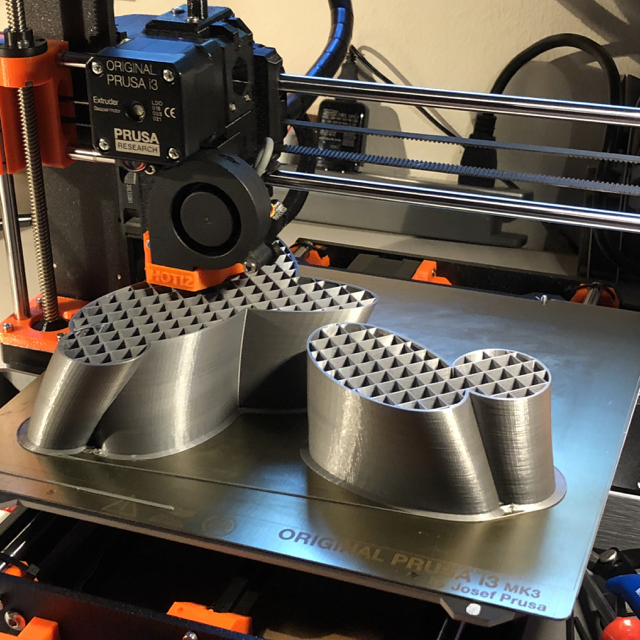
One thing I use a regularly use a 3D printer for is to preview and test sculpture designs and work out details before committing the time and materials to build a full-scale sculpture. Much better to solve design and construction issues before running into a problem halfway through the building and carving a 4′ tall version out of wood. The printer shown is one of my favorites: the superb Prusa I3 MK3
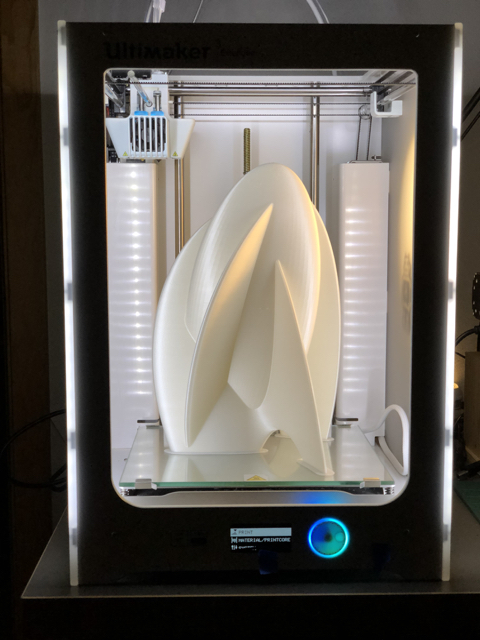
This is a 3D printed test of a 12″ model for a planned 7′ sculpture to be made with stack wood lamination. The model is printed on the excellent Ultimaker 3 Plus. It took 23 hours to print.
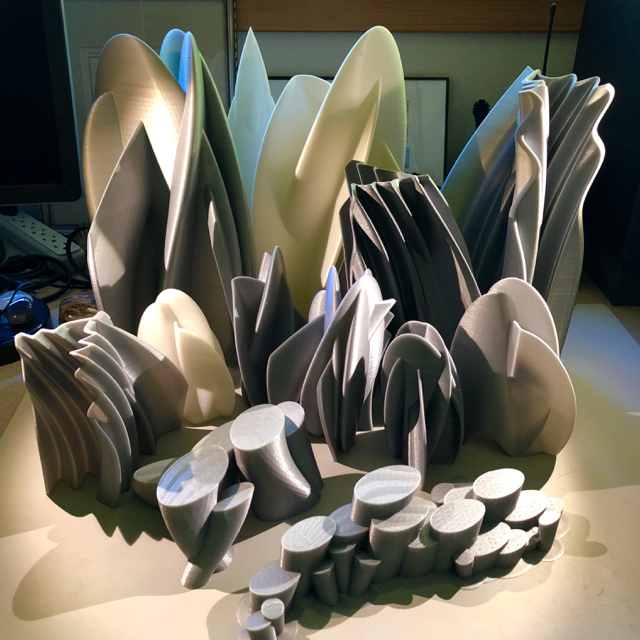
A sample of the many 3D printed sculpture tests I make before committing to making full-size pieces out of wood.
Despite the fact that 3D printers work in plastic, they can make things we can use in the pursuit of our craft. As with CNCs and other digital tools, the secret in getting the best out of 3D printing is to learning how to use CAD software. Digital tools use CAD. That’s pretty much a given. No matter what kind of woodworking you choose to do, I can’t encourage readers enough to invest your time and $ in learning how to use quality CAD software. Don’t be cheap with either. We all have limited amounts of each. So, invest wisely.
Even if you’ll never use a CNC, 3D printer or any digital woodworking tool for that matter, at the very least becoming fluent in CAD will help make you a better designer. Skill and craftsmanship are critical components for better woodworking. They also drive the very passion behind everything we all strive for in woodworking. But, learning to be a better designer is all too often an after thought. Yet, getting better at design is the best long term investment you can make in woodworking. Instinct and personal taste will get you 10% of the way there. The other 90% are about design skills. In the end, it’s design that separates the merely good from the great. CAD just happens to be a great tool for exploring new directions and exploring design possiblities. It’s not that hard to learn CAD basics if you’re willing to try. And, if you regularly use it, you’ll progressively get better at design just by trying variations and testing out ideas. Nice bonus!
With printers starting at $200, 3D printers have become very affordable. At the other end of the equation, serious printers close to the capabilities of expensive industrial/engineering prototyping machines that use tougher, bendable and flexible materials are also becoming more reasonably priced. This class of machines is well suited for useful tasks in a woodworking shop. I’ll have a review of one and a new video in my next post. I’ll review the Dremel 3D45 Digilab 3D printer.
Related Posts
Additional Resources
- Digital Woodworking on Instagram
- Personal Work on Instagram
- Digital Woodworking YouTube Channel
Here are some supplies and tools we find essential in our everyday work around the shop. We may receive a commission from sales referred by our links; however, we have carefully selected these products for their usefulness and quality.


If you would like to play with a 3D printer before purchasing one you can check with your local library. Many libraries these days are setting up Maker Hubs which include 3D printers, Laser Cutters, etc. They usually also offer free training on programs like TinkerCAD.
Original prusa printers are the best. The mk2S is probably better than any printer besides the mk3. The lulzbots are also excellent, if you have the money to spend. I built my cnc machine using a 3D printer and parts from v1engineering.com. it was so much fun, I built another CNC and two 3D printers with cnced parts. They are excellent compliments to woodworkers, especially if you’re technology inclined.