We may receive a commission when you use our affiliate links. However, this does not impact our recommendations.
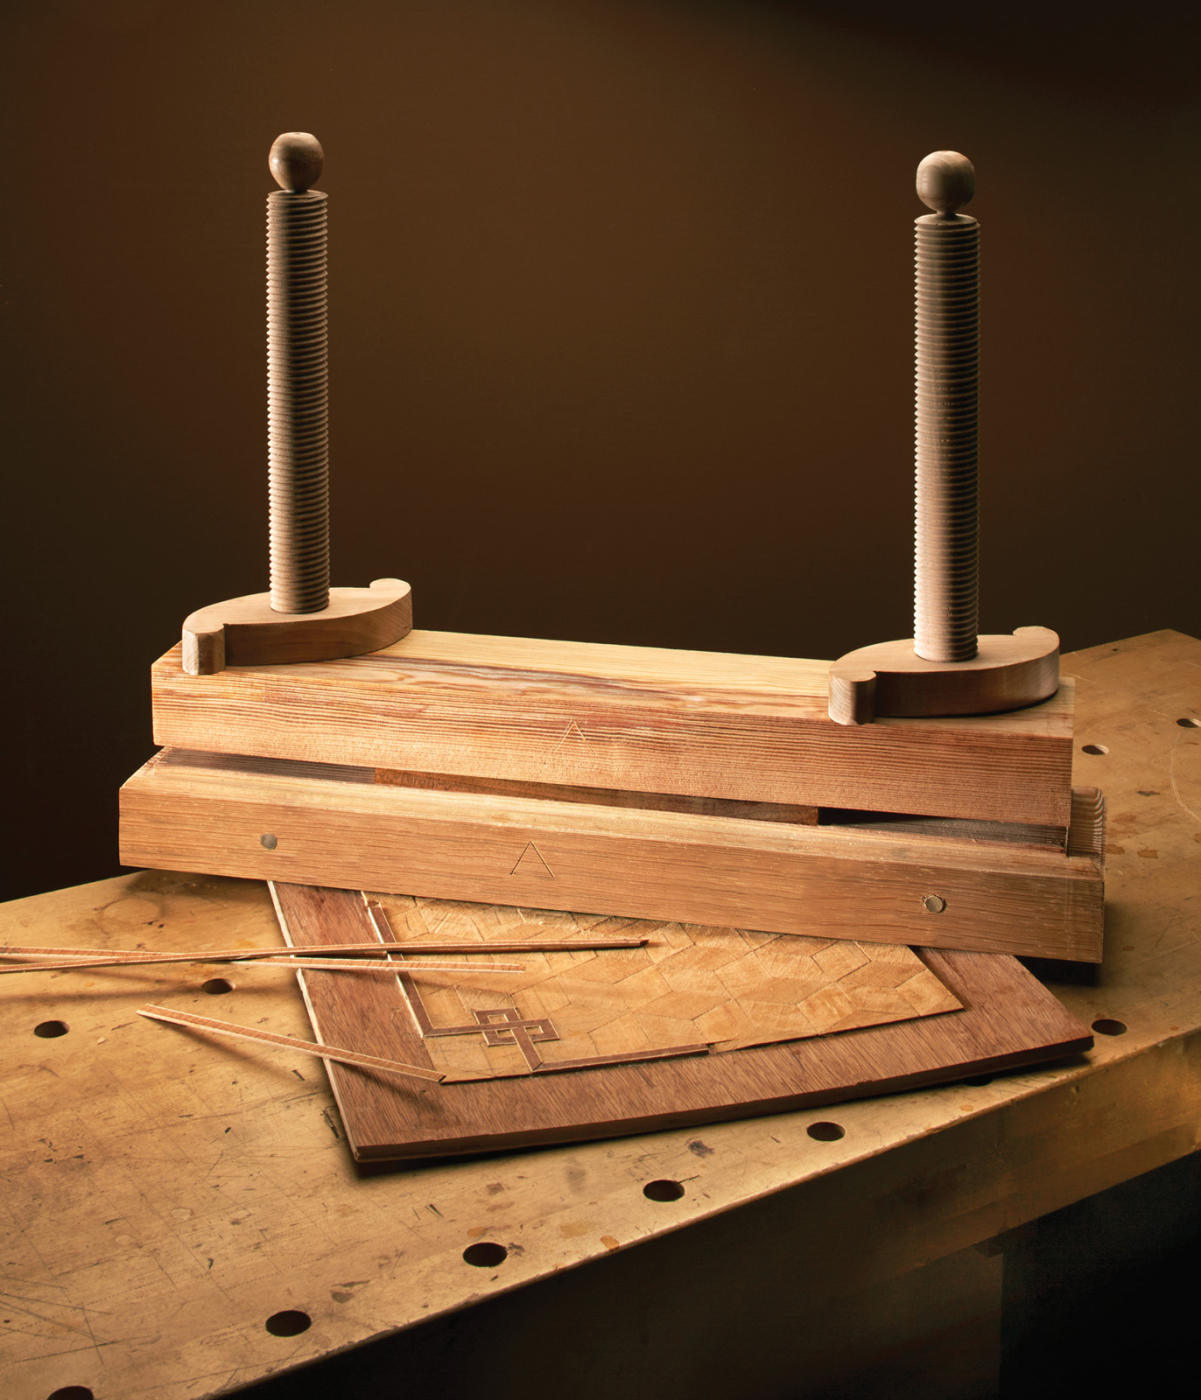
18th-century vise. This traditional device can be used for pressing veneer and solid glue-ups.
This centuries-old device is effective in use and simple to make.
In my early years as a woodworker I was prejudiced against veneer – but experience has mellowed my opinion; I’ve realized building the period furniture pieces on my bucket list requires skills working with veneer and inlay.
My burgeoning interest in traditional techniques made me want to build a veneer press, but I couldn’t find one I liked until I read “To Make as Perfectly as Possible: Roubo On Marquetry” (Lost Art Press), a translation of the marquetry section of André-Jacob Roubo’s 18th-century tome “L’Art du menuisier.” The engravings of Plate 280 held the inspiration I needed.
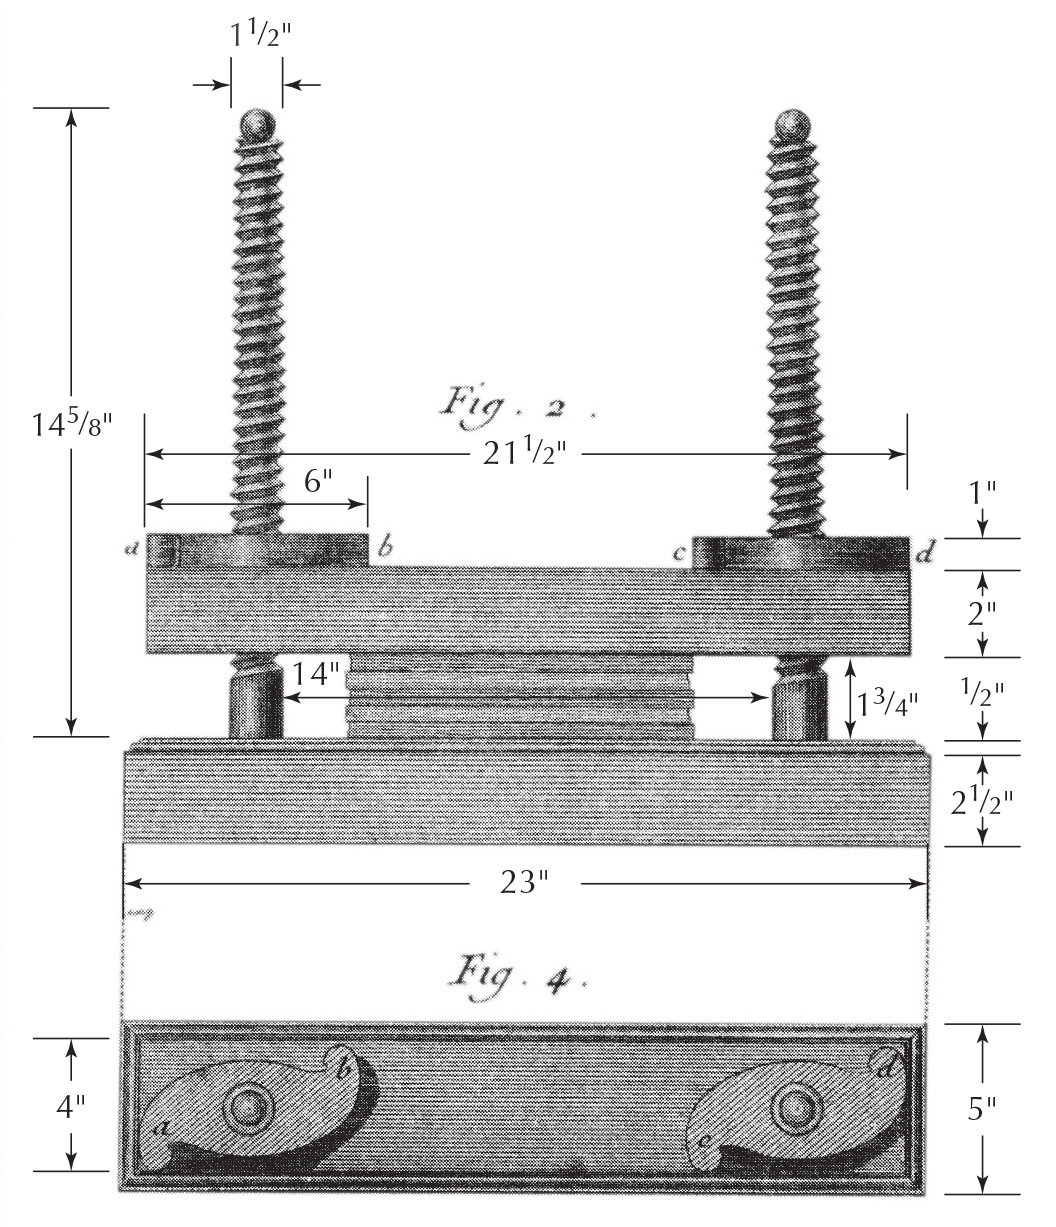
Plate 280. Roubo’s text provides only rough guidelines for the build, so I used dividers to step off measurements for a vise suited to my needs.
After building several incarnations of this vise, I decided to build a version fairly faithful in scale and dimension – though your primary consideration should be making a press that suits your needs, so adjust the dimensions as required. Roubo blesses this experimentation writing, “These types of vises are of different sizes…and serve for gluing as much for solid wood as for veneer work.”
Roubo identifies three components: The “screws,” the upright threaded dowels; the “beams,” the jaws of the press; and the “frames” that act as nuts, twisting around the screws and tightening the beams together.
I used a length of reclaimed Southern yellow pine for the beams, though hardwoods are also a good choice.
The Screws
For the screws, I ordered 1 1⁄2“x 36” maple dowel online. I bought more than I needed to ensure at least a couple of keepers with straight grain and little to no run-out.
At first blush the decorative ball at the top of the screws seems like a delightful conceit, but in use I’ve found it nicer to handle the ball than wrap my palm around the sharper threads when moving the vise around and tightening down the frames.
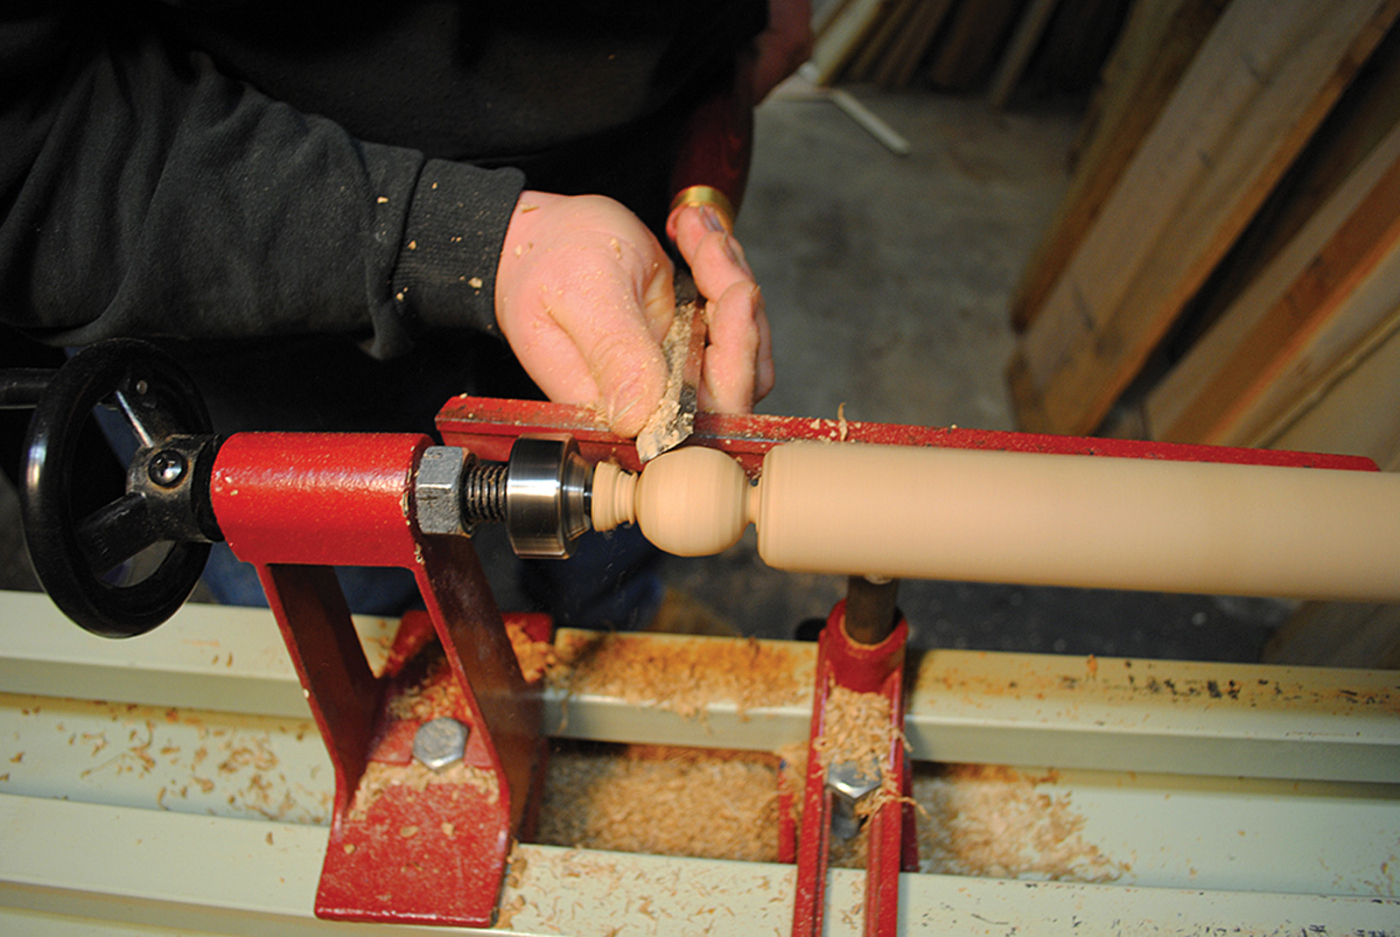
On the ball. The balls on the ends of the screws makes them easier to grab and create the clearance to get your threadbox started.
To turn the balls, crosscut a dowel in half and mark the centers for mounting on the lathe; use a roughing gouge to true 1 7⁄8” on the end for the ball.
Mark for 3⁄8” of waste at the tailstock, then use a parting tool and skew chisel to bring the ball shape to life. I don’t shoot for a perfect sphere – I’m not that good of a turner. I just shoot for something that looks right to my eye, then try to stop before I push it too far.
Sand the ball to #120 grit and attack the remainder of the dowel with #80 grit. Don’t try to remove any real meat; you just want to reduce the dowel’s diameter by a few thousandths of an inch to reduce friction and binding while cutting the threads.
Saw off the tailstock “crown” and sand those saw marks away.
There are several ways to cut threads. I’ve found a hand-powered threadbox to be sufficient for my occasional needs. If you’re a thread-cutting virgin, experiment first on offcuts to ensure that your threadbox is correctly adjusted and that the cutter is sharp (an important point), and that you know what to expect when you approach the good stock. A little practice goes a long way.
Soak the dowels in WD-40, keeping them wet for a half-hour. Use the downtime to rough out the stock for the rest of the vise. Once the dowels are well lubricated, wipe them off and chuck them into a bench vise. I use a holding jig (based on a pair of joiner’s saddles) with a piece of leather nailed across the ends that acts as a flexible hinge; that keeps me from having to juggle three things at once.
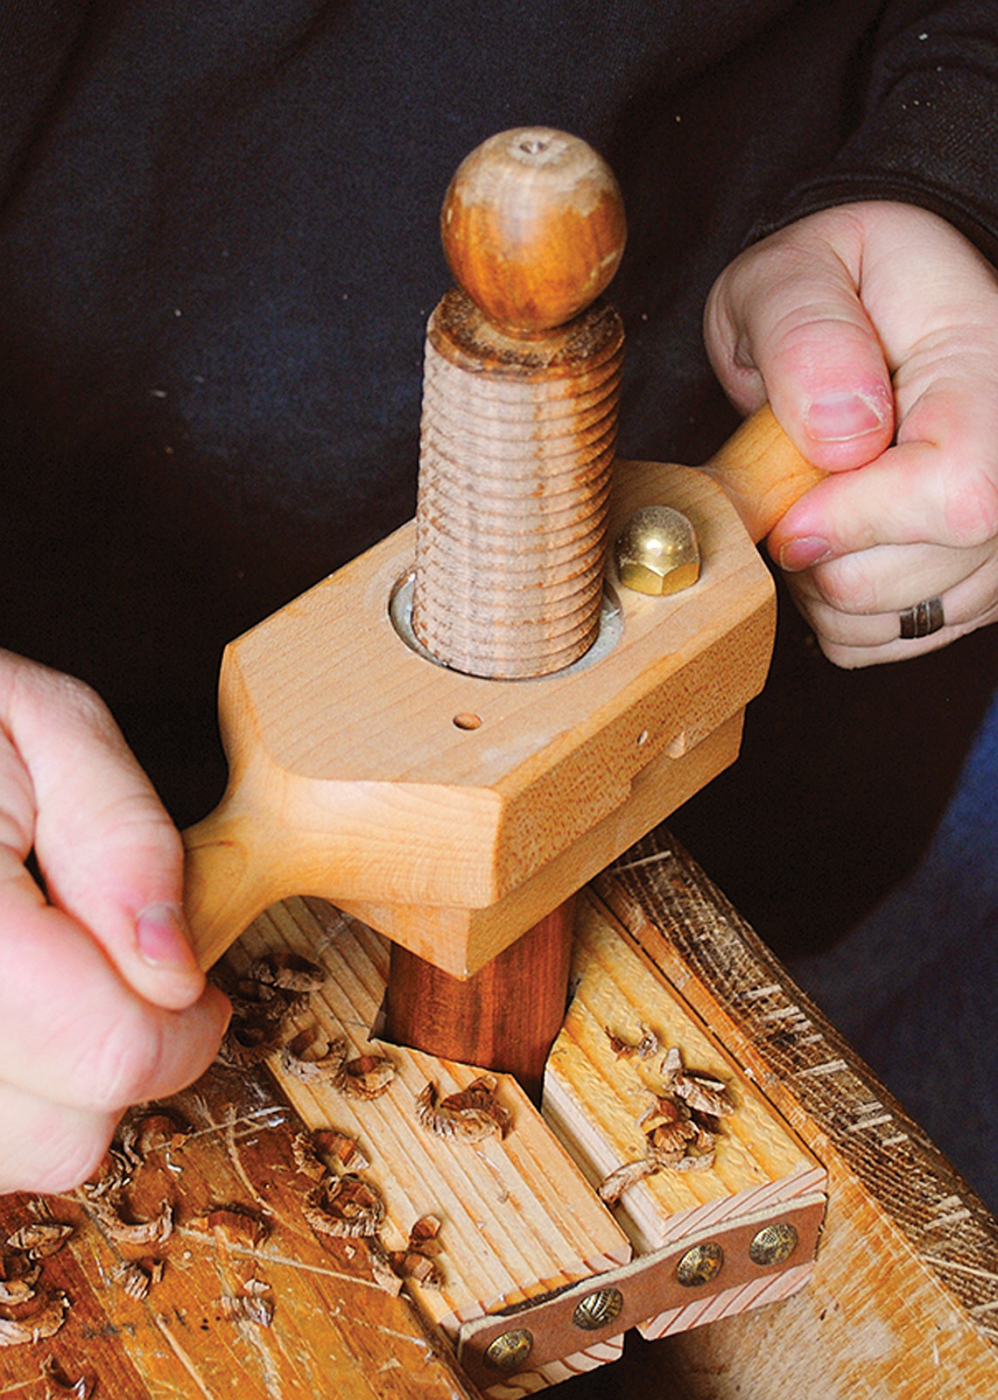
Saddle up. Two pieces of scrap with notches secure the round piece in the vise. The leather strap keeps them together.
If you skip turning the ball, cut a slight chamfer on the starting end to make it easier to fit the threadbox over the dowel’s end. Drive the threadbox in a steady, continuous motion; don’t force your way through. If you get hung up, back up a bit and renew your momentum.
You’ll probably have some grain failure and chip-out along the peaks of the threads. However, I’ve never found this to hurt the function of the screw in use. (The threads act in aggregate, and like soldiers in formation, the army is not affected because a few men fall.)
The Beams
The top beam on my vise is undersized to the base by 3⁄4” on the ends and 1⁄2” on the sides. Roubo shows a nice moulding around the edges of the bottom beam, so I cut one, too. You can skip the moulding if you must, but keep the overhang on the ends. It’s a great landing place for the pad of a holdfast.
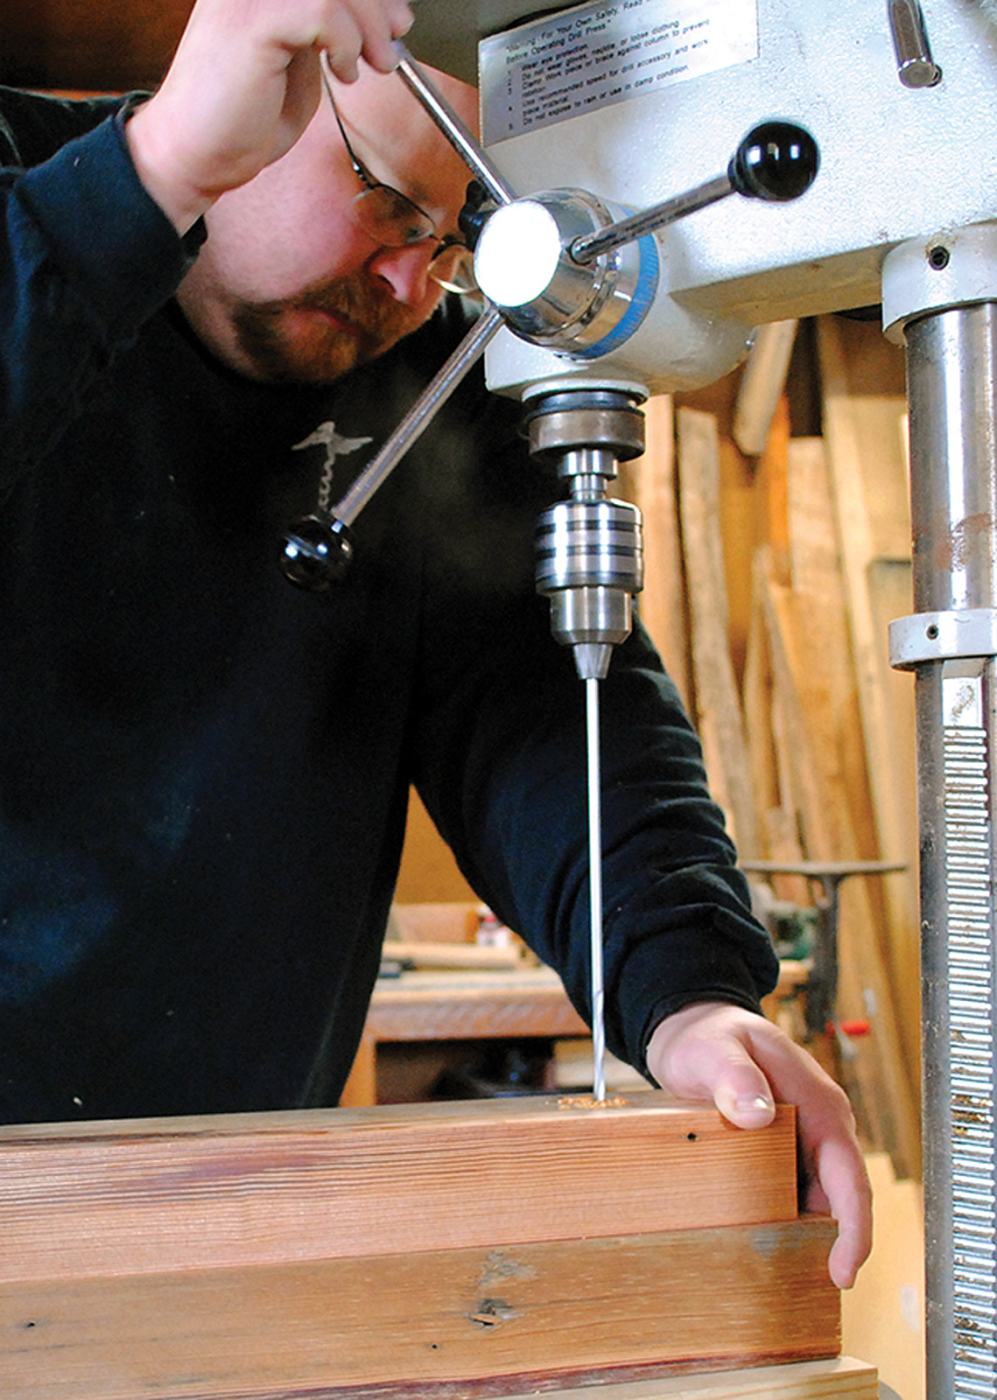
Get it straight. Clamp the two beams together and drill a small hole through both to ensure that the holes are on the same centers.
Cut the beam stock to rough dimensions and select inside faces that are clear and free of defects. After squaring and surfacing the two pieces, return to pay particular attention to the inside faces. Check them carefully both with winding sticks and against one another to ensure they mate and are smooth. Once they are flat, go over each with a finely set smoothing plane or scraper. You want to eliminate any defects that could telegraph to your veneers.
Now find the longitudinal center of the top beam and mark in 3″ from the each end. These points will be the centers for the screws. Line up the beams, inside faces together, and clamp them together. Chuck an extra long 1⁄8” drill bit into the drill press, make sure everything is lined up and square, then drill through the top beam into the base. This pilot hole marks the center alignment for the screws in both beams.
Separate the beams and drill the screw holes using Forstner bits. Following the pilot hole, drill a 1 3⁄8” hole in the base beam and a 1 5⁄8” hole in the top. The 1 3⁄8” hole is appropriate for the threading tap; the larger holes in the top beam allow that piece to pass over the screw threads. Take your time and drill in from both sides to prevent blow-out.
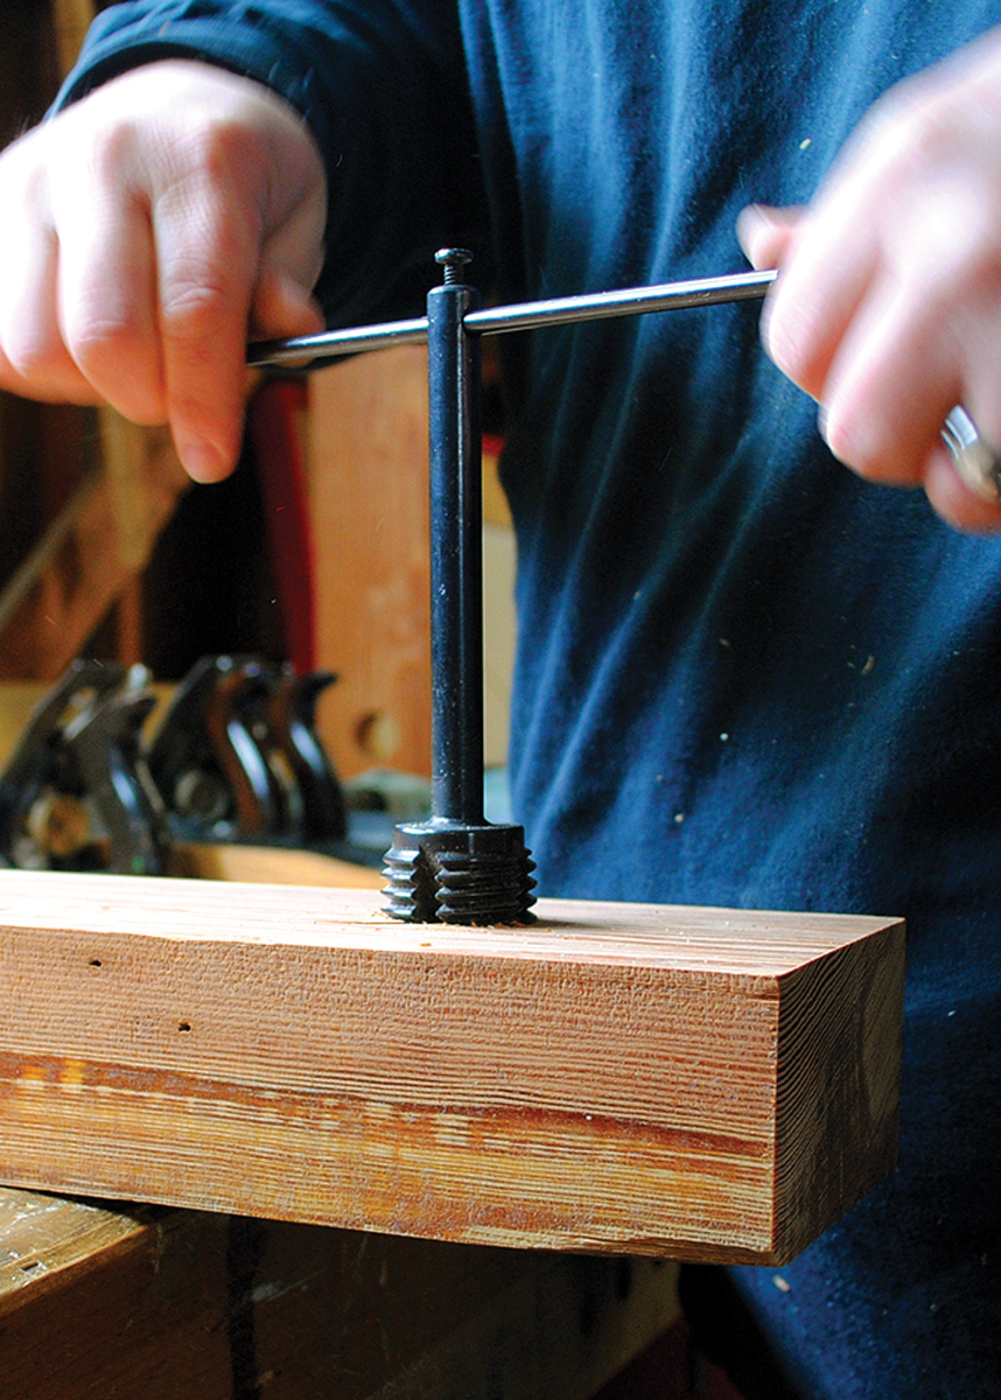
On the beam. The lower beam is tapped for the ends of the screws. Another option is to leave the ends unthreaded and simply glue and peg the screws into the holes.
When tapping holes, accuracy and lubrication are your friends. Prep the tap by rubbing the threads with canning wax, soak the hole in the beam with WD-40 and take special care to make sure you are starting the tap perfectly plumb.
Any slight variance will translate through the length of the screw and will impede the travel of the top beam. You can chuck the tap into an unplugged drill press and rotate it into the cut by hand. If your holes do not tap square, you can enlarge the holes drilled in the top beam to accommodate the slope, but this allows more play in the beams when they meet.
The Frames
The S-shaped frames are the one part of the vise that should be made from hardwood. I used some hickory from my offcut bin and prepared two blocks of 1″ x 3″ x 6″.
Find the center of one block, then sandwich the two together. Drill a hole at the center point and connect the two with a temporary screw.
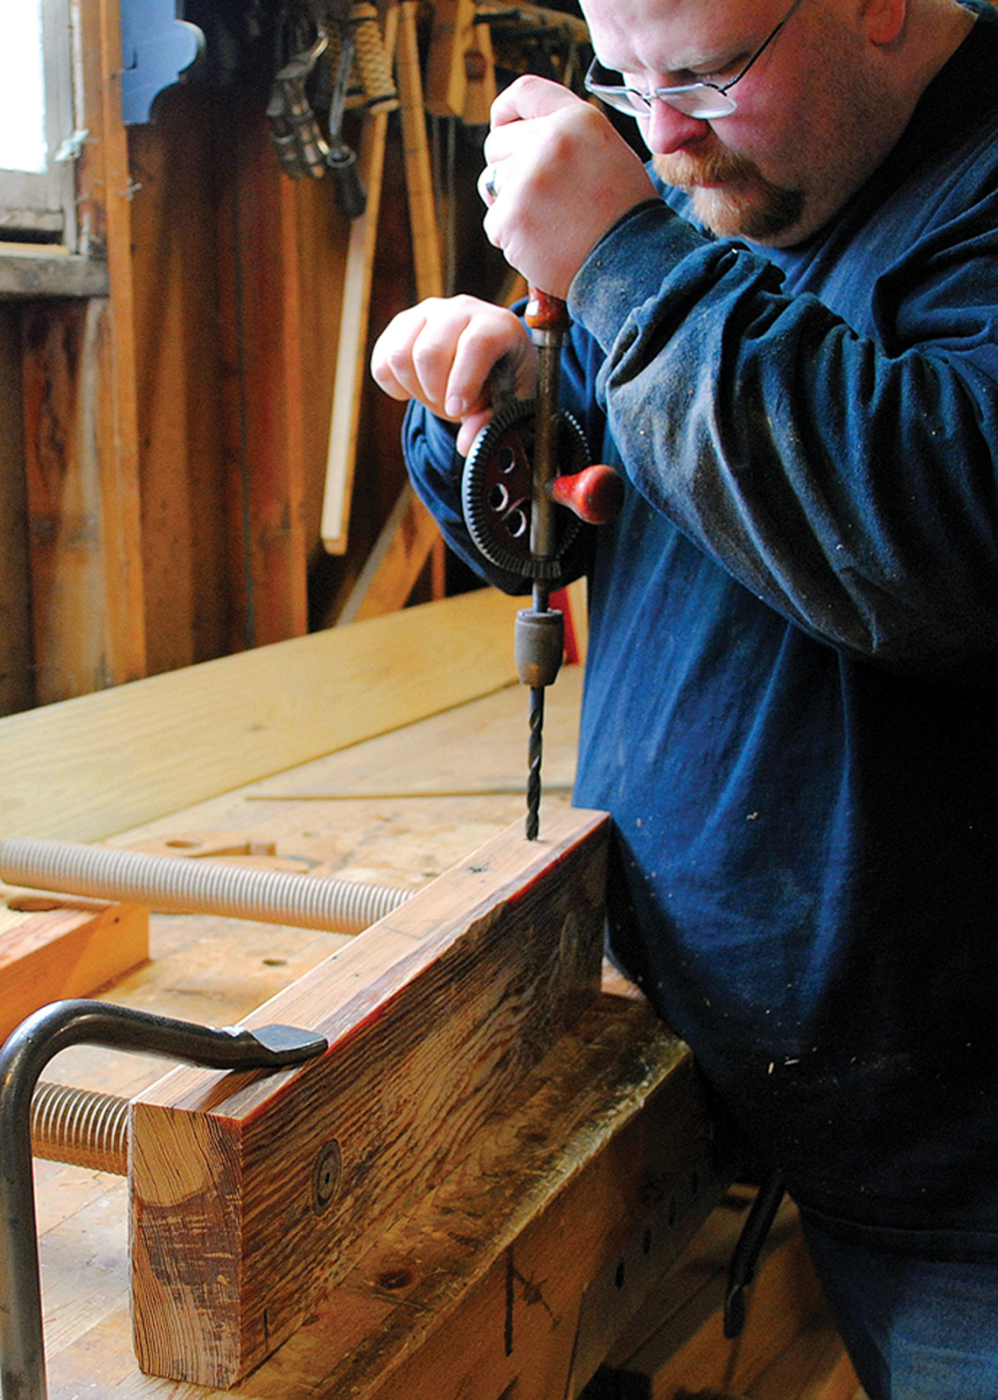
Lock it in. When the screws are in position in the lower beam, drill through the beam and into the screw. A dowel in the hole will keep the screw from turning.
Trace around a quarter to define the round ends in opposite corners, then draw the curved lines between them freehand. I roughed out the shape on the band saw and cleaned up the cuts with rasps and a scraper. Remove the temporary screw and separate the matched frames. The screw hole becomes the guide to drill a 13⁄8” hole. Follow by tapping the holes in the same manner as the beam.
All Together Now
To assemble, brush glue into the threads of the base beam and insert the screws, turning and pushing them down until they bottom out. Now drill and glue in a 3⁄8“-diameter dowel from the side to fix the screws in place. Fit the top beam over the screws and thread on the frames.
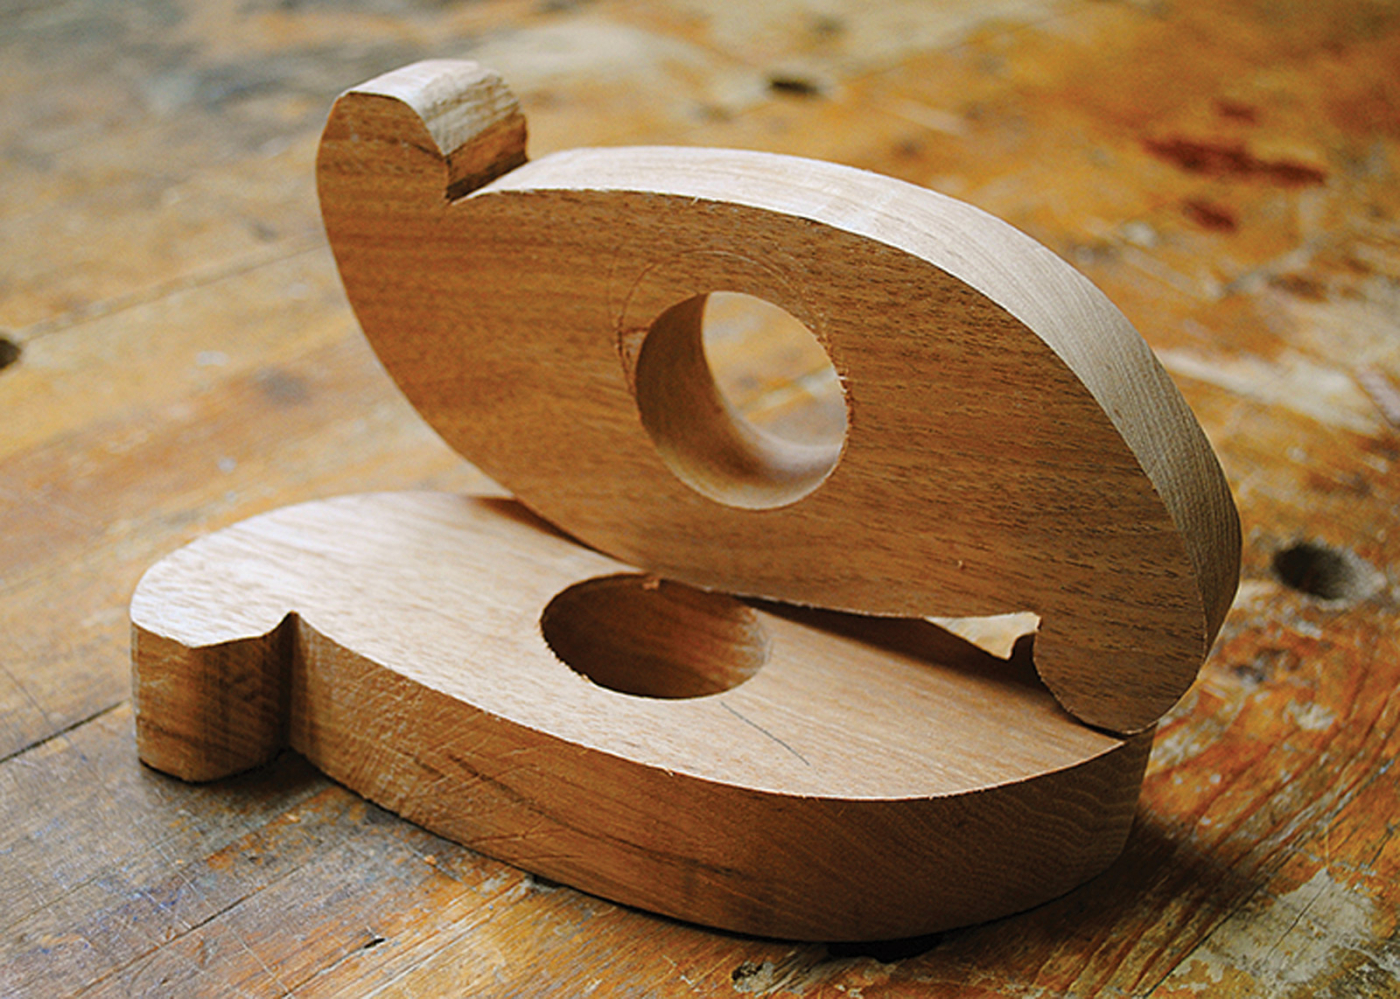
Take it for a spin. After the frames are shaped the holes are tapped. Turning the frames on the screws applies pressure to the top beam.
This press is pure simplicity and versatility. It’s cheap to build, and the only special tool required is a 11⁄2” threadbox and tap. It’s more traditional than vacuum bags and doesn’t use any oddball clamps or hardware. Dismiss the pleasantries like the ball turning and the moulding, and it’s easy to build one in a single day or a half dozen in a weekend. Multiples of this vise would help in pressing larger surfaces.
Here are some supplies and tools we find essential in our everyday work around the shop. We may receive a commission from sales referred by our links; however, we have carefully selected these products for their usefulness and quality.


