We may receive a commission when you use our affiliate links. However, this does not impact our recommendations.
Around the bend. If your coping saw doesn’t work how you think it should, it could be the saw.
When I was a kid, the first saw I bought was a Craftsman coping saw with a chrome frame and red-stained handle. For years I did everything with that saw – crosscuts, rips, curves and even joints. But I made none of those cuts particularly well.
Part of the problem was that I was 11 years old. But part of it was the saw. I still own that saw – it’s sitting in front of me now – and it simply will not tension a blade enough to prevent it from twisting. A good coping saw will keep the blade fixed at one position when fully tensioned and it will allow the blade to move freely for scrollwork when the tension is backed off.
If you’ve bought a coping saw sometime in the last 40 years, you probably have encountered the same problems that I did. While cutting, the blade at the toe rotates, while the blade at the heel stays stationary. This results in a poor cut and broken blades.
It wasn’t always this way. Coping saws (and their ancestors) have a 500-year track record in woodworking. And after buying and using dozens of vintage coping saws, I have come to the conclusion that most of the modern ones aren’t worth much. They don’t tension the blade enough and their frames are weak at best. I know of three solutions: 1. Buy a Knew Concepts coping saw, which costs $149 and tensions the blade brilliantly. 2. Hunt down a well-made vintage coping saw with a stiff and well-tensioned frame. 3. Improve a $12 coping saw with 50 cents’ worth of hardware-store washers.
All three approaches are valid. But before diving into the nitty-gritty, I think it’s important to understand where this ubiquitous woodworking saw came from. It has noble roots.
From Throne Rooms to Toys
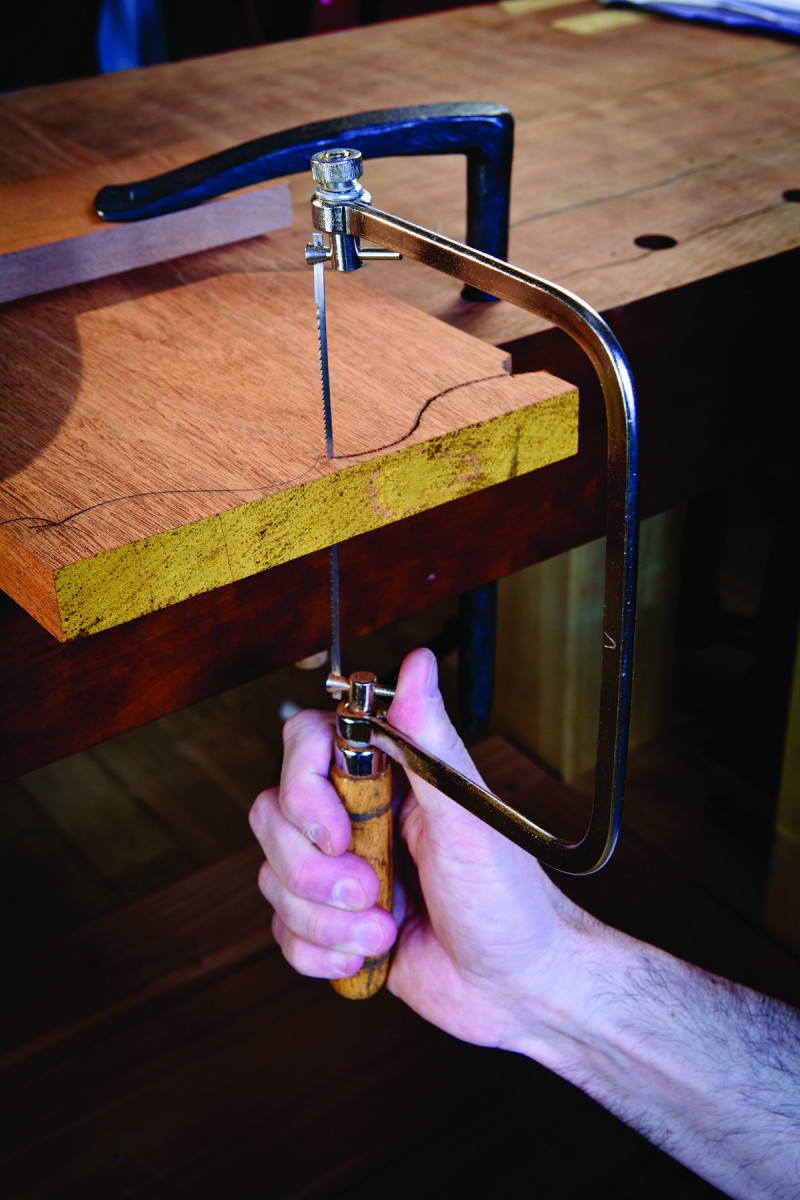
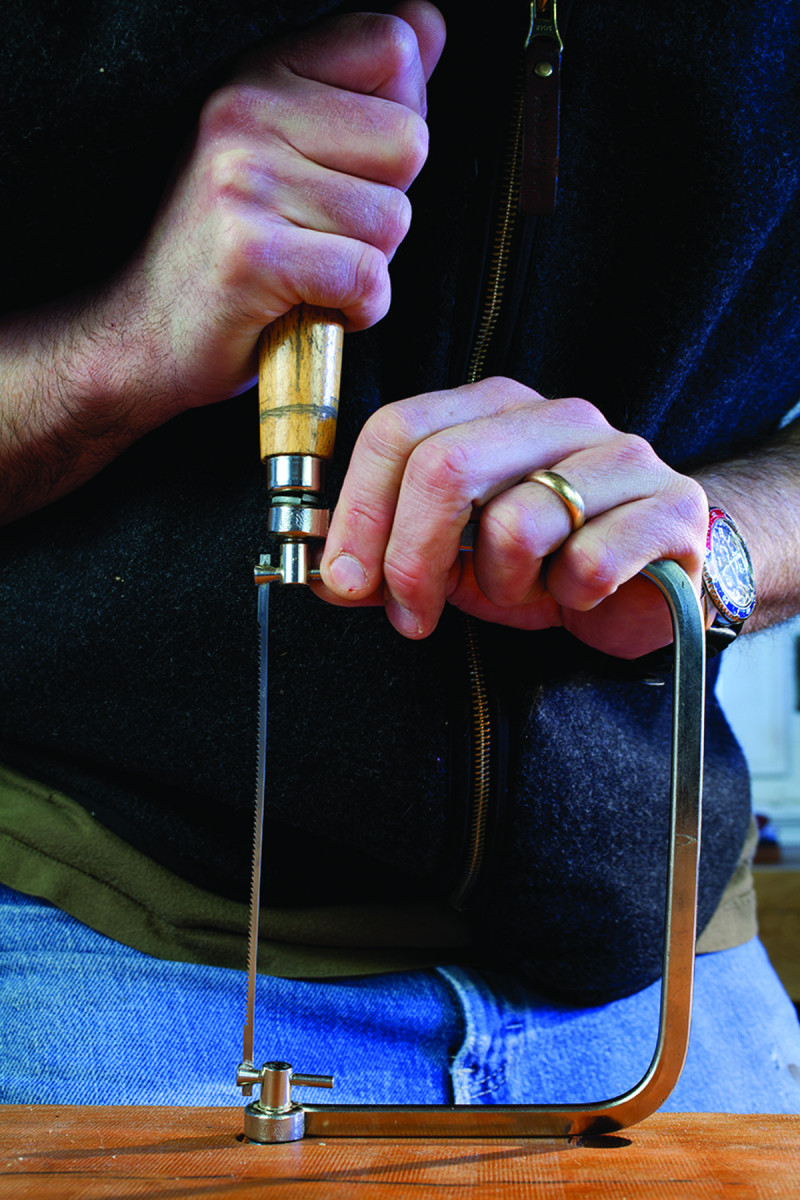
Twisted. The toe of my old coping saw tends to slip when I want it locked, even when the saw is fully tensioned. This makes the saw wander and produces an out-of-square cut.
While frame saws likely were invented by either the Romans or the Greeks, it wasn’t until the Golden Age of veneered marquetry in the 16th century that the delicate bowsaws required for the intricate work appeared. Several woodworking historians think marquetry saws developed from the jeweler’s saw, a small metal-framed saw used to cut precious materials.
In 1676, André Félibien published a drawing of a petite sie de marqueterie that looks for all the world like a modern coping saw – you can even see that the teeth point away from the handle. Furniture covered in marquetry was a favorite of royalty in Europe and (by the 17th century) in England.
By the 18th century, these sorts of saws were sometimes called “Morris saws” – perhaps it was a bastardization of the word “Moorish,” or it relates to the inlaid game board for an old game called “Nine Men’s Morris.” These saws were used for all sorts of intricate cuts, both by cabinetmakers and jewelers. And the saws had blades designed to cut not only wood, but tortoiseshell, brass and other semi-precious materials.
From le Home Depot? This small frame saw from marquetry was shown in a 1676 French text on woodworking and architecture. It looks only slightly fancier than coping saws from today’s home center.
In the 19th century, the saws were commonly called “bracket saws,” and during the middle part of the century a fretwork craze developed – you find advertisements for the saws and plans in publications that have nothing to do with woodwork, such as The Pacific Tourist and Beautiful Homes magazines.
Soon the saws spread to the schools, where 19th-century craft-based schools using the Sloyd system taught handwork that was based around using a knife, a “frame compass saw” and other simple tools to make toys. By the early 20th century, the saw had acquired its modern name, “coping saw,” as carpenters found the tool handy for coping inside corners when cutting moulding.
Historical purists might not agree that the coping saw is a descendant of the early marquetry saw, but from a user’s perspective these saws are functional equivalents: a metal frame that tensions a thin blade that is used for curved and intricate cuts.
3 Ways to Fix the Blade
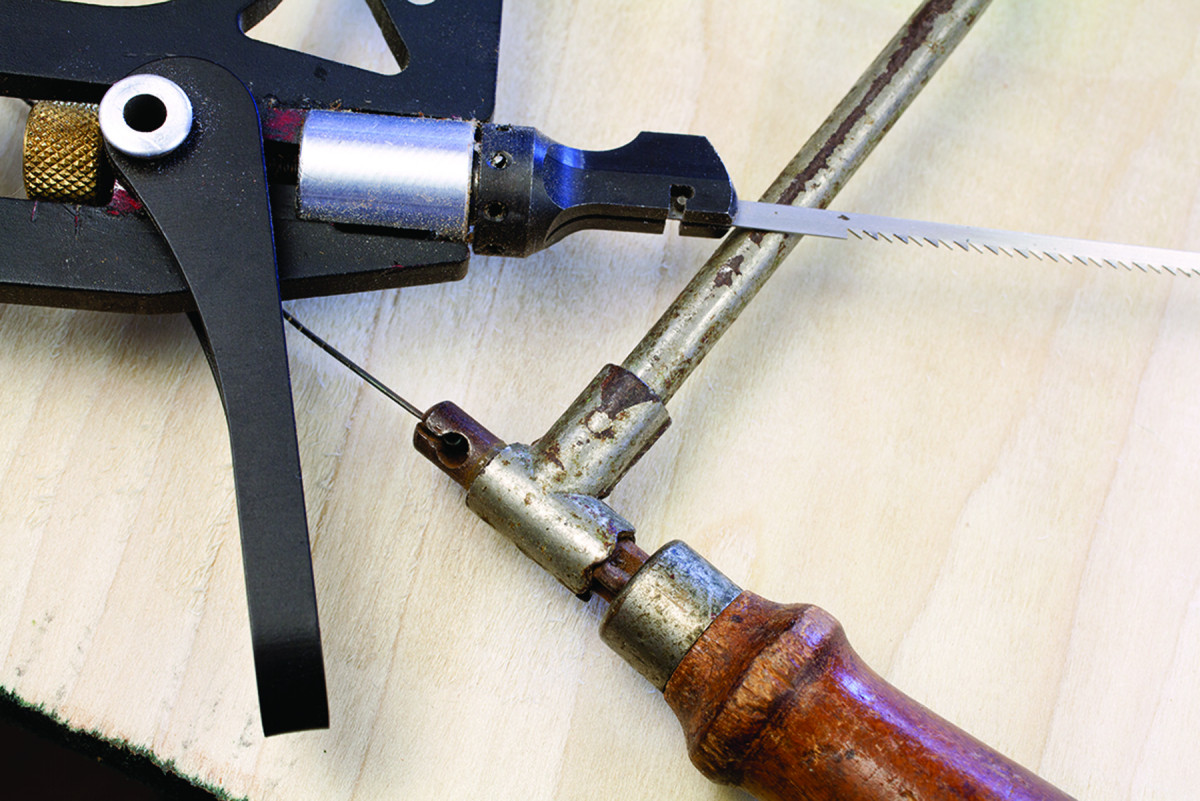
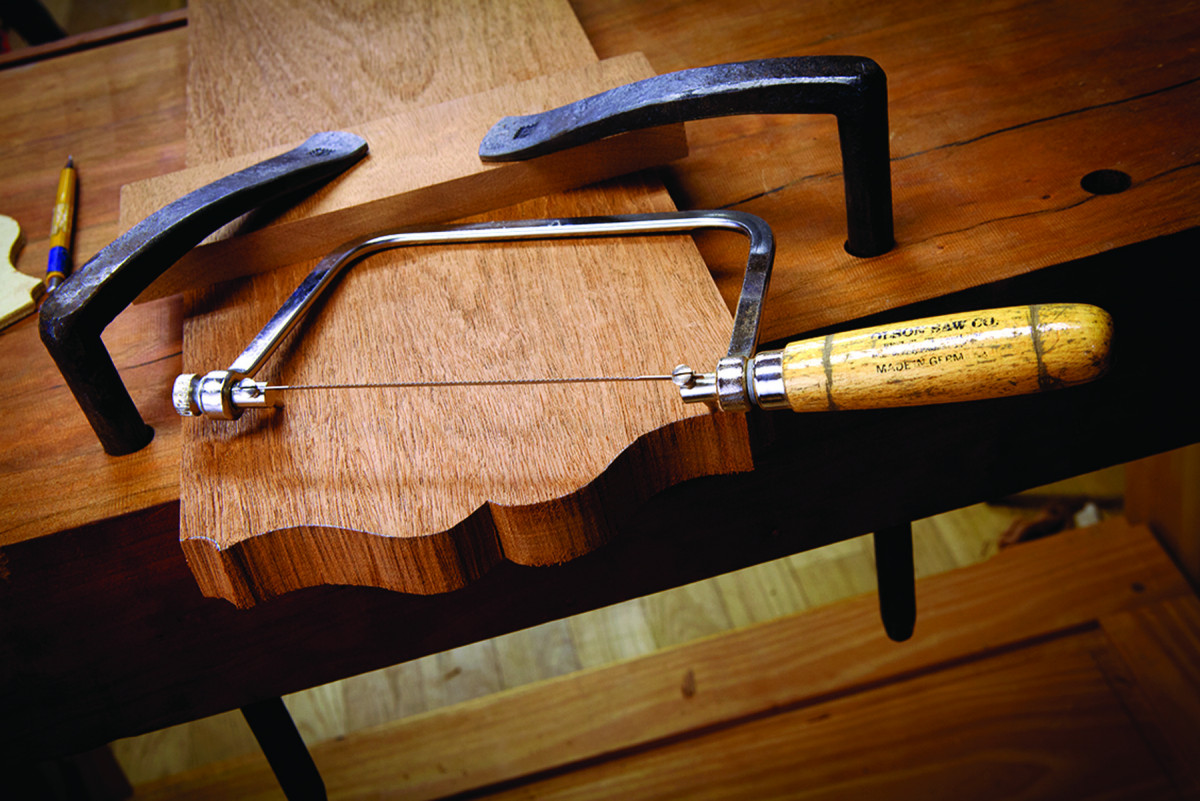
Tighten it. The Olson, and many saws like it, rely on the frame alone to fix the blade in one position. Over time, the frame can become slack.
While researching coping saws, I found three primary ways of keeping the blade aligned at both the toe and heel of the tool.
1. Tension alone. A lot of coping saws – good and bad – use the frame alone to tension the blade and fix it in one position. The two arms of the frame spread out so the opening for the blade is too big. You push the arms together to get the blade into the frame, which tensions the blade somewhat. And you can then increase the tension by turning the handle clockwise, which pulls the arms of the frame even closer together.
This works fine if the frame is rigid and keeps its original shape. Many coping saws with lightweight frames lose their shape after a few months. The arms bend in and stay bent. I have old saws from the early part of the 20th century that still tension the blade beautifully. So some key metallurgical point has been forgotten or ignored.
2. Stops. Some saws have fixed detents or stops in the frame that help the blade stay aligned at the toe and heel. This solution can work brilliantly or not at all. Some modern coping saws have detents that are too shallow to hold anything – so you are back to relying on the frame alone to keep the blade fixed.
Stop it. These saws – a Crary Machine Works (right) and a Knew Concepts – have detents that keep the blade fixed at a certain number of positions.
A downside to a saw with stops is that they don’t always work well when you want the blade to rotate as you cut, such as when you are cutting curvaceous fretwork in thin materials. The stops are actually too aggressive. If you don’t use your coping saw for fretwork, however, one of these saws is likely for you.
3. Pulleys. Some older coping saws that were designed for fretwork use an ingenious system of pulleys or rollers to keep the blade aligned at the toe and heel. The Jones Patent saw made by E.C. Atkins uses a string that passes through the saw’s frame to keep the blade aligned. The Fenner Patent saw uses a chain. (Both are shown below.)
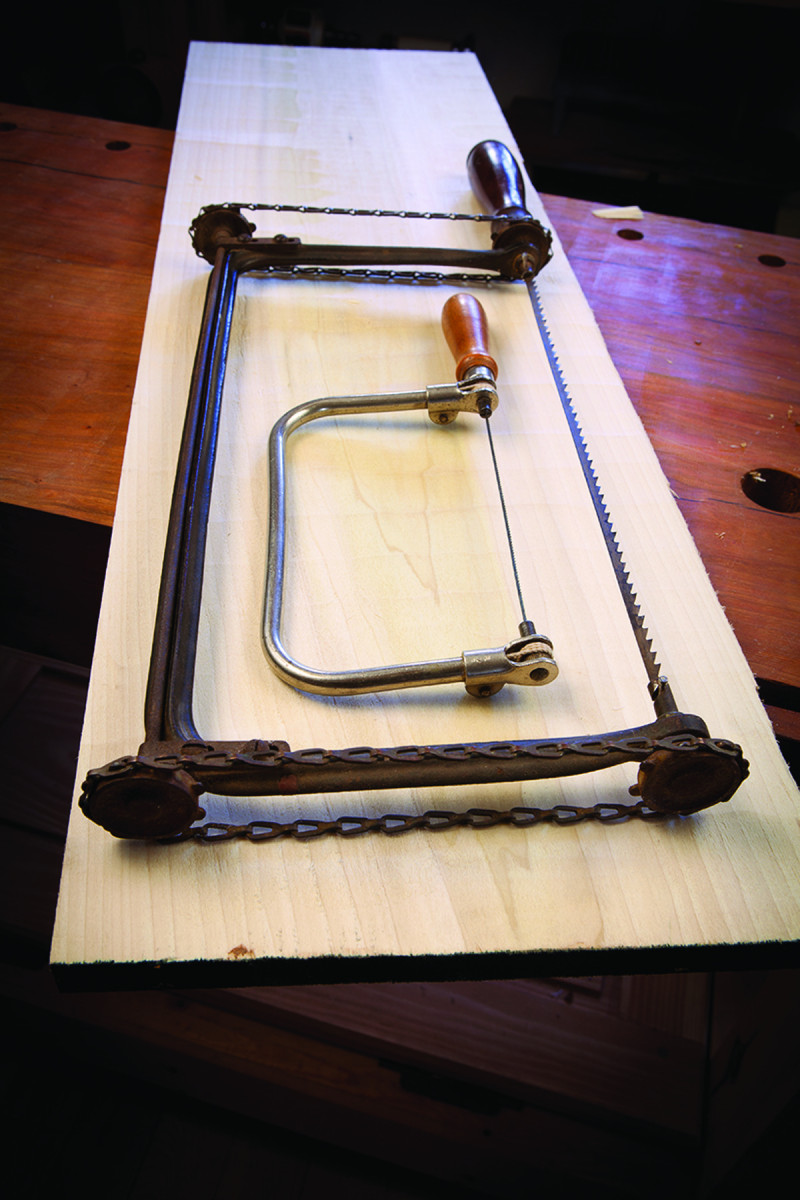
Spin it. Coping saws with pulleys keep the blade aligned no matter what sort of cutting you do. Sometimes they spin too much for waste removal, but you learn to control them.
 These saws excel at coping fretwork. The Jones Patent saw works almost like magic. When using these to saw out dovetail waste, however, you need to pinch the handle and saw frame with your fingers to lock the blade’s position.
A Bargain Solution

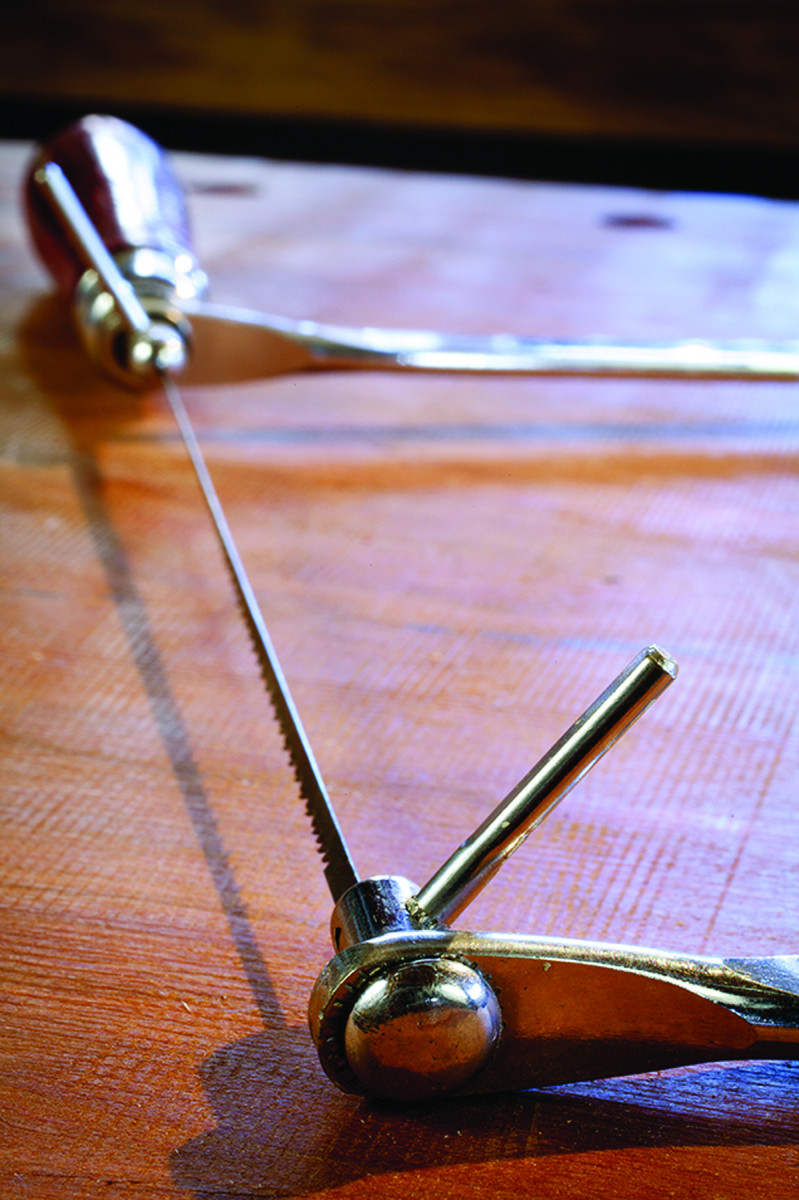
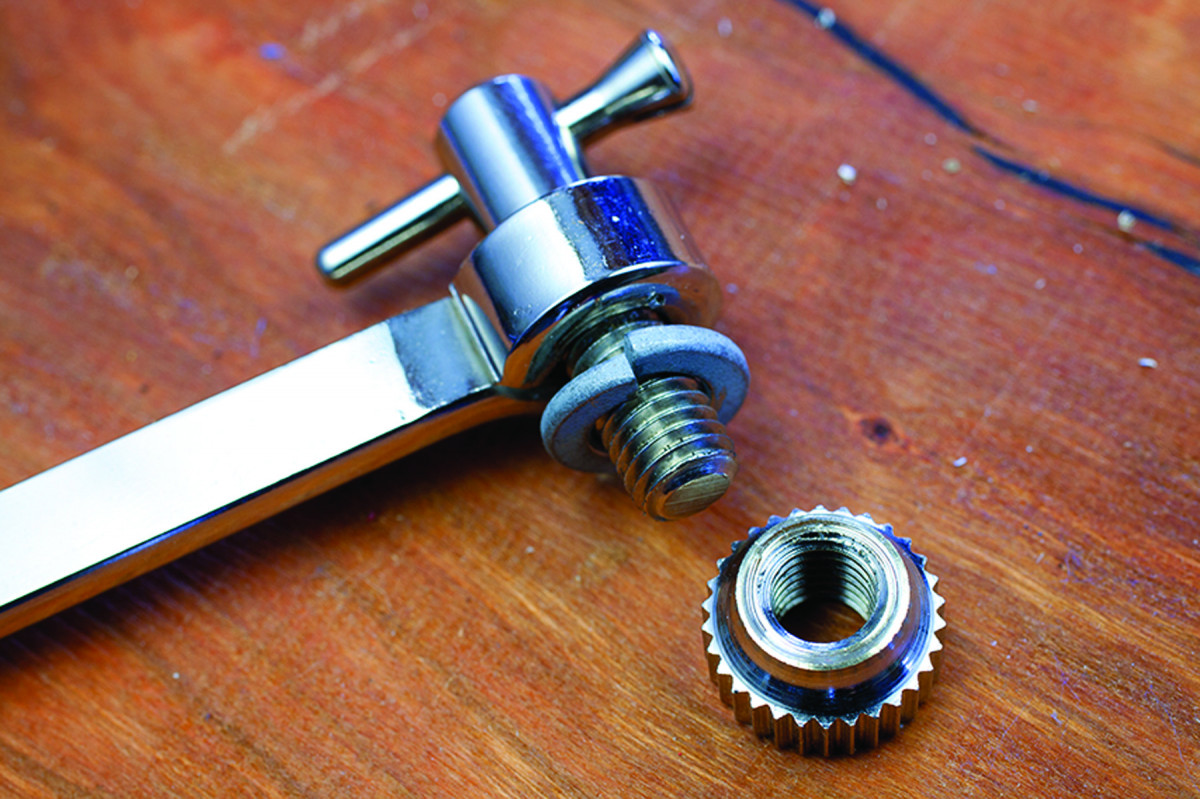
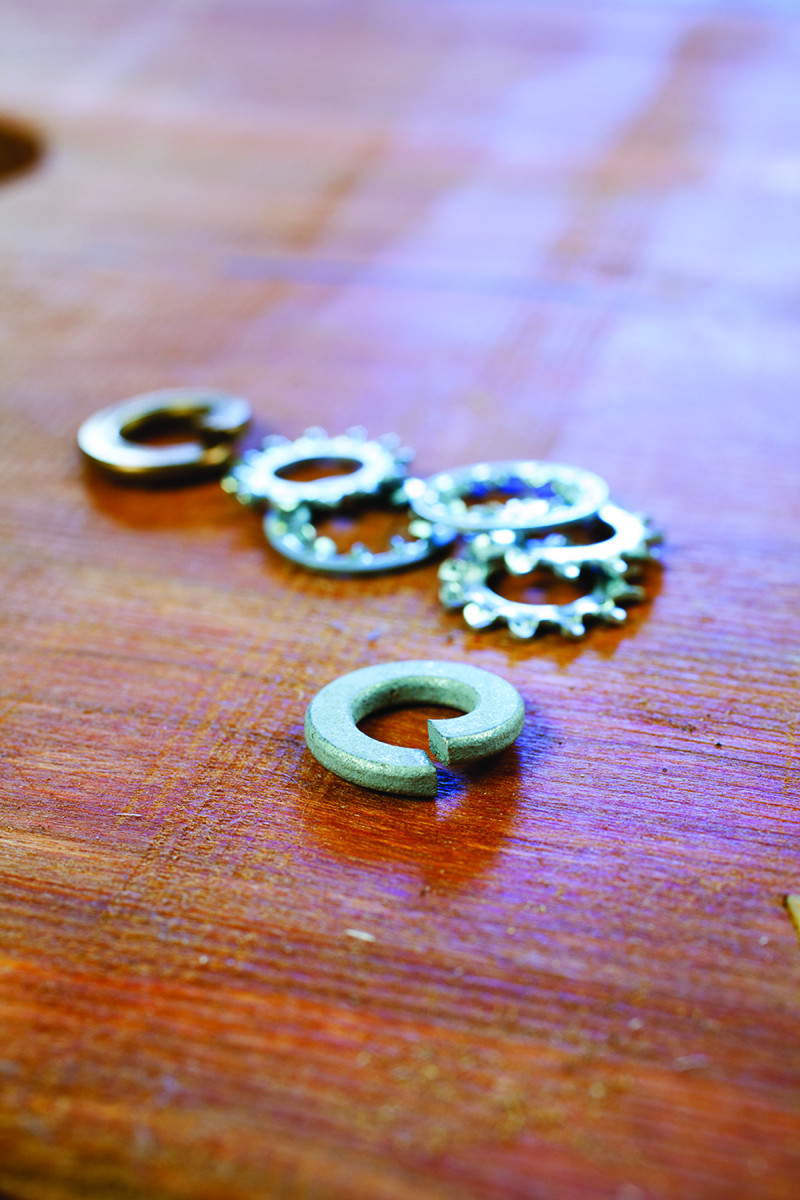
Not that. The current crop of Olson saws come with a plain washer between the handle and the saw frame. Remove it and replace it with a 5⁄16″ split washer (top). Then add a split washer between the screw at the toe and the frame (bottom).
 Now you might be thinking that I’m going to send you on a wild goose chase for one of the aforementioned saws, which can be expensive, rare or both. And that is certainly an option for people who like vintage or well-made tools.
But what if you just want a dang coping saw that works? For the last five years (at least), I’ve been fooling around with this idea, trying to find the best inexpensive coping saw and the simplest way to modify it to make it work well.
Here’s the scoop: Buy an Olson Deluxe Coping Saw – they are available for about $12 from many woodworking suppliers. Right from the box (actually the plastic bag) the Olson is a good saw. It’s unique in that it has a locking mechanism at both the toe and heel. So you can get the blade to stay fairly aligned if you don’t get too aggressive with it when cutting.
But with the addition of two pieces of 25-cent hardware from any hardware store, you can turn this saw into a blade-clamping monster. What you need are two 5⁄16” split washers, sometimes called “spring lock washers.”
I have experimented with a lot of different kinds of washers, including wave washers and serrated-tooth washers. While these improve the saw, the wave washers wear out too quickly for my taste, and the serrated-tooth washers prevent the blade from rotating in one direction only.
Feel free to experiment with more exotic washers – I hear the conical Belleville washers are the cat’s pajamas – or just get it done with the cheap-o split washers.
With the washers in place (see pictures above), your saw is ready to go. You should be able to lock the blade so it might require pliers to move. That’s great for cleaning out dovetail waste. Remove the washers, and the blade will rotate easily for scrollwork.
One last note: Good blades help. The hardware-store varieties are usually overset and break easily. A good-quality blade, such as those made by Olson or Pegas, lasts longer and makes sawing smoother. And just like with your band saw, your saw and your blade will last longer if you relax the tension when you are done for the day.
Choosing Blades
Simple & cheap is best. The simple split steel washer works better in a coping saw than the fancier serrated-tooth washers or bronze cut washers.
Coping saws come in a variety of tooth configurations. You can get them with different teeth per inch (tpi). The typical range is 10 tpi up to 20 tpi. I use the 10-tpi blades for waste removal and usually a 15- or 18-tpi blade for scrollwork. If the material is thick, consider a skip-tooth blade. The wide spaces between the teeth prevent the blade’s gullets from filling with sawdust.
I wish that coping saws didn’t have so much set to the teeth, but there is little you can do about that with typical workshop equipment.
One last detail on blades: I have found that the length of coping saw blades isn’t consistent. Some blades are longer than others. If your saw suddenly stops tensioning properly, it might be that your blades are a little too long.
How to Cut
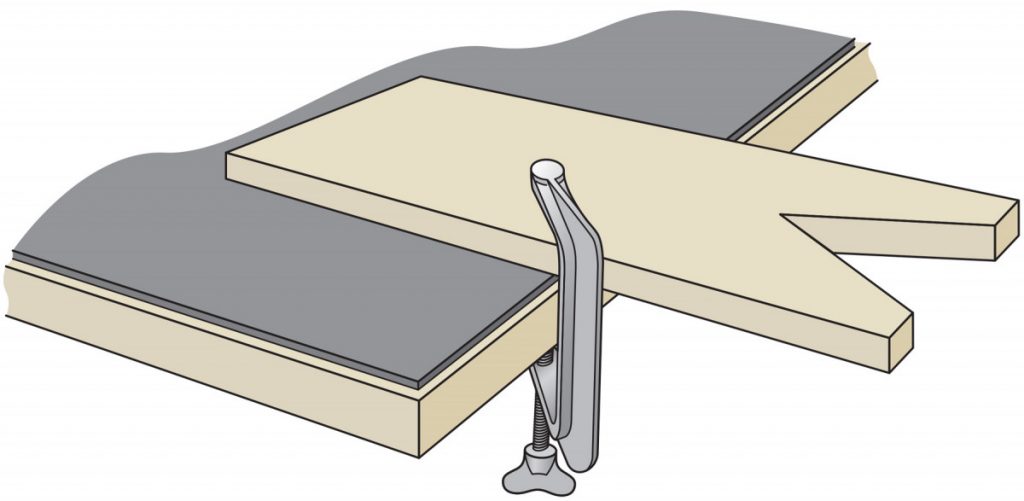
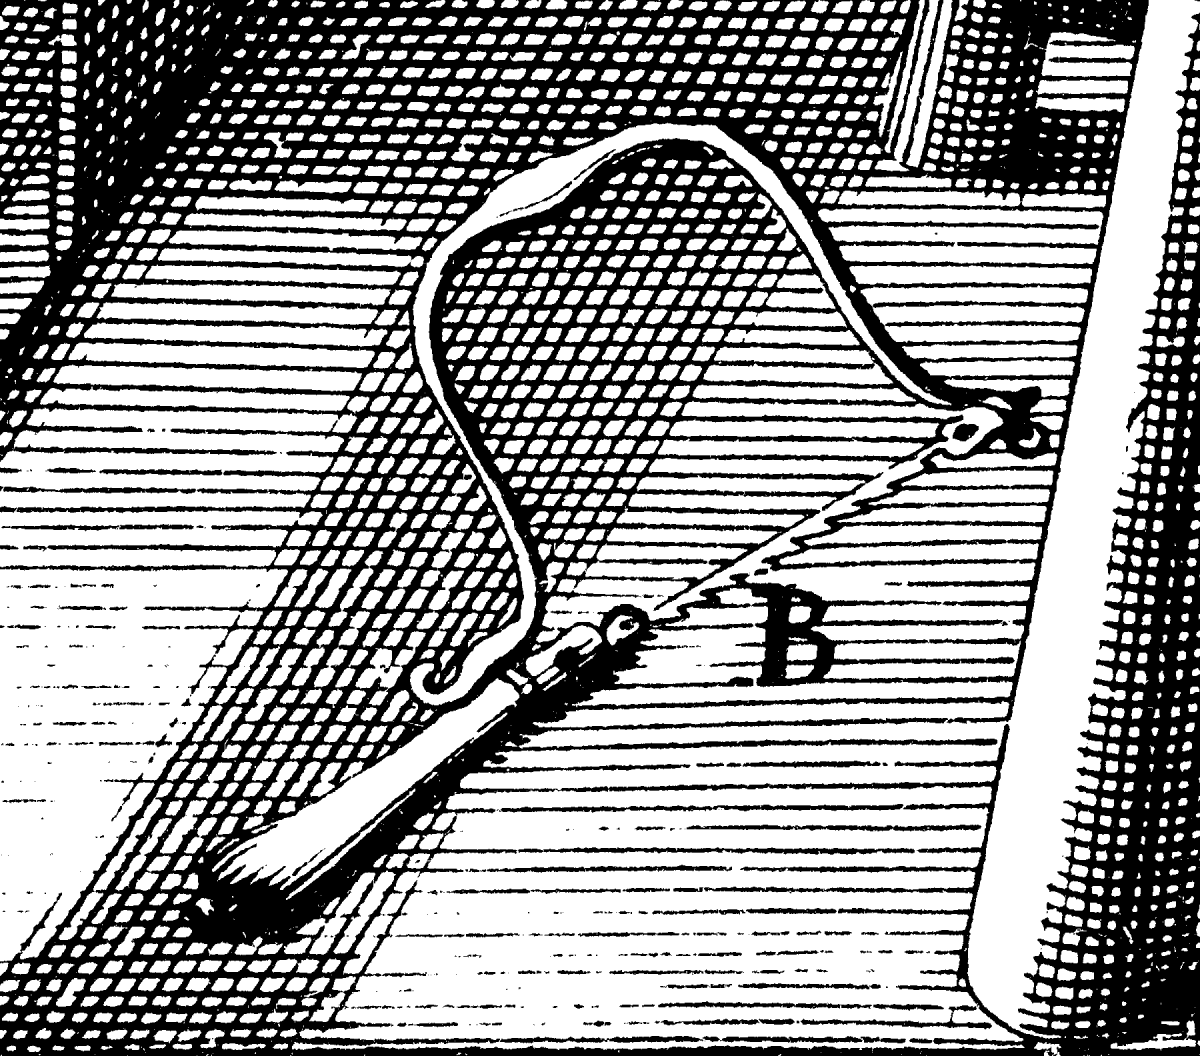
The V-shaped board, called a bench pin, acts as a sawing platform. With the blade cutting near the point of the V, thin materials won’t vibrate during the cut.
There is a lot of debate about whether you should set up the saw to cut on the pull or the push stroke. I think the answer is obvious: Orient the blade so the tearing or splintering from the blade is where you want it.
When your work is vertical in a vise or sawing donkey, the teeth should point away from the handle so the splintering is on the backside, which you cannot see while standing at the bench.
When sawing material held horizontally (more on that in a bit), orient the teeth so they point toward the handle. Then the splintering will be on the backside of the work facing the floor, which you cannot see while sawing.
Of course, if you are just removing dovetail waste with the saw, the tearing will be chopped away. So do whatever you like.
When you set up your work to saw it, many woodworkers prefer to saw the work while it’s held vertically in a vise. And in some cases, such as when you are sawing dovetail waste, this is the best approach.
But when you look at 19th-century photos of schoolchildren sawing out a “Dinky Bird” or squirrel shape, they’re holding the work horizontal on a table or a platform with a V-shaped cutout for support below (see the illustration on page 31). With small pieces of work, you can hold the work with your off-hand and saw with your dominant hand, holding the saw vertical.
Sit & saw. When I cut scrollwork, I clamp the work flat on the bench and sit on a sawbench. Keep your chin right above the work and both hands on the saw if possible.
With big pieces of work, clamp the work to the bench (you can use your face vise or tail vise for outboard support) and hold the handle of the coping saw with both hands. Try it, and I think you will be shocked how easy it is to follow a line and keep your cut square to your face. Gravity is lending a hand.
When you saw with the work horizontal, try not to get too aggressive. You should feel like you are moving smoothly – not quickly – through the work. Speed will come in time with this method because gravity helps pull the saw down and into the cut, and it helps clear the kerf of dust as well.
Like with most things in handwork, it’s more about finesse than force. And practice always helps. But there are times when the tool really is the culprit, and I’m afraid that is definitely the case with many coping saws. So fix your saw and learn to cope.
Sidebar: Coping Dovetail Waste is an Old Technique
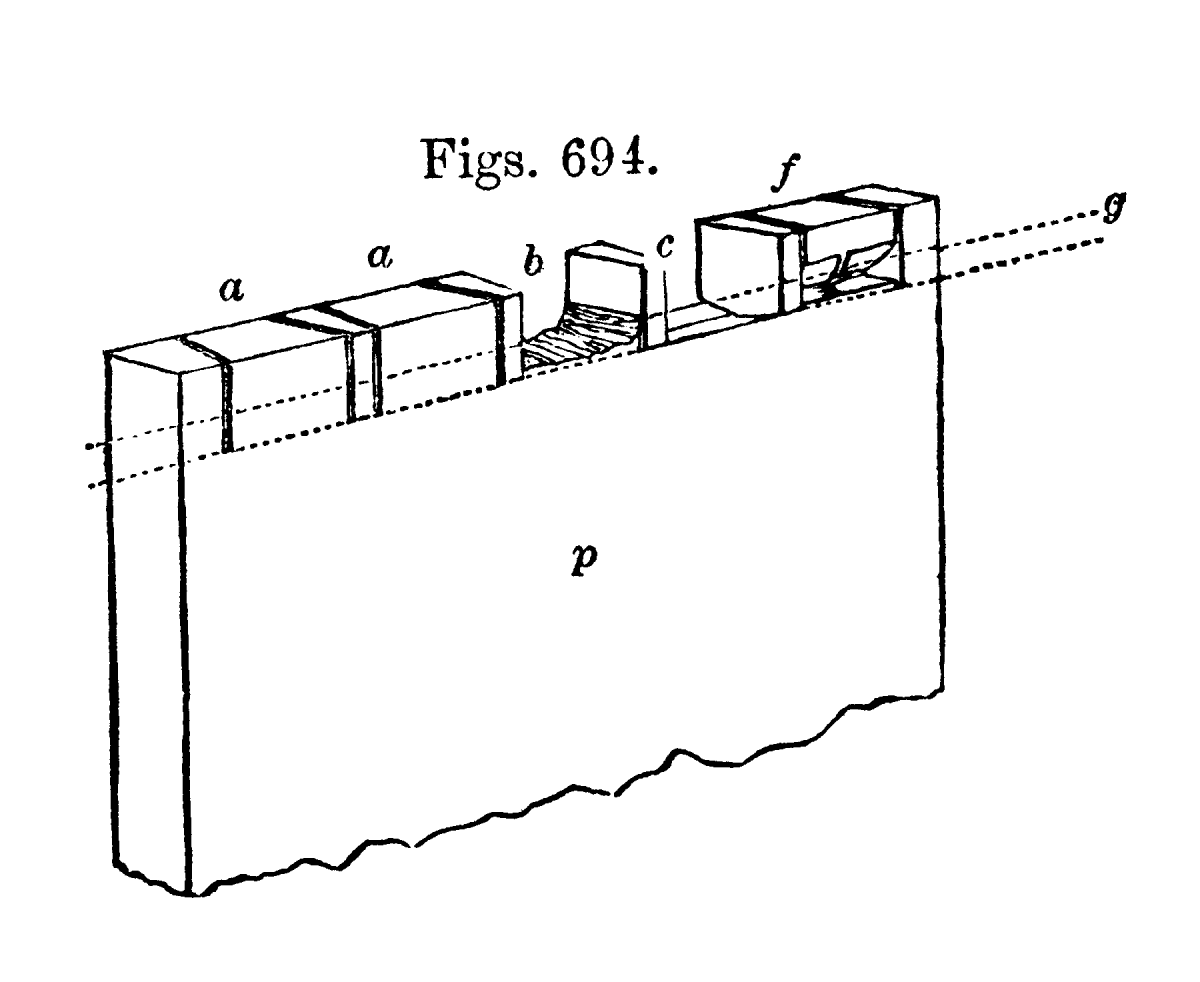
Figure that. Sawing out your dovetail waste is a technique that dates back to 1856 at least.
I cope out the waste between my dovetails because that’s how I learned to do it, and I am fast at it. When I demonstrate that technique, a common gripe from the peanut gallery is that it’s an unnecessary modern complication to dovetailing.
It’s actually not modern. In “Turning and Mechanical Manipulation…” (1856), Charles Holtzapffel wrote:
“The wood between the dovetail pins is generally cut out with the bow or turning saw, leaving the space as at b, fig. 694; and the spaces are then pared out with the firmer chisel from opposite sides, as at c, the chisel being placed exactly on the gage lines, but slightly overhanging, so that the insides are cut hollow rather than square, to insure the exact contact at the inner and outer edges of the dovetails.”
Unless you’re a geologist, I consider 158 years to be a good long run for a woodworking technique.
Sidebar: Knew Concepts – the Aluminum Cadillac
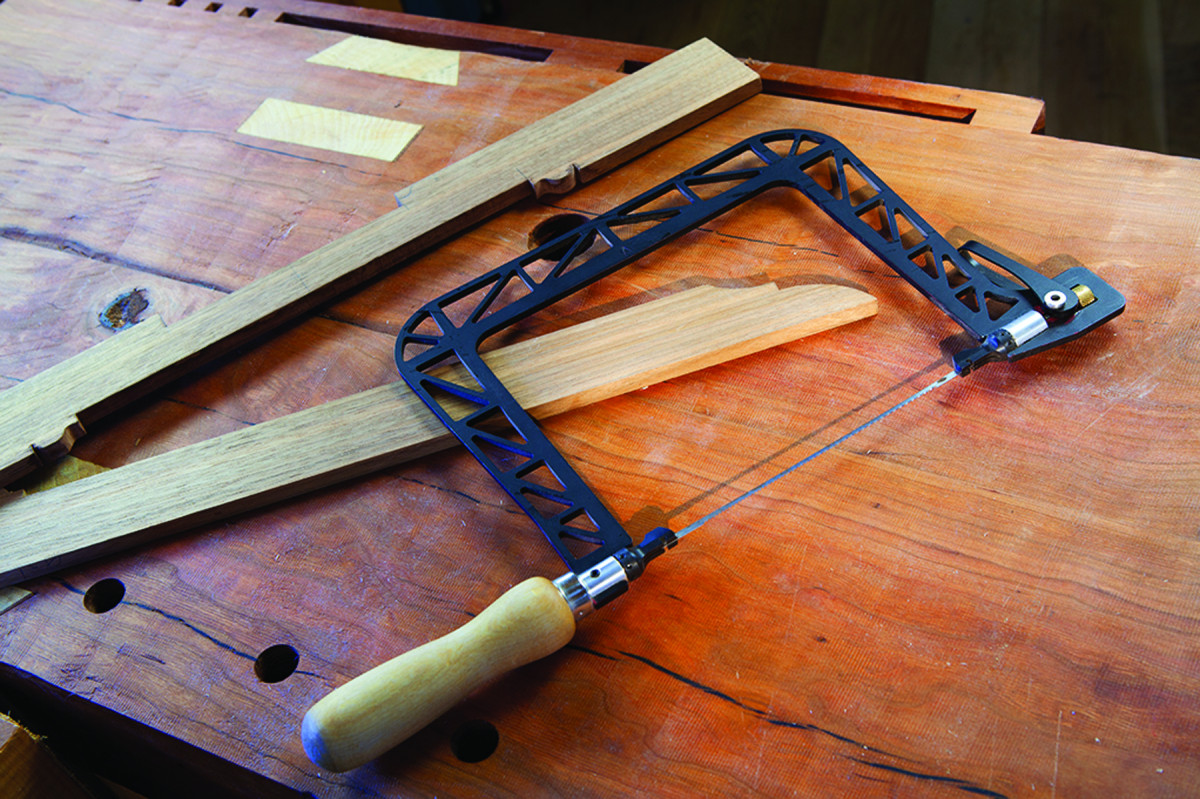
Modern technology. The Knew Concepts saw is different than traditional coping saws on almost every point.
For those woodworkers who have prime-rib tastes, I recommend the Knew Concepts coping saw. It is astonishingly lightweight (8 ounces), tensions the blade to a high note and can lock the blade in eight positions.
Except for the wooden handle, the tool’s makers redesigned the tool from scratch. I’ve been using one for about 18 months and have zero complaints, except for the color. The factory red was just too much for me. So I painted it black to match my planes and my tool chest.
At $149, it is the most expensive coping saw on the market, but it also has no equal.
Christopher is the editor at Lost Art Press and the author of “Campaign Furniture.”
Here are some supplies and tools we find essential in our everyday work around the shop. We may receive a commission from sales referred by our links; however, we have carefully selected these products for their usefulness and quality.