


We may receive a commission when you use our affiliate links. However, this does not impact our recommendations.
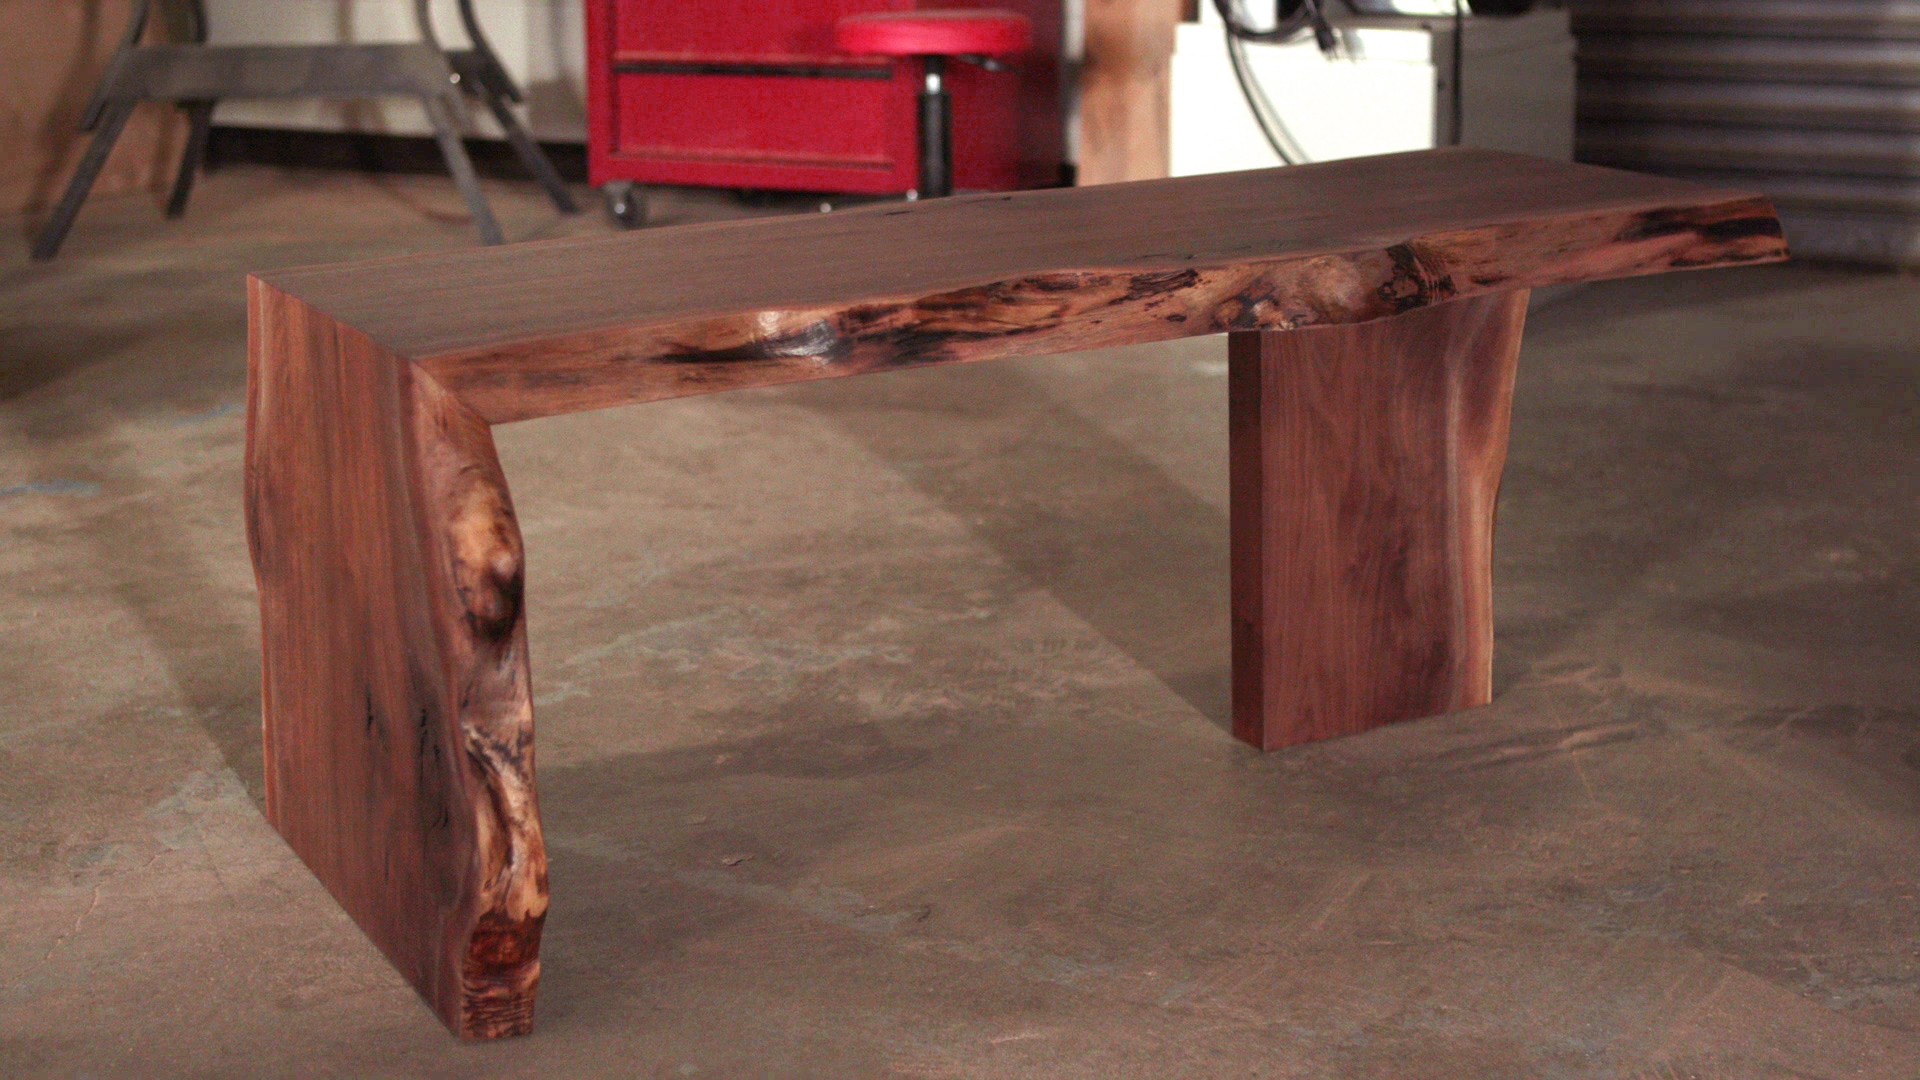 Slab, or live-edge furniture is all the rage, and I like it! If you think wood is one of the most amazing things ever created, then how can you not like a piece of furniture that retains so much of the look of natural wood? The grain on full display and the undulations and imperfections of the live edge bring home the natural representation of the piece. Now here’s the kicker, slab furniture is really easy to make! Our waterfall coffee table (shown here) has one miter joint made with a circular saw, and a dowelled-on leg for support. That’s it! There is a little bit of work involved in flattening the slab, but that’s more time-consuming than difficult. The hardest part is finding a great slab, and that’s where our friends at Horizon Wood Products come in.
To pick your perfect slab you simply go to their website, look at images of actual slabs that are in stock, and pick those that best suit your taste and project. Make your purchase and they’ll deliver them to your house. No need to borrow a friend’s truck or take a long drive. Just relax and wait for your lumber to show up. Simple.
Okay, now you have your slab, let’s get back to the simple “how-to” involved in making the table. We’ve got three ways to make it even easier. Our short video below will walk you through all the steps, and we’ve broken those out into a step-by-step presentation below as well. And if you want to save it for a later date, simply download our PDF of the project build.
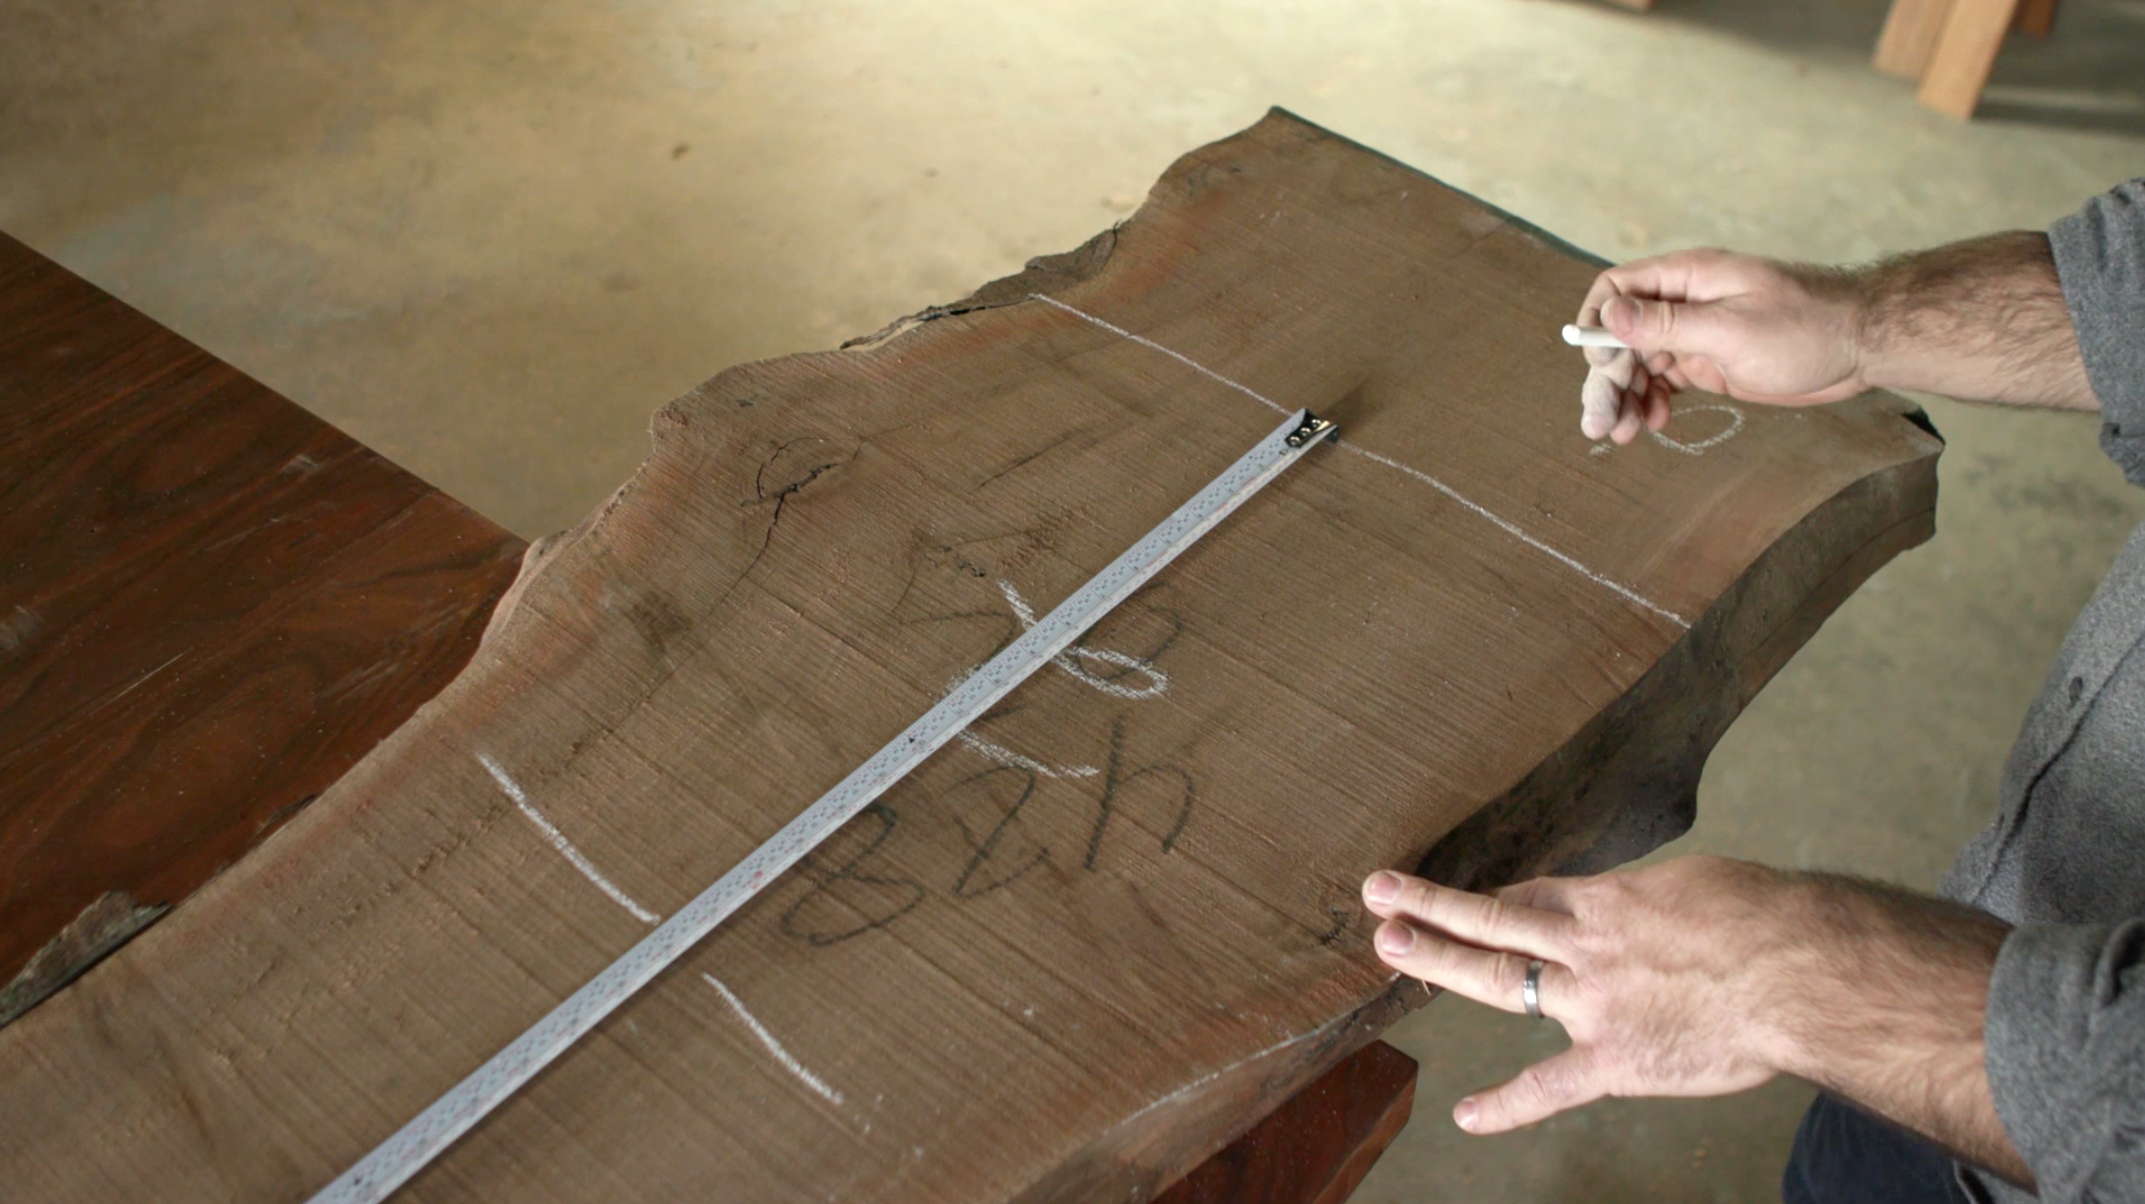
1) Because each slab is unique, working to a planned final size is a little arbitrary. We know that we want a coffee table that’s about 40″ long and 18″ is a good height for a coffee table. The width will mostly be determined by the slab itself. To mark our slab we begin by measuring out a 58″ section (length + height) keeping in mind that at 18″ we need to find a clear section to account for the waterfall joinery. With that location defined, we can mark where to cut the slab, leaving a little extra on the ends to avoid splits.
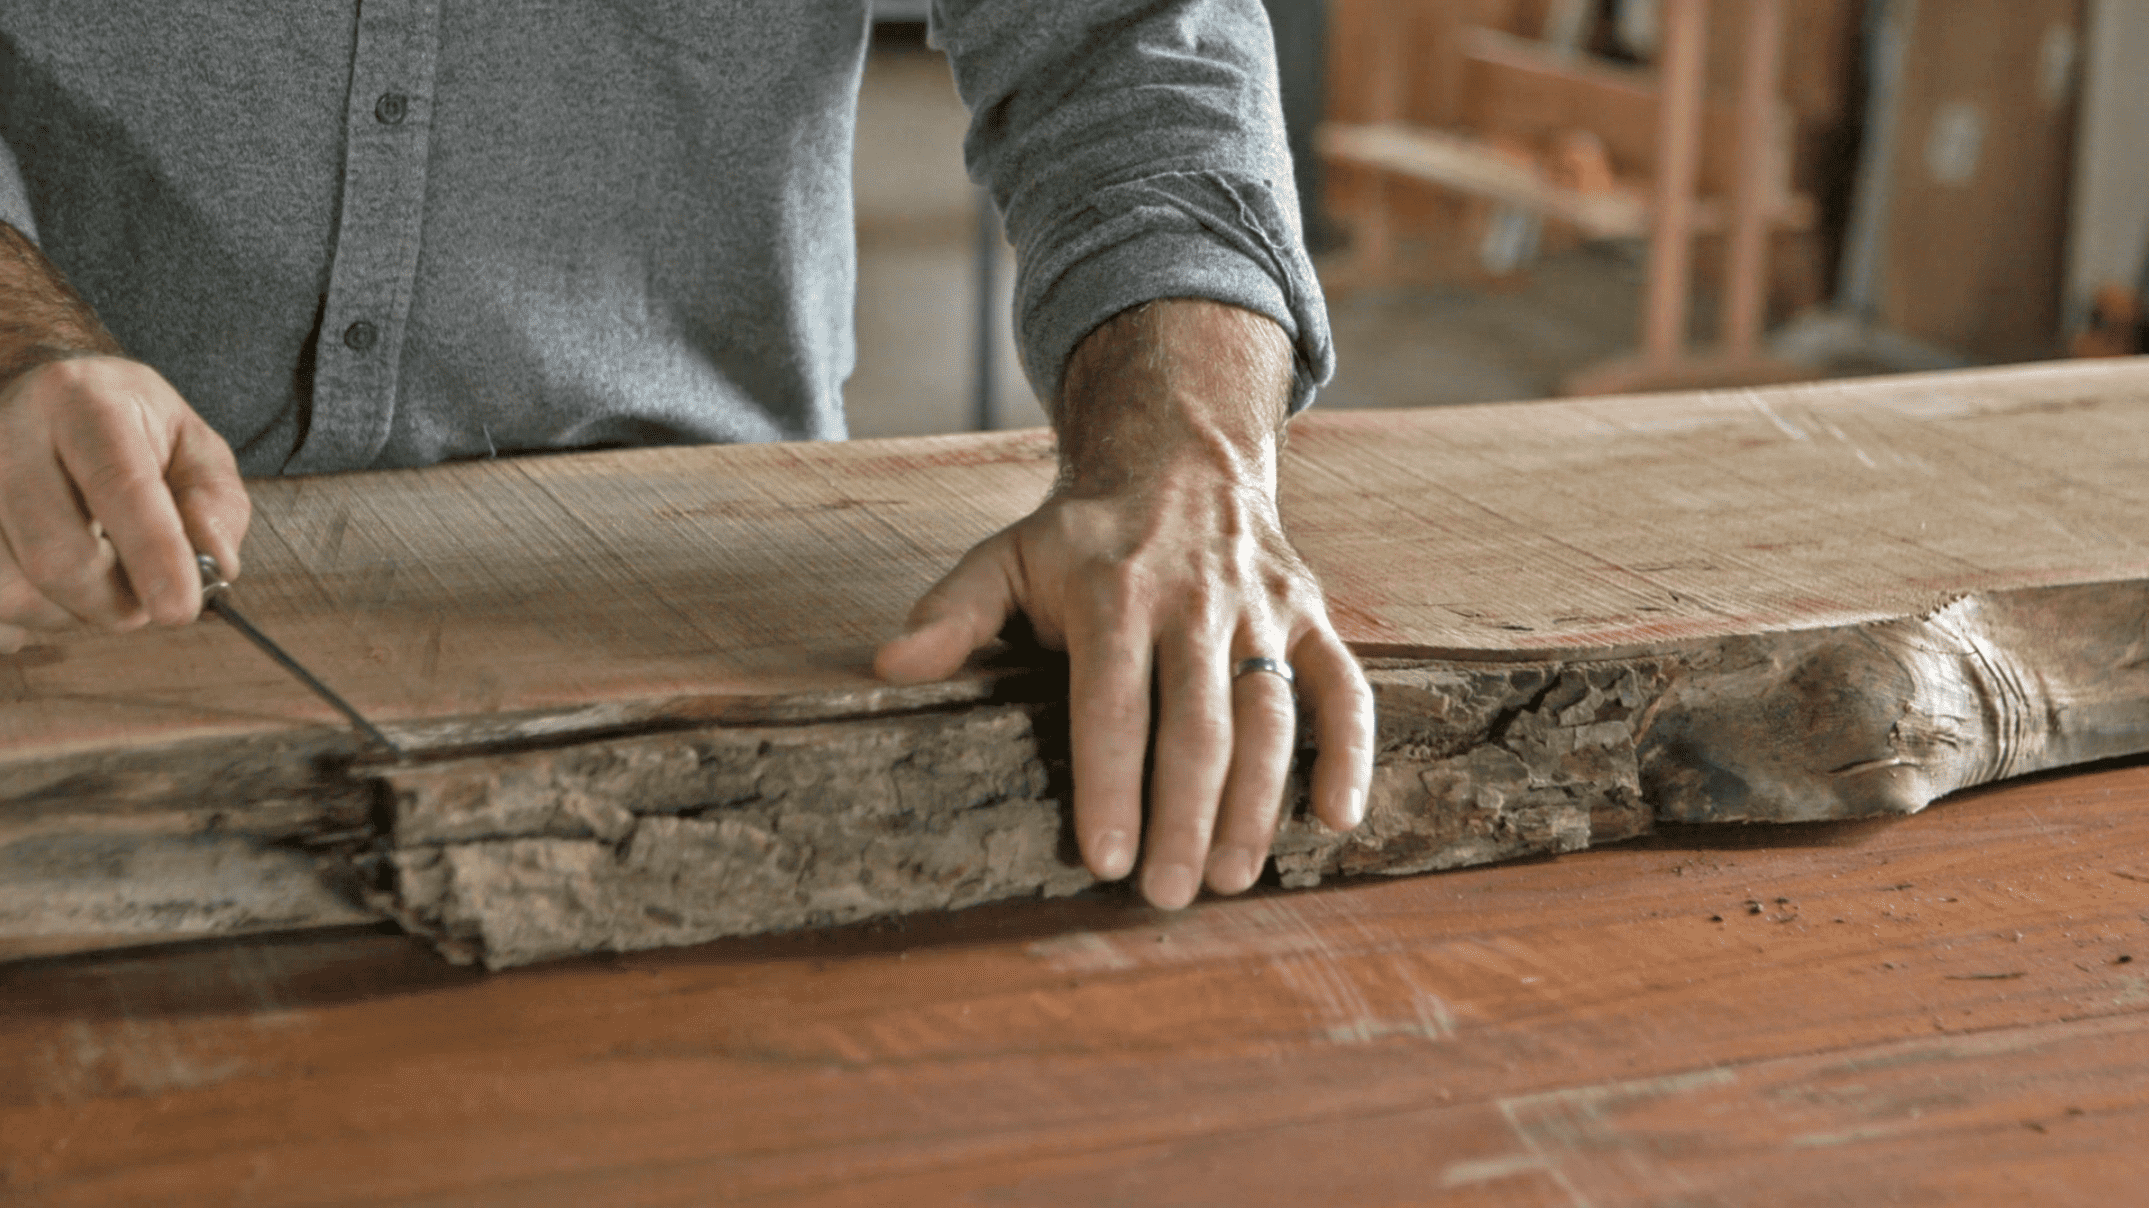
2) The beauty of a live-edge slab is truly in the eye of the beholder. Many will wish to try and retain the bark edge of the slab, while others will prefer to leave only the hardwood edge beneath the bark. Often much of the bark will be so loose that keeping it intact may be impossible. So, before going any further, this is a good time to check the live edges for loose pieces of bark. Some may pop loose with very little encouragement required. If you wish to keep the bark, it will need to be carefully glued in place at this time.
3) If you are removing the bark there will likely be sections that are not loose. In those cases, an awl, a chisel and a drawknife are all tools that will help with this. You want to do as little damage as possible to the hardwood beneath the bark, so slow and steady is the plan.
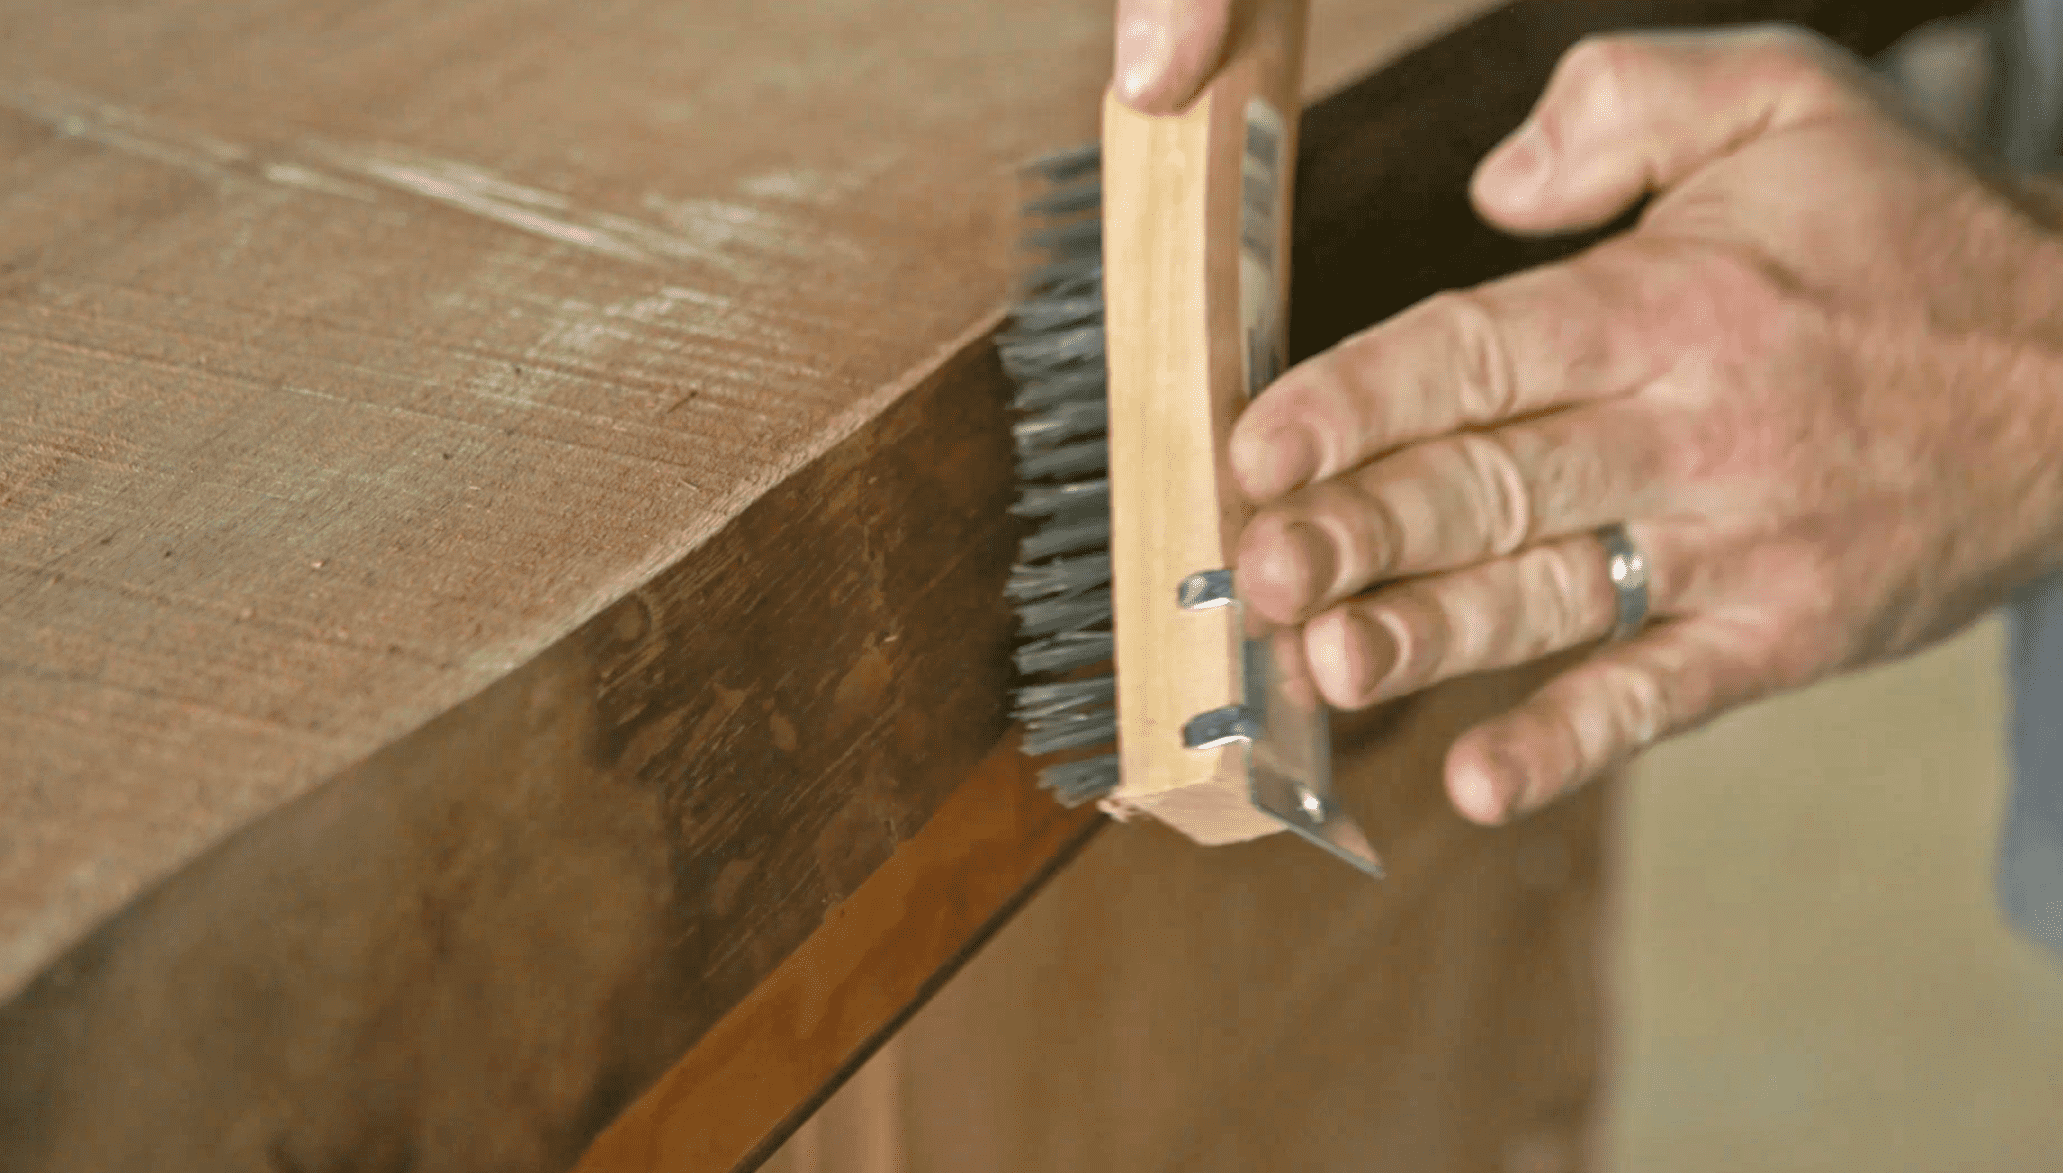
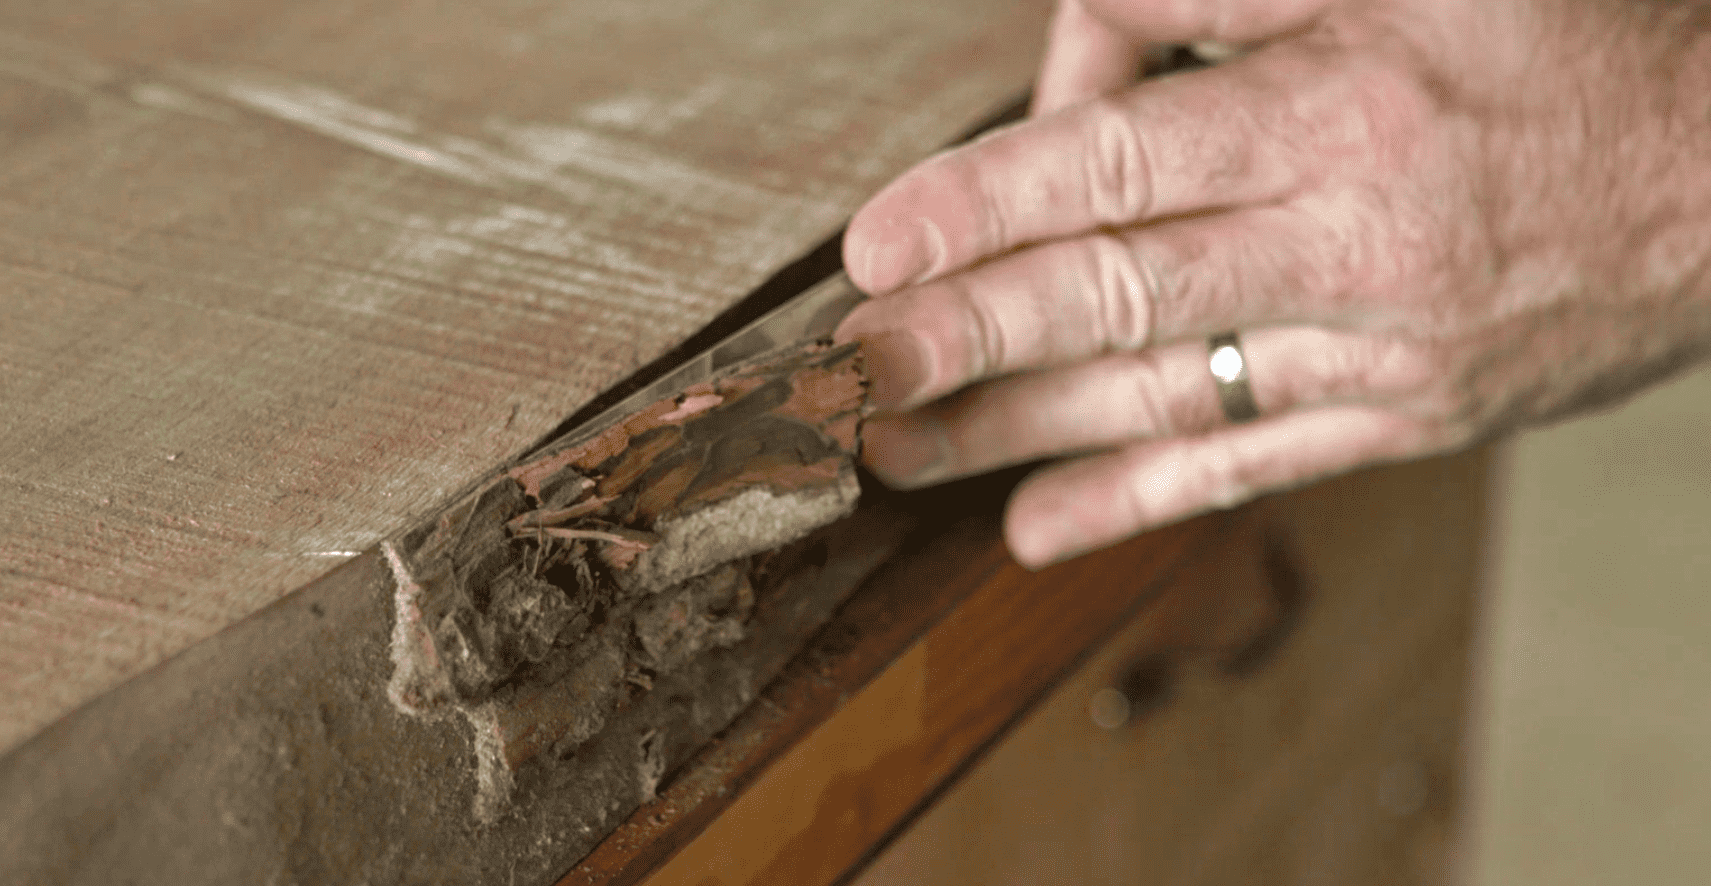
4) With the bark removed, the edges can be cleaned up with a wire brush. Light strokes will be best as you’re only working to remove dirt or organic materials left behind, leaving the hardwood as untouched as possible. A rotary tool (Dremel) with a small wire brush would also work, but again don’t get too aggressive that you gouge the edge.
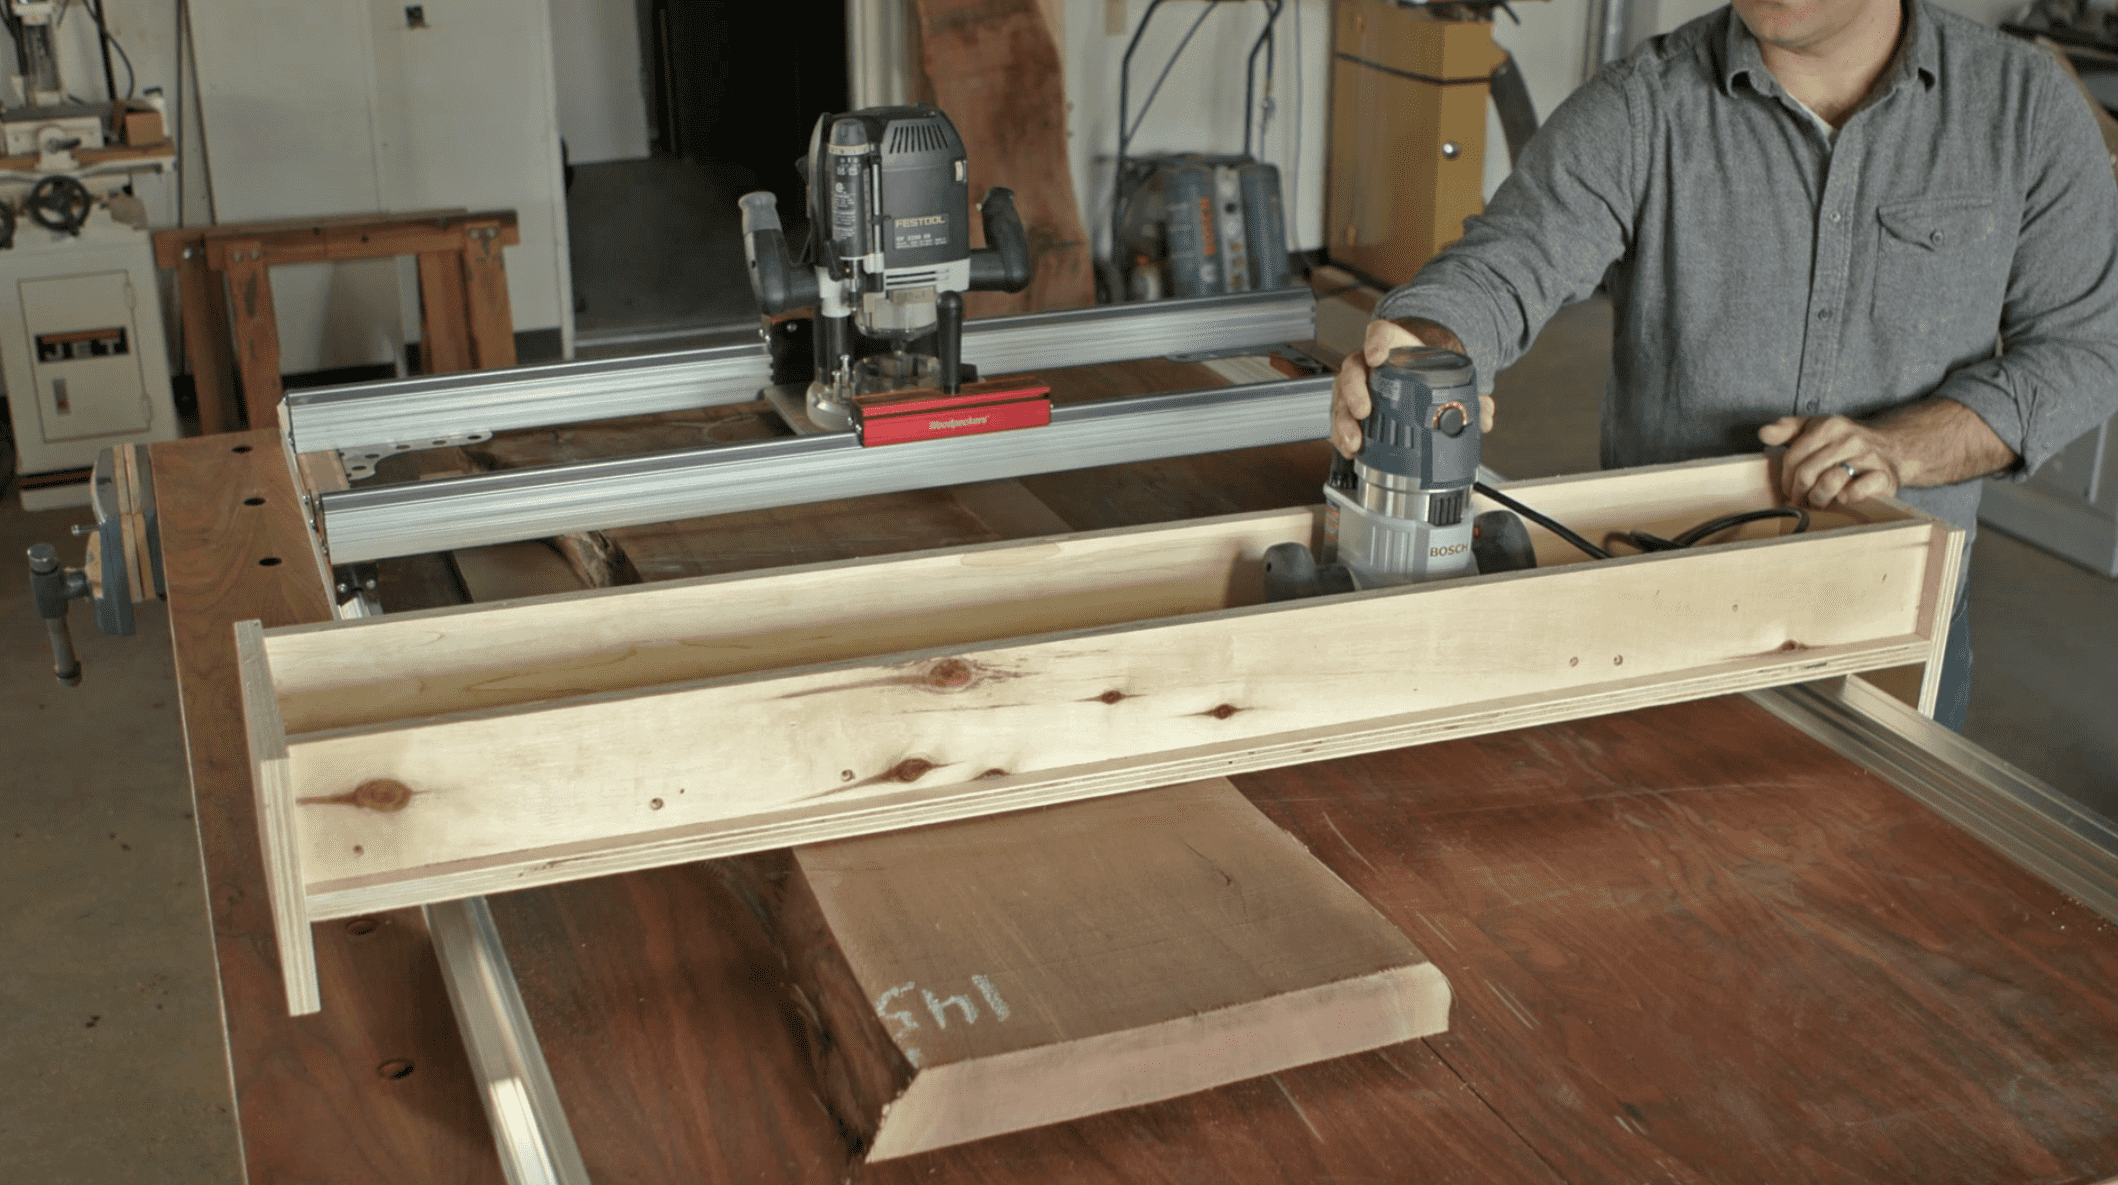
5) To flatten both sides of the slab using machinery would require a fairly large jointer and thickness planer. If you don’t have a 30″ planer sitting around, you can still flatten your slab with a simple jig and a router. A shop-made version is fairly simple, with a platform built to support a router with a slot in the bottom to allow the bit to protrude. The platform allows the router to move across the width of the board. Two support boards elevate the platform above the board. Commercial versions are also available, and we took advantage of one from Woodpeckers.
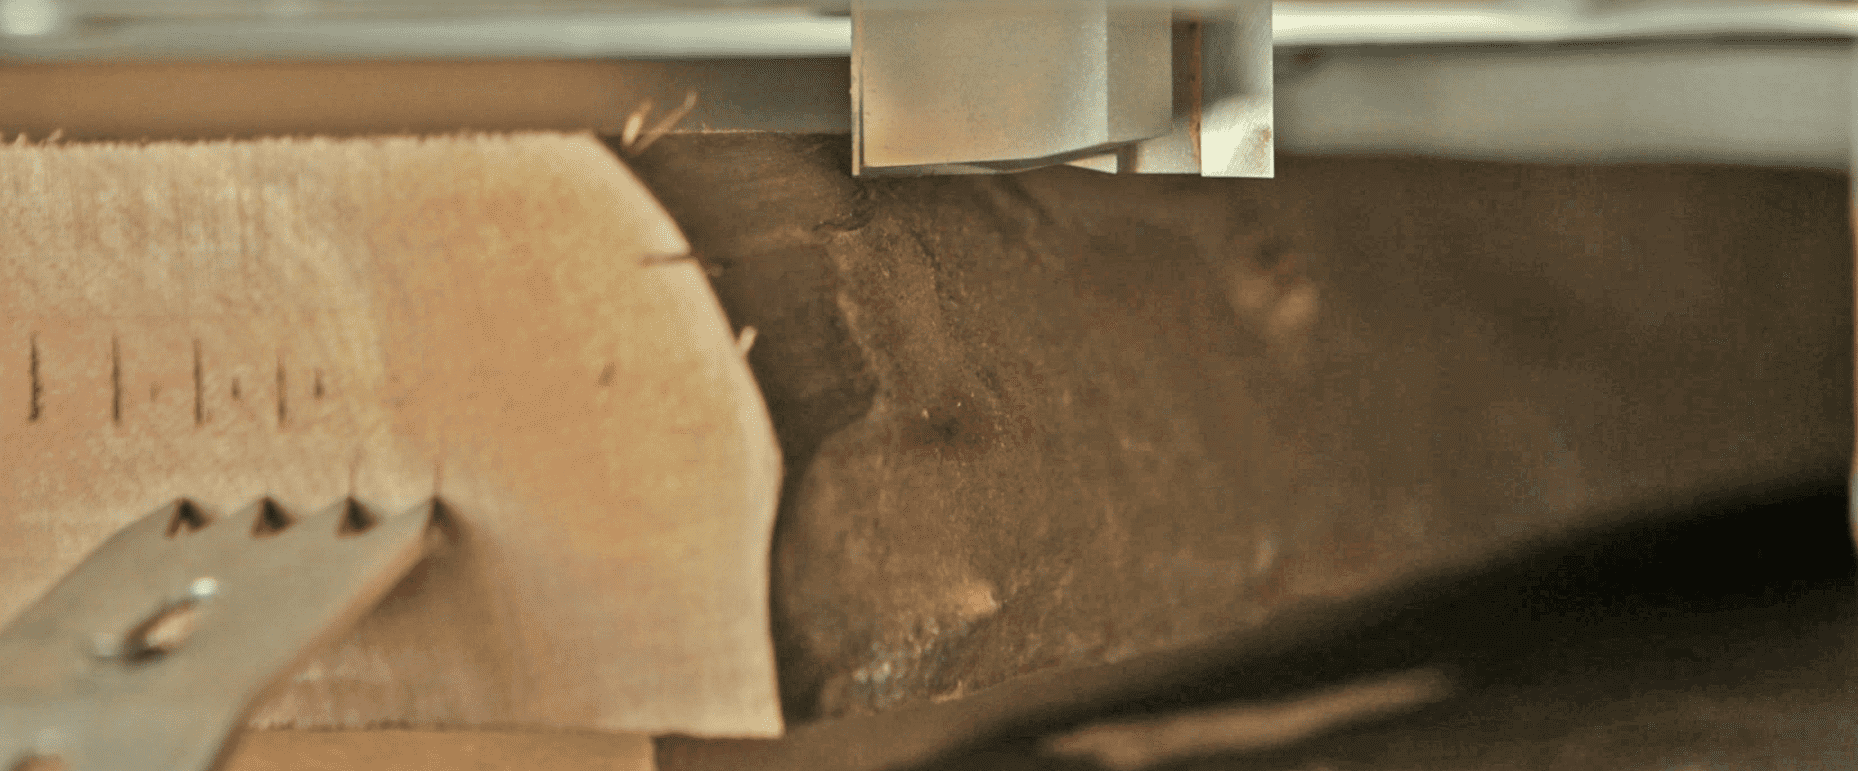
6) Depending on the horsepower of your router and the sturdiness of the flattening bit, you may need to take multiple light passes across the slab. In our case we were able to remove about 1/8″ with each pass. To start the cuts, find the highest spot on the first side and adjust the bit depth for the first pass.
7) Start the first pass across the entire board, making sure all the high spots are found, then adjust the bit depth a bit deeper to remove more material. Repeat the process until the board is evenly surfaced. Then flip the board over and repeat the process on the second side. You’ll need to determine your goal thickness for the slab at this point as well. We ended up with a nice 1-1/2″ thickness for our slab.

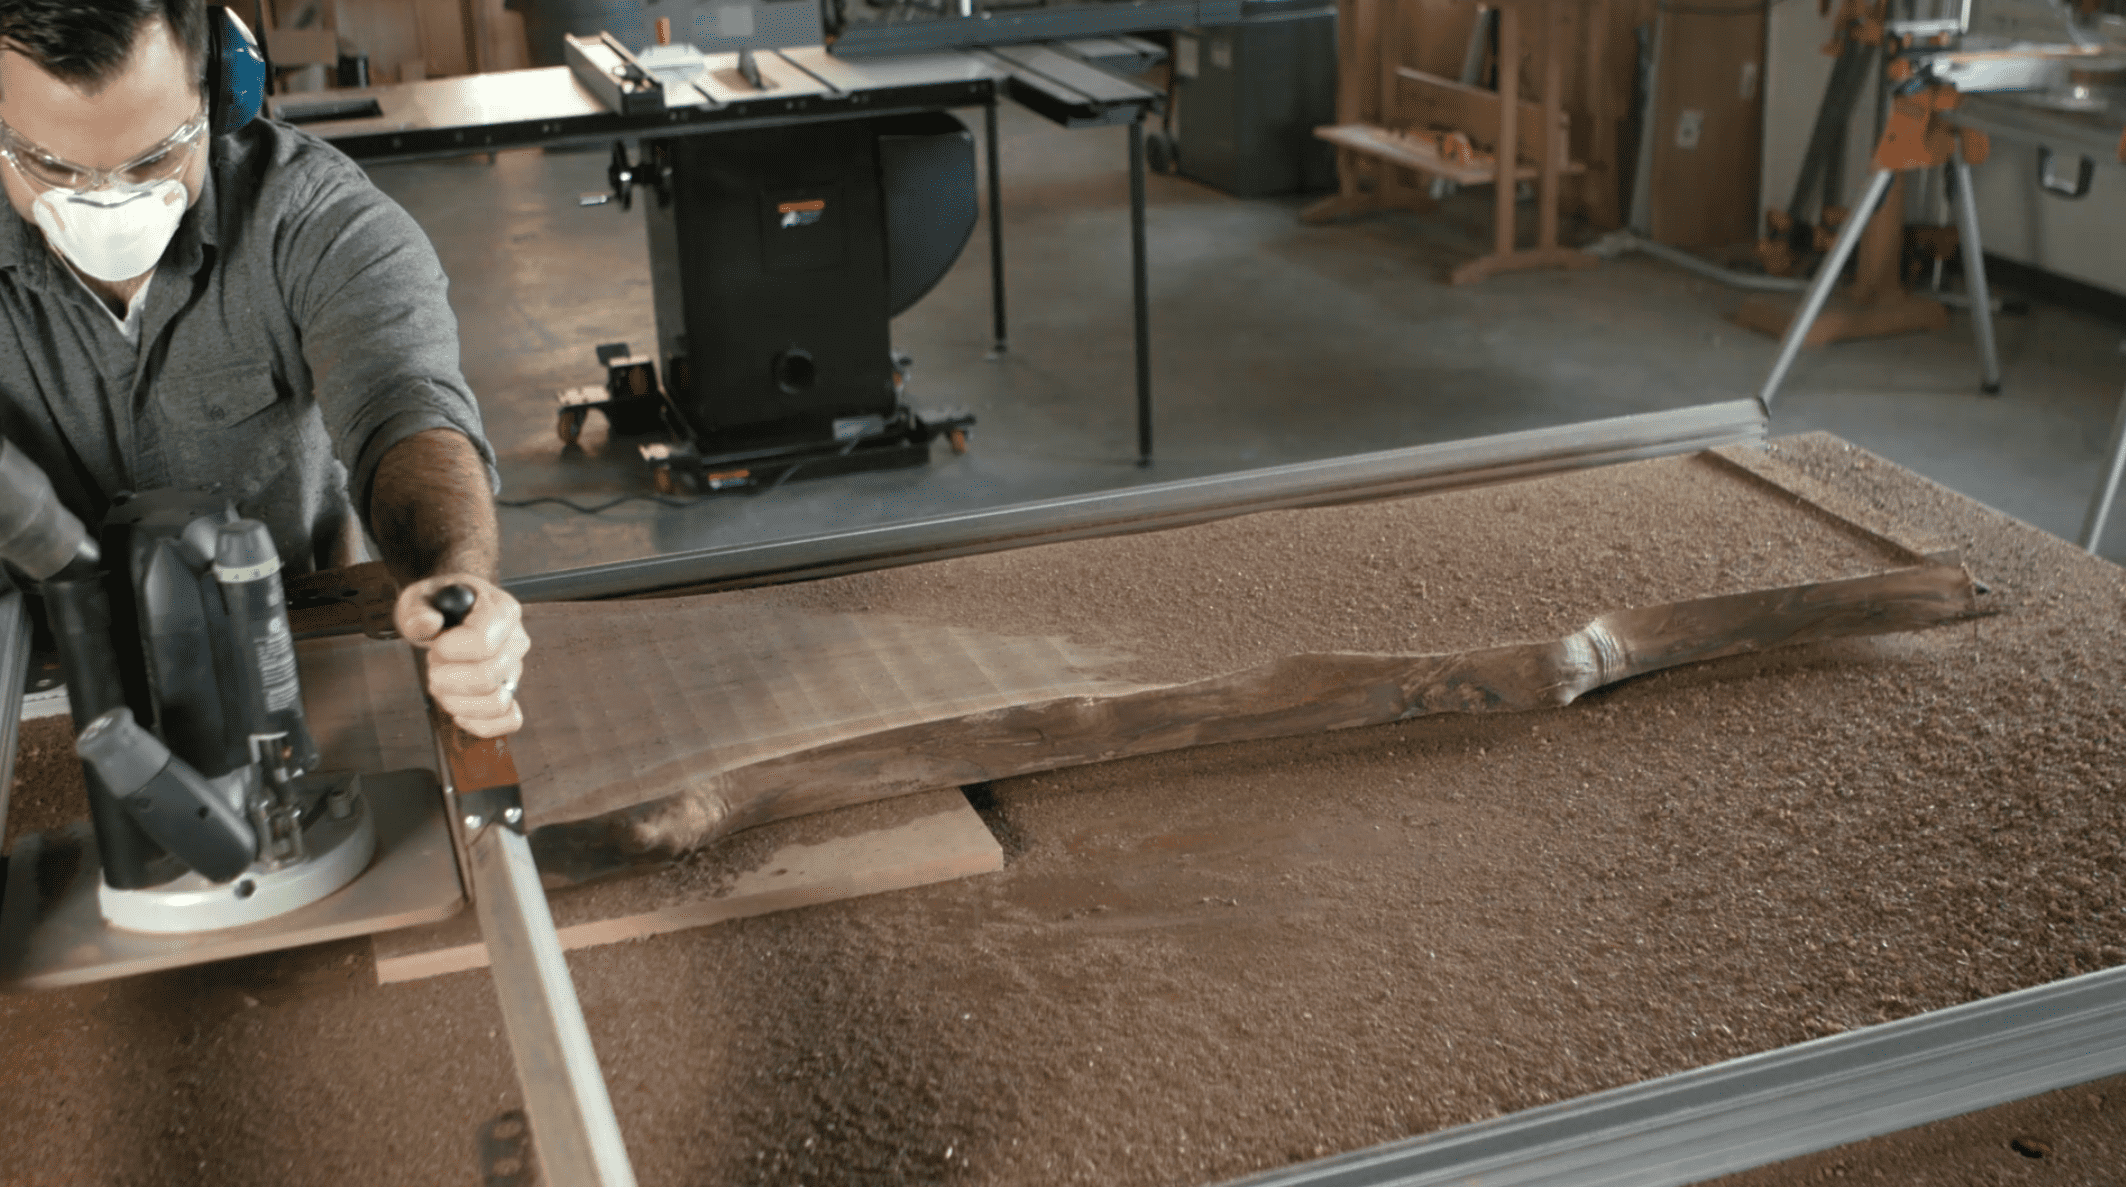
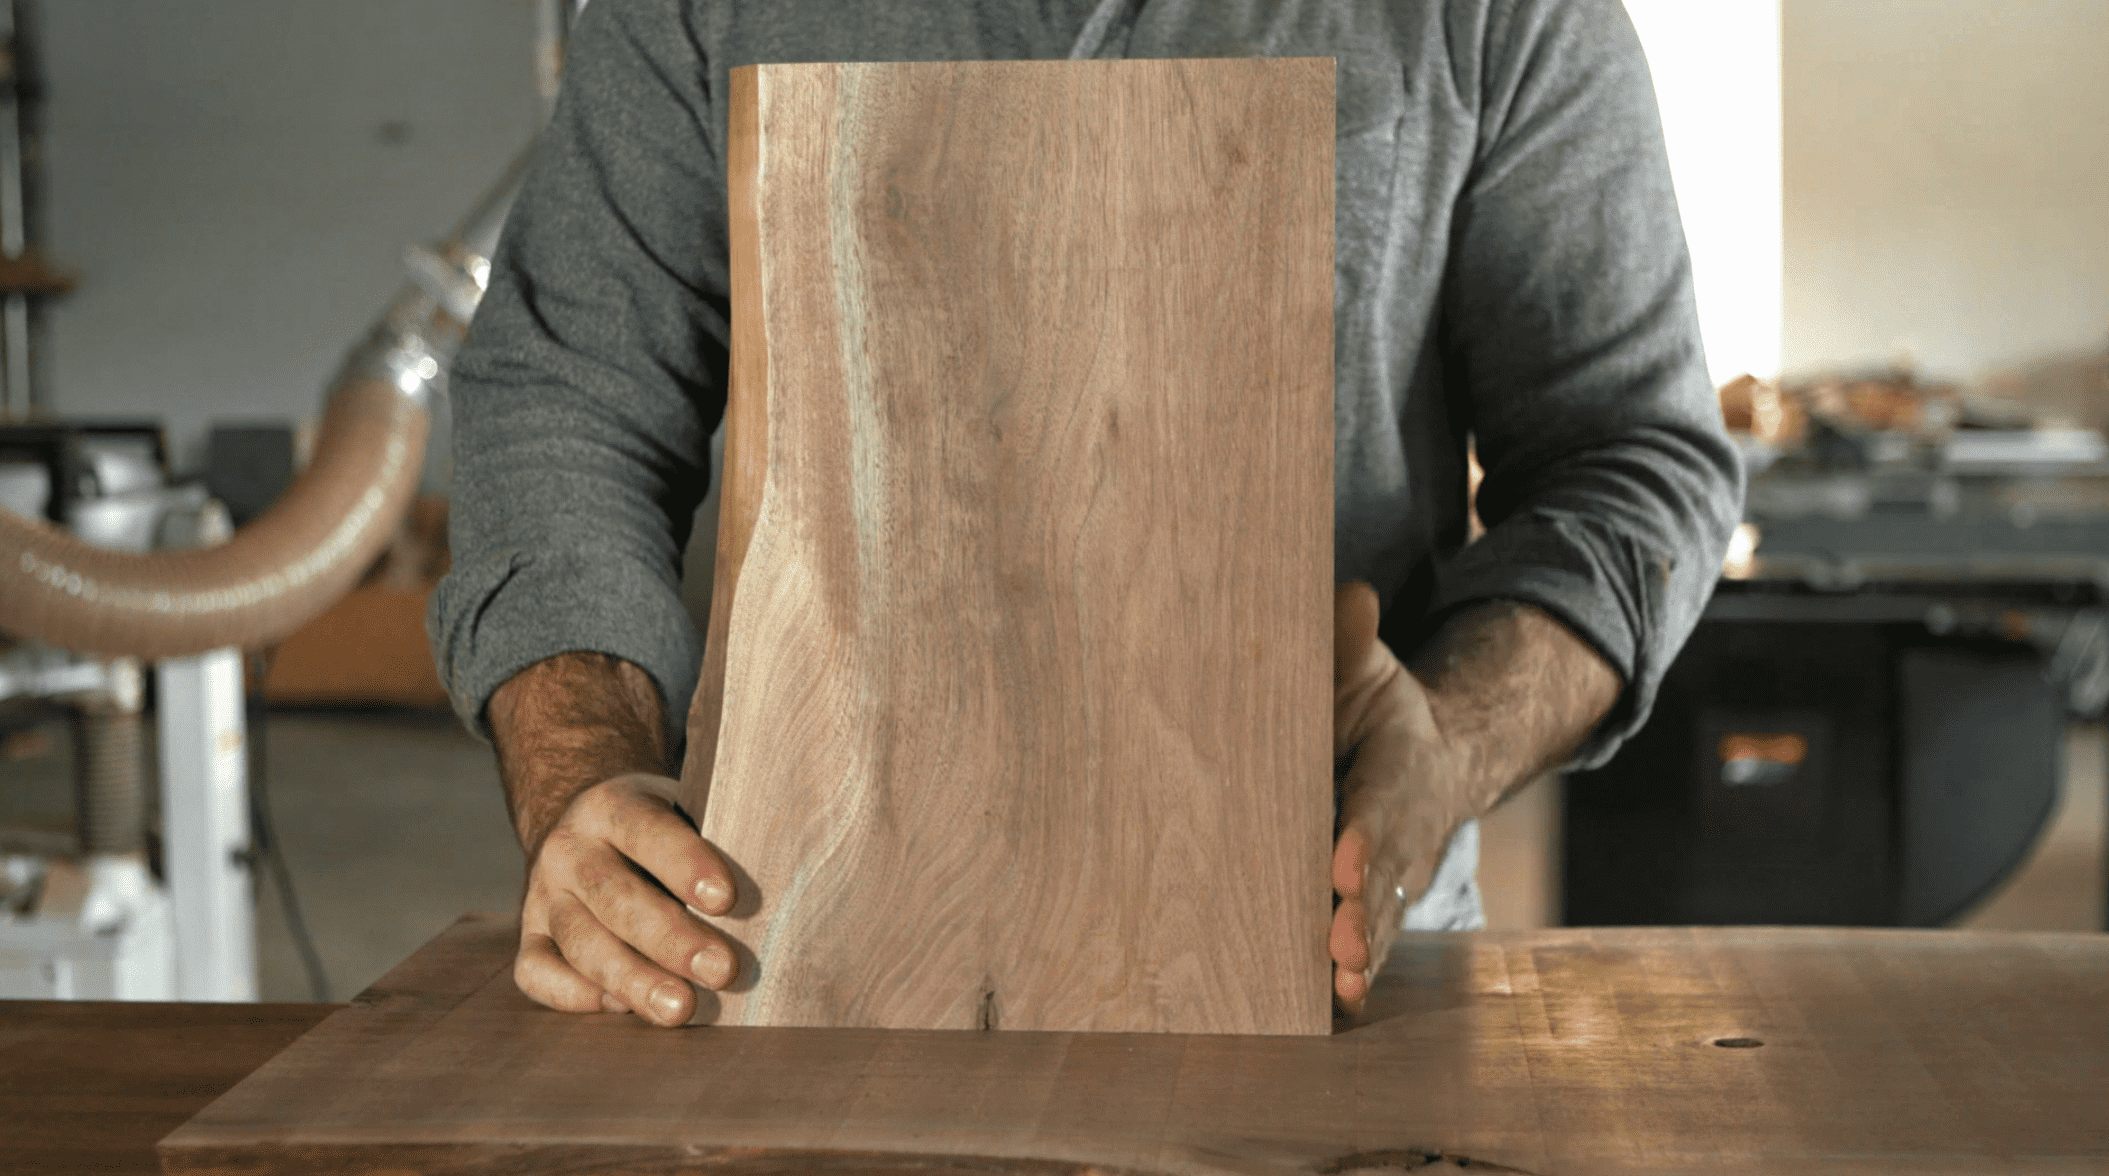
8) The beauty of the waterfall end on the table is allowing the grain to continue from the top and down the end. To show as much of that continuity as possible we’ll cut the mating edges at 45-degree angles using a circular saw. This may seem less precise than you’d like for such a joint, but using a table saw is complicated by the live-edges of the slab. When using a quality blade and when properly guided, a circular saw is more than capable of the task. Set the saw base to 45 degrees, double-checking the setting with a square.
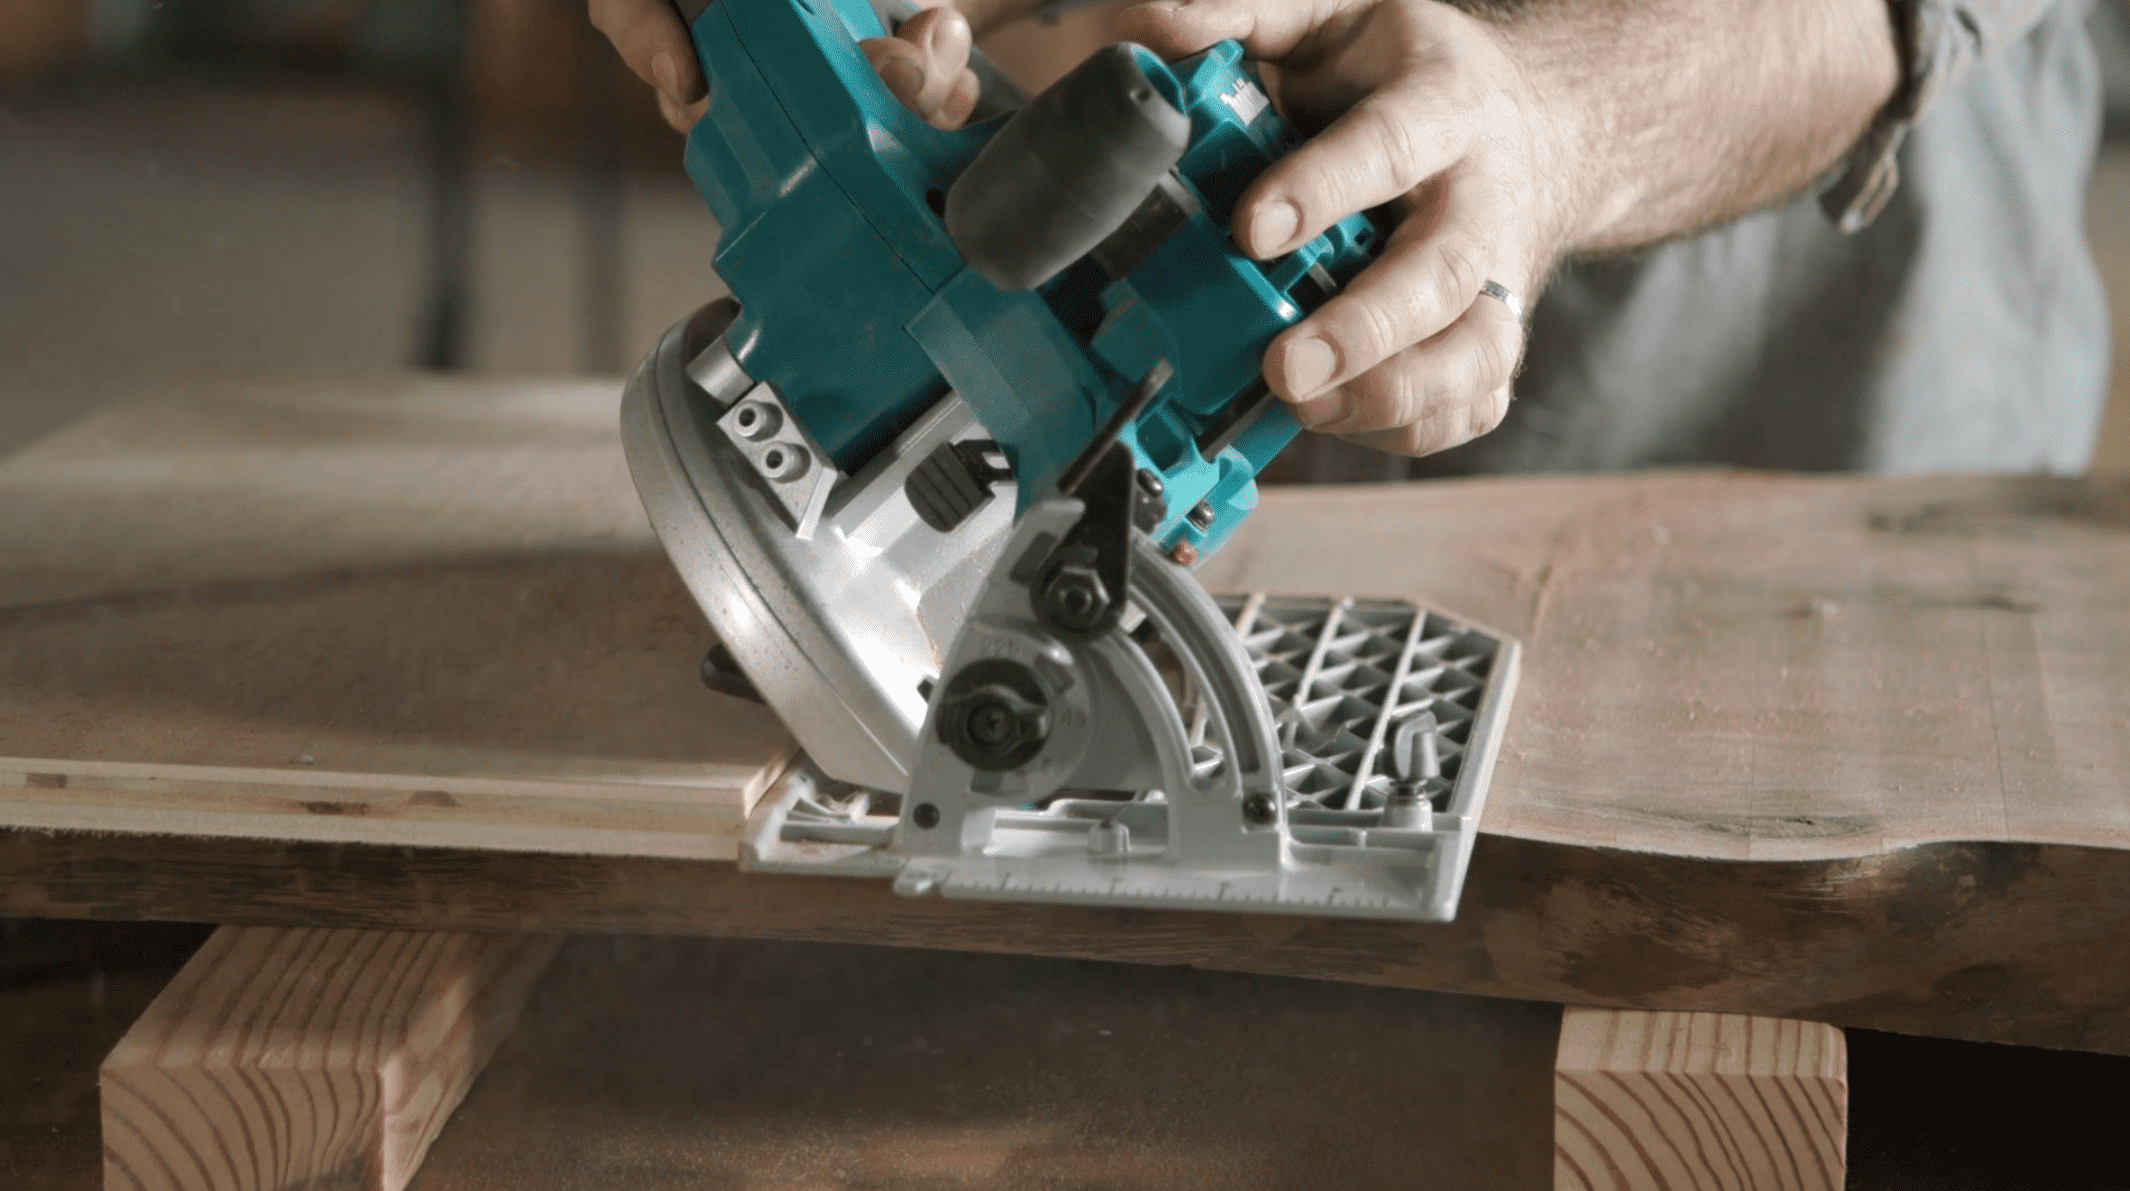
9) We want to make our mark near the 18″ height location, so we made a mark at 17-15/16″. We next measured the offset distance from the edge of the base plate to the blade (careful to make sure your bevel is angled in the correct direction), and moved our straight edge guide to that new line and clamped it in place. Then simply make the cut by keeping the base plate tight against the guide. Keep moving through the cut as any stopping and starting may affect the finished surface of the miter.
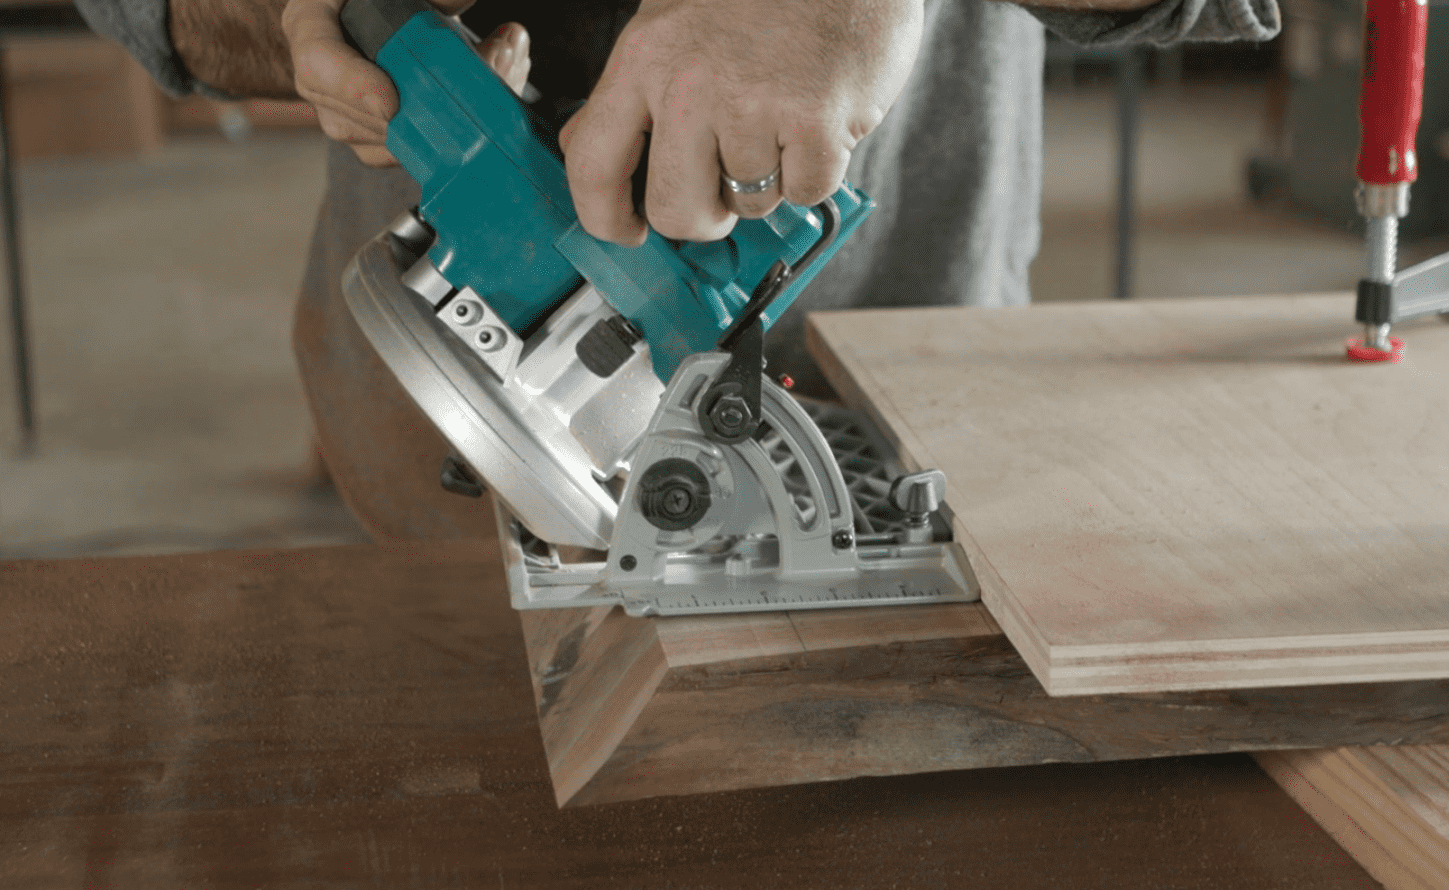
10) With the first cut complete, the straight edge is moved to the second piece, marking a new line measuring from the opposite side of the base plate to the blade and a mirror image of the first cut is made right at the location of the first cut. Check on the match of the two mitered ends. If your cuts were smooth you should have a tight joint. If any gaps are found, a little work with a block plane will improve the joint.
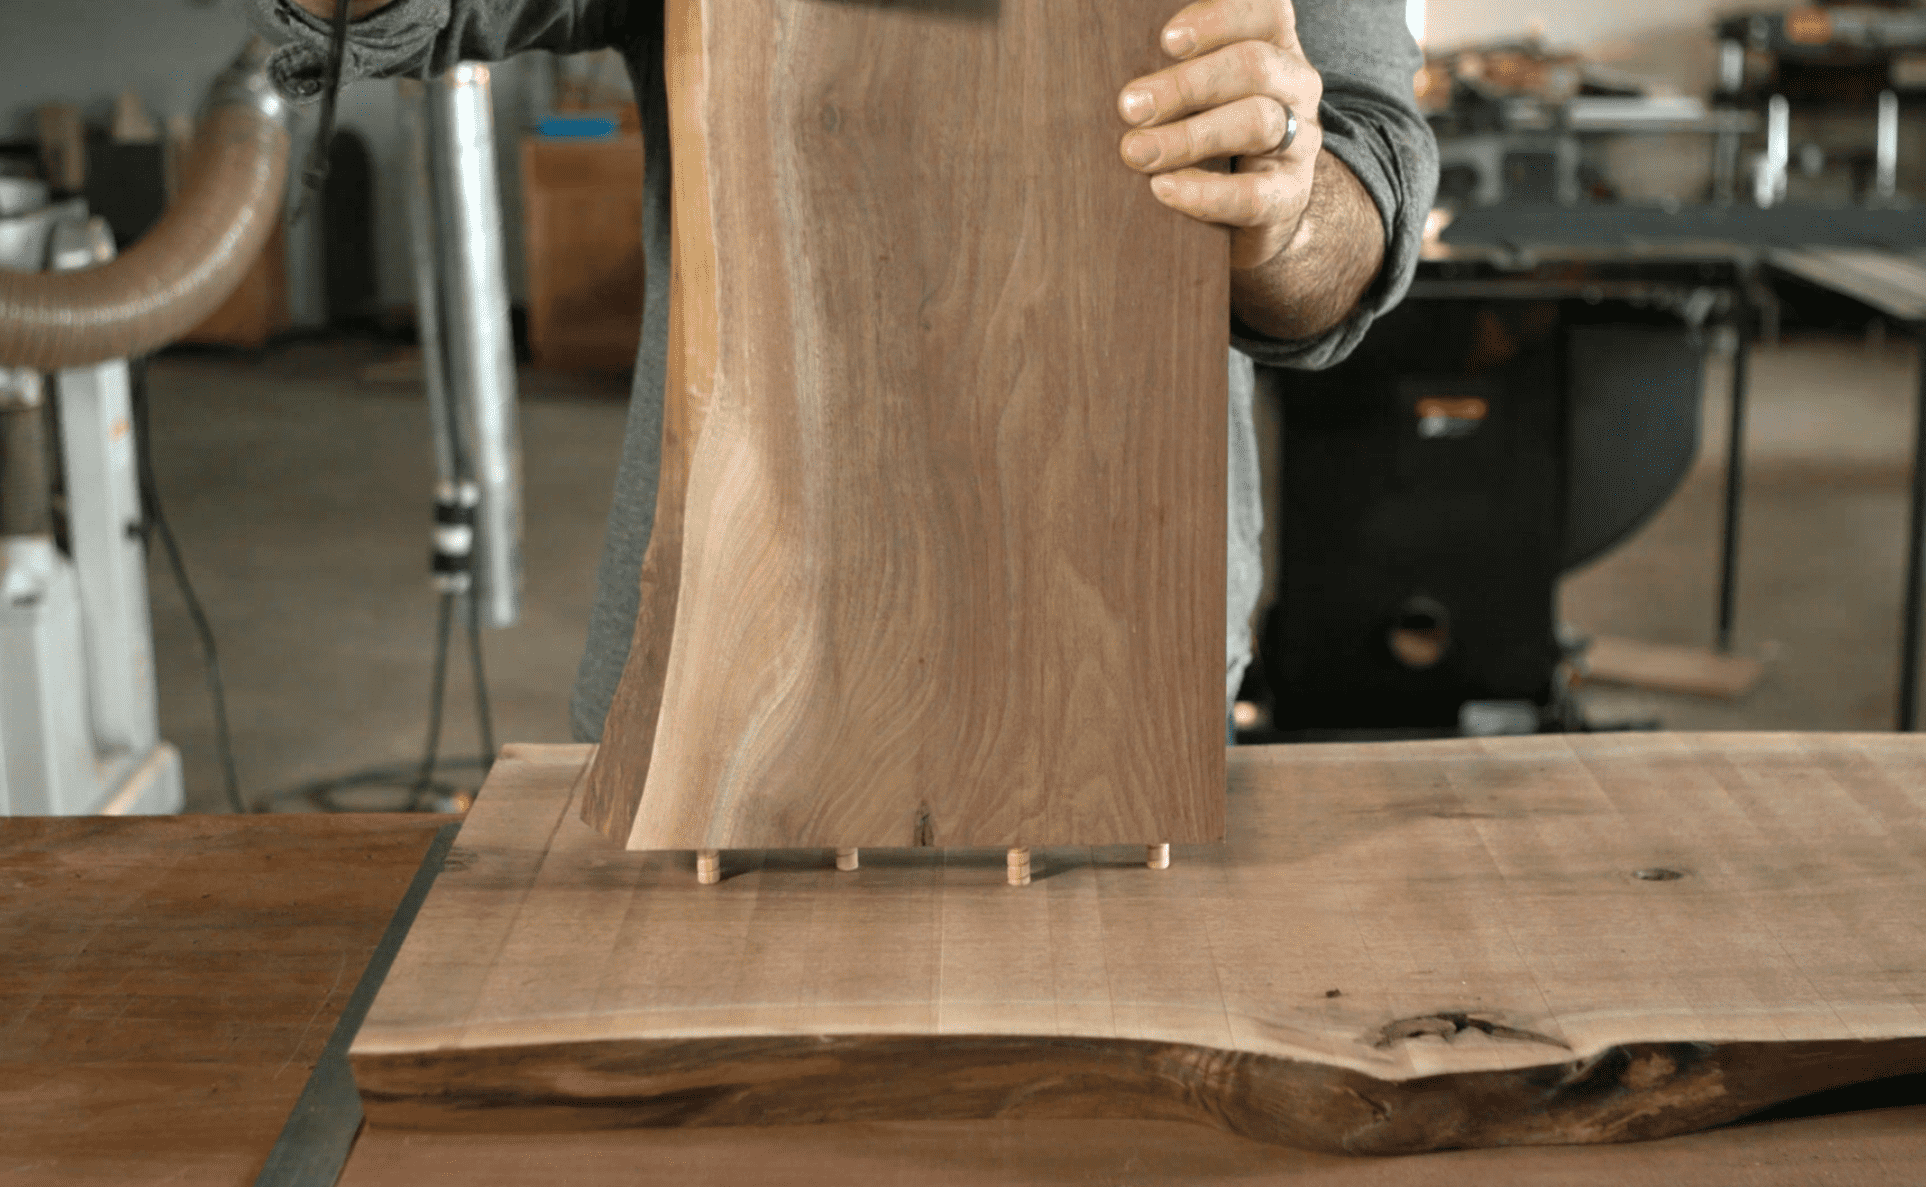
11) For the leg we’re using another piece of live-edge lumber. It’s been planed to the same thickness as the slab and we’ve squared over the inside edge. The width of the leg is up to you, but we’re suggesting a 6-to-8″ width for the bottom of the foot. The leg is simply held in place with dowels. The dowel locations are marked using the leg as a guide, and the dowel pockets are drilled into the top of the legs using a stop on the bit to control depth.
12) We used dowelling centers to transfer the location onto the underside of the tabletop, then drilled the mating dowel pockets in the top.
13) Do a dry test-fit on the leg, then spend some time sanding all the pieces that will be hard to reach once the table is assembled (underside of top, leg sides and inside of waterfall end) to your final sanding grit.
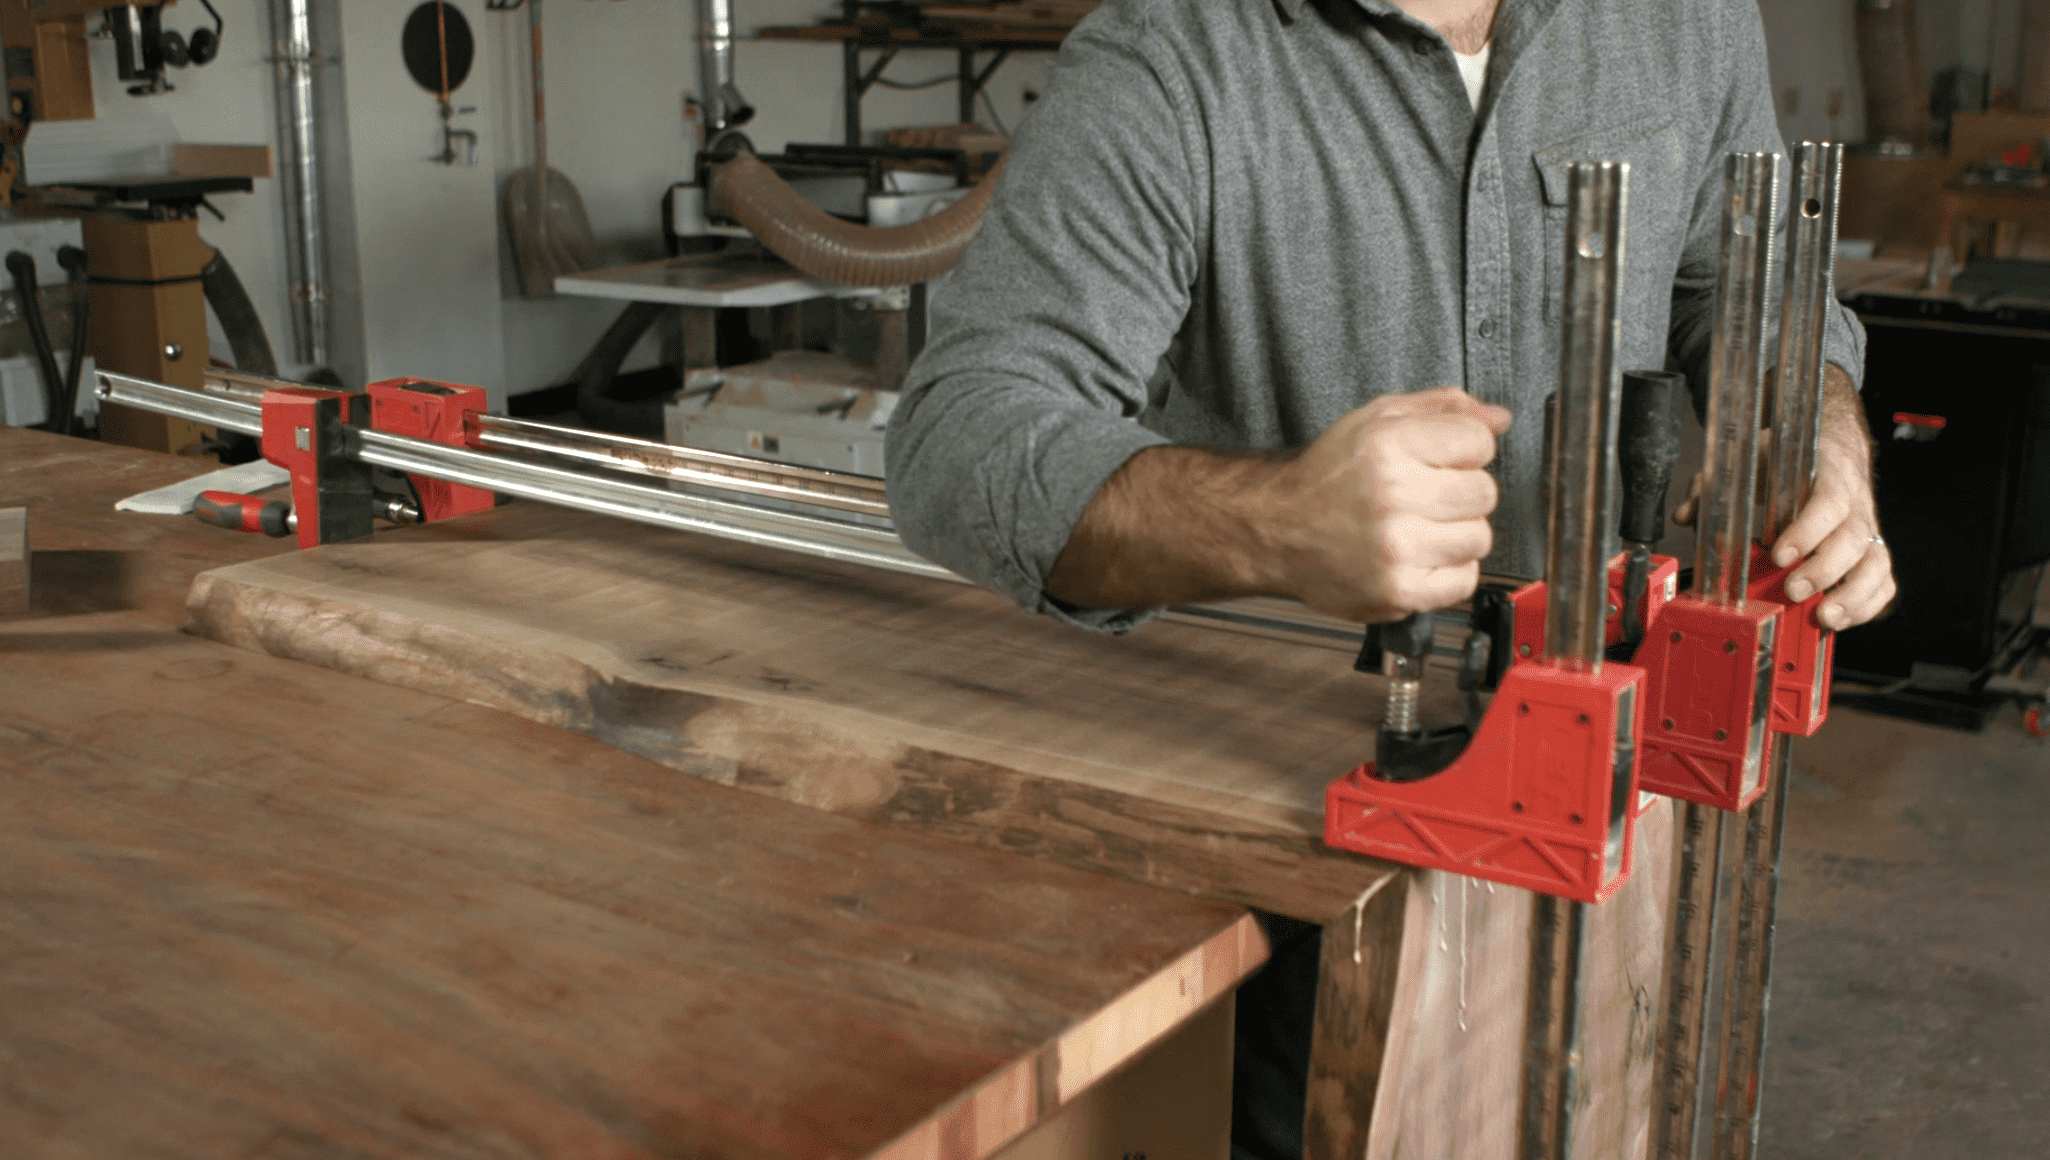
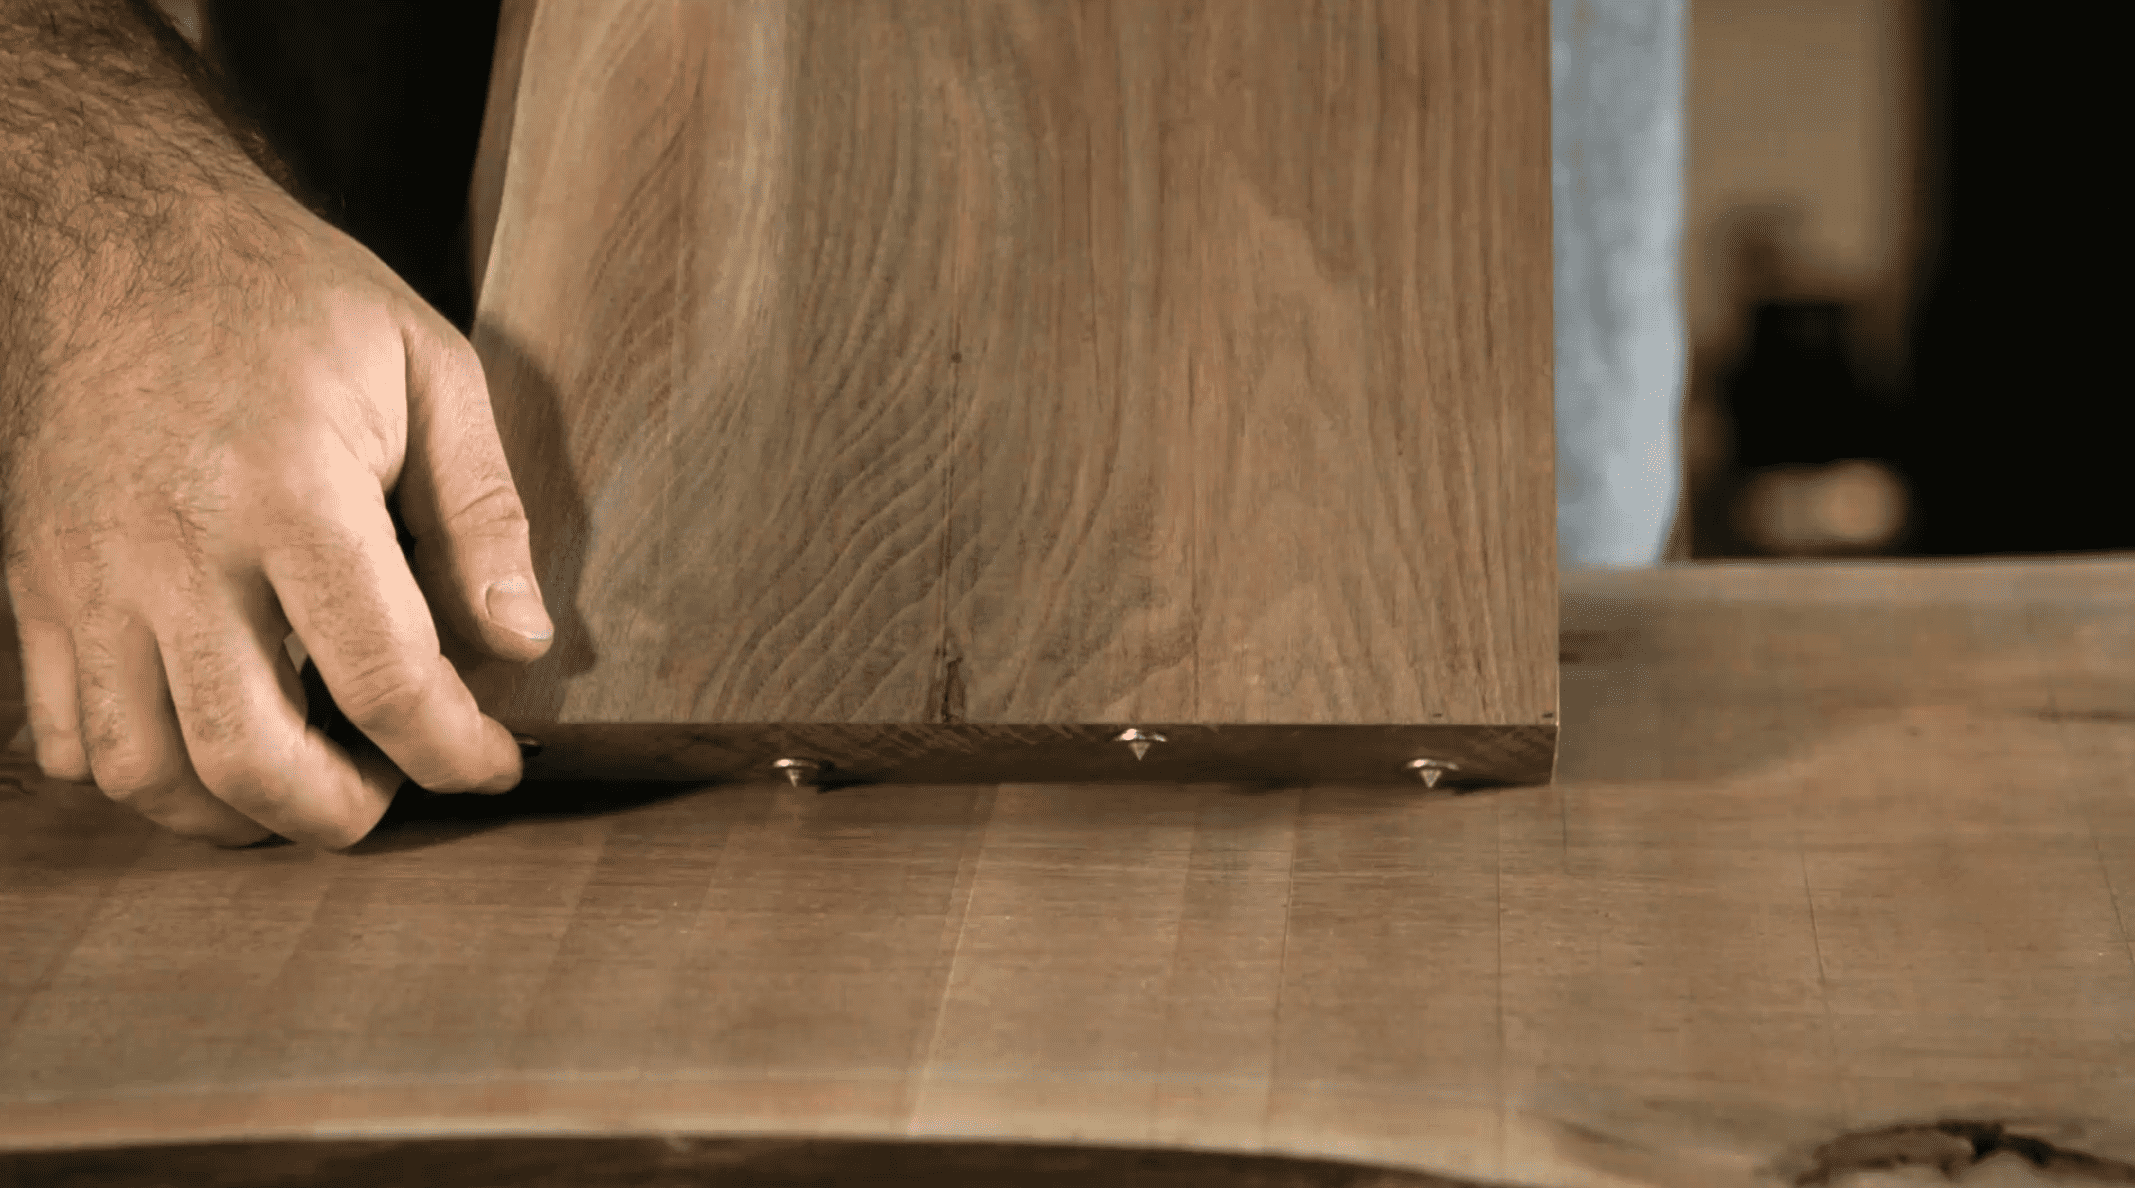
14) You likely know that endgrain-to-endgrain glue joints don’t offer very much strength, but did you know that when you cut a board on a diagonal, you essentially expose a grain pattern that is more long grain than short grain? Mitered joints have great strength, and we chose to make our mitered joint without biscuits or dowels, as these can often add as much misalignment as alignment. We added glue to the mitered joint and then added clamps pulling against the joint in both directions. By carefully adjusting the clamps, the joint is perfectly aligned and pulled tight.
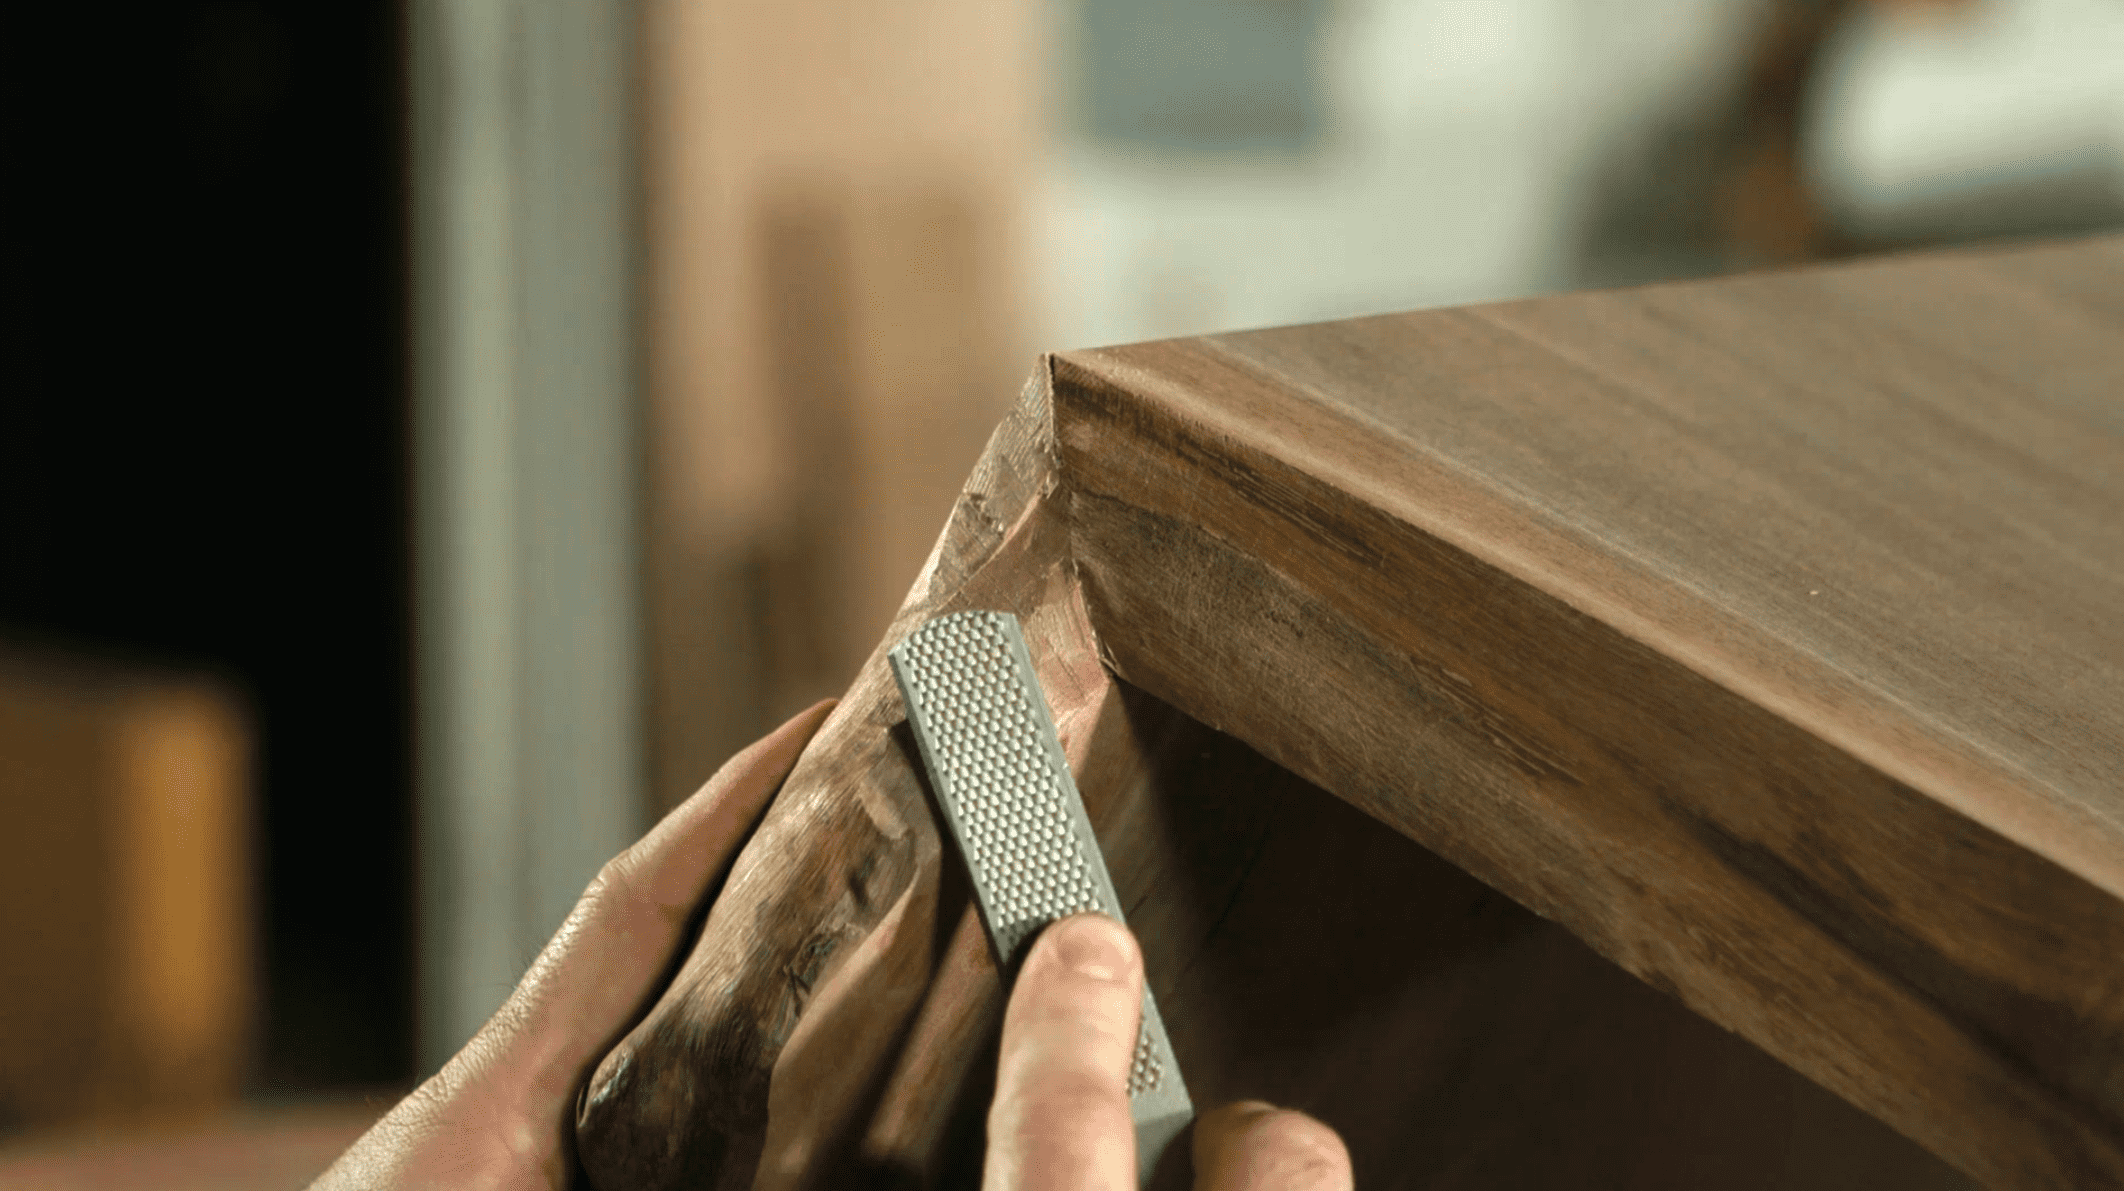
15) No matter how hard you try once the waterfall “joint” is mitered together, the live edge will not be a perfect match. After the end is dry, a little bit of blending of the live edges willl be necessary. Patient work with a chisel (if the offset is dramatic), a rasp and sandpaper will let you blend the edges to a natural-looking juncture.
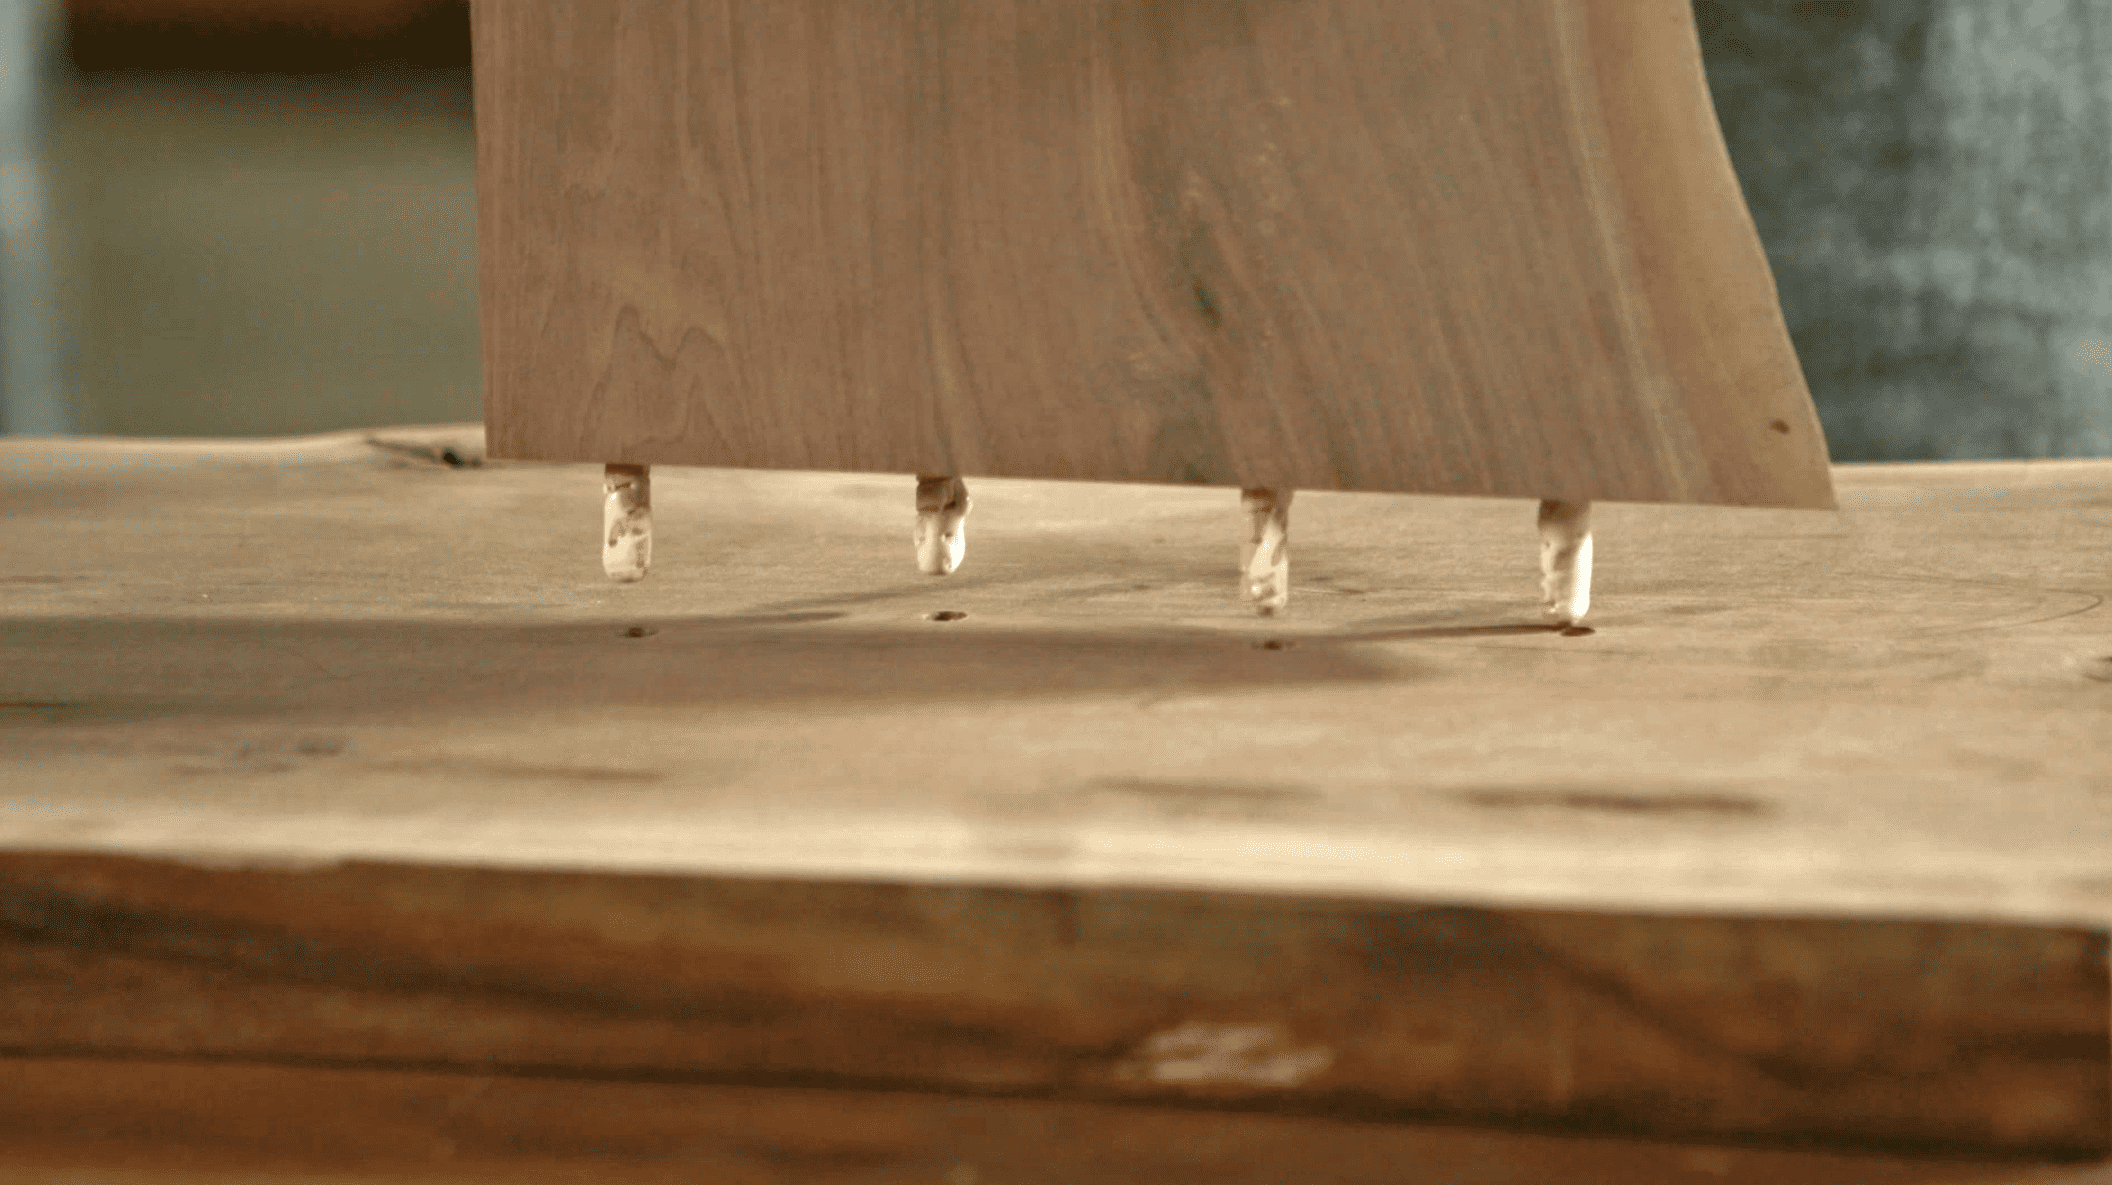
16) The next step is to attach the leg. Glue is applied to the dowels, and the leg is glued and tapped in place.
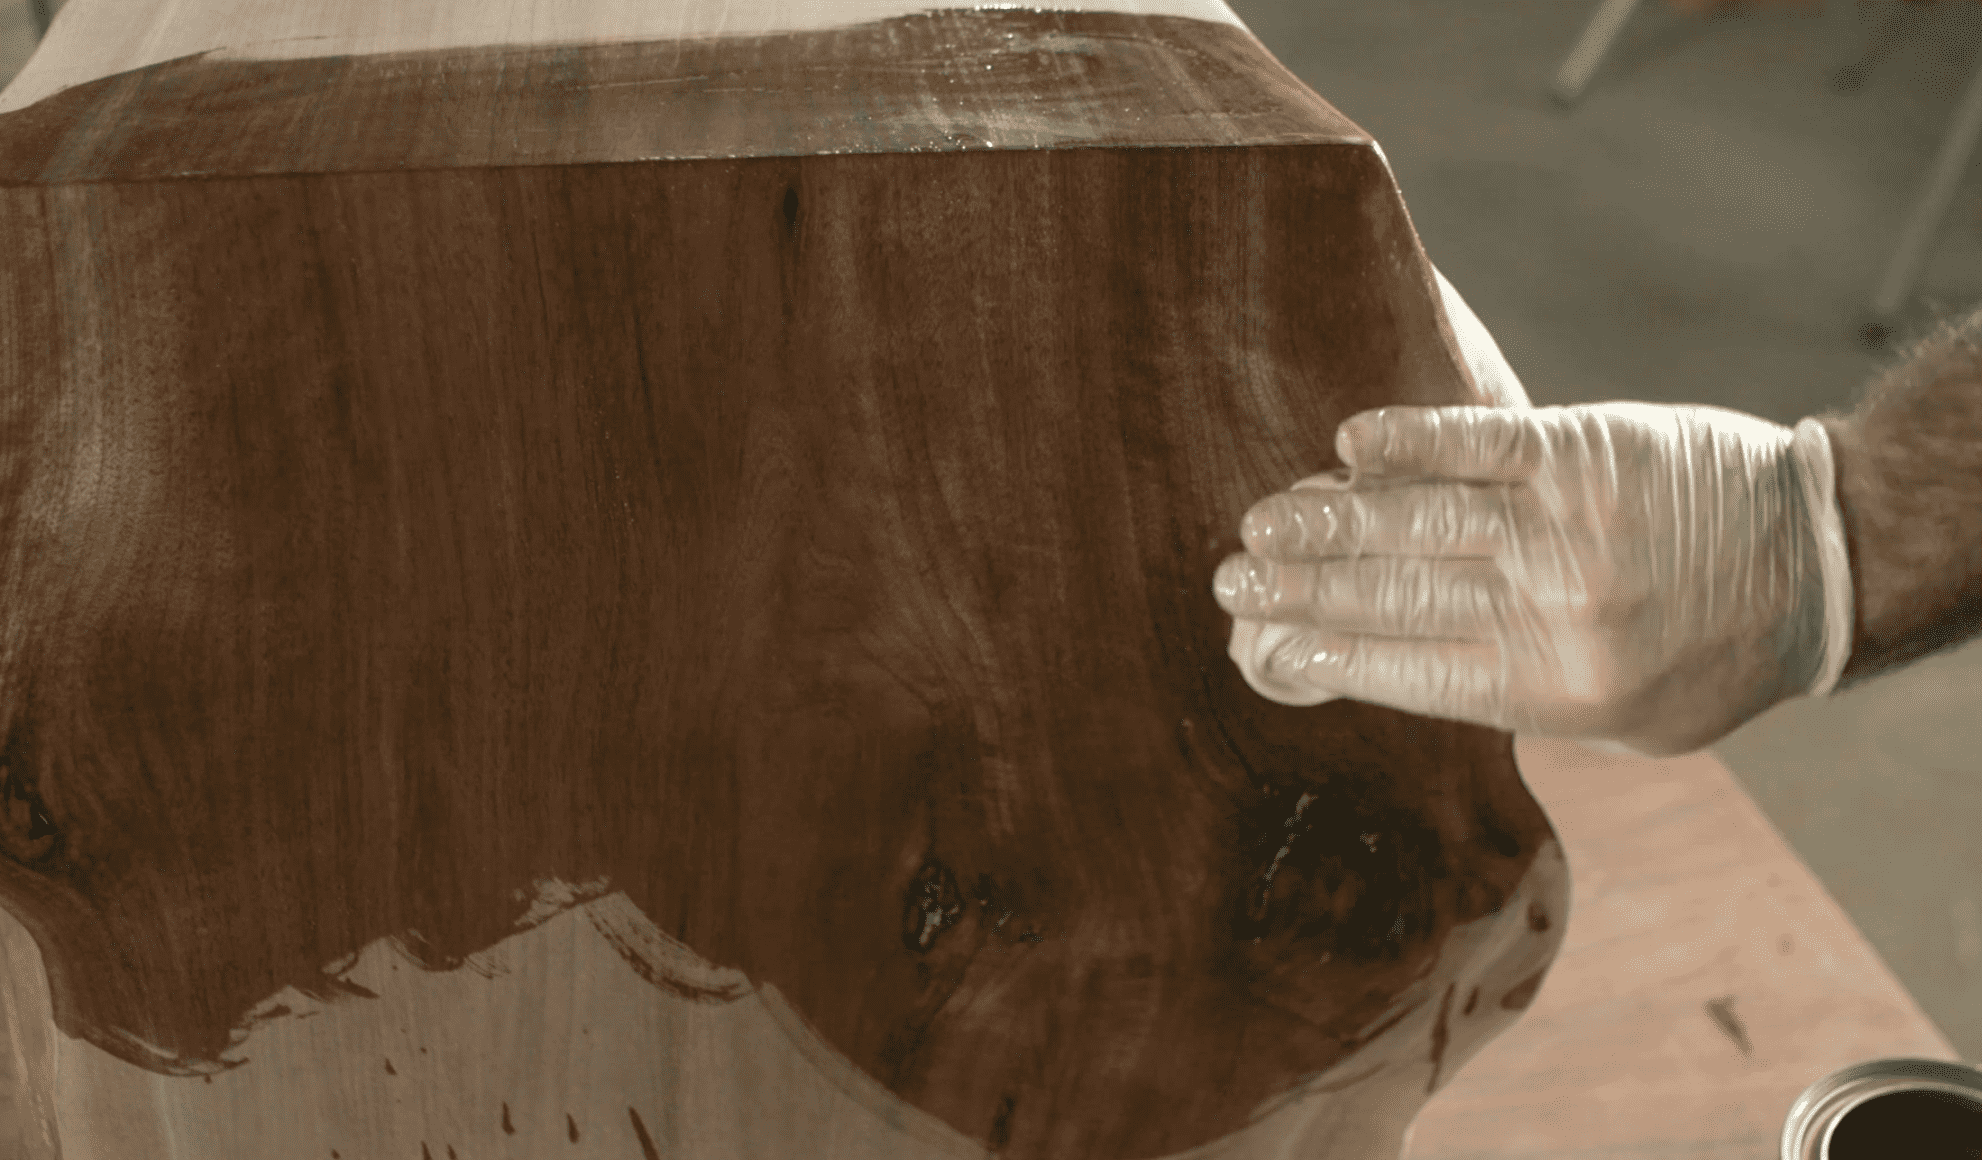
17) To bring out the beauty of the grain and make the live edge even more beautiful, we added a couple of coats of wipe-on polyurethane. It also provides a reasonable layer of protection for the surface of the table.
Much of the beauty and simplicity of this project comes from the wood slab provided by Horizon Wood Products. Visit their web site (https://inventory.horizonwood.com/slabs) to see the impressive selection of slabs available in all standard thicknesses, sizes and species. View the actual inventory online to choose the perfect piece for your next project.
Here are some supplies and tools we find essential in our everyday work around the shop. We may receive a commission from sales referred by our links; however, we have carefully selected these products for their usefulness and quality.


Love the coffee table! Nice work. And not the hairpin legs I see too often……”ouch” to my woodworking soul with them. I’m glad for the links to Horizon Wood Products. Great slabs there. Thanks for educating us on how you made your coffee table. Now to go find that cherry slab I’ve saved…..blessings. Mary Bettencourt, Massachusetts