We may receive a commission when you use our affiliate links. However, this does not impact our recommendations.
Learn the nuts and bolts of making hardware new again.
From the time I began collecting reclaimed wood I remember salvaging all kinds of hardware pieces. I like to dismantle hardware from found furniture that is either too damaged or too big to haul back home, or impossible to take apart and lift from the street. This hardware sometimes includes handles and locks, latches and casters, and occasionally even ornamentation worthy of saving. And remember, most items left out on the curb the eve before trash day ends up in the landfill. So, why not save the hardware if you cannot save the furniture?
Over the years I became finicky about the types and quality of hardware I chose to salvage. Where in the past I used to save die-cast zinc and stamped-steel hardware, these days I mainly save stainless steel, cast iron, brass and bronze parts. I am not intimidated by hardware that displays an unattractive surface, or is painted or tarnished, as I know that can easily be rectified.
Removing Paint, Varnish and Tarnish
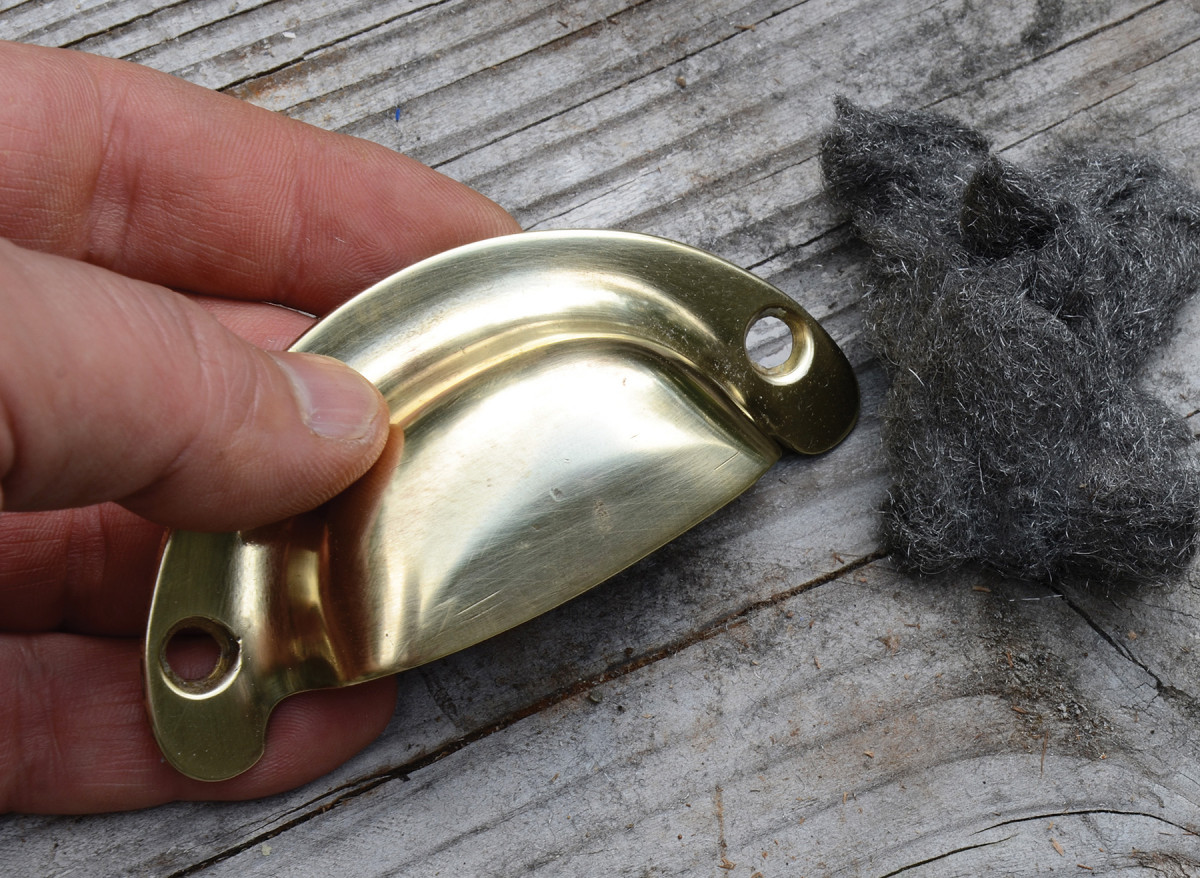
2. Thoroughly cleaned, this tarnished brass drawer pull almost looks brand new.
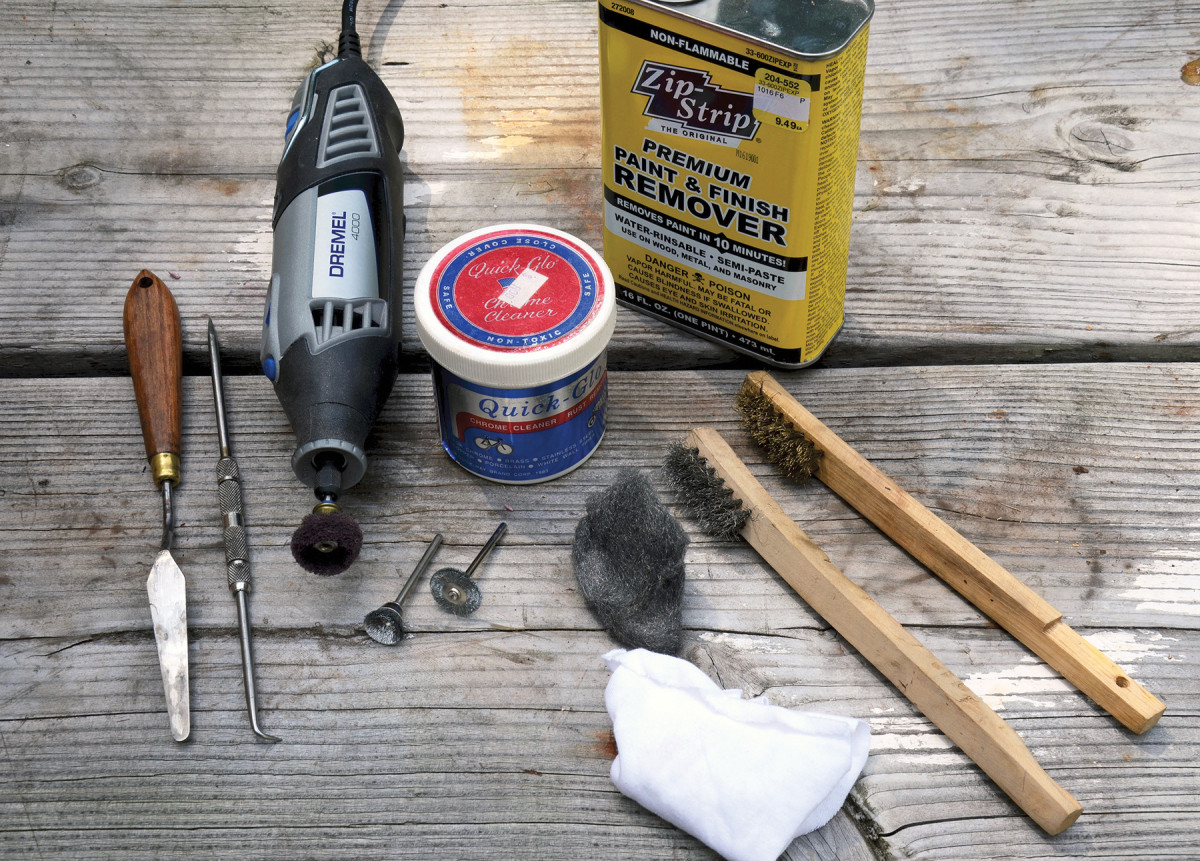
Salvaged hardware, even if made of corrosive-resistant materials such as bronze and brass, is almost always covered with oxidation (patina), accumulated grime or, in the worst cases, it’s painted over a few times.
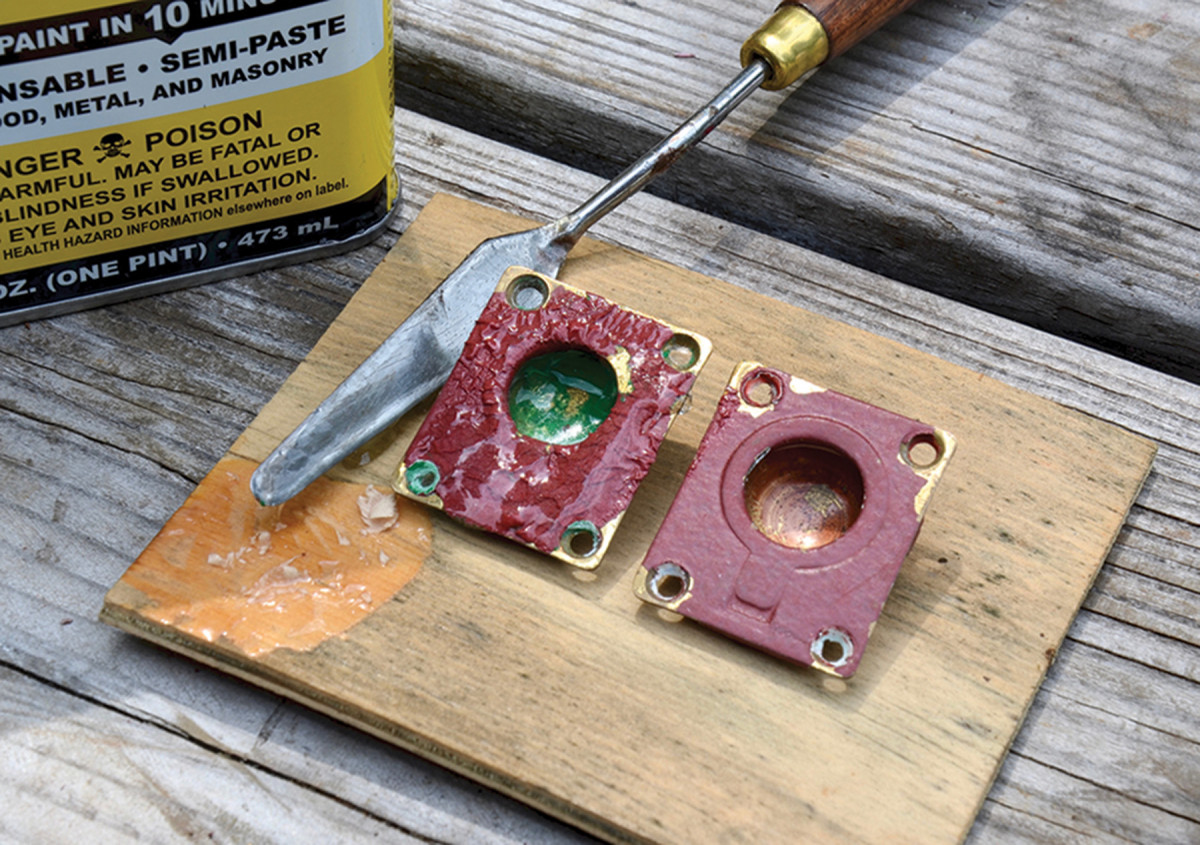
3. Apply the stripper to the surface and let it soften the layers of finish.
Sometimes patinated hardware is exactly what you want for a newly designed project. In this case I recommend cleaning the grime and dirt off by lightly scrubbing the item with 0000 steel wool moistened with mineral spirits. Then moisten a cotton cloth or paper towel with mineral spirits, and wipe the hardware clean of any residue left by the steel wool.
Removing Patina
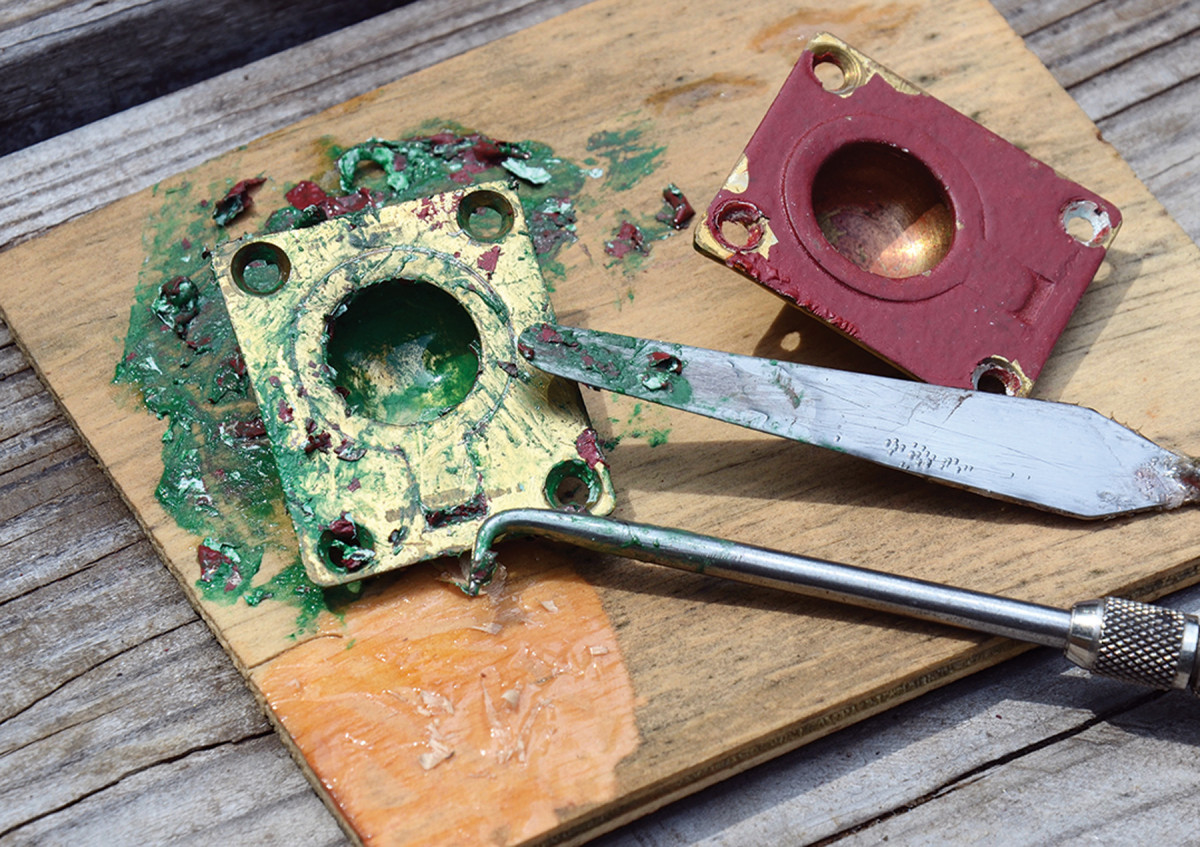
4. Then use any combination of a scraper, steel brush and/or picks remove the old paint or varnish.
If you’d like to achieve a polished look, use a more aggressive steel wool, abrasive pad or even a high-speed rotary tool equipped with an abrasive disc or brush. Then, once the patina has been removed you can decide what level of polish you want for the new/old surface. By using finer and finer abrasives or polishing compounds you will be able to reach a very high level of sheen.
Painted or Varnished Hardware
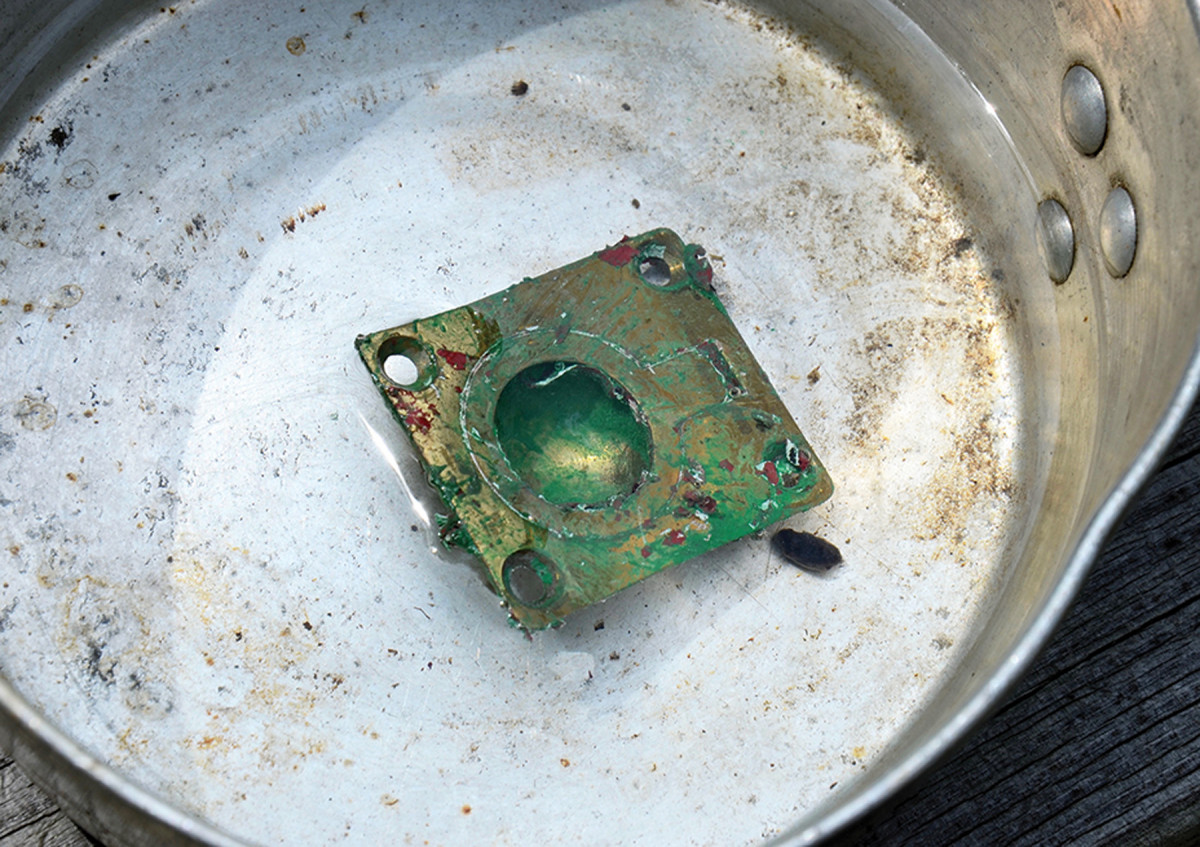
5. If your stripper can be rinsed off with water, then dunk the item in soapy water.
If your hardware item is painted over or is covered with old protective lacquer that looks unattractive, I recommend using paint stripper to entirely remove the old finish.
Rust Removal from Ferrous Hardware
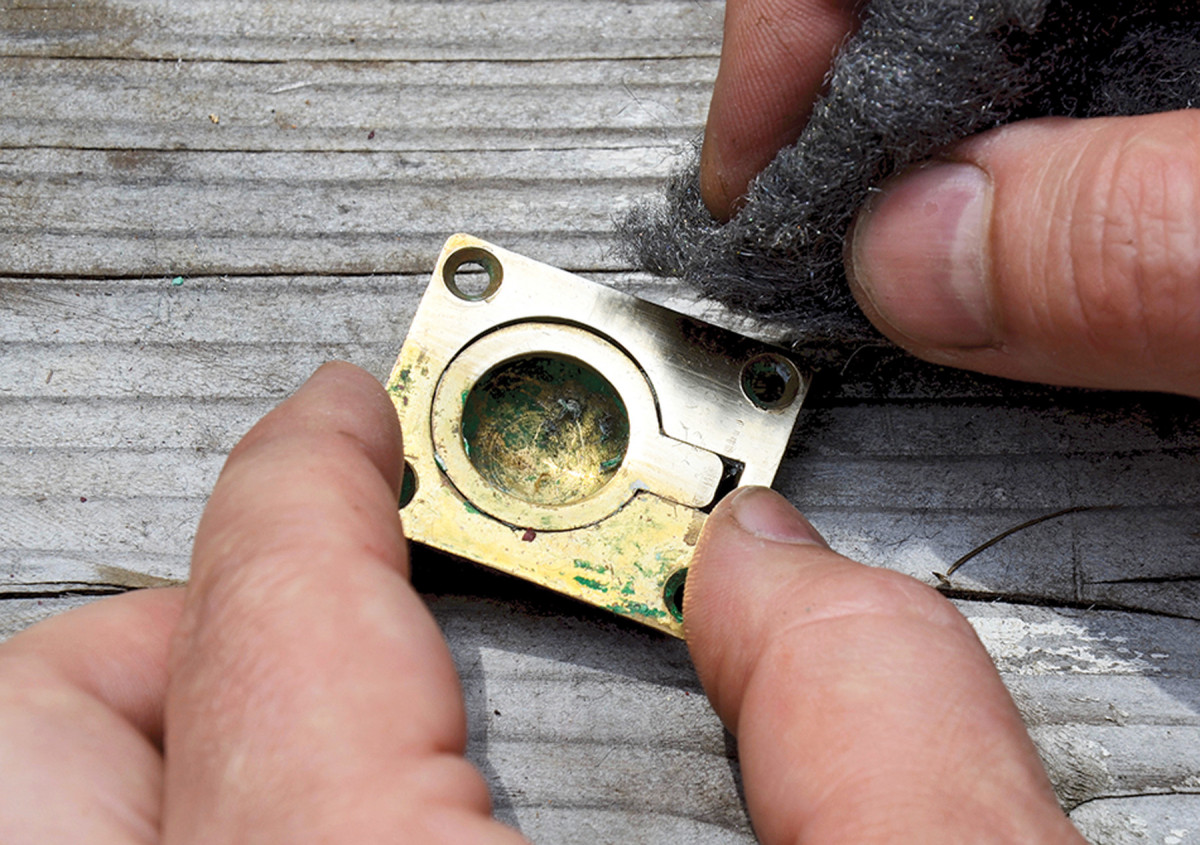
6. Scrub with steel wool or an abrasive pad.
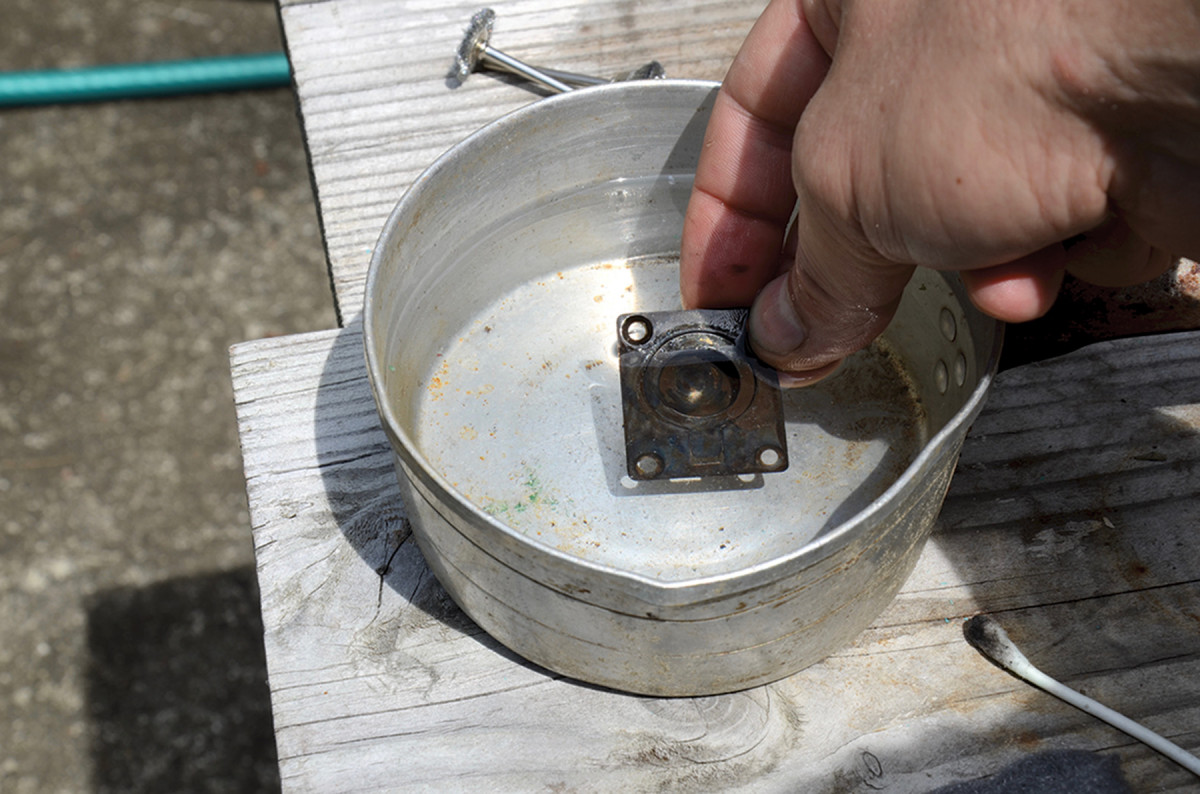
Rust, the mortal enemy of steel and iron, can be removed via a few techniques. You can erode it with abrasives and steel brushes, you can use chemicals or acids, you can submerge rusted objects in a bath of sodium carbonate (also known as “washing soda”) and water, and with the help of electricity reverse the corrosion through a process known as electrolysis. And if this is not enough, I have recently learned about a cutting edge technology that utilizes laser beams to incinerate rust away. Which method is best for your application? It depends on the object, the amount of rust on it and how much time you want to invest to remove it.
Removing Rust with Chemicals
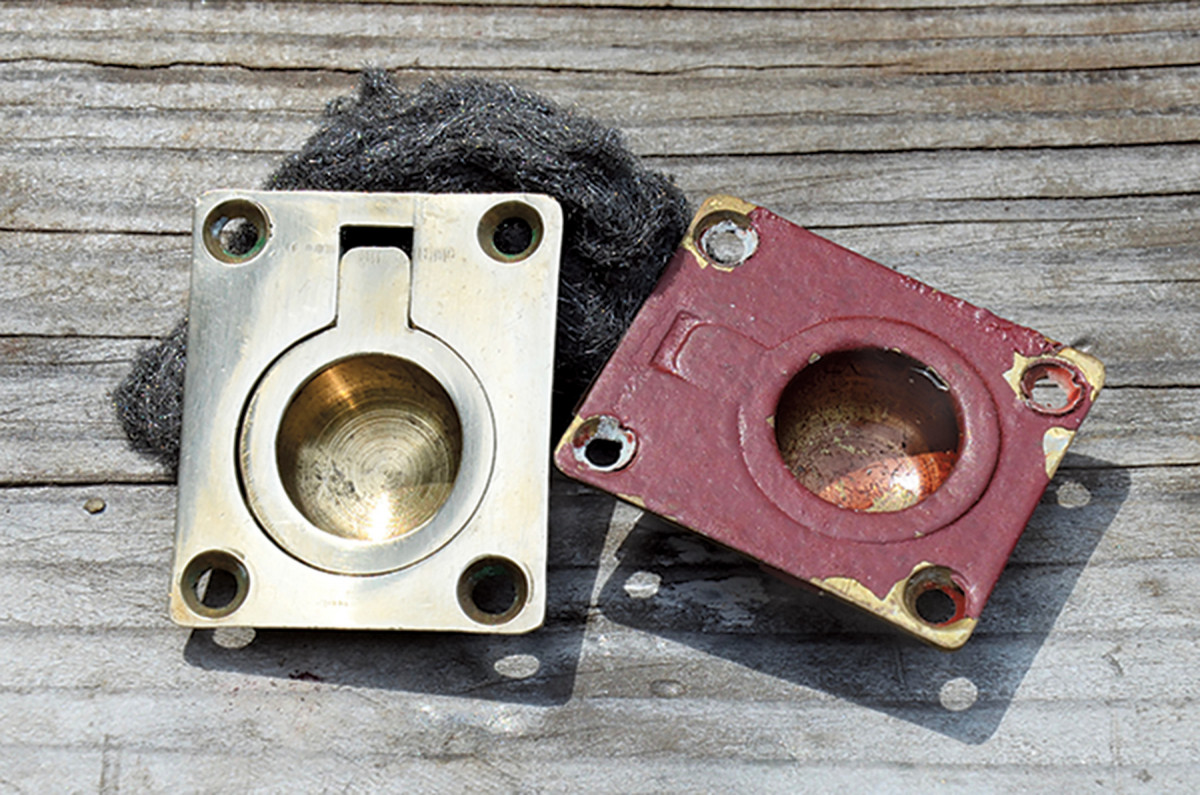
7. When thoroughly cleaned, rinse in water and dry it with a hair dryer or paper towel. The difference with the original look is like night and day.
In my experience there are two main options: acids and dedicated pH-neutral rust-removing chemicals. Over the years I’ve experimented with 5% vinegar, 20% vinegar, citric acid solutions and a product called Evapo-Rust. Among the four, Evapo-Rust, and other commercial products of its kind such as Rust-Oleum Rust Dissolver are the only ones with a neutral pH level. That means that they only work on the rust, and that you don’t have to worry about neutralizing acid residues possibly left on the surfaces after the removal process. You just need to wash with water and dry the objects.
Vinegar
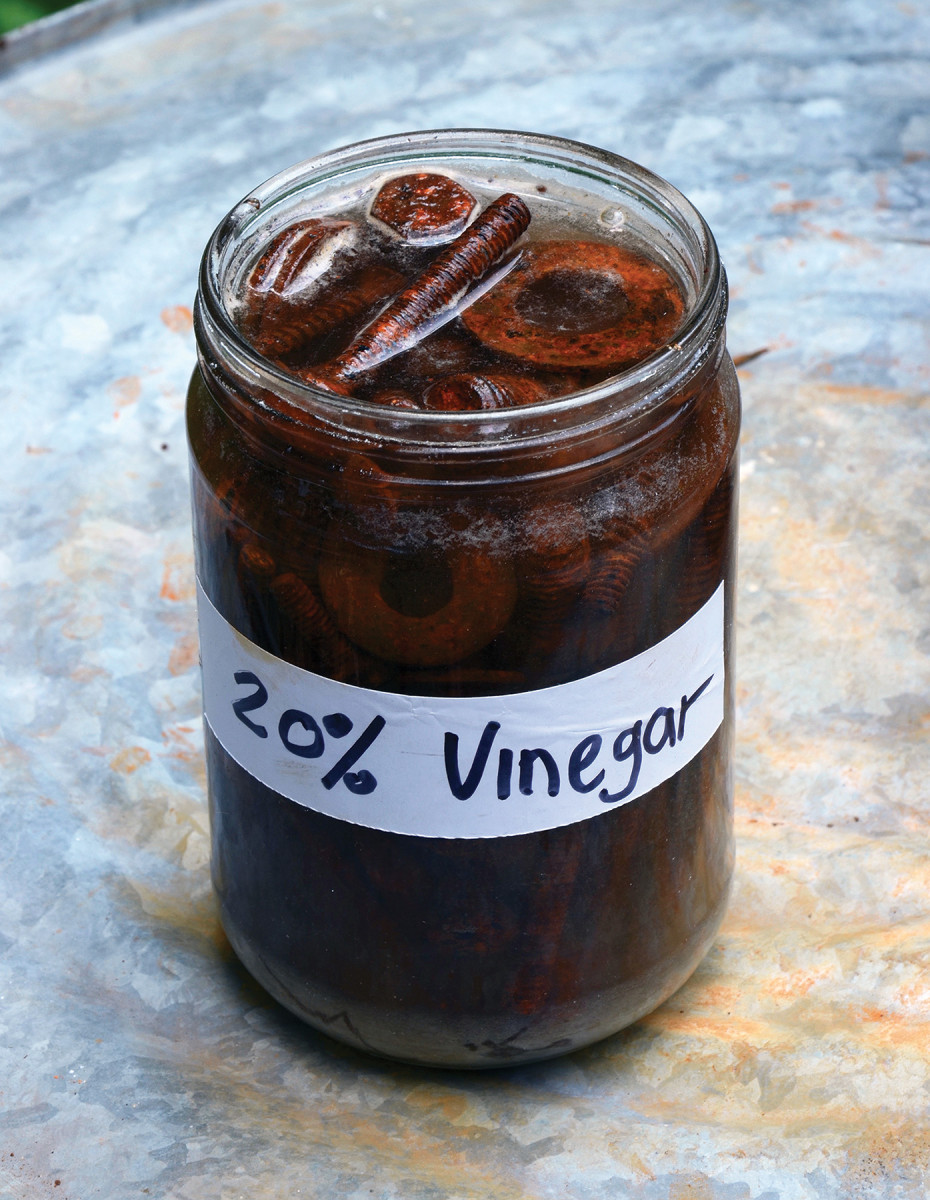
8. Submerged in vinegar.
Regular 5% vinegar (the food-grade type you buy at the grocery store) is probably the cheapest and the most available means for removing rust. Instead of 5% vinegar you can use stronger 20% vinegar. You won’t find 20% vinegar at the grocery. It’s usually sold in home improvement stores and online. Using 20% vinegar gives you the same results as food-grade vinegar, but faster.
9. A baking soda bath neutralizes the acid.
Fill a plastic or glass container with vinegar, then submerge the object and let the vinegar do its job. Check the de-rusting progress and scrape loose rust off with a brass or steel brush or use steel wool or an abrasive pad. Mechanically removing the loose rust encourages the chemical reaction to access the remaining surface rust.
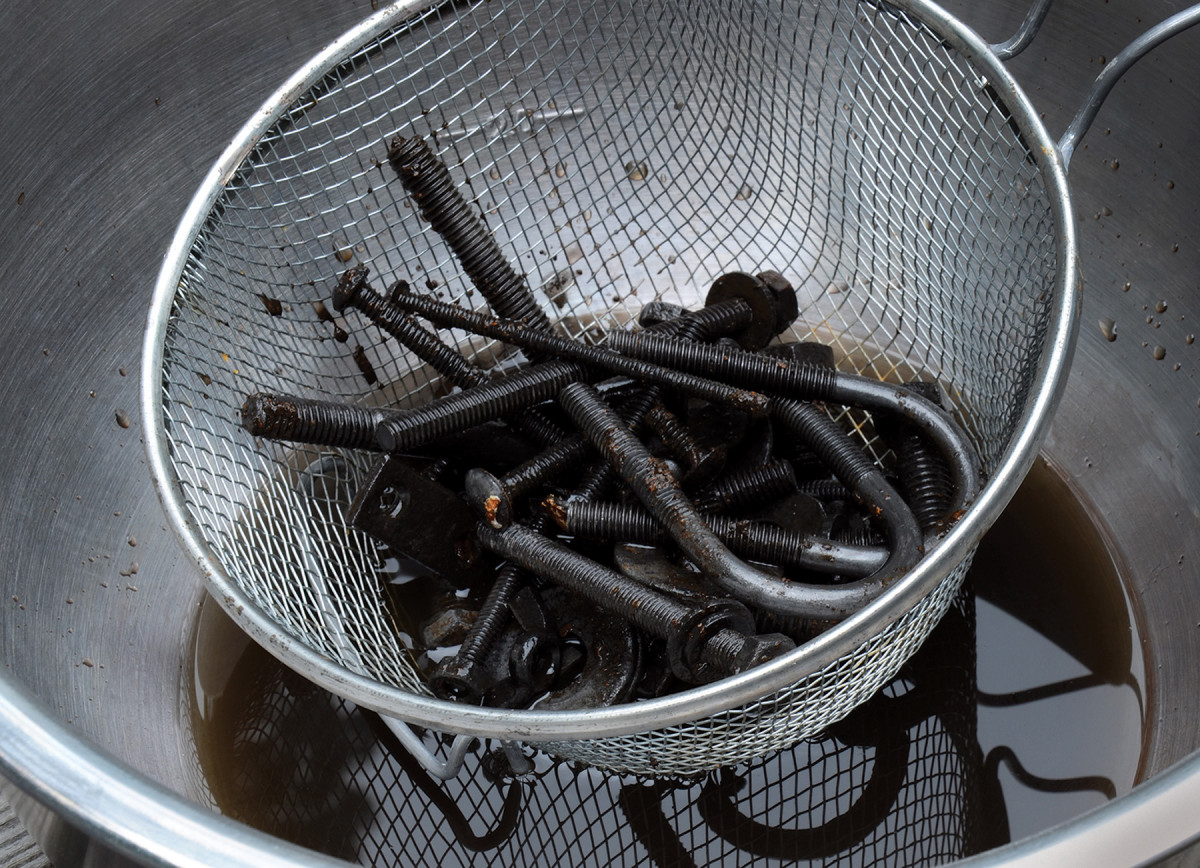
After a few hours of immersion, check the progression of the de-rusting process and remove additional loose rust with a stiff brush, steel wool, picks, hooks or a scraper. Then immerse the object again as necessary.

10. A final rinse.
When the vinegar has affected most of the rust, buff off the black patina that formed on the metal during the process using a cloth or a very fine polishing media (very fine steel wool can work too).
After the metal is free of corrosion, rinse it with water and neutralize the acidic vinegar in a solution of a baking soda and water. One teaspoon per cup of water is fine.
Give the hardware a final rinse in water again, and then dry immediately—you’d be surprised just how quickly rust can re-form on damp, bare metal. You can use paper towels followed by an air blower (or hair dryer) and when that is done apply a protective coat to the surface such as gun blue, wax, paint, or lacquer to prevent rust from reoccurring.
Citric Acid
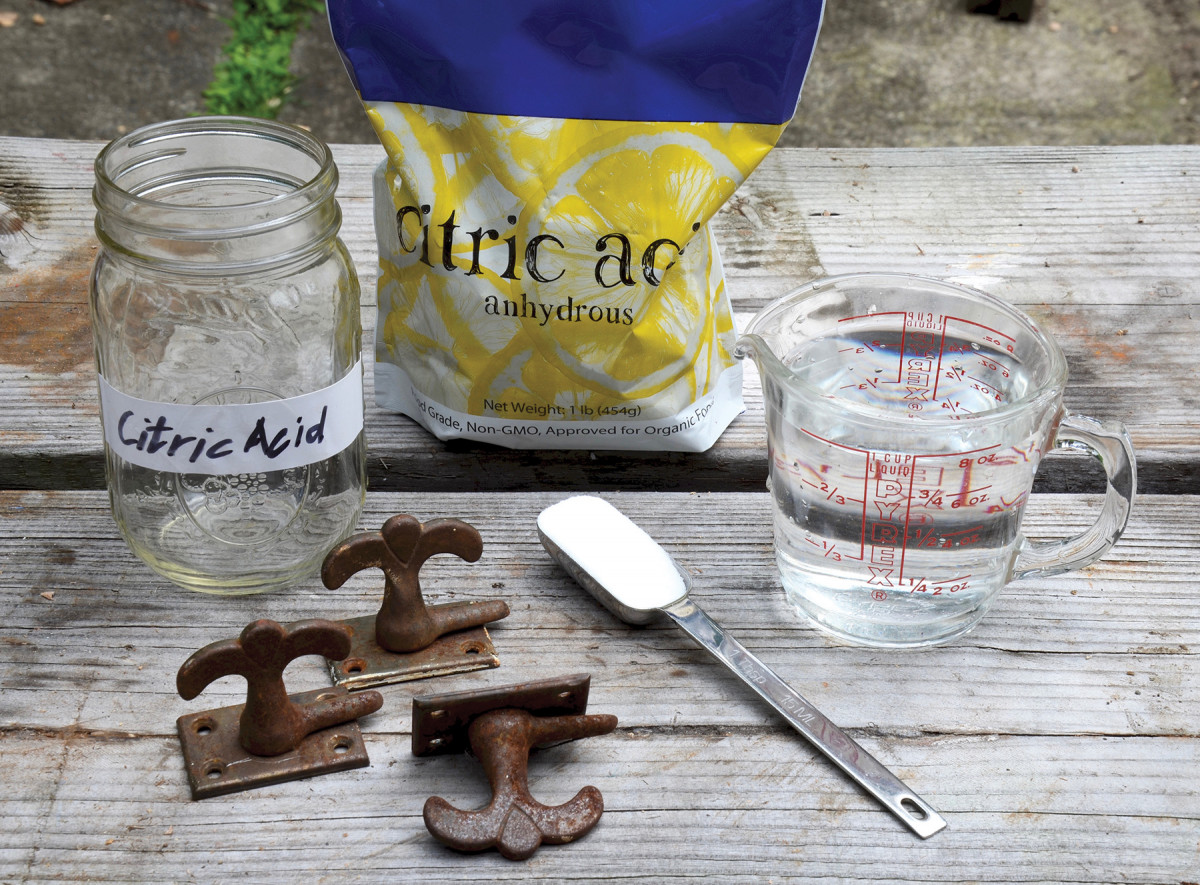
11. Supplies for making your own citric acid.
You can make your own citric acid from a powder available online and in some stores. I dilute one volume unit of citric acid in 10 volume units of water, which gives an approximate pH level higher than 20% vinegar, around pH 1.5. And if we mixed citric acid in less water we could create an even more potent acidic solution.
Re-patination of Restored Hardware
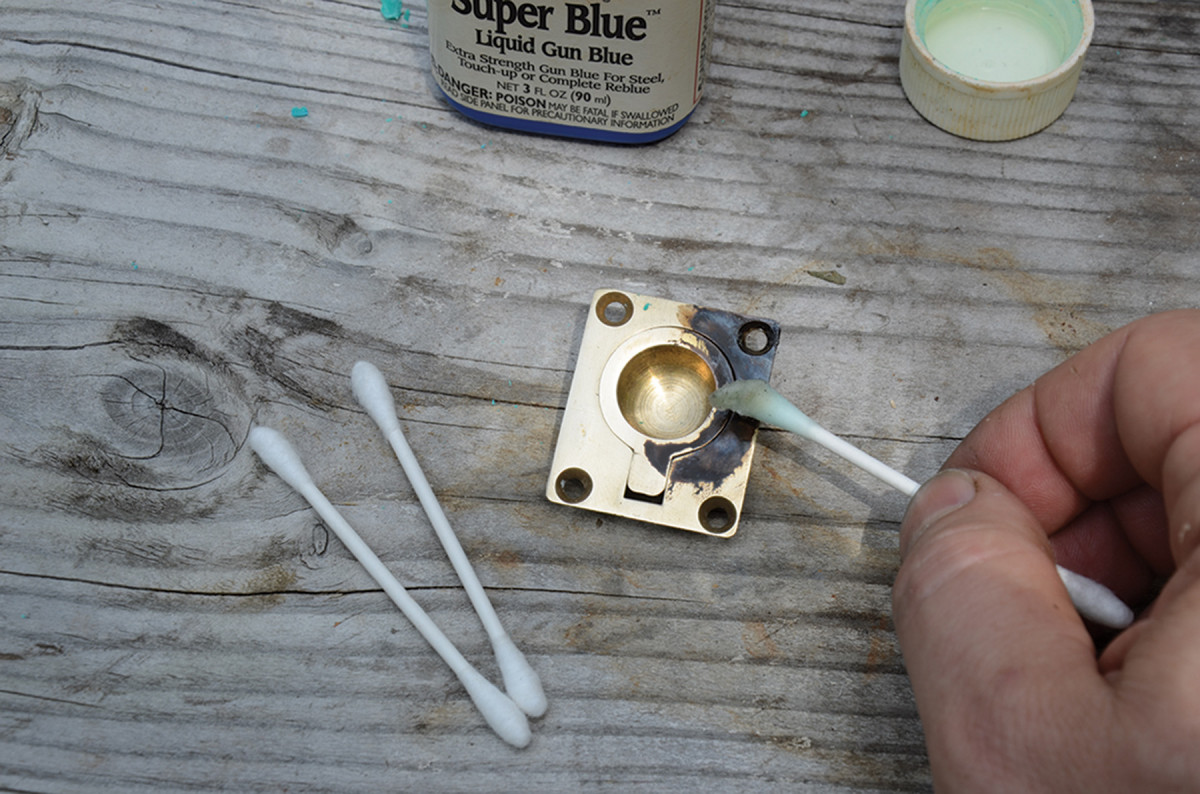
12. Apply gun blue patina on an oil-free brass or bronze surface and wait until it stops darkening.
Newly restored brass and bronze hardware will begin to oxidize within days. Many love to see this slow and natural transformation as the metal succumbs to nature’s call. But if you want to protect the shiny surface, consider varnishing, lacquering or applying wax on it.
13. Rinse the piece in water and lightly polish with a cotton rag.
If you want to bestow your reclaimed hardware with the instant look of an “antique” appearance or even a very dark “ebonized” look, consider using the gun blue family of products. Once the fluid is applied on a grease-free and oil-free surface, it turns the surface dark. The more you apply the darker it becomes. Using cotton Q-tips, (12) apply gun blue on an oil-free brass or bronze surface and wait until it stops darkening. Once you like the new look, rinse the piece in water (13) and lightly polish with a cotton rag.
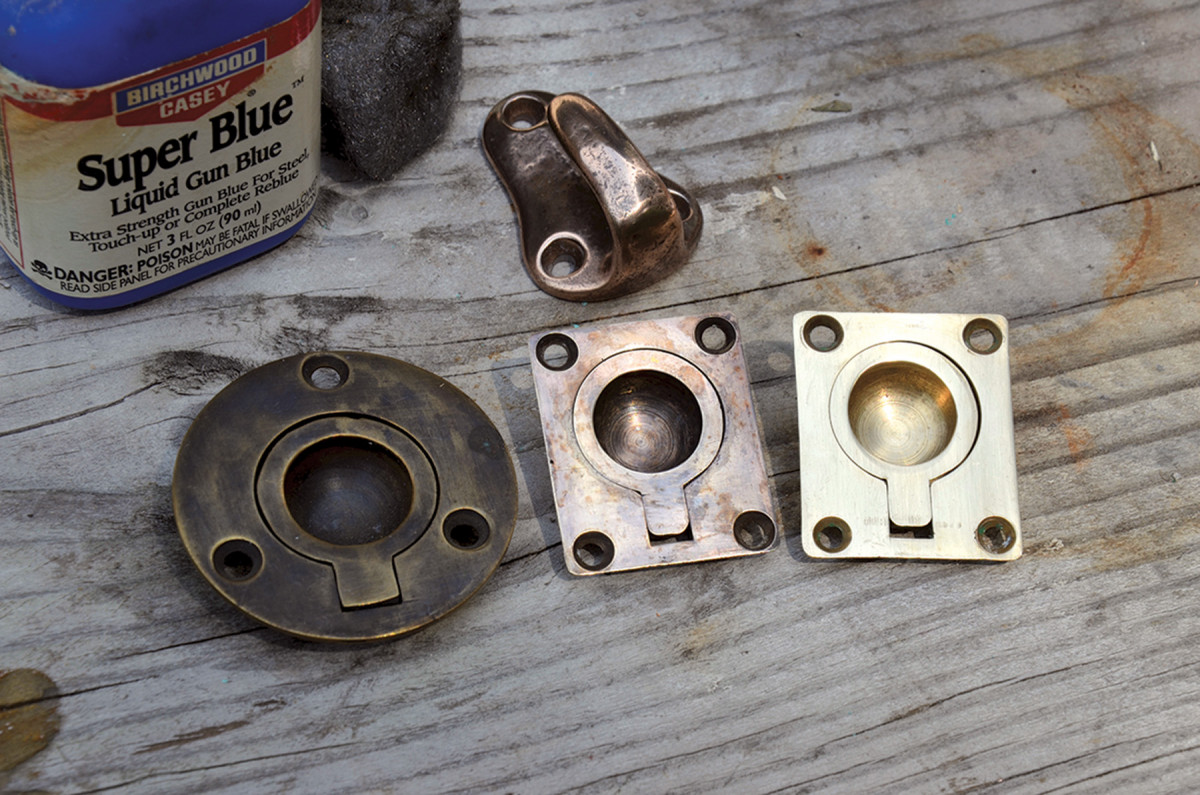
14. There are three different surface treatments: brown patina (bottom left), patinated luster (top and bottom middle), and polished (bottom right).
In photo 14 you can see three different surface treatments: dark brown patina, patinated luster, and polished. If you wish to achieve a look of a patinated luster surface (not too shiny, but not black), slightly abrade the newly built gun blue layer with fine steel wool (#0000) until you reach the level of sheen you like. Take into account that the gun blue patina is thin and can be scratched or even rubbed off easily. To preserve its ebony look, apply a coat of wax, varnish or lacquer it.
Here are some supplies and tools we find essential in our everyday work around the shop. We may receive a commission from sales referred by our links; however, we have carefully selected these products for their usefulness and quality.